


K-2005
KOHLER K-2005, K-2006, K-2007, K-2053, K-2054 Installation Manual
...
Installation
Guide
Wall-Mount Lavatories
K-2005, K-2006, K-2007 K-2053, K-2054, K-2084
M product numbers are for Mexico (i.e. K-12345M)
Los números de productos seguidos de
M corresponden a México (Ej.
K-12345M)
Français, page “Français-1”
Español, página “Español-1”
1018370-2-B
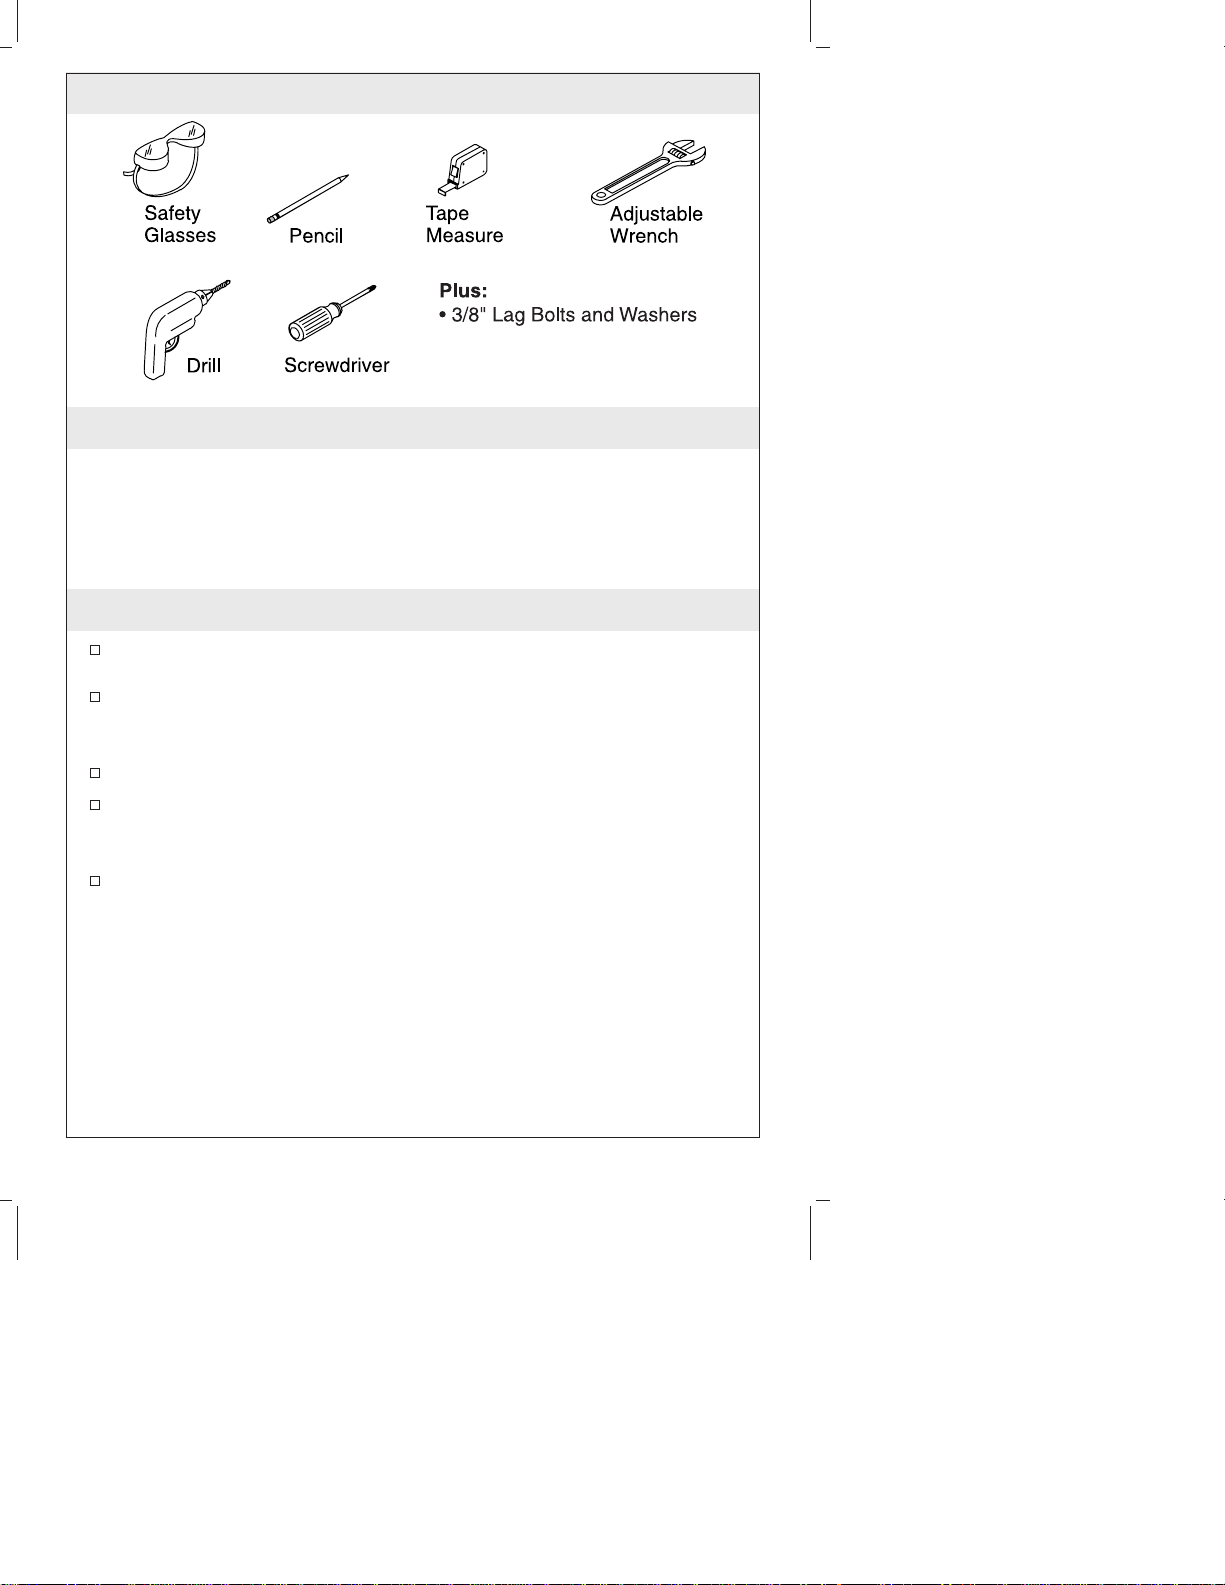
Tools and Materials
Thank You For Choosing Kohler Company
We appreciate your commitment to Kohler quality. Please take a few
minutes to review this manual before you start installation. If you
encounter any installation or performance problems, please don’t
hesitate to contact us. Our phone numbers and website are listed on
the back cover. Thanks again for choosing Kohler Company.
Before You Begin
Observe all local plumbing and building codes.
Prior to installation, unpack the new lavatory and inspect it for
damage. Return the lavatory to its protective carton until you are
ready to install it.
Inspect the drain and supply tubing. Replace if necessary.
These instructions are for installing the lavatory to wood frame
construction. For other installations, supply suitable bracing and
fastening devices of sufficient size and strength.
The walls and floor must be square, plumb, and level.
1018370-2-B 2 Kohler Co.

1. Preparation
Install the water supplies and drain piping according to the
roughing-in information.
Install sufficient backing behind the finished wall to provide a
secure material for the anchoring devices.
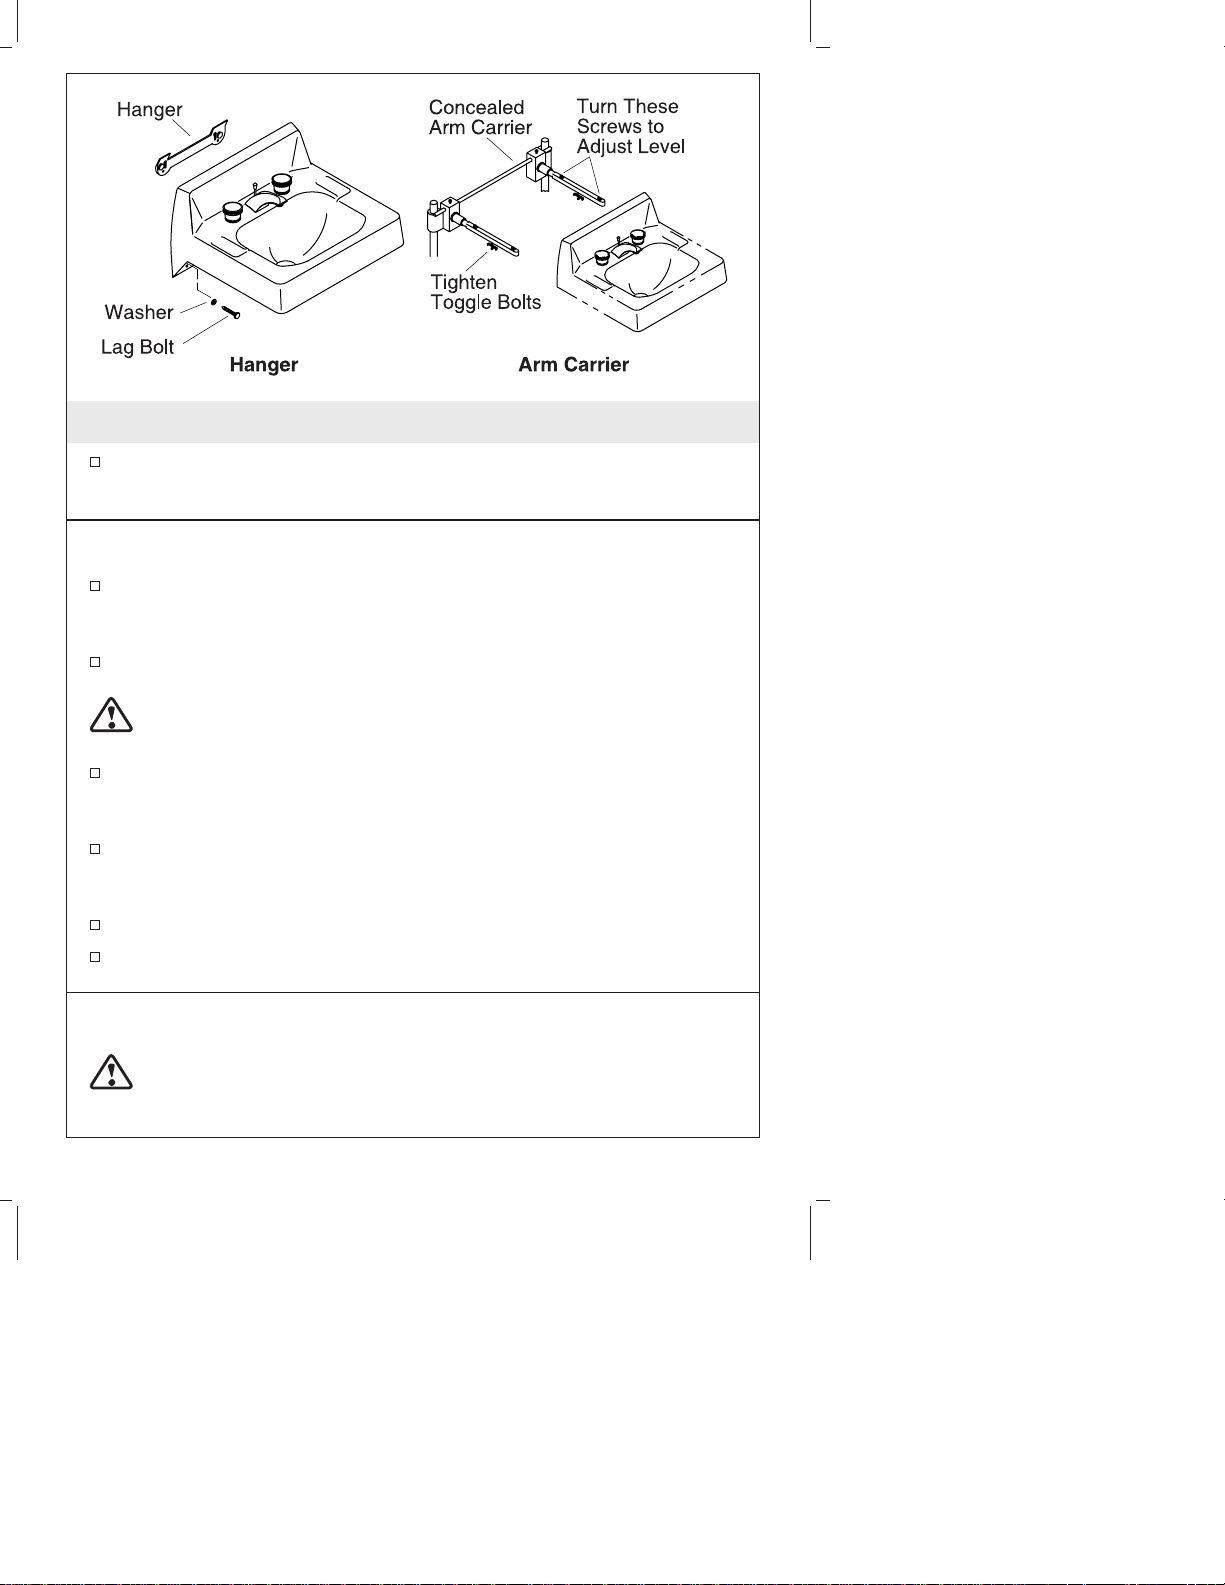
Hanger (provided) Installation
Install the hanger according to the roughing-in information. Use
1/4″ lag bolts and washers (neither is provided) or other suitable
fasteners to secure the hanger to the finished wall and backing
material. Make sure the hanger is level.
Concealed Arm Carrier Installation
Install the concealed arm carrier according to the roughing-in
information. Follow the installation information included with the
carrier. Make sure the carrier is level.
Kohler Co. 3 1018370-2-B
2. Install the Lavatory
Install the faucet and drain to the lavatory according to the
manufacturer’s instructions.
Installation With Hanger
Temporarily position the lavatory on the hanger, and level. Use a
pencil to mark the anchoring hole locations on the finished wall.
Remove the lavatory.
Drill 1/4” mounting holes at the marked locations on the wall.
CAUTION: Risk of product damage. Do not overtighten the
hardware. Overtightening may damage the product.
Position the lavatory on the hanger, and level. Use 3/8″ lag bolts
and washers (not provided) to secure the lavatory to the finished
wall and backing material.
Connect and tighten the trap to the drain, and complete the water
supply connections to the faucet according to the instructions
packed with the faucet.
Run water into the lavatory and check for leaks.
Clean up with a non-abrasive cleaner.
Installation With Concealed Arm Carrier
CAUTION: Risk of product damage. Do not overtighten the
hardware. Overtightening may damage the product.
1018370-2-B 4 Kohler Co.

Install the Lavatory (cont.)
Slide the lavatory completely onto the carrier arms. Adjust the
level of the lavatory by turning the front and rear carrier arm
screws in or out as needed. The lavatory should not rock after it
has been leveled.
Carefully tighten the toggle screws until the lavatory is securely
held in place.
Connect and tighten the trap to the drain, and complete the water
supply connections to the faucet according to the instructions
packed with the faucet.
Run water into the lavatory and check for leaks.
Clean up with a non-abrasive cleaner.
Kohler Co. 5 1018370-2-B
 Loading...