


3-862-548-32 (2)
Digital Video
Camera Recorder
Operating Instructions
Before operating the unit, please read this manual thoroughly, and retain it for future reference.
DCR-TRV9
©1998 by Sony Corporation

Welcome !!
Congratulations on your purchase of this Sony Handycam VisionΤΜ camcorder. With your Handycam Vision, you can capture life’s precious moments with superior picture and sound quality. Your Handycam Vision is loaded with advanced features, but at the same time it is very easy to use. You will soon be producing home video that you can enjoy for years to come.
WARNING
To prevent fire or shock hazard, do not expose the unit to rain or moisture.
To avoid electrical shock, do not open the cabinet. Refer servicing to qualified personnel only.
2

Table of contents |
|
Before you begin |
|
Using this manual ....................................... |
4 |
Checking supplied accessories .................. |
6 |
Getting started |
|
Charging and installing the battery |
|
pack ........................................................ |
7 |
Inserting a cassette .................................... |
10 |
Basic operations |
|
Camera recording ..................................... |
11 |
Using the zoom feature ..................... |
13 |
Selecting the start/stop mode .......... |
14 |
Shooting with the LCD screen .......... |
15 |
Letting the subject monitor the |
|
shot................................................. |
16 |
Hints for better shooting .......................... |
17 |
Checking the recorded picture ................ |
19 |
Playing back a tape ................................... |
20 |
Searching for the end of the picture ....... |
22 |
Advanced operations |
|
Using alternative power sources ............ |
23 |
Using the house current .................... |
23 |
Using a car battery ............................. |
23 |
Changing the mode settings .................... |
24 |
—for camera recording— |
|
Shooting with backlighting ..................... |
28 |
Using the FADER function ...................... |
29 |
Shooting in the dark (NightShot) ........... |
30 |
Photo recording ......................................... |
31 |
Using the wide mode function ................ |
33 |
Using the PROGRAM AE function ........ |
34 |
Focusing manually .................................... |
36 |
Enjoying picture effect ............................. |
38 |
Adjusting the exposure ............................ |
40 |
Superimposing a title ............................... |
41 |
Making a custom title ............................... |
44 |
Labeling a cassette .................................... |
46 |
Releasing the STEADYSHOT function .. |
49 |
—for playing back/editing— |
|
Watching on a TV screen ......................... |
50 |
Searching the boundaries of recorded |
|
tape with date – date search ............ |
52 |
Searching the boundaries of recorded |
|
tape with title – title search .............. |
55 |
Searching for a photo – photo search/ |
|
photo scan ........................................... |
56 |
Returning to a pre-registered position ... |
59 |
Displaying recording data – data code |
|
function ................................................ |
60 |
Editing onto another tape ........................ |
61 |
Recording from a VCR or TV .................. |
63 |
Replacing recording on a tape – insert |
|
editing .................................................. |
64 |
Audio dubbing .......................................... |
65 |
Additional information
Usable cassettes and playback modes ... 67
Charging the vanadium-lithium |
|
battery in the camcorder ................... |
68 |
Resetting the date and time ..................... |
69 |
Tips for using the battery pack ............... |
70 |
Maintenance information and |
|
precautions .......................................... |
74 |
Using your camcorder abroad ................ |
77 |
Trouble check ............................................ |
78 |
Self-diagnosis function ............................. |
83 |
Specifications ............................................. |
84 |
Identifying the parts ................................. |
85 |
Warning indicators ................................... |
93 |
Index ........................................................... |
94 |
begin you Before
3
Before you begin
Using this manual
As you read through this manual, buttons and settings on the camcorder are shown in capital letters.
e.g., Set the POWER switch to CAMERA.
As indicated |
|
in the illustrations, you can hear the beep sound to confirm your |
|
||
operation. |
|
|
Note on Cassette Memory
This camcorder is based on the DV format. You can only use mini DV cassettes with this camcorder. We recommend you to use a tape with cassette memory .
The functions which depend on whether the tape has the cassette memory or not are:
•End Search (p. 19)
•Date Search (p. 52)
•Photo Search (p. 56).
The functions you can operate only with the cassette memory are:
•Title Search (p. 55)
•Superimposing a title (p. 41)
•Making a custom title (p. 44)
•Labeling a cassette (p. 46) For details, see page 67.
Note on TV color systems
TV color systems differ from country to country. To view your recordings on a TV, you need an NTSC system-based TV.
Precaution on copyright
Television programs, films, video tapes, and other materials may be copyrighted. Unauthorized recording of such materials may be contrary to the provision of the copyright laws.
4
Using this manual
Precautions on camcorder care
•The LCD screen and/or the color viewfinder are manufactured using high-precision technology. However, there may be some tiny black points and/or bright points (red, blue or green in color) that constantly appear on the LCD screen and/or in the viewfinder. These points are normal in the manufacturing process and do not affect the recorded picture in any way. Over 99.99% are operational for effective use.
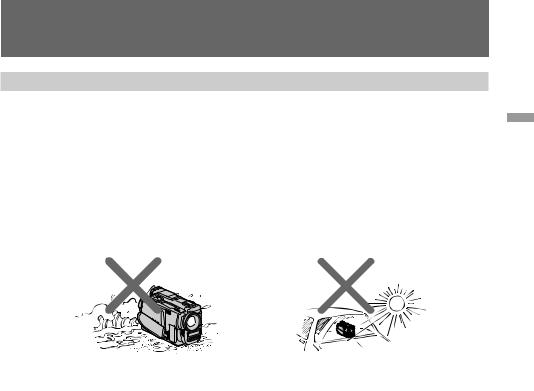
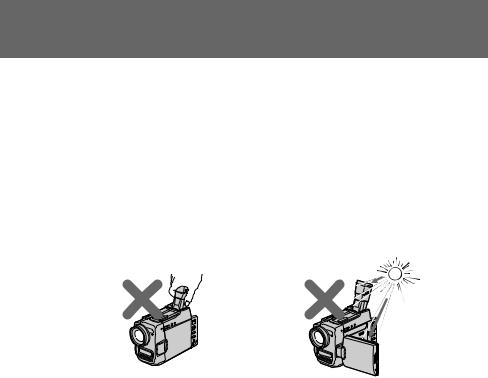
•Do not let the camcorder get wet. Keep the camcorder away from rain and sea water. Letting the camcorder get wet may cause the unit to malfunction, and sometimes this malfunction cannot be repaired [a].
•Never leave the camcorder exposed to temperatures above 60°C (140°F), such as in a car parked in the sun or under direct sunlight [b].
[a] |
[b] |
begin you Before
5
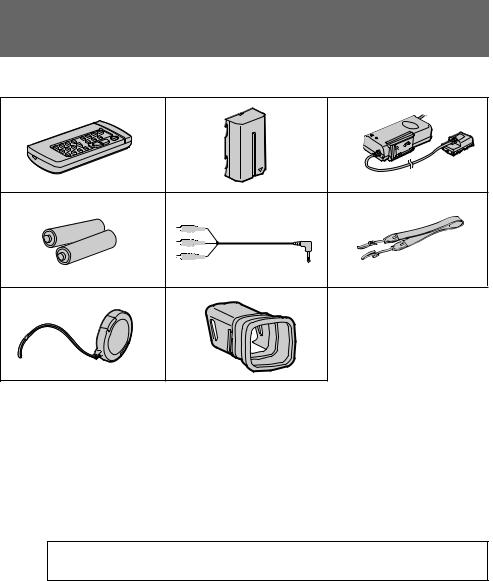
Checking supplied accessories
Check that the following accessories are supplied with your camcorder.
1 |
2 |
3 |
4 |
5 |
6 |
7 |
8 |
|
1Wireless Remote Commander (1) (p. 89) |
5A/V connecting cable (1) (p. 50, 62) |
2NP-F330 battery pack (1) (p. 7) |
6Shoulder strap (1) (p. 90) |
3AC-V316 AC power adaptor (1) (p. 7, 23) |
7Lens cap (1) (p. 11) |
The shape of the plug varies from region to |
8Viewfinder adaptor (1) (p. 9) |
region. |
4R6 (Size AA) battery for Remote Commander (2) (p. 89)
Contents of the recording cannot be compensated if recording or playback is not made due to a malfunction of the camcorder, video tape, etc.
6
Getting started
Charging and installing the battery pack
Before using your camcorder, you first need to charge and install the battery pack. To charge the battery pack, use the supplied AC power adaptor.
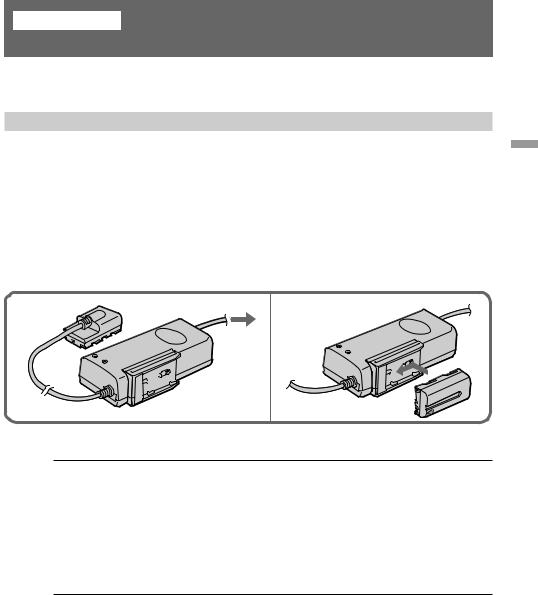
Charging the battery pack
Charge the battery pack on a flat surface without vibration.
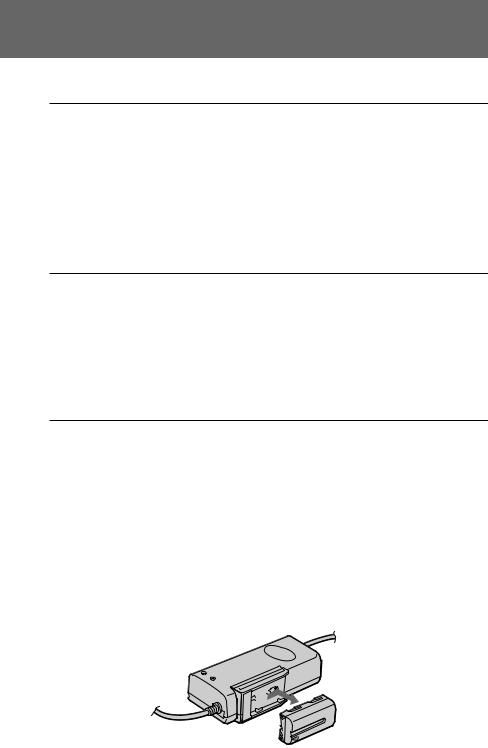
(1) Connect the power cord to a wall outlet.
(2) Align the surface of the battery pack indicated by the zmark with the edge of the terminal shutter of the AC power adaptor. Then fit and slide the battery pack in the direction of the arrow. The CHARGE lamp (orange) lights up. Charging begins.
When the CHARGE lamp goes out, normal charge is completed. For full charge, which allows you to use the battery longer than usual, leave the battery pack in place for approximately one hour. Unplug the unit from the wall outlet, then remove the battery pack and install it into the camcorder. You can also use the battery pack before it is completely charged.
1 |
2 |
Charging time
Battery pack |
Charging time * |
|
NP-F330 (supplied) |
130 |
(70) |
|
|
|
NP-F530 |
170 |
(110) |
|
|
|
NP-F550 |
180 |
(120) |
|
|
|
NP-F730 |
250 |
(190) |
|
|
|
NP-F750 |
270 |
(210) |
|
|
|
NP-F930 |
330 |
(270) |
|
|
|
NP-F950 |
360 |
(300) |
The time required for a normal charge is indicated in parentheses.
*Approximate minutes to charge an empty battery pack using the supplied AC power adaptor. (Lower temperatures require a longer charging time.)
started Getting
7
Charging and installing the battery pack
Battery life
While using with viewfinder
Battery pack Continuous recording time * |
Typical recording time ** |
|||
NP-F330 (supplied) |
80 |
(70) |
40 |
(35) |
|
|
|
|
|
NP-F530 |
125 |
(115) |
65 |
(60) |
|
|
|
|
|
NP-F550 |
155 |
(140) |
85 |
(75) |
|
|
|
|
|
NP-F730 |
275 |
(250) |
150 |
(135) |
|
|
|
|
|
NP-F750 |
325 |
(285) |
175 |
(155) |
|
|
|
|
|
NP-F930 |
430 |
(385) |
235 |
(210) |
|
|
|
|
|
NP-F950 |
495 |
(450) |
270 |
(245) |
|
|
|
|
|
While using with LCD
Battery pack |
Continuous |
Typical |
Playing |
||
|
recording time * |
recording time ** |
time with LCD |
||
|
|
|
|
||
NP-F330 (supplied) |
60 (55) |
30 (30) |
60 (55) |
||
|
|
|
|
|
|
NP-F530 |
100 |
(85) |
55 (45) |
100 |
(85) |
|
|
|
|
|
|
NP-F550 |
125 |
(110) |
70 (60) |
125 |
(110) |
|
|
|
|
|
|
NP-F730 |
215 |
(195) |
120 (110) |
215 |
(195) |
|
|
|
|
|
|
NP-F750 |
260 |
(230) |
145 (130) |
260 |
(230) |
|
|
|
|
|
|
NP-F930 |
355 |
(315) |
200 (175) |
355 |
(315) |
|
|
|
|
|
|
NP-F950 |
395 |
(350) |
220 (195) |
395 |
(350) |
Numbers in parentheses indicate the time when you use a normally charged battery. Battery life will be shorter if you use the camcorder in a cold environment.
*Approximate continuous recording time indoors.
**Approximate minutes when recording while you repeat recording start/stop, zooming and turning the power on/off. The actual battery life may be shorter.
Notes on remaining battery time indication during recording
•Remaining battery time is displayed in the viewfinder or on the LCD screen. However, the indication may not be displayed properly, depending on using conditions and circumstances.
•When you close the LCD panel and open it again, it takes about 1 minute for the correct remaining time to be displayed.
To remove the battery pack
Slide the battery pack in the direction of the arrow.
8
Charging and installing the battery pack
Notes on charging the battery pack
•The CHARGE lamp will remain lit for a while even if the battery pack is removed and the power cord is unplugged after charging the battery pack. This is normal.
•If the CHARGE lamp does not light, disconnect the power cord. After about one minute, reconnect the power cord again.
•You cannot charge the battery pack while you operate the camcorder using the AC power adaptor.
•When a fully charged battery pack is installed, the CHARGE lamp will light once, then go out.
Installing the battery pack
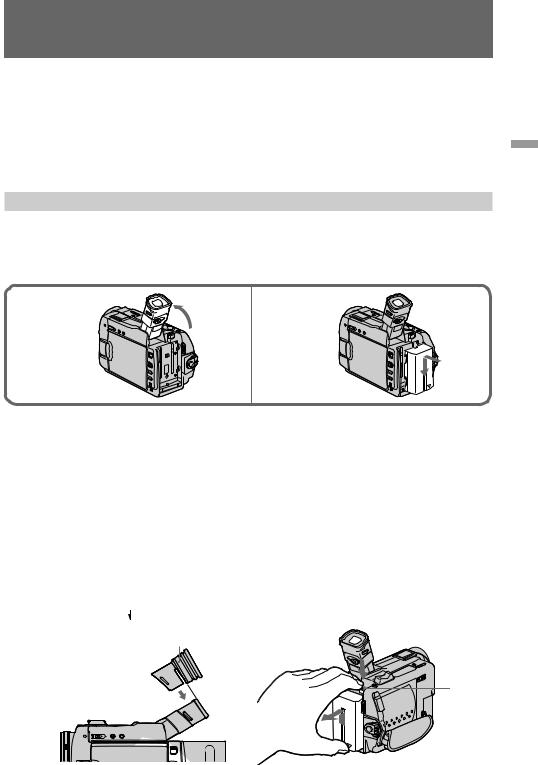
(1) Lift up the viewfinder.
(2) Insert the battery pack in the direction of the $mark on the battery pack. Slide the battery pack down until it is locked.
Attach the battery pack to the camcorder securely.
1 |
2 |
Note on installing the NP-F730/F750 battery pack
Use the camcoder while stretching out the viewfinder. Be careful not to catch your finger in when you fold the viewfinder back to the original position.
Note on installing the NP-F930/F950 battery pack [a]
Use the camcorder while lifting up the viewfinder.
When you install the viewfinder adaptor, you can record a picture with stretching out the viewfinder while using the NP-F930/F950 battery pack.
Install the viewfinder adaptor by matching the adaptor groove and the finder tip shown in the figure. An eclipse may appear in the finder if you use the adaptor. This will not affect the recorded image.
Note on the battery pack
Do not carry the camcorder by grasping the battery pack.
To remove the battery pack [b]
While pressing BATT, slide the battery pack in the direction of the arrow.
[a] Viewfinder adaptor [b]
 BATT
BATT
started Getting
You can look at the demonstration of the functions available with this camcorder (p. 26). |
9 |
|
Inserting a cassette
You can use mini DV cassette with 
 logo* only.
Make sure that the power source is installed.
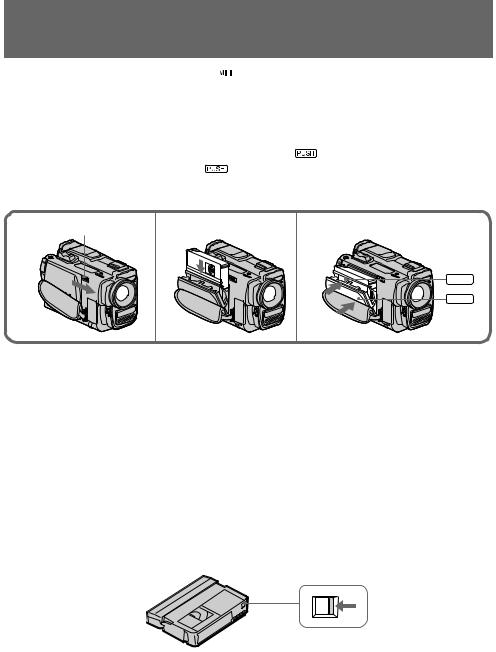
(1) Slide EJECT in the direction of the arrow. The cassette lid opens, then the cassette compartment opens automatically.
(2) Insert a cassette with the window facing out into the cassette compartment.
(3) Close the cassette compartment by pressing the |
mark on the cassette compartment. |
|
(4) Close the lid by pressing the |
mark until it clicks. |
|
* 

 is a trademark.
1 |
EJECT |
2 |
3,4 |
|
|
|
3 |
PUSH |
4 |
PUSH |
Notes
•When you open the lid immediately after you install the battery, the cassette compartment may not open. Close the lid and open it again.
•The cassette lid and the cassette compartment may not be closed when you press any part of the lid other than the  mark.
mark.
To eject the cassette
Follow the procedure above and in step 2, take out the cassette.
To prevent accidental erasure
Slide and open the tab on the cassette to expose the red mark. If you try to record with the red mark exposed, the Land 6indicators flash on the LCD screen or in the viewfinder, and you cannot record on the tape. To re-record on this tape, slide and close the tab to cover the red mark.
10

Basic operations
Camera recording
Make sure that the power source is installed and a cassette is inserted and that the START/ STOP MODE switch inside the LCD panel is set to  . Before you record one-time events, you may want to make a trial recording to make sure that the camcorder is working correctly.
When you use the camcorder for the first time, power on it and reset the date and time to your time before you start recording (p. 69).
(1) Remove the lens cap and pull the lens cap string to fix it.
(2) While pressing the small green button on the POWER switch, set it to CAMERA. The camcorder is set to Standby mode.
(3) Press START/STOP.
The camcorder starts recording. “REC” appears in the viewfinder. The camera recording lamp on the front of the camcorder also lights up.
You can also select Recording mode, SP (standard play) mode or LP (long play) mode.
Set REC MODE in the menu system according to the length of your planned recording before you start.
2 |
1 |
|
|
POWER |
STBY |
|
R |
|
|
–:– –:– – |
|
|
T |
|
|
V |
|
C |
|
|
A |
|
|
F |
M |
|
ERA |
|
|
O |
|
|
F |
|
|
3 |
|
|
|
POWER |
REC |
|
R |
|
|
0:00:00 |
|
|
T |
|
|
V |
|
|
|
60min |
C |
40min |
|
|
M |
|
A |
|
|
F |
ERA |
|
O |
|
|
F |
|
|
To stop recording momentarily [a]
Press START/STOP. The “STBY” indicator appears in the viewfinder (Standby mode).
To finish recording [b]
Press START/STOP again to stop recording. Set the POWER switch to OFF. Then, eject the cassette and remove the battery pack.
[a] |
R |
STBY |
[b] |
|
|
|
|
|
POWER |
|
R |
|
R |
||
|
T |
|
|
|
|||
|
|
|
0:35:20 |
|
POWER |
|
POWER |
|
V |
|
|
V |
|
V |
|
|
|
|
|
|
T |
|
T |
|
|
|
25min |
|
|
|
|
C |
|
|
C |
C |
|||
A |
|
|
|||||
|
M |
|
|
A |
A |
||
O |
E |
RA |
|
|
M |
|
M |
F |
|
|
O |
ERA |
O |
ERA |
|
F |
|
|
F |
|
F |
|
|
|
|
|
|
|
F |
|
F |
When you use mini DV cassette with cassette memory
Read the instruction about cassette memory to use this function properly (p. 67).
operations Basic
11

Camera recording
To focus the viewfinder lens
If you cannot see the indicators in the viewfinder clearly, or after someone else has used the camcorder, focus the viewfinder lens. Move the viewfinder lens adjustment lever so that the indicators in the viewfinder come into sharp focus.
Note on Standby mode
If you leave the camcorder in Standby mode for 5 minutes while the cassette is inserted, the camcorder turns off automatically. This prevents wearing down the battery and wearing out the tape. To resume Standby mode, while pressing the small green button on the POWER switch, set it to OFF once, and then to CAMERA. To start recording, press START/STOP.
Note on Recording mode
This camcorder records and plays back in SP (standard play) mode and in LP (long play) mode. Select SP or LP in the menu system. In LP mode, you can record 1.5 times as long as in SP mode.
Notes on LP mode
•We recommend to use this camcorder to play back a tape recorded on this camcorder. If a tape recorded on other camcorder is played back on this camcorder, or vice versa, mosaicpattern noise may appear.
•When you record in SP and LP modes on one tape or you record some scenes in LP mode, the playback picture may be distorted or the time code may not be written properly between scenes.
•When you record in LP mode, we recommend you to use a Sony Excellence/Master mini DV cassette so that you can get the most out of your camcorder.
•You cannot make audio dubbing on a tape recorded in LP mode. Use the SP mode for the tape to be audio dubbed.
Notes on the time code
•The time code indicates the recording or playback time, “0:00:00” (hours : minutes : seconds) in CAMERA mode and “0:00:00:00” (hours : minutes : seconds : frames) in VTR mode.
•Be sure not to make a blank portion when recording, because the time code will start from “0:00:00:00” again.
•This camcorder uses the drop frame mode.
Note on the beep sound
As indicated with  in the illustrations, a beep sounds when you turn the power on or when you start recording, and two beeps sound when you stop recording, confirming the operation. Several beeps also sound as a warning of any unusual condition of the camcorder.
Note that the beep sound is not recorded on the tape. If you do not want to hear the beep sound, select OFF in the menu system.
12
Camera recording
Note on remaining tape indicator
The indicator may not be displayed accurately depending on the tape. Though the indicator does not appear at the time of recording, it will appear in a few seconds.
Using the zoom feature
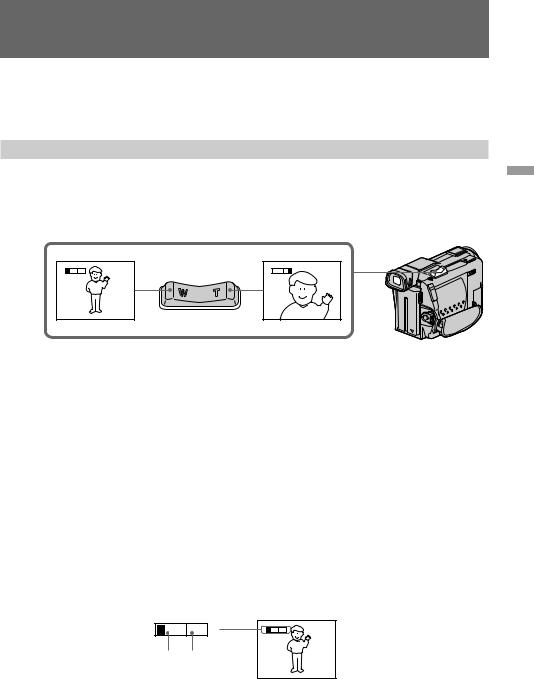
Zooming is a recording technique that lets you change the size of the subject in the scene.
For more professional-looking recordings, use the zoom function sparingly. “T” side: for telephoto (subject appears closer)
“W” side: for wide-angle (subject appears farther away)
W |
T |
W |
T |
Zooming speed (Variable speed zooming)
Press the power zoom switch a little for a relatively slow zoom; press it still more for a highspeed zoom.
When you shoot a subject using a telephoto zoom
If you cannot get a sharp focus while in extreme telephoto zoom, press the “W” side of the power zoom switch until the focus is sharp. You can shoot a subject that is at least about 80 cm away from the lens surface in the telephoto position, or about 1 cm away in the wideangle position.
Notes on digital zoom
•More than 15x zoom is performed digitally, and the picture quality deteriorates as you go toward the “T” side. If you do not want to use the digital zoom, set the D ZOOM function to OFF in the menu system.
•The right side [a] of the power zoom indicator shows the digital zooming zone, and the left side [b] shows the optical zooming zone. If you set the D ZOOM function to OFF, the [a] zone disappears.
W |
T |
W |
T |
[b] [a]
operations Basic
13
Camera recording
Selecting the start/stop mode
Your camcorder has two modes besides normal start/stop mode. These modes enable you to take a series of quick shots resulting in a lively video.
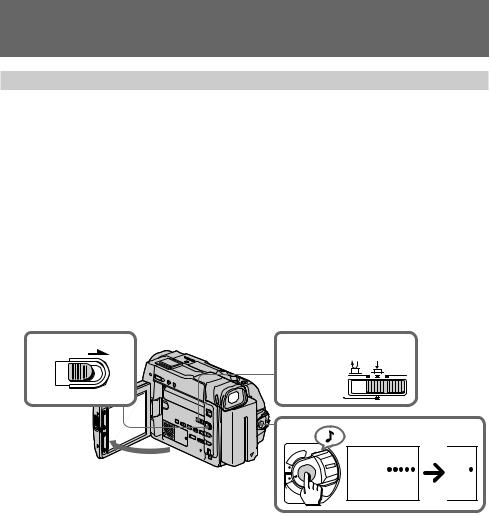
(1) Slide OPEN in the direction of the arrow and open the LCD panel.
(2) Set START/STOP MODE to the desired mode.
 : Recording starts when you press START/STOP, and stops when you press it again (normal mode).
 ANTI GROUND SHOOTING : The camcorder records only while you press down START/STOP so that you can avoid recording unnecessary scenes.
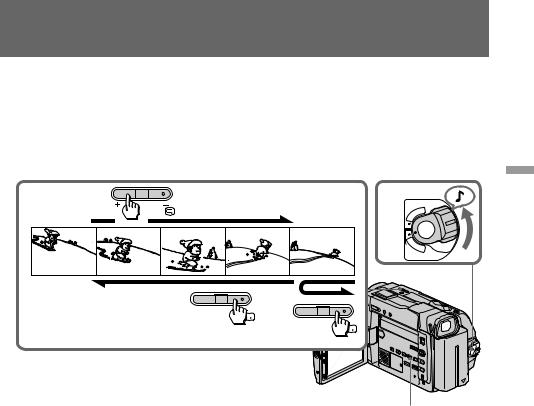
5SEC : When you press START/STOP, the camcorder records for 5 seconds and then stops automatically.
(3) Press START/STOP. Recording starts.
If you selected 5SEC, five dots appear in the viewfinder or on the LCD screen. The dots disappear at a rate of one per second as illustrated below. When five seconds elapse and all the dots disappear, the camcorder switches to Standby mode automatically.
1 OPEN |
2 |
START/STOP MODE |
5 |
SEC
|
|
ANTI GROUND |
|
|
|
|
SHOOTING |
|
|
3 |
|
|
||
|
POWER |
REC |
REC |
|
|
|
R |
||
|
|
|
|
|
|
T |
0:00:00 |
0:00:04 |
|
|
V |
|
||
C |
|
|
|
|
A |
|
|
|
|
|
M |
|
|
|
F |
ERA |
|
|
|
O |
F |
|
|
|
|
|
|
|
|
To extend the recording time in 5SEC mode
Press START/STOP again before all the dots disappear. Recording continues for about 5 seconds from the moment you press START/STOP.
Note on 5SEC recording
If you have turned off the indicators on the LCD screen, the dots do not appear.
14
Camera recording
Shooting with the LCD screen
You can also record the picture while looking at the LCD screen.
When using the LCD screen, the viewfinder turns off automatically except in mirror mode. You cannot monitor the sound from the speaker during recording.
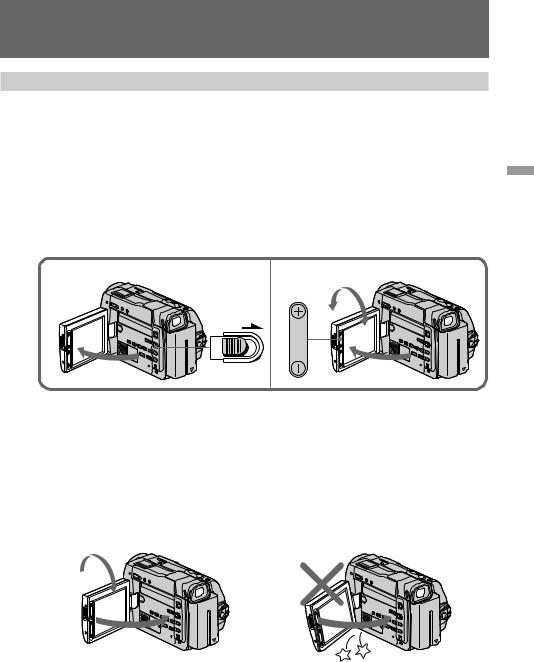
(1) Slide OPEN in the direction of the arrow and open the LCD panel.
(2) Adjust angle of the LCD panel.
The LCD panel moves about 90 degrees to this side and about 180 degrees to the other side.
To adjust the brightness of the LCD screen, press LCD BRIGHT + or –.
The battery life is longer when the LCD panel is closed. Use the viewfinder instead of the LCD screen to save the battery power.
1 |
2 |
|
180° |
|
OPEN |
LCD |
90° |
|
|
||
|
|
BRIGHT |
|
|
|
|
90°
Notes on the LCD panel
•When closing the LCD panel, turn it vertically until it clicks [a].
•When turning the LCD panel, turn it always vertically; otherwise, the camcorder body may be damaged or the LCD panel may not close properly [b].
•Close the LCD panel completely when not in use.
•Do not push nor touch the LCD panel while operating the camcorder.
•You may find it difficult to view the LCD screen due to glare when using the camcorder outdoors.
[a] |
1 |
[b] |
|
2
operations Basic
15
Camera recording
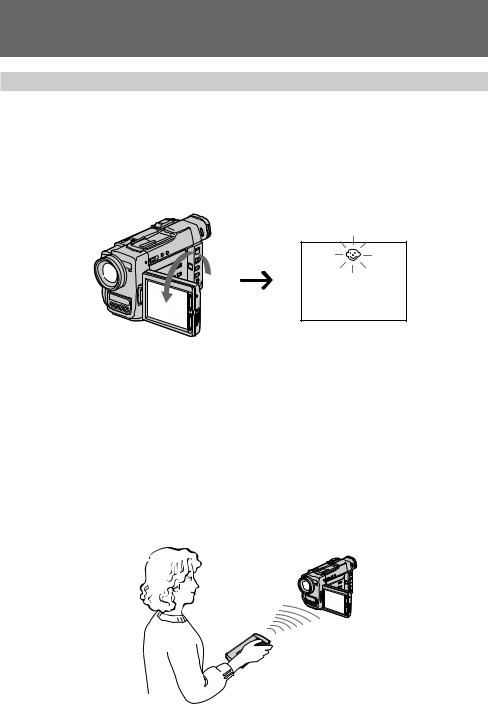
Letting the subject monitor the shot
You can turn the LCD panel over so that it faces the other way and you can let the subject monitor the shot while shooting with the viewfinder.
Turn the LCD panel up vertically. When you turn the LCD panel 180 degrees, the  indicator appears on the LCD screen (mirror mode) and the time code and remaining tape indicators disappear.
You can also use the Remote Commander.
To cancel mirror mode
Turn the LCD panel down toward the camcorder body.
Notes on mirror mode
•When you turn the LCD panel about 90 degrees to 180 degrees, the camcorder enters mirror mode.
•Using the mirror mode, you can record yourself while watching yourself on the LCD.
•The picture on the LCD looks like a mirror-image while recording in mirror mode. The STBY indicator appears as Prand REC as r. Other indicators appear as mirror-image. Some indicators may not appear in mirror mode.
•While recording in mirror mode, you cannot operate the following functions: MENU, TITLE, and ZERO SET MEMORY on the Remote Commander.
16
Hints for better shooting
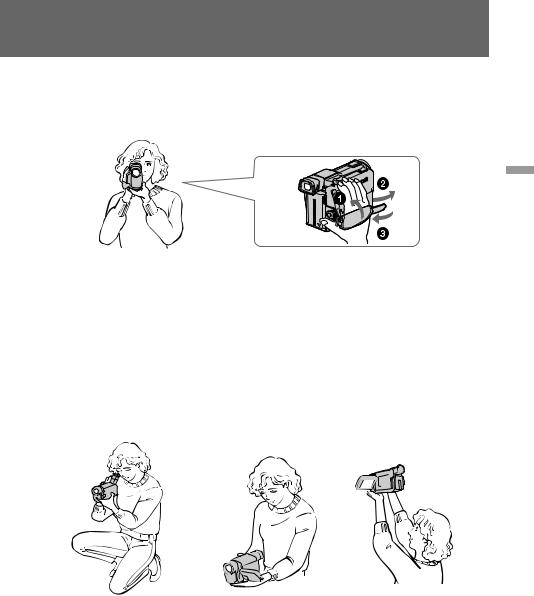
For hand-held shots, you will get better results by holding the camcorder according to the following suggestions:
•Hold the camcorder firmly and secure it with the grip strap so that you can easily manipulate the controls with your thumb. [a]
[a]
operations Basic
•Place your elbows against your side.
•Place your left hand under the camcorder to support it.
•Place your eye against the viewfinder eyecup.
•Be sure not to touch the built-in microphone.
•Use the LCD panel frame or the viewfinder frame as a guide to determine the horizontal plane.
•You can also record in a low position to get an interesting angle. Lift the viewfinder up for record from a low position. [b]
•You can also record in a low position or even in a high position using the LCD panel. [c]
•When you use the LCD screen outdoors in direct sunlight, the LCD screen may be difficult to see. If this happens, we recommend that you use the viewfinder.
[b] |
[c] |
|
17
Hints for better shooting
Place the camcorder on a flat surface or use a tripod
Try placing the camcorder on a table top or any other flat surface of suitable height. If you have a tripod for a still camera, you can also use it with the camcorder. When attaching a non-Sony tripod, make sure that the length of the tripod screw is less than 6.5 mm.
Otherwise, you cannot attach the tripod securely and the screw may damage the camcorder.
Cautions on the LCD panel and on the viewfinder
•Do not pick up the camcorder by the viewfinder or the LCD panel. [d]
•Do not place the camcorder so as to point the viewfinder or the LCD panel toward the sun. The inside of the viewfinder or the LCD panel may be damaged. Be careful when placing the camcorder under sunlight or by a window. [e]
[d] |
[e] |
18
Checking the recorded picture
Using the EDITSEARCH, you can review the last recorded scene or check the recorded picture on the LCD screen or in the viewfinder.
(1)While pressing the small green button on the POWER switch, set it to CAMERA.
(2)Press the РΠside of EDITSEARCH momentarily; the last few seconds of the recorded portion plays back (Rec Review). Hold down the Рside of EDITSEARCH until the camcorder goes back to the scene you want. The last recorded portion is played back. To go forward, hold down the + side (Edit Search).
2 |
EDITSEARCH |
1 |
POWER |
R |
|||
|
|
|
T |
|
|
|
V |
|
|
C |
|
|
|
A |
|
|
|
F |
M |
|
|
ERA |
|
|
|
O |
|
|
|
F |
|
 EDITSEARCH
 EDITSEARCH
operations Basic
END SEARCH
To stop playback
Release EDITSEARCH.
To go back to the last recorded point (END SEARCH)
Press END SEARCH. The last recorded point is played back for about 5 seconds and stops. Note that when you use a tape without cassette memory, this function does not work once you eject the cassette after recording.
To begin re-recording
Press START/STOP. Re-recording begins from the point you released EDITSEARCH. Provided you do not eject the tape, the transition between the last scene you recorded and the next scene you record will be smooth.
19
Playing back a tape
You can monitor the playback picture on the LCD screen or in the viewfinder.
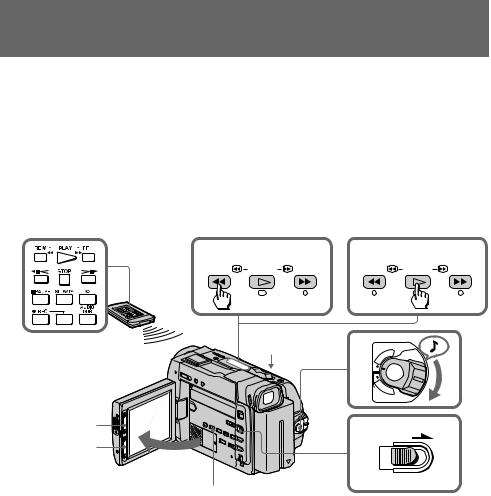
(1) Insert the recorded tape with the window facing out.
(2) Slide OPEN in the direction of the arrow and open the LCD panel.
(3) While pressing the small green button on the POWER switch, set it to VTR.
(4) Press 0to rewind the tape.
(5) Press ·to start playback.
(6) Adjust the volume using VOL +/– and the brightness of the LCD screen using LCD BRIGHT +/–.
You can also monitor the picture on a TV screen, after connecting the camcorder to a TV or VCR.
4 |
5 |
REW PLAY FF |
REW PLAY FF |
|
1 |
3 |
R |
|
|
T |
|
|
|
|
POWER |
|
|
|
V |
|
|
C |
|
|
|
A |
|
|
|
F |
M |
|
|
ERA |
|
|
|
O |
|
|
|
F |
|
LCD BRIGHT |
|
2 |
OPEN |
|
|
||
VOL
DISPLAY
To stop playback, press .
To rewind the tape, press 0.
To fast-forward the tape rapidly, press ).
Using the Remote Commander
You can control playback using the supplied Remote Commander. Before using the Remote Commander, insert the R6 (size AA) batteries .
To display the LCD screen/viewfinder screen indicators
Press DISPLAY.
To erase the indicators, press again.
Notes on screen indicators
•The screen indicator disappears when the title is displayed.
•When you play back a tape using a “InfoLITHIUM” battery, Bindicates the remaining battery capacity. The remaining battery time in minutes is not displayed.
20
Playing back a tape
Using headphones
Connect headphones (not supplied) to the 2jack. You can adjust the volume of the headphones using VOL +/–.
To view the playback picture in the viewfinder
Close the LCD panel. The viewfinder turns on automatically.
When using the viewfinder, you can monitor the sound only by using headphones.
To view on the LCD screen again, open the LCD panel. The viewfinder turns off automatically.
Various playback modes
To view a still picture (playback pause)
Press Pduring playback. To resume playback, press Por ·.
To locate a scene (picture search)
Keep pressing 0or )during playback. To resume normal playback, release the button.
To monitor the high-speed picture while advancing the tape or rewinding (skip scan)
Keep pressing 0while rewinding or )while advancing the tape. To resume normal rewinding or fast-forward, release the button.
To view the picture at 1/3 speed (slow playback)
Press &on the Remote Commander during playback. For slow playback in reverse direction, press <, then press &. To resume normal playback, press ·.
To view the picture at double speed
For double speed playback in the reverse direction, press <, then press × 2 on the Remote Commander during playback. For double speed playback in the forward direction, press >, then press × 2 during playback. To resume normal playback, press ·.
To view the picture frame-by-frame
Press 'or 7on the Remote Commander in playback pause mode. If you keep pressing the button, you can view the picture at 1/30 speed. To resume normal playback, press ·.
To change the playback direction
Press <on the Remote Commander for reverse direction or >on the Remote Commander for forward direction during playback. To resume normal playback, press ·.
Notes on playback
•The sound is muted in the various playback modes.
•During playback other than normal playback, the previous recording may appear in mosaic image. This is not malfunction.
•When playback pause mode lasts for 5 minutes, the camcorder automatically enters stop mode. To resume playback, press ·.
Note on slow playback
The slow playback can be performed smoothly on this camcorder; however, this function does not work for an output signal from the DV IN/OUT jack.
operations Basic
21
Searching for the end of the picture
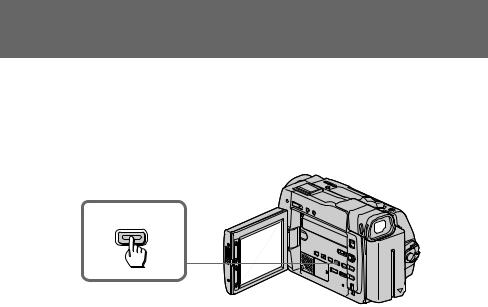
You can go to the end of the recorded portion after you record and play back the tape. The tape starts rewinding or fast-forwarding and the last about 5 seconds of the recorded portion plays back. Then the tape stops at the end of the recorded picture (End Search).
Open the LCD panel and press END SEARCH during recording standby.
This function works when the POWER switch is set to CAMERA or VTR.
END SEARCH
Notes on End Search
•When you use a tape without cassette memory, the End Search function does not work once you eject the cassette after recording.
•When you use a tape with cassette memory, the End Search function works once you eject the cassette. When you play back a tape which has a blank portion in the beginning or between the recorded portions, the End Search function will not work correctly.
22
Advanced operations
Using alternative power sources
You can choose any of the following power sources for your camcorder: battery pack, house current, and 12/24 V car battery. Choose the appropriate power source depending on where you want to use your camcorder.
Place |
Power source |
Accessory to be used |
Indoors |
House current |
Supplied AC power adaptor |
|
|
|
Outdoors |
Battery pack |
Battery pack NP-F330 (supplied), NP-F530, NP-F550, NP- |
|
|
F730, NP-F750, NP-F930, NP-F950 |
|
|
|
In the car |
12 V or 24 V car battery |
Sony DC adaptor/charger DC-V700 |
|
|
|
Note on power sources
Disconnecting the power source or removing the battery pack during recording or playback may damage the inserted tape. If this happens, restore the power supply again immediately.
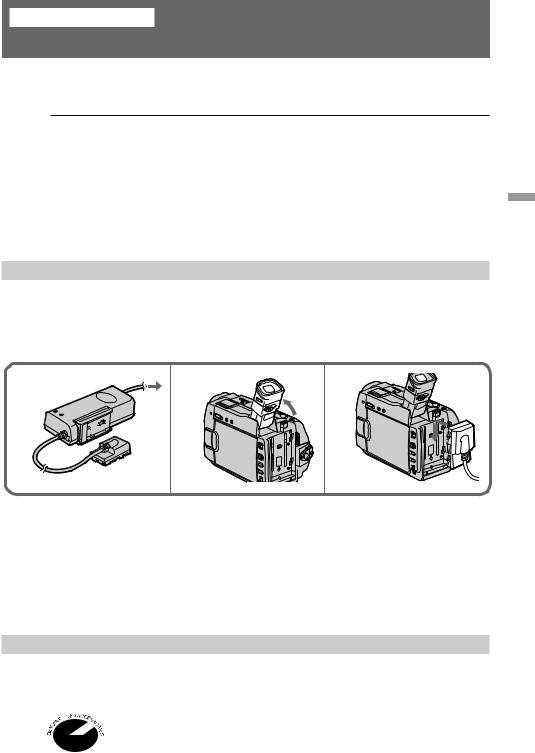
Using the house current
To use the supplied AC power adaptor:
(1) Connect the power cord to a wall outlet.
(2) Lift up the viewfinder.
(3) Slide the connecting plate down into the guides at the rear of the camcorder until it clicks.
operations Advanced
1 |
2 |
3 |
To remove the connecting plate
The connecting plate is removed in the same way as the battery pack.
WARNING
The power cord must only be changed at a qualified service shop.
PRECAUTION
The set is not disconnected from the AC power source (house current) as long as it is connected to the power cord, even if the set itself has been turned off.
Using a car battery
Use a DC adaptor/charger such as Sony DC-V700 (not supplied). Connect the car battery cord to the cigarette lighter socket of a car (12 V or 24 V). Connect the DC adaptor/charger and the camcorder using the DK-415 (supplied with DC-V700) connecting cord.
This mark indicates that this product is a genuine accessory for Sony video product.
When purchasing Sony video products, Sony recommends that you purchase
accessories with this “GENUINE VIDEO ACCESSORIES” mark.
23
Changing the mode settings
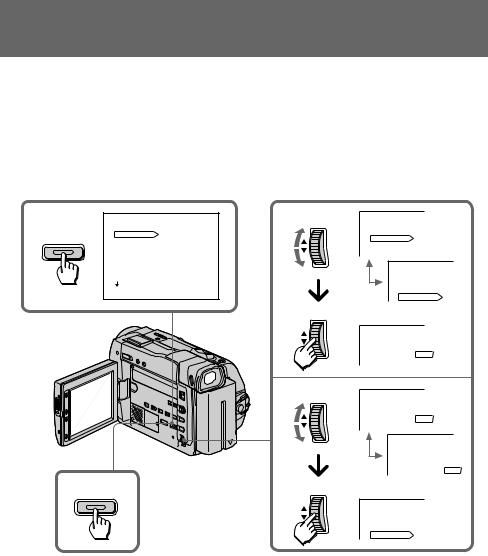
You can change the mode settings in the menu system to further enjoy the features and functions of the camcorder.
(1) Press MENU to display the menu on the LCD screen.
(2) Turn the CONTROL dial to select the desired item, then press the CONTROL dial. Only the selected item is displayed.
(3) Turn the CONTROL dial to select the desired mode, then press the CONTROL dial. If you want to change the other modes, repeat steps 2 and 3.
(4) Press MENU to erase the menu display.
1 |
|
MENU |
2 CONTROL |
MENU |
|
|
|
|
|
|
|||
|
MENU |
COMMANDER |
ON |
COMMANDER |
ON |
|
|
HiFi SOUND |
|
|
|||
|
|
|
HiFi SOUND |
|
|
|
|
|
REC MODE |
|
|
|
|
|
|
|
REC MODE |
|
|
|
|
|
AUDIO MODE |
|
|
|
|
|
|
|
|
|
|
|
|
|
TITLEERASE |
|
MENU |
|
|
|
|
TITLE DSPL |
|
|
|
|
|
|
|
|
|
|
|
|
|
TAPE TITLE |
|
COMMANDER |
|
|
|
|
|
|
|
||
|
|
[MENU]: END |
|
HiFi SOUND |
SP |
|
|
|
|
|
REC MODE |
||
|
|
|
CONTROL |
|
|
|
|
|
|
|
MENU |
|
|
|
|
|
|
REC MODE |
SP |
|
|
|
|
|
|
LP |
|
|
|
|
3 CONTROL |
MENU |
|
|
|
|
|
|
|
|
|
|
|
|
|
REC MODE |
SP |
|
|
|
|
|
|
LP |
|
|
|
|
|
MENU |
|
|
|
|
|
|
REC MODE |
SP |
|
|
4 MENU |
|
|
|
|
LP |
|
|
CONTROL |
|
|
|
|
|
|
|
|
|
|
|
|
|
|
|
MENU |
|
|
|
|
|
|
COMMANDER |
|
|
|
|
|
|
HiFi SOUND |
|
|
|
|
|
|
REC MODE |
LP |
|
While recording in mirror mode, you cannot operate the menu system.
Note on changing the mode settings
Menu items differ depending on the setting of the POWER switch to VTR or CAMERA.
24

Changing the mode settings
Selecting the mode setting of each item
Items for both CAMERA and VTR modes
COMMANDER* <ON/OFF>
•Select ON when using the supplied Remote Commander for the camcorder.
•Select OFF when not using the Remote Commander.
REC MODE <SP/LP>
•Select SP when recording in SP (standard play) mode.
•Select LP when recording in LP (long play) mode.
AUDIO MODE <12BIT/16BIT>
•Normally select 12BIT to record two stereo sound.
•Select 16BIT to record the one stereo sound with high quality.
BEEP <ON/OFF>
•Select ON so that beeps sound when you start/stop recording, etc.
•Select OFF when you do not want to hear the beep sound.
TITLEERASE
Erase the title you have superimposed.
LCD B.L. <BRT NORMAL/BRIGHT>
•Normally select BRT NORMAL.
•Select BRIGHT when the LCD panel is dark.
Even if you adjust the LCD B.L., the recorded picture is not affected.
LCD COLOR
Select this item and change the level of the indicator by turning the CONTROL dial up (+) or down (–) to adjust the color intensity of the picture.
VF BRIGHT
Close the LCD panel.
Select this item to adjust the brightness of the viewfinder. The viewfinder becomes brighter when you turn the CONTROL dial up (+), and darker when you turn it down (–).
DISPLAY <LCD or V-OUT/LCD >
•Normally select LCD.
•Select V-OUT/LCD to display indicator both on the LCD panel and TV screen.
AUTO TV ON <ON/OFF>
You can use this feature only with Sony TVs.
•Select ON to turn on the TV automatically when using the LASER LINK function.
•Select OFF not to turn on the TV.
TV INPUT <VIDEO1/VIDEO2/VIDEO3/OFF>
Select 1, 2 or 3 of the video input on the TV which the IR receiver (not supplied) is connected to when using the LASER LINK function.
operations Advanced
25

Changing the mode settings
Items for CAMERA mode only
D ZOOM <ON/OFF>
•Select ON to activate digital zooming.
•Select OFF not to use the digital zoom. The camcorder goes back to 15x optical zoom.
STEADYSHOT <ON/OFF>
•Normally select ON.
•Select OFF when you do not have to worry about camera-shake.
REC LAMP <ON/OFF>
•Normally select ON.
•Select OFF when you do not want the camera recording/battery lamp at the front of the unit to light up.
N.S.LIGHT <ON/OFF>
•Select ON when you use the NightShot Light.
•Select OFF when you do not use the NightShot Light.
CLOCK SET
Select this item to reset the date or time.
DEMO MODE <STBY/ON or OFF>
•Select STBY/ON to glance over the function of camcorder.
•Select OFF not to display demonstration.
Notes on DEMO MODE
•DEMO MODE is set to STBY (Standby)/ON at the factory and the demonstration starts about 10 minutes after you set the POWER switch to CAMERA without inserting a cassette.
Note that you cannot select STBY/ON of DEMO MODE in the menu system.
•You cannot select DEMO MODE when a cassette is inserted in the camcorder.
•If you insert a cassette during the demonstration, the demonstration stops. You can start recording as usual. DEMO MODE automatically returns to STBY/ON.
•When you set NIGHTSHOT to ON, NIGHTSHOT indicator appears in the viewfinder or on the LCD screen. At this time, you cannot select DEMO MODE in the menu system.
To look at the demonstration at once
Eject the cassette, if inserted. Select STBY/ON of DEMO MODE and erase the menu display. The demonstration will begin.
When you turn off the camcorder once, DEMO MODE automatically returns to STBY/ON.
Items for VTR mode only
HiFi SOUND* <STEREO/1/2>
•Select STEREO to play back stereo sound or main and sub sound (for dual sound).
•Select 1 to play back the left sound (for stereo sound) or main sound (for dual sound).
•Select 2 to play back the right sound (for stereo sound) or sub sound (for dual sound).
TITLE DSPL <ON/OFF>
•Select ON to display the title you have superimposed.
•Select OFF not to display the title.
26

Changing the mode settings
TAPE TITLE
Select this item to label the cassette tape.
AUDIO MIX*
Select this item and adjust the balance between the stereo 1 and stereo 2 by turning the CONTROL dial.
CM SEARCH <ON/OFF>
•Select ON to search using cassette memory.
•Select OFF to search without using cassette memory.
DATA CODE <DATE/CAM or DATE>
•Select DATE/CAM to display date and recording data during playback.
•Select DATE to display date during playback.
*These settings return to the default 5 minutes or more after the power source is disconnected or battery is removed. As far as the items without an asterisk are concerned, their settings are retained even when the power source is disconnected or battery is removed, as long as the vanadium-lithium battery is charged.
When recording a close subject
When REC LAMP is set to ON, the red camera recording lamp on the front of the camcorder may reflect on the subject if it is close. In this case, we recommend you set REC LAMP to OFF.
Notes
•When playing back a tape recorded in the 16-bit mode, you cannot adjust the balance in AUDIO MIX.
•If you select 16BIT in AUDIO MODE menu, you cannot add an audio sound.
•If you select BRIGHT in LCD B.L. menu, the battery life while recording becomes 10 to 20% shorter. When you use the power sources except for a battery, the menu item LCD B.L. is set to BRIGHT automatically and the item does not appear in the screen.
operations Advanced
27
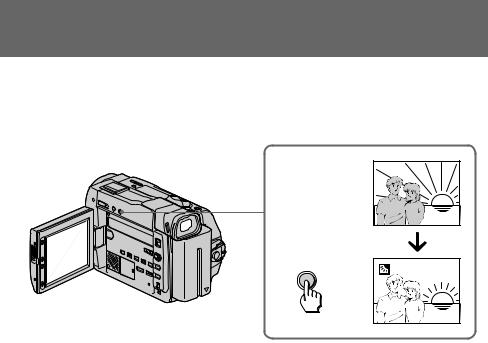
Shooting with backlighting
When you shoot a subject with the light source behind the subject or a subject with a light background, use the BACK LIGHT function.
Press BACK LIGHT. The cindicator appears on the LCD screen or in the viewfinder.
|
[a] |
BACK LIGHT |
[b] |
[a] Subject is too dark because of backlight.
[b]Subject becomes bright with backlight compensation.
After shooting
Be sure to release this adjustment condition by pressing BACK LIGHT again. The c indicator disappears. Otherwise, the picture will be too bright under normal lighting condition.
This function is also effective under the following conditions:
•A subject with a light source nearby or a mirror reflecting light.
•A white subject against a white background. Especially when you shoot a person wearing shiny clothes made of silk or synthetic fiber, his or her face tends to become dark if you do not use this function.
Note on the BACK LIGHT function
When you press EXPOSURE, the BACK LIGHT function is cancelled.
28

Using the FADER function
You can fade in or out to give your recording a professional appearance.
When fading in, the picture gradually fades in from black while the sound increases. When fading out, the picture gradually fades to black while the sound decreases.
When fading in [a]
(1) While the camcorder is in Standby mode, press FADER until the desired indicator flashes.
(2) Press START/STOP to start recording. The fade indicator stops flashing.
When fading out [b]
(1) During recording, press FADER until the desired indicator flashes.
(2) Press START/STOP to stop recording. The fade indicator stops flashing, and then recording stops.
[a] STBY |
REC |
FADER
M.FADER
STBY REC [b]
1 |
2 |
|
|
FADER |
POWER |
|
|
|
FADER |
|
R |
|
V |
|
|
M.FADER |
T |
|
|
|
|
C |
|
|
A |
|
|
F |
M |
|
ERA |
|
|
O |
|
|
F |
|
operations Advanced
To cancel the fader function
Before pressing START/STOP, press FADER until the fade indicator disappears.
You cannot use the fader function in the following situations
–The START/STOP MODE switch is set to  ANTI GROUND SHOOTING or 5SEC.
–The camcorder is in the photo recording.
–A title is displayed in the viewfinder or on the LCD screen.
29
 Loading...