


 Loading...
K Service Source
Sheet Feeder
LaserWriter Pro 600/630 Sheet Feeder,
LaserWriter 16/600 PS Sheet Feeder

K Service Source
Basics
Sheet Feeder

Basics |
About This Manual - 1 |
|
|
|
|
About This Manual
This manual covers the Take Apart, Additional Procedures, and Adjustments for the sheet feeder. Refer to the main printer manuals for all other information.
Sheet Feeder

Basics |
Compatibility - 2 |
|
|
|
|
Compatibility
Note: The LaserWriter Pro 600/630 feeder is not compatible with the LaserWriter Pro 16/600 PS printer, but the LaserWriter Pro 16/600 PS feeder is compatible with the LaserWriter Pro 600/630 printer. Unless noted otherwise, all parts and procedures contained in this manual do apply to both versions.
You can tell the two feeders apart in two distinct ways:
1By comparing controller board serial numbers: The LaserWriter Pro 600/630 sheet feeder controller board has the vendor number "RG5-0541" imprinted on it. The LaserWriter 16/600 PS sheet feeder controller board bears the number "RG5-1086."
2By comparing serial numbers: Numbers starting with JBD00001 denote feeders for use only with the Pro

Basics |
Compatibility - 3 |
|||
|
|
|
||
|
600/630. Numbers starting with LBJ00001 denote |
|||
|
feeders for use on both generations of printer. |
|||
|
|
|
|
|
|
|
|
|
|

K Service Source
Take Apart
Sheet Feeder
Take Apart |
Controller Board - 1 |
|
|
|
|
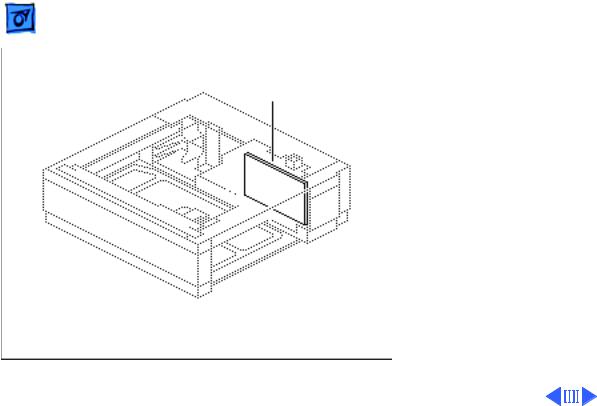
Controller
Board
Controller Board
No preliminary steps are required before you begin this procedure.
Note: See "Circuit Board Diagrams" in Basics in the main printer manual for layout of board.
Take Apart |
Controller Board - 2 |
||
|
|
|
|
|
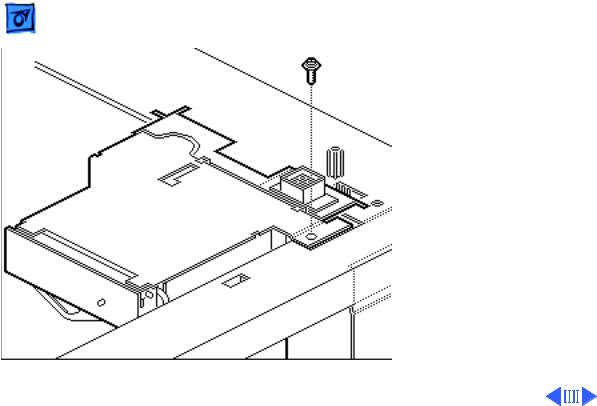
1 Remove the single black |
||
Cover |
screw that secures the |
||
controller block cover. |
|||
Screw |
|||
Take Apart |
Controller Board - 3 |
|
|
|
|
|
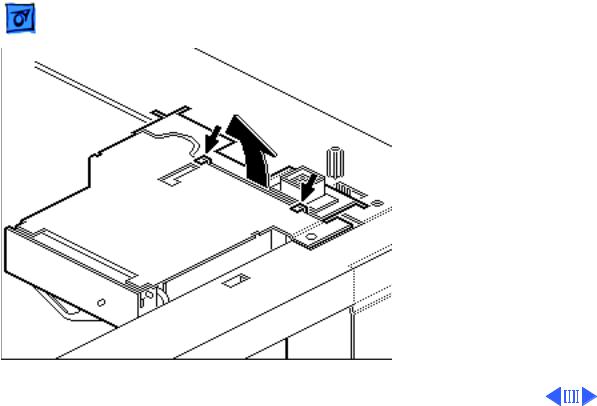
2 Release the two flex tabs |
|
|
and swing the cover |
|
|
upward. |
|
Tab
Tab

Take Apart |
Controller Board - 4 |
|
|
|
|
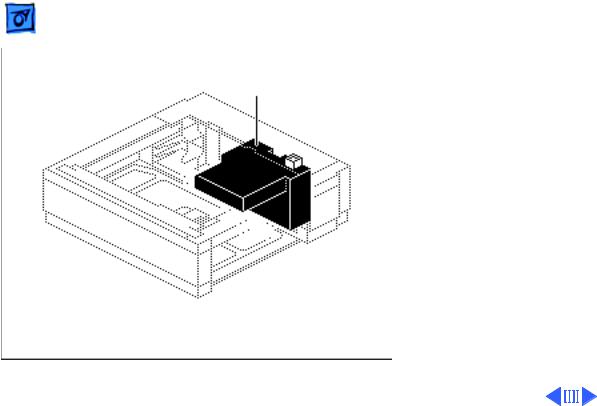
Controller
Board
J853
J852
J851
3Cut the cable tie (if present) and disconnect the three cables from the controller board.
Take Apart |
Controller Board - 5 |
|
|
|
|
Flex
Tab
Slot
Tab Access Below
4Note: There is a flex tab near the bottom that hooks into a slot in the controller board. An arch-shaped hole on the inside face of the controller block housing provides access to the flex tab.
5Release the flex tab and carefully slide out the board.
Take Apart |
Controller Block - 6 |
|
|
|
|
Controller
Block
Controller Block
No preliminary steps are required before you begin this procedure.
Note: The controller block is available from Apple but it does not include the lid or controller board. Save these two parts if you are replacing the controller block. None of the other parts contained in the controller block is available separately.
Loading...