


 Loading...
Congratulations on your purchase of the Apple VideoPhone Kit. You can use the equipment in your kit to exchange live video and sound, view and annotate content in a shared window, and transfer files with other users.
If you install the optional Farallon Timbuktu Pro software, you can also use the shared desktop feature to share applications with other Timbuktu Pro users and observe or control their computers while conferencing. (An additional 8 MB of random-access memory [RAM] is required for Timbuktu Pro.)
You can connect with other Apple VideoPhone users or users with compatible conferencing software (such as Netscape’s audioconferencing software for Macintosh, Windows, and UNIX®) over
ma high-speed local area network (LAN), such as Ethernet
mthe Internet, using a standard V.34 28.8 kbps modem, an ISDN modem, an ISDN-to-Ethernet router, or a direct Ethernet connection (To access the Internet, you must have an Internet Service Provider.)
Note: If you’re videoconferencing over the Internet, the quality of video and sound will vary depending on Internet traffic, the type of computer you are using, and network bandwidth.
1

What’s in this booklet
This booklet contains information on how to
mconnect the camera to your computer, and adjust the camera
minstall the Apple VideoPhone conferencing software
mmake calls over the Internet, using your Apple VideoPhone Kit and a standard V.34 28.8 kbps modem or an ISDN modem
In addition, you will find technical specifications for the camera.
IMPORTANT For onscreen instructions on using the camera and software, open the Apple VideoPhone program and choose Apple VideoPhone Guide from the Guide (h) menu. The Guide is your resource for all information about using the Apple VideoPhone software. For more information on using onscreen Guides, see the manual that came with your computer.
For additional information, consult the QuickTime Conferencing World Wide Web site, located at the following address: http://qtc.quicktime.apple.com.
System requirements
To install and use the Apple VideoPhone Kit, you must have the following:
man AV-equipped Macintosh computer with a PowerPC™ microprocessor and 16 MB of RAM (An additional 8 MB of RAM is required for Timbuktu Pro.)
msystem software version 7.5.3 or later (System 7.5.3 is provided in this kit.) It is recommended that you install the System 7.5.5 Update (also provided in this kit).
ma microphone (For instructions on how to connect the microphone to your computer, see the manual that came with your computer.)
ma pair of speakers or headphones (recommended)
2

Care and cleaning instructions
1
2
3
For your own safety and that of your equipment, always take the following precautions:
mKeep your camera away from sources of liquids, such as washbasins, bathtubs, shower stalls, and so on.
mProtect your camera from dampness or wet weather, such as rain, snow, and so on.
mKeep these instructions handy for reference by you and others.
To clean the camera, do the following:
Make sure the camera is disconnected from the computer.
Wipe plastic surfaces lightly with a clean, soft cloth dampened with water.
Clean the lens only with tissue intended for camera lenses, available from any photographic supply store.
Connecting the camera to your Macintosh
1Turn off the computer.
2Attach the integrated cable to the camera and the S-video input port on the back of the computer.
Attach the single plug at one end of the cable to the S-video input port on the back of the computer. Then attach the two plugs at the other end of the cable to the Video Out and DC In ports on the camera.
(¾) S-video input port
¾

POWER
ON
OFF
-
|
|
+ |
+ |
|
|
|
|
VIDEO OUT |
IRIS |
DC |
IN 12V |
|
3
Positioning the camera
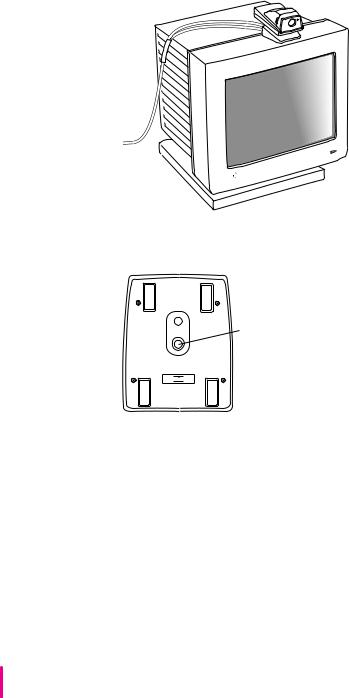
After connecting the camera to your computer, you would typically set it on top of the computer’s monitor, pointing at your face.
NEAR FOCUS ∞
You can also attach the camera to a tripod.
Tripod screw
50Hz

 60Hz
60Hz
You can pan the camera (rotate it left or right on its base) as much as 40 degrees in either direction. You can tilt it upward as much as 10 degrees, or downward as much as 20 degrees.
4
You may also need to adjust the camera to accommodate ambient lighting conditions. For example, it’s usually best not to point the camera toward a bright light source, such as an outside window. Any subject in front of such a light source is likely to appear in shadow.
For the best picture in a variety of lighting conditions, use the iris adjustment knob described in the next section, “Using the Camera Controls.”
Use the following settings with your videoconferencing software:
mVideo source settings: built-in AV digitizer, S-Video input, and NTSC format
mVideo image settings: default settings; use the iris adjustment knob for best results
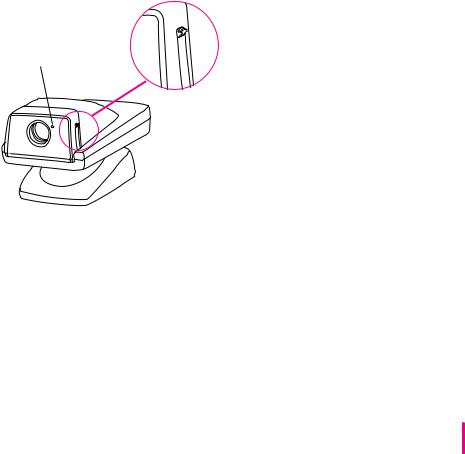
Using the camera controls
The camera has four simple controls:
Power switch
Power light
POWER ON
OFF
POWER
ON
OFF
To open the lens cover and turn the camera on, move the power switch to the On position. The power light next to the lens glows green.
5

Manual focus dial
NEAR
FOCUS
∞
NEAR
FOCUS
∞
The camera can focus from two inches to infinity. Use the manual focus dial to adjust the focus. To learn how to display an image on your screen, see the Apple VideoPhone Guide, available in the Guide (h) menu when Apple VideoPhone is the active program.
Iris (aperture)
POWER ON 
OFF
Iris adjustment knob
|
|
+ |
+ |
|
- |
|
|
|
|
|
OUT |
|
|
VIDEO |
DC |
IN |
12V |
|
||
IRIS |
|
|
-
|
+ |
+ |
- |
|
OUT |
|
VIDEO |
DC IN |
12V |
IRIS |
|
The iris adjustment knob is on the back of the camera, next to the DC In port. Use this knob to adjust the image brightness for the best picture in different lighting conditions. (For information about software adjustments you can make to improve color, brightness, and contrast, see the Apple VideoPhone Guide, available in the Guide [h] menu when Apple VideoPhone is the active program.)
6
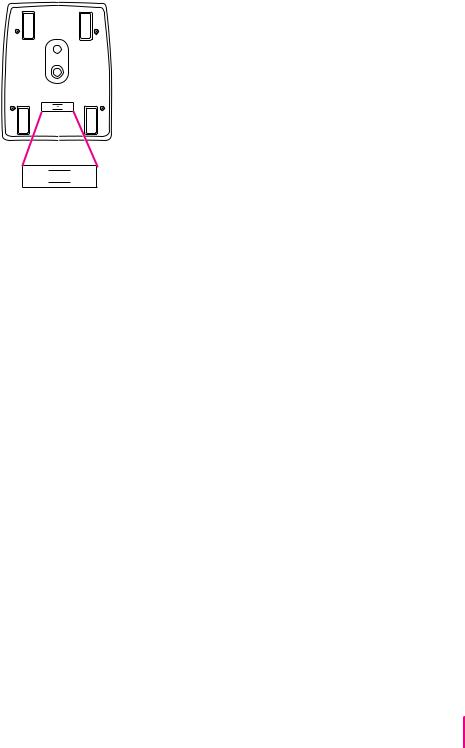
50 Hz/60 Hz switch
50Hz

 60Hz
60Hz
50Hz

 60Hz
60Hz
In some countries, indoor lighting uses 50 Hz AC power. If you are using the camera in one of these regions, set this switch to 50 Hz to prevent image flicker.
If you are using a Power Macintosh 7100 AV or 8100 AV computer, videoconferencing performance will improve if you connect your monitor to the standard monitor port on the AV card instead of the built-in highdensity monitor port. See the manual that came with your computer for more information.
IMPORTANT Depending on which computer you have and the amount of video RAM (VRAM) your computer has, your system may or may not be able to display the Apple VideoPhone video images in color. To display the Apple VideoPhone video images in color, you may have to decrease your monitor resolution, decrease the number of colors displayed, or install additional VRAM. (For more information, see the manual that came with your computer.)
Note: If you have two monitors connected to your computer, the Apple VideoPhone video images will appear only on the main monitor. For instructions on how to designate the main monitor, see the manual that came with your computer.
7
Loading...