


 Loading...
K Service Source
QuickTake 200

K Service Source
Basics
QuickTake 200
Basics |
Overview - 1 |
|
|
|
|
Overview
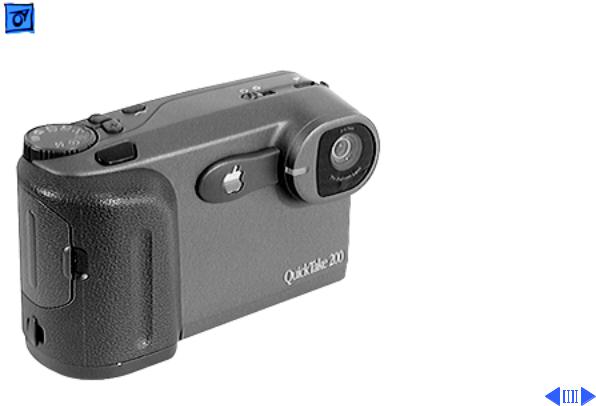
The QuickTake 200 is an easy-to-use digital camera that produces high-quality images that can quickly transfer to a Mac OS-based computer. Using the computer, you can manipulate and modify the images.
The QuickTake 200 is repaired through wholeunit exchange in most countries. Check the service strategy in your region.

 Basics Overview - 2
Features
Features of the QuickTake 200 include the following:
• 1.8-inch color LCD display that supports frame-by- frame and automatic playback modes
• 24-bit VGA images at resolutions of up to 640x480 pixels in more than 16 million colors
• SmartMedia 2 MB memory card that can accommodate 30 standard-quality images or as many as 20 high-quality images
• User-selectable aperture setting of f2.2 and f8
• Focus selections for close-up, portrait, and distance
• Automatic power-off after 2 minutes of no use
• Self-timer
• Bundled software including Adobe PhotoDeluxe, Adobe PageMill, and PictureWorks NetCard

|
|
|
Basics |
|
|
|
|
|
Overview - 3 |
|||
|
|
|
|
|
|
|
|
|
|
|
|
|
|
|
|
|
|
|
|
|
|
|
|
Mode Dial: Sets modes for |
|
|
|
|
Date Button (+) |
|
Viewfinder |
camera operation. |
||||||
|
|
|
|
|||||||||
|
|
Time Button (-) |
|
|
|
|
|
|
|
|||
Mode Dial |
|
|
|
|
|
|
|
Date/Time Button: Changes |
||||
|
|
|
|
|
|
|
||||||
|
|
|
|
|
|
date and time; allows |
||||||
|
|
|
|
|
|
|
|
|
|
|
||
|
|
|
|
|
|
|
|
|
|
|
||
|
|
|
|
|
|
|
|
|
|
Lens |
scrolling through frames. |
|
|
|
|
|
|
|
|
|
|
|
|||
|
|
|
|
|
|
|
|
|
|
Viewfinder: Use to conserve |
||
|
|
|
|
|
|
|
|
|
|
|
||
|
|
|
|
|
|
|
|
|
|
|
||
|
|
|
|
|
|
|
|
|
|
|
batteries or to prevent |
|
|
|
|
Shutter Release |
|
|
|
|
|
||||
|
|
|
|
|
|
|
|
sunlight from distorting LCD |
||||
|
|
|
|
|
|
|
|
|
|
|
||
|
|
|
|
|
|
|
|
|
|
|
screen. |
|
|
|
|
|
|
|
Timer/Sleep Light |
||||||
|
|
|
|
|
|
|
|
|||||
|
|
|
|
|
|
|
|
|
|
|
Lens: Frames subject. |
|
|
|
|
|
|
|
|
|
|
|
|
Timer/Sleep Light: Indicates |
|
|
|
|
|
|
|
|
|
|
|
|
self-timing and sleep modes. |
|
|
|
|
|
|
|
|
|
|
|
|
||
|
|
|
|
|
|
|
|
|
|
|
Memory Door: Protects |
|
|
|
|
|
|
|
|
|
|
|
|
memory card. |
|
|
|
|
|
|
|
|
|
|
|
|
|
|
Memory Door |
|
|
|
|
|
|
|
|||||
|
Basics |
|
|
|
|
Overview - 4 |
||||
|
|
|
|
|
|
|
|
|
|
|
|
|
|
|
|
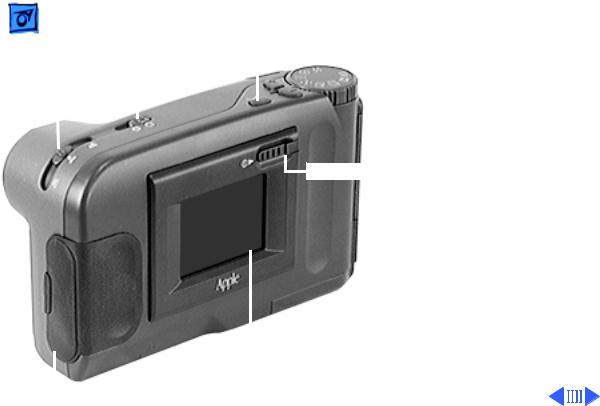
Action Button |
Focus Selector: Selects the |
||||
|
|
|
|
|
distance from the lens to the |
|||||
|
|
|
Aperture Selector |
|
|
|
|
|||
|
|
|
|
|
||||||
Focus Selector |
|
|
|
|
|
subject. |
||||
|
|
|
|
|
Aperture Selector: Sets the |
|||||
|
|
|
|
|
|
|
|
|
||
|
|
|
|
|
|
|
|
|
||
|
|
|
|
|
|
|
|
|
||
|
|
|
|
|
|
|
|
|
light setting to f2.2 or f8.0. |
|
|
|
|
|
|
|
|
|
|
Power Switch Action Button: Provides data |
|
|
|
|
|
|
|
|
|
|
||
|
|
|
|
|
|
|
|
|
||
|
|
|
|
|
|
|
|
|
during playback, erase, and |
|
|
|
|
|
|
|
|
|
|
other operations. |
|
|
|
|
|
|
|
|
|
|
Power Switch: Turns on and |
|
|
|
|
|
|
|
|
|
|
shuts off the camera. |
|
|
|
|
|
|
|
|
|
|
LCD Screen: Allows viewing |
|
|
|
|
|
|
|
|
|
|
of selected images. |
|
|
|
|
|
|
|
|
|
|
Terminal Door: Protects |
|
|
|
|
|
|
LCD Screen |
|||||
|
|
|
|
|
camera ports. |
|||||
|
|
|
|
|
|
|
|
|
||
|
|
|
|
|
|
|
|
|||
Terminal Door |
|
|
|
|
|
|
||||
|
|
Basics |
Overview - 5 |
||||
|
|
|
|
|
|
|
|
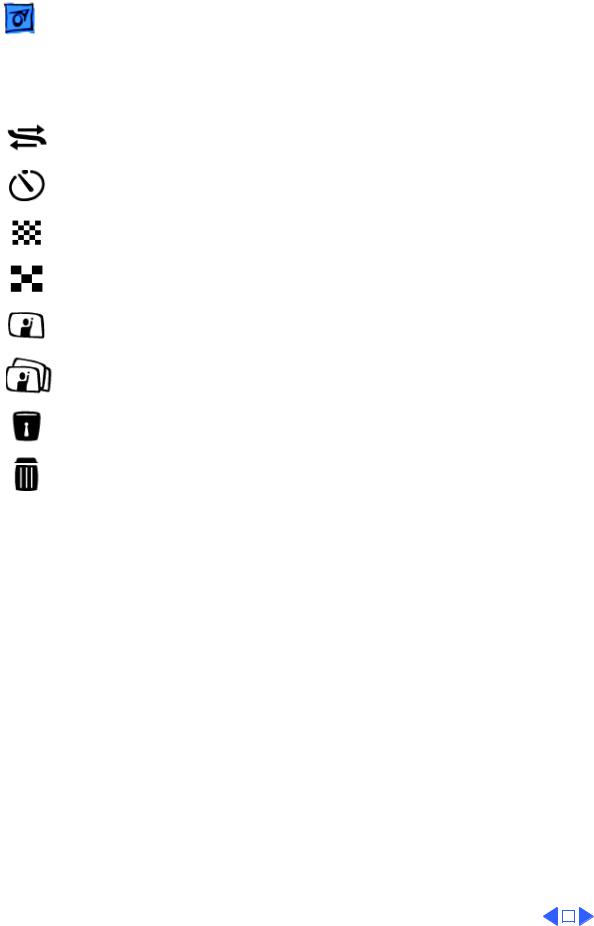
Mode Dial Settings |
|
|
|
|
|||
|
|
|
|
|
|||
Icon |
|
Mode Name |
Function |
||||
|
|
|
|
|
|
||
|
|
|
Computer |
Transfer images from the camera to the computer. |
|||
|
|
|
|
|
|
||
|
|
|
Self-Timer |
Take a picture after 10 seconds. |
|||
|
|
|
|
|
|
||
|
|
|
Record-Fine |
Take high-quality pictures or change the date and time. |
|||
|
|
|
|
|
|
||
|
|
|
Record |
Take good quality pictures. |
|||
|
|
|
|
|
|
||
|
|
|
Play |
View single or multiple images in the camera. |
|||
|
|
|
|
|
|
||
|
|
|
Auto-Playback |
Automatically play back consecutive frames or view |
|||
|
|
|
|
images on a television. |
|||
|
|
|
|
|
|
||
|
|
|
Protect |
Prevent images from being erased. |
|||
|
|
|
|
|
|
||
|
|
|
Erase |
Erase a single image or all images on the memory card, |
|||
|
|
|
|
or format the memory card. |
|||
|
|
|
|
|
|
|
|
|
|
|
|
|
|
|
|
|
|
|
|
|
|
|
|

Basics |
Camera Operation - 6 |
|
|
|
|
Camera Operation
This section covers basic camera operations. The information can also be found in Chapter 2 of the Apple QuickTake 200 owner’s manual.
Adjusting the LCD Screen Brightness
Use the brightness dial on the bottom of the camera to set the LCD screen to a visible brightness.
Note: While taking pictures indoors, the brightness of an image might be affected by the flicker of fluorescent lighting.
Important: The brightness dial does not adjust the brightness of images that you have already taken; it only adjusts the brightness of the LCD screen.
Using the Camera Mode Dial
The mode dial on the top of the camera provides eight settings (represented by icons) that let you choose how you want your camera to work.
Record-Fine and Record Modes
You take pictures by turning the mode dial to either Record-Fine ( ) for highest-quality |
|
images or Record ( |
) for good-quality images. |
• In Record-Fine ( |
) mode, high-quality images have 640x480 pixels resolution, and |
you can take up to 20 high-quality pictures. Use Record-Fine mode to print or display the image when you want to preserve the details of the image.
• In Record ( ) mode, good-quality images have 640x480 pixels resolution, and you can take up to 30 standard-quality pictures. Use Record mode when you don’t need to show as much detail.
You can mix high-quality and standard-quality images on the camera—all in 24-bit color. The camera holds a maximum of 30 images.
1Set the mode dial to either Record-Fine ( ) or Record (
 ) . Live video images appear on the LCD screen.
2Frame your picture using the LCD screen as your guide.
3Adjust the brightness of the LCD screen using the brightness dial on the bottom of the camera, and select the correct focus using the focus selector.
4Press the shutter release.
The photographed image is displayed for about 5 to 8 seconds. “REC” or “REC-FINE” (to indicate the camera is recording) appears flashing in the upper-left corner of the LCD screen.
Loading...