


 Loading...
+L3DWK#6333# +L3DWK#8333#560
+L3DWK#$OO6HUYH/#+LFRP#483#(2+
RSWL3RLQW#833#HFRQRP\ RSWL3RLQW#833#EDVLF RSWL3RLQW#833#VWDQGDUG RSWL3RLQW#833#DGYDQFH
2SHUDWLQJ#,QVWUXFWLRQV
Before You Begin
These operating instructions describe the optiPoint 500 economy, optiPoint 500 basic, optiPoint 500 standard and optiPoint 500 advance telephones on your
HiPath 3000 / 5000 RSM.
They describe all functions you can use from your telephone. You may find that some functions you wish to use are not available on your telephone. This may be due to one of the following reasons:
•The function has not been configured for your telephone - address any questions to your service personnel.
•Your communications platform does not support this function - contact your service personnel to upgrade your system.
Important Notes
Do not operate the telephone in environments where there is a danger of explosions.
Use only original Siemens accessories Æ page 101. Using other accessories may cause a hazard and will invalidate the warranty and the CE mark.
Never open the telephone or a key module. If you encounter any problems, contact your service personnel.
Never allow the telephone to come into contact with staining or aggressive liquids such as coffee, tea, juice, or soft drinks. For information on telephone maintenance Æ page 102.
The information provided in this document contains merely general descriptions or characteristics of performance which in case of actual use do not always apply as described or which may change as a result of further development of the products.
An obligation to provide the respective characteristics shall only exist if expressly agreed in the terms of contract.
Marks
The device conforms to the EU guideline 1999/5/EG, as attested by the CE mark.
This device has been manufactured in accordance with our certified environmental management system (ISO 14001). This process ensures that energy consumption and the use of primary raw materials are kept to a minimum, thus reducing waste production.
2

Contents
Basic operating instructions . . . . . . . . . . . . . . . . . . . . 9
optiPoint 500 economy/basic/standard control panel . . . . . . . . . . . . . . . 9 optiPoint 500 advance control panel with optiPoint key modules . . . . . 10 How to Use these Operating Instructions . . . . . . . . . . . . . . . . . . . . . . . 11 Screen Displays . . . . . . . . . . . . . . . . . . . . . . . . . . . . . . . . . . . . . . . . 11 Accessing Functions . . . . . . . . . . . . . . . . . . . . . . . . . . . . . . . . . . . . . . . 12
... Interactively . . . . . . . . . . . . . . . . . . . . . . . . . . . . . . . . . . . . . . . . . 12
... Via the Program/Service Menu . . . . . . . . . . . . . . . . . . . . . . . . . . 12
... With Function Keys . . . . . . . . . . . . . . . . . . . . . . . . . . . . . . . . . . . 12 Functions You Can Use . . . . . . . . . . . . . . . . . . . . . . . . . . . . . . . . . . . . . 13 Basic and Enhanced Functions . . . . . . . . . . . . . . . . . . . . . . . . . . . . 13 Additional Team and Executive/Secretary Functions. . . . . . . . . . . . 13 Using the Telephone Efficiently. . . . . . . . . . . . . . . . . . . . . . . . . . . . . . . 13
ØBasic and Enhanced Functions
Making and Answering Calls . . . . . . . . . . . . . . . . . . 14
Answering a Call With the Handset. . . . . . . . . . . . . . . . . . . . . . . . . . . . 14 Answering a Call with the Speaker
(Speakerphone Mode) . . . . . . . . . . . . . . . . . . . . . . . . . . . . . . . . . . . . . . 14 Open Listening in the Room During a Call . . . . . . . . . . . . . . . . . . . . . . 15 Switching to Speakerphone Mode . . . . . . . . . . . . . . . . . . . . . . . . . . . . 16 Switching to the Handset . . . . . . . . . . . . . . . . . . . . . . . . . . . . . . . . . . . 16 Using Call Waiting . . . . . . . . . . . . . . . . . . . . . . . . . . . . . . . . . . . . . . . . . 16
Accepting a Waiting Call (Camp-On) . . . . . . . . . . . . . . . . . . . . . . . . 16 Preventing and Allowing Call Waiting (Automatic Camp-On). . . . . . 17 Turning the Call Waiting Tone On and Off . . . . . . . . . . . . . . . . . . . . 17 Accepting a Specific Call for Your Colleague. . . . . . . . . . . . . . . . . . . . . 18 Rejecting Calls . . . . . . . . . . . . . . . . . . . . . . . . . . . . . . . . . . . . . . . . . . . . 18 Using Mailboxes . . . . . . . . . . . . . . . . . . . . . . . . . . . . . . . . . . . . . . . . . . 19 Accessing the Mailbox. . . . . . . . . . . . . . . . . . . . . . . . . . . . . . . . . . . 19 Using Timed Reminders . . . . . . . . . . . . . . . . . . . . . . . . . . . . . . . . . . . . 19 Using the Speakerphone . . . . . . . . . . . . . . . . . . . . . . . . . . . . . . . . . . . . 20 Enabling and Disabling Handsfree Answerback. . . . . . . . . . . . . . . . 20 Answering a Call With a Headset . . . . . . . . . . . . . . . . . . . . . . . . . . . . . 20 Turning Do Not Disturb On and Off. . . . . . . . . . . . . . . . . . . . . . . . . . . . 21 Turning Ringer Cutoff On and Off . . . . . . . . . . . . . . . . . . . . . . . . . . . . . 21 Trace Call: Identifying Anonymous Callers (Not for U.S.) . . . . . . . . . . . 22 Turning the Microphone On and Off . . . . . . . . . . . . . . . . . . . . . . . . . . . 22 Answering Calls from the Entrance Telephone and Opening the Door. 23 Accepting a Call From an Answering Machine . . . . . . . . . . . . . . . . . . . 24 Display Number of Waiting Calls and Overload Indication. . . . . . . . . . . 25
3

Contents
Making Calls . . . . . . . . . . . . . . . . . . . . . . . . . . . . . . . . .26
Off-Hook Dialing . . . . . . . . . . . . . . . . . . . . . . . . . . . . . . . . . . . . . . . . . . 26 On-Hook Dialing. . . . . . . . . . . . . . . . . . . . . . . . . . . . . . . . . . . . . . . . . . . 26 En-Bloc Sending / Correcting Numbers . . . . . . . . . . . . . . . . . . . . . . 27 Caller ID Suppression . . . . . . . . . . . . . . . . . . . . . . . . . . . . . . . . . . . . . . 28 Talking to Your Colleague With a Speaker Call . . . . . . . . . . . . . . . . . . . 28 Activating Tone Dialing (DTMF Suffix Dialing) . . . . . . . . . . . . . . . . . . . . 29 Automatic Connection Setup (Hotline) . . . . . . . . . . . . . . . . . . . . . . . . . 29 Reserve Trunk . . . . . . . . . . . . . . . . . . . . . . . . . . . . . . . . . . . . . . . . . . . . 30 Assigning a Station Number (Not for U.S.) . . . . . . . . . . . . . . . . . . . . . . 30 Trunk Flash . . . . . . . . . . . . . . . . . . . . . . . . . . . . . . . . . . . . . . . . . . . . . . 31 Associated Dialing/Dialing Aid . . . . . . . . . . . . . . . . . . . . . . . . . . . . . . . . 32
Calling Multiple Parties Simultaneously. . . . . . . . .33
Calling a Second Party (Consultation Hold) . . . . . . . . . . . . . . . . . . . . . . 33 Switching to the Party on Hold (Toggle) . . . . . . . . . . . . . . . . . . . . . 33 Conducting a Conference . . . . . . . . . . . . . . . . . . . . . . . . . . . . . . . . . . . 34 Adding Up to Five Parties to the Conference (Initiator Only) . . . . . . 34 Checking Which Parties Are in the Conference (Initiator Only) . . . . 35 Removing Parties From the Conference (Initiator Only) . . . . . . . . . 35 Leaving a Conference . . . . . . . . . . . . . . . . . . . . . . . . . . . . . . . . . . . 35 Ending a Conference (Initiator Only) . . . . . . . . . . . . . . . . . . . . . . . . 35
Removing the ISDN Central Office Party
From the Conference (Only for U.S.) . . . . . . . . . . . . . . . . . . . . . . . . 35 Transferring a Call . . . . . . . . . . . . . . . . . . . . . . . . . . . . . . . . . . . . . . . . . 36
...After a Speaker Call (Announcement) in a Group . . . . . . . . . . . . . 36 Parking a Call . . . . . . . . . . . . . . . . . . . . . . . . . . . . . . . . . . . . . . . . . . . . . 37 Retrieving a Parked Call . . . . . . . . . . . . . . . . . . . . . . . . . . . . . . . . . . 37 Placing External Calls on Hold . . . . . . . . . . . . . . . . . . . . . . . . . . . . . . . . 38 Picking up (Retrieving) a Held Call . . . . . . . . . . . . . . . . . . . . . . . . . . 38
Making Calls to Stored Destinations . . . . . . . . . . . .39
Using a Caller List . . . . . . . . . . . . . . . . . . . . . . . . . . . . . . . . . . . . . . . . . 39 Retrieving the Caller List . . . . . . . . . . . . . . . . . . . . . . . . . . . . . . . . . 39 Ending Retrieval. . . . . . . . . . . . . . . . . . . . . . . . . . . . . . . . . . . . . . . . 39 Displaying the Call Time and Additional Call Information. . . . . . . . . 40 Dialing a Station Number from the Caller List . . . . . . . . . . . . . . . . . 40 Removing an Entry from the Caller List . . . . . . . . . . . . . . . . . . . . . . 40 Saving the Other Party’s Station Number in the Caller List (Redial) 40
4

Contents
Redialing a Number . . . . . . . . . . . . . . . . . . . . . . . . . . . . . . . . . . . . . . . . 41
Dialing a Number From the Internal Directory. . . . . . . . . . . . . . . . . . . . 42
Using Repertory Dialing Keys . . . . . . . . . . . . . . . . . . . . . . . . . . . . . . . . 43
Using Station and System Speed-Dial Numbers . . . . . . . . . . . . . . . . . . 43
Displaying and Assigning Call Charges . . . . . . . . . 44
Displaying Call Charges (Not for U.S.) . . . . . . . . . . . . . . . . . . . . . . . . . . 44 Displaying Call Charges for Another Telephone (Not for U.S.) . . . . . . . 45 Dialing with Call Charge Assignment. . . . . . . . . . . . . . . . . . . . . . . . . . . 46
If You Cannot Reach a Destination .... . . . . . . . . . . . |
47 |
Using Callback . . . . . . . . . . . . . . . . . . . . . . . . . . . . . . . . . . . . . . . . . . . . 47
Storing a Callback. . . . . . . . . . . . . . . . . . . . . . . . . . . . . . . . . . . . . . . 47
Answering a Callback. . . . . . . . . . . . . . . . . . . . . . . . . . . . . . . . . . . . 47
Checking and Canceling a Saved Callback . . . . . . . . . . . . . . . . . . . . 47
Call Waiting (Camp-On) . . . . . . . . . . . . . . . . . . . . . . . . . . . . . . . . . . . . . 48
Busy Override - Joining a Call in Progress. . . . . . . . . . . . . . . . . . . . . . . 49
Telephone Settings . . . . . . . . . . . . . . . . . . . . . . . . . . . 50
Adjusting the Ring Volume . . . . . . . . . . . . . . . . . . . . . . . . . . . . . . . . . . 50 Adjusting the Ring Tone . . . . . . . . . . . . . . . . . . . . . . . . . . . . . . . . . . . . 50 Adjusting the Attention Ring Volume . . . . . . . . . . . . . . . . . . . . . . . . . . 50 Adjusting the Speakerphone to the Room Acoustics . . . . . . . . . . . . . . 51 Adjusting the Receiving Volume During a Call. . . . . . . . . . . . . . . . . . . . 51 Adjusting the Display to a Comfortable Reading Angle. . . . . . . . . . . . . 52 Display backlight . . . . . . . . . . . . . . . . . . . . . . . . . . . . . . . . . . . . . . . . . . 52 Adjusting the display contrast . . . . . . . . . . . . . . . . . . . . . . . . . . . . . . . . 52 Selecting the Language of Screen Prompts . . . . . . . . . . . . . . . . . . . . . 52 Locking the Telephone to Prevent Unauthorized Use . . . . . . . . . . . . . . 53 Saving Your PIN. . . . . . . . . . . . . . . . . . . . . . . . . . . . . . . . . . . . . . . . . . . 54
Saving Station Numbers,
Functions, Procedures and Appointments . . . . . . . 55
Saving Repertory Dialing Numbers on a Key. . . . . . . . . . . . . . . . . . . . . 55 Storing Station Speed-Dial Numbers . . . . . . . . . . . . . . . . . . . . . . . . . . . 56 Assigning Functions to Keys . . . . . . . . . . . . . . . . . . . . . . . . . . . . . . . . . 57 Assigning a Procedure (Operating Steps) to a Key . . . . . . . . . . . . . . . . 60 Saving Appointments . . . . . . . . . . . . . . . . . . . . . . . . . . . . . . . . . . . . . . 62
Testing the Telephone . . . . . . . . . . . . . . . . . . . . . . . . 63
Testing the Telephone Functions . . . . . . . . . . . . . . . . . . . . . . . . . . . . . 63
Checking the Key Assignment . . . . . . . . . . . . . . . . . . . . . . . . . . . . . . . 63
5

Contents
Call Forwarding . . . . . . . . . . . . . . . . . . . . . . . . . . . . . .64
Using Variable Call Forwarding . . . . . . . . . . . . . . . . . . . . . . . . . . . . . . . 64 Using Night Answer . . . . . . . . . . . . . . . . . . . . . . . . . . . . . . . . . . . . . . . 65 Call Forwarding in the Carrier Network
and Forwarding Multiple Subscriber Numbers (MSN) (Not for U.S.). . . 66
Using Other Functions. . . . . . . . . . . . . . . . . . . . . . . . .67
Sending a Message . . . . . . . . . . . . . . . . . . . . . . . . . . . . . . . . . . . . . . . . 67 Displaying and Deleting Messages You Have Sent . . . . . . . . . . . . . 67 Answering Messages . . . . . . . . . . . . . . . . . . . . . . . . . . . . . . . . . . . 67 Leaving an Advisory Message. . . . . . . . . . . . . . . . . . . . . . . . . . . . . . . . 68 Deleting Advisory Messages . . . . . . . . . . . . . . . . . . . . . . . . . . . . . . 68 Using Another Telephone Like Your Own . . . . . . . . . . . . . . . . . . . . . . . 69 Change call number (relocate) . . . . . . . . . . . . . . . . . . . . . . . . . . . . . . . . 70 Fax Details and Message on Answering Machine . . . . . . . . . . . . . . . . 71
Resetting Services and Functions
(System-Wide Cancellation for a Telephone). . . . . . . . . . . . . . . . . . . . . 71 Silent Monitor . . . . . . . . . . . . . . . . . . . . . . . . . . . . . . . . . . . . . . . . . . . . 72 Monitoring a Room . . . . . . . . . . . . . . . . . . . . . . . . . . . . . . . . . . . . . . . . 72 Activating Functions for Another Telephone . . . . . . . . . . . . . . . . . . . . . 73 Locking Another Telephone to Prevent Unauthorized Use . . . . . . . . . . 74 Using System Functions from the Outside
(DISA: Direct Inward System Access) . . . . . . . . . . . . . . . . . . . . . . . . . . 74 Using functions in ISDN via code dialing (keypad dialing) . . . . . . . . . . . 76 Controlling Connected Computers or Other Programs and Telephone Data Service (HiPath 3500/3550/3700/3750 Only). . . . . . . . . . . . . . . . . . . . . 77 Controlling Relays . . . . . . . . . . . . . . . . . . . . . . . . . . . . . . . . . . . . . . . . . 78 Sensors (HiPath 3300/3350/3500/3550 Only) . . . . . . . . . . . . . . . . . . . . 78 Radio Paging (Not for U.S.) . . . . . . . . . . . . . . . . . . . . . . . . . . . . . . . . . . 79
Simple Paging Equipment . . . . . . . . . . . . . . . . . . . . . . . . . . . . . . . . 79 Enhanced Paging Equipment (Hipath 3700/3750 Only) . . . . . . . . . . 79
6

Contents
ØTeam and Executive/Secretary Functions
Team and Executive/Secretary
Functions With Trunk Keys . . . . . . . . . . . . . . . . . . . . 81
Using Trunk Keys. . . . . . . . . . . . . . . . . . . . . . . . . . . . . . . . . . . . . . . . . . 81 Answering Calls With Trunk Keys . . . . . . . . . . . . . . . . . . . . . . . . . . 82 Making Calls with Trunk Keys . . . . . . . . . . . . . . . . . . . . . . . . . . . . . 82 Using a Trunk Key to Place a Call on Hold and Retrieve It Again . . . 82 Switching Between Phone Calls on Multiple Trunks . . . . . . . . . . . . 83
Forwarding Calls on Lines . . . . . . . . . . . . . . . . . . . . . . . . . . . . . . . . . . . 83 Using DSS Keys. . . . . . . . . . . . . . . . . . . . . . . . . . . . . . . . . . . . . . . . . . . 85 Using DSS Keys to Answer Calls. . . . . . . . . . . . . . . . . . . . . . . . . . . 85 Calling a Team Member Directly . . . . . . . . . . . . . . . . . . . . . . . . . . . 85 Transferring a Call in Progress. . . . . . . . . . . . . . . . . . . . . . . . . . . . . . . . 86 Accepting a Call for Another Team Member . . . . . . . . . . . . . . . . . . . . . 86
Joining or Leaving a Group Call
(Not for the Executive Telephone in an Executive/Secretary Team) . . . 86 Transferring Calls Directly to the Executive
(Only in an Executive/Secretary Group) . . . . . . . . . . . . . . . . . . . . . . . . . 87
Using Other Team Functions . . . . . . . . . . . . . . . . . . . 88
Turning Group Call On and Off . . . . . . . . . . . . . . . . . . . . . . . . . . . . . . . 88 Accepting a Call for Another Member of Your Team . . . . . . . . . . . . . . 90 Activating and Deactivating a Ringing Group. . . . . . . . . . . . . . . . . . . . . 90 Uniform Call Distribution (UCD). . . . . . . . . . . . . . . . . . . . . . . . . . . . . . . 91
ØSystem networking via LAN (PC network)
Special Functions in the LAN (PC Network). . . . . . 93
Leaving a Hunt Group/Group Call . . . . . . . . . . . . . . . . . . . . . . . . . . . . . 93
Transferring Call Forwarding . . . . . . . . . . . . . . . . . . . . . . . . . . . . . . . . . 94
Using Night Answer . . . . . . . . . . . . . . . . . . . . . . . . . . . . . . . . . . . . . . . 95
Activating and Deactivating a Ringing Group. . . . . . . . . . . . . . . . . . . . . 96
Controlling Relays . . . . . . . . . . . . . . . . . . . . . . . . . . . . . . . . . . . . . . . . . 97
Opening the Door . . . . . . . . . . . . . . . . . . . . . . . . . . . . . . . . . . . . . . . . . 98
7

Contents
ØAll About Your Telephone
Labeling, Documentation and Accessories . . . . . .99
Labeling Key Fields . . . . . . . . . . . . . . . . . . . . . . . . . . . . . . . . . . . . . . . . 99
Attaching a Station Number Label. . . . . . . . . . . . . . . . . . . . . . . . . . . . 100
Documentation . . . . . . . . . . . . . . . . . . . . . . . . . . . . . . . . . . . . . . . . . . 100
Accessories . . . . . . . . . . . . . . . . . . . . . . . . . . . . . . . . . . . . . . . . . . . . . 101
Fixing Problems . . . . . . . . . . . . . . . . . . . . . . . . . . . . .102
Telephone Maintenance . . . . . . . . . . . . . . . . . . . . . . . . . . . . . . . . . . . 102 Troubleshooting. . . . . . . . . . . . . . . . . . . . . . . . . . . . . . . . . . . . . . . . . . 102 Responding to Error Messages on the Screen . . . . . . . . . . . . . . . . . . 103 Contacts for Resolving Problems . . . . . . . . . . . . . . . . . . . . . . . . . . . . 103
Index. . . . . . . . . . . . . . . . . . . . . . . . . . . . . . . . . . . . . . .104
8
Basic operating instructions
Basic operating instructions
optiPoint 500* |
economy |
basic |
standard |
advance |
Function keys |
12 |
12 |
12 |
19 |
|
|
|
|
|
Full-duplex speakerphone |
- |
- |
9 |
9 |
feature |
|
|
|
|
|
|
|
|
|
Illuminated display |
- |
- |
- |
9 |
|
|
|
|
|
Headset port |
- |
- |
- |
9 |
|
|
|
|
|
USB interface |
- |
9 |
9 |
9 |
|
|
|
|
|
Interface for add-on equipment |
- |
9 |
9 |
9 |
|
|
|
|
|
Option bays |
0 |
1 |
1 |
2 |
|
|
|
|
|
* The name and model of your telephone are printed on the base of your optiPoint 500.
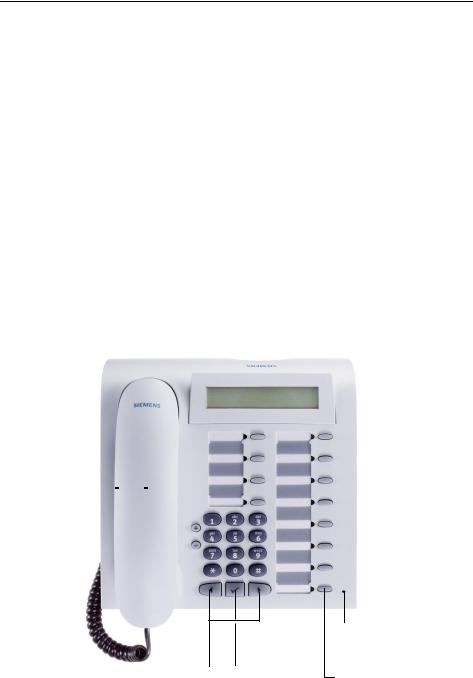
optiPoint 500 economy/basic/standard control panel
Key field - fixed function keys: |
|
|
|
|
|
Keypad |
||||||||||||||||
|
|
|
|
|
||||||||||||||||||
Program/Service |
|
|
||||||||||||||||||||
Redial |
|
|
|
|
|
|
|
|
LEDs |
|||||||||||||
Mute or Internal |
|
|
|
|
|
|
|
|
||||||||||||||
|
|
|
|
|
|
|
|
|
||||||||||||||
Speaker |
|
|
|
|
|
|
|
|
|
|||||||||||||
Display, |
|
|
|
|
|
|
|
|
|
|
|
|
|
|
|
|||||||
|
|
|
|
|
|
|
|
|
|
|
|
|
|
|||||||||
2 lines with |
|
|
|
|
|
|
|
|
|
|||||||||||||
24 chars |
|
|
|
|
|
|
|
|
Key field - |
|||||||||||||
Handset |
|
|
|
|
|
|
|
|
|
|
|
|
|
|
|
|
|
|
|
|
freely program- |
|
|
|
|
|
|
|
|
|
|
|
|
|
mable keys |
||||||||||
|
|
|
|
|
|
|
|
|
|
|||||||||||||
Speaker for open |
|
|
|
|
|
|
|
|
|
|
|
|
|
|
|
|
|
|
||||
|
|
|
|
|
|
|
|
|
|
|
|
|
|
|
|
|
||||||
listening |
|
|
|
|
|
|
|
|
|
|||||||||||||
and ring tones |
|
|
|
|
|
|
|
|
|
|||||||||||||
|
|
|
|
|
|
|
|
|
||||||||||||||
|
|
|
|
|
|
|
|
|
||||||||||||||
Keys for |
|
|
|
|
|
|
|
|
|
|
|
|||||||||||
|
|
|
|
|
|
|
|
|
|
|||||||||||||
telephone |
|
|
|
|
|
|
|
|
|
|||||||||||||
settings |
|
|
|
|
|
|
|
|
|
|||||||||||||
|
|
|
|
|
|
|
|
|
|
|
|
|
|
|
|
|
|
|
|
|
|
|
|
|
|
|
|
|
|
|
|
|
|
|
|
|
|
|
|
|
|
|
|
|
|
Keys for scrolling to |
Key for |
functions |
confirming |
|
a function |
Microphone for speakerphone mode (only optiPoint 500 standard)
Fixed function key: Release
9
Basic operating instructions
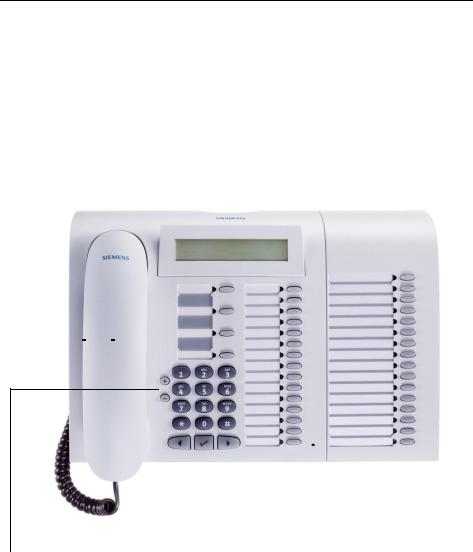
optiPoint 500 advance control panel with optiPoint key modules
|
|
|
|
|
|
|
|
|
|
|
|
|
|
Key field - fixed function keys: |
||||
|
|
|
|
|
|
|
|
|
|
|
|
|
|
|||||
|
|
|
|
|
|
|
|
|
|
|
|
|
|
Program/Service |
||||
|
|
|
|
|
|
|
|
|
|
|
|
|
|
Redial |
||||
|
|
|
|
|
|
|
|
|
|
|
|
|
|
Mute or Internal |
||||
Speaker |
|
|
|
|
|
|
Speaker |
|||||||||||
for open |
Iluminated |
|
|
|
Keypad |
|||||||||||||
listening |
|
|
|
|||||||||||||||
Display, |
|
|
|
|
LEDs |
|||||||||||||
|
|
|
|
|||||||||||||||
and ring tones |
|
|
|
|
||||||||||||||
2 lines with |
|
|
|
|
||||||||||||||
|
|
|
|
|
|
|
|
|
|
|
|
|
|
Key field - |
||||
|
|
|
|
|
|
|
|
24 chars |
|
|
|
|
|
|
||||
|
|
|
|
|
|
|
|
|||||||||||
|
Handset |
|
|
|
|
|
|
|
|
|
freely programmable keys |
|||||||
|
|
|
|
|
|
|
|
|
|
|
|
|||||||
|
|
|
|
|
|
|
|
|
|
|
|
|||||||
|
|
|
|
|
|
|
|
|
|
|
|
|
|
|
|
|
|
|
|
|
|
|
|
|
|
|
|
|
|
|
|
|
|
|
|
|
|
|
|
|
|
|
|
|
|
|
|
|
|
|
|
|
|
|
|
|
|
|
|
|
|
|
|
|
|
|
|
|
|
|
|
|
|
|
|
|
|
|
|
|
|
|
|
|
|
|
|
|
|
|
|
|
|
|
|
|
|
|
|
|
|
|
|
|
|
|
|
|
|
|
|
|
|
|
|
|
|
|
|
|
|
|
|
|
|
|
|
|
|
|
|
|
|
|
|
|
|
|
|
|
|
|
|
|
|
|
|
|
|
|
|
|
|
|
|
|
|
|
|
|
|
|
|
|
|
|
|
|
|
|
|
|
|
|
|
|
|
|
|
|
|
|
|
|
|
|
|
|
|
|
|
|
|
|
|
|
Fixed |
|
|
optiPoint key module |
|
|
|
|
|
|
function key: |
|
|
with programmable |
|
|
|
|
|
|
Release |
|
keys |
||
|
|
|
|
|
|
|
|
|
|
Keys for |
Keys for scrolling to |
|
Key for |
Microphone for speakerphone |
|||||
telephone |
functions |
confirming |
mode |
||||||
settings |
|
|
a function |
|
|
|
|||
10
Basic operating instructions
Step by Step |
|
|
C |
|
I |
|
H |
|
D |
|
99 |
|
Jor K |
Program/Service |
|
Speaker |
|
Start conference? |
|
Display contrast? |
|
Please dial |
|
Return to held call? |
> |
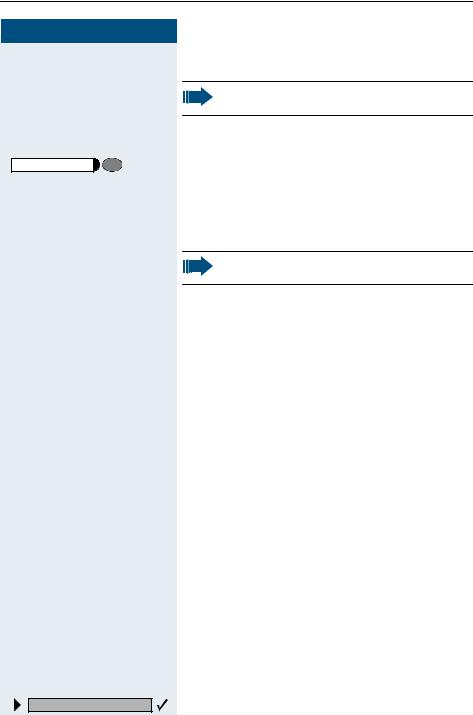
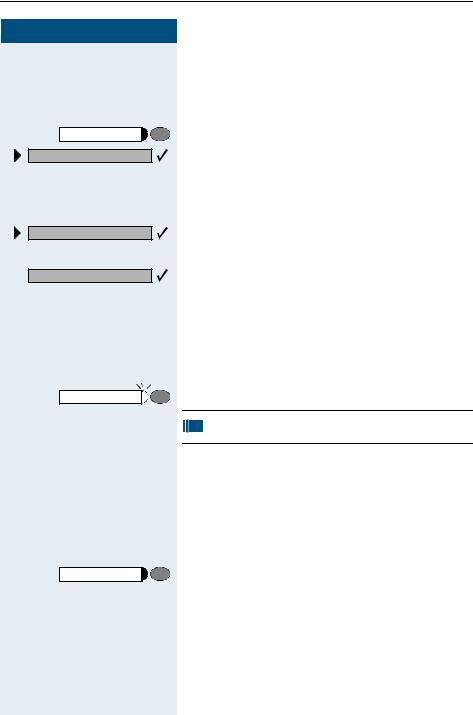
How to Use these Operating Instructions
You will find a graphic representation of the steps in logical sequence in the left column. Below is an explanation of the symbols:
Lift the handset (off-hook).
Replace the handset (on-hook).
Conduct a call.
Enter a telephone number or code.
Enter the code.
Press volume controls on the telephone.
Press the key.
Press the illuminated key.
Press the flashing key.
The option appears on the screen.
Press the ãkey to confirm your selection.
Search for an option. Press the á!keys,
until the option appears on the screen.
Then press the ã key to confirm your selection.
Screen Displays
Line 1 displays prompts or acknowledgment messages, depending on the situation.
Line 2 displays functions that you can confirm by pressing ã. If the symbol ">" appears on the right, you can press á!to access further options.
11

Basic operating instructions
Step by Step |
Forwarding on |
Callback |
or |
Send message |
Program/Service |
#0=Reset services? |
or |
G9 |
12 |
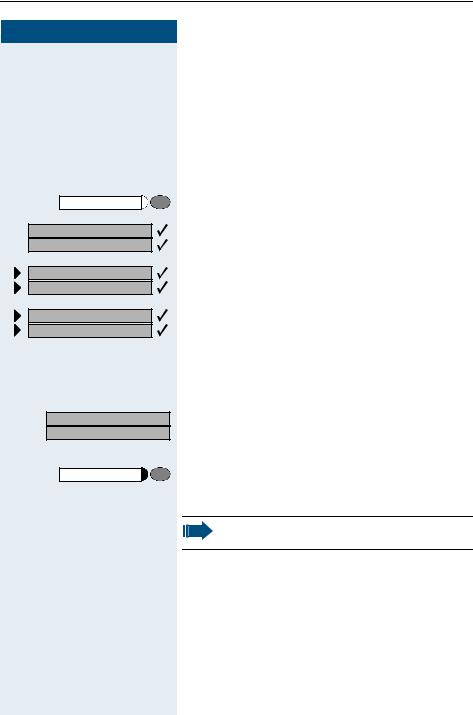
Accessing Functions
... Interactively
You can select some functions while the telephone is idle, for example:
Use á!to scroll to a function and press ãto execute it.
You can select other functions directly depending on the situation. Example: you call a number, but the line is busy:
Press ãto confirm.
Use á!to scroll to a function and press ãto execute it.
... Via the Program/Service Menu
First press the "Program/Service" key. You then see a list of selection options, such as: "#0=Reset services"
Æ page 71.
Press the key.
Use á!to scroll to a function and press ãto execute it.
Enter the code directly.
The Quick-Reference Operating Instructions contain a list of codes. However, they are also displayed on screen along with the corresponding function.
... With Function Keys
If you saved a function on a key Æ page 57, you can access it directly as follows:
Press the Mute key to execute the function.

Basic operating instructions
Functions You Can Use
Basic and Enhanced Functions
You can use all basic and enhanced communications platform functions that appear interactively on the screen, in the Program/Service menu, and when you press function keys.
Additional Team and Executive/Secretary Functions
Æ page 81f.
To help working and project groups work together more efficiently, the service technician can configure a variety of team functions, depending on your preferences when working in the team. You can use these team functions in addition to the basic and enhanced functions.
In addition to call pickup, hunting groups (group call), and call distribution groups, you can also set up teams with multiple lines per telephone. You can tell if a telephone has trunk keys if your station number and the numbers of your colleagues are programmed on trunk keys. You can ac-
cess all lines and can also conduct different calls simultaneously on multiple lines.
Another team function category includes the executive/secretary functions,which are configured by the service technician. You can use executive and secretary functions in addition to the basic and enhanced functions as well as other team functions.
An executive/secretary telephone has DSS keys for the executive or secretary, trunk keys for the executive and secretary, as well as ring transfer keys.
Using the Telephone Efficiently
•You probably have certain colleagues or external parties with whom you talk on the phone especially frequently. To dial these numbers fast-
er and more conveniently, you can save them on keys
(Saving station numbers for repertory dialing on keys Æ page 55).
•All too often you reach a busy line when dialing a number. Amid the confusion of your working day, it’s easy to forget to try the number
again later on. To avoid this, make it a habit to use the "Callback" Æ page 47 function.
13

Making and Answering Calls
Step by Step
Making and Answering Calls
Special default ring signaling is set for your telephone:
•When you receive an internal call, your telephone rings once every four seconds (single-tone sequence).
•When you receive an external call, your telephone rings twice in rapid succession every four seconds (dual-tone sequence).
•When you receive a call from the entrance telephone, your telephone rings three times in rapid succession every four seconds (triple-tone sequence).
•If a call is waiting, you hear a short tone (beep) every six seconds.
The number or the name of the caller appears on the display.
Answering a Call With the Handset
The telephone rings. The caller appears on the screen.
C Lift the handset.
Jor K Raise or lower the volume. Keep pressing the key until the desired volume is set.
Ending the call:
I Replace the handset. or
Release |
Press the key. |
Answering a Call with the Speaker (Speakerphone Mode)
This function is not available with
optiPoint 500 economy and optiPoint 500 basic.
The telephone rings. The caller appears on the screen.
Speaker |
Press the key. The LED lights up. |
|
Speakerphone mode. |
Jor K Raise or lower the volume. Keep pressing the key until the desired volume is set.
14

|
|
|
Making and Answering Calls |
|
|
|
|
Step by Step |
|
Ending the call: |
|
|
|
|
|
|
|
|
|
|
|
|
Press the key. The LED goes out. |
|
Speaker |
|
|
|
|
or |
Press the key. |
|
|
||
|
Release |
|
|
|
|
|
Notes on speakerphone mode: |
|
|
|
• Tell the other party that you are using speakerphone |
|
|
|
mode. |
|
|
|
• The speakerphone works bests at a low receiving |
|
|
|
volume. |
|
|
|
• The ideal distance between the user and the tele- |
|
|
|
phone set in speakerphone mode is about 50 cm |
|
|
|
(approx. 20 inches). |
|
|
|
Open Listening in the Room During a Call |
|
|
|
You can let other people in the room join in on the call. |
|
|
|
Let the other party know that you have turned on the |
|
|
|
speaker. |
|
|
|
Precondition: You are conducting a call with the hand- |
|
|
|
set. |
|
|
|
Activating ring transfer: |
|
|
|
Press the key. The LED lights up. |
|
Speaker |
|
|
|
|
|
Deactivating this function: |
|
|
|
Press the key. The LED goes out. |
|
Speaker |
|
|
|
|
|
|
15
Making and Answering Calls
Step by Step |
|
Speaker |
and I |
|
Cand H |
|
I |
|
C |
Call waiting? |
|
16 |
|
Switching to Speakerphone Mode
This function is not available with
optiPoint 500 economy and optiPoint 500 basic.
Precondition: You are conducting a call with the handset.
Hold down the key and replace the handset.
(in the U.S.: press the key once and replace the handset). Then release the key and continue the call.
Switching to the Handset
This function is not available with
optiPoint 500 economy and optiPoint 500 basic.
Precondition: You are engaged in a call in speakerphone mode.
Lift the handset. Continue the call.
Using Call Waiting
Callers can still reach you while you are engaged in another call. A signal alerts you to the waiting call.
You can either ignore or accept the waiting call. When you accept the waiting call, you can either end
the first call or place it on hold and resume the call later on.
You can also bar call waiting or the call waiting tone Æ page 17.
Accepting a Waiting Call (Camp-On)
Precondition: You are engaged in a phone call and hear a tone (every six seconds).
Ending the first call and answering the waiting call:
Replace the handset. Your telephone rings.
Answer the second call. Lift the handset.
Placing the first call on hold and answering the second call:
Select and confirm.

Making and Answering Calls
Step by Step |
|
|
or |
Program/Service |
|
F>> |
|
Quit and return? |
|
|
or |
Program/Service |
F9 |
|
or |
IC |
|
Program/Service |
|
|
and |
#490=Call wait.trm.off? |
|
|
or |
*490=Call wait.term.on? |
|
|
or |
G=B9or F=B9 |
|
Waiting tone off? |
|
|
or |
Waiting tone on? |
|
|
or |
FA@or GA@ |
|
Press the key. The LED lights up. Enter the code.
You are connected to the call waiting party immediately. The first party is placed on hold.
Ending the second call and resuming the first one:
Confirm.
Press the key. The LED lights up. Enter the code.
Replace the handset. "Recall: ..." appears on the screen. Lift the handset.
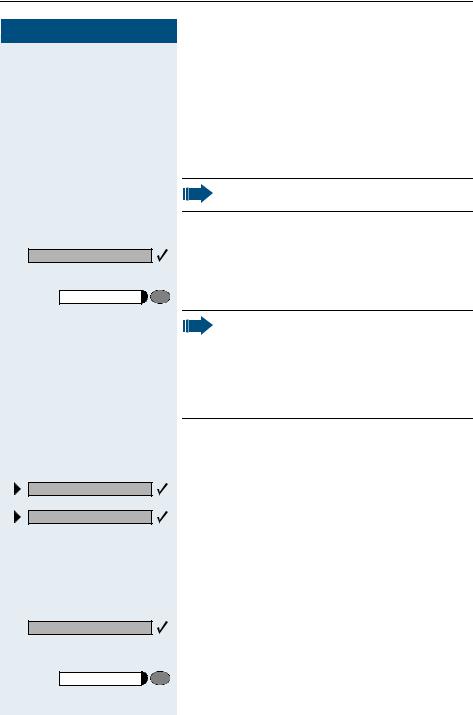
Preventing and Allowing Call Waiting
(Automatic Camp-On)
If this function has been configured (ask your service technician), you can prevent or allow a second call
Æ page 16 from being signaled by automatic camp-on during an ongoing call.
Press the key. The LED lights up
Select and confirm.
Enter the code for "off" or "on".
Turning the Call Waiting Tone On and Off
You can suppress the call waiting tone (every six seconds) for external calls. A one-time special dial tone then alerts you to the waiting call.
Select and confirm.
Enter code for "tone off" or "tone on".
17
Making and Answering Calls
Step by Step |
Program/Service |
*59=Pickup - directed? |
or |
F>B |
If applicable |
Next? |
Accept call? |
or |
D |
or |
Release |
18 |
Accepting a Specific Call for Your Colleague
You hear another telephone ring.
Press the key. The LED lights up
Select and confirm.
Enter the code.
A called station appears on the screen.
Select and confirm until you see the station you want.
Confirm.
If you know the number of the telephone that is ringing, enter it directly.
Press the flashing key.
 Accepting calls in a team Æ page 90.
Rejecting Calls
You can reject calls which you do not wish to take. The call is then signaled at another definable telephone (contact your service personnel).
The telephone rings. The caller is displayed.
Press the key.
If a call cannot be rejected, your telephone will continue to ring. The message "currently not possible" (UK) or "Feature not available" (US) is displayed (e.g in the case of recalls).
Making and Answering Calls
Step by Step |
or |
US: View messages? |
UK: Display Messages? |
US: Message sent? |
UK: Text? |
or |
US: Call voice mail? |
UK: Call Voice Mail? |
US: Reminder: |
UK: Reminder at: |
Speaker |
or |
CI |
Using Mailboxes
If you have programmed the "Mailbox" key Æ page 57, the associated LED lights up when messages have arrived for you. If your telephone is connected to a voice mail system, the "Mailbox" key will also light up to alert you to any messages that have arrived.
Accessing the Mailbox
Press the illuminated "Mailbox" key.
Confirm.
Select and confirm.
Follow the user prompts.
Using Timed Reminders
Precondition: You must have saved a timed reminder Æ page 62. The current time is the time stored.
The telephone rings. The timed reminder appears on the screen.
Press the key twice.
Lift the handset and replace it again.
If you fail to answer the timed reminder, it repeats five times and is then erased.
19
Making and Answering Calls
Step by Step |
C |
or |
Mute off? |
or |
Mute |
HF answerback on? |
or |
HF answerback off? |
or |
FB?or GB? |
Answer? |
Release |
20 |
Using the Speakerphone
A colleague addresses you directly over the speaker with a speaker call. You hear a tone before the announcement. The other party’s name or station number appears on the screen.
You can conduct the call with the handset or in speakerphone mode.
Speakerphone mode is not available with optiPoint 500 economy and optiPoint 500 basic.
Lift the handset and answer the call.
Press the "OK" key to confirm your selection and answer the call.
Press the key and answer the call.
If handsfree answerback is enabled (see below), you do not need to switch on the microphone - you can answer directly. You can answer immediately in speakerphone mode.
If handsfree answerback is disabled (default setting), follow the procedure described above.
Placing a speaker call to a colleague Æ page 28.
Enabling and Disabling Handsfree
Answerback
Select and confirm.
Enter the code for "on" or "off".
Answering a Call With a Headset
Your telephone rings. Confirm.
Ending the call:
Press the key. The LED goes out.
Making and Answering Calls
Step by Step |
DND on? |
or |
DND off? |
or |
FB@or GB@ |
Ringer cutoff on? |
or |
Ringer cutoff off? |
or |
FBAor GBA |
Turning Do Not Disturb On and Off
You can activate the do not disturb function if you do not want the receive any calls. When do not disturb is activated, internal callers hear a busy signal and external callers are rerouted to a telephone assigned for this purpose (contact your service personnel).
Select and confirm.
Enter the code for "on" or "off".
When you lift the handset, a special dial tone (continuous buzzing tone) reminds you that do not disturb is active.
Authorized internal callers can automatically override the do not disturb function after five seconds.
Turning Ringer Cutoff On and Off
You can activate the ringer cutoff function if you do not want the receive any calls. Calls are only identified by one ring signal, an indication on the display, and a key which has been programmed to flash (such as a trunk key).
Select and confirm.
Enter the code for "on" or "off".
21
Making and Answering Calls
Step by Step |
Program/Service |
and |
*84=Trace call? |
or |
FA= |
Mute |
or |
Mute |
or |
Mute on? |
or |
Mute off? |
or |
Program/Service |
F>;or G>; |
22 |
Trace Call: Identifying Anonymous Callers (Not for U.S.)
You can have the carrier identify malicious external callers. You can save the caller’s station number during the call or for 30 seconds after the call ends. However, it is essential that you do not replace your handset during this time.
Press the key. The LED lights up.
Select and confirm.
Enter the code.
After you have finished tracing the call, the data is stored on the carrier’s system. Now contact your service personnel.
Turning the Microphone On and Off
To prevent the other party from listening in while you consult with someone in your office, you can temporarily switch off the handset microphone or the handsfree microphone. You can also switch on the handsfree microphone to answer an announcement via the telephone speaker (speaker call, Æ page 20).
Speakerphone mode is not available with optiPoint 500 economy and optiPoint 500 basic.
Precondition: You are conducting a call. The microphone is switched on.
Press the key. The LED lights up.
Press the illuminated key. The LED goes out.
Select and confirm.
Press the key. The LED lights up
Enter the code for "on or "off".
Making and Answering Calls
Step by Step |
C |
or |
C |
D |
Open door? |
Program/Service |
*61=Open door? |
or |
F?: |
D |
Answering Calls from the Entrance Telephone and Opening the Door
If an entrance telephone has been programmed, you can use your telephone to speak to someone at the entrance telephone and to activate a door opener.
If you have the proper authorization (contact your service personnel), you can activate the door opener, enabling visitors to open the door themselves by entering a
5-digit code (using a DTMF transmitter or installed keypad).
Speaking to visitors via the entrance telephone:
Precondition: Your telephone rings.
Lift the handset within thirty seconds. You are connected to the entrance telephone immediately.
Lift the handset after more than thirty seconds.
Dial the entrance telephone number.
Opening the door from your telephone during a call from the entrance telephone:
Confirm.
Opening the door from your telephone without calling the entrance telephone:
Press the key. The LED lights up.
Select and confirm.
Enter the code.
Dial the entrance telephone number.
Special features must be taken into consideration if your telephone operates with
HiPath 5000 RSM (system networking via PC network) Æ page 98!
23

Making and Answering Calls
Step by Step |
D |
Program/Service |
*89=Door opener on? |
or |
FAB |
D |
D |
or |
3=change password? |
1=enable with ring? |
or |
2=enable w/o ring? |
Program/Service |
#89=Door opener off? |
or |
GAB |
24 |
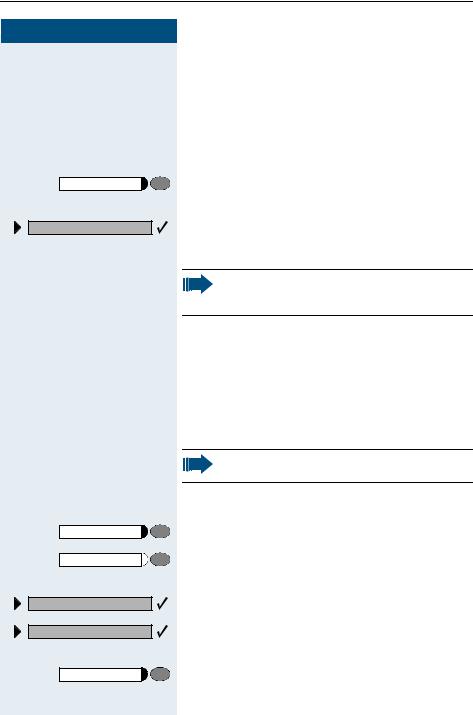
Opening the door with a code (at the door):
After ringing the bell, enter the five-digit code (using the keypad or a DTMF transmitter). Depending on how the door opener has been programmed, a doorbell call signal may or may not be forwarded.
Activating the door opener:
Press the key. The LED lights up
Select and confirm.
Enter the code.
Dial the entrance telephone number.
Enter the five-digit code. Default code = "00000".
Select the displayed function and press the "OK" dialog key to change the code.
Select and confirm.
You can also open the door without a doorbell ring.
Deactivating the door opener:
Press the key. The LED lights up.
Select and confirm.
Enter the code.
Accepting a Call From an Answering
Machine
You can accept a call from any answering machine if the machine is connected to your system (contact your service personnel) and you have programmed the answering machine number on a key Æ page 57.
The LED lights up. Press the key.

Making and Answering Calls
Step by Step
Display Number of Waiting Calls and
Overload Indication
You can show the number of external waiting calls on the display by pressing the "View number of calls" key Æ page 57.
Press the "Waiting calls" key.
If the number of waiting calls exceeds a preset limit while you are engaged in another call (overload), the LED on the key lights up. Contact your service personnel to find out the waiting call limit.
•LED off:
No callers waiting.
•LED flashes slowly:
You have reached the programmed threshold.
•LED flashes rapidly:
You have exceeded the threshold value (overload).
25

Making Calls
Step by Step
Making Calls
Off-Hook Dialing
C Lift the handset.
DInternal calls: Enter the station number.
External calls: Enter the external code and the station number.
The called party does not answer or is busy:
I Replace the handset.
On-Hook Dialing
DInternal calls: Enter the station number.
External calls: Enter the external code and the station number.
The other party answers with speaker:
C Lift the handset.
or On-hook: Use speakerphone mode (not available with optiPoint 500 economy and optiPoint 500 basic).
The called party does not answer or is busy:
Speaker |
|
Press the key. The LED goes out. |
|
|
|
Your system may also be programmed so that you have to press the Internal key before you dial an internal number.
To call an external party, you have to enter an external code before dialing the party’s telephone number (Prime Line is not active; contact your service personnel).
26
Making Calls
Step by Step |
D |
C |
or |
Dial? |
Delete number? |
D |
End? |
or |
Speaker |
or |
Release |
En-Bloc Sending / Correcting Numbers
If this feature is configured (contact your service personnel), a connection is not attempted immediately when a station number is entered. This means that you can correct the number if necessary.
The station number is only dialed at your specific request.
Internal: enter station number.
External: enter external code and station number.
Dialing entered/displayed numbers:
Lift the handset.
Confirm.
Correcting numbers entered:
Select and confirm.
The last digit entered in each case is deleted.
Enter the required digit(s).
Canceling en-bloc sending:
Select and confirm.
Press the key. The LED goes out.
Press the key.
27
Making Calls
Step by Step |
Suppress call ID? |
or |
Restore caller ID? |
or |
FA?or GA? |
Program/Service |
*80=Speaker call? |
or |
FA9 |
D |
28 |
Caller ID Suppression
You can prevent your station number or name from appearing on the displays of external parties you call. The feature remains active until you deactivate it.
Select and confirm.
Enter code for "suppress" or "restore".
Your service personnel can turn caller ID suppression on and off for all telephones.
Talking to Your Colleague With a Speaker Call
You can make a loudspeaker announcement through a loudspeaker if connected (ask your service personnel), or to an internal user with a system telephone without any action on their part.
Press the key. The LED lights up.
Select and confirm.
Enter the code.
Enter the station number.
 Responding to a speaker call Æ page 20.
Making Calls
Step by Step |
Program/Service |
*53=DTMF dialing? |
or |
F>< |
D |
C |
Activating Tone Dialing
(DTMF Suffix Dialing)
You can transmit dual-tone multifrequency (DTMF) signals to control devices such as an answering machine or automatic information system.
Press the key. The LED lights up.
Select and confirm.
Enter the code.
You can use the keys "0" through "9", "*", and "#" to transmit DTMF signals.
Ending the call also deactivates DTMF suffix dialing.
Your system may be configured so that you can start DTMF suffix-dialing immediately after setting up a connection.
Automatic Connection Setup (Hotline)
If this function is configured (contact your service personnel), the system automatically sets up a connection to a preset internal or external destination.
Lift the handset.
Depending on the setting, the connection is either set up immediately or only after a preset period of time
(hotline after a timeout).
29

Making Calls
Step by Step |
Reserve trunk? |
C |
D |
Program/Service |
*41=Temporary MSN? |
or |
F=: |
D |
D |
30 |
Reserve Trunk
If this feature is configured (contact your service personnel), you can reserve a busy trunk for your own use. When the trunk is free, you receive a call and a message appears on the display.
Precondition: The message "US:Currently busy UK:busy at the moment" appears on your screen.
Confirm.
When the reserved trunk becomes free:
Your telephone rings. The display shows " Trunk is free".
Lift the handset. You hear the CO dial tone.
Enter the number of the external station.
Assigning a Station Number (Not for U.S.)
If this function has been configured (contact your service personnel), you can selectively assign a specific number (DID number) to your telephone before making an external call. The assigned number then appears on the called party’s display.
Press the key. The LED lights up.
Select and confirm.
Enter the code.
Enter the DID number you wish to use.
Dial the external number.
Loading...