


Owner’s Manual for advanced features
Digital Camera
Model No. DMC-LZ20
Before connecting, operating or adjusting this product, please read the instructions completely.
Register online at www.panasonic.com/register
(U.S. customers only)
VQT4K59
M0712KZ0

Contents |
|
Before use |
|
Before use......................................................................................................................... |
6 |
Standard Accessories...................................................................................................... |
8 |
Names and Functions of Main Parts............................................................................... |
9 |
Cursor button .................................................................................................................................... |
11 |
Attaching the lens cap/shoulder strap......................................................................... |
12 |
Attaching the lens cap ...................................................................................................................... |
12 |
Attaching the shoulder strap ............................................................................................................. |
13 |
Preparations |
|
About the batteries......................................................................................................... |
14 |
Inserting and removing the batteries ........................................................................... |
15 |
Remaining battery............................................................................................................................. |
17 |
Guidelines for number of recordable pictures and operating time .................................................... |
17 |
Inserting and removing the card (optional) ................................................................. |
19 |
About built-in memory/cards......................................................................................... |
21 |
Picture save destination (cards and built-in memory)....................................................................... |
21 |
Recording capacity guidelines (pictures/recording time)................................................................... |
22 |
Setting the clock............................................................................................................. |
23 |
To change time setting...................................................................................................................... |
24 |
- 2 - |
VQT4K59 |

|
Contents |
Basics |
|
Sequence of operations................................................................................................. |
25 |
Taking pictures with your own settings [Program AE] Mode.................................... |
28 |
Adjusting focus .............................................................................................................. |
29 |
Taking pictures with automatic settings [Intelligent Auto] Mode ............................. |
30 |
About flash........................................................................................................................................ |
30 |
Automatic Scene Detection............................................................................................................... |
31 |
[AF Tracking]..................................................................................................................................... |
32 |
[Intelligent Auto] Mode restrictions.................................................................................................... |
33 |
Taking motion pictures [Motion Picture] Mode .......................................................... |
34 |
Viewing your pictures [Normal Play]........................................................................... |
36 |
Zooming in and viewing “Playback Zoom”........................................................................................ |
37 |
Viewing a list of pictures “Multi Playback”......................................................................................... |
37 |
Viewing pictures by their recording date “Calendar Playback”.......................................................... |
38 |
Viewing motion pictures.................................................................................................................... |
39 |
Deleting pictures ............................................................................................................ |
40 |
To delete multiple (up to 50)/To delete all pictures............................................................................ |
41 |
Setting the menu ............................................................................................................ |
42 |
Menu type ......................................................................................................................................... |
43 |
Using Quick menu............................................................................................................................. |
44 |
Using the [Setup] menu................................................................................................. |
45 |
[Battery]............................................................................................................................................. |
45 |
[Clock Set]......................................................................................................................................... |
45 |
[Beep]................................................................................................................................................ |
45 |
[Volume]............................................................................................................................................ |
45 |
[LCD Display].................................................................................................................................... |
45 |
[LCD Mode]....................................................................................................................................... |
46 |
[Histogram]........................................................................................................................................ |
47 |
[Economy]......................................................................................................................................... |
47 |
[Auto Review].................................................................................................................................... |
48 |
[Reset]............................................................................................................................................... |
48 |
[Output] ............................................................................................................................................. |
48 |
[Version Disp.]................................................................................................................................... |
49 |
[Format]............................................................................................................................................. |
49 |
[Language]........................................................................................................................................ |
49 |
- 3 - |
VQT4K59 |

Contents |
|
Application (Record) |
|
Changing recording information display..................................................................... |
50 |
Using Zoom..................................................................................................................... |
51 |
Zoom types and use.......................................................................................................................... |
52 |
Taking pictures with flash.............................................................................................. |
53 |
Taking close-up pictures ............................................................................................... |
57 |
Focus range...................................................................................................................................... |
58 |
[Macro Zoom].................................................................................................................................... |
59 |
Taking pictures with self-timer...................................................................................... |
60 |
Taking pictures with Exposure Compensation............................................................ |
61 |
[Auto Bracket].................................................................................................................................... |
62 |
Determine aperture and shutter speed and record [Manual Exposure] Mode ........ |
63 |
Taking pictures of people [Portrait] Mode................................................................... |
64 |
Taking pictures of scenery [Scenery] Mode ............................................................... |
65 |
Taking pictures of sporting events [Sports] Mode..................................................... |
66 |
Taking pictures according to the scene [Scene Mode].............................................. |
67 |
[Panorama Shot]............................................................................................................................... |
68 |
[Night Portrait]................................................................................................................................... |
70 |
[Night Scenery].................................................................................................................................. |
70 |
[Food]................................................................................................................................................ |
71 |
[Baby]................................................................................................................................................ |
71 |
[Sunset]............................................................................................................................................. |
72 |
[High Sens.]....................................................................................................................................... |
72 |
Using the [Rec] menu..................................................................................................... |
73 |
[Picture Size]..................................................................................................................................... |
73 |
[Quality]............................................................................................................................................. |
74 |
[Rec Quality] ..................................................................................................................................... |
74 |
[Sensitivity]........................................................................................................................................ |
75 |
[White Balance]................................................................................................................................. |
76 |
[AF Mode].......................................................................................................................................... |
78 |
[Continuous AF]................................................................................................................................. |
79 |
[i.Exposure]....................................................................................................................................... |
79 |
[Digital Zoom].................................................................................................................................... |
79 |
[Burst]................................................................................................................................................ |
80 |
[Color Mode]...................................................................................................................................... |
81 |
[AF Assist Lamp]............................................................................................................................... |
81 |
[Red-Eye Removal]........................................................................................................................... |
82 |
[Stabilizer] ......................................................................................................................................... |
82 |
[Date Stamp]..................................................................................................................................... |
83 |
[Clock Set]......................................................................................................................................... |
83 |
- 4 - |
VQT4K59 |

|
Contents |
Application (View) |
|
Different playback methods [Playback Mode] |
............................................................ 84 |
[Slide Show]...................................................................................................................................... |
85 |
[Category Selection].......................................................................................................................... |
86 |
[Calendar].......................................................................................................................................... |
86 |
Using the [Playback] menu............................................................................................ |
87 |
[Resize]............................................................................................................................................. |
87 |
[Cropping].......................................................................................................................................... |
89 |
[Protect]............................................................................................................................................. |
90 |
[Copy]................................................................................................................................................ |
91 |
Connecting with other devices |
|
Viewing on TV screen .................................................................................................... |
92 |
Using with your PC......................................................................................................... |
94 |
Using the supplied software.............................................................................................................. |
95 |
Installing supplied software (PHOTOfunSTUDIO)............................................................................ |
96 |
Copying still pictures and motion pictures......................................................................................... |
97 |
Printing............................................................................................................................ |
99 |
Printing multiple pictures................................................................................................................. |
100 |
Making print settings on the camera............................................................................................... |
101 |
Print with date and text.................................................................................................................... |
102 |
Others |
|
List of LCD monitor displays....................................................................................... |
103 |
Message displays......................................................................................................... |
105 |
Q&A Troubleshooting ................................................................................................. |
107 |
Usage cautions and notes............................................................................................ |
113 |
Specifications................................................................................................................ |
118 |
■How to read this document
●Recording mode icons
Recording mode: 


Available recording modes |
Unavailable recording modes |
- 5 - |
VQT4K59 |
 Before use
■Camera handling
Keep the camera away from excessive vibration, force, or pressure.
●Avoid using the camera under the following conditions, which may damage the lens, LCD monitor, or camera body. This may also cause the camera to malfunction or prevent recording.
• Dropping or hitting the camera against a hard surface
• Pushing with excessive force on the lens or LCD monitor
• When carrying or using the playback feature, ensure that the lens is in the stored position, with lens cap on.
The camera is not dust resistant, splash resistant, or waterproof.
Avoid using the camera in places with excessive dust or sand, or where water can come into contact with the camera.
●Avoid using the camera under the following conditions, which present a risk that sand, water, or foreign material may enter the camera through the lens or openings around buttons. Be especially careful, because these conditions may damage the camera and such damage may not be repairable.
•In extremely dusty or sandy places
•In the rain or by the shore, where the camera may be exposed to water
■Condensation (When the lens or the LCD monitor is fogged up)
●Condensation may occur when the camera is exposed to sudden changes of temperature or humidity. Avoid these conditions, which may make the lens or LCD monitor dirty,
cause mold, or damage the camera.
●If condensation does occur, turn off the camera and wait about two hours before using it. Once the camera adjusts to the surrounding temperature, the fogging will clear naturally.
- 6 - |
VQT4K59 |

Before use
■Always take a test shot first
Before important events when you will use the camera (at weddings, for example), always take a test shot to make sure that pictures and sound record correctly.
■No compensation for missed shots
We cannot compensate for missed shots if technical problems with the camera or card prevent recording.
■Carefully observe copyright laws
Unauthorized use of recordings which contain works with copyright for purposes other than personal use is prohibited under copyright law. Recording of certain material may be restricted even for the purpose of personal use.
■Also refer to “Usage cautions and notes” (→113)
- 7 - |
VQT4K59 |

 Standard Accessories
Check that all the accessories are supplied before using the camera.
●The accessories and their shape may differ depending on the country or area where the camera was purchased.
For details on the accessories, refer to Basic Owner’s Manual.
●LR6/AA alkaline batteries or HR6/AA rechargeable Ni-MH (nickel metal hydride) batteries is indicated as battery (or batteries) in the text.
●SD Memory Card, SDHC Memory Card and SDXC Memory Card are indicated as card in the text.
●Please dispose of all packaging appropriately.
●Keep small parts in a safe place out of the reach of children.
■Optional accessories
•Cards are optional. You can record or play back pictures on the built-in memory when you are not using a card.
•If any accessories are lost, customers should contact Panasonic’s parts department at 1-800-833-9626 for further information about obtaining replacement parts.
- 8 - |
VQT4K59 |

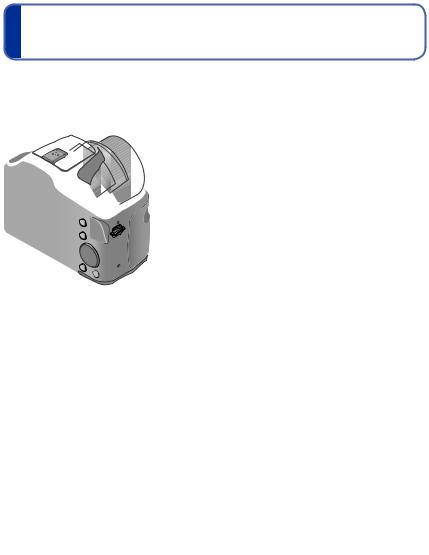
 Names and Functions of Main Parts
1 |
1 |
Self-timer indicator (→60) / |
|
|
AF Assist Lamp (→26, 81) |
||
2 |
2 |
Flash (→26, 53) |
|
3 |
Lens |
||
|
3
4 |
5 |
4 |
LCD monitor (→50, 103, 104) |
|
|
5 |
[EXPOSURE] button (→63) |
|
|
|
Operate this when setting the shutter |
|
|
|
speed or aperture value (only in the |
|
|
|
mode). |
|
|
6 |
Playback button (→27, 36, 84) |
|
|
6 |
Use this to switch to playback mode. |
77 Cursor button (→11)
8 [DISP.] button (→50) Use this to change display.
9 [Q.MENU] / [ ] / [
] / [ ] button
In the recording mode:
Quick menu is displayed. (→44) 8 9 In the playback mode:
Pictures are deleted. (→40) During menu operations: Previous screen is restored. (→42)
●The illustrations and screens in this manual may differ from the actual product.
- 9 - |
VQT4K59 |

|
|
|
Names and Functions of Main Parts |
10 |
11 |
10 |
Flash open button (→53) |
|
|
11 |
Shoulder strap eyelet (→13) |
|
|
12 |
Lens barrel |
|
|
13 |
Speaker (→45) |
|
|
14 |
[AV OUT/DIGITAL] socket |
12 13 14
[AV OUT/DIGITAL] socket
(→92, 97, 99)
●Some methods of holding the camera may block the speaker, making it difficult to hear the beep, etc.
- 10 - |
VQT4K59 |
|
|
|
Names and Functions of Main Parts |
15 |
16 17 |
15 |
Microphone (→26, 34) |
|
|
16 |
Mode dial (→25) |
|
|
|
Use this to select the recording |
|
|
|
mode. |
|
18 |
17 |
Zoom lever (→51) |
|
|
|
Operate this when zooming in on a |
|
|
|
distant subject to record it larger. |
|
|
18 |
Shutter button (→26, 28, 34) |
|
|
|
Use this to focus and record still and |
|
|
|
motion pictures. |
|
|
19 |
Power button (→23, 25) |
|
19 |
|
Use this to turn the camera on and |
|
|
off. |
|
20 |
21 |
|
|
|
|
20 |
Tripod Mount (→117) |
|
|
|
Do not attach to a tripod with a |
|
|
|
5.5 mm (0.22”) or longer screw. |
|
|
|
Doing so may damage this unit. |
|
|
21 |
Release lever (→15, 19) |
|
|
22 |
Card/Battery door (→15, 19) |
22
Cursor button
[MENU/SET] |
Up cursor button ( ) |
Use this to display the menus, enter |
• Exposure Compensation, Auto |
the settings, etc. (→42) |
Bracket etc. (→61) |
Left cursor button ( ) |
Right cursor button ( ) |
• Self-timer (→60) |
• Flash (→54) |
|
|
Down cursor button ( ) |
|
• Macro Mode etc. (→57) |
|
●In this manual, the button that is used is indicated by


 .
.
- 11 - |
VQT4K59 |

 Attaching the lens cap/shoulder strap
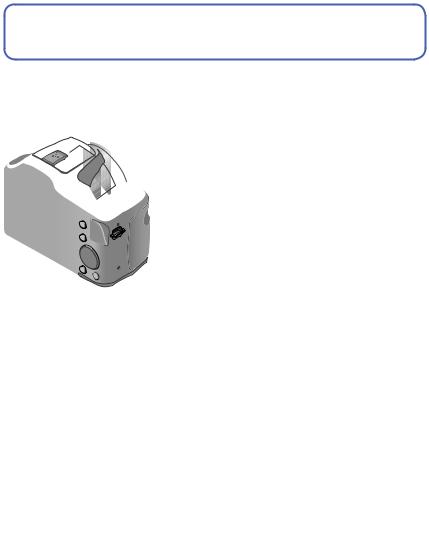
Attaching the lens cap
When you turn the camera off or carry the camera, attach the lens cap (supplied) to protect the surface of the lens.
Pass the lens cap string through
the shoulder strap eyelet on the camera body
• Attach the lens cap string before attaching the shoulder strap.
• Pass the shorter loop of the string through the eyelet.
Pass the lens cap string through the lens cap eyelet
• Pass the lens cap through the loop of the string and tighten it.
 Attach the lens cap
●Do not hang or swing around this unit.
●Make sure to detach the lens cap when turning on the power. ●Be careful not to lose the lens cap.
●Be careful that the lens cap string does not become entangled with the shoulder strap.
- 12 - |
VQT4K59 |
Attaching the lens cap/shoulder strap
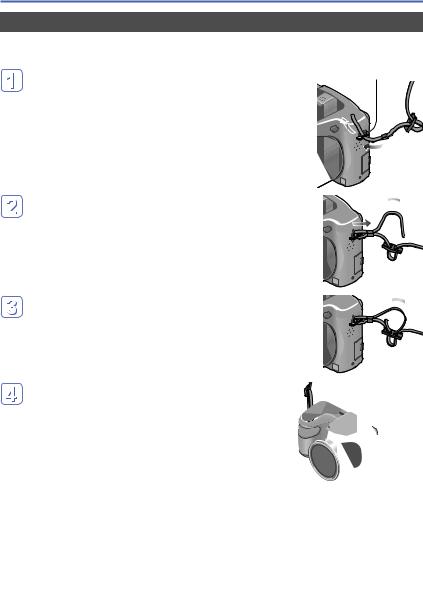
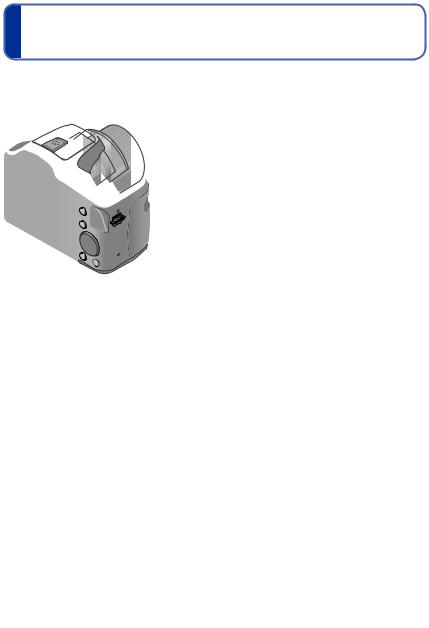
Attaching the shoulder strap
We recommend attaching the shoulder strap (supplied) when using the camera to prevent it from dropping.
Pass the shoulder strap through the shoulder strap eyelet on the camera body
Shoulder strap eyelet
• Attach the shoulder strap so that the “LUMIX” Logo is on the outside.
Pass the end of the shoulder strap through the ring in the direction of the arrow and then pass it through the stopper
Pass the end of the shoulder strap through the hole on the other side of the stopper
Pull the other side of the shoulder strap and then check that it is secure
• Perform steps  to
to  and then attach the other side of the shoulder strap.
●Be sure to follow the steps and attach the shoulder strap correctly. ●Check that the shoulder strap is firmly attached to the camera. ●Use the shoulder strap around your shoulder.
•Do not wrap the strap around the neck. It may result in injury or accident. ●Do not leave the shoulder strap where an infant can reach it.
•It may result in an accident by mistakenly wrapping around the neck.
- 13 - |
VQT4K59 |

 About the batteries
■About batteries that you can use with this unit
LR6/AA alkaline batteries or optional HR6/AA rechargeable Ni-MH (nickel metal hydride) batteries can be used with this unit.
●EVOLTA (EVOIA) batteries (Panasonic battery) can also be used.
●The following batteries cannot be used.
•Manganese batteries
•Lithium batteries
•Nickel batteries
•Ni-Cd batteries
•Oxyride batteries
●If these batteries are used, the following problems may occur:
•Battery leakage
•Incorrect display of remaining battery power
•Failure to turn on camera
•Damage to data written to built-in memory or card
•Other troubles
●Never use batteries such as those indicated below.
•Batteries with all or part of their covering peeled off
•Batteries with flat  poles
poles
- 14 - |
VQT4K59 |
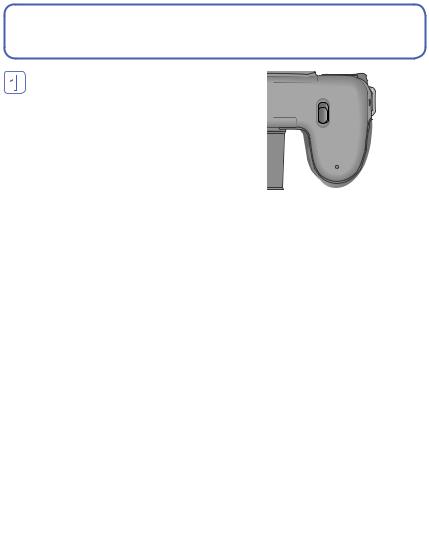
 Inserting and removing the batteries
Move the release lever to the [OPEN] position ( ) and slide the card/battery door in the direction (
 ) to open it
Insert the batteries all the way with correct orientation of  and
and  poles
poles
Close the card/battery door and slide the door in until you hear a locking sound
- 15 - |
VQT4K59 |
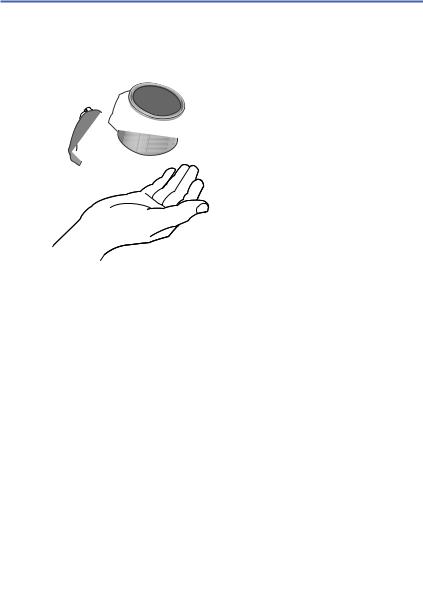
Inserting and removing the batteries
Turn off the camera.
■To remove batteries
Tilt the camera and catch the batteries in your hand. Be careful not to drop them.
●To remove the batteries, turn the camera off and wait until the LUMIX indicator on the LCD monitor goes off. (Failure to wait may cause the camera to malfunction and may damage the card or recorded data.)
●Be sure to remove the batteries if you are not using the camera for a long period of time. Batteries may be hot immediately after use. Turn off the camera and wait until the battery temperature lowers before removing them.
●The clock settings may reset if batteries are removed from the camera for 120 hours or more.
●Always use all new batteries of the same type and brand when replacing batteries. ●The unusable battery should be discarded in accordance with battery recycling laws.
Call the RBRC hotline at 1-800-822-8837 for information.
- 16 - |
VQT4K59 |
Inserting and removing the batteries
Remaining battery
Remaining battery


 (flashes red)
If the battery mark flashes red, replace the batteries with new ones.
Guidelines for number of recordable pictures and operating time
The number of recordable pictures or available operating time may vary according to surrounding environment and usage conditions. Figures may be reduced if flash, zoom, or other functions are used frequently, or in colder climates.
Number of recordable pictures
Recording time
Playback time
Supplied batteries or optional |
Fully-charged Panasonic Ni-MH |
|
batteries (optional, when the |
||
Panasonic alkaline batteries |
||
battery capacity is 1900 mAh) |
||
|
||
Approx. 380 pictures |
Approx. 540 pictures |
|
|
|
|
Approx. 190 min |
Approx. 270 min |
|
Approx. 430 min |
Approx. 560 min |
|
|
|
●Recording conditions by CIPA standard
•CIPA is an abbreviation of [Camera & Imaging Products Association].
•[Program AE] Mode
•Temperature: 23 °C (73.4 °F)/Humidity: 50%RH when LCD monitor is on.
•Using a Panasonic SD Memory Card (32 MB).
•Using the supplied batteries.
•Starting recording 30 seconds after the camera is turned on (when the Optical Image Stabilizer function is set to [ON]).
•Recording once every 30 seconds with full flash every second recording.
•Rotating the zoom lever from max. Tele to max. Wide or vice versa in every recording.
•Turning the camera off every 10 recordings and leaving it until the temperature of the batteries decreases.
Number reduced if intervals are longer (e.g. to approx. one quarter for 2-minute intervals under the above conditions).
- 17 - |
VQT4K59 |

Inserting and removing the batteries
Please note that the performance of alkaline batteries significantly decreases in low temperature conditions.
(When the temperature is 0 °C (32 °F))
Number of recordable pictures
Recording time
Playback time
Supplied batteries or optional |
Fully-charged Panasonic Ni-MH |
|
batteries (optional, when the |
||
Panasonic alkaline batteries |
||
battery capacity is 1900 mAh) |
||
|
||
Approx. 120 pictures |
Approx. 500 pictures |
|
|
|
|
Approx. 60 min |
Approx. 250 min |
|
Approx. 340 min |
Approx. 540 min |
●The number of recordable pictures, recording time, and playback time vary, depending on the storage and operating conditions of the batteries and the brand and type of batteries.
●We recommend using [Economy] (→47) or turning off the camera frequently between recording sessions to save battery power. If you will be using the camera for long periods of time, the use of rechargeable Ni-MH batteries is recommended. If the available battery power is significantly reduced even when fully charged Ni-MH batteries are used, the batteries have reached the end of their life. Please purchase new batteries.
●Do not use a damaged or dented battery (especially connectors), e.g. by dropping
(can cause faults).
- 18 - |
VQT4K59 |

Inserting and removing the card (optional)
Turn off the camera.
Move the release lever to the [OPEN] position ( ) and slide the card/battery door in the direction (
 ) to open it
Insert the card all the way
• Push in until it clicks.
Card (Check orientation)
•Do not touch the terminals on the back of the card.
Close the card/battery door and slide the door inward until it locks firmly
- 19 - |
VQT4K59 |

Inserting and removing the card (optional)
Turn off the camera.
■To remove card
Press the center of the card.
●Keep the Memory Card out of reach of children to prevent swallowing.
●To remove the card, turn the camera off and wait until the LUMIX indicator on the LCD monitor goes off. (Failure to wait may cause the camera to malfunction and may damage the card or recorded data.)
- 20 - |
VQT4K59 |
 About built-in memory/cards
Picture save destination (cards and built-in memory)
Pictures will be saved to a card if one is inserted, or to the built-in memory  if not.
■Built-in memory (approx. 100 MB)
●Pictures may be copied between cards and the built-in memory. (→91)
●The access time for the built-in memory may be longer than the access time for a card.
■Compatible memory cards (optional)
The following SD standard-based cards (Panasonic brand recommended)
Type of Card |
|
Capacity |
Notes |
||
SD Memory Cards |
8 |
MB – 2 GB |
• Using a card of SD speed “Class 6”*or above is |
||
SDHC Memory Cards |
4 |
GB – 32 |
GB |
recommended for recording motion pictures. |
|
• Can be used with devices compatible with the |
|||||
SDXC Memory Cards |
48 GB, 64 |
GB |
|||
respective formats. |
|||||
•Before using SDXC Memory Cards, check that your computer and other devices support this type of card. http://panasonic.net/avc/sdcard/information/sdxc.html
•Only the cards listed on the left with the given capacities are supported.
*SD speed class refers to a specification for sustained write speeds. Confirm the SD speed by checking the card label or other card related materials.
(Example)
●While the camera is accessing the card or built-in memory (for an |
|
|
operation such as picture writing, reading, deletion or formatting), |
|
|
|
|
|
|
|
|
do not turn off the camera or remove the batteries/card. Do not |
|
|
subject the camera to vibrations, impact, or static electricity. Should |
|
|
any of these cause camera operation to be terminated, attempt to |
|
|
perform the operation again. |
Switch |
|
●Please reformat the card with this camera if it has already been |
|
|
formatted with a computer or another device. (→49) |
|
|
●If the write-protect switch is set to “LOCK”, the card cannot be used |
|
|
to record or delete pictures, and it cannot be formatted. |
|
|
●It is recommended that you copy important pictures to your |
|
|
computer (as electromagnetic waves, static electricity, or faults may |
|
|
cause data to be damaged). |
|
|
●Latest information: |
|
|
http://panasonic.jp/support/global/cs/dsc/ |
|
|
(This site is available in English only.) |
|
|
- 21 - |
VQT4K59 |

About built-in memory/cards
Recording capacity guidelines (pictures/recording time)
The number of pictures you can take and the recording time vary in proportion to card capacity (and depending on recording conditions and type of card).
Estimated remaining pictures or recording time capacity
 Displayed when no card is inserted (pictures will be saved to built-in memory)
■Recording picture capacity (still pictures)
|
[Picture Size] |
Built-in memory |
2 GB |
32 GB |
64 GB |
|||
|
|
|
|
16M |
15 |
340 |
5600 |
10980 |
|
|
|
|
|||||
|
|
|
|
|
|
|
|
|
|
|
|
|
5M |
40 |
860 |
13950 |
27460 |
|
|
|
|
|||||
|
|
|
|
|
|
|
|
|
|
|
|
|
0.3M |
355 |
6130 |
99120 |
164830 |
|
|
|
|
|||||
|
|
|
|
|
|
|
|
|
•When the number of recordable pictures exceeds 99,999, “+99999” is displayed.
■Recording time capacity (motion pictures)
[Rec Quality] |
Built-in memory |
2 GB |
32 GB |
64 GB |
HD |
– |
08m20s |
02h17m |
04h34m |
|
|
|
|
|
VGA |
– |
22m00s |
05h58m |
11h55m |
|
|
|
|
|
QVGA |
03m30s |
01h03m |
17h09m |
34h14m |
|
|
|
|
|
([h], [m] and [s] indicate “hour”, “minute” and “second”.)
•Motion pictures can be recorded continuously up to 2 GB.
The maximum available recording time for up to 2 GB only is displayed on the screen.
- 22 - |
VQT4K59 |
 Setting the clock
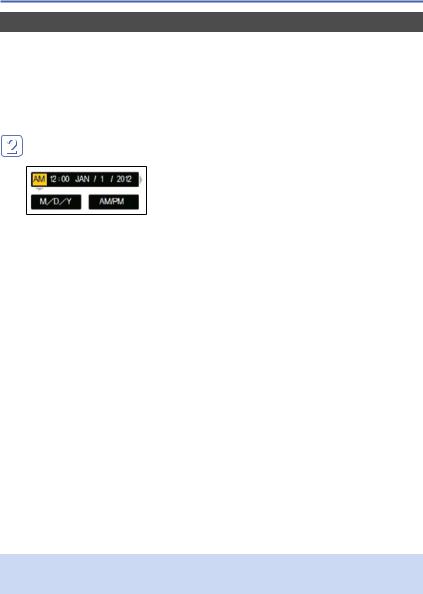
The clock is not set when the camera is shipped.
• Make sure to detach the lens cap when turning on the power.
Press the Power button
The power is turned on.
If the language select screen is not displayed, proceed to step  .
.
Cursor button / [MENU/SET]
Press [MENU/SET] while the message is displayed
Press
 to select the language, and press [MENU/SET]
 Press [MENU/SET]
Press
 to select the items (year, month, day, hour, minute, display order or time display format), and press
 to set
• To cancel → Press [ ] button.
 Press [MENU/SET] to set Press [MENU/SET]
•To return to the previous screen, press [ ] button.
- 23 - |
VQT4K59 |
Setting the clock
To change time setting
When resetting date and time, select [Clock Set] from the [Setup] menu or [Rec] menu.
•If approximately 2 hours have elapsed after installing the batteries with sufficient power in the camera, the clock settings will be retained for about 120 hours even if the batteries are removed.
 Select [Clock Set] from the [Setup] menu or [Rec] menu (→42)
Press
 to select the items (year, month, day, hour, minute, display order or time display format), and press
 to set
• To cancel → Press [ ] button.
 Press [MENU/SET] to set
●If the clock is not set, the correct date cannot be printed.
●If the clock is set, the correct date can be printed even if the date is not displayed on the screen of the camera.
- 24 - |
VQT4K59 |

 Sequence of operations
Make sure to detach the lens cap when turning on the power.
Press the Power button
1 |
Power button |
|
Set to the desired recording mode |
|
|
Align the mode dial correctly to |
→ |
|
the mode that you want to use. |
|
|
[Intelligent Auto] Mode |
Take pictures with automatic settings. (→30) |
2 |
[Program AE] Mode |
Take pictures with your own settings. (→28) |
|
[Manual Exposure] Mode |
Determine aperture and shutter speed, |
|
then take pictures. (→63) |
|
|
|
|
|
[Scene Mode] |
Take pictures according to scene. (→67) |
|
[Sports] Mode |
Take pictures of sporting events, etc. (→66) |
|
[Scenery] Mode |
Take pictures of scenery. (→65) |
|
[Portrait] Mode |
Take pictures of people. (→64) |
|
[Motion Picture] Mode |
Take motion pictures. (→34) |
(Continued on the next page)
- 25 - |
VQT4K59 |

Sequence of operations
Aim the camera and shoot
Shutter button
Microphone
■Taking still pictures
 Press the shutter button halfway to focus
  Press and hold the shutter button to take the picture
■Recording motion pictures (→34)
 Set mode dial to
 Press the shutter button to start recording, and press it again to end
Mode dial
3
■Holding the camera
•To avoid camera shake, hold it with both hands keeping your arms close to your
Flash (→53) |
body while standing with your feet slightly |
|
AF Assist Lamp |
apart. |
|
• Do not touch the lens. |
||
|
||
|
• Do not hold the lens barrel as you take |
|
|
pictures. There is a risk that your finger will |
|
|
be trapped as the lens retracts. |
|
|
• Do not block the flash or the lamp. Do not |
|
|
look at it from close range. |
•Make sure that the camera does not move at the moment the shutter button is pressed.
●We recommend attaching the shoulder strap (supplied) when using the camera to prevent it from dropping. (→13)
(Continued on the next page)
- 26 - |
VQT4K59 |

Sequence of operations
Press the Playback button
4
Playback button
View pictures (→36, 69) |
• Press |
to select a picture |
5 |
• Press |
to play back motion pictures |
or panorama pictures |
||
Turn off the power (Press the Power button)
6
■To turn the power on in Playback Mode
Press and hold the playback button.
• Pictures on the card or built-in memory are displayed.
- 27 - |
VQT4K59 |
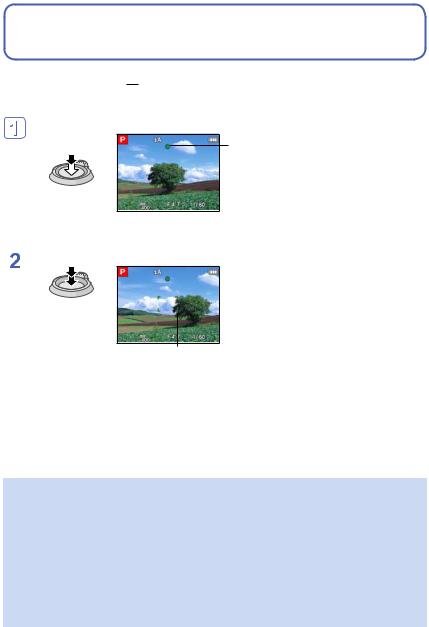
Taking pictures with your own settings
[Program AE] Mode
Recording mode: 


Using the [Rec] menu to change settings and set up your own recording environment.
 Set to
  ([Program AE] Mode)
 Take a picture
Press halfway |
Press fully |
(press lightly to focus) |
(press the button all the |
|
way to record) |
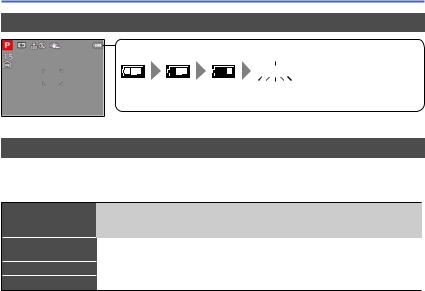
Focus display
(When focus is aligned: illuminated
When focus is not aligned: flashing)
●If a warning is displayed about jitter, use [Stabilizer], a tripod, or [Selftimer].
●If aperture and shutter speed are shown in red, you do not have appropriate exposure. You should either use the flash or change [Sensitivity] settings.
 Jitter alert display
Aperture value |
|
|
Shutter speed |
||
- 28 - |
|
VQT4K59 |
 Adjusting focus
When [AF Mode] is set to 

 (1-area-focusing), focus on the AF area in the center of the picture. If a subject you want to record is not in the center, follow the steps below.
Adjust focus according to subject
Align the AF area with the subject
Hold down halfway
Focus display
(When focus is aligned: illuminated When focus is not aligned: flashing)
 AF area
(When focus is aligned: green When focus is not aligned: red)
 Return to desired composition
Press fully
AF area
●Subjects/environments which may make focusing difficult:
•Fast-moving or extremely bright objects, or objects with no color contrast.
•Taking pictures through glass or near objects emitting light. In dark, or with significant jitter.
•When too close to object or when taking pictures of both distant and close objects together in the same picture.
●The focus display flashes and beep sounds when focus is not aligned. Use the focus range displayed in red as a reference. (→58)
Even if the focus display is lit, the camera may be unable to bring the subject into focus if it is out of range.
●The AF area display may be larger depending on recording conditions such as dark locations or zoom ratio.
- 29 - |
VQT4K59 |
Taking pictures with automatic settings
[Intelligent Auto] Mode
Recording mode: 


Optimum settings are made automatically from information such as “face”, “movement”, “brightness”, and “distance” just by pointing the camera at the subject, meaning that clear pictures can be taken without the need to make settings manually.
 Set to
  ([Intelligent Auto] Mode)
 Take a picture
Press halfway |
Press fully |
(press lightly to focus) |
(press the button all the |
|
way to record) |
About flash
Press [ |
] to open the flash (→53). |
|
|
|
|
|
|
|||||
|
|
|
|
|
|
|
|
|
|
|
|
|
●When |
|
is selected, the optimum flash ( |
|
, |
|
, |
|
, |
|
) is selected automatically |
||
|
||||||||||||
depending on conditions. (→56) |
|
|
|
|
|
|
|
|
||||
●When |
|
or |
|
is selected, the red-eye reduction function is activated. |
||||||||
●When |
|
or |
|
is selected, the shutter speed is reduced. |
||||||||
|
|
|||||||||||
- 30 - |
VQT4K59 |
 Loading...