


Operating Instructions
Digital Camera
Model No. DMC-LS1GC
DMC-LS1SG
Before use, please read these instructions completely.
VQT0Q72

Before Use
Dear Customer,
We would like to take this opportunity to thank you for purchasing this Panasonic Digital Camera. Please read these Operating Instructions carefully and keep them handy for future reference.
Information for Your Safety
WARNING
TO REDUCE THE RISK OF FIRE OR SHOCK HAZARD AND ANNOYING INTERFERENCE, USE ONLY THE RECOMMENDED ACCESSORIES AND DO NOT EXPOSE THIS EQUIPMENT TO RAIN OR MOISTURE. DO NOT REMOVE THE COVER (OR BACK); THERE ARE NO USER SERVICEABLE PARTS INSIDE. REFER SERVICING TO QUALIFIED SERVICE PERSONNEL.
Carefully observe copyright laws. Recording of pre-recorded tapes or discs or other published or broadcast material for purposes other than your own private use may infringe copyright laws. Even for the purpose of private use, recording of certain material may be restricted.
•Please note that the actual controls and components, menu items, etc. of your Digital Camera may look somewhat different from those shown in the illustrations in these Operating Instructions.
•SD Logo is a trademark.
•Other names, company names, and product names printed in these instructions are trademarks or registered trademarks of the companies concerned.
THE SOCKET OUTLET SHALL BE INSTALLED NEAR THE EQUIPMENT AND SHALL BE EASILY ACCESSIBLE.
CAUTION
Danger of explosion if battery is incorrectly replaced. Replace only with the same or equivalent type recommended by the manufacturer. Dispose of used batteries according to the manufacturer’s instructions.
2
VQT0Q72

Before Use
∫ Care for the camera
•Do not shake or cause impact to the camera. The camera may not be operated normally or recording of pictures may be disabled, or the lens may be damaged.
•Sand or dust may cause a malfunction of the camera. When you use the camera on a beach etc., take care so that sand or dust does not get into the camera.
•When you use the camera on a rainy day or on a beach, take care so that water does not get into the camera.
•If seawater splashes onto the camera, wet a soft cloth with tap water, wring it well, and use it to wipe the camera body carefully. Then, wipe it again with a dry cloth.
∫ About the LCD monitor
•Do not press the LCD monitor strongly. It may cause uneven colours on the LCD monitor or a malfunction of the LCD monitor.
•In a place with drastic temperature changes, condensation may form on the LCD monitor. Wipe it with a soft, dry cloth.
•If the camera is extremely cold when you turn the camera on, the image on the LCD monitor is slightly darker than usual at first. However, as the internal temperature increases, it goes back to the normal brightness.
Extremely high precision technology is employed to produce the LCD monitor screen. The result is more than 99.99% effective pixels with a mere 0.01% of the pixels inactive or always lit. However, this will not be recorded on the pictures in the built-in memory or the card.
∫ About the Lens
•Do not direct the lens to the sun or strong light sources. It may cause not only a malfunction of the camera but irreversible damage to your eye.
•Do not press the lens strongly.
•Leaving the camera with the lens facing the sun may cause a malfunction. Be careful when you put the camera outside or near a window.
∫ About Condensation (When the lens is fogged up)
Condensation takes place when the ambient temperature or humidity is changed as follows:
Be careful of condensation since it causes stains on the lens, fungus or malfunction.
•When the camera is brought inside from the cold to a warm room.
•When the camera is moved from outside to an air-conditioned car.
•When cool wind from an air conditioner or other is directly blown onto the camera.
•In humid places
Put the camera into plastic bag until the temperature of the camera is close to the ambient temperature to avoid condensation. In case of condensation, turn the camera off and then leave it for about 2 hours.
When the camera becomes close to the ambient temperature, the fog disappears naturally.
3
VQT0Q72

Before Use
∫If you will not be using the camera for a long time
•Store the batteries in a cool and dry place with a relatively stable temperature. (Recommended temperature:
15oC – 25oC,
Recommended humidity: 40% – 60%)
•Be sure to remove the batteries and the card from the camera.
•When the batteries are left inserted in the camera, the batteries are discharged since a weak electric current is passed even if the camera is turned off. (Refer to P14 for Ni-MH batteries.)
•When you keep the camera in a closet or a cabinet, we recommend storing it with the desiccant (silica gel).
4
VQT0Q72
Before Use
About These Operating Instructions
Please note that the description on this page is a sample and all pages are not described in this manner.
Compensating the Exposure


 SCN1 SCN2
Use this function when you cannot achieve appropriate exposure due to the difference of brightness between the subject and the background.
•EV is an abbreviation of Exposure Value, and it is the amount of light given to the CCD by the aperture value and the shutter speed.
1Modes indicated here allow you to use the functions or
2
1
N SC
SCN
settings described on this page. Set the Mode dial to any of the modes to use the functions or settings.
2Convenient or helpful information for use of the camera is described.
∫About illustrations in these operating instructions
Please note that the appearance of the product, the illustration or the menu screen are a little different from those in actual use.
∫ About illustrations of the cursor button
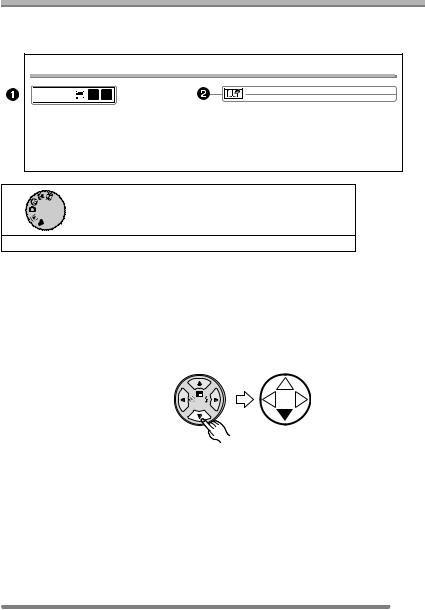
In these operating instructions, the operations on the cursor button are described as illustrated below.
e.g.: When you press the 4 button
REV
5
VQT0Q72

Contents |
|
Before Use |
|
Information for Your Safety....................... |
2 |
About These Operating Instructions ......... |
5 |
Preparation |
|
Standard Accessories............................... |
8 |
Names of the Components ....................... |
9 |
Quick Guide ............................................ |
11 |
About the Batteries ................................. |
12 |
Inserting/Removing the Batteries............ |
17 |
Inserting/Removing the Card |
|
(Optional) ............................................ |
18 |
About the Built-in Memory/the Card........ |
19 |
Approximate number |
|
of recordable pictures and the size ..... |
21 |
Setting Date/Time (Clock Set) ................ |
22 |
About the Setup Menu ............................ |
23 |
About the LCD Monitor ........................... |
27 |
Recording pictures (basic) |
|
Taking Pictures ....................................... |
29 |
Taking Pictures in Simple Mode ............. |
34 |
Checking the Recorded Picture |
|
(Review) .............................................. |
37 |
Using the Optical Zoom .......................... |
38 |
Taking Pictures |
|
using the Built-in Flash........................ |
39 |
Taking Pictures with the Self-timer ......... |
42 |
Compensating the Exposure .................. |
43 |
Taking Pictures using Auto Bracket........ |
44 |
Optical Image Stabilizer.......................... |
45 |
Taking Pictures using Burst Mode .......... |
46 |
Playback (basic) |
|
Playing Back Pictures ............................. |
48 |
9 Pictures Multi Playback........................ |
49 |
Using the Playback Zoom....................... |
50 |
Deleting Pictures..................................... |
51 |
Recording pictures (advanced) |
|
Using the Mode Dial ............................... |
53 |
• Economy mode................................. |
53 |
• Macro mode...................................... |
53 |
• Motion image mode .......................... |
54 |
• Scene mode...................................... |
56 |
– Portrait mode................................. |
57 |
– Sports mode .................................. |
57 |
– Scenery mode ............................... |
58 |
– Night scenery mode ...................... |
58 |
– Night portrait mode........................ |
59 |
– Fireworks mode............................. |
59 |
– Party mode .................................... |
60 |
– Snow mode ................................... |
60 |
Recording Menu Settings |
|
Using the [REC] mode menu .................. |
61 |
• White Balance [W.BALANCE] .......... |
62 |
• ISO Sensitivity [SENSITIVITY] ......... |
64 |
• Picture Size [PICT.SIZE] .................. |
64 |
• Quality [QUALITY] ............................ |
65 |
• AF Mode [AF MODE]........................ |
65 |
• Slow Shutter [SLOW SHUTTER]...... |
66 |
• Digital Zoom [D.ZOOM] .................... |
67 |
• Colour Effect [COL.EFFECT]............ |
67 |
• Picture Adjustment [PICT.ADJ.]........ |
67 |
6
VQT0Q72

Playback (advanced) |
|
Others |
|
|
|
Playing Back Motion Images .................. |
68 |
Using the [PLAY] mode menu ................ |
69 |
•Displaying pictures in a direction at the time of recording
[ROTATE DISP.] .............................. |
70 |
• Rotating the Picture [ROTATE]......... |
70 |
• Setting the Picture to be Printed |
|
and the Number of Prints |
|
[DPOF PRINT].................................. |
71 |
• Preventing Accidental Erasure |
|
of the Picture [PROTECT] ................ |
73 |
• Playing Back with Slide Show |
|
[SLIDE SHOW] ................................. |
74 |
• Resizing the Pictures [RESIZE] ........ |
75 |
• Trimming the Pictures |
|
[TRIMMING] ..................................... |
76 |
• Copying Picture Data [COPY]........... |
78 |
• Initializing the Built-in Memory/ |
|
the Card [FORMAT] ......................... |
79 |
Playing Back Pictures on a TV Screen ... |
81 |
Screen Display........................................ |
89 |
Cautions for Use ..................................... |
92 |
Message Display .................................... |
94 |
Troubleshooting ...................................... |
96 |
Specifications.......................................... |
99 |
Connecting to a PC or Printer
Before Connecting to the PC |
|
or the Printer [USB MODE] ................. |
82 |
Connecting to a PC................................. |
83 |
Connecting to a PictBridge-compliant |
|
Printer.................................................. |
85 |
7
VQT0Q72
Preparation
Standard Accessories
Before using your camera, check the contents.
1 |
2 |
|
K1HA08CD0004 |
3 |
4 |
|
K1HA08CD0006 |
5 |
|
|
VFC4090 |
1Batteries
AA Oxyride batteries
2USB Connection Cable
3Video Cable
4CD-ROM
5Strap
•SD Memory Card is optional.
When you do not use the card, you can record or play back pictures on the built-in memory. (P19)
•Consult the dealer or your nearest service centre if you lose the supplied accessories. (You can purchase the accessories separately.)
8
VQT0Q72

Preparation
Names of the Components
1 2 3 |
1 |
Lens (P3) |
||||
2 |
Self-timer Indicator (P42) |
|||||
|
|
|
|
|
3 |
Flash (P39) |
|
|
|
|
|
|
|
|
|
|
|
|
|
|
|
|
|
|
|
|
|
4 5 6
7 8 9
4LCD Monitor (P27, 89)
5Status Indicator (P13, 17, 53)
6[DISPLAY] Button (P27)
7Cursor Buttons 2/Self-timer Button (P42) 4/[REV] Button (P37)
1/Flash Setting Button (P39)
3/Exposure Compensation (P43)/Auto Bracket (P44)/White Balance Fine Adjustment (P63)/Backlight Compensation in Simple Mode (P36) Button
8[MENU] Button (P23)
9Single or Burst Mode (P46)/Delete (P51) Button
9
VQT0Q72
10 11
12 13 14
15
16
17
18
19
Preparation
10Zoom Lever (P38, 67)
11Optical Image Stabilizer Button (P45)
12Mode Dial (P29)
13Shutter Button (P30)
14Camera ON/OFF Switch (P11)
15 Strap Eyelet
16Card Door (P18)
17[DIGITAL/V.OUT] Socket (P81, 83, 85)
18[DC IN] Socket (P83, 85)
•Please be sure to use genuine Panasonic AC adaptor (DMW-AC2; optional).
19Terminal Door
20 |
21 |
20 |
Battery Door (P17) |
|
21 |
Tripod Receptacle |
|||
|
|
|||
|
|
|
• When you use a tripod, make sure the |
|
|
|
|
tripod is stable with the camera |
|
|
|
|
attached to it. |
10
VQT0Q72
Preparation
Quick Guide
This is the overview of the procedure to record and playback pictures with the camera. For each operation, be sure to refer to the corresponding pages.
1 Insert the batteries. (P12, 17)
2 Turn the camera on to take pictures.
•Set the clock. (P22)
•Select the type of battery in use on [BATTERY TYPE] in the [SETUP] menu. (P23)
•When you do not use the card (optional), you can record or play back pictures on the built-in memory (P19). Refer to P18 when you use a card.
2 |
SCN |
1 |
|
SCN |
|
OFF ON
1 Set the mode dial to [ ].
].
2Press the shutter button to take pictures. (P30)
3 Play back the pictures.
1 SCN
2 SCN
1 Set the mode dial to [ ].
].
2 Select the picture you want to view.
(P48)
11
VQT0Q72
Preparation
About the Batteries
∫Usable batteries
AA Oxyride batteries (supplied)¢
AA Alkaline batteries (optional)
AA Rechargeable Ni-MH (nickel-metal hydride) batteries (optional)
¢The oxyride battery is a new type of non-rechargeable battery developed by Panasonic.
Oxyride batteries have higher power and more stability to handle the higher load on the batteries, compared to conventional alkaline batteries.
Oxyride batteries are specially designed to use with products as digital still cameras, that place more load on the batteries.
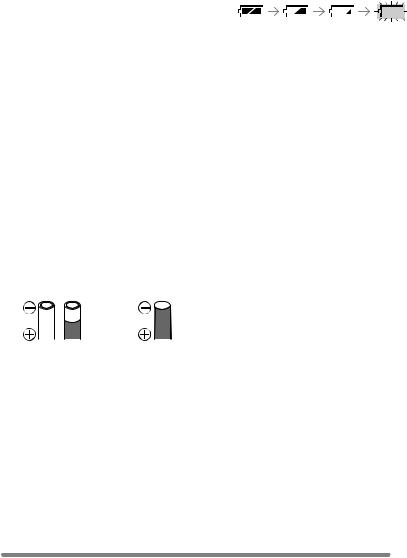
•It is necessary to select the type of batteries according to the batteries you use. Select the type of batteries in use on [BATTERY TYPE] in the [SETUP] menu (P23). The setting can be distinguished by the colour of the battery indication (blue or white).
–The battery indication does not appear when you use the camera along with the AC adaptor (DMW-AC2; optional).
2304 


5
A: When oxyride batteries are selected
The battery indication turns blue.
B: When alkaline/Ni-MH batteries are selected
The battery indication turns white.
•We recommend that you use Panasonic batteries.
•The performance of the batteries may vary depending on brand or storage terms/condition of the batteries.
•The performance of the batteries may be temporarily deteriorated in low temperature conditions (10oC or less). However, the performance of the batteries is recovered when the batteries become close to the ambient temperature.
•Depending on the temperature or the conditions, the camera may not be operated properly or the battery indication may not be displayed correctly and the batteries may become empty without indication. However, this is not a malfunction.
•We recommend turning the camera off frequently while recording to maintain the power of the batteries for a long time. If you will be using the camera for a long time, using rechargeable Ni-MH batteries is more practical.
•The exhausted batteries may recover some performance when they are left for a period of time. However, they cannot be used for a long time. Be sure to replace with new batteries.
12
VQT0Q72
Preparation
∫ Unusable batteries
Manganese |
Lithium batteries |
batteries |
|
|
|
Nickel batteries |
Ni-Cd batteries |
|
|
•Operations by using the batteries listed above are not guaranteed. If the batteries listed above are used, leakages can result and the following malfunctions can occur;
–Remaining battery power may not be displayed accurately.
–The camera may not be turned on.
–Data written to the built-in memory or the card can be damaged resulting in the loss of photos.
∫Shapes of batteries that cannot be used
•Batteries with unusual shapes cause leakage, generation of heat or explosion if they are inserted in the camera.
•Some commercial batteries have partially or entirely peeled outer coverings. Never use these batteries. (Refer to the illustration below.)
• All or part of the |
• - polarity is flat |
seal of batteries |
|
are peeled off |
|
|
|
∫ Battery indication
The remaining battery power appears on the screen. [It does not appear when you use the camera along with the AC adaptor (DMW-AC2; optional).]
•The battery indication turns red and blinks. (If the LCD monitor is turned off, the status indicator blinks.)
•Replace with new batteries or fully charged Ni-MH batteries.
∫ Proper Care and Handling of the
Batteries
If you mishandle the batteries, leakage, generation of heat and fire or explosion may occur. Observe the following cautions;
•Do not subject the batteries or the battery contacts to any moisture.
•Do not peel off or scratch the covered seal.
•Do not drop, hit or do anything that causes impact to the batteries.
•Do not use batteries that show signs of leakage, deformation, discolouration or other defects.
•Do not store batteries in high humidity or high temperature environments.
•Keep batteries away from children.
•When you replace batteries, always use two of the same type.
•If you will not be using the camera for a long time, remove the batteries.
•Batteries may become warm soon after you use the camera. To remove the batteries, turn the camera off and then wait until the battery temperature becomes lower.
13
VQT0Q72

Preparation
•As the ambient temperature is low (10oC or less), the performance of the batteries will be deteriorated and the available recording/playback time becomes extremely short. This is normal. Alkaline batteries significantly show such tendencies. In such cases, remove the batteries and warm them in your pocket. Take special care not to allow the contacts to come into contact with metal objects or a pocket warmer in your pocket.
•If an oil stain or any foreign substance is found on the battery contacts, it could prevent the batteries from making good electrical contact. The available recording/ playback time may become extremely short. Before inserting the batteries, clean the battery contacts with soft, dry cloth.
If any leakage from the batteries is noted, remove the batteries, thoroughly wipe off the battery electrolyte in the battery housing and then insert new batteries or fully charged Ni-MH batteries.
If leaked battery electrolyte contacts your hand or cloth, wash with water. Battery electrolyte may cause loss of sight if it comes in contact with your eyes. In such cases, do not rub at your eyes. Immediately wash your eyes with pure water and consult a doctor.
∫ Ni-MH Batteries (Nickel Metal Hydride)
Ni-MH batteries can be used when you charge them with the exclusive charger. However, wrong handling of the batteries may cause leakage, generation of heat, fire or explosion. Please be aware of the following issues:
•If any oxidation or foreign substance is found on the battery contacts, the batteries may not be charged correctly. Clean battery contacts and terminals of the recharger with a soft, dry cloth.
•Newly purchased Ni-MH batteries or those which have not been used for a long period of time may not reach full capacity after one charge. This is a feature of the batteries, not a malfunction. The overall performance will increase after repeating discharge/charge cycles several times.
•Batteries should be used to the point when the camera stops working before recharging. If you charge batteries without discharging enough, it can cause “memory effect”, whereby the overall operating time can be decreased.
•If “memory effect” occur, use the batteries until the camera stops working and then recharge them fully. Repeat the discharge/ charge cycles several times. The capacity of the batteries will be recovered.
•Ni-MH batteries will naturally discharge and the capacity will become lower even if they are not in use.
•Once Ni-MH batteries have reached full charge, do not charge them continuously.
•Do not peel off or scratch the covered seal.
•Read the operating instructions for the battery charger.
Ni-MH batteries have a limited life. The capacity of the batteries decreases gradually over time. If available time seems much shorter, the battery life may be expired. Purchase new batteries.
14
VQT0Q72

Preparation
•The battery life differs depending on the condition stored or used or environment.
When you do not use batteries for a long period of time
•When the batteries are left inserted in the camera, the batteries are discharged since a weak electric current is passed even if the camera is turned off. If you leave the batteries, they will excessively discharge and may become unusable even if they are recharged.
•When you store the batteries for a long period of time, we recommend charging the batteries once a year and removing them from the camera for storage after the batteries are completely discharged.
∫ The battery life
The number of recordable pictures by CIPA standard (In normal picture mode)
•CIPA is an abbreviation of
[Camera & Imaging Products Association].
Batteries Used |
Number of recordable |
|
pictures |
||
|
||
Panasonic Oxyride |
Approx. 215 pictures |
|
batteries (supplied |
(Approx. 107 min.) |
|
or optional) |
|
|
|
|
|
Panasonic Alkaline |
Approx. 140 pictures |
|
batteries (optional) |
(Approx. 70 min.) |
|
|
|
|
Fully charged |
Approx. 370 pictures |
|
Panasonic Ni-MH |
(Approx. 185 min.) |
|
batteries (optional) |
|
|
|
|
Recording conditions by CIPA standard
•Temperature: 23°C/
Humidity: 50% when LCD monitor is on.
•Using Panasonic’s SD Memory Card (16 MB)¢
•Starting recording 30 seconds after the camera is turned on.
•Recording once every 30 seconds, with full flash every other recording.
•Rotating the zoom lever towards Tele to Wide and vice versa in every recording.
•Turning the camera off every
10 recordings./Leaving the camera until the batteries are cooled down.
¢The card is not supplied.
The number of recordable pictures varies depending on the recording interval time.
If the recording interval time becomes longer, the number of recordable pictures decreases.
(e.g., when taking pictures every
2 minutes: about 1/4 of the amount when recording once every
30 seconds)
15
VQT0Q72

Preparation
Recordable number in low temperatures (In normal picture mode)
(Temperature: 0°C/Other recording conditions comply with CIPA standard)
Batteries Used |
Number of recordable |
|
pictures |
||
|
||
Panasonic Oxyride |
Approx. 35 pictures |
|
batteries (supplied |
(Approx. 17 min.) |
|
or optional) |
|
|
|
|
|
Panasonic Alkaline |
Approx. 30 pictures |
|
batteries (optional) |
(Approx. 15 min.) |
|
|
|
|
Fully charged |
Approx. 340 pictures |
|
Panasonic Ni-MH |
(Approx. 170 min.) |
|
batteries (optional) |
|
|
|
|
•Please note that the performance of the oxyride batteries and the alkaline batteries significantly decreases in low temperature conditions.
Playback time
Batteries Used |
Continuous playback |
|
|
||||||||||||||||||||||||||||
time |
|
|
|||||||||||||||||||||||||||||
|
|
|
|
|
|
|
|
|
|
|
|
|
|
||||||||||||||||||
Panasonic Oxyride |
Approx. 400 min. |
|
|
||||||||||||||||||||||||||||
batteries (supplied |
|
|
|
|
|
|
|
|
|
|
|
|
|
|
|
|
|
|
|
|
|||||||||||
or optional) |
|
|
|
|
|
|
|
|
|
|
|
|
|
|
|
|
|
|
|
|
|||||||||||
|
|
|
|
||||||||||||||||||||||||||||
Panasonic Alkaline |
Approx. 390 min. |
|
|
||||||||||||||||||||||||||||
batteries (optional) |
|
|
|
|
|
|
|
|
|
|
|
|
|
|
|
|
|
|
|
|
|||||||||||
|
|
|
|
||||||||||||||||||||||||||||
Fully charged |
Approx. 470 min. |
|
|
||||||||||||||||||||||||||||
Panasonic Ni-MH |
|
|
|
|
|
|
|
|
|
|
|
|
|
|
|
|
|
|
|
|
|||||||||||
batteries (optional) |
|
|
|
|
|
|
|
|
|
|
|
|
|
|
|
|
|
|
|
|
|||||||||||
|
|
|
|
|
|
|
|
|
|
|
|
|
|
|
|
|
|
|
|
|
|
|
|
|
|
|
|
|
|
|
|
|
|
|
|
|
|
|
|
|
|
|
|
|
|
|
|
|
|
|
|
|
|
|
|
|
|
|
|
|
|
|
|
|
|
|
|
|
|
|
|
|
|
|
|
|
|
|
|
|
|
|
|
|
|
|
|
|
|
|
|
|
|
|
|
|
|
|
|
|
|
|
|
|
|
|
|
|
|
|
|
|
|
|
|
|
|
|
|
|
|
|
|
|
|
|
|
•Recordable number/playback time varies depending on the storage condition or use condition.
•Recordable number/playback time varies depending on the brand and the type of the batteries used.
•We recommend using the power save mode (P23) or economy mode (P53) to maintain the battery power or turning the camera off frequently while recording.
16
VQT0Q72

Preparation
Inserting/Removing the Batteries
•Check that the camera is turned off and that the lens is retracted.
•Use oxyride batteries (supplied), alkaline batteries (optional) or Ni-MH batteries (optional).
1 Slide the battery door to open it.
3 1 Close the battery door.
2Slide the battery door to the end and then close it firmly.
2 Insert the batteries observing the direction of the + and - polarities.
•Select the type of battery in use on [BATTERY TYPE] in the [SETUP] menu. (P23)
•If you will not be using the camera for a long time, remove the batteries.
•When new batteries or fully charged Ni-MH batteries have been inserted for more than 3 hours, the clock setting is stored (in the camera) for at least
3 months even if the batteries are removed. (The storing time may be shorter if the batteries are not charged sufficiently.)
If more than 3 months has passed, the clock setting will be lost. In this case, set the clock again. (P22)
•Do not remove the card and the batteries during an access. The data on the built-in memory or the card may be damaged. (P20)
•Remove the batteries after the LCD monitor and the status indicator (green) are turned off. Otherwise, the settings on the camera may not be stored properly.
17
VQT0Q72

Preparation
Inserting/Removing the Card (Optional)
• Check that the camera is turned off and that the lens is retracted.
• Prepare SD Memory Card (optional) or MultiMediaCard (optional).
• When you do not use the card, you can record or play back pictures on the built-in memory. (P19)
1 Slide the card door to open it.
•The card and the data may be damaged if it is inserted or removed while the camera is on.
•We recommend using Panasonic’s SD Memory Card. (Use only the genuine SD card with SD Logo.)
2Insert:
Insert the card fully until it clicks and it is locked with the label facing the back of the camera.
Remove:
Push the card until it clicks, then pull the card out upright.
•Check the direction of the card.
•Do not touch the connection terminals on the back side of the card.
•The card may be damaged if it is not fully inserted.
3 1 Close the card door.
2Slide the card door to the end and then close it firmly.
•If the card door cannot be completely closed, remove the card and insert it again.
18
VQT0Q72
Preparation
About the Built-in Memory/the Card
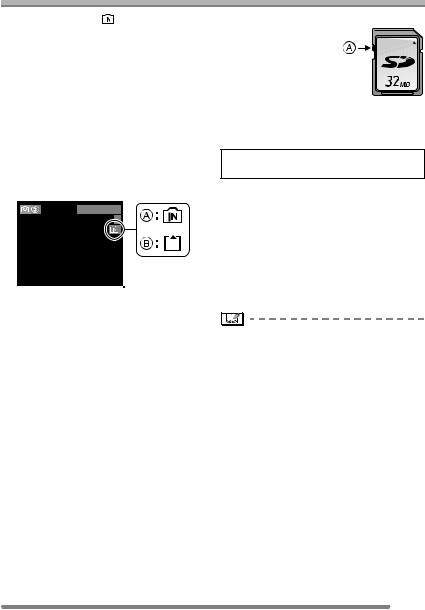
∫ Built-in Memory [ |
|
] |
SD Memory Card |
|
|||
When you do not use the card, you can |
|
||
record or play back pictures on the |
|
||
built-in memory. |
|
||
(The capacity of the built-in memory is |
|
||
about 14 MB.) |
|
||
∫ Card [  ]
]
When you use the card, you can record or play back pictures on it.
(The built-in memory cannot be used when the card is inserted.)
Icons displayed on the screen:
2304 


5
A: When the built-in memory is used B: When the card is used
•Picture data recorded onto the built-in memory or the card can be copied from the built-in memory to the card and vice versa. (P78)
∫SD Memory Card (optional) and MultiMediaCard (optional)
The SD Memory Card and MultiMediaCard are small, lightweight, removable external cards. The reading/writing speed of an SD Memory Card is fast. The SD Memory Card is equipped with a Write-Protect switch A that can inhibit writing and formatting a card. (When the switch is slid to the [LOCK] side, it is not possible to write or delete data on the card and format it. When the switch is unlocked, these functions become available.)
On this unit, you can use SD Memory Cards of the following capacity (from 8 MB to 1 GB).
8 MB, 16 MB, 32 MB, 64 MB, 128 MB, 256 MB, 512 MB, 1 GB (Maximum)
Please confirm the latest information on the following website.
http://panasonic.co.jp/pavc/global/cs
(This Site is English only.)
•This unit supports SD Memory Cards formatted in FAT12 system and FAT16 system based on SD Memory Card Specifications.
•The reading/writing speed of a MultiMediaCard is slower than an SD Memory Card. When a MultiMediaCard is used, the performance of certain features may be slightly slower than advertised.
•After recording motion images using the MultiMediaCard, the card access indication may appear for a while, but this is not a malfunction.
•Keep the Memory Card out of reach of children to prevent swallowing.
19
VQT0Q72

Preparation
∫Access to the built-in memory or the card
When pictures are being recorded onto the built-in memory (or the card), the access indication lights red.
2304 


5
A: When the built-in memory is used B: When the card is used
When the access indication lights, pictures are being read or deleted, or the built-in memory (or the card) is formatted, do not:
•turn the camera off.
•remove the batteries or the card (if used).
•shake or impact the camera.
•disconnect the AC adaptor (DMW-AC2; optional).
(when using the AC adaptor)
The card and the data may be damaged and the camera may not operate normally.
•The built-in memory (about 14 MB) can be used as a temporary memory instead of the card, when the capacity of the card becomes full.
•The data on the built-in memory or the card may be damaged or lost due to electromagnetic wave, static electricity or breakdown of the camera or the card. We recommend storing precious data to the PC or other.
•The access time on the built-in memory may become longer than the access time on the card. (Max. about 7 sec.)
•Do not format the built-in memory or the card with a PC. Please use the camera to format the built-in memory and the card. (P79)
20
VQT0Q72
Preparation
Approximate number of recordable pictures and the size
|
Picture size |
|
2304k1728 |
|
1600k1200 |
|
|
1280k960 |
|
|
640k480 |
|
1920k1080 |
|
|||||||||||||||||||||||||||||||
|
|
|
|
|
|
|
|
(HDTV) |
|
||||||||||||||||||||||||||||||||||||
|
|
|
|
|
|
|
|
|
|
|
|
|
|
|
|
|
|
|
|
|
|
|
|
|
|
|
|
|
|
|
|
|
|
|
|
|
|
|
|
|
|||||
Reference for number |
|
|
Approx. |
|
Approx. |
|
|
Approx. |
|
|
Approx. |
|
Approx. |
|
|||||||||||||||||||||||||||||||
|
of pixels |
|
|
|
|
|
|
4M pixels |
|
2M pixels |
|
1.3M pixels |
|
|
0.35M pixels |
|
2M pixels |
|
|||||||||||||||||||||||||||
|
Quality |
|
|
|
|
|
|
|
|
|
|
|
|
|
|
|
|
|
|
|
|
|
|
|
|
|
|
|
|
|
|
|
|
|
|
|
|
||||||||
|
|
|
|
|
|
|
|
|
|
|
|
|
|
|
|
|
|
|
|
|
|
|
|
|
|
|
|
|
|
|
|
|
|
|
|
|
|||||||||
|
|
|
|
|
|
|
|
|
|
|
|
|
|
|
|
|
|
|
|
|
|
|
|
|
|
|
|
|
|
|
|
|
|
|
|
|
|||||||||
Built-in Memory |
8 |
|
15 |
|
14 |
|
27 |
|
22 |
|
40 |
|
|
68 |
111 |
|
13 |
|
|
25 |
|
||||||||||||||||||||||||
(Approx. 14 MB) |
|
|
|
|
|
|
|
|
|
|
|
||||||||||||||||||||||||||||||||||
|
|
|
|
|
|
|
|
|
|
|
|
|
|
|
|
|
|
|
|
|
|
|
|
|
|
|
|
|
|
|
|
||||||||||||||
|
|
|
|
16 |
MB |
8 |
|
16 |
|
14 |
|
28 |
|
22 |
|
41 |
|
|
69 |
113 |
|
13 |
|
|
25 |
|
|||||||||||||||||||
|
|
|
|
32 |
MB |
17 |
|
33 |
|
31 |
|
59 |
|
47 |
|
86 |
|
|
145 |
236 |
|
28 |
|
|
54 |
|
|||||||||||||||||||
SD |
64 |
MB |
35 |
|
69 |
|
63 |
|
121 |
96 |
|
176 |
|
298 |
484 |
|
58 |
|
|
110 |
|
||||||||||||||||||||||||
Memory |
|
|
128 MB |
71 |
|
139 |
|
128 |
244 |
195 |
|
356 |
|
602 |
979 |
|
118 |
|
223 |
|
|||||||||||||||||||||||||
Card |
|
|
256 MB |
139 |
272 |
|
250 |
476 |
381 |
|
693 |
|
1173 |
1906 |
231 |
|
435 |
|
|||||||||||||||||||||||||||
|
|
|
|
|
|
|
|
|
|
|
|||||||||||||||||||||||||||||||||||
|
|
|
|
|
|
512 MB |
277 |
539 |
|
495 |
944 |
755 |
|
1373 |
|
2324 |
3777 |
457 |
|
863 |
|
||||||||||||||||||||||||
|
|
|
|
1 |
GB |
554 |
1079 |
991 |
1889 |
1511 |
2748 |
|
4650 |
7557 |
916 |
|
1727 |
|
|||||||||||||||||||||||||||
|
|
|
|
|
|
|
|
|
|
|
|
|
|
|
|
|
|
|
|
|
|
|
|
|
|
|
|
|
|
|
|
|
|
|
|
|
|
|
|
|
|
|
|
|
|
|
|
|
|
|
|
|
|
|
|
|
|
|
|
|
|
|
|
|
|
|
|
|
|
|
|
|
|
|
|
|
|
|
|
|
|
|
|
|
|
|
|
|
|
|
|
•If you select a larger picture size, you can print pictures clearly. When you select a smaller picture size, you can record more pictures.
•The numbers are approximations. (If you mix Fine and Standard quality, the number of recordable pictures changes.)
•The number of recordable pictures varies depending on subjects.
•The remaining number of recordable pictures displayed on the screen is an approximation.
21
VQT0Q72

Preparation
Setting Date/Time (Clock Set)
∫ Initial setting
The clock is not set when the camera is shipped. When you turn the camera on, the following screen appears.
PLEASE SET THE CLOCK
 CLOCK SET MENU
•When pressing the [MENU] button, the screen shown in step 1 appears.
•The screen disappears in about
5 seconds. Turn the camera on again or select [CLOCK SET] on the [SETUP] menu and then set the clock. (P23)
2 Select [D/M/Y], [M/D/Y] or [Y/M/D].
 CLOCK SET
10:00111.DEC.2005
D/M/Y
SELECT SET
SET EXITMENU
•Close the menu by pressing the [MENU] button 2 times after finishing the setting.
•Check if the clock setting is correct, after turning the camera off and on.
1 Set date and time.
 CLOCK SET
00 : 00 11. JAN .2005 
D/M/Y
SELECT SET
SET EXITMENU
•2/1: Select the desired item.
•3/4: Set date and time.
•When new batteries or fully charged Ni-MH batteries have been inserted for more than 3 hours, the clock setting will be stored (in the camera) for at least
3 months even if the batteries are removed. (The storing time may be shorter if the batteries are not charged sufficiently.)
If more than 3 months has passed, the clock setting will be lost. In this case, set the clock again.
•You can set the year from 2000 to 2099. The 24-hour system is used.
•If you do not set the date, the date cannot be printed when you go to a photo studio for digital printing.
•For the date print setting, refer to P72.
22
VQT0Q72

Preparation
About the Setup Menu
•Set the items if necessary. (Refer to P24– 26 for each menu item.)
1 Turn the camera on.
OFF ON
•The menu items depend on the mode selected with the mode dial (P29). In
this page, the items in normal picture mode [ ] are indicated.
2 Press the [MENU] button.
|
|
REC 1/2 |
SETUP |
|
|
W.BALANCE |
AUTO |
MENU |
|
SENSITIVITY |
AUTO |
|
|
PICT.SIZE |
2304 |
|
|
QUALITY |
|
|
|
AF MODE |
|
SELECT EXITMENU
4 Select the desired item.
|
|
SETUP |
1/3 |
BATTERY TYPE |
|
||
MONITOR |
n0 |
|
|
AUTO REVIEW |
OFF |
|
|
POWER SAVE |
1SEC. |
||
BEEP |
|
3SEC. |
|
SELECT |
SET |
ZOOM |
|
EXITMENU |
|||
5 Select the desired value.
|
|
SETUP |
1/3 |
BATTERY TYPE |
|
||
MONITOR |
n0 |
|
|
AUTO REVIEW |
OFF |
|
|
POWER SAVE |
1SEC. |
||
BEEP |
|
3SEC. |
|
SELECT |
SET |
ZOOM |
|
EXITMENU |
|||
Be sure to press 1 at the end to store the setting.
•Close the menu by pressing the [MENU] button after finishing the setting. In recording mode, you can also close the menu by pressing the shutter button halfway.
3 Select the [SETUP] Menu.
REC |
SETUP 1/3 |
BATTERY TYPE |
|
MONITOR |
n0 |
AUTO REVIEW |
1SEC. |
POWER SAVE |
2MIN. |
BEEP |
|
SELECT |
EXITMENU |
•When rotating the zoom lever A toward T or W, the page of the menu screen can be forwarded or reversed.
23
VQT0Q72

Preparation
 BATTERY TYPE
Select the type of battery in use from the following 2 items.
[ ALKALINE (LR6)/Ni-MH]:
Alkaline batteries or Ni-MH batteries
[ OXYRIDE (ZR6)]:
Oxyride batteries
•If the item on this setting is not selected according to the type of battery in use, the battery indication cannot be displayed correctly.
•The setting on the type of battery also affects simple mode [  ].
].
 MONITOR
Adjust the brightness of the LCD monitor in 7 steps.
 AUTO REVIEW
[OFF]: The recorded picture does not automatically appear.
[1SEC.]: The recorded picture automatically appears on the screen for about 1 second.
[3SEC.]: The recorded picture automatically appears on the screen for about 3 seconds.
[ZOOM]: The recorded picture automatically appears on the screen for about 1 second. Then it is enlarged 4 times and appears for about 1 second. This mode is useful for confirming focus. Pictures in burst mode, auto bracket are not enlarged even if [ZOOM] is selected.
•In motion image mode [ ], auto review function is not activated.
•When pictures are recorded in simple
mode [ ] (P34), any speed ([ |
|
], |
|||||||||
[ |
|
] and [ |
|
|
|
]) on burst mode (P46) or |
|||||
|
|
|
|
||||||||
auto bracket [ |
|
|
|
|
] (P44), the auto review |
||||||
function is activated regardless of the setting on the auto review function. (The picture is not enlarged.)
•The setting for the auto review function is disabled in motion image mode, burst mode, auto bracket.
 POWER SAVE
(Except for the economy mode) [1MIN.]/[2MIN.]/[5MIN.]/[10MIN.]:
The power save mode is activated (the camera is automatically turned off to save the battery life) if the camera has not been used for the time selected on the setting.
•Press the shutter button halfway or turn the camera off and on to cancel the power save mode.
•When using the AC adaptor (DMW-AC2; optional)/connecting to a PC or a printer/ recording motion images/playing back motion images/during Slide Show, the power save mode is not activated.
•In simple mode [  ] (P34), the setting for the power save mode is fixed to [2MIN.].
24
VQT0Q72

Preparation

 ECONOMY (Economy mode only)
The battery life is saved by turning the LCD monitor off automatically while the camera is not in use. (P53) (Press any button to recover from the economy mode.) [LEVEL 1]: If you do not operate the
camera for about 15 seconds, the LCD monitor is turned off.
[LEVEL 2]: If you do not operate the camera for about 15 seconds, or if you do not operate the camera for about 5 seconds after you take a picture, the LCD monitor is turned off.
•The status indicator lights while the LCD monitor is turned off.
•In the economy mode, [POWER SAVE] is fixed to [2MIN.].
|
|
|
|
|
BEEP |
[ |
]: No operational sound |
|
[ |
]: Soft operational sound |
|
[ |
]: Loud operational sound |
|
•The operational sound setting also affects simple mode [  ].
].
 CLOCK SET
Change date and time. (P22)


 NO.RESET
Set this when you want to start the file number of the picture from 0001 on the next recording. (The folder number is updated, and the file number starts from 0001.)
•The folder number can be assigned from 100 to 999.
When the folder number reaches 999, you cannot reset the file number. We recommend formatting the built-in memory or the card after saving the data on a PC or elsewhere.
•To reset the folder number to 100, format the built-in memory or the card first and then use this function to reset the file number.
After that, the reset screen for the folder number appears. Select [Yes] to reset the folder number.
•Refer to P84 for detailed information about the file number and the folder number.
•The file number reset also affects simple mode [  ].
].
 RESET
RESET
The settings on the [REC] or the [SETUP] menu are reset to the initial settings.
•The setting on [ROTATE DISP.] in the [PLAY] mode menu is also reset. (P70)
•The settings on the type of battery, the folder number and the clock setting are not changed.


 USB MODE
Set the USB communication system.
•Set before connecting to a PC or a printer. (P82)
 VIDEO OUT
(Playback mode only) (P81)
[NTSC]: Video output is set to NTSC system.
[PAL]: Video output is set to PAL system.
25
VQT0Q72

Preparation
 SCENE MENU
[OFF]: Scene menu does not appear when setting the mode dial to
[
 ] or [
 ] and the camera is operated in the scene mode currently selected. If you change the scene mode, press the [MENU] button to display the scene menu and then select the desired scene mode.
[AUTO]: Scene menu appears automatically when setting the mode dial to [
 ] or [
 ]. Select the desired scene mode.


 LANGUAGE
Set to the language on the menu screen from the following languages.
Set to the desired language with 3/4 and store it with 1.
[ENGLISH]: English
[DEUTSCH]: German
[FRANÇAIS]: French
[ESPAÑOL]: Spanish [ITALIANO]: Italian
[


 ]: Russian
[  ]: Chinese (Traditional)
•When you set to other language by
mistake, select [

 ] from the menu icons to set the desired language.
•The language setting also affects simple mode [ ].
].
26
VQT0Q72
Preparation
About the LCD Monitor
∫ Selecting the screen to be used
DISPLAY
In recording mode (P30)
2304 |
5 |
A LCD monitor (LCD)
Press the [DISPLAY] button to change the display.
•When the menu screen appears, the [DISPLAY] button is not activated. During 9 pictures multi playback (P49) or playback zoom (P50), the indications on the screen can be turned on and off.
In simple mode [ ] (P34)
5
BACKLIGHT
B Normal display
C No display
D Normal display
E Display with histogram
F No display (Recording guide line) G No display
¢Histogram
In playback mode (P48)
2304 |
100_0001 |
1/5 |
2304 |
100_0001 |
1/5 |
H Normal display
IDisplay with recorded information and histogram
J No display
27
VQT0Q72

Preparation
∫ Recording guide line
When you align the subject on the horizontal and vertical guide lines or the cross point of these lines, you can take pictures with well-designed composition by viewing the size, the slope and the balance of the subject.
∫ Histogram
•A histogram is a graph that displays brightness along the horizontal axis (black to white) and the number of pixels at each brightness level on the vertical axis.
•It allows the camera user to easily check the way a picture is being exposed.
•It is very useful if manual adjustments of the lens aperture and shutter speed are available, especially in those situations where automatic exposure may be difficult due to uneven lighting. Using the histogram feature will allow you to get the best performance from the camera.
A When the values are concentrated to the left, the picture is under exposed.
B When the values in the histogram are distributed evenly, the exposure is adequate and the brightness is well-balanced.
C When the values are concentrated to the right, the picture is over exposed.
Example of histogram
|
|
|
2304 |
|
|
|
|
|
|
100_0001 |
|
||
|
|
|
|
|
1/5 |
|
|
F2.8 1/200 |
|
|
|
||
|
|
|
|
|
||
|
ISO100 |
|
AUTO |
|||
10:00 |
1.DEC.2005 |
|
|
|||
|
|
|
2304 |
|
|
|
|
|
|
100_0001 |
|
||
|
|
|
|
|
1/5 |
|
|
F2.8 1/100 |
|
|
|
||
|
|
|
|
|
||
|
ISO100 |
|
AUTO |
|||
10:00 |
1.DEC.2005 |
|
|
|||
|
|
|
2304 |
|
|
|
|
|
|
100_0001 |
|
||
|
|
|
|
|
1/5 |
|
|
F2.8 1/50 |
|
|
|
|
|
|
|
|
|
|
|
|
|
|
ISO100 |
|
AUTO |
||
10:00 |
1.DEC.2005 |
|
|
|||
|
|
|
|
|
|
|
A Under Exposed B Properly Exposed C Over Exposed ¢Histogram
•When you take pictures with the flash or in dark places, the histogram is displayed in orange because the recorded picture and the histogram do not match each other.
•The histogram does not appear when in
motion image mode [ ], during multi playback and playback zoom.
•The histogram in the recording mode is an approximation.
•The histogram in recording and playback may not match each other.
•The histogram in the camera does not match the one displayed in image editing software used with a PC, etc.
28
VQT0Q72

Recording pictures (basic)
Taking Pictures
∫ The Mode Dial
This camera has a mode dial to suit recording of many kinds of scenes. Select the desired mode and enjoy the variety of recording.
The mode dial can be rotated 360o. Rotate it slowly and securely to adjust to each mode. (Do not adjust the mode dial to the space between the marks of modes.)
2
1  SCN
SCN
SCN
 : Normal picture mode (P30)
Use this mode for usual recording.
 : Economy mode (P53)
This mode allows you to take pictures reducing the battery power consumption.
 : Macro mode (P53)
This mode allows you to take a picture closely focusing on the subject.
 : Motion image mode (P54)
This mode allows you to record motion images.

 : Scene mode 1

 : Scene mode 2 (P56)
This mode allows you to take pictures depending on the recording scenes.
This mode also allows you to set [SCENE MENU] on the [SETUP] menu to [OFF] and set the scene modes which are frequently used to [
 ] and [
 ] on the mode dial.
It is convenient because you can select the scene mode quickly and minimise the operation.
 : Simple mode (P34)
This is the recommended mode for beginners.
 : Playback mode (P48)
This mode allows you to play back recorded pictures.
29
VQT0Q72

Recording pictures (basic)
∫ Normal recording
3 Take a picture.
The camera automatically sets the shutter speed and the aperture value according to the brightness of the subject.
1 1 Turn the camera on.
2Select normal picture mode [ ].
].
2 |
SCN |
1 |
|
SCN |
|
OFF ON
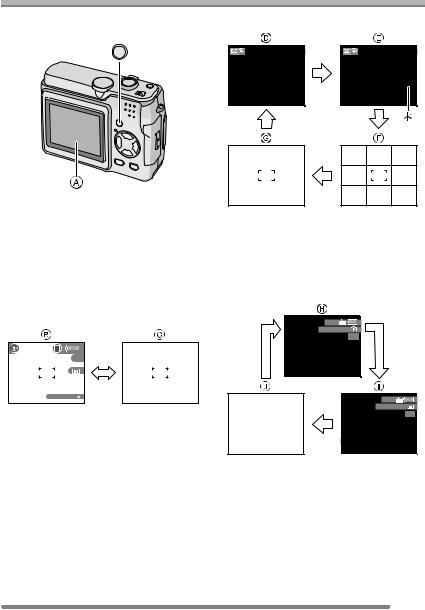
2 Aim the AF area 1 to the point you want to focus and then press the shutter button halfway.
• B: Press the shutter button fully to take the picture.
|
When the |
When the |
|
subject is not |
subject is |
|
focused |
focused |
Focus |
Blink (green) |
On (green) |
indication |
|
|
|
|
|
AF area |
Turns from |
Turns from |
|
white to red |
white to green |
|
|
|
Sound |
Beeps 4 times |
Beeps 2 times |
|
|
|
|
|
|
|
|
|
F2.8 1/25
•A: Press the shutter button halfway to focus.
•The focus indication 2 is lit and then the aperture value 3 and the shutter speed 4 are displayed.
30
VQT0Q72
 Loading...