


 Loading...
Service Source
Power Mac G4 (Mirrored Drive Doors)
© 2002 Apple Computer, Inc. All rights reserved.
Service Source
Take Apart
Power Mac G4 (Mirrored Drive Doors)
© 2002 Apple Computer, Inc. All rights reserved.
General Information
Overview
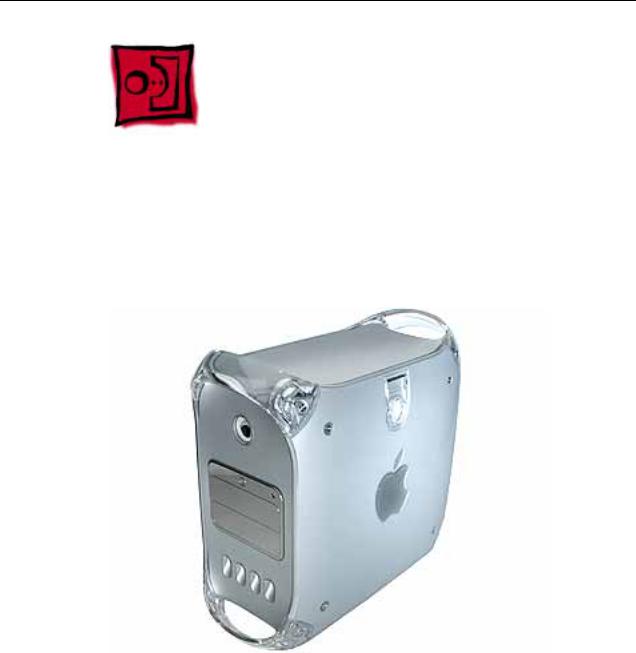
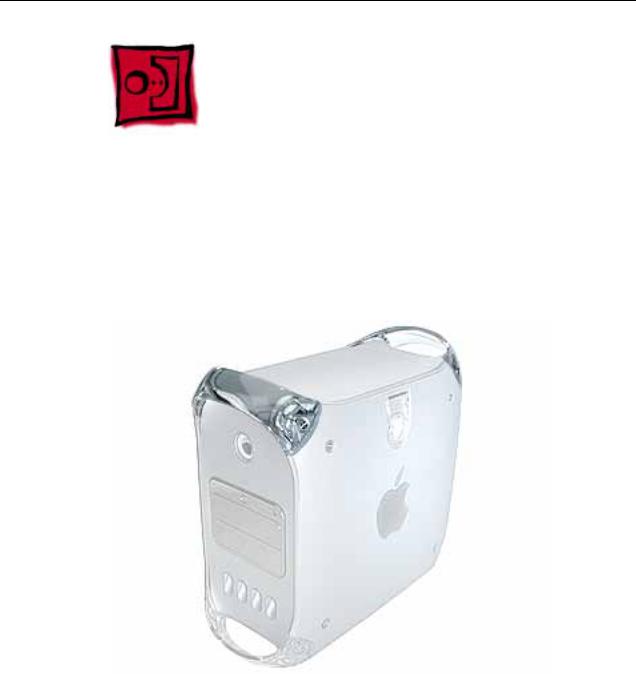
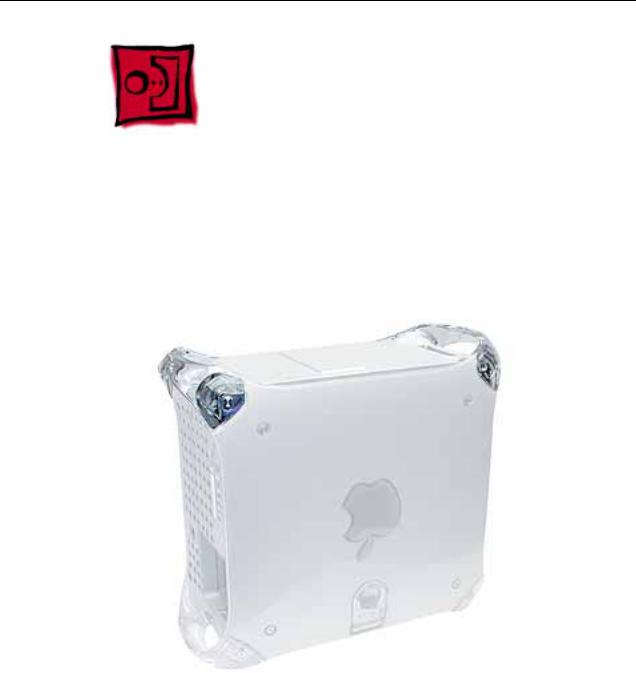
The identifying characteristics on the front of this Power Mac G4 (Mirrored Drive Doors) computer are its top speaker and mirrored optical drive bezel. Like the Power Mac G4 (QuickSilver and QuickSilver 2002) computers, this model also has a silver-colored case.
Tools
The following tools are required:
•#2 Phillips screwdriver
•#1 Phillips screwdriver
•T-10 Torx driver or 2.5 mm Allen wrench
•Small flat-blade screwdriver
•Needlenose pliers
Note: Magnetized tools are recommended to avoid dropping screws within the computer.
General Information |
Power Mac G4 (Mirrored) Take Apart - 1 |

Note: To organize the screws your remove from the computer, use a tray with divided compartments (such as a plastic ice cube tray).
Serial Number Location
The computer’s serial number is located on the back panel.
Before Opening the Computer
Warning: The power supply in this computer is a high-voltage component and should not be opened for any reason, even when the computer is off.
Warning: After shutting down the computer, you must wait a few minutes before servicing it to allow internal components to cool.
Important: The only way to shut off power completely to the computer and display is to disconnect their power plugs from the power source. Make sure the power cords to the computer and display are within easy reach.
Electrostatic Discharge (ESD) Precautions
Follow these steps to avoid damage from ESD before working inside the computer.
1.Shut down the computer.
2.Wait a few minutes to allow the computer’s internal components to cool.
3.Unplug all cables from the computer except the power cord.
4.Touch the metal PCI access covers on the back of the computer to discharge static electricity.
5.Unplug the power cord.
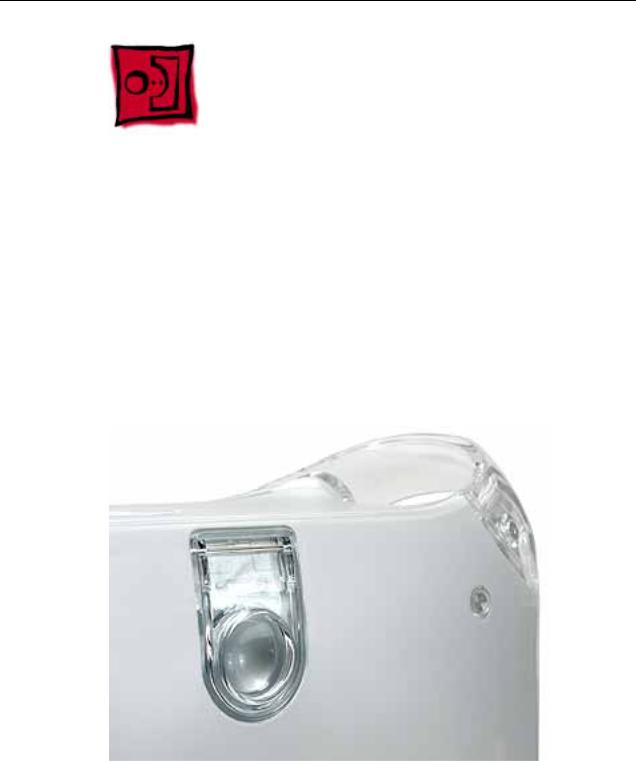
6.Lift the latch on the side of the computer. (If the latch will not lift, check that the security lock port and lockable cover latch in the back of the computer are not locked.)
7.Put on an ESD wrist strap.
8.To avoid static electricity building back up in your body, do not walk around the room until after you have finished working and closed the computer.
2 - Power Mac G4 (Mirrored) Take Apart |
General Information |
Opening the Computer
Tools
No tools are required for this procedure.
Preliminary Steps
No preliminary steps are required before you begin this procedure.
Procedure
1. Lift the latch to unlock the right side access panel.
2.Note: Gently lower the side panel onto a clean, ESD-safe mat to avoid scratching the case. Lower the side panel until it lies flat.
Note: Release the latch before returning the side panel to its upright closed position.
Opening the Computer |
Power Mac G4 (Mirrored) Take Apart - 3 |
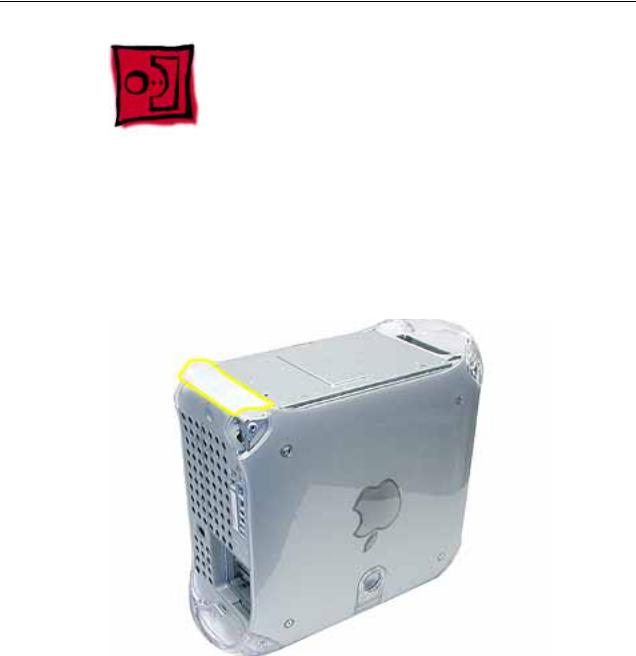
Top Handles
Tools
The only tool required for this procedure is a 2.5 mm Allen wrench.
Part Location
Preliminary Steps
There are no preliminary steps for this procedure.
4 - Power Mac G4 (Mirrored) Take Apart |
Top Handles |
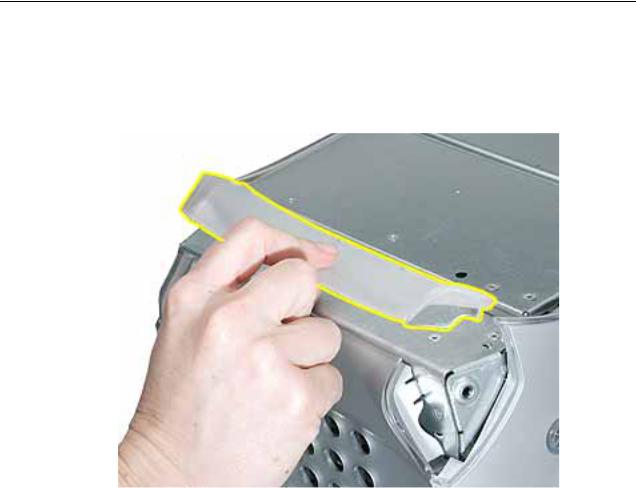
Procedure
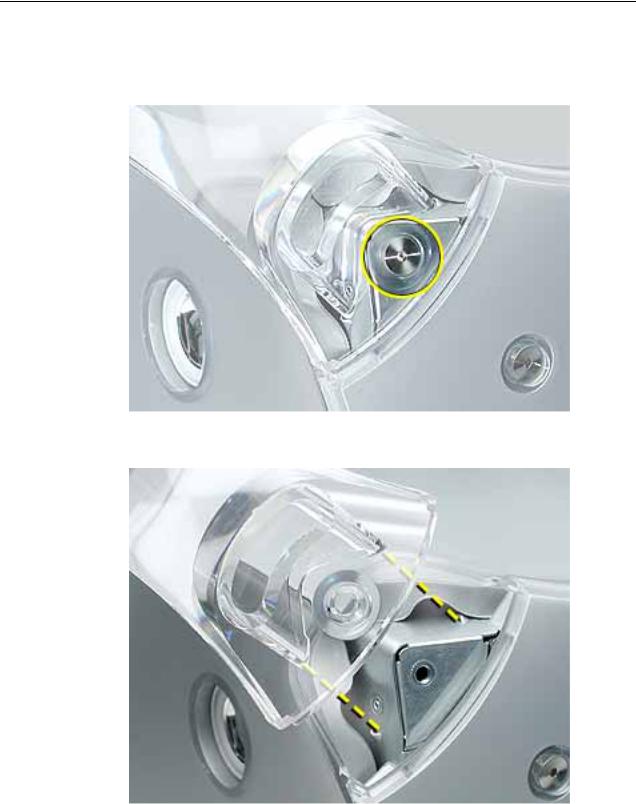
1. Remove the two Allen screws that secure the handle you are replacing.
2. Lift the handle from the computer.
Replacement Note: When replacing a handle, make sure the inner prongs fit inside the raised points on the computer.
Top Handles |
Power Mac G4 (Mirrored) Take Apart - 5 |
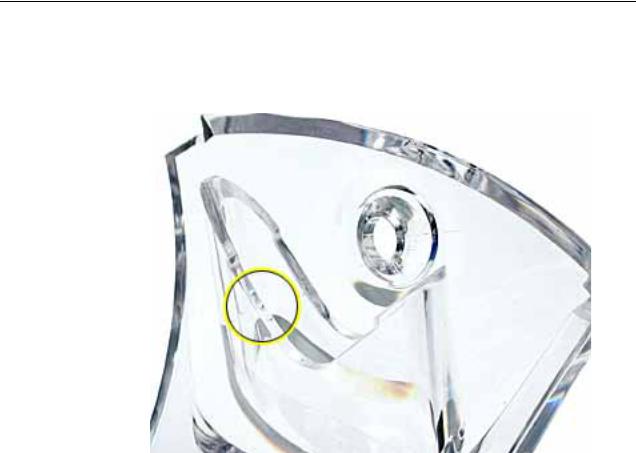
Replacement Note: When replacing a handle, make sure you orient the handle so the three tiny bumps are near the lower edge of the handle.The handle won’t fit properly if it is turned upside down. The top front and top rear handles are interchangeable.
6 - Power Mac G4 (Mirrored) Take Apart |
Top Handles |
Top Panel
Tools
No tools are required for this procedure.
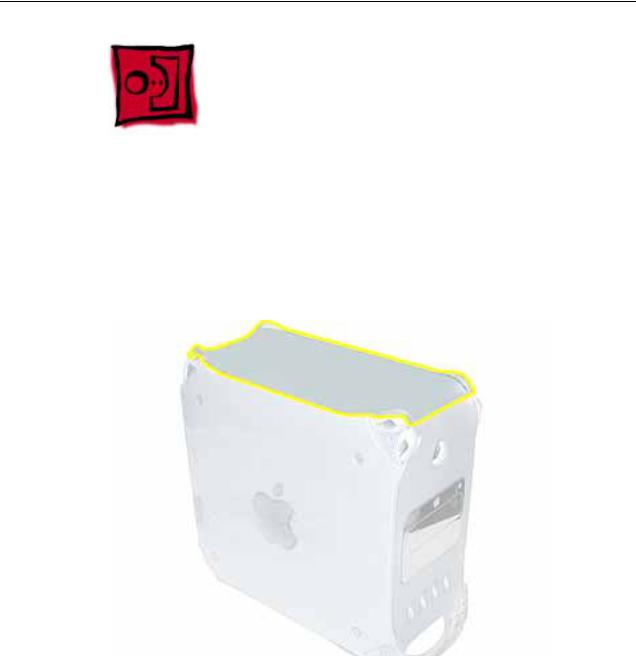
Part Location
Preliminary Steps
Before you begin, remove the handles from the top front and top rear of the computer.
Top Panel |
Power Mac G4 (Mirrored) Take Apart - 7 |
Procedure
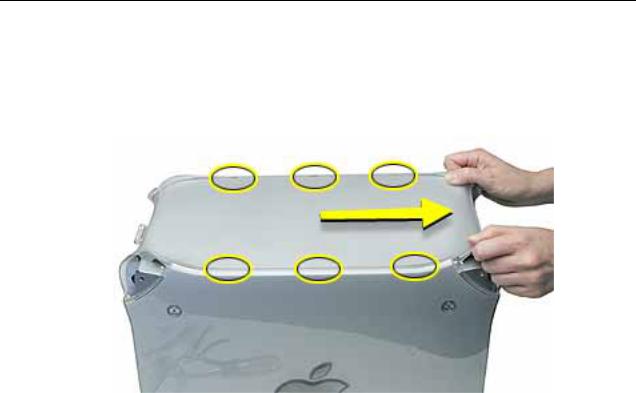
1.Slide the top panel toward the front of the computer to unhook the six tabs.
2.Lift the top panel from the chassis.
8 - Power Mac G4 (Mirrored) Take Apart |
Top Panel |
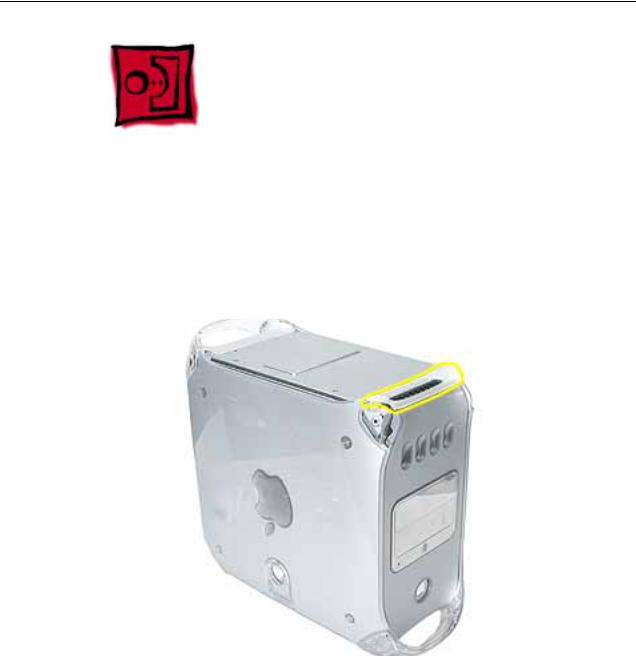
Speaker Grill
Tools
The only tool required for this procedure is a small flat-blade screwdriver.
Part Location
Preliminary Steps
There are no preliminary steps for this procedure.
Speaker Grill |
Power Mac G4 (Mirrored) Take Apart - 9 |
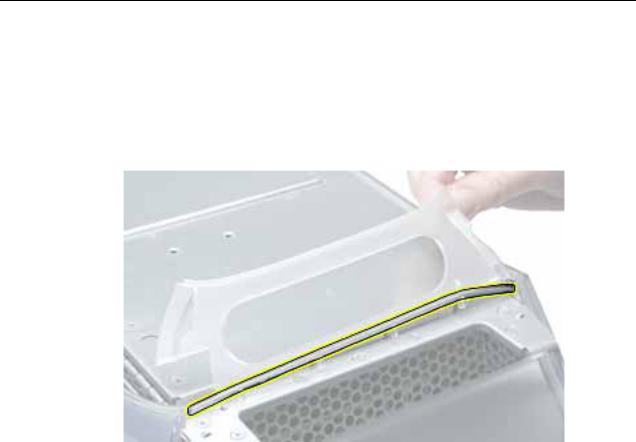
Procedure
1.Insert the tip of a screwdriver into one of the openings in the speaker grill.
Warning: To prevent damage to the speaker, do not insert the screwdriver too far.
2.Pry out the speaker grill.
Replacement Note: Press the replacement speaker grill into the speaker opening.
10 - Power Mac G4 (Mirrored) Take Apart |
Speaker Grill |
Lower Supports
Tools
The only tool required for this procedure is a 2.5 mm Allen wrench.
Part Location
Preliminary Steps
Before you begin, place the computer upside down on an ESD mat.
Warning: When the computer is upside down or the lower supports are removed, the computer can be unstable.
Lower Supports |
Power Mac G4 (Mirrored) Take Apart - 11 |

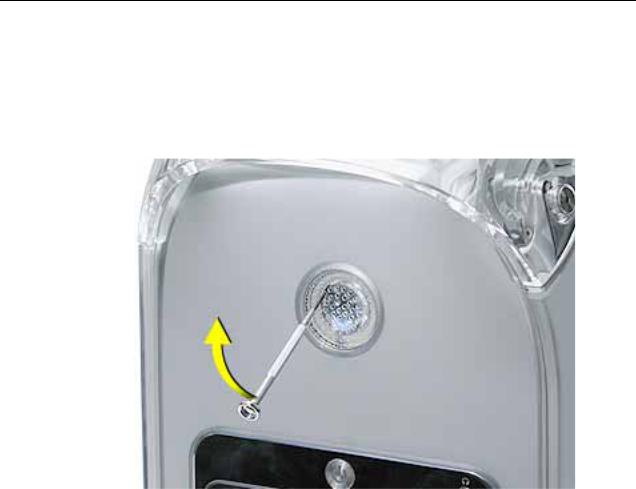
Procedure
1.With the computer upside down, remove the two Allen screws securing the support to the computer.
2. Remove the support from the computer.
12 - Power Mac G4 (Mirrored) Take Apart |
Lower Supports |
Lower Panel, Front
Tools
No tools are required for this procedure.
Part Location
Preliminary Steps
Before you begin, remove the lower front support.
Warning: When the computer is upside down or the lower support is removed, the computer can be unstable.
Lower Panel, Front |
Power Mac G4 (Mirrored) Take Apart - 13 |
Procedure
1.Lift the lower front panel from the chassis. There are no screws holding this panel to the chassis; the front support holds it in place.
2.Important: Note the routing of the AirPort antenna cable. Carefully remove it from the notches in the lower front panel.
14 - Power Mac G4 (Mirrored) Take Apart |
Lower Panel, Front |
Lower Panel, Rear
Tools
No tools are required for this procedure.
Part Location
Preliminary Steps
Before you begin, remove the lower rear support.
Warning: When the computer is upside down or the lower support is removed, the computer can be unstable.
Lower Panel, Rear |
Power Mac G4 (Mirrored) Take Apart - 15 |
Procedure
Lift the lower rear panel from the chassis. There are no screws holding this panel to the chassis; the rear support holds it in place.
16 - Power Mac G4 (Mirrored) Take Apart |
Lower Panel, Rear |
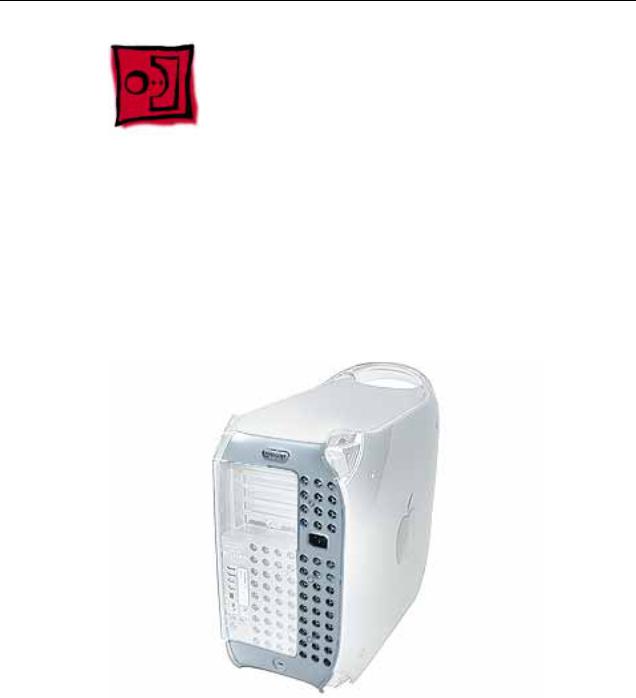
Rear Vented Panel
Tools
The following tools are required for this procedure:
•2.5 mm Allen wrench
•Flat-blade screwdriver
Part Location
Preliminary Steps
Before you begin, remove the following:
•Lower rear support
•Lower rear panel
•Top rear handle
Warning: When the computer is upside down or the lower supports are removed, the computer can be unstable.
Rear Vented Panel |
Power Mac G4 (Mirrored) Take Apart - 17 |
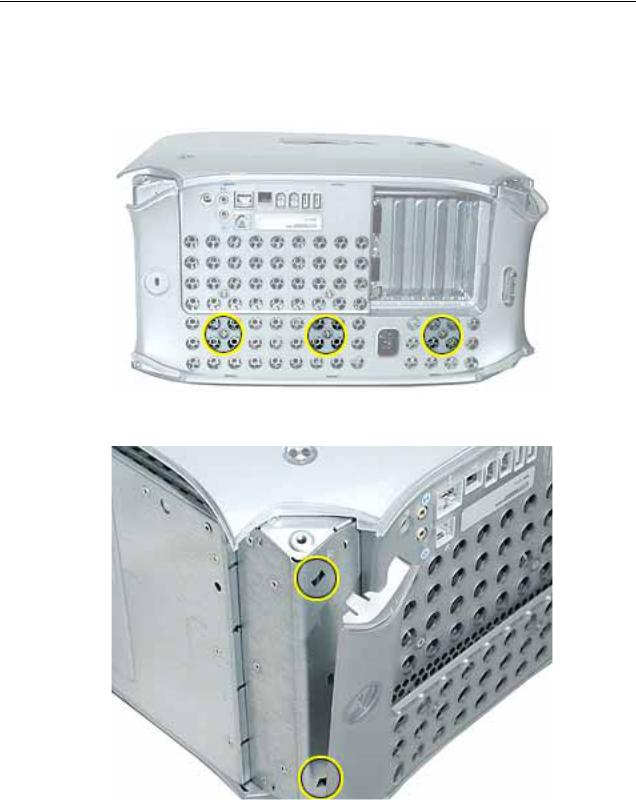
Procedure
1.With the computer positioned on its left side panel, remove the three Allen screws securing the rear vented panel to the computer.
2. Use a flat-blade screwdriver to pry out the tabs from the lower chassis.
18 - Power Mac G4 (Mirrored) Take Apart |
Rear Vented Panel |
3.Grasp the rear vented panel on both sides of the lockable cover latch, and forcefully pull off the rear vented panel.
Rear Vented Panel |
Power Mac G4 (Mirrored) Take Apart - 19 |
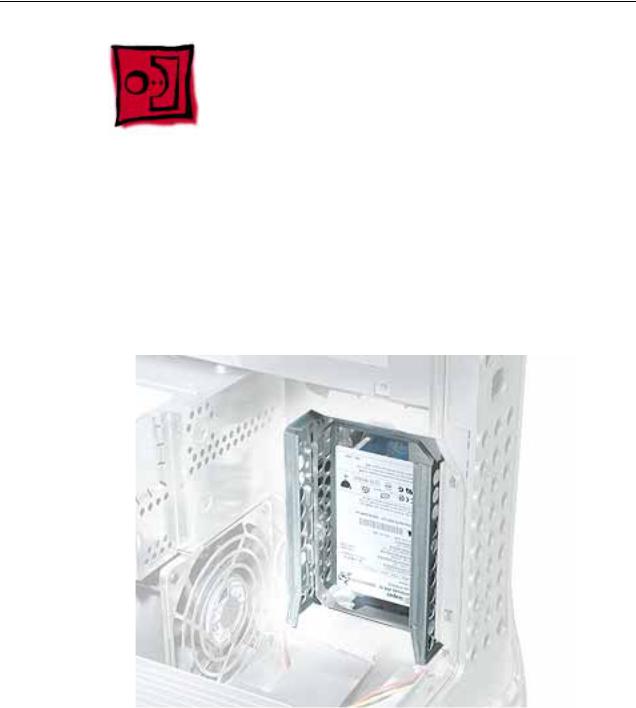
Hard Drive Carrier, Back
Tools
The following tools are required for this procedure:
•Magnetized #2 Phillips screwdriver.
•Pliers
Part Location
Preliminary Steps
Before you begin, open the side access panel.
20 - Power Mac G4 (Mirrored) Take Apart |
Hard Drive Carrier, Back |
Procedure
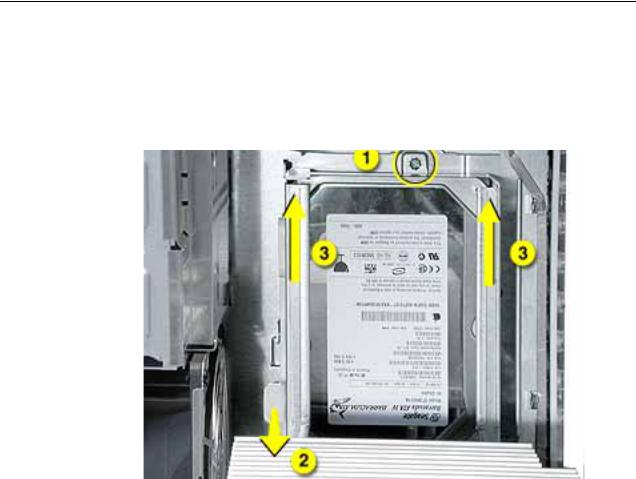
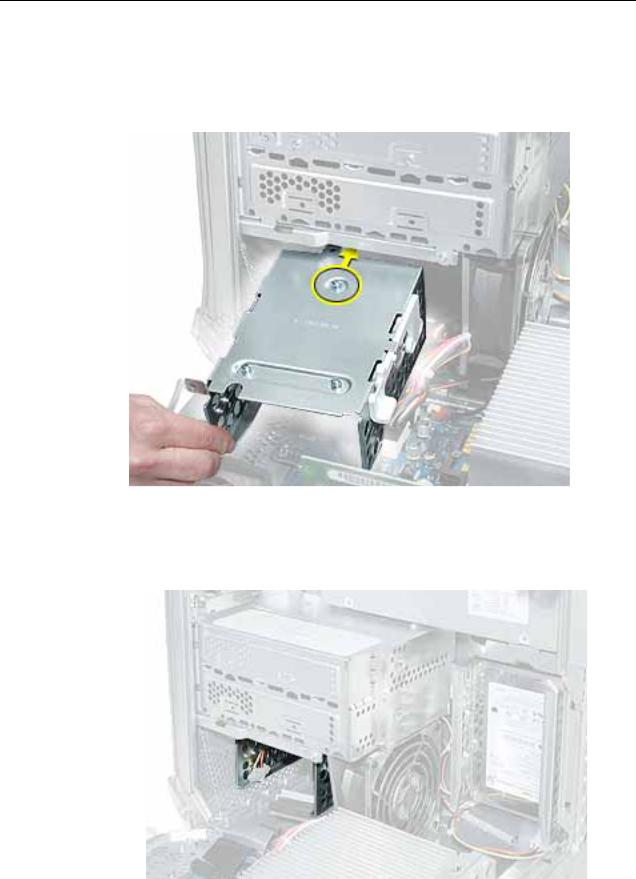
1.Using a Phillips screwdriver, remove the screw that attaches the carrier to the chassis.
2.Pull the left side lever forward, and slide the carrier up to release the mounting pegs on the back of the carrier from the chassis.
Hard Drive Carrier, Back |
Power Mac G4 (Mirrored) Take Apart - 21 |

3.Rotate the carrier back from the chassis far enough to reach the drive cables. Disconnect the hard drive data and power cables (P2 and P3) from the hard drive(s).
Note: You might need to use pliers to grasp and disconnect the power cable connector(s).
4. Remove the carrier and drive(s) from the computer.
Replacement Note: Connect the cables to the drives before installing the carrier.
22 - Power Mac G4 (Mirrored) Take Apart |
Hard Drive Carrier, Back |
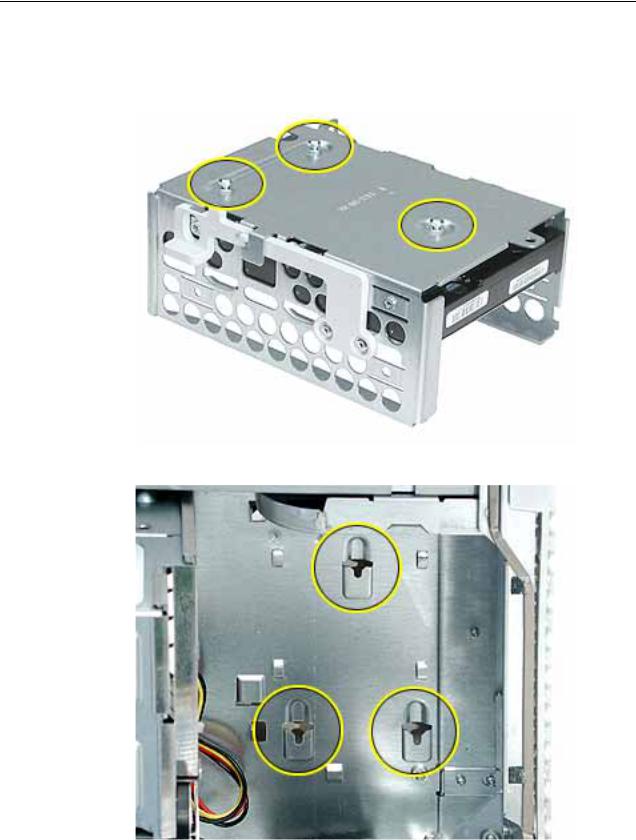
Replacement Note: Be sure to align the mounting pegs on the back of the carrier with the notches in the chassis. Then press the carrier in and down until the pegs engage and the left side lever clicks into place.
Hard Drive Carrier, Back |
Power Mac G4 (Mirrored) Take Apart - 23 |
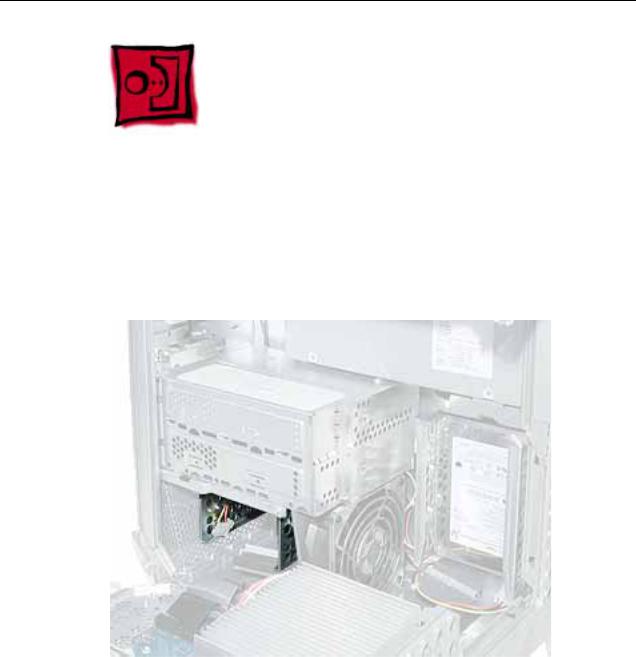
Hard Drive Carrier, Front
Tools
The only tool required for this procedure is a magnetized Phillips screwdriver.
Part Location
Preliminary Steps
Before you begin, open the side access panel.
24 - Power Mac G4 (Mirrored) Take Apart |
Hard Drive Carrier, Front |

Procedure
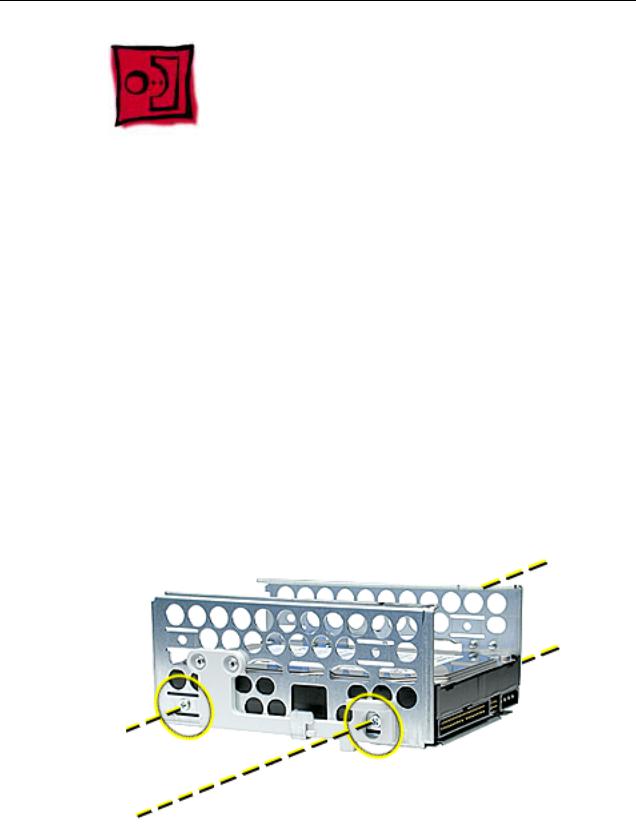
1. Using a Phillips screwdriver, remove the carrier mounting screw.
2.Press down on the right side lever, and slide the carrier forward and out of the computer.
Warning: Be careful not to scrape any cables when sliding the carrier forward.
Hard Drive Carrier, Front |
Power Mac G4 (Mirrored) Take Apart - 25 |
Replacement Note: Align the center mounting peg on the top of the carrier with the center channel on the underside of the optical drive shelf. This center peg helps to guide the carrier. Then align the two remaining pegs, and slide the carrier in until the pegs engage and the right side lever clicks into place.
Replacement Note: Before closing the side access panel, make sure the P4 and P5 power cable connectors are either attached to the hard drives or tucked inside the front hard drive carrier.
26 - Power Mac G4 (Mirrored) Take Apart |
Hard Drive Carrier, Front |
Hard Drive
Tools
The only tool required for this procedure is a Phillips screwdriver.
Preliminary Steps
Before you begin, do the following:
•Open the side access panel.
•Remove the hard drive carrier.
Procedure
1.Remove the four mounting screws from the sides of the drive carrier.
2.Slide the drive forward out the front of the drive carrier.
Power Mac G4 (Mirrored) Take Apart - 27
ATA 100 Hard Drive Cable
Tools
No tools are required for this procedure.
Preliminary Steps
Before you begin, do the following:
•Open the side access panel.
•Remove the back hard drive carrier.
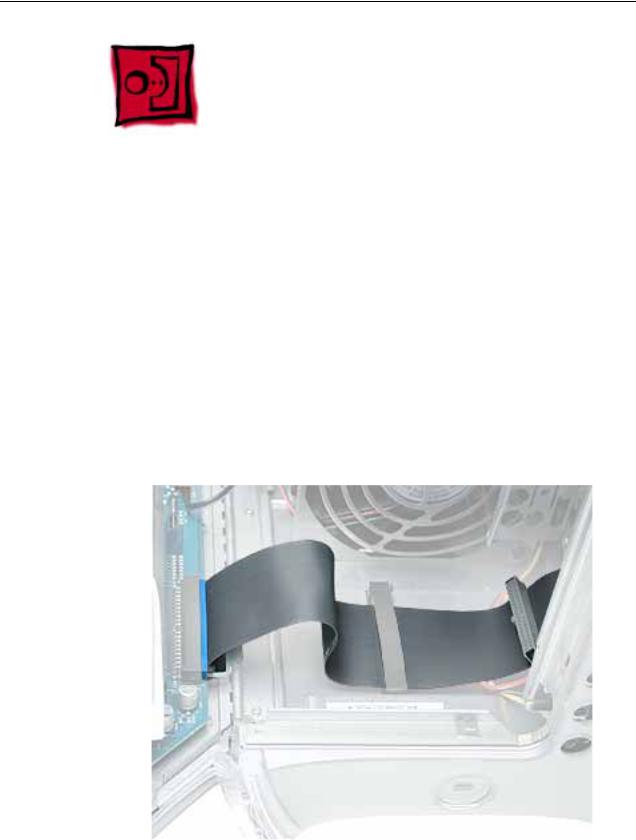
Procedure
1.Open the cable clamp at the bottom of the chassis.
2.Disconnect the ATA 100 cable from the connector at J34 on the logic board.
28 - Power Mac G4 (Mirrored) Take Apart
Loading...