


POWERBOOK FIREWIRE AIRPORT CARD

PowerBook (FireWire)
AirPort Card
Replacement Instructions
Be sure to follow the instructions in this sheet carefully. Failure to follow
these instructions could result in damage to your equipment and may void
your warranty.
Installing the AirPort Card requires seven basic steps:
• Turn off the computer.
• Open the computer.
• Remove the heat shield.
• Remove the installed AirPort Card, if applicable.
• Install the replacement AirPort Card.
• Replace the heat shield.
• Close the computer.
Note:
A video version of the replacement instructions is available at
http://www.info.apple.com/installparts
Tools Required
• Jeweler’s flat-blade screwdriver
• Phillips screwdriver
Electrostatic Discharge (ESD)
Static electricity , a normal and natural phenomenon, builds up on y our body
as you walk around. You experience an electrostatic discharge (ESD) when
you touch an object and feel a spark. ESD can cause damage to the
internal components of your computer. Avoid walking around while
performing this procedure, and follow the instructions carefully when you
are asked to discharge static electricity.
2
- PowerBook (FireWire) AirPort Card
Installing an AirPort Card
To install an AirPort Card in your PowerBook, follow these steps:
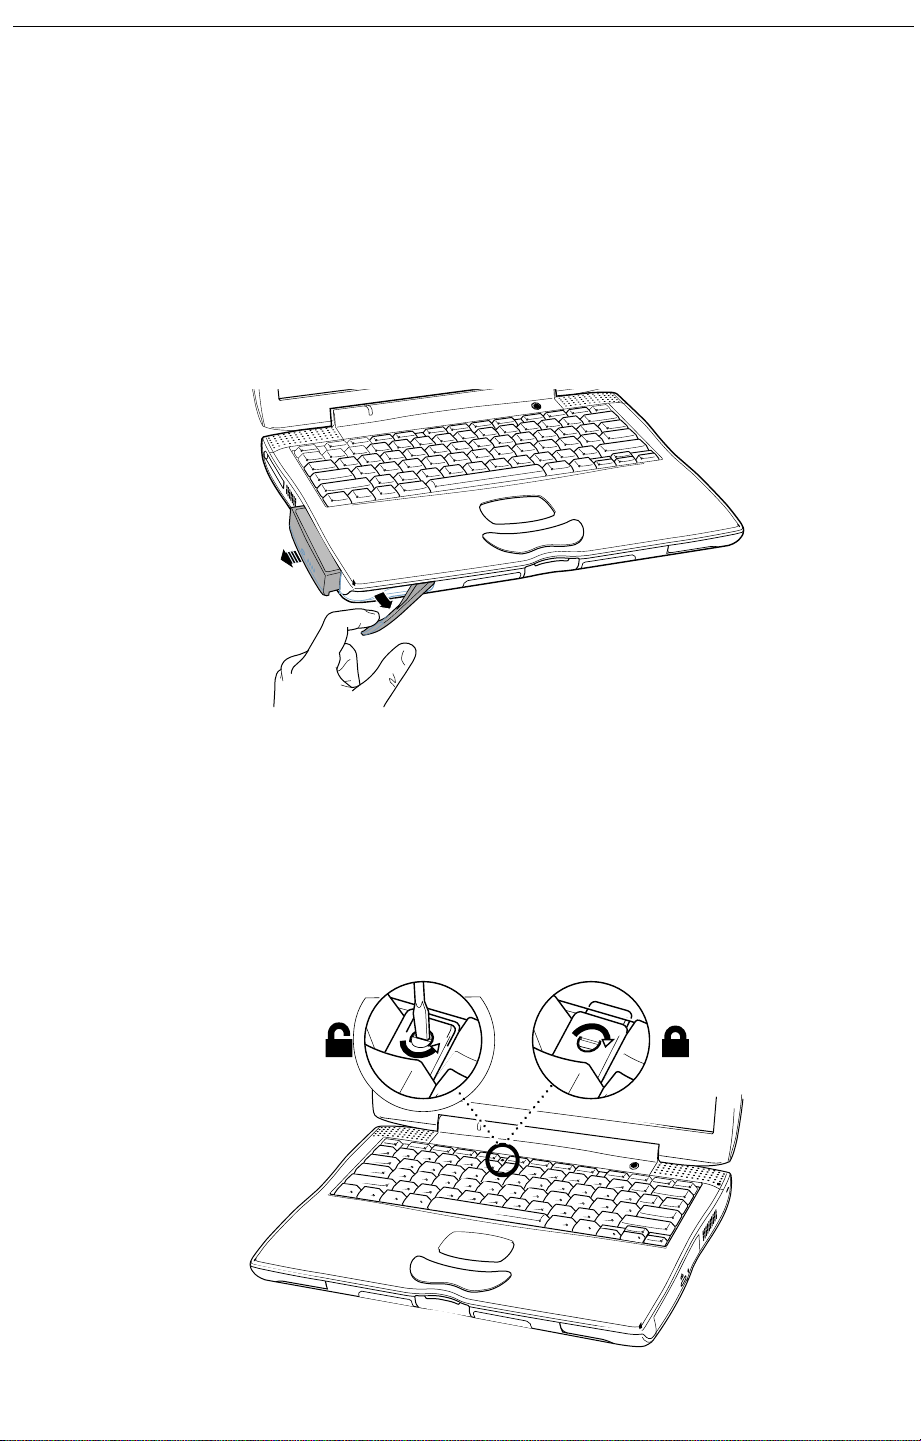
1 Place your computer on a clean, flat surface.
2 Shut down your computer, remove the battery from the expansion bay,
and disconnect the power adapter, modem, and any other cables
connected to the computer.
Warning: Always turn off your computer before opening it to
avoid damaging its internal components.
Warning: The internal components of your PowerBook may be
hot. If you have been using your PowerBook, wait 30 minutes
after shutting down your computer to let the internal components
cool down before continuing.
3 Make sure that the keyboard loc king scre w is not in the loc k ed position.
Your new P owerBook comes with the k eyboard unloc ked, so unless you
or someone else locked the keyboard, you can skip this step.
®
PowerBook (FireWire) AirPort Card -
3
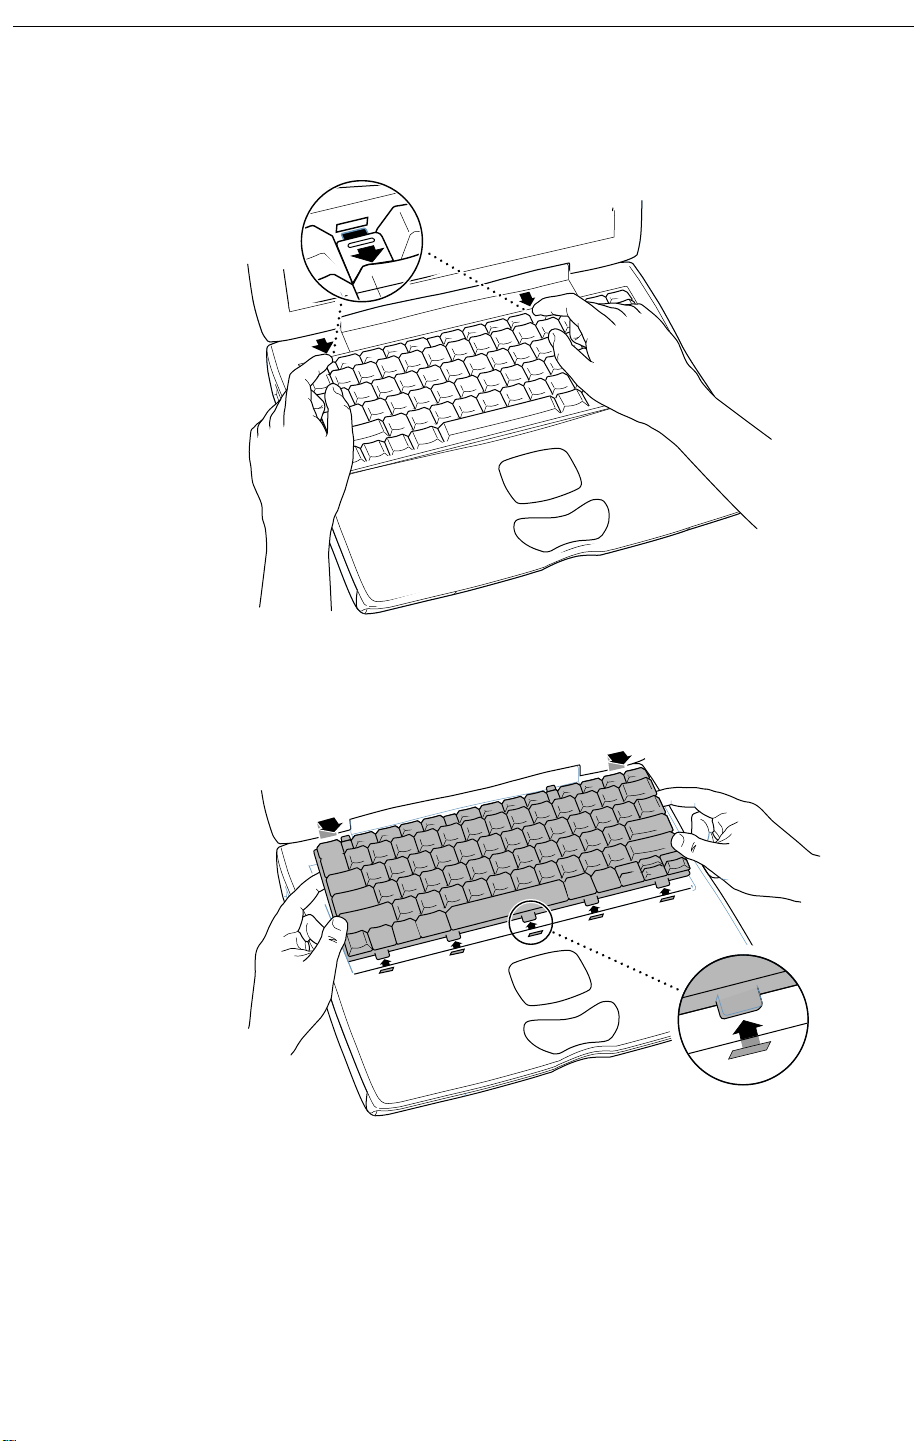
4 Release the keyboard by pulling down on the keyboard release tabs
(located to the left of the F1 and F9 keys) until the top portion of the
keyboard pops up.
5 Lift the top portion of the PowerBook keyboard up slightly near the top
row of keys and pull it back far enough to release the small tabs that
hold the bottom of the keyboard in place.
 Loading...