


 Loading...
4-229-805-43(1)
Mini Hi-Fi
Component
System
Operating Instructions
MHC-ZX70DVD
©2000 Sony Corporation

WARNING
To prevent fire or shock hazard, do not expose the unit to rain or moisture.
To avoid electrical shock, do not open the cabinet. Refer servicing to qualified personnel only.
Do not install the appliance in a confined space, such as a bookcase or built-in cabinet.
CAUTION
The use of optical instruments with this product will increase eye hazard. As the laser beam used in this CD/DVD Player is harmful to eyes, do not attempt to disassemble the cabinet.
Refer servicing to qualified personnel only.
This appliance is classified as a CLASS 1 LASER product. The CLASS 1 LASER PRODUCT MARKING is located on the rear exterior.
This stereo system is equipped with the Dolby B-type noise reduction system*.
*Manufactured under license from Dolby Laboratories Licensing Corporation.
DOLBY and the double-D symbol ;are trademarks of Dolby Laboratories Licensing Corporation.
IMPORTANT NOTICE
Caution: The enclosed DVD player is capable of holding a still video image or on-screen display image on your television screen indefinitely. If you leave the still video image or on-screen display image displayed on your TV for an extended period of time you risk permanent damage to your television screen. Projection televisions are very susceptible.
This system incorporates Dolby* Digital and Pro Logic Surround.
* Manufactured under license from Dolby Laboratories. “Dolby”, “AC-3”, “Pro Logic” and the double-D symbol ; are trademarks of Dolby Laboratories.
Confidential unpublished Works. © 1992-1997 Dolby Laboratories, Inc. All rights reserved.
2

Table of Contents |
|
This Player Can Play the Following Discs |
..... 4 |
Hookups |
|
Step 1: Hooking up the system ................ |
6 |
Step 2: Setting up your speakers ............ |
10 |
Step 3: Setting the time .......................... |
12 |
Saving the power in standby mode* ....... |
13 |
Setting up for DVD/VIDEO CD/ CD
Using the Setup Display .......................... |
14 |
Setting the language ................................ |
15 |
Setting the on-screen display .................. |
15 |
Custom settings ....................................... |
16 |
Setting for sound ..................................... |
19 |
Speaker settings ....................................... |
21 |
If connecting the front speakers only ...... |
23 |
When playing back a DVD: |
|
Searching for the title/chapter ................. |
45 |
Locating a start point using |
|
the time code .................................... |
46 |
Displaying the subtitles ........................... |
47 |
Selecting the language for the sounds |
|
on the DVD ...................................... |
48 |
Changing the angles ................................ |
50 |
When playing back a CD/VIDEO |
|
CD: |
|
Searching for the track/index/scene ........ |
51 |
Selecting the stereo/monaural |
|
(L/R) sound ....................................... |
52 |
Other functions: |
|
Checking the play information ................ |
53 |
Dividing playback into 9 sections ........... |
55 |
Scanning the title, chapter, or track ......... |
56 |
Displaying different angles |
|
simultaneously .................................. |
57 |
The DVD/VIDEO CD/CD Player
Playing discs ........................................... |
24 |
Checking the text information |
|
of the disc ......................................... |
28 |
Checking the playing time and remaining |
|
time ................................................... |
29 |
Playing DVDs using the menu ................ |
32 |
Playing VIDEO CDs with PBC functions |
|
(Ver. 2.0) .......................................... |
34 |
Setting for the surround sound ................ |
36 |
Playing repeatedly ................................... |
39 |
Repeating a Specific Portion ................... |
41 |
Playing in random order .......................... |
42 |
Enjoying your original playback order ... |
43 |
The Radio |
|
Presetting radio stations .......................... |
58 |
Listening to the radio .............................. |
59 |
Using the Radio Data System (RDS)** .. |
61 |
The Tape deck |
|
Playing a tape .......................................... |
64 |
Recording a disc ...................................... |
66 |
Recording from a tape ............................. |
68 |
Recording on a tape manually ................. |
69 |
Recording a disc by specifying |
|
the order ............................................ |
70 |
Mixing and recording sounds*** ............ |
73 |
continued |
|
3

Table of Contents (continued)
Sound Adjustment |
|
|
Adjusting the sound ................................ |
|
75 |
Selecting the preset audio effect file |
....... 76 |
|
Creating a personal audio effect file |
....... 77 |
|
Changing the spectrum analyzer display 78 |
||
Selecting surround effects ....................... |
|
79 |
Enjoying Dolby Pro Logic Surround |
|
|
sound ................................................ |
|
80 |
Controlling the graphic equalizer ............ |
81 |
|
Timer |
|
|
Falling asleep to music ............................ |
|
82 |
Waking up to music ................................ |
|
82 |
Timer-recording radio programs |
............. |
84 |
Optional components |
|
|
Connecting audio components ................ |
|
86 |
Connecting a VCR .................................. |
|
88 |
Connecting external antennas ................. |
|
88 |
Additional Information |
|
|
Precautions .............................................. |
|
90 |
Troubleshooting ...................................... |
|
91 |
Specifications .......................................... |
|
95 |
GLOSSARY ............................................ |
|
98 |
Parts Identification for the remote .......... |
99 |
|
Language Code List .............................. |
|
101 |
Items in “Sound Mode” and |
|
|
“Set Up Mode” ............................... |
|
102 |
Control Menu Item List ......................... |
|
103 |
DVD Setup Menu List .......................... |
|
105 |
Index .......................................... |
Back cover |
|
*North American and European models only
**European model only
***Asian model only
This Player Can Play the
Following Discs
DVD VIDEOs
Disc logo:
Contents: Audio + Video
Disc size and play time:
-12 cm:
About 4 h (for single-sided DVD)/ about 8 h (for double-sided DVD)
-8cm:
About 80 min. (for single-sided DVD)/about 160 min. (for doublesided DVD)
*“DVD VIDEO” logo is a trademark.
VIDEO CDs
Disc logo: 

Contents: Audio + Video
Disc size and play time:
-12 cm: 74 min.
-8 cm: 20 min.
Audio CDs
Disc logo:
Contents: Audio
Disc size and play time:
-12 cm: 74 min.
-8cm (CD single): 20 min.
Discs that the player cannot play
The player cannot play discs other than the ones listed above. SVCD, CD-G, CD-R, CD-ROMs including PHOTO CDs, data sections in CDEXTRAs, DVD-ROMs, etc., cannot be played.
4

Region code of DVDs you can
play on this unit
Your DVD player has a region code printed on the back of the unit and will only play DVDs that are labeled with identical region codes.
MODEL NO. |
X |
Region code |
DVP–8306 |
|
|
CD/DVD PLAYER |
|
|
AC 110V 60Hz |
|
|
22W NO. |
|
|
SONY CORPORATION MADE IN JAPAN 3-444-464-01 |
|
|
DVDs labeled ALL will also be played on this unit.
If you try to play any other DVD, the message “Playing this disc prohibited by area limits.” will appear on the TV screen.
Depending on the DVD, no region code indication may be labeled even though playing the DVD is prohibited by the area limits.
Note on playback operations of DVDs and VIDEO CDs
Some playback operations of DVDs and VIDEO CDs may be intentionally fixed by software producers. Since this player plays DVDs and VIDEO CDs according to the disc contents the software producers designed, some playback features may not be available. Also refer to the instructions supplied with the DVDs or VIDEO CDs.
Note on PBC (Playback Control) (VIDEO CDs)
This player conforms to Ver. 1.1 and Ver. 2.0 of VIDEO CD standards. You can enjoy two kinds of playback according to the disc type.
VCD type |
You can |
Without PBC functions |
Enjoy video playback |
(Ver. 1.1 discs) |
(moving pictures) as well |
|
as music. |
|
|
With PBC functions |
Play interactive software |
(Ver. 2.0 discs) |
using menu screens |
|
displayed on the TV screen |
|
(PBC Playback), in |
|
addition to the video |
|
playback functions of Ver. |
|
1.1 discs. Moreover, you |
|
can play high-resolution |
|
still pictures, if they are |
|
included on the disc. |
|
|
Note
This product incorporates copyright protection technology that is protected by method claims of certain U.S. patents and other intellectual property rights owned by Macrovision Corporation and other rights owners. Use of this copyright protection technology must be authorized by Macrovision Corporation, and is intended for home and other limited viewing uses only unless otherwise authorized by Macrovision Corporation. Reverse engineering or disassembly is prohibited.
Terms for discs
Title
The longest sections of a picture or a music piece on a DVD; a movie, etc., for a picture piece on a video software; or an album, etc., for a music piece on an audio software. Each title is assigned a title number enabling you to locate the title you want.
Chapter
Sections of a picture or a music piece on a DVD that are smaller than titles. A title is composed of several chapters. Each chapter is assigned a chapter number enabling you to locate the chapter you want. Depending on the disc, no chapters may be recorded.
Track
Sections of a picture or a music piece on a VIDEO CD or a CD. Each track is assigned a track number enabling you to locate the track you want.
DVD structure
VIDEO CD  or CD
or CD  structure
Disc
Title
Chapter
Disc
Track
Index
Index (CD) / Video Index (VIDEO
CD)
A number that divides a track into sections to easily locate the point you want on a VIDEO CD or a CD. Depending on the disc, no indexes may be recorded.
Scene
On a VIDEO CD with PBC functions, the menu |
|
screens, moving pictures, and still pictures are |
|
divided into sections called “scenes”. Each scene |
|
is assigned a scene number enabling you to locate |
5 |
the scene you want. |
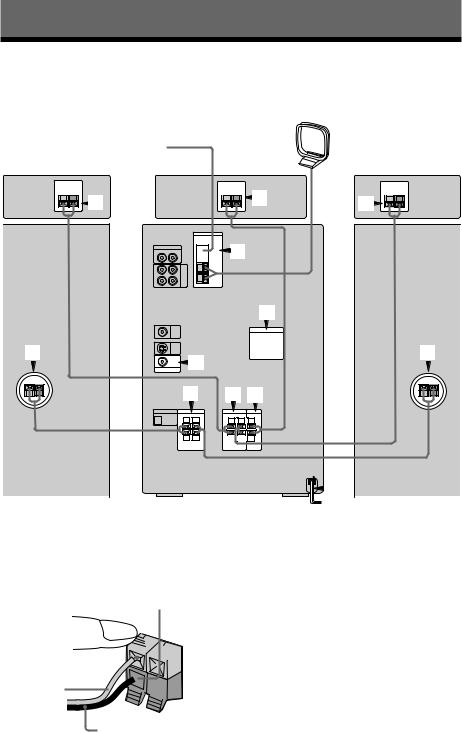
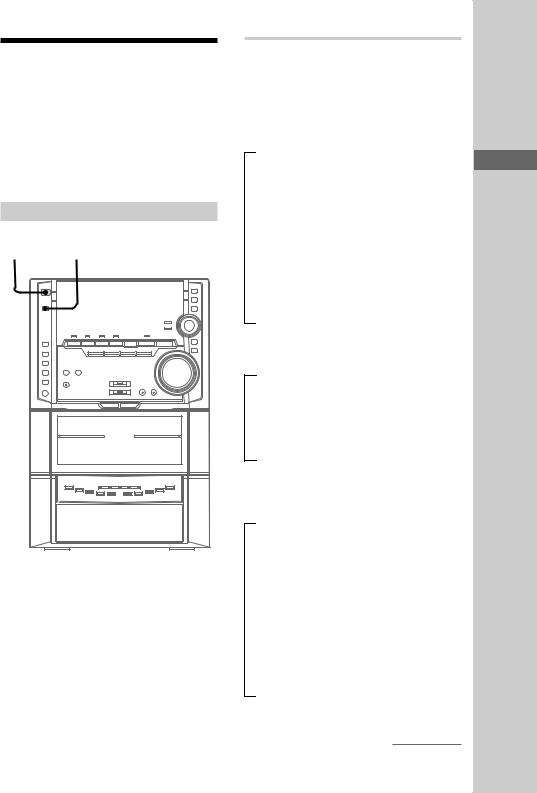
Hookups
Step 1: Hooking up the system
Follow steps 1 through 9 of the following procedure to hook up your system using the supplied cords and accessories.
|
AM loop antenna |
|
|
FM antenna |
|
Rear speaker (Right) |
Center speaker |
Rear speaker (Left) |
2 |
3 |
2 |
|
4 |
6
1 |
5 |
1 |
|
|
|
|
1 |
23 |
|
|
|
|
|
|
|
|
|
|
|
|
|
|
|
|
|
|
|
|
|
|
|
|
|
|
|
|
|
|
|
|
|
|
|
|
|
|
|
|
|
|
|
|
|
|
|
|
|
|
|
|
|
|
|
|
|
|
|
|
|
|
|
|
|
|
|
|
|
|
|
|
|
|
|
|
|
|
|
|
|
|
|
|
7 |
|
||||
|
|
|
|
|
|
|
|
|
|
|
|
|
|
|
|
Front speaker (Right) |
|
|
|
|
|
|
|
|
|
|
|
|
Front speaker (Left) |
|
|
|
|
|
|
|
|
|
|
|
Notes |
|||
1 Connect the front speakers. |
|
|
|
|
|
|
|
|
||||||
|
|
|
|
|
|
|
|
• Keep the speaker cords away from the |
||||||
|
Connect the speaker cords of the front |
|
|
antennas to prevent noise. |
||||||||||
|
speakers to the FRONT SPEAKER jacks as |
|
|
• The type of speakers supplied varies |
||||||||||
|
below. |
|
|
|
|
|
|
|
|
according to the model you purchased (see |
||||
|
|
|
|
|
|
|
|
|
|
|
“Specifications” on page 97). |
|||
|
Insert only the stripped portion. |
|
|
|
|
|
|
|||||||
|
|
R |
L |
|
|
|
|
|
|
|||||
+

– Red (3)

Black (#)
6
2Connect the rear speakers.
Connect the speaker cords of the rear speakers to the REAR SPEAKER jacks.
|
Insert only the stripped portion. |
||
|
+ |
R |
L |
|
|
||
|
|
|
|
|
|
|
+ |
Gray/Solid |
|
|
– |
(3) |
|
|
|
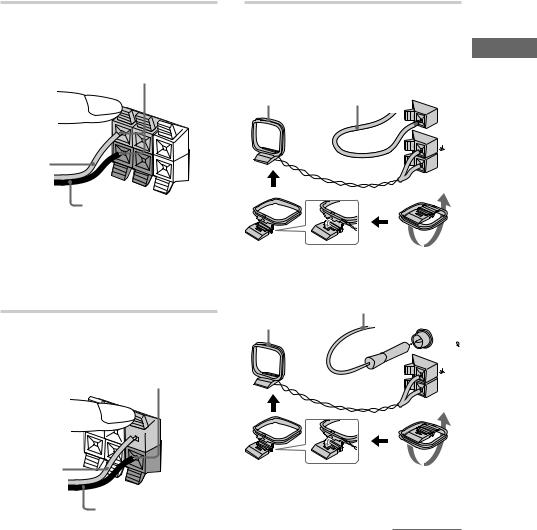
4Connect the FM/AM antennas.
Set up the AM loop antenna, then connect it.
Jack type A
Extend the FM lead
AM loop antenna antenna horizontally.

 FM75
FM75
 AM
AM
Hookups
Black/Stripe (#)
Notes
•Keep the speaker cords away from the antennas to prevent noise.
•Do not place the rear speakers on top of a TV. This may cause color distortion in the TV screen.
3Connect the center speaker.
Connect the speaker cords of the center speaker to the CENTER SPEAKER jacks.
Insert only the stripped portion.
+ |
R |
L |
|
||
|
|
Gray/Solid

 +
+
–
(3)
Black/Stripe (#)
Note
Keep the speaker cords away from the antennas to prevent noise.
Jack type B
Extend the FM lead antenna horizontally.
AM loop antenna
FM75
COAXIAL
AM
continued
7

Step 1: Hooking up the system (continued)
5Connect the video input jack of your TV to the VIDEO OUT jack with the supplied video cable.
 VIDEO OUT
When using a TV
Turn on the TV and select the video input so you can view the pictures from this system.
Tip
For even higher quality video images, you can use an optional S-video cable to connect the S VIDEO input jack on your TV to the S VIDEO OUT jack.
SVIDEO OUT
To the S VIDEO input of the TV
6For models with a voltage selector, set VOLTAGE SELECTOR to the position of your local power line voltage.
VOLTAGE SELECTOR
230 |
- |
240V |
|
||
120V |
|
220V |
7Connect the power cord to a wall outlet.
If the supplied adapter on the plug does not fit your wall outlet, detach it from the plug (only for models equipped with an adapter).
8(Asian model only)
Set the color system according to your TV. The factory setting is NTSC. Each time you perform the procedure below, the color system changes as follows:
NTSC y PAL
1Press ?/1 to turn the system on.
2Press FUNCTION repeatedly until “DVD” appears in the display.
3Press x.
4Press ?/1 while holding down NEXT. The system turns off.
5Press ?/1 to turn on the system.
The system turns on and the color system is changed.
9Remove the dummy disc.
A dummy disc is placed in the DISC 1 tray at shipment to prevent damage to the system during transportation.
Before using the system for the first time, remove the dummy disc following the steps below.
1 Press ?/1 to turn on the system.
2 Press A 1 and remove the dummy disc from the disc tray.
3 Press A 1 to close the disc tray.
Notes on the dummy disc
•You must use the dummy disc for protection when transporting the system. Be sure to keep the dummy disc in a secure place (page 90).
•There are no signals recorded on the dummy disc.
8

To connect optional components
See page 86.
To deactivate/activate the demonstration
When you set the time (“Step 3: Setting the time” on page 12), the demonstration is deactivated.
To activate/deactivate the demonstration again, press DISPLAY repeatedly while the system is off.
Inserting two size AA (R6) batteries into the remote
Using the remote
You can use the shaded buttons shown below to operate a Sony TV.
|
TV |
|
TV VOL +/ |
TV/VIDEO |
TV CH +/ |
|
To |
Press |
Turn the TV on or off |
TV ?/1. |
|
|
Switch the TV's |
TV/VIDEO. |
video input |
|
|
|
Change the TV |
TV CH +/–. |
channels |
|
|
|
Adjusts the volume |
TV VOL +/–. |
of the TV speaker(s) |
|
|
|
Tip
With normal use, the batteries should last for about six months. When the remote no longer operates the system, replace both batteries with new ones.
Note
If you do not use the remote for a long period of time, remove the batteries to avoid possible damage from battery leakage.
Hookups
9
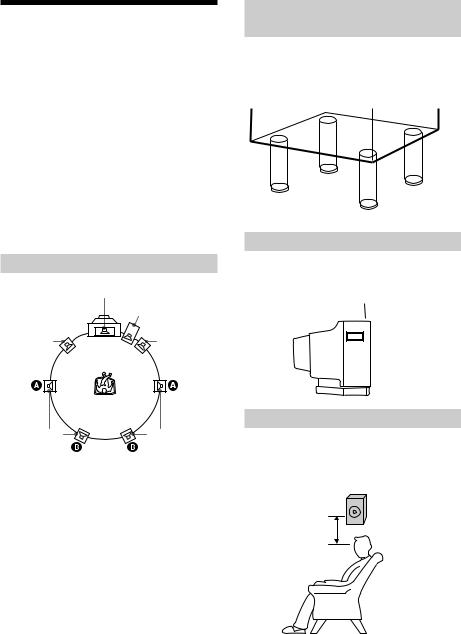
Step 2: Setting up your speakers
Connecting the supplied rear and center speakers enables you to fully enjoy Dolby Digital and Dolby Pro Logic Surround sound. Dolby Pro Logic Surround is a decoding system standardized in TV programs and movies. Dolby Pro Logic Surround improves the sound image by using four separate channels. These channels manipulate the sound to be heard and enhance the action on the TV screen.
When you have finished setting up the speakers and adjusting the balance and level (see page 11), be sure to perform the on-screen setup (see “Speaker settings” on page 21).
Positioning the speakers
Center
Subwoofer
Front (L) |
Front (R) |
Attaching the front speaker
pads
Attach the supplied speaker pads to the bottom of the front speakers to stabilize the speaker and prevent it from slipping.
Setting the center speaker
Set the center speaker firmly on top of the TV set, making sure it is completely level.
 Foot pads
Rear (L) |
Rear (R) |
*You can connect an optional subwoofer speaker (see page 87).
Each speaker should face the listening position. Better surround effects will result if all speakers are set at the same distance from the listening position.
Place the front speakers at a suitable distance to the left and right of the television. The height of the front speakers should be adjusted to about the center of the TV screen.
Place the center speaker on the top of the TV set.
The placement of rear speakers greatly depends on the configuration of the room. The rear speakers may be placed on both sides of the listening position A or behind the listening position B.
When you connect the subwoofer, place it on either side of the television.
Setting the rear speakers
Place the rear speakers facing each other at about 60 to 90 cm (2 to 3 feet) above your listening position.
Rear speaker
60 to 90 cm (2 to 3 feet)
10
Adjusting the balance/level
Follow the procedure on this page to adjust the balance and levels of each of the speakers for enjoyment of Dolby Pro Logic Surround sound from functions other than DVD. You cannot perform the procedure below when the function is set to “DVD”. For playback of DVDs, VIDEO CDs, and CDs, see “Adjusting the speaker balance/level” on page 22 to make adjustments.
?/1 (Power)
3 2, 4 1
N nN nN X
.> m M x
c C t T
O
MODE SELECT
v
b B
VOL +/–
V
B/b
1 Press PRO LOGIC ON/OFF.
“PRO LOGIC ON” appears.
2 Press T.TONE ON/OFF on the remote.
Each speaker will emit a test tone in the following order.
t LEFT t CENTER t RIGHT 
 REAR L T REAR R T
3 From your listening position, press CENTER LEVEL (+/–) and REAR LEVEL (+/–) on the remote to adjust the volume.
For the rear level, the rear right/left speaker will emit sound.
The volume levels from each speaker should sound the same.
4 Press T.TONE ON/OFF when you are done adjusting.
The test tone turns off.
Tip
If you press VOL +/–, all the speaker volumes change.
Note
T.TONE ON/OFF on the remote can only be used to turn on the test tone feature when the Dolby Pro Logic mode is on.
To adjust the speaker balance
When you enjoy Dolby Pro Logic Surround sound, you can adjust the balance of the front speakers and the rear speakers.
1In step 2 above, select RIGHT, LEFT, or CENTER to adjust the front balance, and select REAR R or REAR L to adjust the rear balance.
2Press B or b on the remote to adjust the balance.
Tip
When you enjoy Dolby Pro Logic Surround sound, you can adjust the speaker balance using the “Sound Mode” menu.
1Press MODE SELECT repeatedly to select “Sound Mode”, then press ENTER.
2Press B or b repeatedly to select “Front Balance” or “Rear Balance”, then press ENTER.
3Press B or b repeatedly to adjust the balance, then press ENTER.
Hookups
11
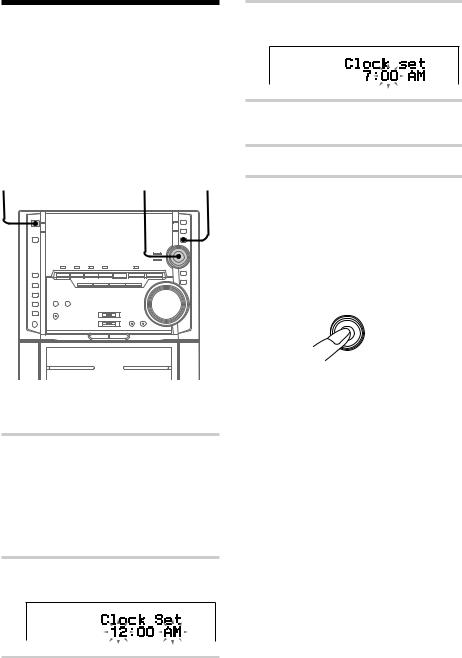
Step 3: Setting the time
You must set the time before using the timer functions.
The clock is on a 24-hour system for the European model, and on a 12-hour system for other models.
For illustration purposes, the 12-hour system model is used.
?/1 |
2,3,4,5,6 1 |
(Power) |
1 Press MODE SELECT when the system is turned off.
“Clock Set ?” appears.
When the system is in the Power Saving Mode, “Clock Set ?” will not appear. Either set Power Saving Mode off, or follow the steps on this page (“To change the time”) after turning the power on.
2 Press PUSH ENTER.
The hour indication flashes.
3 Move the multi stick toward V or v repeatedly to set the hour.
4 Move the multi stick toward b.
The minute indication flashes.
5 Move the multi stick toward V or v repeatedly to set the minute.
6 Press PUSH ENTER.
To cancel the menu operation
Press MODE SELECT.
Tips
• Refer to the illustration to use the multi stick. Place your finger on the center of the multi stick and move in the direction you want (up/down or left/ right shown V/v or B/b in this manual).
Up (V)
Left (B) |
ENTER |
Right (b) |
|
PUSH |
|
Down (v)
•All of the functions that use the multi stick can also be performed using V/v/B/b and ENTER on the remote.
•If you’ve made a mistake, start over from step 1.
To change the time
The previous explanation shows you how to set the time while the power is off. To change the time while the power is on, do the following:
1Press MODE SELECT repeatedly to select “Set Up Mode”, then press PUSH ENTER.
2Move the multi stick toward B or b repeatedly to select “Timer Set Up ?”, then press PUSH ENTER.
3Move the multi stick toward B or b repeatedly to select “Clock Set ?”, then press PUSH ENTER.
4Perform steps 3 through 6 on this page.
Note
The clock settings are canceled when you disconnect the power cord or if a power failure occurs.
12

Saving the power in standby mode
(North American and European models only)
You can lower the power consumption to a minimum (Power Saving Mode) and save energy in the standby mode.
?/1
(Power) DISPLAY
,Press DISPLAY repeatedly when the power is off.
Each time you press the button, the display changes as follows:
t Demonstration t clock
Power Saving Mode T
The system is turned on/off by pressing ?/1.
Tips
•The ?/1 indicator and timer indicator (when the timer is set) light even in the Power Saving Mode.
•The timer functions in the Power Saving Mode.
Notes
•You cannot set the time in the Power Saving Mode.
•The One Touch Play function does not work in the Power Saving Mode.
To cancel the Power Saving Mode
Press DISPLAY repeatedly to show the demonstration or the clock.
Hookups
13
Setting up for DVD/VIDEO CD/CD
Using the Setup Display
You can adjust the picture and sound quality, set the various outputs, etc. You can also set a language for the subtitles and the setup display, limit playback by children, etc. For details on each setup display item, see pages 16 to 22.
The North American model is the model used for OSD (on-screen display) illustration purposes in this section.
Note
The setup display appears only in stop mode.
1
N nN nN X
.> m M x
2,6 |
c |
C t |
T |
CLEAR |
O |
|
|
|
|
3,4,5 b |
B |
|
3,4,5 |
|
|
|
v |
|
|
V
5
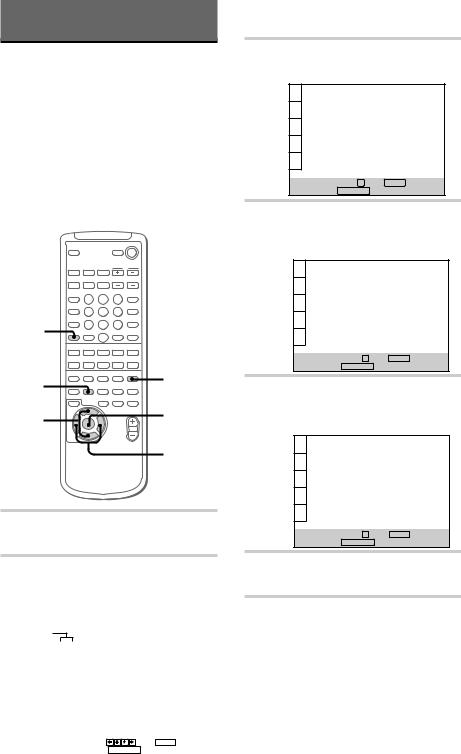
1 Press FUNCTION repeatedly until “DVD” appears in the display.
2 In the stop mode, press DVD SETUP to display the setup display on the TV screen.
The main items appear.
Main items
LANGUAGE |
|
|
|
|
LANGUAGE SETUP |
|||||
|
|
|
|
|||||||
|
|
|
|
|
|
|
|
|
OSD: |
ENGLISH |
SCREEN |
|
|
|
|
|
|
|
DVD MENU: |
ENGLISH |
|
|
|
|
|
|
|
AUDIO: |
ORIGINAL |
|||
CUSTOM |
|
|
|
|
|
SUBTITLE: |
AUDIO FOLLOW |
|||
|
|
|
|
|
||||||
|
|
|
|
|
||||||
AUDIO |
|
|
|
|
|
|
|
|
|
|
|
|
|
|
|
|
|
|
|
|
|
|
|
|
|
|
|
|
|
|
|
|
SPEAKER |
|
|
|
|
|
|
|
|||
|
|
|
|
|
|
|
||||
|
|
|
|
|
|
|
||||
|
|
|
|
|
|
|
|
|
|
|
|
|
|
|
|
|
|
|
|
|
|
|
|
|
|
|
|
To set, press |
, then ENTER . |
|||
14 |
|
|
|
|
|
To quit, press DVD SETUP . |
||||
|
|
|
|
|
|
|
|
|
|
|
3 Press V or v repeatedly to select the main item you want, then press ENTER.
|
SCREEN SETUP |
|
|
|
|
TV TYPE: |
16:9 |
|
|
SCREEN SAVER: |
ON |
|
|
BACKGROUND: |
JACKET PICTURE |
|
|
|
|
To set, press 


 , then ENTER .
To quit, press DVD SETUP .
4 Press V or v repeatedly to select the item you want, then press ENTER.
Other settings appear for the item you select.
|
SCREEN SETUP |
|
|
|
|
TV TYPE: |
16:9 |
|
|
SCREEN SAVER: |
16:9 |
|
|
BACKGROUND: |
4:3 LETTER BOX |
|
|
|
4:3 PAN SCAN |
|
|
|
|
To set, press 


 , then ENTER .
To quit, press DVD SETUP .
5 Press B/b/V/v repeatedly to select the setting you want, then press ENTER.
The setting changes to one you select.
|
SCREEN SETUP |
|
|
|
|
TV TYPE: |
4:3 PAN SCAN |
|
|
SCREEN SAVER: |
ON |
|
|
BACKGROUND: |
JACKET PICTURE |
|
|
|
|
To set, press 

 , then ENTER .
To quit, press DVD SETUP .
6 Press DVD SETUP to exit the setup display.
To cancel using the setup display on the way
Press DVD SETUP on the remote.
Note
Some setup display items require operations other than selecting the setting. For details on these items, see the relevant pages.
Setting the language
–– LANGUAGE SETUP
Select the language you want to use for the onscreen display and the sound from the language list.
Select here after pressing DVD SETUP on the remote.
LANGUAGE SETUP
OSD: |
ENGLISH |
DVD MENU: |
ENGLISH |
AUDIO: |
ORIGINAL |
SUBTITLE: |
AUDIO FOLLOW |
To set, press |
, then ENTER . |
To quit, press DVD SETUP . |
|
OSD ------------------ Select the language for the on-screen display from the language list displayed on the TV screen.
DVD MENU ------- Select the language for the DVD menu from the language list displayed on the TV screen.*
AUDIO -------------- Select the language you hear during DVD playback from the language list displayed on the TV screen.*
When you select “ORIGINAL”, the language given priority on the disc is used.
SUBTITLE -------- Select the language for the subtitle from the language list displayed on the TV screen.*
When you select “AUDIO FOLLOW”, the language for the subtitles changes according to the language setting you selected in “AUDIO”.
*When you select “ OTHERS,” for any of these items, select and enter the language code from the list using the number buttons (page 101). After you have made a selection, the language code (4 digits) is displayed.
Note
When you select a language that is not recorded on the DVD, the language given priority on the disc is automatically selected except for the “OSD”.
Setting the on-screen display
–– SCREEN SETUP
Select here after pressing DVD SETUP on |
|
|||||||
Setting |
||||||||
the remote. |
|
|
|
|||||
|
|
|
|
|||||
|
|
|
|
|
|
|
||
|
|
SCREEN SETUP |
|
|
|
|
||
|
|
|
TV TYPE: |
|
16:9 |
|
|
|
|
|
|
SCREEN SAVER: |
ON |
|
forup |
||
|
|
|
BACKGROUND: |
|
JACKET PICTURE |
|
||
|
|
|
|
|
|
|
DVD/VIDEO |
|
|
|
|
|
|
|
|
||
|
|
|
|
|
|
|
||
|
|
|
|
|
|
|
||
|
To set, press |
, then ENTER . |
|
|||||
|
To quit, press DVD SETUP . |
|
|
|
||||
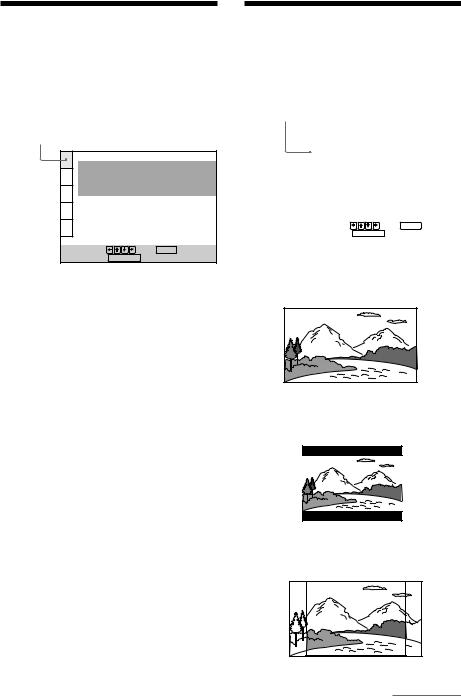
TV TYPE --------------------- Select the aspect |
|
|||||||
ratio of the connected TV. |
|
|
|
CD/CD |
||||
• 16:9 or 16:9/4:3 WIDE MODE: A wide-screen |
||||||||
|
||||||||
TV.
•4:3 LETTER BOX: A normal TV displaying a wide picture with bands displayed on the upper and lower portions of the screen.
•4:3 PAN SCAN: A normal TV displaying the wide picture on the whole screen with a portion automatically cut off.
continued
15

Setting the on-screen display (continued)
Note
Depending on the DVD, “4:3 LETTER BOX” may be selected automatically instead of “4:3 PAN SCAN” and vice versa.
SCREEN SAVER -------------------- Turn on and off the screen saver. If you turn on the screen saver, the screen saver image appears when you leave the player or the remote in pause or stop mode for 15 minutes or when you play back a CD for more than 15 minutes. The screen saver is useful to prevent your display from becoming damaged.
•ON: Turns on the screen saver.
•OFF: Turns off the screen saver.
BACKGROUND ---------------------- Select the background color or picture of the TV screen in stop mode or while playing a CD.
•JACKET PICTURE: The jacket picture appears in the background, but only when the jacket picture is already recorded on the disc.
•GRAPHICS: The picture stored in memory in the player beforehand appears in the background.
•BLUE: The background color is blue.
•BLACK: The background color is black.
Note
If a disc which does not contain a jacket picture is played while “BACKGROUND” is set to “JACKET PICTURE”, the graphic picture stored in the player will automatically appear in the background.
Custom settings
––CUSTOM SETUP
Select here after pressing DVD SETUP on the remote.
CUSTOM SETUP
|
|
PAUSE MODE: |
AUTO |
||
|
|
PARENTAL CONTROL |
|
|
|
|
|
|
|
|
|
|
|
|
|
|
|
|
|
|
|
|
|
To set, press 

 , then ENTER .
To quit, press DVD SETUP .
COLOR SYSTEM (Asian model only) ------
Select the color system when you play a VIDEO CD.
•AUTO: Outputs the video signal in the system of the disc, either PAL or NTSC. If your TV uses a DUAL system, select AUTO.
•PAL: Changes the video signal of an NTSC disc and outputs it in the PAL system.
•NTSC: Changes the video signal of a PAL disc and outputs it in the NTSC system.
Notes
•You cannot change the color system of the disc itself.
•When you purchased the Asian model, you can change the color system of this unit according to the connected TV. See page 8.
PAUSE MODE ------------------------ Select the picture in pause mode for DVD playback only.
•AUTO: A picture including subjects that move dynamically is output with no jitter. Normally select this position.
•FRAME: A picture including subjects that do not move dynamically is output with high resolution.
PARENTAL CONTROL ----------------------
Set a password and playback limitation level when you play DVDs with playback limitation for children. For details, see “Limiting playback by children (Parental Control)” on the following page.
16

Limiting playback by children
(Parental Control)
1 Press V or v repeatedly to select “PARENTAL CONTROL”, then press ENTER.
|
CUSTOM SETUP |
|
|
|
|
|
|
PAUSE MODE: |
AUTO |
||
|
|
PARENTAL CONTROL |
|
|
|
|
|
|
|
|
|
|
|
|
|
|
|
To set, press 


 , then ENTER .
To quit, press DVD SETUP .
xWhen you have not entered a password yet
The display for entering a password appears.
CUSTOM SETUP
PARENTAL CONTROL
Entry password. Enter a number in 4 figures, then press ENTER .
To return, press RETURN .
To quit, press DVD SETUP .
xWhen you have already entered a password
The display for confirming a password appears. Skip step 2.
CUSTOM SETUP
PARENTAL CONTROL
Enter password, then press ENTER .
To return, press RETURN .
To quit, press DVD SETUP .
2 Enter a password in 4 digits using the numeric buttons on the remote, then press ENTER.
The display for confirming the password appears.
CUSTOM SETUP
PARENTAL CONTROL
To confirm, enter password again then press ENTER .
To return, press RETURN .
To quit, press DVD SETUP .
3 To confirm your password, enter it using the numeric buttons, then press ENTER.
The display for setting the playback limitation level and changing the password appears.
CUSTOM SETUP
PARENTAL CONTROL
LEVEL: OFF
STANDARD: USA
CHANGE PASSWORD
To set, press 

 , then ENTER .
To quit, press DVD SETUP .
4 Press V or v repeatedly to select “STANDARD”, then press b.
5 Press V or v repeatedly to select an area as the standard for the playback limitation level, then press ENTER.
When you select “OTHERS ,”, select and enter the standard code from the table on the next page using the numeric buttons.
|
CUSTOM SETUP |
|
|
|
|
PARENTAL CONTROL |
|
|
|
|
|
LEVEL: |
OFF |
|
|
|
STANDARD: |
USA |
|
|
|
CHANGE PASSWORD |
USA |
|
|
|
|
OTHERS |
|
|
|
|
|
|
To set, press 

 , then ENTER .
To quit, press DVD SETUP .
continued
CD/CD DVD/VIDEO for up Setting
17

Custom settings (continued)
6 Press V or v repeatedly to select “LEVEL”, then press b.
|
CUSTOM SETUP |
|
|
|
|
PARENTAL CONTROL |
|
|
|
|
|
LEVEL: |
|
OFF |
|
|
STANDARD: |
|
|
|
|
CHANGE PASSWORD |
|
OFF |
|
|
|
8: |
NC17 |
|
|
|
||
|
|
|
7: |
|
|
|
|
6: |
R |
|
|
|
5: |
|
|
|
|
|
|
To set, press 


 , then ENTER .
To quit, press DVD SETUP .
7 Press V or v repeatedly to select the level, then press ENTER.
|
CUSTOM SETUP |
|
|
|
|
|
PARENTAL CONTROL |
|
|
|
|
|
|
LEVEL: |
4: PG13 |
||
|
|
STANDARD: |
USA |
||
|
|
CHANGE PASSWORD |
|
|
|
|
|
|
|
|
|
To set, press 


 , then ENTER .
To quit, press DVD SETUP .
The lower the value is, the stricter the limitation.
To return to the normal screen
Press DVD SETUP on the remote.
To turn off the Parental Control function and play the DVD after entering your password
Set “LEVEL” to “OFF” in Step 7, then press DVD N.
To change the password
1After Step 3, press V or v repeatedly to select “CHANGE PASSWORD”, then press b or ENTER.
The display for changing the password appears.
2Follow Steps 2 and 3 to enter a new password.
Standard code
Standard |
Code number |
Austria |
2046 |
|
|
Belgium |
2057 |
|
|
Canada |
2079 |
|
|
China |
2092 |
|
|
Denmark |
2115 |
|
|
Finland |
2165 |
|
|
France |
2174 |
|
|
Germany |
2109 |
|
|
Hong Kong |
2219 |
|
|
Indonesia |
2238 |
|
|
Italy |
2254 |
|
|
Japan |
2276 |
|
|
Malaysia |
2363 |
|
|
Netherlands |
2376 |
|
|
Norway |
2379 |
|
|
Philippines |
2424 |
|
|
Russian |
2489 |
|
|
Singapore |
2501 |
|
|
Spain |
2149 |
|
|
Sweden |
2499 |
|
|
Switzerland |
2086 |
|
|
Taiwan |
2543 |
|
|
Thailand |
2528 |
|
|
United Kingdom |
2184 |
|
|
18
Tips
•You can turn off the Parental Control function just after inserting the DVD (Parental Control Temporarily Canceled).
When you set a playback limitation level and insert the DVD, the PARENTAL CONTROL display appears. Enter the password to turn off the Parental Control function.
When you stop playing the DVD, the level returns to the original level.
•If you have forgotten your password, enter the
6-digit number “199703” in Step 2 to clear the current password. To enter a new password, follow the procedure from Step 2 again.
Notes
•When you play DVDs which do not have the Parental Control function, playback cannot be limited on this player.
•When you do not set a password, you cannot change the settings for playback limitation.
•Depending on the DVD, you may be asked to change the parental control level while playing the disc. In this case, enter the password, then change the level. When you stop playing the DVD, the level returns to the original level.
Setting for sound
–– AUDIO SETUP
Select here after pressing DVD SETUP on the remote.
AUDIO SETUP
|
|
TRACK SELECTION: |
OFF |
|
|
DIGITAL OUT: |
ON |
|
|
DOLBY DIGITAL: |
D-PCM |
|
|
|
|
|
|
|
|
To set, press 


 , then ENTER .
To quit, press DVD SETUP .
TRACK SELECTION -------------- Give the sound track which contains the highest number of channels priority when you play a DVD on which multiple audio formats are recorded. If multiple audio channels are recorded in PCM, MPEG AUDIO, or Dolby Digital format, the highernumbered channel audio recorded in PCM, MPEG AUDIO, or Dolby Digital format is played.
•OFF: No priority given.
•AUTO: Priority given.
Notes
• When you set this item to “AUTO”, the language may change depending on the “AUDIO” settings in “LANGUAGE SETUP”.
The “TRACK SELECTION” setting has higher priority than that of “AUDIO” settings in “LANGUAGE SETUP” (page 15).
•If PCM, MPEG AUDIO, and Dolby Digital sound tracks have the same highest number of channels, the player selects PCM, Dolby Digital, and MPEG AUDIO sound tracks, in this order.
•Depending on the DVD, the audio with priority may be predetermined. In this case, you cannot give priority to the MPEG AUDIO or Dolby Digital format by selecting “AUTO”.
continued
CD/CD DVD/VIDEO for up Setting
19

Setting for sound (continued)
DIGITAL OUT ------------------------ Select output signals via the DIGITAL OUT OPTICAL jack.
•ON: Normally select this position. When you select “ON”, set “DOLBY DIGITAL”. For details, see “Setting for the signal to the digital output.”
•OFF: Select this when the player does not output the sound signals via the DIGITAL OUT OPTICAL jack. If you select this position, the influence of the digital circuit upon the analog one is minimum.
Notes
•When you play sound tracks with 96 kHz sampling frequency, the output signals from the DIGITAL OUT OPTICAL jack are converted to 48 kHz (sampling frequency). When the signals are output from the MD OUT jacks, the sampling frequency stays at 96kHz and the output signals are converted to analog signals.
•When you select “OFF,” you cannot set “DOLBY DIGITAL”.
Setting for the signal to the
digital output
Switch the methods of outputting audio signals when you connect a digital component such as a receiver (amplifier), DAT, or MD via the DIGITAL OUT OPTICAL jack using an optical digital connecting cord. For details on the connection, see page 86.
AUDIO SETUP
|
|
TRACK SELECTION: |
OFF |
|
|
DIGITAL OUT: |
ON |
|
|
DOLBY DIGITAL: |
D-PCM |
|
|
|
|
|
|
|
|
|
|
|
|
To set, press 


 , then ENTER .
To quit, press DVD SETUP .
DOLBY DIGITAL -------------------- Select output of Dolby Digital signals via the DIGITAL OUT OPTICAL jack. You cannot select this item when you set “DIGITAL OUT” to “OFF”.
•D-PCM (Downmix PCM): When you play Dolby Digital sound tracks, the output audio signals are mixed down to 2 channels.
•DOLBY DIGITAL: When the player is connected to an audio component with a builtin Dolby Digital decoder.
Notes
•If the player is connected to an audio component lacking a built-in Dolby Digital decoder, do not set “DOLBY DIGITAL” in “AUDIO SETUP” to “DOLBY DIGITAL.” Otherwise, when you play the Dolby Digital sound track, a loud noise or no sound will come out from the speakers, affecting your ears or causing the speakers to be damaged.
•MPEG AUDIO is converted to linear PCM (LPCM) before being output.
20
Speaker settings
–– SPEAKER SETUP
Set up your speaker system for playback of 5.1CH DVDs.
Select here after pressing DVD SETUP on the remote.
|
SPEAKER SETUP |
|
|
|
|
|
|
||
|
|
SET UP: |
|
|
|
|
|
|
|
|
|
DISTANCE: |
|
|
|
|
|
|
|
|
|
BALANCE: |
|
|
|
|
|
|
|
|
|
LEVEL: |
|
OFF |
|
|
|
|
|
|
|
TEST TONE: |
|
|
|
||||
|
|
|
FRONT: |
|
|
|
|
YES |
|
|
|
|
CENTER: |
|
|
|
|
YES |
|
|
|
|
REAR: |
|
|
|
BEHIND |
|
|
|
|
|
SUBWOOFER: |
|
|
|
YES |
|
|
To set, press |
, then ENTER . |
|
|||||||
To quit, press DVD SETUP .
SETUP ------------------------ Select the rear speaker location and whether a subwoofer is connected or not.
•REAR: These items let you specify the location of your rear speakers for proper implementation of “VIRTUAL REAR SHIFT” and “VIRTUAL MULTI REAR” in the Control Menu display.
-BEHIND (shown A)
-SIDE (shown B)
|
90° |
|
B |
45° |
B |
A |
A |
|
|
20° |
|
•SUBWOOFER: Select whether a subwoofer is connected or not.
-YES
-NONE
Notes
•When you select an item, the sound cuts off for a moment.
•The cut off frequency for the subwoofer is fixed at 100Hz.
•Set the cut off frequency on the subwoofer as high as possible.
•Depending on the settings of other speakers, the subwoofer may output excessive sound.
DISTANCE ----------------------------- Adjust the distance of each speaker in 0.2 meter (1 ft. for North American models) steps. For the speaker distance of North American models, refer to the distance in brackets.
•FRONT: Front speaker distance. Default is
3.6meter (12 ft.). Adjust the distance from
1.0to 15.0 meters (4 to 50 ft.).
•CENTER: Center speaker distance. Default is
3.6meter (12 ft.). Distance can be set in
0.2meter (1 ft.) steps from a distance 0.6 meter (2 ft.) farther to the front speaker to a distance
1.6meter (6 ft.) closer to your listening position.
•REAR: Rear speaker distance. Default is
3.0meter (10 ft.). Distance can be set in
0.2 meter (1 ft.) steps from a distance equal to the front speaker to a distance 5 meter (16 ft.) closer to your listening position.
Notes
•When you set the distance, the sound cuts off for a moment.
•If each of the front or rear speakers is not placed an equal distance from your listening position, set the distance of the closest speaker.
•Do not place the rear speakers farther away from your listening position than the front speakers.
continued
CD/CD DVD/VIDEO for up Setting
21

Speaker settings (continued)
BALANCE ------------------------------ Adjust the balance of each speaker in 1.0 dB steps from –6 dB [L] to +6 dB [R]. Default adjustments are 0.0 dB.
•FRONT: The balance between the front left and right speakers.
•REAR: The balance between the rear left and right speakers.
LEVEL ------------------------ Adjust the level of each speaker in 1.0 dB steps from –10 dB to
+6 dB. Default adjustments are 0.0 dB.
•CENTER: The level of the center speaker.
•REAR: The level of the rear speakers.
•SUBWOOFER: The level of the subwoofer.
TEST TONE --------------------------- |
Use the |
test tone to adjust the speaker volume. |
|
•OFF: The test tone is not emitted from the speakers.
•ON: During adjustment of “BALANCE” or “LEVEL”, the test tone is emitted from both speakers simultaneously.
Note
While you are playing a disc, you cannot hear the test tone. Execute the test tone after you stop playback.
Adjusting the speaker
balance/level
1 In the stop mode, press DVD SETUP, then select “SPEAKER SETUP”.
2 Select “TEST TONE” and set “TEST TONE” to “ON”.
You will hear the test tone from each speaker in sequence.
3 From your listening position, press V or v repeatedly to select “BALANCE” or “LEVEL”, then press ENTER. Adjust the value of “BALANCE” and
“LEVEL” using V or v.
During this adjustment, the test tone is emitted from both speakers simultaneously.
4 Select “TEST TONE” and set “TEST TONE” to “OFF” to turn off the test tone.
To return to the default setting
Select the item, then press CLEAR.
Tip
If you turn VOLUME (or press VOL +/– on the remote), all the speaker volumes change.
22

If connecting the front speakers only
You can use this system with the front speakers only.
In this case, switch the system to the 2-channel mode.
?/1
(Power)
MULTI/2CH
,Press MULTI/2CH to turn off the indicator on the button.
In the DVD 2CH mode, all of the audio channels are mixed down to a 2-channel audio signal.
CD/CD DVD/VIDEO for up Setting
23

The DVD/VIDEO CD/CD Player
Playing discs
— Normal Play
You can play up to five discs (DVD, VIDEO CD, CD) in a row.
You can play both VIDEO CDs without PBC functions (Ver. 1.1) and VIDEO CDs with PBC functions (Ver. 2.0). You can enjoy two kinds of playback according to the disc type.
Depending on the DVD or VIDEO CD, some operations may be different or restricted. Refer to the instructions supplied with your disc.
PREVIOUS DVD NX MODE SELECT
?/1 |
Multi stick |
(Power) NEXT |
. > x PUSH ENTER |
3 2 VOLUME m M
|
|
|
|
D.SKIP |
|
N nN nN |
X |
X |
|
|
||||
. > m |
M |
x |
SLOW t/T |
|
|
|
|
|
|
c |
C t |
T |
|
|
O |
|
|
|
STEP c/C |
|
V |
|
|
ENTER |
B |
b |
|
|
|
VOL +/–
v
 B/b
B/b
1 Turn on your TV and select the video input.
Refer to the operating instructions supplied with your TV if you need help.
2 Press one of the A 1~5 buttons and place a disc on the disc tray.
If a disc is not placed properly, it will not be recognized.
Place with the
label side up. When you
play an 8 cm disc, place it
on the inner circle of the
tray.
Press the same button to close the disc tray. To insert other discs, press A of other numbers to open the disc tray.
The disc presence indicator lights in the display.
Disc presence indicator
24

3 Press one of the DISC 1~5 buttons.
The disc tray closes and playback starts.
If you press DVD NX when the disc tray is closed, playback starts from the disc loaded on the tray whose disc pointer indicator lights.
When playing back a DVD:
Title number
Disc number Chapter number
Playing time
Disc indicators
When playing back a VIDEO CD or CD:
Disc number Track number
Disc indicators |
Playing time |
|
|
Disc presence |
Disc pointor |
indicator |
indicator |
In “1 Disc” play mode (see the following list)
In “All Discs” play mode (see the following list)
To |
Do this |
Stop play |
Press x. The playback stops at the |
|
point x is pressed (Resume Play). |
|
Press x again to cancel the |
|
Resume Play. |
|
|
Pause |
Press DVD NX (or X on the |
|
remote)*1. Press again to resume |
|
playback. |
|
|
Select a track |
During playback or pause, press |
or chapter*2 |
> or NEXT (to go forward), |
|
. or PREVIOUS (to go back). |
Find a point in |
Press M or m during playback. |
a track title or |
When you press M or m |
chapter |
repeatedly, the search speed |
(Lock search |
changes as follows: |
function) |
1 (slow) t 2 (faster than 1) t |
|
1 (slow)... |
|
Press DVD NX (or DVD N on |
|
the remote) at the desired point. |
|
|
Change the |
During playback, press SLOW t |
playback |
or T*3 on the remote. Each time |
speed*4 |
you press the button, the speed |
|
switches between two slowed |
|
playback speeds. To return to |
|
normal playback, press DVD NX |
|
(or DVD N on the remote). |
|
|
Playing the disc |
During playback, press STEP c |
frame by frame |
or C*3 on the remote. Each time |
changing the |
you press the button, playback is |
playback speed*4 |
advanced a single frame in the |
|
desired direction. To return to |
|
normal playback, press DVD NX |
|
(or DVD N on the remote). |
Select a disc |
Press one of the DISC 1~5 buttons |
in stop mode |
(or D.SKIP on the remote). |
|
|
Play only the |
1 Press MODE SELECT |
disc you have |
repeatedly to select “Set Up |
selected |
Mode”, then press PUSH ENTER |
|
in stop mode. |
|
2 Move the multi stick toward B or |
|
b repeatedly to select “DVD Set |
|
Up ?”, then press PUSH ENTER. |
|
3 Move the multi stick toward B or |
|
b repeatedly to select “Play |
|
Mode Set Up ?”, then press |
|
PUSH ENTER. |
|
4 Move the multi stick toward B or |
|
b repeatedly to select “Play |
|
Mode 1 Disc”, then press PUSH |
|
ENTER. |
|
|
continued
Player CD/CD DVD/VIDEO The
25

Playing discs (continued)
To |
Do this |
|
Play all discs |
1 Press MODE SELECT |
|
|
repeatedly to select “Set Up |
|
|
Mode”, then press PUSH ENTER |
|
|
in stop mode. |
|
|
2 Move the multi stick toward B or |
|
|
b repeatedly to select “DVD Set |
|
|
Up ?”, then press PUSH ENTER. |
|
|
3 Move the multi stick toward B or |
|
|
b repeatedly to select “Play |
|
|
Mode Set Up ?”, then press |
|
|
PUSH ENTER. |
|
|
4 Move the multi stick toward B or |
|
|
b repeatedly to select “Play |
|
|
Mode All Discs”, then press |
|
|
PUSH ENTER. |
|
|
|
|
Remove a disc |
Press one of the A 1~5 buttons. |
|
|
|
|
Exchange other |
Press one of the A 1~5 buttons |
|
discs while |
to open the tray that contains |
|
playing |
the disc that you want to |
|
|
change. When you change the disc, |
|
|
press the same button to close the |
|
|
tray. |
|
|
|
|
Adjust the |
Turn VOLUME (or press VOL +/– |
|
volume |
on the remote). |
|
*1 There may be some disturbance in the video image.
*2 Only when the PBC function is set to off or when playing VIDEO CDs without PBC functions (Ver 1.1).
*3 SLOW t and STEP c are not available during playback of VIDEO CDs.
*4 DVD and VIDEO CD only.
Tips
•Pressing DVD NX when the power is off automatically turns the power on and starts disc playback if there is a disc in the tray (One Touch Play). When the system is in the Power Saving Mode, the One Touch Play function does not work.
•You can switch from another source to the DVD player and start playing a disc just by pressing DVD NX or one of the DISC 1~5 buttons (Automatic Source Selection).
•If there is no disc in the player, “No Disc” appears in the display.
•When a disc tray is holding a disc, the indicator for the tray lights. In the display, when a disc tray holding a disc is selected (or the disc in the disc tray is playing), the disc pointer indicator lights. When a disc tray holding a disc is not selected, the disc presence indicator lights, but the disc pointer indicator does not light. When all disc trays are empty, all the disc pointer indicators and all the disc presence indicators light.
26

Notes
•When a tray has not been read by the unit, the disc presence indicator may light even though there is no disc in the tray.
•Depending on the DVD or VIDEO CD, some operations may be prohibited.
•VIDEO CDs cannot be viewed slowly or frame by frame in the reverse direction.
•Resume Play may not be available depending on the disc.
•Resume Play is not available in Shuffle or Program Play mode.
•Depending on where you stopped the disc, the player may resume playback from a different point.
•The point where you stopped playing is cleared when:
–you open or close the disc tray
–you disconnect the AC power cord
–you change the play mode
–you start playback after selecting a title, chapter, or track
–you change the settings of “DVD MENU”, “AUDIO”, or “SUBTITLE” in “LANGUAGE SETUP” in the setup display.
–you change the settings of “TV TYPE” in ”SCREEN SETUP” in the setup display
–you change the settings of “PARENTAL CONTROL” in ”CUSTOM SETUP” in the setup display
–you select another disc.
•When “DVD” is selected as the function, you
cannot use Dolby Pro Logic Surround sound and the DSP surround effects.
•When recording, the indicator on the MULTI/2CH button is turned off automatically.
•Under the following circumstances, 2CH is automatically selected and the indicator on the MULTI/2CH button turns off.
–When recording.
–When TAPE B is in REC PAUSE mode.
–When recording using TAPE B.
•When using headphones, the sound from headphones is 2 channel.
•Switch the channel mode to 2CH by pressing MULTI/2CH when making an analog recording using a component connected to the MD OUT jacks on this unit. There is no audio output from the MD OUT jacks in the multi channel mode.
•Depending on the DVD, digital recording may not be done. In this case, perform analog recording. Press MULTI/2CH to switch the channel mode to 2CH on this system when making an analog recording.
Player CD/CD DVD/VIDEO The
27

Checking the text information of the disc
You can check the DVD TEXT or CD TEXT of the disc on the TV screen and the front panel display.
DVD TEXT and CD TEXT is information recorded on the disc which you cannot change.
 DISPLAY
N nN nN X
.> m M x
c C t T
DVD DISPLAY
O
V
B b
v
,Press DISPLAY repeatedly while playing a DVD or a TEXT-CD.
The “TIME/TEXT” information is displayed at the top of the screen. When the elapsed time of the chapter, or track is displayed, text information is displayed at the bottom of the screen.
TIME/TEXT |
|
|
|
|
C 0 1 : 3 2 : 5 5 |
|
|
|
|
|
|
|
BRAHMS SYMPHONY NO – 4
Notes
•Only DVD TEXT in English is displayed.
•When there is no text recorded on the disc, “NO TEXT” is displayed.
•If DISPLAY is not pressed for 2 seconds, the display disappears.
28
Checking the playing time and remaining time
You can check the remaining time of the current track or that of the disc.
When a TEXT disc is loaded, you can check the information stored on the disc, such as the disc titles. When the unit detects TEXT discs, the “TEXT” indicator appears in the display.
Using the front panel display
?/1
(Power) DISPLAY
,Press DISPLAY.
Each time you press the button during normal playback or when playback is stopped, the display changes as follows:
During normal playback
DVDs:
t Playing time of the current chapter r
Remaining time of the current chapter r
Playing time of the current title r
Remaining time of the current title r
Title name* r
Clock display (for eight seconds) r
Preset file name or “EFFECT ON (OFF)”
VIDEO CDs with PBC functions:
t Playing time of the current track r
Title name of the current track* r
Clock display (for eight seconds) r
Preset file name or “EFFECT ON (OFF)”
VIDEO CDs (in continuous play) or CDs
t Playing time of the current track r
Remaining time of the current track r
Playing time of the current disc r
Remaining time of the current disc r
Title name of the current track r
Clock display (for eight seconds) r
Preset file name or “EFFECT ON (OFF)”
continued
Player CD/CD DVD/VIDEO The
29

Checking the playing time and remaining time (continued)
When playback is stopped
During Program Play mode when there is a program
tThe last title, chapter, or track number of the program and the total playing time
r
Title name* r
Clock display (for eight seconds) r
 Preset file name or “EFFECT ON (OFF)”
In other conditions
DVDs:
t Total number of titles** r
Title name* r
Clock display (for eight seconds) r
Preset file name or “EFFECT ON (OFF)”
VIDEO CDs with PBC functions:
tTotal number of tracks and the total playing time**
r
Title name of the disc* r
Clock display (for eight seconds) r
 Preset file name or “EFFECT ON (OFF)”
VIDEO CDs (in continuous play) or CDs:
tTotal number of tracks and the total playing time**
r
Title name of the disc* r
Clock display (for eight seconds) r
Preset file name or “EFFECT ON (OFF)”
*With discs that are recorded with TEXT only (certain characters cannot be displayed). When no text is on the disc, nothing appears. Depending on the disc, some TEXT information may not appear.
**When playback is stopped and “RESUME” appears on the front panel display, the point where playback was stopped is displayed.
30
Loading...