


LED Work Lamp
Operation and Safety Notes
Lampa warsztatowa LED
Wskazówki dotyczące obsługi i bezpieczeństwa
LEDMUNKALÁMPA
Kezelési és biztonsági utalások
LED palična svetilka
Navodila za upravljanje in varnostna opozorila
LED tyčová svítilna
Pokyny pro obsluhu a bezpečnostní pokyny
Tyčová LED lampa
Pokyny pre obsluhu a bezpečnostné pokyny
LED-STABLEUCHTE
Bedienungs - und Sicherheitshinweise
Z30590 |
4 |
GB |
Operation and Safety Notes |
Page |
4 |
|
|
|
|
PL |
Wskazówki dotyczące obsługi i bezpieczeństwa |
Strona |
15 |
|
|
|
|
HU |
Kezelési és biztonsági utalások |
Oldal |
27 |
SI |
Navodila za upravljanje in varnostna opozorila |
Stran |
38 |
|
|
|
|
CZ |
Pokyny pro obsluhu a bezpečnostní pokyny |
Strana |
48 |
|
|
|
|
SK |
Pokyny pre obsluhu a bezpečnostné pokyny |
Strana |
58 |
DE / AT / CH |
Bedienungsund Sicherheitshinweise |
Seite |
68 |
|
|
|
|

1
2
3
4
5
3

Table of Contents
Introduction |
|
|
Proper use............................................................................... |
Page |
5 |
Description of parts and features.......................................... |
Page |
5 |
Technical data........................................................................ |
Page |
6 |
Scope of delivery.................................................................... |
Page |
7 |
Safety instructions....................................................... |
Page |
7 |
Preparing for use |
|
|
Recharging the rechargeable |
|
|
batteries for the LED work lamp............................................. |
Page |
9 |
Use |
|
|
Using the LED work lamp connected to a power supply..... |
Page |
11 |
Maintenance and cleaning.................................. |
Page 12 |
|
Troubleshooting............................................................ |
Page 12 |
|
Disposal................................................................................ |
Page 13 |
|
4 GB
Introduction
LED Work Lamp
Q Introduction
Familiarise yourself with the product before using it for the first time. In addition please refer carefully to the operating instructions below and the safety advice. Use the product
only as described and for the indicated purpose. Keep these instructions in a safe place. If you pass the product on to anyone else, please ensure that you also pass on all the documentation.
Q Proper use
The product is intended for providing illumination in dry indoor rooms and in outdoor environments. If used outdoors the mains adapter must be protected from moisture and the weather. Any other use or modification of the product constitute improper use and pose a risk of short circuits, fire, electric shocks and damage to the product. The manufacturer is not liable for damage caused by improper use. The product is not intended for commercial use.
Q Description of parts and features
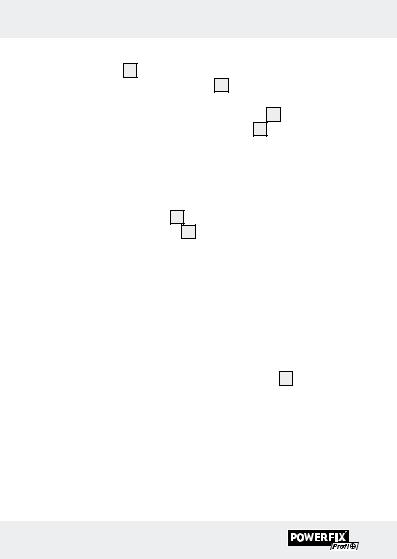
1Hook
2Adapter
3Adapter for cigarette lighter
4On / off switch
5Protective rubber pad
GB 5

Introduction
Q Technical data
Light bulb: |
60 LEDs (white, non-replaceable) |
||||
Light intensity : |
approx. 13,000 - 15,000 mcd |
||||
|
(millicandela) |
||||
Lamp rechargeable batteries: |
3 x AA NiMH, 1800 mAh |
||||
|
(not replaceable) |
||||
Charging time: |
approx. 5 to 7 hours |
||||
|
(Empty battery charging time |
||||
|
approx. 8 to 11 hours) |
||||
Burn time: |
approx. 4 hours (with fully charged |
||||
|
battery) |
|
|
||
Lifespan of LEDs: |
approx. 100,000 hours |
||||
Protection class: |
III |
|
|
||
System of protection: |
IP44 |
|
|
||
Adapter: |
|
|
|
|
|
Input: |
230 V ~ 50 Hz |
||||
Output: |
DC 6 V |
|
|
, 300 mA |
|
|
|
||||
Model: |
YX-0603 |
||||
Protection class: |
II |
|
|
||
System of protection: |
IP20 |
|
|
||
Cigarette lighter: |
|
|
|
|
|
Input: |
12 V |
|
|
|
|
|
|
|
|||
Output: |
12 V |
|
, 240 mA |
||
|
|||||
6 GB

Introduction / Safety instructions
Q Scope of delivery
1 LED work lamp including rechargeable batteries
1 Adapter
1 Adapter for cigarette lighter
1 Set of directions for use
 Safety instructions
J Warning! DANGER TO LIFE AND RISK
OF ACCIDENTS FOR INFANTS AND CHILDREN!
Never leave children alone and unsupervised with the packaging material. There is always a risk of suffocation if children play with the packaging material. Children often underestimate risks. Always keep children away from the packaging material. This product is not a toy.
JKeep batteries out of the reach of children. Do not leave the batteries lying around. There is a risk of children or animals swallowing them. Consult a doctor immediately if a battery is swallowed.
JChildren or persons who lack the knowledge or experience to use the device or whose physical, sensory or intellectual capacities are limited must never be allowed to use the device without supervision or instruction by a person responsible for their safety. Children must never be allowed to play with the device.
JThis product is not a toy and should be kept out of the reach of children. Children are not aware of the dangers associated with handling electrical products.
JDo not use the article if you detect any kind of damage.
GB 7

Safety instructions
JCAUTION! DANGER OF EXPLOSION! Do not
operate the LED work lamp in potentially explosive environments in which there are inflammable vapours,
gases or dusts.
JThe LED work lamp is splash-proof. The product and the adapter must never be immersed into water or other liquids. Otherwise there is a risk of electric shock! Never hang the product near a washbasin, a pond or the like.
JConnect the LED work lamp to a properly installed mains socket or a suitable cigarette lighter socket only. The voltages in each case must comply with information given in the section “Technical data”.
JEnsure that the electrical socket is easily accessible so that you can pull the plug quickly out of the socket if necessary.
JDo not carry out any modifications or repairs to the product yourself. The LEDs cannot and must not be replaced.
mATTENTION! The protective cover in front of the LEDs is non-replace- able. Dispose of the LED work lamp when you detect cracks or signs of breakages in the protective cover. Dispose of the product when the LED work lamp, the cables or adapters are damaged.
JNever connect the LED work lamp to a power supply socket if the LED work lamp, power lead or socket is damaged or the LED work lamp has been dropped.
JEnsure that the power lead cannot become damaged by sharp edges or hot objects. Unwind all the lead completely before use.
JKeep easily flammable materials away the product. Never hang objects above the LED work lamp or the mains adapter and never cover them.
JPull the mains adapter / plug out of the mains socket / cigarette lighter socket when you are not using the LED work lamp or before you clean it. Do this as well if signs of a fault develop during use or charging, e.g. smoke, burning smell etc., or during a storm.
8 GB
Safety instructions / Preparing for use
When doing this, pull directly on the mains adapter / plug and not on the lead.
JProtect the product against heat, cold, strong vibrations and impacts.
JCAUTION! LED RADIATION. Avoid damage to
eyes! ! Never look directly at the LED. Never use optical appliances such as magnifying glasses or the like to
look at the LED. Protect yourself and your environment by taking proper precautions.
JNever point the LED beam at reflective surfaces, people or animals. This could result in blindness or irritation of the eyes. Even weak LEDs could result in eye damage.
JDo not attach the hook 1 to hot objects. The dead weight of the LED work lamp might cause the hook to deform or bend out of shape.
QPreparing for use
QRecharging the rechargeable batteries for the LED work lamp
mDo not connect the LED work lamp to the cigarette lighter socket in your vehicle if the vehicle battery is very old or exhausted. This
could cause the engine to fail to start.
jIn order to use the LED work lamp without a cable, you need to recharge the batteries before use. The charging process takes about 5 to 7 hours. The rechargeable batteries are firmly integrated into the handle of the LED work lamp.
jYou can recharge the rechargeable batteries using a normal household socket or the cigarette lighter of your vehicle.
Tip: We recommend you recharge the LED work lamp with a normal domestic socket so that the battery of your vehicle does not become flat.
GB 9
Preparing for use
jSwitch the LED work lamp off during the charging process (put the
on / off switch 4 to position 0).
jRemove the protective rubber pad 5 on the lower side of the LED work lamp.
jInsert the connection plug of the mains adapter 2 or the connection plug of the cigarette lighter socket adapter 3 into the connection
socket in the LED work lamp handle.
mATTENTION! When charging from a cigarette lighter socket, the adapter must always be fully inserted into the cigarette lighter socket of the vehicle. Otherwise there is the danger of fire through overheating.
jInsert the mains adapter 2 into a mains socket or insert the cigarette lighter socket adapter 3 into the cigarette lighter socket in your vehicle.
Note: The product is fitted with an overcharge protection circuit. In spite of this, you should disconnect the LED work lamp from the power supply after the charging process is complete.
jThe charging indicator lights up red during the charging process. When the charging process is complete, the charging indicator lights up green. When the indicator LED work lamp is green, pull the adapter out of the socket. Also disconnect it from the LED work lamp so that the batteries do not go flat.
mATTENTION! Attach the protective rubber pad 5 back onto the lower side of the LED work lamp before operating it again. Otherwise water might get onto the connector pin if you use the LED work lamp outside.
10 GB
Use
Q Use
mWhen using the LED work lamp in a vehicle make sure that you do not endanger the driver or the passengers. Store and secure the LED work lamp in such a way that, even under conditions of full
braking, there is no danger of damage to the product or personal injury.
jFully charge the rechargeable batteries for the LED work lamp as described in the section called “Recharging the rechargeable batteries for the LED work lamp”.
jPress the on / off switch 4 (position I) to switch the LED work lamp on.
QUsing the LED work lamp connected to a power supply
mArrange the power lead so that it does not create a trip hazard.
mCAUTION DANGER OF ACCIDENT! Do not connect or use the LED work lamp if you are in moving traffic, for example driving a vehicle. The LED work lamp is not a passenger compartment light or a reading light!
jPull the protective rubber pad 5 out of the bottom of the LED work lamp handle.
jInsert the connection plug of the mains adapter 2 or the connection plug of the cigarette lighter socket adapter 3 into the connection socket in the LED work lamp handle.
jInsert the mains adapter 2 into a 230 V ~ mains socket or insert the cigarette lighter socket adapter 3 into the cigarette lighter socket in your vehicle.
jPress the On / Off switch 4 to switch on the LED work lamp.
GB 11

Use / Maintenance and cleaning / Troubleshooting
mATTENTION! Remember to close the protective rubber pad 5 before use, otherwise water may flow into the DC pin when using the LED work lamp in an outside area.
mATTENTION! If the LED work lamp is connected to the mains supply via an adapter, it is only suitable for indoor use.
Q Maintenance and cleaning
The product requires no maintenance. The LEDs cannot be replaced.
JDisconnect the product from the power supply before you clean it. j Clean the product regularly with a dry, fluff-free cloth. Use a slightly
moist cloth to remove any stubborn dirt. j Do not use corrosive cleaning agents.
JNever immerse the product in water or other liquids.
Q Troubleshooting
Fault |
Possible causes and cures |
|
|
No |
- Is the mains adapter or cigarette lighter socket adapter |
functions |
fully inserted? |
Charging |
When connected to a cigarette lighter socket: |
indicator |
- Is the cigarette lighter socket supplied with power? |
does not |
Some cigarette lighter sockets only supply power with |
light up |
the ignition switched on. |
|
- Check the fuse in the vehicle. |
12 GB
Troubleshooting / Disposal
Fault |
Possible causes and cures |
Charging When connected to a cigarette lighter socket: takes a - Vehicle battery too weak?
very long time
Q Disposal
The packaging is made entirely of recyclable materials, which you may dispose of at local recycling facilities.
Contact your local refuse disposal authority for more details of how to dispose of your worn-out product.
To help protect the environment, please dispose of the product properly when it has reached the end of its useful life and not in the household waste. Information on collection points and their opening hours can be obtained from your local authority.
Faulty or used batteries must be recycled in accordance with Directive 2006 / 66 / EC. Please return the batteries and / or the device to the available collection points.
Pb
Environmental damage through incorrect disposal of the rechargeable batteries!
Rechargeable batteries may not be disposed of with the usual domestic waste. They may contain toxic heavy metals and are subject to hazardous waste treatment rules and regulations. The chemical symbols for heavy
GB 13

Disposal
metals are as follows: Cd = cadmium, Hg = mercury, Pb = lead. That is why you should dispose of used rechargeable batteries at a local collection point.
Product Description:
LED Work Lamp
Model No.: Z30590
Version: 12 / 2010
EMC 

14 GB

Spis zawartości
Wstęp |
|
|
Zastosowanie zgodne z przeznaczeniem........................ |
Strona |
16 |
Opis części.......................................................................... |
Strona |
16 |
Dane techniczne................................................................. |
Strona |
17 |
Zakres dostawy.................................................................. |
Strona |
18 |
Wskazówki bezpieczeństwa................................. |
Strona |
18 |
Przed zastosowaniem |
|
|
Ładowanie akumulatora lampy......................................... |
Strona |
21 |
Zastosowanie............................................................. |
Strona |
22 |
Zastosowanie z podłączeniem do sieci elektrycznej....... |
Strona |
23 |
Konserwacja oraz czyszczenie.................... |
Strona |
24 |
Usuwanie usterek................................................... |
Strona |
24 |
Utylizacja........................................................................ |
Strona |
25 |
PL 15
Wstęp
Lampa warsztatowa LED
Q Wstęp
Przed uruchomieniem urządzenia po raz pierwszy zapoznaj się z nim. W tym celu przeczytaj uważnie poniższą instrukcję obsługi oraz wskazówki dotyczące bezpieczeństwa. Użytkuj
urządzenie tylko tak, jak to opisano i tylko w podanych dziedzinach zastosowania. Przechowuj starannie niniejszą instrukcję. Przy przekazywaniu urządzenia osobom trzecim, przekaż wraz z nią również całą przynależną dokumentację.
Q Zastosowanie zgodne z przeznaczeniem
Produkt wykorzystywany jest zarówno do oświetlenia w suchych pomieszczeniach wewnętrznych, jak i na zewnątrz. W przypadku stosowania na zewnątrz, zasilacz musi być chroniony przed wilgocią oraz przed warunkami atmosferycznymi. Inne zastosowanie lub zmiany w produkcie nie są zgodne z jego przeznaczeniem i mogą prowadzić do zagrożeń takich jak np. zwarcie, pożar, porażenie prądem i uszkodzenie produktu. Producent nie ponosi odpowiedzialności za szkody powstałe wskutek użycia produktu niezgodnie z jego przeznaczeniem. Produkt nie jest przeznaczony do użytku komercyjnego.
Q Opis części
1Hak
2Zasilacz
3Adapter zapalniczki pojazdu
16 PL

Wstęp
4Przełącznik Zał. / Wył.
5Gumowa osłona ochronna
Q Dane techniczne
Żarόwki: |
60 diod LED (białe, nie wymienne) |
||||
Natężenie światła: |
ok. 13.000 - 15.000 mcd (Millicandela) |
||||
Baterie lampy: |
3 x AA Ni-MH, 1800 mAh (nie wymienne) |
||||
Czas ładowania: |
ok. 5 do 7 godzin (z pustymi bateriami ok. 8 |
||||
|
do 11 godzin) |
||||
Czas świecenia: |
ok. 4 godziny (po pełnym naładowaniu |
||||
|
akumulatora) |
||||
Żywotność diod LED: |
ok. 100.000 godzin |
||||
Klasa ochrony: |
III |
|
|
||
Rodzaj ochrony: |
IP44 |
|
|
||
Zasilacz: |
|
|
|
|
|
Wejście: |
230 V ~ 50 Hz |
||||
Wyjście: |
DC 6 V |
|
|
, 300 mA |
|
|
|
||||
Model: |
YX-0603 |
||||
Klasa ochrony: |
II |
|
|
||
Rodzaj ochrony: |
IP20 |
|
|
||
Zapalniczka pojazdu: |
|
|
|||
Wejście: |
12 V |
|
|
|
|
|
|
|
|||
Wyjście: |
12 V |
|
, 240 mA |
||
|
|||||
PL 17
Wstęp / Wskazówki bezpieczeństwa
Q Zakres dostawy
1 Lampa warsztatowa LED włącznie z bateriami ponownego ładowania
1 Adapter sieciowy
1 Adapter do zapalniczki
1 Instrukcja obsługi
|
Wskazówki bezpieczeństwa |
J |
Ostrzeżenie! NIEBEZPIECZEŃSTWO |
|
URAZU I ZAGROŻENIE ŻYCIA DLA MAŁYCH |
|
DZIECI! Proszę nie pozostawiać dzieci bez nadzoru z |
|
materiałem opakowaniowym. Istnieje zagrożenie uduszeniem, |
|
wywołane przez materiał opakowaniowy. Dzieci często nie doce- |
|
niają istniejących zagrożeń. Dzieci powinny zawsze przebywać z |
|
dala od materiału opakowaniowego. Niniejszy produkt nie jest |
|
zabawką. |
JAkumulatorki nie są przeznaczone do zabawy dla dzieci. Nie należy pozostawiać akumulatorków w miejscu dostępnym dla wszystkich. Istnieje niebezpieczeństwo, że zostaną one połknięte przez dzieci lub zwierzęta domowe. W razie połknięcia należy udać się natychmiast do lekarza.
JDzieciom lub osobom, którym brak wiedzy lub doświadczenia w obchodzeniu się z urządzeniem oraz osobom, które są ograniczone pod względem ich fizycznych, sensorycznych lub duchownych zdolności, nie wolno obsługiwać urządzenia bez nadzoru lub wskazówek osoby odpowiedzialnej za ich bezpieczeństwo. Dzieci muszą być nadzorowane, aby nie bawiły się urządzeniem.
18 PL

Wskazówki bezpieczeństwa
JTen produkt nie jest zabawką dla dzieci. Dzieci nie potrafią oszacować zagrożeń wywoływanych przez kontakt z urządzeniami elektrycznymi.
JNie powinno się stosować produktu jeśli posiada on jakiekolwiek uszkodzenia.
JOSTROŻNIE! ZAGROŻENIE EKSPLOZJĄ! Lampy
warsztatowej LED nie należy stosować w środowisku zagrożonym wybuchem, w obecności łatwopalnych
oparów, gazów lub pyłów.
JLampa warsztatowa LED chroniona jest przed wodą rozpryskową. Nie wolno jednak zanurzać produktu oraz zasilacza w wodzie lub innych cieczach. W przeciwnym razie istnieje zagrożenie porażenia prądem elektrycznym! Produktu nie należy zawieszać w pobliżu umywalki, stawu lub podobnych.
JLampę warsztatową LED należy podłączyć jedynie do prawidłowo zainstalowanego gniazda lub odpowiedniej zapalniczki pojazdu. Odpowiednie napięcie musi być zgodne z danymi podanymi w rozdziale „Dane techniczne“.
JProszę przy tym zwracać uwagę, aby w razie nagłej potrzeby usunięcia wtyczki z gniazdka było ono zawsze dobrze dostępne.
JProszę nie przeprowadzać żadnych zmian lub napraw na produkcie.
Żarόwek LED nie można i nie wolno wymieniać.
mUWAGA! Osłona ochronna przed diodami LED nie jest wymienna. Lampę warsztatową LED należy usunąć, kiedy stwierdzi się
pęknięcia lub ślady złamań na osłonie ochronnej. Produkt należy zbyć, stwierdzając uszkodzenia na lampie warsztatowej LED, na połączeniowych przewodach sieciowych lub na adapterze.
JLampy warsztatowej LED nie należy podłączyć, kiedy lampa, przewόd sieciowy lub wtyczka uszkodzone są lub gdy lampa spadła.
PL 19

Wskazówki bezpieczeństwa
JProszę przy tym zwracać uwagę, aby przewody sieciowe nie zostały uszkodzone przez ostre krawędzie lub gorące przedmioty. Przed użyciem należy całkowicie rozwinąć wszystkie przewody.
JMateriały łatwopalne należy trzymać z dala od produktu. Nie należy zawieszać jakichkolwiek przedmiotόw nad lampą warsztatową LED lub nad zasilaczem i nie należy ich nakrywać.
JZasilacz / wtyczkę należy usunąć z gniazdka / zapalniczki, kiedy lampa warsztatowa LED nie jest w użyciu oraz przed czyszczeniem. Należy tego rόwnież dokonać, jeśli w trakcie zastosowania lub ładowania akumulatora wystąpi widoczne zakłόcenie, np. dym, zapach spalenizny itp., lub w trakcie burzy. Należy zawsze pociągać za zasilacz / wtyczkę, nigdy za przewόd.
JProszę chronić niniejszy produkt przed wysoką temperaturą, zimnem, jak rόwnież przed mocnymi wstrząsami oraz uderzeniami.
JOSTROŻNIE! PROMIENIOWANIE LED! Należy unikać uszkodzenia oczu! Nie należy kierować wzroku
na promienie LED. Nie należy stosować urządzeń optycznych, takich jak lup lub podobnych, aby patrzeć na promienie LED. Należy chronić siebie i swoje otoczenie poprzez podjęcie odpowiednich środków ostrożności.
JPromieni LED nie należy kierować na powierzchnie reflektujące, osoby lub zwierzęta. Utrata wzroku lub podrażnienie oczu może być tego następstwem. Nawet słabe promienie LED mogą doprowadzić do uszkodzenia wzroku.
JHaka 1 nie należy zawieszać na gorących przedmiotach. Może dojść do jego deformacji / wygięcia, spowodowanego ciężarem własnym lampy warsztatowej LED.
20 PL
Przed zastosowaniem
QPrzed zastosowaniem
QŁadowanie akumulatora lampy
mLampy warsztatowej LED nie należy podłączyć do zapalniczki pojazdu, kiedy akumulator pojazdu jest już stary i zużyty. Może się zdarzyć, że nie da się uruchomić silnika pojazdu.
jAby mόc zastosować lampę warsztatową LED bez przewodu, należy przed jej użyciem naładować akumulatory. Proces ładowania trwa ok. 5 do 7 godzin. Akumulatory są na stałe zabudowane w uchwycie lampy warsztatowej LED.
jAkumulatory można naładować na standardowym gniazdku domowym lub za pomocą zapalniczki pojazdu.
Rada: Zalecamy ładowanie lampy warsztatowej LED na standardowym gniazdku domowym, aby zapobiec wyładowaniu akumulatora pojazdu.
jW trakcie procesu ładowania należy wyłączyć lampę warsztatową LED (przełącznik Zał. / Wył. 4 ustawić na pozycję 0).
jNależy usunąć gumową osłonę ochronną 5 na spodzie lampy warsztatowej LED.
jNależy włożyć wtyczkę połączeniową zasilacza 2 lub adaptera zapalniczki pojazdu 3 do gniazdka połączeniowego w uchwycie
lampy warsztatowej LED.
mUWAGA! Podczas ładowania w zapalniczce, wtyczka musi być całkowicie włożona w zapalniczce samochodu. W przeciwnym przypadku istnieje zagrożenie pożarem poprzez przegrzanie.
jProszę włożyć adapter sieciowy 2 do gniazdka względnie adapter do zapalniczki 3 do zapalniczki państwa samochodu.
PL 21

Przed zastosowaniem / Zastosowanie
Wskazόwka: Produkt posiada zabezpieczenie przed przeciążeniem. Jednakże po zakończeniu procesu ładowania należy odłączyć lampę warsztatową LED od zasilania.
jW trakcie procesu ładowania lampa kontrolna świeci czerwono. Po zakończeniu procesu ładowania lampa kontrolna świeci zielono. Po zapaleniu się lampy kontrolnej na zielono, należy usunąć zasilacz z gniazdka. Należy go rόwnież usunąć z lampy warsztatowej
LED, aby nie wyładować baterii.
mOSTROŻNIE! Przed zastosowaniem lampy warsztatowej LED należy ponownie zamocować gumową osłonę ochronną 5 . W przeciwnym razie woda może wniknąć do wnętrza, w trakcie jej zastosowania na terenie zewnętrznym.
Q Zastosowanie
mW trakcie zastosowania lampy warsztatowej LED w pojeździe, nie powinno istnieć zagrożenie dla kierowcy oraz pasażerόw. Należy
zawsze w ten sposόb składować oraz zamocować lampę warsztatową LED, aby rόwnież w trakcie pełnego hamowania nie zaistniało zagrożenie obrażenia spowodowanego przez produkt lub jego uszkodzenia.
jAkumulatory lampy należy całkowicie naładować w sposόb podany w rozdziale „Ładowanie akumulatorόw lampy“.
jNależy nacisnąć przycisk Zał. / Wył. 4 (pozycja I), aby załączyć lampę warsztatową LED.
22 PL

Zastosowanie
QZastosowanie z podłączeniem do sieci elektrycznej
mProszę w ten sposόb poprowadzić przewόd, aby nie zaistniało zagrożenie potknięcia się.
mOSTROŻNIE ZAGROŻENIE WYPADKIEM! Nie wolno podłączać lub obsługiwać lampy warsztatowej LED, biorąc aktywny udział w ruchu drogowym i przykładowo prowadząc samochόd. Lampa warsztatowa LED nie jest oświetleniem wnętrza lub lampą do czytania!
jNależy usunąć gumową osłonę ochronną 5 na spodzie lampy warsztatowej LED.
jNależy włożyć wtyczkę połączeniową zasilacza 2 lub adaptera zapalniczki pojazdu 3 do gniazdka połączeniowego w uchwycie lampy warsztatowej LED.
jNależy włożyć zasilacz 2 do gniazdka 230 V ~ lub adapter zapalniczki pojazdu 3 do zapalniczki pojazdu.
jNależy nacisnąć przycisk Zał. / Wył. 4 , aby załączyć lampę warsztatową LED.
mOSTROŻNIE! Przed zastosowaniem lampy warsztatowej LED należy ponownie zamocować gumową osłonę ochronną 5 . W przeciwnym razie woda może wniknąć do wnętrza, w trakcie jej zastosowania na terenie zewnętrznym.
mOSTROŻNIE! Jeżeli lampa warsztatowa LED podłączona jest do sieci za pomocą zasilacza, nadaje ona się wyłącznie do zastosowania w pomieszczeniach wewnętrznych.
PL 23

Konserwacja oraz czyszczenie / Usuwanie usterek
Q Konserwacja oraz czyszczenie
Niniejszy produkt nie wymaga konserwacji. Diody świecące nie są wymienne.
JPrzed czyszczeniem produktu należy go odłączyć od sieci elek-
trycznej.
jProszę regularnie czyścić niniejszy produkt suchą, nie strzępiącą się ścierką. W przypadku silniejszego zabrudzenia proszę zastosować lekko zwilżoną ścierkę.
jW żadnym przypadku nie należy stosować żrących środkόw czyszczących.
JProszę nigdy nie zanurzać niniejszego produktu w wodzie lub innych cieczach.
Q Usuwanie usterek
|
Usterka |
Możliwe przyczyny usterek oraz środki |
|
||||
|
|
zaradcze |
|
||||
|
Brak |
- adapter sieciowy względnie wtyczka zapalniczki |
|
||||
|
funkcji |
całkowicie włożony? |
|
||||
|
Lampa kontrol- |
Na połączeniu zapalniczki: |
|
||||
|
na ładowania |
- jest zapalniczka zasilona energią? Niektόre zapal- |
|
||||
|
nie świeci |
niczki są zasilane dopiero w momencie zapalenia |
|
||||
|
|
motoru. |
|
||||
|
|
- Proszę skontrolować bezpieczniki w samochodzie. |
|
||||
|
Proces łado- |
Na połączeniu zapalniczki: |
|
||||
|
wania trwa |
- Akumulator samochodu za słaby? |
|
||||
|
zbyt długo |
|
|
|
|
|
|
|
|
|
|
|
|
|
|
|
24 PL |
|
|
|
|
|
|
|
|
|
|
|
|
||
|
|
|
|
|
|
|
|
 Loading...