Powerfix Z31780 User Manual [en, de, pl, cs]

OWIM GmbH & Co. KG
Stiftsbergstraße 1
D-74167 Neckarsulm
Model No.: Z31780
Version:11/2014
|
|
|
|
|
|
|
|
|
|
|
|
|
IAN 103440 |
4 |
|
|
|||
|
|
|
|
|
|
|
|
|
|
|
|
|
|
|
|
|
|
|
|
|
|
103440_HU_CZ_SK_cover.indd 1 |
|
|
|
7/31/2014 5:32:14 PM |
|
|
|
|
|
|
|
|
|
|
|||
|
|
|
|
|
|
|
|
|
|
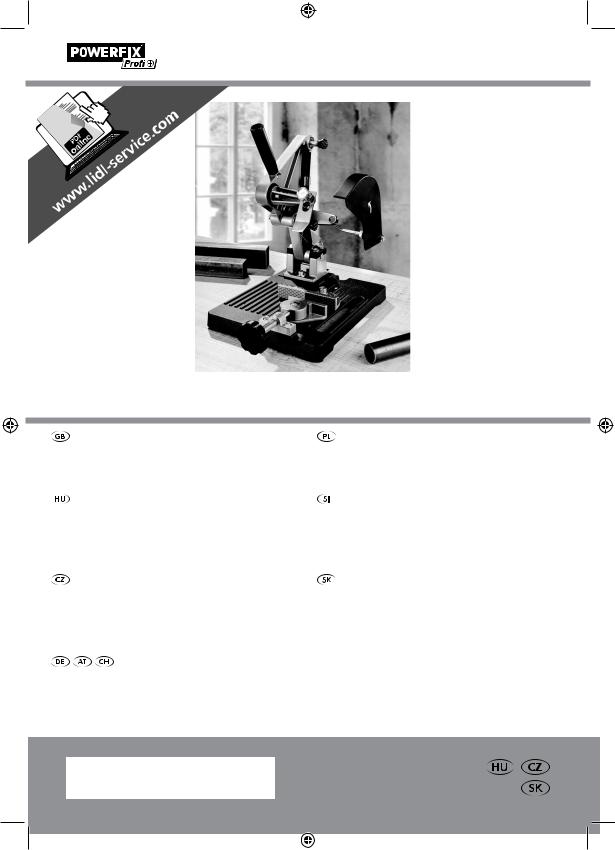
ANGLE GRINDER STAND
ANGLE GRINDER STAND |
STOJAK DO SZLIFIERKI KĄTOWEJ |
Assembly-, Operation and Safety Notes |
Wskazówki montażu, obsługi i bezpieczeństwa |
SAROKCSISZOLÓ ÁLLVÁNY |
STOJALO ZA ENOROČNI KOTNI |
Szerelési, használati és biztonsági tudnivalók |
BRUSILNIK |
|
Navodila za montažo, uporabo in varnostna navodila |
STOJAN NA BRUSKU |
STOJAN PRE UHLOVÚ BRÚSKU |
Pokyny k montáži, obsluze a bezpečnostní pokyny |
Pokyny na montáž, obsluhu a bezpečnostné pokyny |
EINHAND- |
|
WINKELSCHLEIFERSTÄNDER |
|
Montage-, Bedienungsund Sicherheitshinweise |
|
IAN 103440
103440_HU_CZ_SK_cover.indd 2 |
|
|
7/31/2014 5:32:16 PM |
|
|
||
|
|
|
|

GB |
Assembly-, Operation and Safety Notes |
Page |
3 |
PL |
Wskazówki montażu, obsługi i bezpieczeństwa |
Strona |
9 |
HU |
Szerelési, használati és biztonsági tudnivalók |
Oldal |
15 |
SI |
Navodila za montažo, uporabo in varnostna navodila |
Stran |
21 |
CZ |
Pokyny k montáži, obsluze a bezpečnostní pokyny |
Strana |
27 |
SK |
Pokyny na montáž, obsluhu a bezpečnostné pokyny |
Strana |
33 |
DE / AT / CH |
Montage-, Bedienungsund Sicherheitshinweise |
Seite |
39 |
103440_HU_CZ_SK_cover.indd 3 |
|
|
7/31/2014 5:32:16 PM |
|
|
||
|
|
|
|

103440_HU_CZ_SK_cover.indd 4 |
|
|
7/31/2014 5:32:16 PM |
|
|
||
|
|
|
|

Introduction |
|
|
Proper use............................................................................................................................................ |
Page |
4 |
Description of parts and features...................................................................................................... |
Page |
4 |
Included items...................................................................................................................................... |
Page |
5 |
Technical data..................................................................................................................................... |
Page |
5 |
Safety advice |
|
|
General safety advice........................................................................................................................ |
Page |
5 |
Assembly......................................................................................................................................... |
Page |
7 |
Operation....................................................................................................................................... |
Page |
8 |
Cleaning and care.................................................................................................................... |
Page |
8 |
Disposal............................................................................................................................................ |
Page |
8 |
GB 3
103440_HU_CZ_SK_content.indd 3 |
|
|
7/31/2014 5:31:54 PM |
|
|
||
|
|
|
|
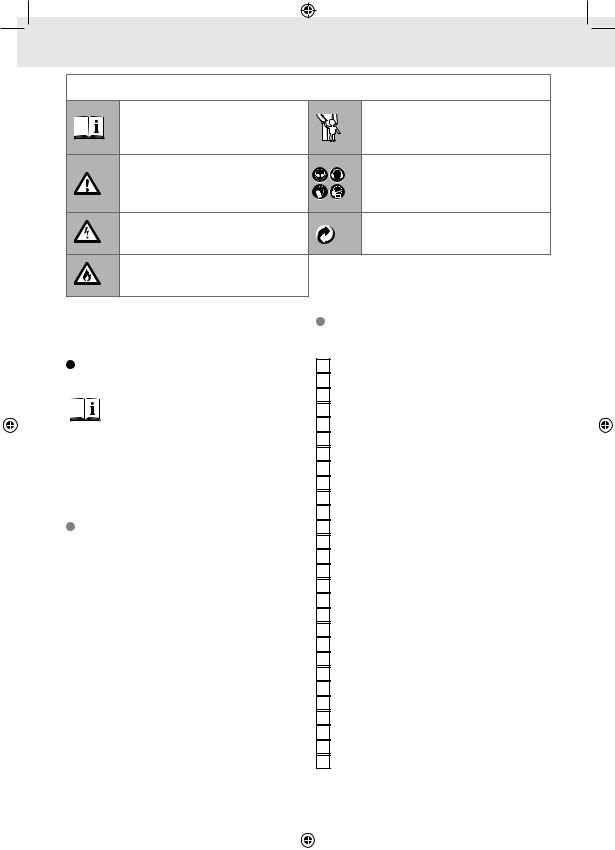
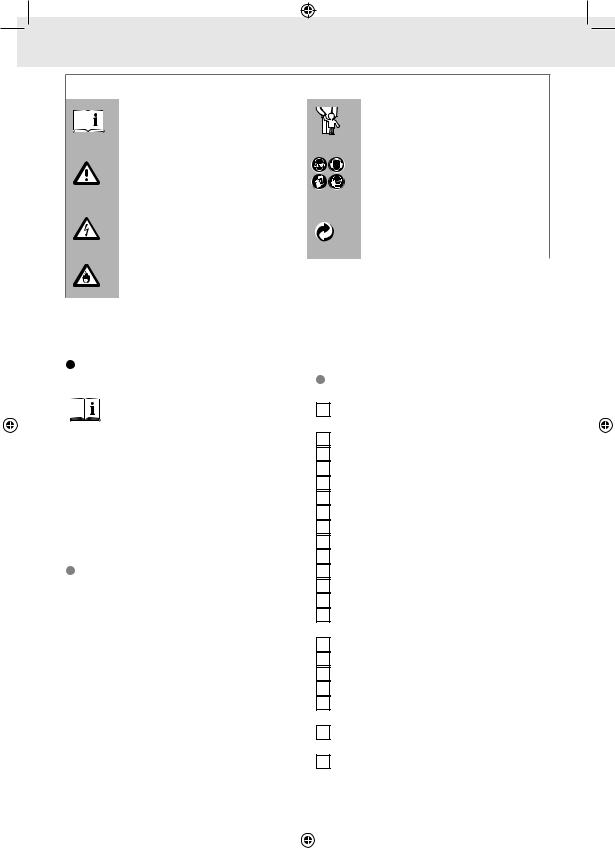
The following icons / symbols are used in this instruction manual:
|
Never leave children unsupervised |
Read instruction manual! |
with the packaging materials or the |
|
device. |
|
Wear protective glasses, hearing |
Observe caution and safety notes! |
protection, protective gloves and dust |
|
protection mask. |
Caution – electric shock! |
Dispose packaging and appliance in |
Danger to life! |
an environmentally-friendly way! |
Risk of fire! |
|
|
|
|
|
|
ANGLE GRINDER STAND |
|
Description of parts |
|||||||||||
|
|
|
|
|
|
|
|
|
|
|
|
and features |
||||||
|
|
|
|
|
Introduction |
|
Adjustment screw with rubber buffer (short) |
|||||||||||
|
|
|
|
|
1 |
|||||||||||||
|
|
|
|
|
|
|
|
|
|
|
|
Metal rod |
||||||
|
|
|
|
|
|
|
|
|
|
|
2 |
|||||||
|
|
|
|
|
|
Familiarise yourself with the product |
|
Handle |
||||||||||
|
|
|
|
|
|
3 |
||||||||||||
|
|
|
|
|
|
|||||||||||||
|
|
|
|
|
|
prior to assembly. Carefully read the |
|
Nut (guard mount) |
||||||||||
|
|
|
|
|
|
4 |
||||||||||||
|
|
|
|
|
|
following assembly instructions and |
|
Safety guard |
|
|
|
|
||||||
|
|
|
|
|
|
5 |
|
|||||||||||
|
|
|
|
|
|
|
|
|
||||||||||
|
|
|
|
|
safety tips. Only use the product as instructed and |
|
Plastic bushing M6 |
|
|
|||||||||
|
|
|
|
|
6 |
|
||||||||||||
|
|
|
|
|
only for the indicated field of application. Keep |
|
Plastic bushing M8 |
|||||||||||
|
|
|
|
|
7 |
|||||||||||||
|
|
|
|
|
instructions in a safe place. Submit all documents to |
|
Washer (mounting bolt) |
|||||||||||
|
|
|
|
|
8 |
|||||||||||||
|
|
|
|
|
a third party if distributing the product. |
|
Mounting bolt M6 (angle grinder) |
|||||||||||
|
|
|
|
|
9 |
|||||||||||||
|
|
|
|
|
|
|
|
|
|
|
|
Mounting bolt M8 (angle grinder) |
||||||
|
|
|
|
|
|
|
|
|
|
|
10 |
|||||||
|
|
|
|
|
|
|
|
|
|
|
|
Mounting bolt M10 (angle grinder) |
||||||
|
|
|
|
|
Proper use |
11 |
||||||||||||
|
|
|
|
|
|
Nut (mounting bolt M6 angle grinder) |
||||||||||||
|
|
|
|
|
12 |
|||||||||||||
|
|
|
|
|
|
|
|
|
|
|
|
Nut (mounting bolt M8 angle grinder) |
||||||
|
|
|
|
|
|
|
|
|
|
|
13 |
|||||||
|
|
|
|
|
This product is intended to provide a method of |
|
Nut (mounting bolt M10 angle grinder) |
|||||||||||
|
|
|
|
|
14 |
|||||||||||||
|
|
|
|
|
holding a hand-held angle grinder in a fixed position |
|
Distance piece (60 mm) |
|||||||||||
|
|
|
|
|
15 |
|||||||||||||
|
|
|
|
|
while using it for cutting. The product is suitable for |
|
Distance piece (90 mm) |
|||||||||||
|
|
|
|
|
16 |
|||||||||||||
|
|
|
|
|
most hand-held angle grinders that take a disc 115 |
|
Distance piece (130 mm) |
|||||||||||
|
|
|
|
|
17 |
|||||||||||||
|
|
|
|
|
or 125 mm diameter disc. Any use other than that |
|
Front mounting piece |
|||||||||||
|
|
|
|
|
18 |
|||||||||||||
|
|
|
|
|
described above or modification to the product is |
|
Plastic locating piece (mounting piece) |
|||||||||||
|
|
|
|
|
19 |
|||||||||||||
|
|
|
|
|
not permitted and could lead to injury and/or |
|
Adjustment screw with rubber buffer (long) |
|||||||||||
|
|
|
|
|
20 |
|||||||||||||
|
|
|
|
|
damage to the product. The manufacturer accepts |
|
Fastening screw (vice) |
|||||||||||
|
|
|
|
|
21 |
|||||||||||||
|
|
|
|
|
no liability for loss or damage arising from improper |
|
Rotary adjustment knob (vice) |
|||||||||||
|
|
|
|
|
22 |
|||||||||||||
|
|
|
|
|
use. The product is not intended for commercial use. |
|
Vice adjustment thread (vice) |
|||||||||||
|
|
|
|
|
23 |
|||||||||||||
|
|
|
|
|
|
|
|
|
|
|
|
Guide bolt(vice) |
||||||
|
|
|
|
|
|
|
|
|
|
|
24 |
|||||||
|
|
|
|
|
|
|
|
|
|
|
|
Guide(vice) |
||||||
|
|
|
|
|
|
|
|
|
|
|
25 |
|||||||
|
|
|
|
|
|
|
|
|
|
|
|
Square nut (guide rail) |
||||||
|
|
|
|
|
|
|
|
|
|
|
26 |
|||||||
|
|
|
|
|
|
|
|
|
|
|
|
Stop (vice) |
||||||
|
|
|
|
|
|
|
|
|
|
|
27 |
|||||||
|
|
|
|
|
|
|
|
|
|
|
|
Stop (vice rear jaw) |
||||||
|
|
|
|
|
|
|
|
|
|
|
28 |
|||||||
|
|
|
|
|
|
|
|
|
|
|
|
|
|
|
|
|
|
|
|
|
|
|
|
4 GB |
|
|
|
|
|
|
|
|
|||||
|
|
|
|
|
|
|
|
|
|
|
|
|
|
|
|
|
|
|
|
|
|
|
|
|
|
|
|
|
|
|
|
|
|
|
|
|
|
|
|
|
|
103440_HU_CZ_SK_content.indd 4 |
|
|
|
|
7/31/2014 5:31:55 PM |
|
|
|
|
|
||||
|
|
|
|
|
|
|
|
|
|
|
|
|
||||||
|
|
|
|
|
|
|
|
|
|
|
|
|
|
|
|
|
|
|
29Washer (fastening bolt vice rear jaw)
30Fastening bolt (vice rear jaw)
31Hexagonal socket head screw (fastening of mounting piece)
32Base plate
33Saddle
34Washer (hexagonal socket head screw saddle)
35Hexagonal socket head screw (fastening of saddle)
36Mount
37Clip
38Rear mounting piece
39Nut (mounting bolt guard mount)
40Mounting bolt (guard mount)
41Vice
Included items
Check that all the items and accessories are present and that the product and its all parts have no defects immediately after unpacking. Do not assemble the product if any of the included items listed below are missing.
1 x Base plate
1 x Saddle
2 x Washers (hexagonal socket head screw saddle)
2 x Hexagonal socket head screws (fastening of saddle)
2 x Hexagonal socket head screws (fastening of mounting pieces)
1 x Mount
1 x Adjustment screw with rubber buffer (long)
2 x Mounting bolts M10 (angle grinder)
2 x Mounting bolts M8 (angle grinder)
2 x Mounting bolts M6 (angle grinder)
2 x Nuts (mounting bolts M10 angle grinder)
2 x Nuts (mounting bolts M8 angle grinder)
2 x Nuts (mounting bolts M6 angle grinder)
1 x Handle
1 x Metal rod
1 x Safety guard
1 x Adjustment screw with rubber buffer (short)
2 x Mounting pieces
2 x Plastic location pieces (mounting pieces)
2 x Fastening screws (vice)
1 x Vice adjustment thread (vice)
1 x Rotary adjustment knob (vice)
1 x Guide bolt (vice)
1 x Guide (vice)
1 x Clip
3 x Square nuts (guide rail)
1 x Stop (vice)
1 x Stop (vice rear jaw)
2 x Fastening bolts (vice rear jaw)
2 x Washers (fastening bolts vice rear jaw)
1 x Mounting bolt (guard mount)
1 x Nut (mounting bolt guard mount)
1 x Nut (guard mount)
3 x Distance pieces (60 / 90 / 130 mm)
3 x Washers (mounting bolt)
2 x Plastic bushings M6
2 x Plastic bushings M8
Technical data
Max. dimensions of the workpiece:
Tubes: |
round tube: 30 x 2 mm (ø x t) |
|
other shapes: 30 x 2 mm (W x t) |
Bars: |
round bar: ø 12 mm |
|
other shapes: 12 mm (W) |
Plates: |
45 x 2 mm (W x t) |
Material / Weight:
Material: cast aluminium, cast iron (main material) Weight: 2.9 kg (±5%)
 Safety advice
 WARNING! Read all the safety advice and instructions. Failure to observe the safety advice and instructions could result in electric shock, fire and/or serious injury.
General safety advice
DANGER OF LOSS OF LIFE
AND ACCIDENT TO INFANTS AND CHILDREN! Never leave
children unsupervised with the packaging materials.
GB 5
103440_HU_CZ_SK_content.indd 5 |
|
|
7/31/2014 5:31:55 PM |
|
|
||
|
|
|
|
Packaging materials present a suffocation hazard. Children often underestimate danger. Always keep the product out of reach of children. This product is not a toy.
Keep your working area clean and well lit. Untidy or poorly lit working areas can lead to accidents.
Store the angle grinder stand in dust-free and dry conditions.
To avoid danger to life from electric shock!
Ensure that the mains lead does not enter the working area of the disc or lie within range of flying sparks.
Always keep the angle grinder’s mains lead in place using the clip 37 .
Always pull your angle grinder’s mains plug out of the mains socket before you carry out any cleaning or adjustment of your angle grinder stand.
Avoiding the danger of injury and/or damage to property!
While working with your angle grinder always wear protective glasses, hearing protection and
safety gloves, and if necessary a hairnet (with long hair) and a dust mask (depending on the materials being cut).
Do not wear loose clothing while you are working with your angle grinder stand.
Fasten the angle grinder stand through the fastening holes down on to a workbench / table. Ensure that the workbench / table and the stand are stable.
 CAUTION! DANGER OF INJURY! Ensure that you do not come into contact with the cutting disc while working.
Always use the cutting disc safety guard 5 .
Use this angle grinder stand only with angle grinders that have a suitable metal protective guard around the disc.
Position this protective guard on the grinder in such a way that the lower part of the rotating cutting disc is uncovered and the grinder’s protective guard cannot come into contact with the workpiece.
CAUTION! DANGER OF FIRE!
Cutting metal creates sparks. Ensure that there are no ignitable materials
in the working area.
Sparks can damage paint, glass and other surfaces. Do not wear clothing made of nylon or polyester; wear suitable, non-inflammable working clothes.
Ensure that the workpiece is held firmly in place and lies tightly against the base plate. Do not use the device on workpieces that are too large, otherwise they cannot be held firmly in middle of the vice.
Check before and regularly during use that the screws, bolts and other fixings are firmly seated. Check the stand regularly for damage.
Vibrations can loosen screws, bolts and other fixings during use.
Never use your angle grinder stand if you discover that it is damaged in any way.
Ensure that the cutting disc of your angle grinder is mounted at right angles to the base plate. Use cutting discs only and not roughing discs in this stand.
Check the cutting disc of your angle grinder regularly for damage.
Never use a disc if you discover it has any dents, nicks or other damage. It could disintegrate. Do not allow parts of your body to come within working range of the cutting disc until after it has come to a standstill.
When cutting follow the instructions of the manufacturers of the electrical power tool and the cutting disc.
Use angle grinders that have a cutting disc diameter of 115 or 125 mm only.
Do not allow anyone else to come within the working range of the device while you are using it.
6 GB
103440_HU_CZ_SK_content.indd 6 |
|
|
7/31/2014 5:31:55 PM |
|
|
||
|
|
|
|
Assembly
 CAUTION! DANGER OF FIRE! Assemble and use the product on a fire-resistant surface only.
The following tools are required for assembly:
7 x Open spanners (1 x 8 mm, 2 x 10 mm, 2 x 14 mm, and possibly 2 x 17 mm)
2 x Allen key
1 x Slotted head screwdriver (approx. 5 mm)
Follow these steps:
Fasten the saddle 33 on to the base plate 32 with the hexagonal socket head screws 35 and washers 34 (see Fig. A).
Fasten the handle 3 on to the mount 36 with the projecting screw thread and the corresponding nut (see Fig. A).
Note: Please bear in mind that the angle grinder must be fitted with a suitable cutting disc before assembly. It is not possible to change the disc with the angle grinder installed in the stand.
Now mount the angle grinder in the mount 36 . Note: At this point, first check the size of the handle thread of your angle grinder. It may be M6, M8 or M10.
Then place the corresponding mounting bolts 9 , 10 , 11 , washers 8 and matching nuts 12 , 13 , 14 , distance pieces 15 , 16 , 17 and plastic bushings 6 , 7 to one side, ready for use.
Insert the necessary plastic bushings 6 , 7 into the mounting pieces 18 , 38 (see Fig. B). Note: Ensure that the size of the plastic bushings 6 , 7 matches the required mounting bolts 9 , 10 . Plastic bushings are not required for mounting bolts M10 11 .
Screw the matching mounting bolt 9 , 10 , 11 through the rear mounting piece 38 (see Fig. B).
Fasten the rear mounting piece 38 in place by tightening the corresponding size of nut 12 , 13 , 14 on the mounting bolt 9 , 10 , 11 (i.e. by turning it in the direction of the mounting piece 38) (see Fig. B).
Insert the adjustment screw 20 through the bottom hole and the adjustment screw 1
through the top hole of the mount 36 . Note that later the rubber buffers of these screws must lie against the angle grinder housing.
Note: First insert these screws so that the rubber buffers lie directly against the mount 36 .
Now push the plastic locating pieces 19 of the mounting pieces 18 , 38 on to the guide of the mount 36 (Figure B).
Then attach the mounting pieces 18 , 38 through the plastic locating pieces 19 with the hexagonal socket head screws 31 in the elongated holes in the mount 36 (see Fig. A). Place the desired distance piece 15 , 16 , 17 on the mounting bolt 9 , 10 , 11 and washer 8 on to the front mounting piece 18 (see Fig. D). Note: The three distance pieces 15 , 16 , 17 are of different lengths. Choose the distance piece 15 , 16 , 17 of the most appropriate length. Note: Set the distance piece 15 , 16 , 17 so that the cutting disc cannot come into contact with the workbench / table below the base plate 32 (see Figure E).
Screw the matching mounting bolt 9 , 10 , 11 through the front mounting piece 18 .
Fasten the front mounting piece 18 in place by tightening the corresponding size of nut 12 , 13 , 14 on the mounting bolt 9 , 10 , 11 (i.e. by turning it in the direction of the mounting piece 18 ). Now set the adjustment screws 1 , 20 so that the angle grinder is aligned at right angles to the base plate 32 and firmly attached to the mount 36 .
After slightly loosening the hexagonal socket head screws 35 , adjust the saddle 33 so that the cutting disc of the angle grinder lowers into centre of the slot provided in the base plate 32 . Now attach the safety guard 5 . To do this push the safety guard 5 on to the metal rod 2 and fasten it in place with the nut 4 (see Fig. C). Now insert the metal rod 2 into the corresponding opening in the mount 36 and fasten it in place with the nut 39 and the mounting bolt 40 (see Fig. C).
Always keep the angle grinder’s mains lead in place using the clip 37 .
After assembly is complete, switch the angle
GB 7
103440_HU_CZ_SK_content.indd 7 |
|
|
7/31/2014 5:31:55 PM |
|
|
||
|
|
|
|
grinder on for a few seconds and then switch it off again. Check again that all the screws, bolts and fixings are firmly seated.
Operation
Place the workpiece on to the base plate 32 against the rear stop 27 and secure it with the vice 41 .
Note: Ensure that the workpiece lies against the base plate 32 .
 CAUTION! DANGER OF INJURY! Ensure that the length of the workpiece is at least half the length of the stop 27 , otherwise the workpiece may become loose and slide out.
Set the vice 41 so that the workpiece lines up with the centre of the cutting disc.
Now switch on the angle grinder and press it down on to the workpiece.
Avoid any backwards movement and apply even pressure on the workpiece.
Cleaning and care
Use a slightly moist, fluff-free cloth when you are cleaning or polishing the product.
Disposal
The packaging is made entirely of recyclable materials, which you may dispose of at local recycling facilities.
Contact your local refuse disposal authority for more details of how to dispose of your worn-out product.
8 GB
103440_HU_CZ_SK_content.indd 8 |
|
|
7/31/2014 5:31:56 PM |
|
|
||
|
|
|
|

Wstęp |
|
|
Zastosowanie zgodne z przeznaczeniem..................................................................................... |
Strona |
10 |
Opis części....................................................................................................................................... |
Strona |
10 |
Zakres dostawy................................................................................................................................ |
Strona |
11 |
Dane techniczne ............................................................................................................................. |
Strona |
11 |
Instrukcja bezpieczeństwa |
|
|
Ogólne wskazówki dotyczące bezpieczeństwa........................................................................... |
Strona |
12 |
Montaż............................................................................................................................................ |
Strona |
13 |
Obsługa......................................................................................................................................... |
Strona |
14 |
Czyszczenie i pielęgnacja.............................................................................................. |
Strona |
14 |
Usuwanie..................................................................................................................................... |
Strona |
14 |
PL 9
103440_HU_CZ_SK_content.indd 9 |
|
|
7/31/2014 5:31:56 PM |
|
|
||
|
|
|
|
W niniejszej instrukcji obsługi zastosowano następujące znaki / symbole:
|
|
|
|
|
|
|
Przeczytać instrukcję obsługi! |
|
|
|
Nie pozostawiać dzieci samych bez |
|
|||||||
|
|
|
|
|
|
|
|
|
|
dozoru z materiałem opakowaniowym. |
|||||||||
|
|
|
|
|
|
|
|
|
|
|
|
|
|||||||
|
|
|
|
|
|
|
|
|
|
|
|
|
|
|
|
|
|
|
|
|
|
|
|
|
|
|
Przestrzegaj wskazówek |
|
|
|
Zakładać okulary ochronne, |
||||||||
|
|
|
|
|
|
|
|
|
|
ochronniki słuchu i maskę chroniącą |
|||||||||
|
|
|
|
|
|
|
ostrzegawczych i bezpieczeństwa! |
|
|
|
|||||||||
|
|
|
|
|
|
|
|
|
|
drogi oddechowe. |
|||||||||
|
|
|
|
|
|
|
|
|
|
|
|
|
|||||||
|
|
|
|
|
|
|
|
|
|
|
|
|
|
|
|
|
|
|
|
|
|
|
|
|
|
|
Ostrzeżenie przed porażeniem |
|
|
|
Opakowanie i urządzenie przekaż |
||||||||
|
|
|
|
|
|
|
prądem elektrycznym! Zagrożenie |
|
|
|
do utylizacji zgodnie z przepisami |
||||||||
|
|
|
|
|
|
|
dla życia! |
|
|
|
o ochronie środowiska! |
||||||||
|
|
|
|
|
|
|
|
|
|
|
|
|
|
|
|
|
|
|
|
|
|
|
|
|
|
|
Niebezpieczeństwo pożaru! |
|
|
|
|
|
|
|
|
|
|
||
|
|
|
|
|
|
|
|
|
|
|
|
|
|
|
|
|
|||
|
|
|
|
|
STOJAK DO SZLIFIERKI KĄTOWEJ |
czeniem. Produkt nie jest przeznaczony do użytku |
|||||||||||||
|
|
|
|
|
|
|
|
|
|
zawodowego. |
|||||||||
|
|
|
|
|
Wstęp |
|
|
|
Opis części |
||||||||||
|
|
|
|
|
|
Przed przystąpieniem do montażu należy |
|
|
|||||||||||
|
|
|
|
|
|
|
|
|
|
|
|
|
|
|
|
||||
|
|
|
|
|
|
|
|
|
|
|
|
|
|
|
|
||||
|
|
|
|
|
|
zapoznać się z produktem. W tym celu |
|
|
Śruba regulacyjna amortyzatora gumowego |
||||||||||
|
|
|
|
|
|
1 |
|||||||||||||
|
|
|
|
|
|
należy uważnie przeczytać poniższą |
|
|
(krótka) |
|
|
|
|||||||
|
|
|
|
|
|
|
|
|
|
||||||||||
|
|
|
|
|
instrukcję montażu, jak również wskazówki dotyczące |
|
2 |
Pręt metalowy |
|
||||||||||
|
|
|
|
|
obsługi i bezpieczeństwa. Używać produktu tylko |
|
|
Chwyt |
|||||||||||
|
|
|
|
|
3 |
||||||||||||||
|
|
|
|
|
w sposób opisany i w podanych zakresach |
|
|
Nakrętka (uchwyt pokrywy) |
|||||||||||
|
|
|
|
|
4 |
||||||||||||||
|
|
|
|
|
zastosowania. Zachować dobrze niniejszą |
|
|
Osłona |
|||||||||||
|
|
|
|
|
5 |
||||||||||||||
|
|
|
|
|
instrukcję. W przypadku przekazania produktu |
|
|
Tulejka z tworzywa sztucznego M6 |
|||||||||||
|
|
|
|
|
6 |
||||||||||||||
|
|
|
|
|
osobom trzecim należy przekazać im również |
|
|
Tulejka z tworzywa sztucznego M8 |
|||||||||||
|
|
|
|
|
7 |
||||||||||||||
|
|
|
|
|
wszystkie dokumenty związane z produktem. |
|
|
Podkładka (śruba ustalająca) |
|||||||||||
|
|
|
|
|
8 |
||||||||||||||
|
|
|
|
|
|
|
|
|
|
|
|
Śruba mocująca M6 (szlifierka kątowa) |
|||||||
|
|
|
|
|
|
|
|
|
|
9 |
|||||||||
|
|
|
|
|
|
|
|
|
|
|
|
Śruba ustalająca M8 (szlifierka kątowa) |
|||||||
|
|
|
|
|
Zastosowanie zgodne |
10 |
|||||||||||||
|
|
|
|
|
|
|
Śruba ustalająca M10 (szlifierka kątowa) |
||||||||||||
|
|
|
|
|
11 |
||||||||||||||
|
|
|
|
|
z przeznaczeniem |
|
|
Nakrętka (śruba ustalająca M6 szlifierka kątowa) |
|||||||||||
|
|
|
|
|
12 |
||||||||||||||
|
|
|
|
|
|
|
|
|
|
|
|
Nakrętka (śruba ustalająca M8 szlifierka kątowa) |
|||||||
|
|
|
|
|
|
|
|
|
|
13 |
|||||||||
|
|
|
|
|
Produkt ten jest przewidziany jako stacjonarne |
|
|
Nakrętka (śruba ustalająca M10 szlifierka |
|||||||||||
|
|
|
|
|
14 |
||||||||||||||
|
|
|
|
|
pomocnicze urządzenie mocujące do cięcia za |
|
|
kątowa) |
|||||||||||
|
|
|
|
|
pomocą szlifierek kątowych. Produkt nadaje się do |
|
15 |
Element dystansowy (60 mm) |
|||||||||||
|
|
|
|
|
większości jednoręcznych szlifierek kątowych ze |
|
|
Element dystansowy (90 mm) |
|||||||||||
|
|
|
|
|
16 |
||||||||||||||
|
|
|
|
|
ściernicami o wielkości 115 lub 125 mm. Inne |
|
|
Element dystansowy (130 mm) |
|||||||||||
|
|
|
|
|
17 |
||||||||||||||
|
|
|
|
|
zastosowania aniżeli podane powyżej lub |
|
|
Przedni trzpień ustalający |
|||||||||||
|
|
|
|
|
18 |
||||||||||||||
|
|
|
|
|
modyfikacja produktu są niedopuszczalne i mogą |
|
|
Zamocowanie z tworzywa sztucznego (trzpień |
|||||||||||
|
|
|
|
|
19 |
||||||||||||||
|
|
|
|
|
prowadzić do obrażeń ciała i / lub uszkodzenia |
|
|
uchwytu) |
|||||||||||
|
|
|
|
|
produktu. Producent nie ponosi odpowiedzialności |
|
20 |
Śruba regulacyjna z amortyzatorem gumowym |
|||||||||||
|
|
|
|
|
za szkody powstałe na skutek użycia niezgodnego |
|
|
(długa) |
|||||||||||
|
|
|
|
|
z przezna- |
|
|
Śruba mocująca (uchwyt śrubowy) |
|||||||||||
|
|
|
|
|
21 |
||||||||||||||
|
|
|
|
|
|
|
|
|
|
|
|
|
|
|
|
|
|
|
|
|
|
|
|
|
10 PL |
|
|
|
|
|
|
|
|
|
|
||||
|
|
|
|
|
|
|
|
|
|
|
|
|
|
|
|
|
|
|
|
|
|
|
|
|
|
|
|
|
|
|
|
|
|
|
|
|
|
|
|
|
|
|
|
103440_HU_CZ_SK_content.indd 10 |
|
|
|
|
7/31/2014 5:31:56 PM |
|
|
|
|
||||||
|
|
|
|
|
|
|
|
|
|
|
|
|
|||||||
|
|
|
|
|
|
|
|
|
|
|
|
|
|
|
|
|
|
|
|
22Chwyt śrubowy (uchwyt śrubowy)
23Gwint ustalający (uchwyt śrubowy)
24Śruba prowadnicy (uchwyt śrubowy)
25Prowadnica (uchwyt śrubowy)
26Nakrętka kwadratowa (szyna prowadnicy)
27Ogranicznik (uchwyt śrubowy)
28Ogranicznik (uchwyt tylny)
29Podkładka (śruba mocująca uchwytu tylnego)
30Śruba mocująca (uchwyt tylny)
31Śruba z łbem z gniazdem sześciokątnym (zamocowanie trzpienia ustalającego)
32Płyta podstawy
33Gniazdo
34Podkładka (śruba z łbem z gniazdem sześciokątnym gniazdo)
35Śruba z łbem z gniazdem sześciokątnym (zamocowanie gniazda)
36Uchwyt
37Klamra
38Tylny trzpień ustalający
39Nakrętka (śruba ustalająca uchwyt pokrywy)
40Śruba ustalająca (uchwyt pokrywy)
41Uchwyt śrubowy
Zakres dostawy
Bezpośrednio po rozpakowaniu należy sprawdzić zakres dostawy pod kątem kompletności i należytego stanu produktu i wszystkich elementów. Nie należy montować produktu, jeśli zakres dostawy nie jest kompletny.
1 x Płyta podstawy
1 x Gniazdo
2 x Podkładka (śruba z łbem z gniazdem sześciokątnym gniazda)
2 x Śruba z łbem z gniazdem sześciokątnym (zamocowanie gniazda)
2 x Śruba z łbem z gniazdem sześciokątnym (zamocowanie trzpienia ustalającego)
1 x Uchwyt
1 x Śruba regulacyjna z amortyzatorem gumowym (długa)
2 x Śruba ustalająca M10 (szlifierka kątowa)
2 x Śruba ustalająca M8 (szlifierka kątowa)
2 x Śruba ustalająca M6 (szlifierka kątowa)
2 x Nakrętka (śruba ustalająca M10 szlifierka kątowa)
2 x Nakrętka (śruba ustalająca M8 szlifierka kątowa)
2 x Nakrętka (śruba ustalająca M6 szlifierka kątowa)
1 x Chwyt
1 x Pręt metalowy
1 x Osłona
1 x Śruba regulacyjna z amortyzatorem gumowym (krótka)
2 x Trzpień ustalający
2 x Zamocowanie z tworzywa sztucznego (trzpień ustalający)
2 x Śruba mocująca (uchwyt śrubowy)
1 x Gwint ustalający (uchwyt śrubowy)
1 x Chwyt śrubowy (uchwyt śrubowy)
1 x Śruba prowadnicy (uchwyt śrubowy)
1 x Prowadnica (uchwyt śrubowy)
1 x Klamra
3 x Nakrętka kwadratowa (szyna prowadnicy)
1 x Ogranicznik (uchwyt śrubowy)
1 x Ogranicznik (uchwyt tylny)
2 x Śruba mocująca (uchwyt tylny)
2 x Podkładka (śruba mocująca uchwytu tylnego)
1 x Śruba ustalająca uchwyt pokrywy)
1 x Nakrętka (śruba ustalająca uchwyt pokrywy)
1 x Nakrętka (uchwyt pokrywy)
3 x Element dystansowy (60 / 90 / 130 mm)
3 x Podkładka (śruba ustalająca)
2 x Tulejka z tworzywa sztucznego M6
2 x Tulejka z tworzywa sztucznego M8
Dane techniczne
Maksymalny wymiar przedmiotu obrabianego:
Rury: |
rury okrągłe: 30 x |
2 mm (ø x grub.) |
|
inne kształty: 30 x |
2 mm (szer. x grub.) |
Pręty: |
pręt okrągły: ø 12 mm |
|
|
Inne kształty: 12 mm (szer.) |
|
Płyty: |
45 x 2 mm (szer. x grub.) |
|
Materiał / Ciężar:
Materiał: obsadka aluminiowa, żeliwo (materiały podstawowe)
Ciężar: 2,9 kg (±5%)
PL 11
103440_HU_CZ_SK_content.indd 11 |
|
|
7/31/2014 5:31:56 PM |
|
|
||
|
|
|
|

 Instrukcja bezpieczeństwa
 OSTRZEŻENIE! Prosimy o przeczytanie wszystkich instrukcji oraz wskazówek bezpieczeństwa. Zaniedbania
w przestrzeganiu instrukcji i wskazówek bezpieczeństwa mogą powodować porażenie prądem elektrycznym, pożar i / lub ciężkie obrażenia ciała.
Ogólne wskazówki dotyczące bezpieczeństwa
ZAGROŻENIE ŻYCIA I

 WYPADKÓW DLA MAŁYCH I DORASTAJĄCYCH DZIECI! Nie należy nigdy pozostawiać dzieci bez dozoru z
materiałem opakowania. Istnieje niebezpieczeństwo uduszenia materiałem opakowania. Dzieci często nie dostrzegają niebezpieczeństwa. Trzymać dzieci z daleka od produktu. Produkt nie jest zabawką. Utrzymywać stanowisko pracy i jego otoczenie w czystości i dobrze oświetlone. Nieporządek i źle oświetlone stanowiska pracy mogą prowadzić do wypadków.
Przechowywać stojak szlifierki kątowej w pomieszczeniu suchym i pozbawionym kurzu.
Unikać zagrożenia życia na skutek porażenia prądem elektrycznym!
Upewnić się, czy kabel zasilający nie może przedostać się do obszaru roboczego tarczy tnącej lub do obszaru odprysku iskier.
Kabel zasilający szlifierki kątowej należy zawsze mocować za pomocą klamry 37 . Przed przystąpieniem do jakichkolwiek czynności czyszczenia lub regulacji stojaka szlifierki kątowej, zawsze należy wyciągnąć wtyczkę kabla zasilającego szlifierki kątowej z gniazdka sieciowego.
12 PL
Unikać zagrożenia obrażeń i / lub powstania szkód materialnych!
Podczas pracy ze szlifierką kątową zawsze należy zakładać okulary
 ochronne, ochronniki słuchu i buty ochronne, oraz w razie potrzeby (przy długich włosach) siatkę na włosy i maskę do ochrony dróg oddechowych (w zależności od obrabianego materiału).
Podczas pracy ze stojakiem szlifierki kątowej nie należy nosić obszernego ubrania.
Stojak szlifierki kątowej należy zamocować w otworach mocujących stołu roboczego. Upewnić się, czy stół i stojak pewnie stoją.
 OSTROŻNIE! NIEBEZPIECZEŃSTWO OBRAŻEŃ! Zwracać uwagę, aby podczas pracy nie dotknąć tarczy tnącej.
Zawsze należy używać osłony 5 tarczy tnącej.
Stojak szlifierki kątowej można używać tylko ze szlifierką kątową wyposażoną z odpowiednią metalową osłoną wokół tarczy tnącej.
Ustawiać tę osłonę zawsze tak, aby tarcza tnąca pracowała przy odsłoniętym dolnym obszarze i aby osłona nie mogła dotknąć przedmiotu obrabianego.
OSTROŻNIE!
NIEBEZPIECZEŃSTWO POŻARU! Podczas cięcia powstają iskry. Upewnić się, czy w
obszarze pracy nie znajdują się żadne palne materiały.
Iskry mogą uszkodzić lakier, szkło i inne powierzchnie. Nie zakładać ubrania z nylonu lub polistyrenu, lecz odpowiednie ubranie robocze nieulegające zapaleniu.
Upewnić się, czy przedmiot obrabiany jest właściwie zamocowany i przylega dobrze do płyty podstawy.
Nie należy ciąć przedmiotów, które są za duże, aby mogły być bezpiecznie zamocowane za pomocą uchwytu śrubowego.
Przed i w czasie użytkowania należy regularnie sprawdzić należyte dokręcenie wszystkich śrub. Kontrolować regularnie stojak pod kątem ewentualnych uszkodzeń. Śruby mogą się poluzować w trakcie pracy na skutek wibracji.
103440_HU_CZ_SK_content.indd 12 |
|
|
7/31/2014 5:31:56 PM |
|
|
||
|
|
|
|
W razie stwierdzenia jakichkolwiek uszkodzeń nie należy używać stojaka szlifierki kątowej. Upewnić się, czy tarcza tnąca szlifierki kątowej jest zamontowana prostopadle do płyty podstawy.
Przy tym stojaku należy używać wyłącznie tarcze tnące, a nie tarcze do zdzierania. Regularnie sprawdzać tarcze tnące szlifierki kątowej pod kątem jakichkolwiek uszkodzeń. Nie należy używać tarczy tnącej, jeśli zostaną zauważone jakiekolwiek garby, nacięcia lub inne uszkodzenia. Tarcza taka może się rozerwać. Nigdy nie należy sięgać do obszaru roboczego tarczy tnącej, dopóki się ona całkowicie nie zatrzyma.
Przestrzegać instrukcji producenta elektronarzędzi i tarcz tnących dotyczących przecinania.
Używać tylko szlifierek kątowych, których tarcza tnąca posiada średnice 115 lub 125 mm.
Zwracać uwagę na to, by podczas pracy w obszarze działania urządzenia nie przebywały żadne inne osoby.
Montaż
 OSTROŻNIE! NIEBEZPIECZEŃSTWO POŻARU! Urządzenie można montować i używać tylko na niepalnym podłożu.
Do montażu potrzebne są:
7 x klucz szczękowy (1 x SW8, 2 x SW10, 2 x SW14, ewentualnie 2 x SW17)
2 x klucz imbusowy
1 x wkrętak płaski (ok. 5 mm)
Należy postępować w sposób następujący:
Zamocować gniazdo 33 za pomocą śrub z łbem z gniazdem sześciokątnym 35 oraz podkładek 34 do płyty podstawy 32 (patrz Rys. A).
Zamocować uchwyt 3 za pomocą wpuszczanej śruby i przynależnej nakrętki do uchwytu 36 (patrz Rys. A).
Uwaga: Zwrócić uwagę, aby szlifierka kątowa
już przed montażem była wyposażona w odpowiednią tarczę tnącą, ponieważ wymiana tarczy tnącej przy zamontowanej szlifierce kątowej w uchwycie nie jest możliwa. Następnie zamontować szlifierkę kątową w uchwycie 36 .
Uwaga: Sprawdzić najpierw, czy posiadana szlifierka kątowa posiada zamocowanie uchwytu z gwintem o wielkości M6, M8 lub M10.
Przygotować odpowiednie śruby ustalające 9 , 10 , 11 , podkładki 8 , jak również przynależne nakrętki 12 , 13 , 14 , elementy dystansowe 15 , 16 , 17 i tulejki z tworzywa sztucznego 6 , 7 w zasięgu ręki.
Włożyć potrzebne tulejki z tworzywa sztucznego 6 , 7 do trzpieni ustalających 18 , 38 (patrz Rys. B).
Uwagi: Zwrócić uwagę, aby zastosować tulejki z tworzywa sztucznego 6 , 7 odpowiadające potrzebnym śrubom ustalającym 9 , 10 . Dla śruby ustalającej M10 11 nie jest potrzebna żadna tulejka z tworzywa sztucznego. Wkręcić odpowiednią śrubę ustalającą 9 , 10 , 11 przez tylny trzpień ustalający 38 (patrz Rys. B).
Zamocować tylne trzpienie ustalające 38 , poprzez przykręcenie odpowiedniej nakrętki 12 , 13 , 14 śruby ustalającej 9 , 10 , 11 (tzn. przekręcić w kierunku trzpienia ustalającego 38 ) (patrz Rys. B).
Włożyć śrubę regulacyjną 20 do dolnego otworu, a śrubę regulacyjną 1 do górnego otworu uchwytu 36 . Amortyzatory gumowe tych śrub winny potem przylegać do obudowy szlifierki kątowej.
Uwaga: Ustawić śruby te najpierw w ten sposób, aby amortyzatory przylegały bezpośrednio do uchwytu 36 .
Następnie założyć zamocowania z tworzywa sztucznego 19 trzpieni mocujących 18 , 38 na prowadnicę uchwytu 36 (Rysunek B).
Zamocować następnie trzpienie ustalające 18 , 38 przez te zamocowania z tworzywa sztucznego 19 za pomocą śrub z łbem z gniazdem sześciokątnym 31 w otworach wzdłużnych uchwytu 36 (patrz Rys. A). Założyć na przednich trzpieniach ustalających
PL 13
103440_HU_CZ_SK_content.indd 13 |
|
|
7/31/2014 5:31:57 PM |
|
|
||
|
|
|
|
 Loading...