


EasyShare Z1285
Installing the software
Before connecting any cables, install the software that was
included with your camera. Follow the on-screen instructions.
After installing the software, return to this
user guide.
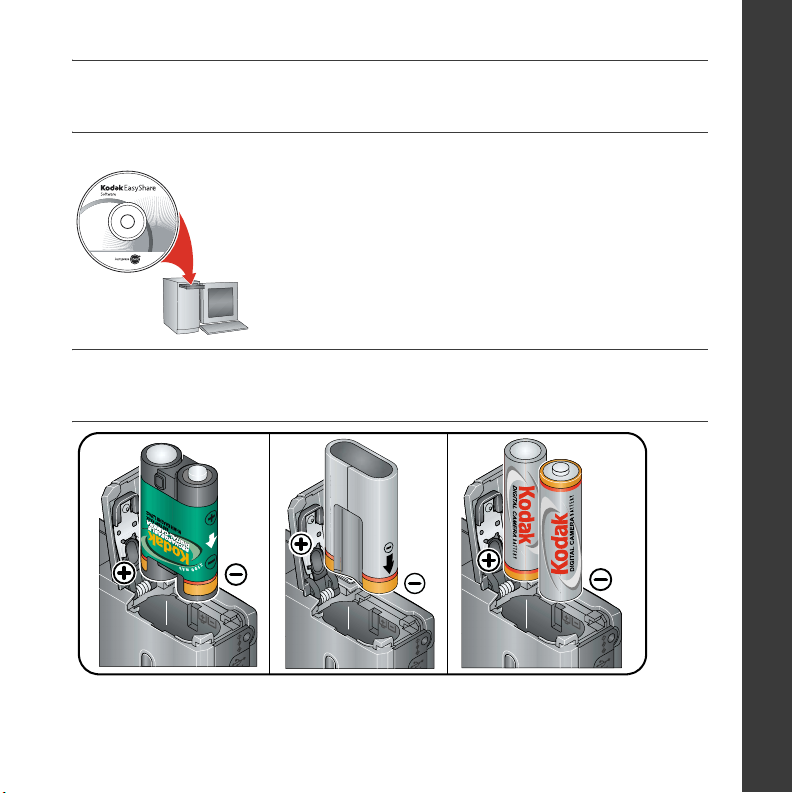
Loading the batteries
ENGLISH
Ni-MH
(rechargeable)
www.kodak.com/go/z1275support or z1285support 1
CRV3 lithium
(non-rechargeable)
2 AA (rechargeable or
non-rechargeable)
ENGLISH
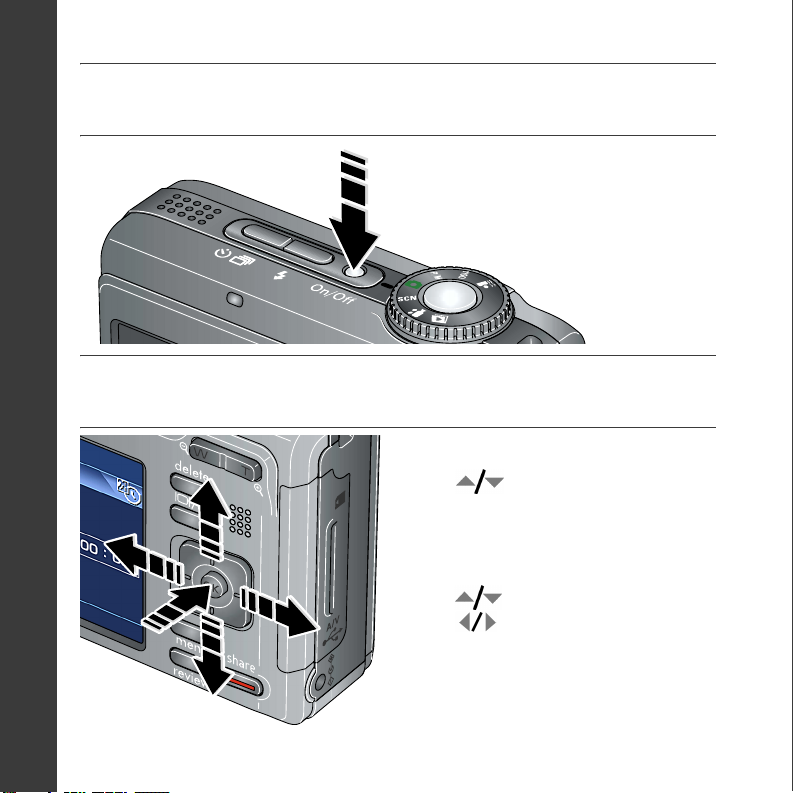
Turning on the camera
Setting the language, date/time
Language:
to change.
to accept.
OK
Date/Time:
to change.
for previous/next field.
to accept.
OK
2 www.kodak.com/go/easysharecenter

Taking a picture/video
Pictures Videos
ENGLISH
1
Framing
Ready
marks
light
Press the Shutter button halfway to
3
focus and set exposure.
When the Ready light turns green,
press the Shutter button
completely down.
www.kodak.com/go/z1275support or z1285support 3
1
Press the Shutter button
3
completely down and release.
To stop recording, press and
release the Shutter button
again.
22
ENGLISH
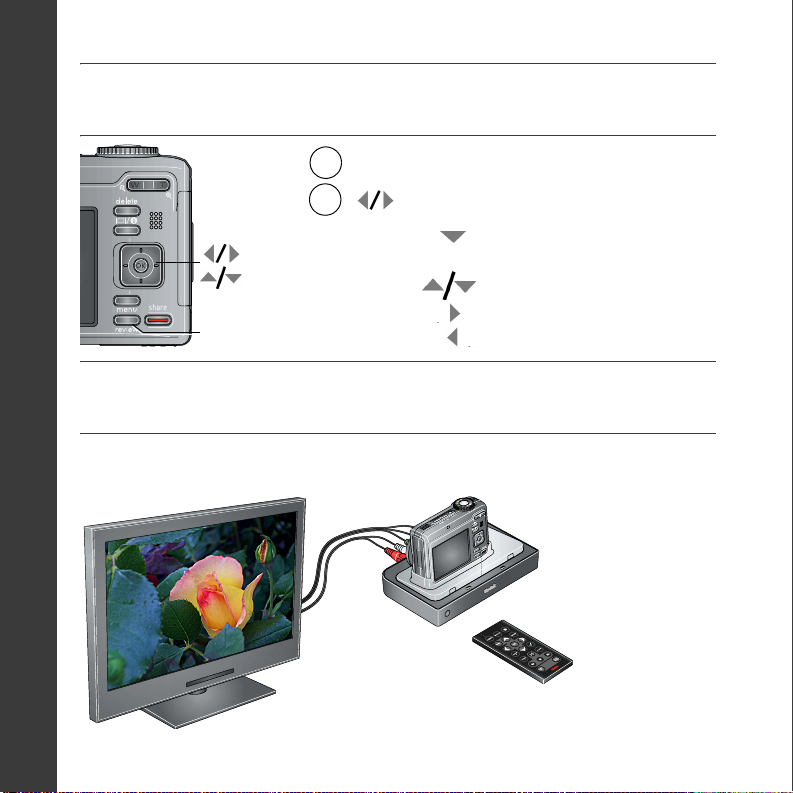
Reviewing pictures/videos
1
Press Review. (Press again to exit.)
2
Review
for previous/next picture/video.
Videos:
Play
OK
Pause/unpause
Adjust the volume
2X, 4X forward
2X, 4X reverse
Playing HD on your television
For a true HDTV experience on your television, dock your camera on the
optional Kodak EasyShare HDTV dock. Visit www.kodak.com/go/hdtvdock
4 www.kodak.com/go/easysharecenter

Transferring pictures/videos
ENGLISH
USB cable
1
Turn off camera.
2
Connect USB cable.
3
Turn on camera.
Kodak EasyShare software opens on your computer
and prompts you through the transfer process.
USB
cable
U-8
Kodak EasyShare printer
dock or camera dock
(May be sold separately.)
For dock compatibility, visit
www.kodak.com/go/dockcompatibility.
To purchase accessories, visit
www.kodak.com/go/z1275accessories
or z1285accessories.
To use an EasyShare dock, see its
user documentation.
www.kodak.com/go/z1275support or z1285support 5
ENGLISH
Keep learning about your camera!
Congratulations!
You have:
• set up your camera
• taken pictures
• transferred pictures to your computer
Keep learning!
Finish reading this book, so you can take and share your best pictures!
Visit www.kodak.com/go/z1275support or Z1285support and
www.kodak.com/go/easysharecenter for:
• the extended user guide
• interactive troubleshooting and repairs
• interactive tutorials
• FAQs
• downloads
• accessories
• printing information
• product registration
6 www.kodak.com/go/easysharecenter

Front view
2
1
1 Mode dial 6 Self-timer/Burst button
2 Shutter button 7 Flash
3 Self-timer/Video light 8 Speaker
4 On/Off button 9 Microphone
5 Flash button 10 Lens
3
4
5
6
7
ENGLISH
8
9
10
www.kodak.com/go/z1275support or z1285support 7
ENGLISH
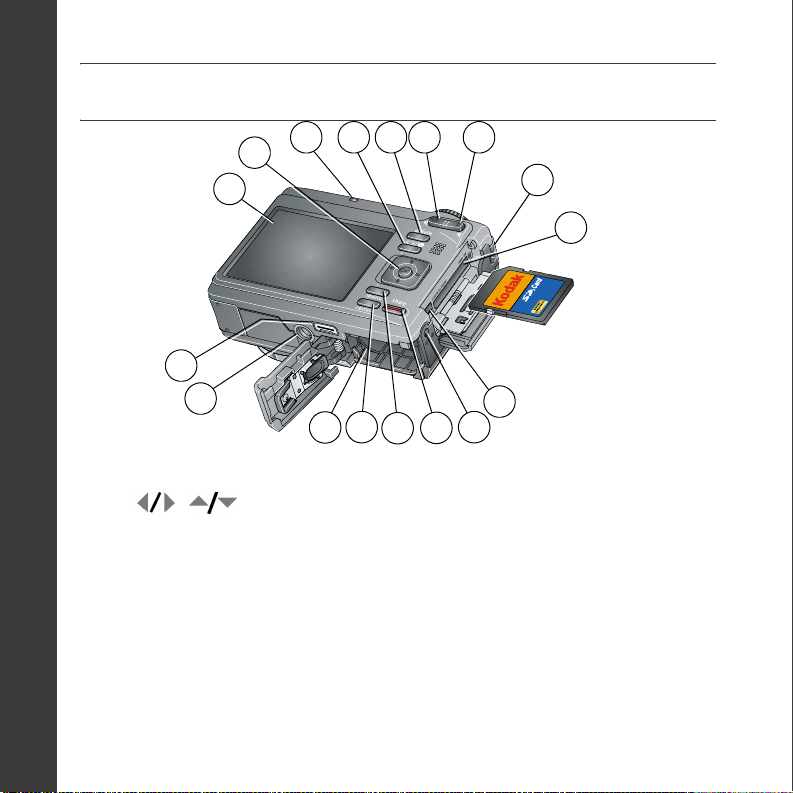
Back view
2
1
76543
8
9
17
16
14
15
1 LCD 10 USB, A/V Out
2 OK/ 11 DC-In, for optional 3V AC adapter
3 Ready light 12 Share button
4 LCD/Info button 13 Menu button
5 Delete button 14 Review button
6 Wide angle (W) button 15 Battery compartment
7 Telephoto (T) button 16 Tripod socket
8 Strap post 17 Dock connector
9 Slot for optional SD/SDHC or MMC card
8 www.kodak.com/go/easysharecenter
13
12
10
11

1 Taking better pictures/videos
Capture modes
Choose the mode that best suits
your subjects and surroundings.
Capture mode For
General picture taking. When the Shutter button is pressed halfway,
Smart Scene
P, M Program, Manual modes for more creative control. (See page 19).
P/M
High ISO
ISO
Digital
Image
Stabilization
Scene
SCN
Video
faces are detected, the scene is analyzed, and the best settings are
applied.
People in low-light scenes indoors using a higher ISO.
Minimizing the effects of camera shake and subject movement.
Point-and-shoot simplicity when taking pictures under special
conditions.
Capturing video with sound. (See page 3.)
Favorites
Viewing favorite pictures.
www.kodak.com/go/z1275support or z1285support 9
 Loading...