


 Loading...
Kodak EasyShare wireless digital picture frame
User’s guide
for EX811, EX1011
www.kodak.com
For help with your picture frame, www.kodak.com/go/digitalframesupport

Eastman Kodak Company
Rochester, New York 14650
© Eastman Kodak Company, 2007
All screen images are simulated.
Kodak and EasyShare are trademarks of Eastman Kodak Company.
Eastman Kodak Company is an authorized licensee of the CompactFlash trademark.
P/N 2F6846_en
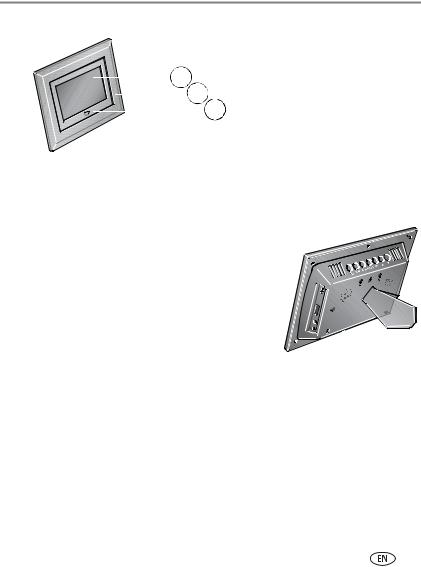
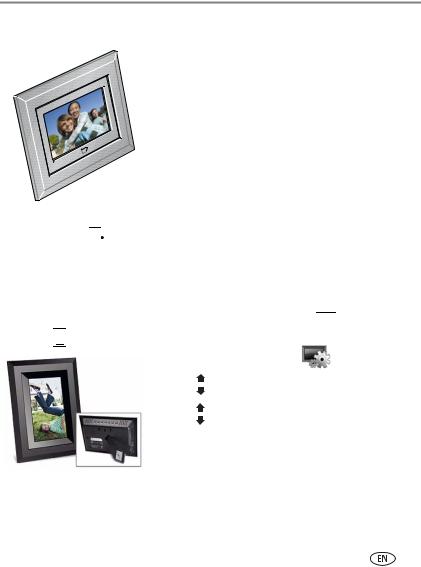
Product features
Front View
|
|
1 |
|
|
1 |
LCD screen |
|
|
2 |
3 |
2 |
Faceplate |
|
|
|
|
||||
|
|
|
||||
|
|
|
3 |
Remote control sensor |
||
|
|
|
||||
Back/Left Side View
|
2 1 |
|
Slide the holder 7 |
|
|
|
into slots. |
|
1 |
4 |
|
|
|
|
|
|
2 |
5 |
|
|
3 |
6 |
|
|
|
|
|
1 |
Speakers |
5 |
Memory card slot - SD, MS, xD, MMC |
2 |
Wall mount hangers |
6 |
On/Off switch |
3 |
Frame stand |
7 |
Remote control holder (removable) |
4Memory card slot - CF, MD
www.kodak.com/go/support |
i |
Product features
Top/Right Side View
1 2 3 4 5 6 7
8
9
10
11 

12
1 |
Picture/music toggle |
|
|
|
8 |
USB connector (to connect to computer; also connect |
|||||
|
|
||||||||||
|
|||||||||||
|
|||||||||||
2 |
Play/Pause |
|
|
|
|
|
|
|
camera/USB device - with adapter cable.) |
||
|
|
|
|
|
|
|
|||||
|
|
|
|
|
|
|
|
|
|
||
3 |
Stop/Back |
|
|
9 |
Volume control |
||||||
|
|||||||||||
4 |
Menu |
10 |
Headphone jack |
||||||||
5 |
OK |
11 |
DC-In (12 V) |
|
|
||||||
|
|||||||||||
|
|||||||||||
6 |
Down |
12 |
Reset button |
||||||||
7Up 
ii |
www.kodak.com/go/support |

Table of contents |
|
|
1 |
Getting started ...................................................................................... |
1 |
|
Installing the software................................................................................... |
1 |
|
Using the remote control............................................................................... |
1 |
|
Setting up your picture frame ........................................................................ |
4 |
2 |
Viewing pictures and videos .................................................................. |
8 |
|
Home screen—picture sources and settings................................................... |
8 |
|
Running a slide show .................................................................................... |
9 |
|
Viewing thumbnails ...................................................................................... |
9 |
|
Viewing a single picture .............................................................................. |
10 |
|
Playing a video............................................................................................ |
10 |
|
Viewing pictures by date or filename ........................................................... |
11 |
3 Doing more with your frame ............................................................... |
12 |
|
|
Playing music.............................................................................................. |
12 |
|
Printing pictures.......................................................................................... |
13 |
|
Copying on your frame................................................................................ |
14 |
|
Copying between your frame and computer................................................. |
15 |
|
Deleting pictures/videos .............................................................................. |
16 |
|
Selecting multiple pictures/videos ................................................................ |
17 |
4 |
Changing frame settings ..................................................................... |
18 |
|
Settings menus ........................................................................................... |
18 |
|
Setting the clock and timer.......................................................................... |
20 |
|
Upgrading your firmware............................................................................. |
22 |
5 Using wireless mode ........................................................................... |
24 |
|
|
What are the wireless features of my frame? ............................................... |
24 |
|
Setting up your frame for wireless operation ................................................ |
24 |
|
Wireless networking and the Internet .......................................................... |
24 |
|
Viewing pictures over your wireless network................................................ |
25 |
www.kodak.com/go/support |
iii |
|

Table of contents |
|
Viewing pictures from the KODAK Gallery.................................................... |
26 |
Automatically receiving My Friends’ Albums................................................. |
27 |
Picture transfer software—copying wirelessly .............................................. |
29 |
Glossary of common wireless network terms................................................ |
31 |
6 Troubleshooting and support .............................................................. |
35 |
Picture frame problems ............................................................................... |
35 |
Picture frame/computer communications ..................................................... |
35 |
Wireless network connection....................................................................... |
36 |
Screen messages......................................................................................... |
39 |
7 Appendix ............................................................................................. |
41 |
Digital frame specifications.......................................................................... |
41 |
Important safety instructions ....................................................................... |
43 |
Upgrading your software and firmware........................................................ |
44 |
Additional care and maintenance ................................................................ |
44 |
Limited warranty ......................................................................................... |
45 |
FCC compliance and advisory ...................................................................... |
47 |
iv |
www.kodak.com/go/support |

1 Getting started
Welcome to your Kodak EasyShare digital picture frame. Viewing your pictures and videos couldn’t be simpler!
Installing the software
See the Wireless Setup Guide to install the software and to set up your frame and wireless network.
Using the remote control
Activating the remote control
An activation tab protects the remote control’s battery during shipment.
■ Remove the tab to start using the remote.
|
|
There is no need to open the battery compartment |
|
|
or remove the battery. |
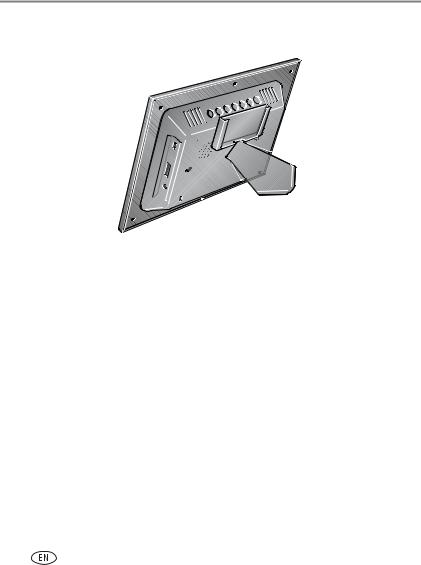
Storing the remote control |
||
|
1 |
Install the remote control holder on the back of the |
1 |
2 |
frame (page i). |
|
||
|
2 |
Slide the remote into the holder for convenient, |
|
|
out-of-the-way storage. |
www.kodak.com/go/support |
1 |
Getting started
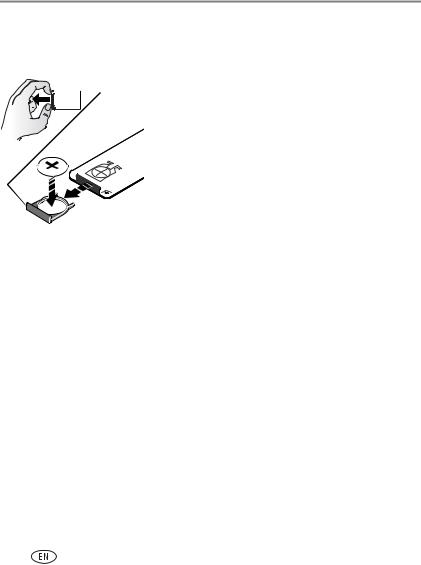
Replacing the remote control battery
NOTE: Replace with a CR2025, 3V lithium cell battery.
 release tab
1Push and hold the release tab while pulling the battery holder out of the remote. Follow the graphic on the back of the remote control.
2Place the new battery in the holder with the plus sign (+) facing up as shown.
3Slide the battery and holder into the remote until it clicks into place.
2 |
www.kodak.com/go/support |
Getting started
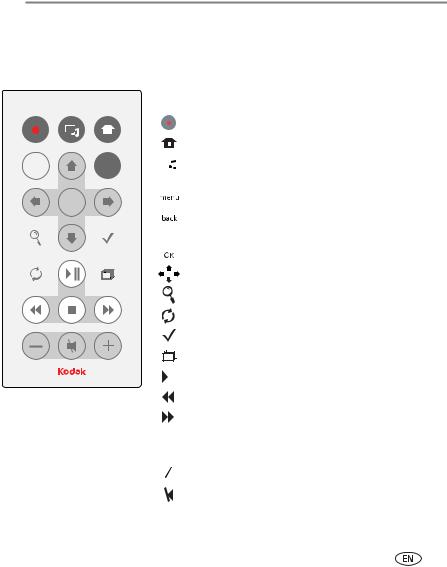
Using the remote control buttons
Some buttons are also on the back of the frame (page ii). They operate identically.
back |
menu |
OK
Button |
Press to: |
|||||||
|
|
|
|
|
|
|
|
|
|
|
|
|
|
|
|
power* |
turn on/off the picture frame. |
|
|
|
|
|
|
|
|
|
|
|
|
|
|
|
|
home |
return to the home screen. |
|
|
|
|
|
|
|
|
|
|
|
|
|
|
|
|
music/pics |
toggle between viewing pictures and selecting |
|
|
|
|
|
|
|
|
music. |
|
|
|
|
|
|
|
|
|
|
|
|
|
|
|
|
menu |
display the menu choices. |
|
|
|
|
|
|
|
|
|
|
|
|
|
|
|
|
back |
return to the previous screen. |
|
|
|
|
|
|
|
|
stop a slide show, display thumbnails. |
|
|
|
|
|
|
|
|
|
|
|
|
|
|
|
|
OK |
accept the current selection. |
|
|
|
|
|
|
|
|
|
|
|
|
|
|
|
|
4-way |
navigate through pictures or menus. |
|
|
|
|
|
|
|
||
|
|
|
|
|
|
|
||
|
|
|
|
|
|
|
||
|
|
|
|
|
|
|
|
|
|
|
|
|
|
|
|
zoom |
magnify the picture. |
|
|
|
|
|
|
|
|
|
|
|
|
|
|
|
|
rotate |
rotate the picture, 90° clockwise each press. |
|
|
|
|
|
|
|
|
|
|
|
|
|
|
|
|
select |
mark pictures for an operation. |
|
|
|
|
|
|
|
|
|
|
|
|
|
|
|
|
slide show |
play a slide show. |
|
|
|
|
|
|
|
||
|
|
|
|
|
|
|
|
|
|
|
|
|
|
|
|
play/pause |
play/pause a video or slide show. |
|
|
|
|
|
|
|
||
|
|
|
|
|
|
|
|
|
|
|
|
|
|
|
|
rewind |
rewind a video. |
|
|
|
|
|
|
|
|
|
|
|
|
|
|
|
|
fast forward |
fast forward a video. |
|
|
|
|
|
|
|
|
|
|
|
|
|
|
|
|
stop |
stop a video, display the first frame. |
|
|
|
|
|
|
|
||
|
|
|
|
|
|
|
|
stop a slide show, display thumbnails. |
|
|
|
|
|
|
|
|
|
|
|
|
|
|
|
|
volume |
decrease (-) or increase (+) the volume. |
|
|
|
|
|
|
|
||
|
|
|
|
|
|
|
|
|
|
|
|
|
|
|
|
mute |
mute audio. |
|
|
|
|
|
|
|
||
|
|
|
|
|
|
|
|
|
* First, turn on the power switch on the frame.
www.kodak.com/go/support |
3 |

Getting started
Setting up your picture frame
Buttons and controls
back |
menu |
All buttons and controls described in this guide (for example: press  ) are on the remote control unless otherwise noted.
OK
Connecting the power cable
1Pull out and extend the stand on the frame back and place the frame on a flat, stable surface.
2Plug in the power cable.
Your power cable (included with the frame) may be different from the one pictured. Use the plug that accommodates your type of power outlet.
4 |
www.kodak.com/go/support |

Getting started
Inserting a card or camera
CompactFlash
MicroDrive
Secure Digital Memory Stick xD
MultiMedia Card
Connecting a digital camera or other USB device
a)USB cable included with your USB device.
b)USB adapter cable included with your EX model picture frame.


 b) a)
b) a) 


www.kodak.com/go/support |
5 |

Getting started
Turning on the frame
■ Press the power switch to On.
NOTE: You can leave the power switch On, and use the remote control to turn the frame off and on.
Setting your language
The language screen appears the first time you turn on your frame.
■ Press |
to select your language, then press OK. |
A slide show starts from sample pictures pre-loaded in internal memory.
■To change the language at a later time, press Home
 , Settings
  →Language. See page 20.
6 |
www.kodak.com/go/support |
Getting started
Viewing your first slide show!
■To play a slide show, insert a memory card or USB device (see page 5).
The pictures/videos are displayed in the order they appear on the card or other device.
–If a slide show is already playing (for example, from the pre-loaded sample pictures), your
pictures begin playing automatically.
–If you are at the Home screen, press 
 to highlight your picture source, then press

 to start the slide show.
■To play music 
 with your pictures or slide shows, see page 12.
■To view pictures from your computer over your wireless network, see page 25. For setting up your network, see the Wireless Setup Guide.
Changing the frame orientation
Your frame is set up to display pictures in landscape orientation 

 . You can turn it to portrait


 but you must also change the setting. Here’s how.
1 Press Home  , Settings .
2 |
Press |
to select Viewing options, then press OK. |
3 |
Press |
to select Frame orientation, then press OK. |
|
See page 19. |
|
www.kodak.com/go/support |
7 |
2 Viewing pictures and videos
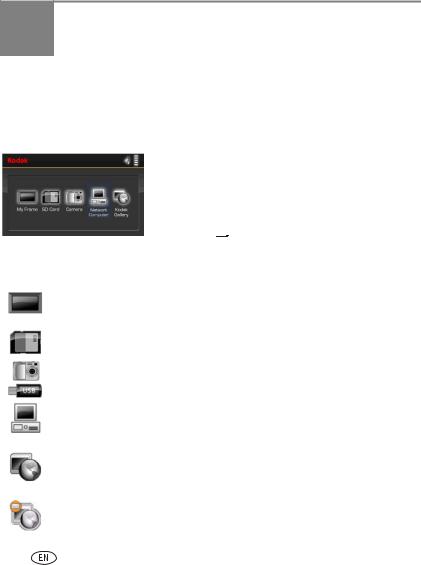
Home screen—picture sources and settings
Go to the Home screen to access pictures from all connected sources and to change frame settings.
1On the remote control, press Home  .
.
All connected sources and the Settings icon are displayed.
2Press 
 to highlight a picture source, then:
■Press 


 to start a slide show.
■Press OK to display thumbnails, folders, albums.
Possible picture sources:
My Frame—the frame’s internal memory. Copy your special pictures into My Frame from a memory card or other device (page 14).
Memory card—appears when you insert a card (page 5). The label and icon indicate the type of card.
Camera—appears when you connect a digital camera via USB cable (page 5).
USB drive—appears when you insert a USB flash drive (page 5).
Network computer —appears if you are connected to a wireless network. Lets you display pictures that are stored on your computer. See the Wireless Setup Guide or Chapter 5 in this guide.
Kodak Gallery—appears if you have set up your Gallery account and are connected to a wireless network. Lets you display your albums from the Gallery. See the Wireless Setup Guide or Chapter 5 in this guide.
Kodak Gallery, with new picture notification  —someone has shared pictures with you at the Gallery! See page 27.
8 |
www.kodak.com/go/support |
Viewing pictures and videos
Settings—customize and configure your frame. See Changing frame settings, page 18.
Running a slide show
There are three ways to start a slide show on your frame:
■Insert a memory card or connect a USB device, then turn on the frame.
■Turn on your frame, then insert a card or connect a USB device—a new slide show starts automatically, replacing a currently running slide show or single view picture.
■Select a picture in thumbnail view or select a picture source on the Home screen, then press 

 or
or 

 .
.
Other slide show information
–A slide show plays continuously until you stop it or turn off the frame.
–You can change the slide duration and transition style (see page 19).
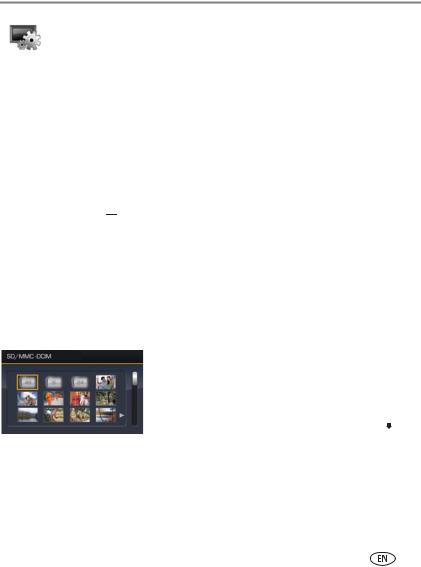
Viewing thumbnails
There are two ways to view your pictures as thumbnails:
■Press  , select a picture source (see page 8), then press OK.
■Press  or
or 
 from a slide show or single view. To navigate through the thumbnails, press
 .
.
www.kodak.com/go/support |
9 |

Viewing pictures and videos
Viewing a single picture
■To view a single, full-screen picture, highlight it in thumbnails view and press OK.
■To magnify a picture up to 8X, press  repeatedly. To view other parts of the picture, press
 . Press
  repeatedly to return.
■To rotate a picture, press  .
.
Playing a video
■To play a video from thumbnails view, highlight it and press OK.
■Videos in thumbnail view:
–MOV videos are indicated with  .
.
–AVI, MPEG, and MPG videos display the first frame.
■During a slide show, videos play automatically. When the video ends, the slide show resumes.
■Video buttons on the remote control:
Press To
play, pause, and resume the video.
rewind / fast forward.
adjust the volume.
|
or |
stop the video and return to thumbnails. |
|
10 |
www.kodak.com/go/support |

Viewing pictures and videos
Viewing pictures by date or filename
By default, the pictures and videos on your frame are arranged and played by date, starting with the oldest. You can change the arrangement, or sort order, by date or alphabetically by filename.
To change the sort order:
1 Press 
 , then select Sort by.
2 Press OK.
3Select a sort order:
–Date, oldest to newest (default)
–Date, newest to oldest
–Filename, A to Z
–Filename, Z to A
4 Press OK.
www.kodak.com/go/support |
11 |
3 Doing more with your frame
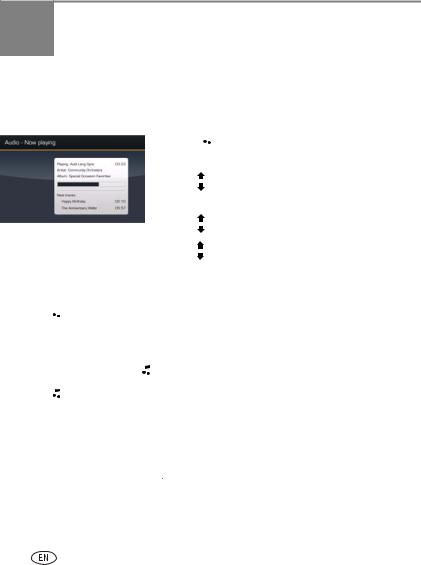
Playing music
Play your MP3 files from any connected source (see page 8).
1Press 
 .
.
Your picture or slide show is paused.
2 |
Press |
to highlight your music source, then press |
|
OK. |
|
3 |
Press |
to locate your music files, then press OK. |
4 |
Press |
to go to the next or previous song, or select |
Play all songs. Then press OK.
Your music starts playing.
5Press 
 to return to your picture or slide show.
Your selected music continues to play as the slide show resumes. When music is playing, videos play without their related audio.
6 |
To turn off music, press |
|
|
, then |
|
. |
|||||||
|
|
|
|||||||||||
|
|
||||||||||||
|
|||||||||||||
7 |
Press |
|
|
|
|
|
|
again to return to your pictures. |
|||||
Notes on playing and copying music:
■A headphone jack is available on the side of the frame (page ii).
■Adjust the volume with the 

 buttons. Press
  to mute the music.
■To copy music files (MP3) to internal memory, drag and drop them from your computer. See Copying pictures to/from your computer, page 15.
12 |
www.kodak.com/go/support |
Loading...