


 Loading...
Quick Reference Guide for Microsoft Windows XPe-based Thin Clients - t5720 & t5730
Quick Reference Guide
© Copyright 2008 Hewlett-Packard
Development Company, L.P.
The information contained herein is subject to change without notice.
The only warranties for HP products and services are set forth in the express warranty statements accompanying such products and services. Nothing herein should be construed as constituting an additional warranty. HP shall not be liable for technical or editorial errors or omissions contained herein.
First Edition (January 2008)
Document Part Number: 453901–001

About This Book
This guide supplements the standard Microsoft Windows XPe documents supplied by Microsoft Corporation. This document highlights the differences, enhancements, and additional features provided with this terminal.
 WARNING! Text set off in this manner indicates that failure to follow directions could result in bodily harm or loss of life.
 CAUTION: Text set off in this manner indicates that failure to follow directions could result in damage to equipment or loss of information.
 NOTE: Text set off in this manner provides important supplemental information.
This guide supplements the standard Microsoft Windows XPe documents supplied by Microsoft Corporation. This document highlights the differences, enhancements, and additional features provided with this terminal.
ENWW |
iii |
iv About This Book |
ENWW |

Table of contents
1 |
Introduction |
|
|
Updates ................................................................................................................................................ |
2 |
|
The XPe desktop .................................................................................................................................. |
2 |
|
User desktop ........................................................................................................................ |
2 |
|
Administrator desktop .......................................................................................................... |
2 |
|
Server environment requirements ........................................................................................................ |
3 |
|
Session services .................................................................................................................. |
3 |
|
Citrix ICA ............................................................................................................. |
3 |
|
Microsoft RDP ..................................................................................................... |
4 |
|
Terminal emulation support ................................................................................. |
4 |
|
Support service - Altiris Deployment Solution ...................................................................... |
4 |
2 |
Configuration |
|
|
Logging on ............................................................................................................................................ |
5 |
|
Automatic logon ................................................................................................................... |
5 |
|
Manual logon ....................................................................................................................... |
6 |
|
Administrator logon access .................................................................................................. |
6 |
|
Logging off, restarting, and shutting down the thin client ..................................................................... |
7 |
|
Enhanced Write Filter .......................................................................................................... |
7 |
|
Power management ............................................................................................................. |
8 |
|
System time ......................................................................................................................... |
8 |
|
Local drives .......................................................................................................................................... |
9 |
|
Drive Z ................................................................................................................................. |
9 |
|
Drive C and flash ................................................................................................................. |
9 |
|
Saving files .......................................................................................................................... |
9 |
|
Mapping network drives ....................................................................................................... |
9 |
|
Roaming profiles ............................................................................................... |
10 |
|
User accounts .................................................................................................................................... |
11 |
|
Creating a new user account ............................................................................................. |
11 |
|
User Manager .................................................................................................................... |
11 |
|
User profiles ....................................................................................................................... |
11 |
|
Regional and Language Options ........................................................................................................ |
13 |
|
Administrative Tools ........................................................................................................................... |
14 |
3 |
Applications |
|
|
Sygate firewall .................................................................................................................................... |
16 |
|
Microsoft Windows Firewall ................................................................................................................ |
17 |
|
On-by-default ..................................................................................................................... |
17 |
|
Configuring Microsoft Windows Firewall ............................................................................ |
17 |
ENWW |
v |
Gathering configuration information ................................................................................... |
19 |
Troubleshooting applications ............................................................................................. |
19 |
Failure symptoms .............................................................................................................. |
20 |
Resolution .......................................................................................................................... |
20 |
Adding a program .............................................................................................. |
20 |
Adding a port ..................................................................................................... |
21 |
Citrix Program Neighborhood ............................................................................................................. |
22 |
Remote Desktop Connection ............................................................................................................. |
23 |
HP PC Session Allocation Manager (SAM) Client ............................................................................. |
24 |
TeemNT Terminal Emulation ............................................................................................................. |
25 |
Altiris Client Agent .............................................................................................................................. |
26 |
Microsoft Internet Explorer ................................................................................................................. |
26 |
Windows Media Player 11 .................................................................................................................. |
26 |
Macromedia Flash Player ................................................................................................................... |
27 |
4 Control Panel extended selections |
|
Enhanced Write Filter Manager .......................................................................................................... |
29 |
Enhanced Write Filter Manager command line control ...................................................... |
29 |
Enhanced Write Filter user interface ................................................................................. |
30 |
Enhanced Write Filter status tool ....................................................................................... |
31 |
HP RAMDisk ...................................................................................................................................... |
32 |
HP DHCP Settings Update Client ...................................................................................................... |
33 |
HP ThinState Capture ........................................................................................................................ |
34 |
HP ThinState Deploy ......................................................................................................... |
37 |
5 Administration and image upgrades |
|
Altiris Deployment Solution software .................................................................................................. |
38 |
Add-on upgrades ............................................................................................................... |
38 |
Image upgrades ................................................................................................................. |
38 |
HP ThinState Capture and Deploy .................................................................................... |
38 |
HP Compaq Thin Client Imaging Tool ................................................................................................ |
39 |
HP Universal Print Driver for Thin Clients Add-on .............................................................................. |
39 |
6 Peripherals |
|
Printers ............................................................................................................................................... |
40 |
Adding printers-using generic text-only print driver ........................................................... |
40 |
Using manufacturer print drivers ........................................................................................ |
41 |
Audio .................................................................................................................................................. |
41 |
Index ................................................................................................................................................................... |
42 |
vi |
ENWW |

1 Introduction
HP Compaq t57x0 thin client models use the Microsoft Windows XP Embedded (XPe) operating system. These thin clients provide the flexibility, connectivity, security, multimedia, and peripheral capabilities that make them ideal for most mainstream business use:
●Flexible
◦Win32-based application support
◦Extensive peripheral device support
●Connectivity
◦Latest versions of Citrix Program Neighborhood, Microsoft RDP, and TeemNT
●User interface similar to familiar Windows XP Professional
●Improved security
◦Sygate Firewall
◦Microsoft Firewall
◦Locked down protected Flash drive
●Multimedia
◦Windows Media Player
◦Midi (Add-on)
◦Windows Messenger
◦Macromedia Flash
●Internet browsing
◦Internet Explorer
◦Adobe Acrobat (Add-on)
◦Sun JVM (Add-on)
●Extensive MUI support: English, French, German, Spanish, Dutch, Norwegian, Traditional Chinese, Simplified Chinese, Korean, and Japanese
HP provides this client “ready to go” out of the box to meet most common customer requirements. You may want to add/remove features using the add-ons provided on the HP support site, and customize it to your specific needs.
ENWW |
1 |

This guide will introduce you to the features of this client that are not found in the standard Microsoft Windows XP operating system.
Typically, a terminal is configured locally then used as a template for other terminals, which are then configured using local or remote administration tools.
Updates
HP provides add-ons, QFEs, and periodic updates for thin client images. Check the HP support site for these updates or for important documentation that provides specific information for your image version at http://welcome.hp.com/country/us/en/support.html.
The XPe desktop
This section provides a general overview of Windows XPe user and administrator desktop features and functions.
User desktop
The desktop that displays when you are logged on as a user is a standard Windows XP desktop, with the exception that the only icons displayed are for the Citrix Program Neighborhood, Microsoft RDP, and Internet Explorer. These selections are also available from the Start menu. You can open the terminal emulator application from Start > Programs.
 NOTE: Links to remote ICA NFuse-published applications may also be listed on the Start menu and/ or displayed as icons on the desktop. Refer to the Citrix documentation for information and instructions.
For information about the functionality of the standard Windows XPe desktop and Start menu items, refer to the applicable Microsoft documentation at http://msdn2.microsoft.com/en-us/embedded/ aa731409.aspx.
For the Web addresses of the Citrix Program Neighborhood and Microsoft RDP help documents, see Citrix Program Neighborhood on page 22.
 NOTE: The Control Panel, available by clicking Start > Control Panel, provides access to a limited set of resources for changing Windows XPe user preferences. You must log on as Administrator to access the extended set of system resources.
Right-clicking the mouse when the pointer is on a user’s desktop background does not open a pop-up menu.
Administrator desktop
The desktop that displays when you are logged on as an administrator is a standard Windows XP desktop. Icons present on the default administrator desktop Start menu include:
●Citrix Program Neighborhood
●Microsoft RDP
●Internet Explorer
2 Chapter 1 Introduction |
ENWW |

For information about the functionality of the standard Windows XPe desktop and Start menu items, refer to the Microsoft Web site at http://msdn2.microsoft.com/en-us/embedded/aa731409.aspx.
 NOTE: Right-clicking the mouse when the pointer is on the administrator’s desktop background opens a pop-up menu.
Server environment requirements
HP thin clients use a variety of services accessed through a network. These services include session and product support services as well as standard network services such as DHCP and DNS. Thin clients require the following
●Session services
●Support services
Session services
The network to which your thin client is connected requires any of the following session services:
●Citrix ICA
●Microsoft RDP
●Terminal emulation support
Citrix ICA
You can make Citrix Independent Computing Architecture (ICA) available on the network using Citrix MetaFrame or Presentation Server for Microsoft Windows 2000 Server family, and Windows 2003 Server family.
ENWW |
Server environment requirements 3 |

Microsoft RDP
The Terminal Services Client application on the thin client accesses Microsoft Terminal Services. You can make Microsoft RDP available on the network using any of the following services:
●Microsoft Windows 2000/2003 Server with Terminal Services installed
●Microsoft Windows Server 2000/2003
 NOTE: If a Windows 2000/2003 server is used for both of these session services (ICA and RDP), a Terminal Services Client Access Licenses TSCAL) server must also reside somewhere on the network. Client Access licenses permit clients to use the terminal, file, print, and other network services provided by Windows 2000/2003 Server. The server grants temporary licenses (on an individual device basis) that are good for 90 days. Beyond that, you must purchase TSCALs and install them in the TSCAL server. You cannot make a connection without a temporary or permanent license.
For additional information about Microsoft Terminal Services, see the Microsoft Web site at http://www.microsoft.com/windows2000/technologies/terminal/def ault.asp.
Terminal emulation support
All t57x0 thin-client models include terminal emulation software to support computing on legacy platforms. The terminal emulation software uses the Telnet protocol to communicate with the computing platform.
Support service - Altiris Deployment Solution
The Altiris Deployment Solution™ support service is available for your thin client network. This service provides an easy-to-use, integrated tool that allows remote management of thin clients throughout their life cycle, including initial deployment, ongoing management, and software deployment.
You must install the Altiris Deployment Solution on a Windows 2000/2003 Server, or a workstation capable of logging on as administrator to a domain that provides specified network services which can access a software repository for your thin client. The Altiris Deployment Solutions software uses a Preboot Execution Environment (PXE) session and protocol to reimage or recover your thin client. PXE upgrade services are built into the Altiris Deployment Solution.
For additional information about the Altiris Deployment Solution, refer to the Altiris Web site at http://www.altiris.com/Support/Documentation.aspx and review the Altiris Deployment Solution User Guide.
4 Chapter 1 Introduction |
ENWW |
2 Configuration
Logging on
You can log on to your thin client either automatically or manually.
Automatic logon
The default for the XPe-based thin client is automatic logon. The administrator can use the HP Windows Logon Configuration Manager in the Control Panel to enable/disable auto logon and change the auto logon user name, password, and domain. Only the administrator account can change auto logon properties.
 NOTE: To save changes, be sure to disable the write filter cache or issue the -commit command anytime during the current boot session. See Enhanced Write Filter Manager on page 29 for information about and instructions for disabling the write filter. Enable the write filter when you no longer want permanent changes.
Enabling automatic logon bypasses the Log On to Windows dialog box. To log on as a different user while auto logon is enabled, press and hold Shift while clicking Start > Shut Down > Log Off. This displays the Log On to Windows dialog box and allows you to type in the logon information.
ENWW |
Logging on 5 |

Manual logon
When automatic logon is disabled, thin client startup displays the Log On to Windows dialog box. Type the logon information in the User Name and Password text boxes. Note the following:
●For a user account, the factory-default user name and password are both User.
●For an administrator account, the factory-default user name and password are both
Administrator.
●For security purposes, HP recommends that you change the passwords from their default values. An administrator can change passwords by pressing Ctrl+Alt+Del to open the Windows Security dialog box, and then selecting Change Password. You cannot change the password when logged on as a user.
●Passwords are case-sensitive, but user names are not.
●The administrator may create additional user accounts using the User Accounts utility available in the Administrative Tools option in Control Panel. However, due to local memory constraints, you should keep the number of additional users to a minimum. For more information, see User accounts on page 11.
Administrator logon access
To access Administrator logon regardless of the state of the thin client user mode:
While holding down Shift, use the mouse to initiate logoff of the User (invoked from the Start menu).
The screen for Administrator logon is displayed.
 NOTE: The default username and password for the Administrator account is Administrator. The default user name and password for the User account is User.
You can use the HP Windows Logon Configuration Manager to permanently modify the default login user. Located in the Control Panel, only the Administrator can access this application.
6 Chapter 2 Configuration |
ENWW |
Logging off, restarting, and shutting down the thin client
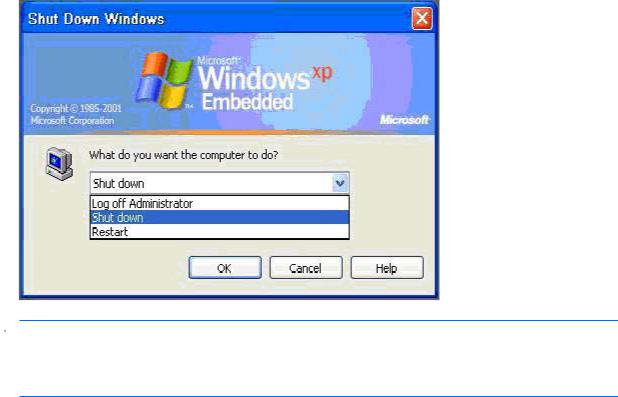
To restart, shut down, or log off from the thin client, click Start > Shut Down. From the Shut Down dialog box, select the desired action, and then click OK.
 NOTE: You may also log off or shut down using the Windows Security dialog box. Press Ctrl+Alt +Del to open the dialog box.
If automatic logon is enabled, when you log off (without shutting down) the thin client immediately logs on the default user. For instructions for logging on as a different user, see Logging on on page 5.
The following utilities are affected by logging off, restarting, or shutting down the thin client:
●Enhanced Writer Filter
●Power Management
●System Time
Enhanced Write Filter
For detailed information about the Enhanced Write Filter, see Enhanced Write Filter Manager
on page 29. If you want to save changes to system configuration settings, you must disable the write filter cache or issue the -commit command during the current boot session. Otherwise, the new settings will be lost when the thin client is shut down or restarted. Enable the write filter when you no longer want to make permanent changes
The write filter cache contents are not lost when you log off and on again (as the same or different user). You may disable the write filter cache after the new logon and still retain the changes.
A user logon account does not have write filter disabling privileges; this is a local or remote administrator function.
ENWW |
Logging off, restarting, and shutting down the thin client |
7 |

Power management
A “Monitor Saver” turns off the video signal to the monitor after a designated idle time, allowing the monitor to enter a power-saving mode. Parameters for this mode are available by right-clicking on the desktop background and selecting Properties > Screen Saver > Power.
System time
After power off, clock time is not lost as long as the power source remains plugged in. You can manually set the local time, or you can automatically set the local time utility to synchronize the thin client clock to a time server at a designated time.
 NOTE: The Windows Time service is Stopped by default. You can Start the service via the administrative tools control panel applet. You may want to Start the service and maintain correct time because some applications may require access to the local thin client time. To open the Date and Time Properties dialog, click on the time area in the task bar or double-click the Date and Time icon in the Control Panel.
8 Chapter 2 Configuration |
ENWW |
Local drives
The following sections describe the local drives located on the thin client.
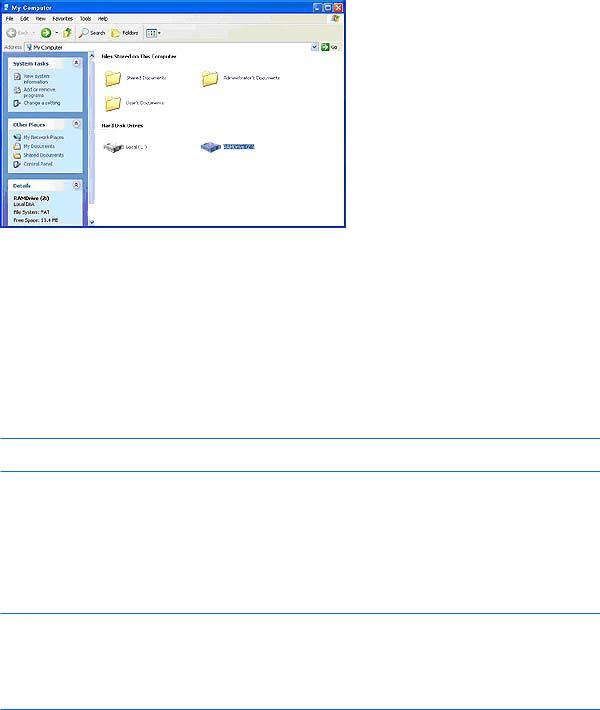
Drive Z
Drive Z is the onboard volatile memory (MS-RAMDRIVE) on the logic board of the thin client. Because drive Z is volatile memory, HP recommends that you do not use this drive to save data that you want to retain. For RAMDisk configuration instructions, see HP RAMDisk on page 32. For information about using the Z drive for roaming profiles, see Roaming profiles on page 10.
Drive C and flash
Drive C is in the onboard flash drive. HP recommends that you do not write to drive C, as writing to drive C reduces the free space on the flash.
 CAUTION: If the available free space on the flash drive is reduced to below 3 MB, the thin client becomes unstable.
A write filter is used by the thin client for security and to prevent excessive flash write activity. Changes to the thin client configuration are lost when the thin client is restarted unless the write filter cache is disabled or a -commit command is issued during the current boot session. See the write filter topics in Enhanced Write Filter Manager on page 29 for instructions to disable the cache. Enable the write filter when you no longer want permanent changes.
Saving files
 CAUTION: The thin client uses an embedded operating system with a fixed amount of flash memory. HP recommends that you save files that you want to retain on a server rather than on your thin client. Be careful of application settings that write to the C drive, which resides in flash memory (in particular, many applications by default write cache files to the C drive on the local system). If you must write to a local drive, change the application settings to use the Z drive. To minimize writing to the C drive, update configuration settings as described in User accounts on page 11.
Mapping network drives
You can map network drives if you log on as either Administrator or User.
ENWW |
Local drives 9 |
Loading...