


iBook G4
Getting Started
Includes setup, expansion, and troubleshooting information for your iBook G4 computer

K Apple Computer, Inc.
© 2004 Apple Computer, Inc. All rights reserved.
Under the copyright laws, this manual may not be copied, in whole or in part, without the written consent of Apple.
The Apple logo is a trademark of Apple Computer, Inc., registered in the U.S. and other countries. Use of the “keyboard” Apple logo (Option-Shift-K) for commercial purposes without the prior written consent of Apple may constitute trademark infringement and unfair competition in violation of federal and state laws.
Every effort has been made to ensure that the information in this manual is accurate. Apple is not responsible for printing or clerical errors.
Apple
1 Infinite Loop
Cupertino, CA 95014-2084 408-996-1010 www.apple.com
Apple, the Apple logo, AirPort, Apple Store, AppleTalk, Final Cut Pro, FireWire, iBook, iCal, iMovie, iTunes, Mac, Macintosh, and Mac OS are trademarks of Apple Computer, Inc., registered in the U.S. and other countries.
Finder, iDVD, iPhoto, Panther, Rendezvous, and Safari are trademarks of Apple Computer, Inc.
AppleCare is a service mark of Apple Computer, Inc., registered in the U.S. and other countries.
.Mac is a service mark of Apple Computer, Inc.
ENERGY STAR® is a U.S. registered trademark.
The Bluetooth® word mark and logos are owned by the Bluetooth SIG, Inc. and any use of such marks by Apple Computer, Inc. is under license.
PowerPC is a trademark of International Business Machines Corporation, used under license therefrom.
Other company and product names mentioned herein are trademarks of their respective companies. Mention of third-party products is for informational purposes only and constitutes neither an endorsement nor a recommendation. Apple assumes no responsibility with regard to the performance or use of these products.
The product described in this manual incorporates copyright protection technology that is protected by method claims of certain U.S. patents and other intellectual property rights owned by Macrovision Corporation and other rights owners. Use of this copyright protection technology must be authorized by Macrovision Corporation and is intended for home and other limited viewing uses only unless otherwise authorized by Macrovision Corporation. Reverse engineering or disassembly is prohibited.
Apparatus Claims of U.S. Patent Nos. 4,631,603, 4,577,216, 4,819,098 and 4,907,093 licensed for limited viewing uses only.
Simultaneously published in the United States and Canada.

Contents
Chapter 1 |
5 |
Getting Started |
|
6 |
Basic Features of Your iBook G4 |
|
8 |
Additional Features of Your iBook G4 |
|
10 |
Setting Up |
|
15 |
How Do I Turn My iBook G4 Off? |
|
16 |
Calibrating Your New Battery |
|
16 |
What’s Next? |
Chapter 2 |
19 |
The Basics |
|
19 |
Getting to Know Your iBook G4 |
|
20 |
Adjusting Your Display |
|
21 |
Using Your Power Adapter |
|
22 |
Using the Trackpad |
|
23 |
Using the Keyboard |
|
23 |
Using a Mouse |
|
24 |
Learning About Mac OS X |
|
24 |
Customizing Your Desktop and Setting Your Preferences |
|
25 |
Connecting to a Printer |
|
26 |
Playing a CD and Connecting Headphones |
|
26 |
Keeping Your Software Up to Date |
|
27 |
Connecting a Camera or Other FireWire or USB Device |
|
27 |
Connecting to a Network |
|
28 |
Using the Internet |
|
28 |
Transferring Files to Another Computer |
|
29 |
When an Application Freezes |
Chapter 3 |
31 |
Using Your Computer |
|
32 |
Universal Serial Bus (USB) |
|
34 |
FireWire |
|
36 |
AirPort Extreme Wireless Networking and Internet Access |
|
37 |
Using Bluetooth Devices |
|
38 |
Ethernet (10/100Base-T) |
|
39 |
Using Your Modem |
3

|
39 |
External Video Support (VGA, Composite, and S-Video) |
|
41 |
Using Your Optical Drive |
|
45 |
Connecting Speakers and Audio Devices |
|
45 |
Battery |
|
49 |
Security Slot |
Chapter 4 |
51 |
Enhancing Your Computer |
|
51 |
Installing an AirPort Extreme Card or Additional Memory |
Chapter 5 |
61 |
Troubleshooting |
|
61 |
Problems That Prevent You From Using Your Computer |
|
63 |
Other Problems |
|
65 |
Restoring Your Computer’s Software |
|
66 |
Locating Your Product Serial Number |
Appendix A |
67 |
Specifications |
Appendix B |
69 |
Care, Use, and Safety Information |
|
69 |
Cleaning Your iBook G4 |
|
69 |
Carrying Your iBook G4 |
|
69 |
Storing Your iBook G4 |
|
70 |
Safety Instructions for Setting Up and Using Your Computer |
|
71 |
General Safety Instructions |
|
72 |
Battery |
|
72 |
Connectors and Ports |
|
72 |
Avoid Hearing Damage |
|
72 |
Apple and the Environment |
|
73 |
Ergonomics |
Appendix C |
75 |
Connecting to the Internet |
|
77 |
Gathering the Information You Need |
|
78 |
Entering Your Information |
|
79 |
Dial-Up Modem With Point-to-Point Protocol (PPP) Connections |
|
81 |
DSL, Cable Modem, or LAN Internet Connections |
|
87 |
AirPort Extreme Wireless Connection |
|
90 |
Troubleshooting Your Connection |
Appendix D |
93 |
Top Ten Questions |
|
97 |
Communications Regulation Information |
Index |
103 |
|
4 |
Contents |
|
|
Getting Started |
1 |
|
|
|
|
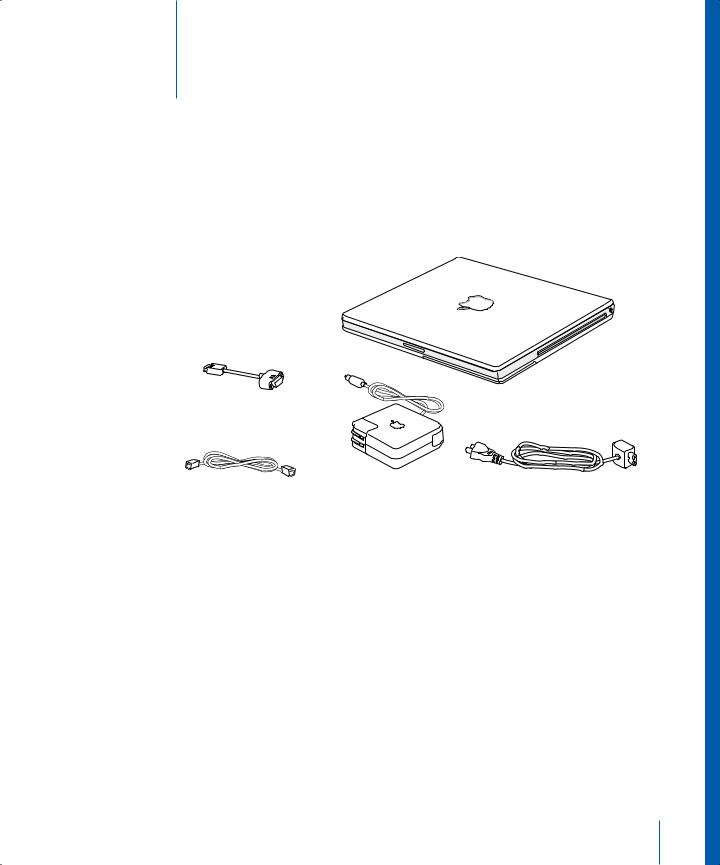
Your iBook G4 is a full-featured notebook computer.
Apple VGA Display Adapter
AC plug
Phone cord |
Power adapter |
AC cord |
Important: Read all the installation instructions and safety information (see page 69) carefully before you plug your computer into a wall socket.
5

Basic Features of Your iBook G4
AirPort Extreme |
Microphone |
antenna |
|
AirPort Extreme antenna
Built-in speaker (located under
speaker grille)
® Power button
Function (Fn)
Built-in speaker
key
®
¯Power
adapter port
Sleep indicator light
Display |
Trackpad |
Trackpad |
Slot-loading |
|
|
release button |
button |
|
optical drive |
|
|
—Mute |
|
Num Lock |
Media |
|
|
control |
|
key |
Eject key |
|
|
|
|
|
|
|
|
|
|
|
|
|
|
|
|
|
|
|
|
¤Brightness |
- Volume |
Function keys |
controls |
controls |
|
6 |
Chapter 1 Getting Started |
|
|

¤Brightness controls
Increase or decrease the brightness of your iBook G4 display.
-Volume controls
Increase or decrease the volume of the sound coming from the built-in speakers and headphone port.
Num Lock key
Activate the numeric keypad embedded in the iBook G4 keyboard. When the numeric keypad is activated, a green light glows on the key.
Media Eject key
Press and hold this key to eject a disc. You can also eject a disc by dragging its desktop icon to the Trash.
Microphone
Record sounds directly on your iBook G4 hard disk with this built-in microphone (located to the upper right of the display).
Built-in stereo speakers (2)
Listen to music, movies, games, and multimedia.
Function (Fn) key
Press and hold this key to activate the function keys (F1 to F12).
Sleep indicator light
A white light pulsates when the iBook G4 is in sleep.
Display release button
Push this button to release your display and open your iBook G4.
Trackpad
Move the pointer on the iBook G4 display.
Slot-loading optical drive
Your optical drive can read standard CD-ROM discs, Photo CDs, and audio discs. If you have an optional Combo drive, it can read DVD-ROM and DVD-R discs, DVD movies, and other kinds of media. It can also write music, documents, and other digital files on CD-R and CD-RW discs. If you have a SuperDrive, you can also write to DVD-R discs.
®Power button
Turn your iBook G4 on and off or put it to sleep.
¯Power adapter port
Plug in the included Apple Portable Power Adapter to recharge your iBook G4 battery.
AirPort Extreme antenna
With an optional AirPort Extreme Card and an AirPort Extreme Base Station or other wireless hub, connect to the Internet wirelessly.
For additional information about AirPort Extreme or your optical drive, see Chapter 3,“Using Your Computer,” on page 31.
Chapter 1 Getting Started |
7 |
|
|

Additional Features of Your iBook G4
®
|
|
Battery |
G Ethernet port |
FireWire 400 |
|
(10/100Base-T) |
port |
|
Security slot |
|
f Headphone |
|
|
port |
WInternal |
USB 2.0 ports |
Video out port |
modem port |
|
|
8 |
Chapter 1 Getting Started |
|
|

WInternal modem port
Connect a standard phone line directly to the internal modem.
GEthernet port (10/100Base-T)
Connect to a high-speed 10/100Base-T Ethernet network or connect to another computer and transfer files. The Ethernet port auto-sensing feature detects other Ethernet devices. You don’t need an Ethernet crossover cable to connect to other Ethernet devices.
FireWire 400 port
Connect high-speed external devices, such as digital videocameras and external storage devices. For more information, see page 34.
Two USB 2.0 (Universal Serial Bus) ports
Connect additional equipment to your iBook G4, such as printers, external storage devices, digital cameras, modems, keyboards, and joysticks.
Video out (external monitor) port
Connect to an external monitor or projection device that uses a VGA connector with the included Apple VGA Display Adapter. You can also use an Apple Video Adapter (sold separately) to connect to a television, VCR, or another video device.
fHeadphone (audio line out) port
Connect external speakers, headphones, or other sound output devices.
ÇSecurity slot
Protect your iBook G4 by connecting a security cable.
For additional information about these features, see Chapter 3,“Using Your Computer,” on page 31.
Chapter 1 Getting Started |
9 |
|
|
Setting Up
Your iBook G4 is designed so that you can set it up quickly and start using it right away.
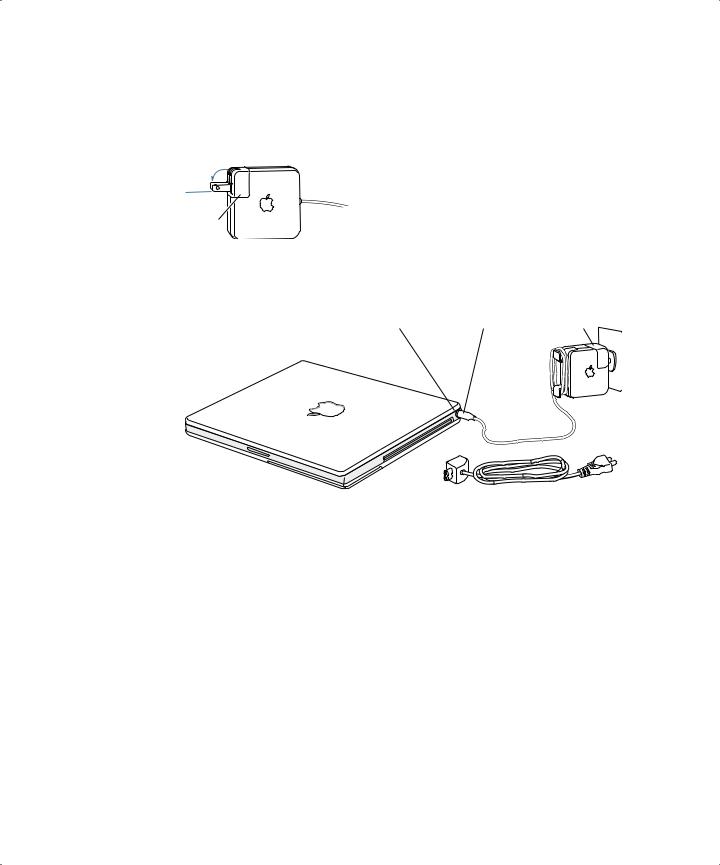
Step 1: Plug In the Power Adapter
mPlug the AC plug of your power adapter into an outlet and the power adapter plug into the iBook G4 power adapter port.
AC plug
Important: Be sure to snap the electrical prongs on your AC plug into their completely extended position before you plug the adapter into the outlet.
¯Power adapter port |
Power adapter plug |
AC plug |
AC cord
To extend the reach of your power adapter, you can attach the AC cord if desired.
See “Using Your Power Adapter” on page 21.
10 |
Chapter 1 Getting Started |
|
|
Step 2: Connect Your Cables
Next, connect your iBook G4 to a phone line, DSL modem, cable modem, or Ethernet network. If you’re connecting to a wireless AirPort Extreme network, you don’t need cables.
To connect to a phone line:
mConnect the phone cord from a wall jack to the internal modem port for a dial-up connection.
Telephone cord
®
WInternal modem port
Make sure you connect the internal modem to an analog phone line—the kind used typically in homes. The modem will not work with a digital phone line.
Warning: Do not connect a digital telephone line to the modem; the wrong
type of line could damage the modem. Contact your telephone service provider if you are unsure whether you have a digital telephone line.
For more information about your modem, see “Using Your Modem” on page 39. For information on other types of connections, see Appendix C,“Connecting to the Internet,” on page 75.
Chapter 1 Getting Started |
11 |
|
|
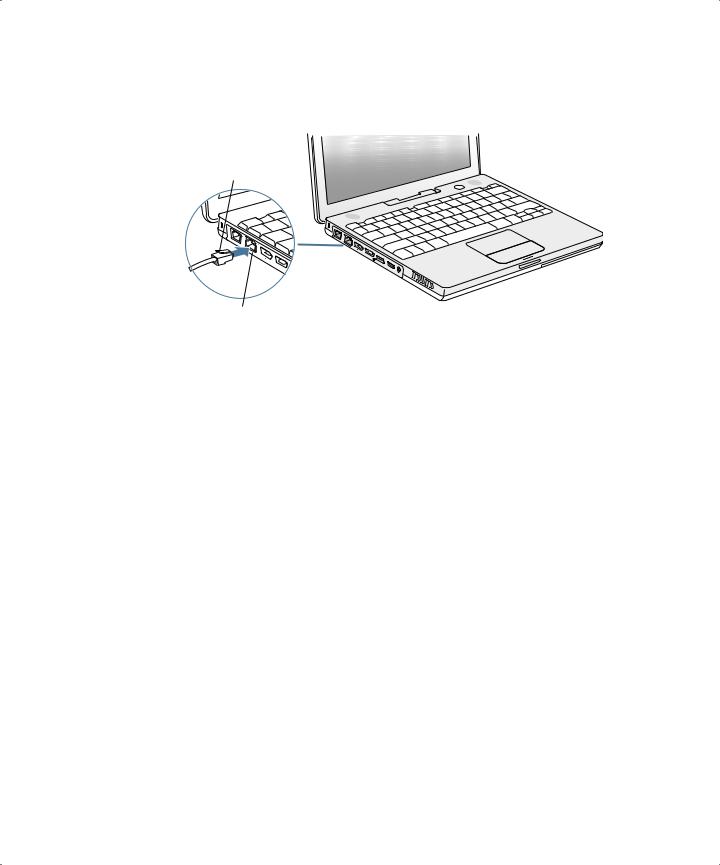
To connect to a DSL or cable modem or an Ethernet network:
mConnect the cable to your DSL or cable modem as shown in the modem instructions, or connect the Ethernet cord to the Ethernet hub or outlet. Then connect the other end of the cord to the computer’s Ethernet port.
Ethernet cord
®
GEthernet port (10/100Base-T)
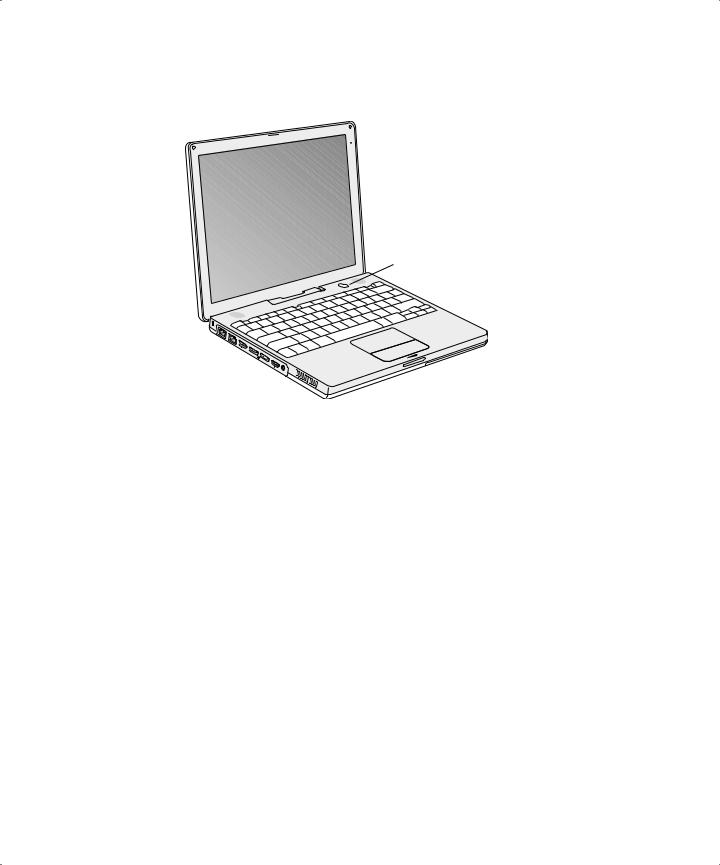
Step 3: Turn On Your iBook G4
The first time you start up your computer, a setup assistant welcomes you and takes you through the registration process. It will also help you set up your computer and Internet connection. Internet access usually requires an account with an Internet service provider (ISP). Fees may apply.
Setting up your Internet connection requires you to supply information such as the account name your ISP gives you. If you know this information, have it on hand when you start up your iBook G4. If you’re not ready to set up your connection yet or you don’t know this information, you can skip that process and come back to it later. See Appendix C,“Connecting to the Internet,” on page 75 for information about how to set it up later.
12 |
Chapter 1 Getting Started |
|
|
1To turn on the computer, press the Power button (®).
You should hear a tone when you turn on the computer. It takes the computer a few moments to start up. The setup assistant launches automatically to help you.
® Power button
®
Note: When you press the Power button to start up your computer, press it only once briefly (up to 1 second). Do not continue to hold down or press the Power button after the startup tone or you may cause the computer to shut down again.
Chapter 1 Getting Started |
13 |
|
|

2Use your iBook G4 trackpad to select and move items on the screen, much as you use a mouse with a desktop computer.
•To move the arrow pointer on the screen, slide your finger across the trackpad.
•To select, click, or double-click an item on the screen, use the trackpad button.
®
Trackpad |
Trackpad button |
For tips on using the trackpad, see “Tips for Using the Trackpad” on page 22.
Congratulations, you’re up and running!
Problems Turning the Computer On?
Nothing happens when you press the Power button.
•The battery may be drained. Make sure that you plugged the power adapter firmly into both the computer and a power source. The plug should light when you plug it into the computer.
•If the computer still doesn’t start up, see “Problems That Prevent You From Using Your Computer” on page 61.
You see a picture of a disk or a folder with a blinking question mark.
•This icon usually means that the computer can’t find system software on the hard disk or any disks attached to the computer. Try restarting. Hold down the Power button for 4 to 5 seconds until the computer turns off. Then press the Power button again. If the problem persists, you may need to reinstall system software. See “Restoring Your Computer’s Software” on page 65.
14 |
Chapter 1 Getting Started |
|
|

How Do I Turn My iBook G4 Off?
When you have finished working with your iBook G4, you can put your computer to sleep or shut it down.
Putting Your iBook G4 to Sleep
If you will be away from your iBook G4 for only a short time, put the computer to sleep. When the computer is in sleep, you can quickly wake it and bypass the startup process.
To put the computer to sleep, do one of the following:
•Close the display.
•Choose Apple (K) > Sleep from the menu bar.
•Press the Power button (®) and click Sleep in the dialog that appears.
Warning: Wait a few seconds until the white sleep light next to the display latch starts pulsating (indicating that the computer is in sleep and the hard disk has stopped spinning) before you move your iBook G4. Moving your computer while the hard disk is spinning can damage the hard disk, causing loss of data or the inability to start up from the hard disk.
To wake the computer:
•If the display is closed, open it. Your iBook G4 automatically wakes from sleep when you open the display.
•If the display is already open, press the Power button (®) or any key on the keyboard.
Shutting Down Your iBook G4
If you aren’t going to use your iBook G4 for a day or two, shut it down.
To shut down your computer, do one of the following:
•Choose Apple (K) > Shut Down from the menu bar.
•Press the Power button (®) and click Shut Down in the dialog that appears.
Chapter 1 Getting Started |
15 |
|
|

If you plan to store your iBook G4 for an extended period of time, see “Storing Your iBook G4” on page 69 for information on how to prevent your battery from draining completely.
Calibrating Your New Battery
To get the longest running time from your battery, complete the following steps sometime during the first week you have your iBook G4.
To initially calibrate your battery, follow these steps:
1Plug in the power adapter and fully charge your iBook G4 battery until the light on the power adapter plug changes to green and the onscreen meter in the menu bar indicates that the battery is fully charged.
2Disconnect the power adapter and use your iBook G4.
When your battery gets low, you will see the first low-battery warning dialog on the screen. Continue to use your iBook G4 until it automatically goes to sleep; at that point the battery has been sufficiently drained for calibration.
3Connect the power adapter and leave it connected until the battery is fully charged again.
Important: You only have to fully discharge and then charge your battery once to calibrate it. After that, you can connect and disconnect the power adapter when the battery is at any charge level.
If you purchased additional batteries, repeat the calibration procedure with the additional batteries as well. For more information about your power adapter and battery, see “Using Your Power Adapter” on page 21 and “Battery” on page 45.
What’s Next?
•Learn the important basics about your iBook G4. Check out Chapter 2,“The Basics,” on page 19.
•Have fun trying out your computer’s applications and Internet features. Browse the Welcome to Panther booklet that came with your computer.
•If you’re unfamiliar with Mac OS X, open Mac OS Help and browse the information.
•Switching from another computer? Open Mac OS Help and see the “New to
Mac OS X” section. It will help you use your previous computer knowledge to get started on a Mac.
16 |
Chapter 1 Getting Started |
|
|
What If I Have More Questions?
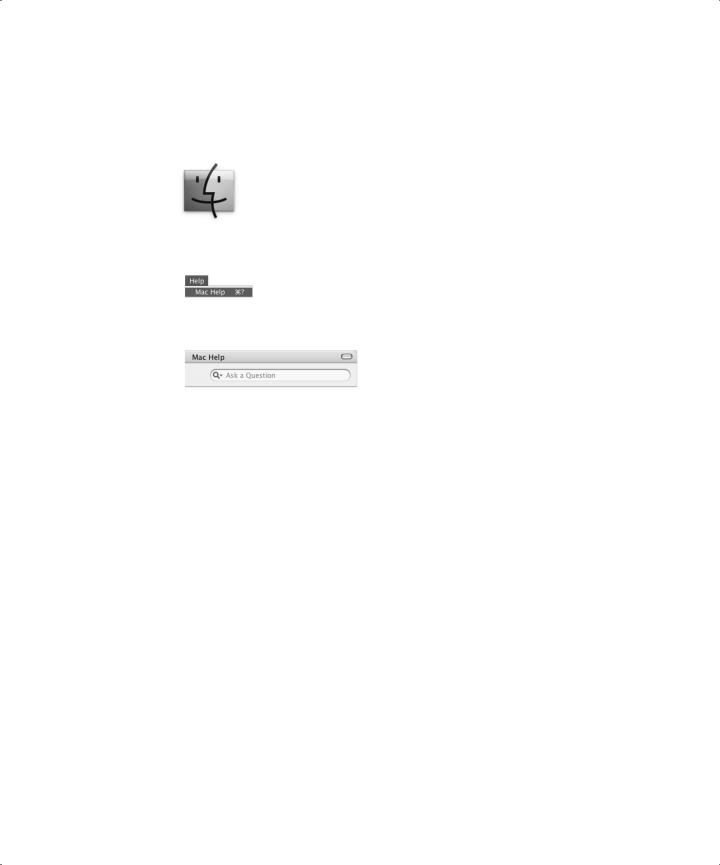
Mac OS Help
Most of the information about using your Macintosh is available right on your computer.
1 Click the Finder icon in the Dock (the bar of icons at the bottom of the screen).
2 Choose Help > Mac Help (click the Help menu in the menu bar and choose Mac Help).
3 Click the Search field, type a question, and press Return on your keyboard.
Other Support
•If you’re having a problem that prevents you from using your computer, see Chapter 5,“Troubleshooting,” on page 61.
•Check out the top ten most commonly asked questions. See Appendix D,“Top Ten Questions,” on page 93.
•For support information, user discussion boards, and the latest Apple software downloads, go to www.apple.com/support.
•If you can’t find the answer to your problem in these places, see the AppleCare materials that came with your computer for information on contacting Apple.
Chapter 1 Getting Started |
17 |
|
|


The Basics |
2 |
|
|
|
|
This chapter introduces important basics about your iBook G4 that you’ll want to know.
Getting to Know Your iBook G4
Because your iBook G4 is so thin and light, you can take it with you to the office, library, class, or wherever you work or play.
Whenever you stop using your iBook G4, wait a few moments to let the hard disk and any optical disc in your drive stop spinning before you transport the computer. Avoid jostling or bumping your iBook G4 while discs are spinning.
When using your iBook G4 or when charging the battery, it is normal for the bottom of the case to get warm. For prolonged use, place your iBook G4 on a flat, stable surface. The bottom of the case is raised slightly to allow airflow that keeps the unit within normal operating temperatures.
As you get to know your new computer, you may hear small noises during startup and when using your hard disk and optical drive. For example, your hard disk and optical drive may whir and click as they access information or load and eject discs. After the computer runs for some time, a small fan may turn on to cool it, producing a faint sound. Small noises are part of the computer’s normal functioning.
For more safety instructions about handling and using your iBook G4 in different locations, be sure to see Appendix B,“Care, Use, and Safety Information,” on page 69.
19
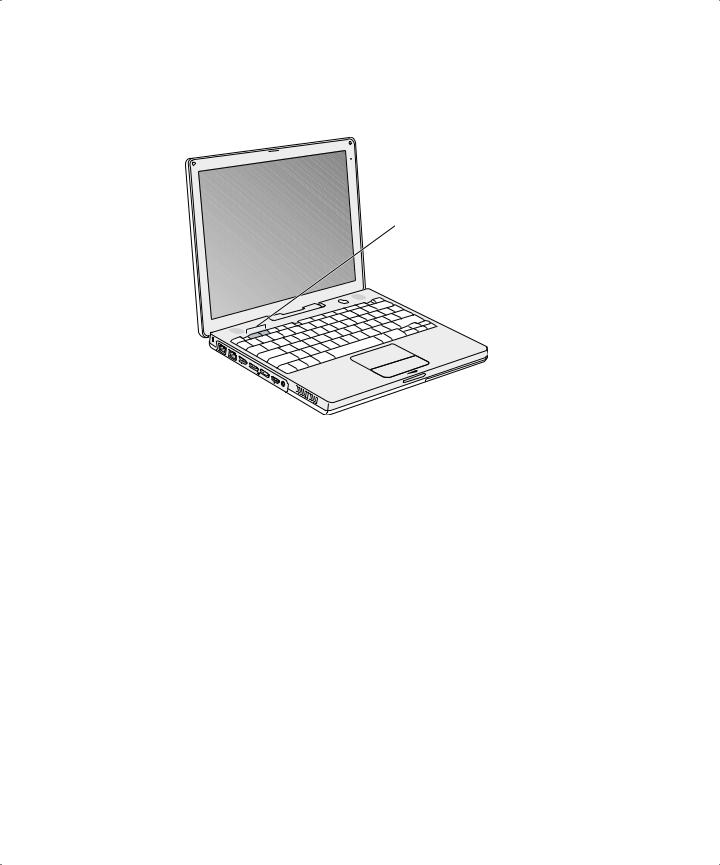
Adjusting Your Display
Once you begin working with your new iBook G4, you may need to adjust your display so that the screen is easier to see. Use the keys labeled with the ¤ icon to adjust screen brightness.
¤ Brightness controls
®
You can increase or decrease the size of images on your display by switching screen resolutions.
You can choose a resolution in the Displays pane of System Preferences. If you want, you can switch to a resolution in which items on the screen appear larger, making them easier to see. However, with some resolutions items may not be as sharp as they are at the display’s default resolution.
To adjust the resolution on your display:
mChoose Apple (K) > System Preferences from the menu bar. Open the Displays pane of System Preferences.
To control your display settings using the Displays icon in the menu bar, click “Show displays in menu bar.”
20 |
Chapter 2 The Basics |
|
|
Using Your Power Adapter
Plugging in the power adapter provides AC power to the computer and recharges the computer’s battery.
Important: For optimal performance, use only the power adapter that came with your computer.
When you first connect your power adapter to your computer, an indicator light comes on. An amber light indicates that the battery is being charged. A green light indicates that the battery is fully charged. You can monitor the battery level using the Battery icon in the menu bar or by checking the battery level indicator lights on the bottom of the battery (see page 45).
To extend the reach of your power adapter, remove the AC plug from the adapter. Attach the included AC cord to the adapter and insert the other end into a wall outlet.
AC cord |
AC plug |
Warning: Make sure the power adapter is fully assembled before plugging it into an electrical outlet. If you’re using the AC plug with your power adapter, make sure the two prongs are snapped into their completely extended position before plugging in the adapter.
Use only the AC cord that came with your power adapter. Make sure to push the power plug snugly into the power adapter port on the computer to ensure it is engaged and power is flowing to the computer.
When disconnecting the power adapter from an outlet or from the computer, pull the plug, not the cord.
For safety instructions about using your power adapter, see “Plugging In the Power Adapter” on page 70.
Chapter 2 The Basics |
21 |
|
|

Using the Trackpad
The trackpad is sensitive to how quickly you move your finger. To move the pointer a short distance across the screen, move your finger slowly across the trackpad. The faster you move your finger, the farther the pointer moves on the screen.
Tips for Using the Trackpad
For best results when using the trackpad, keep in mind these tips:
•Use only one finger.
•Do not use a pen or any other object.
•Keep your finger and the trackpad dry. If the trackpad becomes moist from humidity or condensation, gently wipe it with a clean cloth before you use it.
•Never use any kind of cleaning solution on the trackpad.
For more information on using the trackpad, choose Help > Mac Help from the menu bar at the top of the screen.
Instead of using the trackpad button, you can use your finger to click and double-click directly on the trackpad. You turn on this and other trackpad options in the Keyboard & Mouse pane of System Preferences.
Note: If you find that the pointer moves as you type because you accidentally brush the trackpad, you can avoid this problem by selecting the “Ignore accidental trackpad input” option in the Keyboard & Mouse pane of System Preferences.
22 |
Chapter 2 The Basics |
|
|

Using the Keyboard
Your iBook G4 keyboard has a numeric keypad incorporated in the standard keyboard keys. Keys used for the numeric keypad have a smaller secondary label.
Num Lock key
Numeric keypad
®
To use the numeric keypad, press the Num Lock key. An indicator light glows green, indicating that the keypad is active. When you’re finished, press the Num Lock key again to turn it off.
Important: If your keyboard doesn’t seem to be working correctly, check the Num Lock key. When the numeric keypad is active, other keys and keyboard equivalents for menu commands (such as x-Q to quit) are deactivated.
If you like to use keyboard shortcuts to work efficiently, open Mac OS Help and search for “shortcuts.”You’ll find quite a list of keyboard shortcuts for many common procedures and applications.
Using a Mouse
If you have an Apple mouse with a USB connector, you can insert the USB connector into the USB 2.0 port and use your mouse right away. You can purchase a USB mouse from an Apple Authorized Reseller or from the Apple Store website: www.apple.com/store.
Chapter 2 The Basics |
23 |
|
|
Learning About Mac OS X
Your computer comes with Mac OS X and features Classic, an environment for using
Mac OS 9 applications while the computer is running Mac OS X.
Note: Mac OS 9 cannot be installed as a primary operating system on your iBook G4.
When you’re ready to learn more about Mac OS X and your Apple applications, see the Welcome to Panther booklet that came with your iBook G4. Also open Mac OS Help and browse the information there. You’ll find plenty of information for new users, experienced users, and people switching to the Mac.
For information about the compatibility of software applications with Mac OS X, or to read more about Mac OS X, check the Apple website: www.apple.com/macosx.
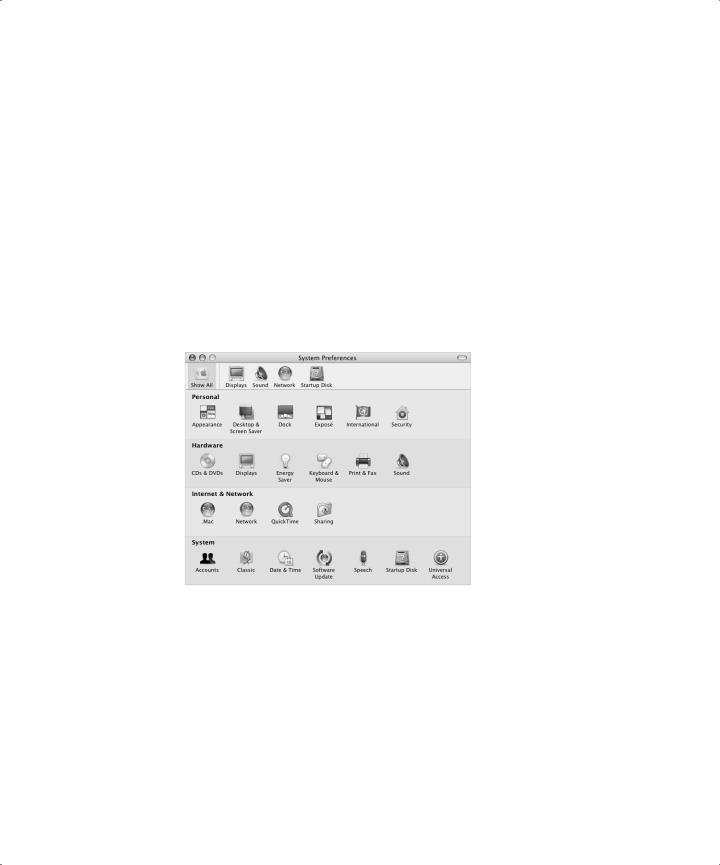
Customizing Your Desktop and Setting Your Preferences
You can quickly make your desktop look the way you want using System Preferences. Choose Apple (K) > System Preferences from the menu bar.
Feel free to make changes and experiment with the following:
•Appearance: Select this preference pane to change the colors of buttons, menus, windows, and highlight colors, among other options.
•Desktop & Screen Saver: Select this preference pane to change the background color or pattern of your desktop, or change it to a photo or image you like. You can also choose an eye-catching screen effect that will appear on your screen when the computer is left idle.
•Dock: Select this preference pane to change the look, location, and behavior of your Dock.
24 |
Chapter 2 The Basics |
|
|

As you get to know your computer, explore the other System Preferences. It is your command center for most settings on your iBook G4. For more information, open Mac OS Help and search for “System Preferences” or for the specific preference pane you want to change.
Connecting to a Printer
To use a printer with your iBook G4, follow the instructions that came with the printer to install required software and connect the printer. Many printers connect via a USB cable; others are accessed via a network connection, such as
Ethernet. For more information about your USB ports, see “Universal Serial Bus (USB)” on page 32. For more information about a network or wireless connection, see “Ethernet (10/100Base-T)” on page 38 and “AirPort Extreme Wireless Networking and Internet Access” on page 36.
After connecting and setting up your printer, use the Print & Fax pane of System Preferences to select your printer for use. If you’re connecting to a printer via a network, you may need to know the network name or address of the printer to select it. If you have a USB printer connected to an AirPort Extreme Base Station, and you have an AirPort Extreme Card installed in your iBook G4, you can connect to the printer and print wirelessly.
To set up a printer:
1 Open System Preferences and click the Print & Fax icon.
2 Click the Set Up Printers button.
3 Click the Add button.
4Choose the type of connection for your printer (for example, USB, AppleTalk, and so on) from the pop-up menu.
To add a USB printer connected to an AirPort Extreme Base Station, choose Rendezvous from the pop-up menu.
5 Select or enter your printer information and click Add.
Chapter 2 The Basics |
25 |
|
|

Monitoring Printing
Once you’ve sent a document to a printer, you can monitor printing and halt or put it temporarily on hold.
To monitor printing:
mClick the Printer icon in the Dock to open the Printer window.
You can now see the print jobs in the print queue and work with them. For more information, open Mac OS Help and search for “printing.”
Playing a CD and Connecting Headphones
If you’d like to listen to music while you work, insert a music CD in your optical drive. iTunes, an easy-to-use music player, will appear automatically on the screen. You can also connect headphones with a minijack to the headphone port of your iBook G4 for private listening right away. To learn more about iTunes, open Mac OS Help and choose Library > iTunes Help. To learn more about your optical drive, see “Using Your Optical Drive” on page 41.
Warning: Listening to music at high volume over extended periods of time can damage your hearing.
Keeping Your Software Up to Date
You can connect to the Internet and automatically download and install the latest free software versions, drivers, and other enhancements from Apple.
When you are connected to the Internet, Software Update checks Apple’s Internet servers to see if any updates are available for your computer. You can set your Mac to check the Apple server periodically and download and install updated software.
26 |
Chapter 2 The Basics |
|
|
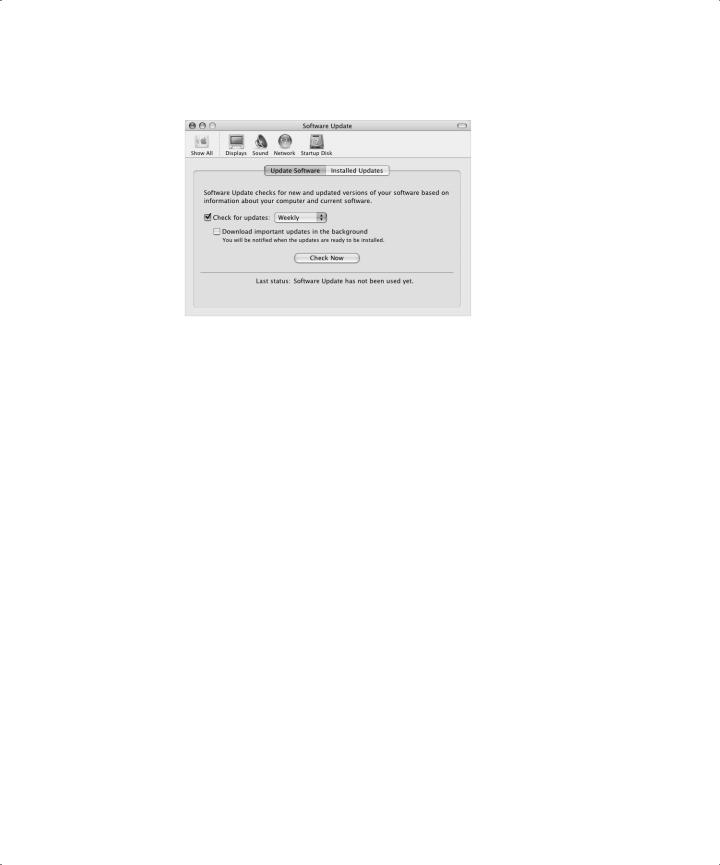
To check for updated software: 1 Open System Preferences.
2 Click the Software Update icon and follow the directions on the screen.
•For more information, search for “Software Update” in Mac OS Help.
•For the latest information on the Mac OS, go to the Mac OS website at www.apple.com/macos.
Connecting a Camera or Other FireWire or USB Device
If you have a digital camera, videocamera, scanner, or other device that has a FireWire or USB connector, you can connect it to your iBook G4. Follow the installation instructions that came with your device. For more information about FireWire, see “FireWire” on page 34. For more information about USB, see “Universal Serial Bus (USB)” on page 32.
Connecting to a Network
If you want to connect your iBook G4 to an Ethernet network or a wireless network, see “Ethernet (10/100Base-T)” on page 38 and “AirPort Extreme Wireless Networking and Internet Access” on page 36 for more information about setting up an Ethernet or AirPort connection. Also open Mac OS Help and search for “Ethernet” or “AirPort” for further help.
Chapter 2 The Basics |
27 |
|
|

Using the Internet
During the initial setup, you were instructed on how to connect to the Internet. If you need to change to a different type of connection, such as DSL, cable modem, Ethernet local area network (LAN), or AirPort Extreme network, you can find more information in Appendix C,“Connecting to the Internet,” on page 75.
Transferring Files to Another Computer
If you want to transfer files or documents to or from your iBook G4, there are several common ways of doing it.
•If you have an external hard disk drive or Zip drive or other data storage device that connects via a USB or FireWire cable, you can use it to transfer files.
•If you have an email connection, you can email your files to another computer.
•You can also connect to another Mac using a FireWire cable (sold separately). When you start up your iBook G4 in FireWire Target Disk Mode, your iBook G4 appears as a hard disk on the other computer and you can transfer files. For information about using FireWire to transfer files, see “Connecting Your iBook G4 to Another Computer Using FireWire” on page 35.
•If you have a .Mac account, you can use it to transfer files. A .Mac account gives you Internet access and iDisk, which provides storage space available over the Internet for sharing files. You can register for a .Mac account from Apple (fees apply). You can then transfer files to your iDisk account where other computers can access them.
•If you connect your computer to a network using Ethernet, you can transfer files to another computer on the network. You can access a server or another computer by clicking Network in the Finder Sidebar, or by choosing Go > Connect to Server from the Finder menu bar.
•You can create a small Ethernet network by connecting an Ethernet cable from your iBook G4 to another computer’s Ethernet port. Once connected, you can transfer files directly from one computer to the other. For more information, open Mac OS Help and search for “connecting two computers.”
•If your computer has an AirPort Extreme Card, you can connect to an AirPort Extreme wireless network to transfer files. For more information, see “AirPort Extreme Wireless Networking and Internet Access” on page 36.
•If you purchased an optional Bluetooth® module with your iBook G4 and you have access to devices that communicate via Bluetooth wireless technology, you can transfer files to other Bluetooth equipped devices. For more information, see “Using Bluetooth Devices” on page 37.
For general information about transferring files and documents, open Mac OS Help and search for “transferring” or for the type of connection you need.
28 |
Chapter 2 The Basics |
|
|

When an Application Freezes
On rare occasions, an application may freeze on the screen. Mac OS X provides a way to quit a frozen application without restarting your computer. Quitting a frozen application may allow you to save your work in other open applications.
To force an application to quit:
1Press Command (x)-Option-Esc or choose Force Quit from the Apple (K) menu. The Force Quit Applications dialog appears with the application selected.
2Click Force Quit.
The application quits, leaving all other applications open.
If needed, you can also force the Classic environment to quit, which closes all Classic applications. You can also restart the Finder from this dialog.
If you’re experiencing other problems, see Chapter 5,“Troubleshooting,” on page 61.
Chapter 2 The Basics |
29 |
|
|

 Loading...