


 Loading...
iDVD Tutorial
Tutorial
This tutorial takes you step-by-step through the process of creating an iDVD project using sample movie clips and pictures that came with the tutorial. When you are done with the tutorial, you will have a complete project ready to burn on a DVD. From there, you can go on to create your own exciting DVDs.
Before You Begin
To make it easier to do the tasks in this tutorial, print the document before you start.
In many tasks shown in this lesson and in iDVD Help, you need to choose menu commands, which look like this:
Choose Edit > Copy.
The first term after Choose is the name of a menu in the iDVD menu bar. The next term (or terms) are the items you choose from that menu.
Preview the Tutorial Project
To see a preview of what the finished project will look like, open the completed tutorial project. You’ll be creating a project just like this one in the next part of this tutorial.
1Double-click the iDVD application in the Finder, and click Open Tutorial.
The tutorial project opens in iDVD. When it opens, you see the main menu. The menu has three buttons, Play Movie, Scene Selection, and Extras. It also has an area in the middle called a drop zone that has a slideshow playing in it.
2If you don’t see the slideshow playing in the drop zone, click the Motion button at the bottom of the iDVD window.
3 Click Preview to enter preview mode.
4Click the Play Movie button. Notice that the menu dissolves into the movie, because a Dissolve transition was set for this menu. The movie plays and returns to the main menu when it is finished.
5Click the Scene Selection button. A scene menu opens with buttons for each of the chapters in the movie. These chapters were set in video-editing software, such as iMovie, Final Cut Express, or Final Cut Pro. Click a chapter button to play the movie starting from that scene. When the movie finishes playing, it returns to the main menu.
6 Click the Extras button. A submenu opens.
1

7Click the Snow Day Pictures button to preview the slideshow. When the slideshow finishes playing, it returns to the submenu.
8 Click Exit on the DVD remote control to leave preview mode.
Create a New Project
Now that you’ve seen the features of the iDVD tutorial, you are ready to create the project yourself. In this section, you will locate the movies, photos, and audio files you will use, open a new project, and select the theme.
Locate the Movies, Photos, and Audio Files to Use in the Tutorial
Before you can create a DVD, you need to assemble your images and be sure your movies and songs are in the right format for iDVD.
The video clips, images, and audio files you’ll use in this tutorial are located inside the iDVD Tutorial folder in the /Library/Application Support folder on your hard disk. They are already in the proper format.
Open a New Project in iDVD
If iDVD isn’t open, double-click the iDVD application icon on your hard disk. If this is the first time iDVD has been opened, click the New Project button in the dialog.
If iDVD is already open, choose File > New Project. In the dialog that appears, click the Don’t Save button to close the tutorial demo and leave it as it was. Choose a location for your new project, and click Create.
Select the Theme
A theme is a combination of the background image or background movie that appears on your DVD menu along with the button style, fonts, sizes, and locations for titles and button labels. You can use one of the themes that come with iDVD, or you can customize them and create your own theme. In this tutorial, you will learn how to select an existing iDVD theme.
To choose the theme for your DVD menu:
1 Click the Customize button [A] at the bottom of the iDVD window. The Customize drawer opens.
BC
E
D
A
2 |
iDVD Tutorial |
|
|
2Click the Themes button [B] at the top of the Customize drawer. Choose All from the pop-up menu [C] at the top of the Customize drawer.
3Click the Motion button. Some themes contain movies, slideshows, or music. To see the motion or hear the music included in these themes, you need to turn on motion by clicking the Motion button.
4Move the scroller [D] up and down to see the themes. Use the pop-up menu at the top to check out all the different kinds of themes. Click each theme to see it in the iDVD window.
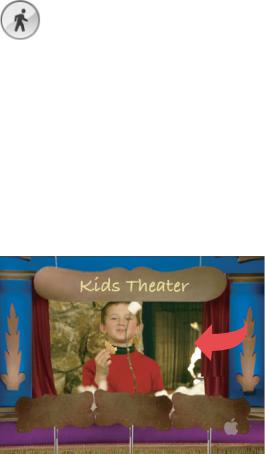
5Click the theme named Kids Theater [E] to select it for your project. This theme contains an autoplay movie, which is set to play before the main DVD menu appears. You will see more about autoplay movies later in the tutorial. Notice the symbol in the upper-left corner of the theme indicating that it includes an autoplay movie.
6Drag the Pictures folder in the iDVD Tutorial folder into the drop zone in the menu. A slideshow of the pictures plays in the drop zone. The drop zone is not a link to view the slideshow; it just lets you add interest to your menu background. You can also add a movie or a single still image to a drop zone.
iDVD Tutorial |
3 |
|
|

Add a Movie With Chapter Markers
After you have chosen your theme, you can add movies to your iDVD project.The movie you’ll add to this project contains chapter markers, which identify the start of each scene in the movie. (You add chapter markers in the video-editing software you use to create your movie.) When you drop a movie with chapter markers onto the menu, iDVD recognizes the chapter markers and automatically creates scene selection menus with buttons that link to each of the chapters.
To add a movie with chapter markers:
1Drag the movie Our First Snowman.mov from the Movies folder in the iDVD Tutorial folder to the menu. Be sure to drag the movie to an area outside of the drop zone. The title of the menu changes to the name of the movie. iDVD automatically creates two buttons on the menu: a Play Movie button [A], so the viewer can play the entire movie, and a Scene Selection button [B] that links to the scene selection menu.
A
B
2Double-click the Scene Selection button to open the scene menu. You see a button for each chapter in the movie. The button names match the names assigned to the different chapters.
3Click the theme named Kids Theater 2 in the Themes pane of the Customize drawer to select it as the theme of the scene menu. This theme was designed to be used as a submenu with the Kids Theater theme. The buttons now have images on them that match the thumbnails set in the video-editing software.
4 In the Customize drawer, click Settings.
5Drag the audio file “Cat Briar Road 0’32.m4a” from the Audio folder in the iDVD Tutorial folder to the Audio well in the Settings pane to set the background audio for the scene menu.
4 |
iDVD Tutorial |
|
|
Loading...