


 Loading...
|
Voice Processing System |
|
Subscriber’s Guide |
VOICE PROCESSING SYSTEM |
|
POWER |
|
<KX-TVS75> |
KX-TVS75 |
|
Model No. KX-TVS100 / KX-TVS200 |
Thank you for purchasing a Panasonic Voice Processing System, Model KX-TVS75/100/200. Please read this manual before installing, customizing, or operating the Voice Processing System.

2

Introduction
The Panasonic Voice Processing System (VPS) is a powerful tool used to manage your voice communications and increase your productivity through the use of your voice mailbox. As a subscriber (the owner of a VPS mailbox), you can:
•Send a message to one or more people inside or outside of your office.
•Transfer messages (with your annotation) to other VPS subscribers.
•Receive messages from any touch-tone telephone.
•Be called at an outside telephone or be notified through your beeper, when there are messages stored in your mailbox.
•Be notified by the message-waiting lamp on your extension that there are messages stored in your mailbox.
•Screen your calls.
•Automate the handling of callers.
•And more...
This guide is your reference to making the best use of your mailbox and the Voice Processing System.
How to Use This Manual
This Subscriber's Guide explains how to use the Voice Processing System (VPS) with any touch-tone telephone. Diagrams and notes accompany step-by-step descriptions of each VPS operation. Additionally, you are guided through each procedure by the voice prompts played as each step is performed.
Description
Describes the step-by-step actions that you must perform for each procedure.
 This symbol identifies important notes about the operation being described.
Introduction |
3 |
Menu Diagram
Subscriber's
Main Command Menu
1 2 3 4 5 6
Automated
Attendant
Status
1 |
2 |
3 |
4 |
Call |
Covering |
Message |
Incomplete |
Transfer |
Extension |
Reception |
Handling |
Status |
Setting |
Mode |
Status |
1 |
2 |
3 |
4 |
5 |
Call |
Call |
Intercom |
Calling |
Disable |
Blocking |
Screening |
Paging |
a Beeper |
All Transfer |
|
|
|
|
Services |
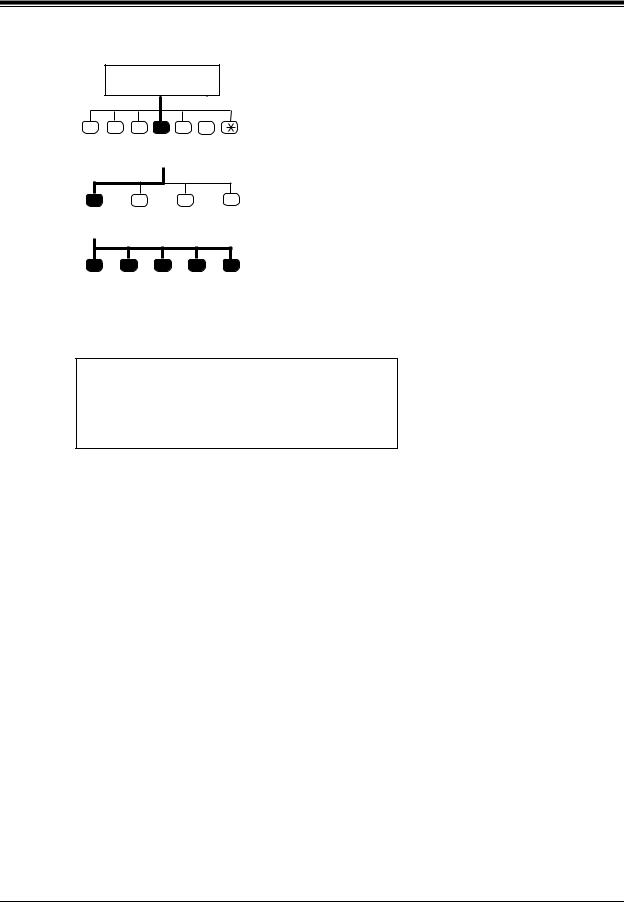
You will find a diagram in the left-hand corner of the first page of each procedure. The diagrams illustrate the menu path for each procedure. The bold lines and black keys indicate the path that you should take and the steps that must be performed.
Voice Prompts
To set Call Transfer Status, Press [1]
To set up Covering Extension, Press [2]
To set Message reception Mode, Press [3]
To set Incomplete Handling Status, Press [4]
The voice prompts for each step are shown in Italicized text.
Quick Reference
At the end of this guide is a flow-chart showing all VPS operations. The Quick Reference has been designed to serve as an at-a-glance guide to basic VPS operations.
Terms to Know
Subscriber
The owner of a VPS mailbox.
System Manager
The person who manages and maintains the Voice Processing System. The System Manager creates mailboxes and authorizes the use of some VPS features.
Getting Started
Numbers to Know
You must have the following information before you begin:
•The extension number(s) of the VPS.
•Your mailbox and extension number.
•The System Manager's phone number.
4 |
Introduction |

Basic Steps
When using your mailbox for the first time, you must read "Chapter 1: Mailbox Setup" and perform the key set up procedures described. You must customize your mailbox before sending or receiving messages.
Identify yourself as the owner of your mailbox by setting the following:
•Recording Personal Greetings
•Recording Your Name
•Setting Your Password
You may further customize your mailbox by setting any of the additional features:
•Call Transfer Status
•Covering Extension
•Incomplete Call Handling Status
•Message Reception Mode
•Notification by Calling
Introduction |
5 |

Table of Contents |
|
|
1 |
Mailbox Setup |
|
1.1 |
Logging into Your Mailbox ........................................................................................... |
8 |
1.2 |
Recording Personal Greetings .................................................................................... |
10 |
1.3 |
Setting, Changing and Clearing Your Password ...................................................... |
13 |
1.4 |
Recording Your Name ................................................................................................. |
15 |
1.5 |
Service Access Commands .......................................................................................... |
17 |
2 |
Receiving Messages |
|
2.1 |
Receiving Messages...................................................................................................... |
20 |
2.2 |
Replying to Messages .................................................................................................. |
22 |
2.3 |
Message Transfer ......................................................................................................... |
24 |
2.4 |
Erasing Messages......................................................................................................... |
27 |
2.5 |
Accessing Your Mailbox from an Outside Telephone............................................... |
28 |
3 |
Sending Messages |
|
3.1 |
Delivering Messages to Other Subscribers................................................................ |
30 |
3.2 |
Checking Mailbox Distribution .................................................................................. |
34 |
3.3 |
Setting up an External Message Delivery List .......................................................... |
36 |
3.4 |
Sending External Delivery Messages ......................................................................... |
39 |
3.5 |
Checking and Setting External Message Delivery Status ........................................ |
44 |
4 |
Special Features |
|
4.1 |
Call Transfer Status..................................................................................................... |
48 |
4.2 |
Covering Extension...................................................................................................... |
50 |
4.3 |
Incomplete Call Handling Status ............................................................................... |
52 |
4.4 |
Message Reception Mode............................................................................................ |
53 |
4.5 |
Personal Group Distribution Lists ............................................................................. |
54 |
4.6 |
Deleting Group Distribution Members...................................................................... |
57 |
4.7 |
Deleting Group Distribution Lists.............................................................................. |
59 |
4.8 |
Message Waiting Notification ..................................................................................... |
61 |
4.9 |
Interview Mailbox........................................................................................................ |
65 |
4.10 |
Live Call Screening.................................................................................................... |
68 |
4.11 |
Recording a Two-Way Conversation........................................................................ |
69 |
Appendix A Quick Reference |
|
|
A1 |
Subscriber..................................................................................................................... |
72 |
A2 |
Message Manager ........................................................................................................ |
73 |
A3 |
System Manager .......................................................................................................... |
74 |
Glossary............................................................................................................................. |
75 |
|
6 |
Table of Contents |

Section 1
Mailbox Setup
This chapter describes the procedures for customizing your mailbox.
Mailbox Setup |
7 |

1.1Logging into Your Mailbox
1.1Logging into Your Mailbox
 Before you can access Subscriber Services, you must first open your mail box.
1.Press the Intercom Button on the telephone keypad.
2.Dial the extension number connected to the Voice Mail Service.
The extension number is______.
If you do not know the VPS extension number, ask the System Manager.
3.To access your mailbox from your extension when the Direct Mailbox Access is enabled (the extension assigned to your mailbox), go to Step 4.
To access your mailbox from another extension, go to Step 5.
4. You will hear the following if you have set your password. (See 1.3 Setting, Changing and Clearing Your Password.)
Enter your password followed by the pound sign.
a)Enter your password and Press [#] (if needed.) You will then hear the following Main Command Menu.
You have _________new messages.
To Receive a Message, Press [1].
To Deliver a Message, Press [2].
To Check the Mailbox Distribution, Press [3].
For Automated Attendant Status, Press [4].
For Mailbox Management, Press [5].
For Other Features, Press [6].
To End this Call, Press [ ].
].
b) Make your selection.
5.Ignore the greeting and Press [#] [6].
Please enter your party's mailbox number.
a)Press [ ] ______(your mailbox number). If you have set your password, you will hear the following.
Enter your password followed by the pound sign.
8 |
Mailbox Setup |

1.1 Logging into Your Mailbox
b)Enter your password and Press [#] (if needed.) You will then hear the following Main Command Menu.
You have _________new messages.
To Receive a Message, Press [1].
To Deliver a Message, Press [2].
To Check the Mailbox Distribution, Press [3].
For Automated Attendant Status, Press [4].
For Mailbox Management, Press [5].
For Other Features, Press [6].
To End this Call, Press [ ].
].
c) Make your selection.
Mailbox Setup |
9 |

1.2Recording Personal Greetings
1.2Recording Personal Greetings
Subscriber's
Main Command Menu
1 |
2 |
3 |
4 |
5 |
6 |
|
|
|
|
Mailbox |
|
|
|
|
Management |
||
1 |
|
2 |
|
3 |
4 |
Change |
|
Change |
|
Change |
Group |
Personal |
|
Password |
|
Owner's |
Distribution |
Greeting |
|
|
|
Name |
List |
|
|
|
|
|
Setting |
Go to
Step 4
After reaching your mailbox, caller will hear your personal greeting message(s). You can record 3 kinds of personal greetings: No Answer Greeting, Busy Greeting, and After Hours Greeting.
The VPS plays the appropriate message for each call.
Personal greeting messages are always followed by a tone and a chance to leave a message. Your personal greeting should tell callers to "please leave a message at the tone"— otherwise your callers will be confused.
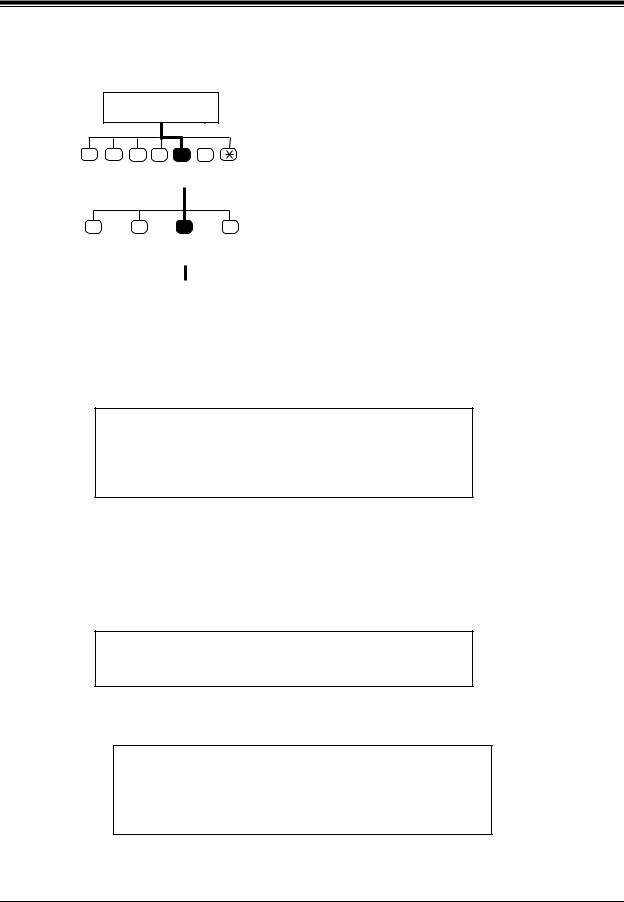
1.Log in to your mailbox to access the Main Command Menu.
2.Press [5] for Mailbox Management.
To change the personal greeting, Press [1].
To change the password, Press [2].
To change the owner's name, Press [3].
To set the Group Distribution List, Press [4].
3. Press [1] to record a personal greeting.
To change the No Answer Greeting, Press [1].
To change the Busy Signal Greeting, Press [2].
To change the After Hours Greeting, Press [3].
4.To record a greeting for the first time, go to Step 5. To change or erase a greeting, go to Step 6.
To erase a greeting, go to Step 7.
5.To record a greeting for the first time:
a)Press [1], [2], or [3].
10 |
Mailbox Setup |
1.2 Recording Personal Greetings
(No Answer) (Busy) or (After Hours) Greeting is not recorded.
Record greeting at the tone. To end recording, Press [1].
To pause and start recording, Press [2].
b) Record the greeting at the tone and Press [1].
To review, Press [1].
To accept, Press [2].
To erase and try again, Press [3].
To add, Press [4].
To erase and exit, Press [ ].
].
c) Press [2] to accept the message recorded.
Recording accepted.
To change the No Answer Greeting, Press [1].
To change the Busy Signal Greeting, Press [2].
To change the After Hours Greeting, Press [3].
 When [2] is selected, the VPS will not play the accepted message.
6.To change a greeting:
a)Press [1], [2], or [3] from the previous menu.
(No Answer) (Busy) or (After Hours) Greeting is:
__________(message played). To change, Press [1].
To accept, Press [2]. To erase, Press [3].
b) Press [1] to change the greeting.
Record greeting at the tone.
To end recording, Press [1].
To pause and start recording, Press [2].
Mailbox Setup |
11 |

1.2Recording Personal Greetings
c) Repeat Steps 5b and 5c.
 When [2] is selected, the VPS will not play the accepted message.
7.To erase a greeting:
a)Press [1], [2], or [3] from the previous menu.
(No Answer) (Busy) or (After Hours) Greeting is:
__________(message played). To change, Press [1].
To accept, Press [2]. To erase, Press [3].
b) Press [3] to erase the greeting without re-recording.
Greeting erased.
Be sure to exit from the menu AFTER the greeting is accepted. Otherwise the greeting will not be stored.
By system default, the maximum length of a personal greeting is 16 s. If you need more time, ask your System Administrator or System Manager to increase the upper bound.
If you change the greeting, follow the steps in "TO RECORD FOR THE FIRST TIME" to re-record.
It is recommended that you mention your name in each personal greeting, because the regular announcement of name (1.4 Recording Your Name) will be suppressed.
12 |
Mailbox Setup |

1.3 Setting, Changing and Clearing Your Password
1.3Setting, Changing and Clearing Your Password
Subscriber's
Main Command Menu
1 |
2 |
3 |
4 |
5 |
6 |
|
|
|
|
Mailbox |
|
|
|
|
Management |
||
1 |
|
2 |
|
3 |
4 |
Change |
|
Change |
|
Change |
Group |
Personal |
|
Password |
|
Owner's |
Distribution |
Greeting |
|
|
|
Name |
List |
|
|
Go to |
|
|
Setting |
|
|
|
|
|
|
|
|
Step 3 |
|
|
|
The VPS provides the option of assigning a password to your mailbox to protect the messages stored there from unauthorized access. A password should be no longer than 8 digits (using the keys 0-9). You can change your password at any time. When setting your password, avoid using obvious number combinations. If you forget your password, have your System Administrator or System Manager clear it. You may then set a new one.
1.Log in to your mailbox to access the Main Command Menu.
2.Press [5] for Mailbox Management.
To change the Personal Greeting, Press [1].
To change the Password, Press [2].
To change the Owner's Name, Press [3].
To set the Group Distribution List, Press [4].
3.To set a password for the first time, go to Step 4. To change an existing password, go to Step 5. To clear a password, go to Step 6.
4.Press [2] to enter the password for the first time.
Password not assigned.
Enter your password followed by the pound sign [#].
a) Enter the password and Press [#].
Password is (password stated).
To change, Press [1].
To accept, Press [2].
b) Press [2] to accept the password.
5.Press [2] at the Mailbox Management Menu, to change an existing password.
Mailbox Setup |
13 |

1.3Setting, Changing and Clearing Your Password
Password is (password stated).
To change, Press [1].
To accept, Press [2].
a) Press [1] to change the password.
Enter your password followed by the pound sign [#]. To skip setting the password, Press the pound sign [#].
b) Enter the new password and Press [#].
Password is (password stated).
To change, Press [1].
To accept, Press [2].
c)Press [2] to accept the new password entered.
6.Press [2] to clear an existing password (no password assigned).
Password is (password stated).
To change, Press [1].
To accept, Press [2].
a) Press [1] to change the password.
Enter your password followed by the pound sign [#]. To skip setting the password, Press [#].
b) Press [#] to clear the password.
Password not assigned.
To change, Press [1].
To accept, Press [2].
c) Press [2] to accept the password as not assigned.
14 |
Mailbox Setup |
1.4 Recording Your Name
1.4Recording Your Name
Subscriber's
Main Command Menu
1 |
2 |
3 |
4 |
5 |
6 |
|
|
|
|
Mailbox |
|
|
|
|
Management |
||
1 |
|
2 |
|
3 |
4 |
Change |
|
Change |
|
Change |
Group |
Personal |
|
Password |
|
Owner's |
Distribution |
Greeting |
|
|
|
Name |
List |
|
|
|
|
|
Setting |
Go to
Step 3
This recording informs callers that they have reached the correct mailbox (for example, when transferring a message to a subscriber, they will hear the subscriber's name). In addition, if a caller does not know the mailbox number and specifies the mailbox by entering the first 3 or 4 letters of the owner's name, the VPS will announce a series of recorded names which the caller may select.
1.Log in to your mailbox to access the Main Command Menu.
2.Press [5] for Mailbox Management.
To change the Personal Greeting, Press [1]
To change the Password, Press [2].
To change the Owner's Name, Press [3].
To set the Group Distribution List, Press [4].
3.To record the owner's name for the first time, go to Step 4. To change an existing owner's name, go to Step 5.
To erase an existing owner's name, go to Step 6.
4.Press [3] to record the owner's name for the first time.
Owner's name is not recorded.
Record owner's name at the tone.
a) State your name at the tone.
Owner's name is (name stated).
To change, Press [1].
To accept, Press [2].
To erase, Press [3].
Mailbox Setup |
15 |

1.4Recording Your Name
b) Press [2] to accept the name.
5.Press [3] to change an existing owner's name.
Owner's name is (name stated).
To change, Press [1].
To accept, Press [2].
To erase, Press [3].
a)Press [1] to change the name.
Record owner's name at the tone.
b)Clearly state the name at the tone.
Owner's name is (name stated).
To change, Press [1].
To accept, Press [2].
To erase, Press [3].
c)Press [2] to accept the new name.
6.Press [3] to erase an existing owner's name.
Owner's name is (name stated).
To change, Press [1].
To accept, Press [2].
To erase, Press [3].
a) Press [3] to erase the owner's name.
Owner's name erased.
16 |
Mailbox Setup |

1.5 Service Access Commands
1.5Service Access Commands
Before routinely using the VPS, you should familiarize yourself with the Service Access Commands shown in Appendix A.
The most important ones are the following:
#6 -Pressing this during system prompts activates Voice Mail Service. It prompts you for a mailbox number and then you can record a message. You can also press  and then your own mailbox number. In this case, you can log into your mailbox.
#8 -Pressing this during system prompts activates Automated Attendant Service. It prompts you for an extension number and then attempts to call your party. If he cannot take the call, the VPS will take some suitable action.
Note: If you call the extension directly, the VPS cannot help you.
-Pressing this during system prompts takes you to the previous VPS menu. If you seem to be stuck in "an infinite loop", use this command to get you out.
Mailbox Setup |
17 |

1.5Service Access Commands
18 |
Mailbox Setup |

Section 2
Receiving Messages
This chapter explains how to access and manage received messages.
Receiving Messages |
19 |

2.1Receiving Messages
2.1Receiving Messages
Subscriber's
Main Command Menu
1 2 3 4 5 6
Receive
Message
Go to
Step 3
The VPS plays both the new and saved messages that are in your mailbox along with the date, time, and sender information pertaining to each message.
1. Log in the Main Command Menu.
You have _____new messages. (Main Command Menu played)
2. Press [1] to access the Receive Message Menu.
You have _____message(s).
New/Old Message (1st message played).
Message recorded on (date started) at (time stated).
An abbreviated menu is played first:
To repeat this message, Press [1].
To play the next message, Press [2].
To erase this message, Press [3].
To transfer this message, Press [7].
For Help, Press [0].
Press [0] or wait and allow the full menu to be played.
To repeat this message, Press [1].
To replay the previous message, Press [1] twice. To play the next message, Press [2].
To erase this message, Press [3]. To reply to this message, Press [4]. To rewind, Press [5].
To fast forward, Press [6].
To transfer this message, Press [7]. To message scan, Press [8].
20 |
Receiving Messages |
2.1 Receiving Messages
3. Select the appropriate message option.
 Repeat Messages
- Press [1] to listen to the current message again.
 Replaying the Previous Message
- Press [1] twice while receiving a message to listen to the previous message.
 Playing the Next Message
- Press [2] while receiving a message to listen to the next message.
 Erase
Erase
- Press [3] after receiving a message to erase it. (See Erasing Messages)
 Reply
Reply
- Press [4] after receiving a message to send a reply. (See Replying to Messages)
 Rewind
- Press [5] after receiving a message to listen to it again.
 Fast Forward
- Press [6] while receiving a message to fast forward to the end.
 Transfer
- Press [7] after receiving a message to transfer it to another subscriber. (See Message Transfer)
 Scan
Scan
- Press [8] to listen to the first 4 s of each message. While scanning, you have these options:
These are the brief segments of your messages.
To replay the previous message, Press [1].
To play the next message, Press [2].
To play the entire message, Press [3].
Option 3 - "To play the entire message," is only available once. Selecting this option a second time will erase the message.
Receiving Messages |
21 |

2.2Replying to Messages
2.2Replying to Messages
Subscriber's
Main Command Menu
1 |
2 |
3 |
4 |
5 |
6 |
Receive
Message
1 |
2 |
3 |
4 |
7 |
0 |
Repeat Next Erase Reply Transfer Help
Go to
Step 4
This feature allows you to reply to messages that have been sent by other subscribers through their mailboxes.
 You can reply only to messages that were transferred to you, or originated as "Delivering Messages to Other Subscribers."
1.Same as Receiving Messages.
2.Same as Receiving Messages (to access the Receive Message Menu).
3.Press [4] to reply to the message.
 When a message cannot be replied to you will hear this prompt:
"Sorry, you cannot reply. The message sender is unknown."
4. Press [2] to record a message.
Please leave a message at the tone.
To end recording, Press [1].
To pause and restart recording, Press [2].
 If paused, the recording must be restarted within 20 s or the VPS will stop recording automatically.
a) Record the message and Press [1].
To review, Press [1].
To accept, Press [2].
To erase and try again, Press [3].
To add, Press [4].
To erase and exit, Press [ ].
].
b) Press [2] to accept the message.
22 |
Receiving Messages |

2.2 Replying to Messages
Recording accepted.
To set deliver time or make this message private, Press [1].
To accept, Press [2].
5. Press [1] to set delivery time.
To set delivery time, Press [1].
For immediate delivery, Press [2].
a) Press [1] to set delivery time (if desired).
Enter the time followed by the pound sign.
For Hellp, Press [0].
 For example: 5:00 is entered as [5] and [#]. 5:15 is entered as [515] [#].
b)Enter the time and Press [#].
Enter [1] for AM or [2] for PM.
c)Press [1] for AM or [2] for PM.
Enter day of the month followed by the pound sign.
6. Enter the day of the month and Press [#].
This message will be delivered on (date stated) at (time stated).
To change, Press [1]. To accept, Press [2].
a) Press [2] to accept the message.
To make this message private, Press [1].
Otherwise, Press [2].
7. Press [1] to make the message private or [2] to return to the main menu.
Receiving Messages |
23 |

2.3Message Transfer
2.3Message Transfer
Subscriber's
Main Command Menu
1 |
2 |
3 |
4 |
5 |
6 |
|
Receive |
|
|
|
|
|
|
Message |
|
|
|
|
|
|
1 |
2 |
3 |
|
4 |
7 |
0 |
Repeat |
Next |
Erase |
Replay |
Transfer Help |
||
|
|
|
|
Mailbox No. |
||
|
|
|
|
XXXX |
||
1 |
2 |
|
|
3 |
|
|
Change |
Accept |
|
Repeat |
|
Cancel |
|
|
|
|
M.B. Info. |
Transfer |
||
1 |
2 |
3 |
|
4 |
|
|
Transfer |
Transfer |
Add |
Review |
Cancel |
||
W. Comment M.B. |
Mailing |
Tansfer |
||||
|
|
|
|
List |
|
|
Go to
Step 6
This function allows you to transfer messages to other mailboxes.
 If the message has been assigned as private, it cannot be transferred to other mailboxes.
1.Same as Receiving Messages.
2.Same as Receiving Messages (to access the Receive Message Menu).
3.Press [7] to transfer the message.
Enter the destination mailbox number.
To enter by name, Press [#] and [1].
4. Enter the mailbox of the intended recipient.
 You can also specify a Personal or a System Group Distribution List instead of an individual mailbox by entering the number of the list. If you use a Personal Group Distribution List, press [#] after the list number. Personal Group Distribution Lists must be created before they can be used. (See 4.5 Personal Group Distribution Lists.) To use a System Group Distribution List, check with the System Administrator to ensure that a list exists within the VPS.
Option 1:
a) Enter the mailbox number on the telephone keypad.
24 |
Receiving Messages |

2.3 Message Transfer
Mailbox (mailbox number stated). (Owner stated)
To change, Press [1]. To accept, Press [2]. To repeat, Press [3].
b) Press [2] to accept the mailbox number entered.
To transfer, Press [1].
To transfer with comment, Press [2].
To add a new mailbox number, Press [3].
To review the mailing list, Press [4].
Option 2:
a) Press [#] and [1] to access the mailbox by name.
Enter the first three or four letters of the person's last name.
For Q, Press [7].
For Z, Press [9].
b) Enter the first 3 or 4 letters of the person's last name.
Mailbox (mailbox number stated). (Owner stated)
To accept, Press [1].
For the next name, Press [2]. To repeat this name, Press [3].
To enter a new name or mailbox, Press [ ].
].
c) Press [1] to accept the mailbox stated.
To transfer, Press [1].
To transfer with comment, Press [2].
To add a new mailbox number, Press [3].
To review the mailing list, Press [4].
5. Press [2] to transfer with comment.
Receiving Messages |
25 |

2.3Message Transfer
State your comment at the tone.
To end recording, Press [1].
To pause and restart recording, Press [2].
 When paused, the recording must be restated within 20 s or the VPS will stop recording automatically.
6. Record a comment and Press [1].
To review, Press [1].
To accept, Press [2].
To erase and try again, Press [3].
To add, Press [4].
To erase and exit, Press [ ].
].
7.Press [2] to accept the message and terminate the activity or make another selection from the Receive Message Menu.
 No acknowledgment will be given that the message has been transferred.
26 |
Receiving Messages |
Loading...