


PD 22
en
*372188* 372190

1 |
9 |
2 |
22 |
PD |
|
I
x |
- |
|
+ |
NEM
R |
ES |
|
|
|
AL |
34
65
L |
AS |
|
|
ER |
|
|
|
MEN
|
x |
- |
+ |
I
7 |
10 |
8 |
2
3 
PD |
22 |
|
x
-
I
+
1

Button functions
Display
Select menu
Measure
Calculate
Switch on / off
|
PD 22 |
|
LASER |
|
|
|
MENU |
|
+ |
x |
= |
- |
|
|
|
|
|
I |
|
|
MENU
x
–
Recall previous measurements (max. 3) Scroll through active menu
Show menu / exit from menu (rEF/nor/CONSt/Light/dELAY/bEEP/UNIT).
Recall previous measurements (max. 3) Scroll through active menu
Measure distance or start tracking.
Addition
Subtraction
xMultiplication
Pythagoras (calculates opposite side of right-angled triangle)
=Execute calculation or reset display
ISwitch range meter on / off
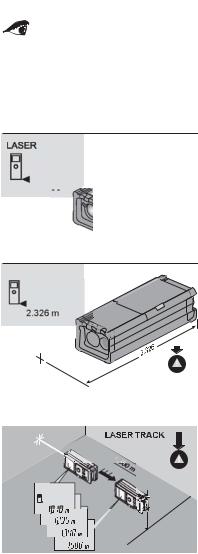
The PD22 at a glance
- - -
|
x |
- |
+ |
|
I
2
3 
1
I
x |
- |
|
+ |
22 |
RESAL |
|
PD |
I
I
x |
- |
|
+ |
22 |
RESAL |
|
DP |

0.1 - 30 m: |
30 - 100 m: |
|
|
+ |
x |
|
|
|
– |
|
|
|
|
I |
|
|
+ |
– |
x |
= |
m/m 2 /m 3 |
ft in |
||||
|
|
|
|
sq . ft /in |
m |
m |
m |
m |
|
ft in |
ft in |
ft in |
ft in |
|
= h!
s a
MENU
rEF
+
–
nor |
+ |
nEAr/FAr |
– |
||
|
|
|
CONSt
+ 0.000 ...
– 999.999m
+
Light OFF / ON / Auto
–
+
dELAY 0/2/5/10/20 s
–
+
bEEP Auto/ON/OFF
–
+
UNIT m / in
–

It is essential that the operating instructions are read before the range meter is operated for the first time.
Always keep these operating instructions together with the range meter.
Ensure that the operating instructions are with the range meter when it is given to other persons.
Parts of the PD 22
1.Laser exit aperture
2.Control panel
3.Receiving lens
4.Plastic casing
5.Bubble level
6.Battery compartment
7.Folding spike
8.Two tripod mounting threads (standard camera thread)
9.Graphical display
10.Four metal contact points for precise measurement
1

Contents |
|
|
1. General information.................................... |
4 |
|
1.1 |
Indication of important information ....... |
4 |
1.2 |
Pictograms ............................................ |
4 |
2. Description.................................................. |
6 |
|
2.1 |
Function ................................................. |
6 |
2.2 |
Items supplied ....................................... |
6 |
3. Tools and accessories ................................ |
6 |
|
4. Technical data............................................. |
7 |
|
5. Safety information ...................................... |
9 |
|
5.1 |
Basic safety information ........................ |
9 |
5.2 |
Intended use .......................................... |
9 |
5.3 |
Misuse ................................................... |
9 |
5.4 |
Latest technology ................................ |
10 |
5.5 |
Proper organisation of the workplace .. |
10 |
|
5.5.1 Electromagnetic compatibility .... |
11 |
|
5.5.2 Laser classification ..................... |
11 |
5.6 |
General safety precautions................... |
12 |
|
5.6.1 Electrical..................................... |
13 |
6. Before use ................................................. |
13 |
|
6.1 Inserting new batteries............................. |
13 |
|
6.2 Menu selection and settings..................... |
14 |
|
|
6.2.1 rEF menu / reference edge.......... |
14 |
|
6.2.2 nor menu / track menu ............... |
15 |
|
6.2.3 CONST menu / constants ........... |
15 |
|
6.2.4 Light menu / display |
|
|
illumination................................. |
16 |
|
6.2.5 dELAY menu / self-timer............. |
16 |
|
6.2.6 dEEP menu / beep signal ............ |
17 |
|
6.2.7 UNIT menu / units of |
|
|
measurement ............................. |
17 |
7. Operation .................................................. |
18 |
|
7.1 |
Measuring distances ............................ |
18 |
7.2 |
Measuring using the spike ................... |
19 |
|
7.2.1 Measuring from an inside corner |
|
|
(e.g. corner of a room) ............... |
19 |
|
7.2.2 Measuring from an outside |
|
|
corner......................................... |
20 |
2

|
Contents |
|
7.3 |
Measuring using the self-timer ............ |
20 |
7.4 |
Measuring using target objects............ |
21 |
7.5 |
Taking measurements from various |
|
|
surfaces ............................................... |
21 |
|
7.5.1 Plants and trees.......................... |
21 |
|
7.5.2 Rough surfaces .......................... |
22 |
7.6 |
Continuous distance measurement |
|
|
(tracking) ............................................. |
23 |
|
7.6.1 Continuous distance |
|
|
measurement (“EAr”) ................. |
23 |
|
7.6.2 Continuous distance |
|
|
measurement (“FAr”) ................. |
25 |
7.7 |
Calculation functions ........................... |
27 |
|
7.7.1 Addition / subtraction |
|
|
(distance) ................................... |
27 |
|
7.7.2 Multiplication (areas / |
|
|
volumes) .................................... |
28 |
7.8 |
Calculations using the Pythagoras |
|
|
principle ............................................... |
31 |
7.9 |
Calculations using constants ............... |
33 |
8. Symbols displayed.................................... |
34 |
|
9. Testing and adjustment ............................ |
35 |
|
10. Care and maintenance............................ |
36 |
|
10.1 Cleaning and drying ........................... |
36 |
|
10.2 Storage .............................................. |
36 |
|
10.3 Transport ........................................... |
36 |
|
11. Disposal .................................................. |
37 |
|
12. Warranty ................................................. |
38 |
|
13. FCC statement (applicable in US) .......... |
39 |
|
14. EC declaration of conformity .................. |
41 |
|
3

1. General information
1. General information
1.1 Indication of important information
-NOTE-
This word indicates information intended to help the user employ the product efficiently and in a technically correct manner.
1.2 Pictograms
Warning signs
General warning Laser class 2
(Do not stare into the beam!)
Symbols
Read the operating instructions before use.
These numbers refer to the corresponding illustrations. The illustrations can be found on the fold-out cover pages. Keep these pages open while studying the operating instructions. In these operating instructions, the PD 22 laser range meter is referred to as “the range meter”.
4
1. General information
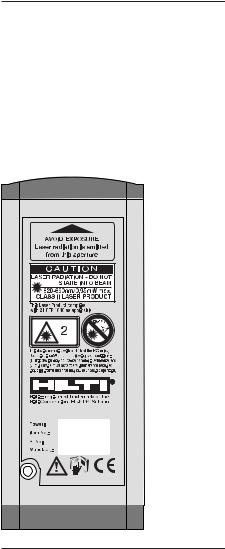
Location of identification data on the range meter
The type designation and serial number can be found on the rating plate on the range meter. Make a note of this data in your operating instructions and always refer to it when making an enquiry to your Hilti representative or service department.
Type : _____________
Serial no.:___________
Type: PD 22 |
319196 |
Made in Germany |
5 |
2. Description / 3. Tools and accessories
2. Description
2.1 Function
The red laser spot clearly identifies the target from which the measurement is taken. The range of the range meter depends on the reflectance and finish of the target surface.
2.2 Items supplied
No. |
Qty. |
Designation |
1 |
1 |
PD 22 laser range meter |
2 |
2 |
Type AA batteries |
3 |
1 |
Carrying case |
4 |
1 |
Operating instructions |
3. Tools and accessories
Target plate
PA 412
With two target surfaces of different colours:
-White side, when reflectance is too high.
-Brown side, when reflectance is too low.
Sighting glasses
PA 970
The laser sighting glasses improve visibility of the laser target spot (by a factor of 4 - 5).
Tripod adaptor
PA 450
With fine adjustment of the X and Y axes for setting up precisely on a tripod.
Telescopic sight
PA 421
For targeting objects precisely over long distances and outdoors.
6

4. Technical data
4. Technical data
Power supply
3 V DC
Battery type: AA (LR6, AM3, Mignon) Standard: 2 alkaline primary cells Optional. Rechargeable NiCd, NiMH
Battery status indicator
Warning symbol when battery voltage is too low.
Measuring range
0.1 to over 100m (4 in to over 300 ft) Typical measuring range without target
plate: |
|
- Drywall panel, white |
70m (210 ft) |
- Concrete, dry |
50m (150 ft) |
- Brick, dry |
50m (150 ft) |
Maximum range depends on:
-Reflectance of the target surface
-Brightness of ambient light
Use the Hilti PA 412 target plate above distances of 30 - 40 m if measurement is impossible.
Accuracy
±2mm (±0.10 in) for typical individual measurements
±3mm (±0.15 in) maximum **
**Due to atmospheric influences, the range meter can be expected to achieve an accuracy of ± (2mm + 30ppm) approx. ± 5mm at long distances (100 m).
Smallest unit displayed
1mm (1/32 in)
7

4. Technical data
Beam diameter
<6mm @ 10m (< 0.2 in @ 30 ft)
<30mm @ 50m (< 1.2 in @ 150 ft)
<60mm @ 100m (< 2.4 in @ 300 ft)
Operating modes
Individual measurement
Continuous measurement
Calculation
Operating status indicator
Liquid crystal display indicating individual operating modes and operating status
Laser
Visible, 620-690nm, Laser class 2 (IEC825-1), class II (FDA21CFR), output power:< 1mW
Automatic cut-out
Laser : 25 sec. Range meter: 5 min.
Battery life at 25º C [+77º F]
Max. number of measurements with laser switched on for a duration of 10 seconds
Alkaline : NiCd: NiMH:
Operating temperature
-10º C ... +50º C (14º F ... 122º F)
Storage temperature
-30º C ... +70º C (-22º F ... 158º F)
Protection class
Dust and splash-proof, IP 54 as per IEC529 standard
8

4. Technical data / 5. Safety information
Mounting points
1/4” Whitworth internal thread, 1 on the side and 1 on the underside (standard camera tripod thread)
Weight
320 g (without batteries)
Dimensions
165 x 67x 47mm (6.5” x 2.6” x 1.8”)
5. Safety information
5.1 Basic safety information
In addition to the safety precautions listed in the individual sections of these operating instructions, the following points must be strictly observed at all times.
5.2 Use as intended
The intended uses of the range meter include the following applications:
–Measuring distances
–Calculating areas, volumes and lengths
–Addition and subtraction of lengths The specified operating and storage temperatures must be observed.
5.3 Misuse
–Operate the range meter only as directed and only when it is in faultless condition.
–Do not render safety devices ineffective and do not remove information and warning notices.
–Observe the information concerning operation, care and maintenance printed in the operating instructions.
9
 Loading...