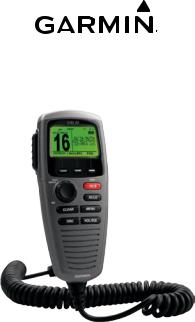
Garmin GHS 10/10i Wired VHF Handset Installation Instructions

GHS10/10i handset
installation instructions instructions d’installation istruzioni di installazione installationsanweisungen instrucciones de instalación

GHS 10/10i Installation Instructions
These installation instructions are for the GHS 10 and GHS 10i handsets. The GHS 10 is for use with the Garmin VHF 200 radio and the GHS 10i is for use with the Garmin VHF 200i radio.
For additional information, refer to the
VHF 100/200 Series Radio Installation Instructions that came with your radio. For operational instructions, refer to your VHF 100/200 Series Radio Owner’s Manual.
The handset comes with a 32.8 ft. (10 m) extension cable, a bulkhead mounting plate, a weather cap, and the necessary cable hardware.
Install the GHS 10 or GHS 10i handset at least 20 in. (500 mm) from any compass.
To connect the GHS 10 or GHS 10i handset:
1.Using the mounting plate as a template, use a center punch to mark the three screw locations on the surface.
2.Use a pencil to trace the cable hole in the center of the mounting plate. Set the mounting plate aside.
3.Use a ⅞ in. (22 mm) hole saw to cut the cable-mounting hole.
4.Use a ⅛ in. (3 mm) drill to drill the three mounting-plate holes.
Cable-mounting hole
Mounting
 plate
plate
Weather cap |
Cable nut |
GHS 10/10i Installation Instructions |
EN- |
5.Use the three 3.5 × 20 mm, panhead mounting screws to attach the mounting plate.
6.Connect the extension cable to the microphone relocation port on the rear of the VHF 200 or VHF 200i radio.
7.Mount the other end of the extension cable through the mounting plate and weather cap, securing with the cable nut.
8.Connect the handset to the extension cable.
Connecting an external speaker next to the GHS 10/10i handset
The green and yellow wires on the extension cable can be used to connect an external passive speaker (4 ohm, 5 W minimum).
1.Connect the yellow wire to the positive (+) connection on the external speaker.
2.Connect the green wire to the negative (-) connection on the external speaker.
Specifications
Dimensions: 6.34 × 2.82 × 1.69 in. (16.1 × 7.16 × 4.28 cm)
Weight: 12.98 oz. (368 g)
Temperature Range: from 14ºF to 122ºF (from -10ºC to 50ºC)
Compass-safe Distance: 20 in. (500 mm)
Waterproof: IEC 60529 IPX7 (Immersion in 1 meter of water for 30 minutes)
Please visit www.garmin.com for additional documentation and information.
EN- |
GHS 10/10i Installation Instructions |

Instructions d’installation du GHS 10/10i
Ces instructions d’installation s’appliquent |
Pour raccorder le combiné GHS 10 ou |
||
aux combinés GHS 10 et GHS 10i. Le |
GHS 10i : |
|
|
GHS 10 s’utilise avec la radio Garmin |
1. Utilisez la plaque de montage comme |
||
VHF 200. Le GHS 10i s’utilise avec la radio |
modèle et marquez l’emplacement |
||
Garmin VHF 200i. |
des trois vis sur la surface à l’aide d’un |
||
pointeau. |
|
||
Pour plus d’informations, reportez-vous |
|
||
2. Utilisez un crayon pour tracer l’orifice du |
|||
aux Instructions d’installation des VHF |
câble au centre de la plaque de montage. |
||
séries 100i/200i fournies avec votre |
Mettez de côté la plaque de montage. |
||
radio. Pour obtenir des instructions de |
3. Utilisez une scie-cloche de 22 mm |
||
fonctionnement, reportez-vous au Manuel |
(⅞ pouce) pour percer l’orifice de |
||
d’utilisation VHF séries 100/200. |
montage du câble. |
|
|
Le combiné est fourni avec une rallonge de |
4. Utilisez un foret de perceuse de 3 mm |
||
(⅛ pouce) pour percer les trois orifices |
|||
10 m (32,8 pieds), une plaque de montage |
|||
dans la plaque de montage. |
|||
sur cloison, un cache étanche et tout le |
|||
|
|
||
matériel de câblage nécessaire. |
|
Orifice de montage |
|
Installez le combiné GHS 10 ou |
|
du câble |
|
|
|
||
GHS 10i à au moins 500 mm |
|
Plaque de |
|
(20 pouces) de tout compas. |
|
||
|
|
montage |
|
Fils du |
|
|
|
haut-parleur externe |
|
||
|
Cache étanche |
Ecrou du câble |
|
Instructions d’installation du GHS 10/10i |
FR- |
 Loading...