


 Loading...
GE Fanuc Automation Europe
Computer Numerical Controls
Series 15i / 150i
- Model A
Parameter Manual
B-63330EN/03
TECHNOLOGY AND MORE

B-63320EN/03 |
DEFINITION OF WARNING, CAUTION, AND NOTE |
DEFINITION OF WARNING, CAUTION, AND NOTE
This manual includes safety precautions for protecting the user and preventing damage to the machine. Precautions are classified into Warning and Caution according to their bearing on safety. Also, supplementary information is described as a Note. Read the Warning, Caution, and Note thoroughly before attempting to use the machine.
WARNING
Applied when there is a danger of the user being injured or when there is a damage of both the user being injured and the equipment being damaged if the approved procedure is not observed.
CAUTION
Applied when there is a danger of the equipment being damaged, if the approved procedure is not observed.
NOTE
The Note is used to indicate supplementary information other than Warning and
Caution.
- Read this manual carefully, and store it in a safe place.
s - 1
B-63320EN/03 |
PREFACE |
PREFACE
Applicable product name
The models covered by this manual, and their abbreviations are:
Product name |
Abbreviations |
|
FANUC Series 15i -MA |
15i -MA |
Series 15i |
FANUC Series 150i -MA |
150i -MA |
Series 150i |
NOTE
Some functions described in this manual may not be applied to some products. For detail, refer to the DESCRIPTIONS manual (B-63322EN).
Related manuals
The table below lists manuals related to MODEL A of Series 15i, and Series 150i. In the table, this manual is marked with an asterisk (*).
Table 1 (a) Related Manuals
Manual name
DESCRIPTIONS
DESCRIPTIONS (Supplement for Remote Buffer)
CONNECTION MANUAL (Hardware)
CONNECTION MANUAL (Function)
PROGRAMMING MANUAL
(Macro Compiler/Macro Executor)
OPERATOR’S MANUAL (PROGRAMMING)
OPERATOR’S MANUAL (OPERATION)
MAINTENANCE MANUAL
PARAMETER MANUAL
Specification
number
B-63322EN
B-63322EN-1
B-63323EN
B-63323EN-1
B-63323EN-2
B-63324EN
B-63324EN-1
B-63325EN B-63330EN *
p - 1

B-63330EN/03 |
TABLE OF CONTENTS |
TABLE OF CONTENTS
DEFINITION OF WARNING, CAUTION, AND NOTE ................................ |
s-1 |
||
PREFACE |
.................................................................................................. |
p-1 |
|
1 |
DISPLAYING PARAMETERS AND PITCH ERROR |
|
|
|
COMPENSATION DATA........................................................................ |
1 |
|
|
1.1 |
DISPLAYING PARAMETERS ........................................................................ |
2 |
|
1.2 ............................... |
DISPLAYING PITCH ERROR COMPENSATION DATA |
5 |
2 |
SETTING PARAMETERS AND PITCH ERROR |
|
|
|
COMPENSATION ........................................................................DATA |
7 |
|
|
2.1 .............................................................................. |
SETTING PARAMETERS |
8 |
|
2.2 ................................... |
SETTING PITCH ERROR COMPENSATION DATA |
10 |
3 |
INPUTTING AND OUTPUTTING PARAMETERS USING |
|
|
|
EXTERNAL ...............................................INPUT/OUTPUT DEVICES |
12 |
|
3.1INPUTTING AND OUTPUTTING PARAMETERS ON THE
PARAMETER SCREEN............................................................................... |
13 |
3.2INPUTTING AND OUTPUTTING PARAMETERS ON THE FLOPPY
DIRECTORY SCREEN................................................................................ |
16 |
3.3INPUTTING AND OUTPUTTING PARAMETERS ON THE MEMORY
|
CARD SCREEN........................................................................................... |
18 |
3.4 |
INPUT/OUTPUT FORMATS........................................................................ |
20 |
|
3.4.1 Input/Output Formats for Parameters .................................................................... |
20 |
|
3.4.2 Input/Output Format for Pitch Error Compensation Data ..................................... |
26 |
4 DESCRIPTION OF PARAMETERS...................................................... |
27 |
|
4.1 |
DATA TYPES .............................................................................................. |
27 |
4.2 |
REPRESENTATION OF PARAMETERS .................................................... |
28 |
4.3 |
STANDARD PARAMETER SETTING TABLES .......................................... |
29 |
4.4 |
SETTING PARAMETERS (DATA NO. 0000 AND LATER) ......................... |
31 |
4.5 |
TIMER PARAMETERS (DATA NO. 0100 AND LATER).............................. |
40 |
4.6 |
AXIS CONTROL PARAMETERS (DATA NO. 1000 AND LATER) .............. |
43 |
4.7 |
CHOPPING PARAMETERS (DATA NO. 1181 AND LATER)...................... |
66 |
4.8COORDINATE SYSTEM PARAMETERS (DATA NO. 1200 AND LATER) .69
4.9 |
FEEDRATE PARAMETERS (DATA NO. 1400 AND LATER)...................... |
74 |
c - 1
TABLE OF CONTENTS |
B-63330EN/03 |
4.10ACCELERATION/DECELERATION CONTROL PARAMETERS
(DATA NO. 1600 AND LATER) ................................................................... |
99 |
4.11SERVO PARAMETER
|
(DATA NO. 1700 TO 1999 AND 2600 AND LATER)................................. |
111 |
4.12 |
DI/DO PARAMETERS (DATA NO. 2000 AND LATER)............................. |
137 |
4.13 |
DISPLAY/MDI AND EDIT PARAMETERS |
|
|
(DATA NO. 2200 AND LATER) ................................................................. |
151 |
4.14 |
PROGRAM PARAMETERS (DATA NO. 2400 AND LATER) .................... |
169 |
4.15SPINDLE SERIAL OUTPUT AND CS CONTOUR CONTROL
FUNCTION PARAMETERS (DATA NO. 3000 AND LATER) .................... |
180 |
4.16SPINDLE SERIAL OUTPUT AND CS CONTOUR CONTROL
|
FUNCTION PARAMETERS (DATA NO. 3000 AND LATER) .................... |
181 |
4.17 |
DRAWING PARAMETERS (DATA NO. 4820 AND LATER) ..................... |
192 |
4.18 |
DATA I/O PARAMETERS (DATA NO. 5000 AND LATER) ....................... |
195 |
4.19 |
STROKE LIMIT PARAMETERS (DATA NO. 5200 AND LATER).............. |
203 |
4.20PITCH ERROR COMPENSATION PARAMETERS
|
(DATA NO. 5420 AND LATER) ................................................................. |
211 |
4.21 |
SPINDLE CONTROL PARAMETERS (DATA NO. 5602 AND LATER)..... |
226 |
4.22 |
TOOL COMPENSATION PARAMETERS |
|
|
(DATA NO. 6000 AND LATER) ................................................................. |
267 |
4.23 |
CANNED CYCLE PARAMETERS (DATA NO. 6200 AND LATER)........... |
293 |
4.24SCALING AND COORDINATE SYSTEM ROTATION PARAMETERS
(DATA NO. 6400 AND LATER) ................................................................. |
298 |
4.25 CUSTOM MACRO PARAMETERS (DATA NO. 7000 AND LATER) ......... |
303 |
4.26PROGRAM RESTART, BLOCK RESTART, AND TOOL RETRACTION
|
AND RETURN PARAMETERS (DATA NO. 7110 AND LATER) ............... |
317 |
4.27 |
SKIP FUNCTION PARAMETERS (DATA NO. 7200 AND LATER) ........... |
318 |
4.28 |
TOOL LIFE MANAGEMENT PARAMETERS |
|
|
(DATA NO. 7400 AND LATER) ................................................................. |
327 |
4.29FIVE-AXIS CONTROL FUNCTION PARAMETERS
|
(DATA NO. 7514 AND LATER) ................................................................. |
332 |
4.30 |
OTHER PARAMETERS............................................................................. |
341 |
4.31 |
SERVICE PARAMETERS (DATA NO. 8000 AND LATER) ....................... |
370 |
4.32 |
MACRO EXECUTOR PARAMETERS (DATA NO. 8500 AND LATER)..... |
371 |
c - 2

B-63330EN/03 |
TABLE OF CONTENTS |
||
|
|
|
|
A |
CHARACTER CODE LIST |
................................................................. |
375 |
B |
LIST OF COMPATIBLE PARAMETERS FOR SERIES 15-MB.......... |
376 |
|
c - 3

B-63330EN/03 |
1.DISPLAYING PARAMETERS AND PITCH ERROR COMPENSATION DATA |
1 DISPLAYING PARAMETERS AND PITCH
ERROR COMPENSATION DATA
This chapter explains how to display parameters and pitch error compensation data.
- 1 -
1.DISPLAYING PARAMETERS AND PITCH ERROR COMPENSATION DATA |
B-63330EN/03 |
1.1 DISPLAYING PARAMETERS
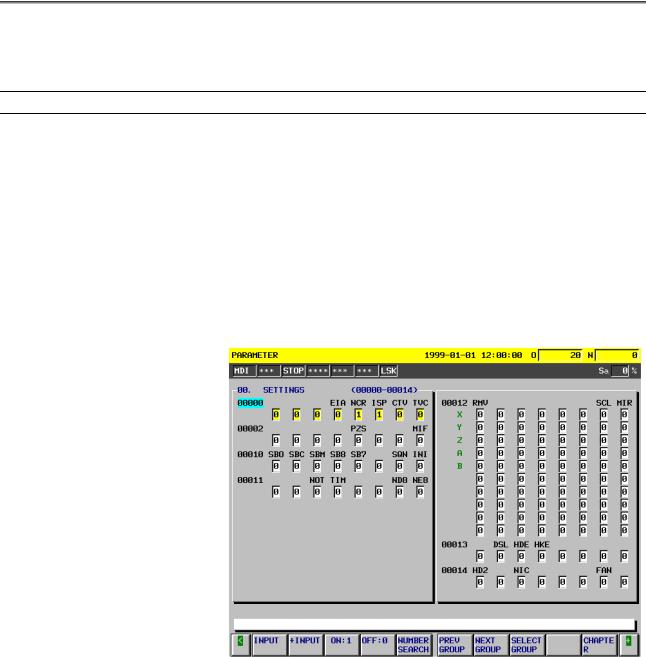
The Parameter screen displays the values specified for CNC parameters.
Parameter screen
Displaying the Parameter screen
Follow either of the procedures described below to display the Parameter screen.
Method 1
Press the <SYSTEM> function key several times, until the
Parameter screen appears.
Method 2
(1)Press the <SYSTEM> function key.
(2)Click the [PARAMETER] soft key.
Fig. 1.1 (a) Parameter Screen
- 2 -
B-63330EN/03 |
1.DISPLAYING PARAMETERS AND PITCH ERROR COMPENSATION DATA |
Displaying specified parameters
The Parameter screen consists of multiple pages.
Follow one of the procedures described below to display the specified parameter.
Method 1
Using the <PAGE ↑ > <PAGE ↓ > page keys, and the <↑ > <↓ > <← > <→ > cursor keys, move the cursor to display the desired parameter.
Method 2
(1)Click the [NO. SEARCH] soft key.
(2)Key in the number of the parameter to be displayed.
(3)Click the [EXEC] soft key.
Method 3
(1)Key in the number of the parameter to be displayed.
(2)Click the [NO. SEARCH] soft key.
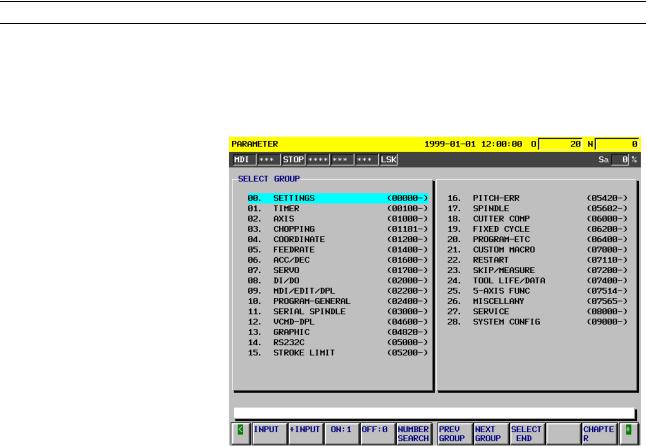
Select Group screen
The Select Group screen can be used to display a selected group of parameters.
Displaying the Select Group screen
On the Parameter screen, select the [SELECTGROUP] soft key.
Fig. 1.1 (b) Select Group Screen
- 3 -
1.DISPLAYING PARAMETERS AND PITCH ERROR COMPENSATION DATA |
B-63330EN/03 |
Selecting a group
Move the cursor to the group to be displayed.
Method 1
Use the <↑ > <↓ > <← > <→ > cursor keys, move the cursor.
Method 2
(1)Click the [NO. SEARCH] soft key.
(2)Key in the number of the group to be displayed.
(3)Click the [EXEC] soft key.
Method 3
(1)Key in the number of the group to be displayed.
(2)Click the [NO. SEARCH] soft key.
Ending group selection
Click the [SELECTEND] soft key to exit from the Select Group screen and return to the Parameter screen. The selected group of parameters is displayed, starting with the first parameter.
- 4 -

B-63330EN/03 |
1.DISPLAYING PARAMETERS AND PITCH ERROR COMPENSATION DATA |
1.2 DISPLAYING PITCH ERROR COMPENSATION DATA
The Pitch Error Compensation screen displays the values specified for pitch error compensation data.
Pitch Error Compensation screen
Displaying the Pitch Error Compensation screen
Follow either of the procedures described below to display the Pitch Error Compensation screen.
Method 1
Press the <SYSTEM> function key several times, until the Pitch
Error Compensation screen appears.
Method 2
(1)Press the <SYSTEM> function key.
(2)Click the [PITCH ERROR] soft key.
Fig. 1.2 (a) Pitch Error Compensation Screen
- 5 -
1.DISPLAYING PARAMETERS AND PITCH ERROR COMPENSATION DATA |
B-63330EN/03 |
Displaying specified pitch error compensation data
The Pitch Error Compensation screen consists of multiple pages. Follow one of the procedures described below to display specified pitch error compensation data.
Method 1
Using the <PAGE ↑ > <PAGE ↓ > page keys, and the <↑ > <↓ > <← > <→ > cursor keys, move the cursor to display the desired pitch error compensation data.
Method 2
(1)Click the [NO. SEARCH] soft key.
(2)Key in the number of the pitch error compensation data to be displayed.
(3)Click the [EXEC] soft key.
Method 3
(1)Key in the number of the pitch error compensation data to be displayed.
(2)Click the [NO. SEARCH] soft key.
- 6 -

B-63330EN/03 |
2.SETTING PARAMETERS AND PITCH ERROR COMPENSATION DATA |
2 SETTING PARAMETERS AND PITCH
ERROR COMPENSATION DATA
This chapter explains how to set parameters and pitch error compensation data from the MDI.
- 7 -

2.SETTING PARAMETERS AND PITCH ERROR COMPENSATION DATA |
B-63330EN/03 |
2.1 SETTING PARAMETERS
The Parameter screen is used to set parameters from the MDI.
For an explanation of how to display the Parameter screen, see
Section 1.1, "Displaying Parameters."
Procedure for setting parameters
- Entering the mode
Enter MDI mode. Alternatively, press the emergency stop button to enter the emergency stop status.
- Setting parameter PWE
On the Setting Parameter screen, set bit 0 of the setting/input-enabled parameter PWE (No. 8000) to 1.
For the setting procedure, refer to Section II-9.3, "Displaying and Setting Setting Parameters" in the "FANUC Series 15i/150i-MA OPERATOR’S MANUAL (Operation)."
- Moving the cursor
Move the cursor to the parameter to be set.
Method 1
Using the <PAGE ↑ > <PAGE ↓ > page keys, and the <↑ > <↓ > <← > <→ > cursor keys, to move the cursor.
Method 2
(1)Click the [NO. SEARCH] soft key.
(2)Key in the parameter number.
(3)Click the [EXEC] soft key. Method 3
(1)Key in the parameter number.
(2)Click the [NO. SEARCH] soft key.
-Entering a setting (absolute input)
Method 1
(1)Click the [INPUT] soft key.
(2)Key in the desired setting.
(3)Click the [EXEC] soft key. Method 2
(1)Key in the desired setting.
(2)Click the [INPUT] soft key. Method 3
(1)Key in the desired setting.
(2)Click the [INPUT] soft key.
- 8 -

B-63330EN/03 |
2.SETTING PARAMETERS AND PITCH ERROR COMPENSATION DATA |
- Entering a setting (incremental input)
Method 1
(1)Click the [+INPUT] soft key.
(2)Key in the value to be added to the current setting.
(3)Click the [EXEC] soft key.
Method 2
(1)Key in the value to be added to the current setting.
(2)Click the [+INPUT] soft key.
NOTE
For bit/bit axis/bit spindle type parameters, incremental input is not possible. Even if the [+INPUT] soft key is clicked, absolute input is assumed.
- Bit ON:1
By clicking the [ON:1] soft key, the bit of a bit/bit axis/bit spindle type parameter on which the cursor is displayed is set to 1.
If the cursor is displayed on all bits, all the bits are set to 1.
- Bit OFF:0
By clicking the [OFF:0] soft key, the bit of a bit/bit axis/bit spindle type parameter on which the cursor is displayed is set to 0.
If the cursor is displayed on all bits, all the bits are set to 0.
- Ending the setting
When parameters have been set, set bit 0 of the setting/input-enabled parameter PWE (No. 8000) to 0.
NOTE
The blank bits in the parameter list (Chapter 4,
"DESCRIPTION OF PARAMETERS") and the parameters displayed on the Parameter screen but not shown on the list are either reserved for future expansion or used internally in the CNC. Do not change the values of these parameter bits.
- 9 -

2.SETTING PARAMETERS AND PITCH ERROR COMPENSATION DATA |
B-63330EN/03 |
2.2 SETTING PITCH ERROR COMPENSATION DATA
For an explanation of how to display the Pitch Error Compensation screen, see Section 1.2, "Displaying Pitch Error Compensation Data." The Pitch Error Compensation screen is used to set pitch error compensation data.
Procedure for setting pitch error compensation data
- Entering the mode
Enter MDI mode. Alternatively, press the emergency stop button to enter the emergency stop status.
- Setting parameter PWE
On the Setting Parameter screen, set bit 0 of the setting/input-enabled parameter PWE (No. 8000) to 1.
For the setting procedure, refer to Section II-9.3, "Displaying and Setting Setting Parameters" in the "FANUC Series 15i/150i-MA OPERATOR’S MANUAL (Operation)."
- Moving the cursor
Move the cursor to the pitch error compensation data to be set.
Method 1
Using the <PAGE ↑ > <PAGE ↓ > page keys, and the <↑ > <↓ > <← > <→ > cursor keys, to move the cursor.
Method 2
(1)Click the [NO. SEARCH] soft key.
(2)Key in the pitch error compensation data number.
(3)Click the [EXEC] soft key.
Method 3
(1)Key in the pitch error compensation data number.
(2)Click the [NO. SEARCH] soft key.
-Entering a setting (absolute input)
Method 1
(1)Click the [INPUT] soft key.
(2)Key in the desired setting.
(3)Click the [EXEC] soft key. Method 2
(1)Key in the desired setting.
(2) Click the [INPUT] soft key. B Method 3
(1)Key in the desired setting.
(2)Click the [INPUT] soft key. B
- 10 -
B-63330EN/03 |
2.SETTING PARAMETERS AND PITCH ERROR COMPENSATION DATA |
- Entering a setting (incremental input)
Method 1
(1)Click the [+INPUT] soft key.
(2)Key in the value to be added to the current setting.
(3)Click the [EXEC] soft key.
Method 2
(1)Key in the value to be added to the current setting.
(2)Click the [+INPUT] soft key.
- 11 -

3.INPUTTING AND OUTPUTTING PARAMETERS USING EXTERNAL INPUT/OUTPUT DEVICES |
B-63330EN/03 |
3 INPUTTING AND OUTPUTTING PARAMETERS USING EXTERNAL INPUT/OUTPUT DEVICES
This chapter explains the procedures for inputting and outputting parameters using the input/output device connected to the reader/punch interface or using a memory card, as well as input/output formats.
- 12 -

B-63330EN/03 |
3.INPUTTING AND OUTPUTTING PARAMETERS USING EXTERNAL INPUT/OUTPUT DEVICES |
3.1 INPUTTING AND OUTPUTTING PARAMETERS ON THE PARAMETER SCREEN
This section explains the procedures for inputting and outputting parameters on the Parameter screen.
Before parameters can be input and output, the parameters related to the input/output device must be set.
Displaying the Parameter screen
Follow either of the procedures described below to display the Parameter screen.
Method 1
Press the <SYSTEM> function key several times, until the Parameter screen appears.
Method 2
(1)Press the <SYSTEM> function key.
(2)Click the [PARAMETER] soft key.
Outputting parameters
Method 1 (neither the output file name nor number need be specified)
(1)Enter MDI mode.
(2)Click the [PUNCH] soft key.
(3)Click the [PARAMETER] soft key. Method 2 (the output file name is specified)
(1)Enter MDI mode.
(2)Click the [PUNCH] soft key.
(3)Click the ["FILE NAME] soft key.
(4)Key in the file name.
(5)Click the [FILE NAME"] soft key.
(6)Click the [PARAMETER] soft key.
Method 3 (the file number is specified, one of three methods)
(1)Enter MDI mode.
(2)Click the [PUNCH] soft key.
(3)Click the [(FILE#)] soft key.
(4)Key in the file number.
(5)Click the [PARAMETER] soft key.
Method 4 (the file number is specified, one of three methods)
(1)Enter MDI mode.
(2)Click the [PUNCH] soft key.
(3)Click the <N> address key.
(4)Key in the file number.
(5)Click the [PARAMETER] soft key.
Method 5 (the file number is specified, one of three methods)
(1)Enter MDI mode.
(2)Click the <N> address key.
(3)Key in the file number.
(4)Click the [PUNCH] soft key. B
- 13 -
3.INPUTTING AND OUTPUTTING PARAMETERS USING EXTERNAL INPUT/OUTPUT DEVICES |
B-63330EN/03 |
Inputting parameters
Method 1 (neither the input file name nor number need be specified)
(1)Enter MDI mode.
(2)Enter the emergency stop status.
(3)Click the [READ] soft key.
(4)Click the [PARAMETER] soft key.
Method 2 (the input file is specified with its file name)
(1)Enter MDI mode.
(2)Enter the emergency stop status.
(3)Click the [READ] soft key.
(4)Click the ["FILE NAME] soft key.
(5)Key in the file name.
(6)Click the [FILE NAME"] soft key.
(7)Click the [PARAMETER] soft key.
Method 3 (the input file is specified with its file number, one of three methods)
(1)Enter MDI mode.
(2)Enter the emergency stop status.
(3)Click the [READ] soft key.
(4)Click the [(FILE#)] soft key.
(5)Key in the file number.
(6)Click the [PARAMETER] soft key.
Method 4 (the input file is specified with its file number, one of three methods)
(1)Enter MDI mode.
(2)Enter the emergency stop status.
(3)Click the [READ] soft key.
(4)Click the <N> address key.
(5)Key in the file number.
(6)Click the [PARAMETER] soft key.
Method 5 (the input file is specified with its file number, one of three methods)
(1)Enter MDI mode.
(2)Enter the emergency stop status.
(3)Click the <N> address key.
(4)Key in the file number.
(5)Click the [READ] soft key.
- 14 -

B-63330EN/03 |
3.INPUTTING AND OUTPUTTING PARAMETERS USING EXTERNAL INPUT/OUTPUT DEVICES |
NOTE
1When outputting and inputting parameters to and from a FANUC Floppy Cassette, FANUC FA Card, and FANUC Handy File, you can specify the input/output file with its file name or number.
2When outputting and inputting parameters to and from a memory card, you can specify the input/output file with its file name.
3When method 1 (in which neither the output file name nor number need be specified), described in "Outputting parameters," is used to output parameters to a FANUC Floppy Cassette, FANUC FA Card, FANUC Handy File, and memory card, the file name will be CNC-PARA.TXT.
- 15 -

3.INPUTTING AND OUTPUTTING PARAMETERS USING EXTERNAL INPUT/OUTPUT DEVICES |
B-63330EN/03 |
3.2 INPUTTING AND OUTPUTTING PARAMETERS ON THE FLOPPY DIRECTORY SCREEN
This section explains the procedures for inputting and outputting parameters on the Floppy Directory screen, using the FANUC Floppy Cassette, FANUC FA Card, FANUC Handy File, or FANUC PROGRAM FILE Mate connected to the serial interface (RS-232-C or RS-422).
Before parameters can be input and output, the parameters related to the input/output device must be set.
Displaying the Floppy Directory screen
Follow either of the procedures described below to display the Floppy Directory screen.
Method 1
Press the <OFFSET/SETTING> function key several times, until the Floppy Directory screen appears.
Method 2
(1)Press the <OFFSET/SETTING> function key.
(2)Click the [RS232C] soft key.
Outputting parameters
(1)Click the [DATA SELECT] soft key.
(2)Click the [PARAMETER] soft key. "PARAMETER" appears in IN/OUT DATA.
(3)Follow either of the procedures described below to set the output file name
Method 1 (the file name is entered using MDI keys)
(1)Click the [NAME INPUT] soft key.
(2)Click the ["FILE NAME] soft key.
(3)Enter the file name with MDI keys.
(4)Click the [FILE NAME"] soft key.
(5)Click the [EXEC] soft key.
Method 2 (the file name is selected from a file list)
(1)Click the [DIR. VIEW] soft key.
A list of files contained in the input/output device is displayed. If the list cannot be displayed on a single page, "Prev Page" and "Next Page" are displayed in PAGE
SELECT to indicate that there are multiple pages.
Press the <PAGE ↑ > <PAGE ↓ > key to display the specified page.
(2)Move the cursor to the desired output file name.
(3)Click the [NAME GET] soft key.
(4)Enter MDI mode.
(5)Click the [DATA PUNCH] soft key.
(6)Click the [EXEC] soft key.
- 16 -
B-63330EN/03 |
3.INPUTTING AND OUTPUTTING PARAMETERS USING EXTERNAL INPUT/OUTPUT DEVICES |
Inputting parameters
(1)Click the [DATA SELECT] soft key.
(2)Click the [PARAMETER] soft key. "PARAMETER" appears in IN/OUT DATA.
(3)Click the [DIR. VIEW] soft key.
A list of files contained in the input/output device is displayed. If the list cannot be displayed on a single page, "Prev Page" and "Next Page" are displayed in PAGE SELECT to indicate that
there are multiple pages.
Press the <PAGE ↑ > <PAGE ↓ > key to display the specified page.
(4)Move the cursor to the desired input file name.
(5)Enter MDI mode.
(6)Enter the emergency stop status.
(7)Click the [DATA READ] soft key.
(8)Click the [EXEC] soft key.
- 17 -

3.INPUTTING AND OUTPUTTING PARAMETERS USING EXTERNAL INPUT/OUTPUT DEVICES |
B-63330EN/03 |
3.3 INPUTTING AND OUTPUTTING PARAMETERS ON THE MEMORY CARD SCREEN
This section explains the procedures for inputting and outputting parameters on the Memory Card screen.
Before parameters can be input and output, the parameters related to the input/output device must be set.
Displaying the Memory Card screen
Follow either of the procedures described below to display the Memory Card screen.
Method 1
Press the <OFFSET/SETTING> function key several times, until the Memory Card screen appears.
Method 2
(1)Press the <OFFSET/SETTING> function key.
(2)Click the [MEMCARD] soft key.
Outputting parameters
(1)Click the [DATA SELECT] soft key.
(2)Click the [PARAMETER] soft key. "PARAMETER" appears in IN/OUT DATA.
(3)Follow either of the procedures described below to set the output file name.
Method 1 (the file name is entered using MDI keys)
(1)Click the [NAME INPUT] soft key.
(2)Click the ["FILE NAME] soft key.
(3)Enter the file name with MDI keys.
(4)Click the [FILE NAME"] soft key.
(5)Click the [EXEC] soft key.
Method 2 (the file name is selected from a file list)
(1)Click the [DIR. VIEW] soft key.
A list of files contained in the input/output device is displayed. If the list cannot be displayed on a single page, "Prev Page" and "Next Page" are displayed in PAGE SELECT to indicate that there are multiple
pages.
Press the <PAGE ↑ > <PAGE ↓ > key to display the specified page.
(2)Move the cursor to the desired output file name.
(3)Click the [NAME GET] soft key.
(4)Enter MDI mode.
(5)Click the [DATA PUNCH] soft key.
(6)Click the [EXEC] soft key.
- 18 -
B-63330EN/03 |
3.INPUTTING AND OUTPUTTING PARAMETERS USING EXTERNAL INPUT/OUTPUT DEVICES |
Inputting parameters
(1)Click the [DATA SELECT] soft key.
(2)Click the [PARAMETER] soft key. "PARAMETER" appears in IN/OUT DATA.
(3)Click the [DIR. VIEW] soft key.
A list of files contained in the input/output device is displayed. If the list cannot be displayed on a single page, "Prev Page" and "Next Page" are displayed in PAGE SELECT to indicate that
there are multiple pages.
Press the <PAGE ↑ > <PAGE ↓ > key to display the specified page.
(4)Move the cursor to the desired input file name.
(5)Enter MDI mode.
(6)Enter the emergency stop status.
(7)Click the [DATA READ] soft key.
(8)Click the [EXEC] soft key.
- 19 -
3.INPUTTING AND OUTPUTTING PARAMETERS USING EXTERNAL INPUT/OUTPUT DEVICES |
B-63330EN/03 |
3.4 INPUT/OUTPUT FORMATS
This section explains the input/output formats for parameters and pitch error compensation data.
3.4.1 Input/Output Formats for Parameters
Parameters are classified according to data types, as follows.
-Bit type
-Bit axis type
-Bit spindle type
-Integer type
-Integer axis type
-Integer spindle type
-Real type
-Real axis type
-Real spindle type
Bit/bit axis/bit spindle type parameters are represented by 8-digit binary numbers, with each digit occupying a single bit.
The valid value ranges of the individual integer/integer axis/integer spindle/real/real axis/real spindle type parameters differ. For details, see the description of each parameter.
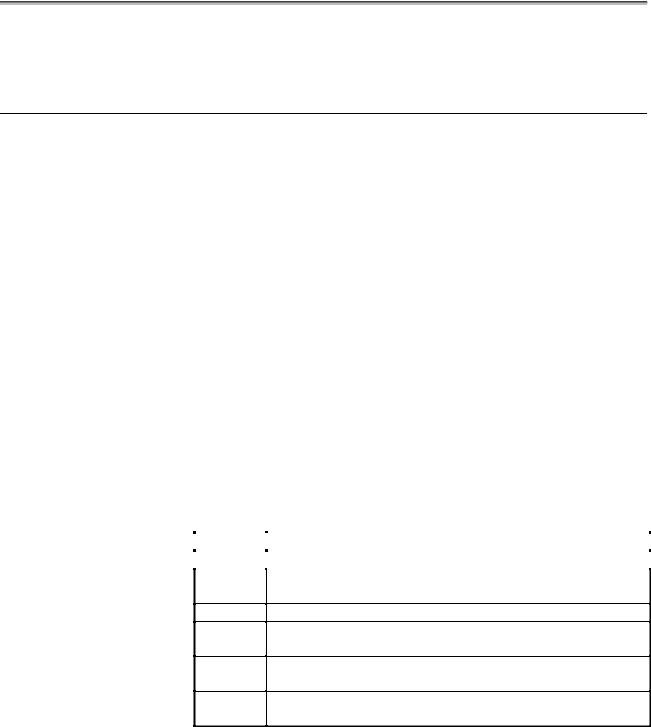
- Keywords
The following alphabetic characters are used as keywords.
The numeric values following the keywords have the meanings described below.
Keyword |
Description of the numeric value following the keyword |
N |
Parameter number |
AControlled axis number of an axis type parameter (1 or above)
S Spindle number of a spindle type parameter (1 or above)
PValue of a parameter that does not depend on inch/metric switching
MMetric-input-time value of a parameter dependent on inch/metric switching
IInch-input-time value of a parameter dependent on inch/metric switching
- 20 -
B-63330EN/03 |
3.INPUTTING AND OUTPUTTING PARAMETERS USING EXTERNAL INPUT/OUTPUT DEVICES |
- Inch/metric switching
The data specified for parameters dependent on inch/metric switching, such as length and feedrate parameters, is determined to be in either inch or metric mode depending on the mode assumed at input time for input from the MDI and depending on whether the keyword preceding the data is I or M for input from an external input/output device. These I and M keywords are added to data as appropriate when that data is output from an external input/output device.
If the mode assumed at input time or the keyword does not match the mode assumed when the data is to be used, for example, the data input in inch mode is to be used in metric mode, the CNC automatically converts the data before use, eliminating the need to change the data according to the mode change. In addition, in the display of parameter data, data is converted according to the mode assumed at display time, before the data is displayed. When the data is to be output from the external input/output device, it is converted back to the original data according to the keyword or mode.
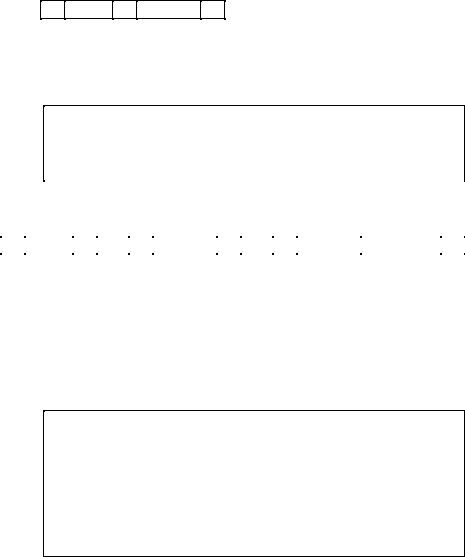
- Bit type format
N ***** P ******** ;
The 8-digit binary number following P represents the values (0 or 1) of the bits of the parameter, with the first digit corresponding to bit 0 and the eighth digit to bit 7. Leading zeros cannot be omitted.
;is an end of block character (LF for ISO code and CR for EIA code).
Example
N00010P00000001; |
|
Parameter number |
10 |
Parameter value |
Bit 0 is 1 and the others are 0. |
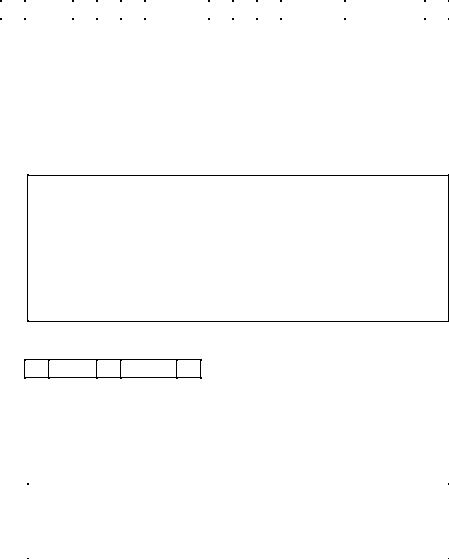
- Bit axis type format
N |
***** |
A |
** |
P |
******** |
A |
** |
P |
******** |
. . |
|
. . |
; |
The numeric value following N represents the parameter number.
The numeric value following A represents the controlled axis number (1 or above).
The 8-digit binary number following P represents the values (0 or 1) of the bits of the parameter for that controlled axis, with the first digit corresponding to bit 0 and the eighth digit to bit 7. Leading zeros cannot be omitted.
; is an end of block character (LF for ISO code and CR for EIA code).
Example
N0005A1P10000001A2P10000001A3P10000001A4P00001001....;
Parameter number |
1005 |
Parameter values
First axis: Bits 0 and 7 are 1 and the others are 0.
Second axis: Bits 0 and 7 are 1 and the others are 0.
Third axis: Bits 0 and 7 are 1 and the others are 0.
Fourth axis: Bits 0 and 3 are 1 and the others are 0.
- 21 -
3.INPUTTING AND OUTPUTTING PARAMETERS USING EXTERNAL INPUT/OUTPUT DEVICES |
B-63330EN/03 |
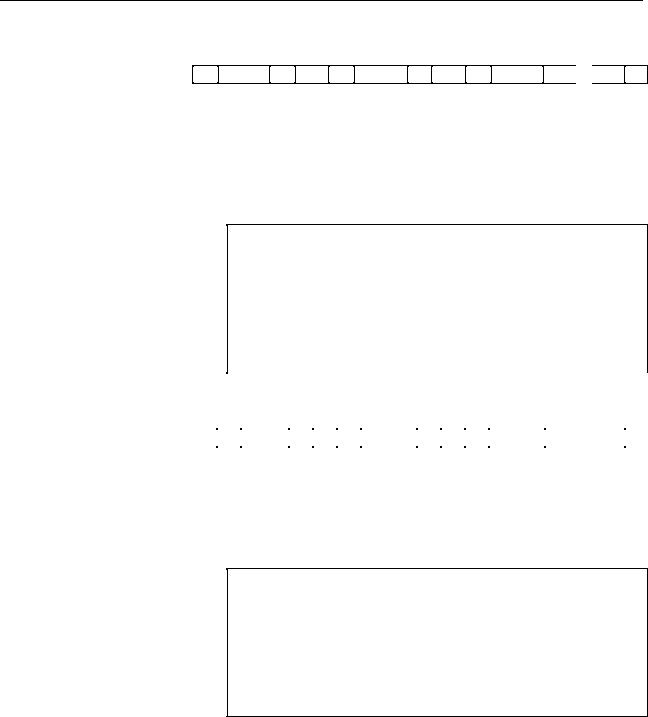
- Bit spindle type format
N |
***** |
S |
* |
P |
******** |
S |
* |
P |
******** |
. . |
|
. . |
; |
The numeric value following N represents the parameter number.
The numeric value following S represents the spindle number (1 or above).
The 8-digit binary number following P represents the values (0 or 1) of the bits of the parameter for that spindle, with the first digit corresponding to bit 0 and the eighth digit to bit 7. Leading zeros cannot be omitted.
; is an end of block character (LF for ISO code and CR for EIA code).
Example
N05603S1P00001000S2P00001000S3P00000000S4P000000000;
Parameter number |
5603 |
Parameter values |
|
First spindle: |
Bit 3 is 1 and the others are 0. |
Second spindle: Bit 3 is 1 and the others are 0. |
|
Third spindle: |
All bits are 0. |
Fourth spindle: All bits are 0.
- Integer type format
N ***** P ****** ;
The numeric value following N represents the parameter number.
The numeric value following P represents the value (integer) of the parameter.
; is an end of block character (LF for ISO code and CR for EIA code).
Example |
|
N00100P31515; |
|
Parameter number |
100 |
Parameter value |
31515 |
- 22 -
B-63330EN/03 3.INPUTTING AND OUTPUTTING PARAMETERS USING EXTERNAL INPUT/OUTPUT DEVICES
- Integer axis type format
N ***** A ** P ****** A ** P ****** . . . . ;
The numeric value following N represents the parameter number.
The numeric value following A represents the controlled axis number (1 or above).
The numeric value following P represents the value (integer) of the parameter.
; is an end of block character (LF for ISO code and CR for EIA code).
Example
N01020A1P88A2P89A3P90A4P66......;
Parameter number |
1020 |
Parameter values |
|
First axis: |
88 |
Second axis: |
89 |
Third axis: |
90 |
Fourth axis: |
66 |
- Integer spindle type format
N |
***** |
S |
* |
P |
****** |
S |
* |
P |
****** |
. . |
|
. . |
; |
The numeric value following N represents the parameter number.
The numeric value following S represents the controlled axis number (1 or above).
The numeric value following P represents the value (integer) of the parameter.
;is an end of block character (LF for ISO code and CR for EIA code).
Example
N05680S1P19S2P19S3P0S4P0;
Parameter number 5680
Parameter values
First spindle: 19
Second spindle: 19
Third spindle: 0
Fourth spindle: 0
- 23 -
Loading...