


 Loading...
|
DGS-3710 Series Layer 2 Managed Gigabit Switch CLI Reference Guide |
|
|
Table of Contents |
|
Chapter 1 Using Command Line Interface........................................................................................... |
1 |
|
Chapter 2 Basic Management Commands .......................................................................................... |
8 |
|
Chapter 3 Basic IP Commands.......................................................................................................... |
32 |
|
Chapter 4 |
802.1X Commands............................................................................................................ |
41 |
Chapter 5 Access Authentication Control (AAC) Commands............................................................ |
67 |
|
Chapter 6 Access Control List (ACL) Commands.............................................................................. |
87 |
|
Chapter 7 |
ARP Commands.............................................................................................................. |
114 |
Chapter 8 ARP Spoofing Prevention Commands............................................................................ |
119 |
|
Chapter 9 Auto Config Commands .................................................................................................. |
121 |
|
Chapter 10 BPDU Attack Protection Commands........................................................................... |
123 |
|
Chapter 11 Cable Diagnostics Commands.................................................................................... |
128 |
|
Chapter 12 |
CFM Commands ......................................................................................................... |
130 |
Chapter 13 Command List History Commands ............................................................................. |
159 |
|
Chapter 14 Command Logging Command List.............................................................................. |
163 |
|
Chapter 15 Compound Authentication Commands ....................................................................... |
165 |
|
Chapter 16 Debug Software Command List .................................................................................. |
173 |
|
Chapter 17 DHCP Local Relay Commands................................................................................... |
194 |
|
Chapter 18 DHCP Relay Commands ............................................................................................ |
197 |
|
Chapter 19 DHCP Server Commands ........................................................................................... |
212 |
|
Chapter 20 DHCPv6 Relay Command List.................................................................................... |
231 |
|
Chapter 21 Digital Diagnostics Monitoring (DDM) Commands...................................................... |
236 |
|
Chapter 22 DNS Relay Commands ............................................................................................... |
242 |
|
Chapter 23 D-Link Unidirectional Link Detection (DULD) Commands .......................................... |
247 |
|
Chapter 24 Ethernet Ring Protection Switching (ERPS) Commands............................................ |
249 |
|
Chapter 25 |
FDB Commands.......................................................................................................... |
260 |
Chapter 26 |
Filter Commands......................................................................................................... |
268 |
Chapter 27 IGMP Snooping Commands ....................................................................................... |
273 |
|
Chapter 28 IGMP Snooping Multicast (ISM) VLAN Commands.................................................... |
296 |
|
Chapter 29 IP Routing Commands ................................................................................................ |
307 |
|
Chapter 30 IP-MAC-Port Binding (IMPB) Commands ................................................................... |
312 |
|
Chapter 31 IPv6 NDP Commands ................................................................................................. |
335 |
|
Chapter 32 Jumbo Frame Commands........................................................................................... |
339 |
|
Chapter 33 Layer 2 Protocol Tunneling (L2PT) Command List..................................................... |
341 |
|
Chapter 34 Limited Multicast IP Address Commands ................................................................... |
346 |
|
|
I |
|

DGS-3710 Series Layer 2 Managed Gigabit Switch CLI Reference Guide
Chapter 35 Link Aggregation Commands...................................................................................... |
355 |
|
Chapter 36 |
LLDP Commands........................................................................................................ |
362 |
Chapter 37 Local Loopback Commands........................................................................................ |
385 |
|
Chapter 38 Loopback Detection Commands ................................................................................. |
388 |
|
Chapter 39 MAC-based Access Control Commands .................................................................... |
394 |
|
Chapter 40 MAC Notification Commands ...................................................................................... |
410 |
|
Chapter 41 |
Mirror Commands........................................................................................................ |
415 |
Chapter 42 MLD Snooping Commands ......................................................................................... |
418 |
|
Chapter 43 MLD Snooping Multicast (MSM) VLAN Commands ................................................... |
440 |
|
Chapter 44 Modify Banner and Prompt Commands...................................................................... |
451 |
|
Chapter 45 |
MSTP commands........................................................................................................ |
454 |
Chapter 46 Network Management Commands.............................................................................. |
467 |
|
Chapter 47 Network Monitoring Commands.................................................................................. |
482 |
|
Chapter 48 |
OAM Commands......................................................................................................... |
504 |
Chapter 49 Packet Storm Commands ........................................................................................... |
512 |
|
Chapter 50 Port Security Commands ............................................................................................ |
517 |
|
Chapter 51 Power Saving Commands........................................................................................... |
525 |
|
Chapter 52 Protocol VLAN Commands ......................................................................................... |
529 |
|
Chapter 53 |
QoS Commands.......................................................................................................... |
535 |
Chapter 54 |
Q-in-Q Command........................................................................................................ |
555 |
Chapter 55 |
RSPAN Commands..................................................................................................... |
563 |
Chapter 56 Safeguard Engine Commands .................................................................................... |
569 |
|
Chapter 57 |
sFlow Commands........................................................................................................ |
571 |
Chapter 58 Simple RED Commands ............................................................................................. |
583 |
|
Chapter 59 Single IP Management Commands ............................................................................ |
588 |
|
Chapter 60 |
SSH Commands.......................................................................................................... |
598 |
Chapter 61 |
SSL Commands .......................................................................................................... |
606 |
Chapter 62 |
SNMPv1/v2/v3 Commands ......................................................................................... |
612 |
Chapter 63 Static MAC-based VLAN Commands ......................................................................... |
627 |
|
Chapter 64 Subnet VLAN Commands ........................................................................................... |
630 |
|
Chapter 65 Switch Port Commands............................................................................................... |
636 |
|
Chapter 66 Synchronous Ethernet Commands ............................................................................. |
640 |
|
Chapter 67 |
System Severity Commands....................................................................................... |
642 |
Chapter 68 Tech Support Commands ........................................................................................... |
644 |
|
Chapter 69 Time and SNTP Commands ....................................................................................... |
646 |
|
Chapter 70 Traffic Segmentation Commands................................................................................ |
653 |
|
|
II |
|

DGS-3710 Series Layer 2 Managed Gigabit Switch CLI Reference Guide
Chapter 71 |
Utility Commands ........................................................................................................ |
655 |
Chapter 72 |
VLAN Commands........................................................................................................ |
667 |
Chapter 73 |
Voice VLAN Commands ............................................................................................. |
688 |
Chapter 74 |
Web-based Access Control (WAC) Commands ......................................................... |
697 |
Appendix A - Password Recovery Procedure..................................................................................... |
710 |
|
Appendix B - System Log Entries ....................................................................................................... |
712 |
|
Appendix C - Trap Entries................................................................................................................... |
732 |
|
Appendix D - RADIUS Attributes Assignment..................................................................................... |
737 |
|
III

DGS-3710 Series Layer 2 Managed Gigabit Switch CLI Reference Guide
Chapter 1 Using Command Line
Interface
The Switch can be managed through the Switch’s serial port, Telnet, SNMP or the Web-based management agent. The Command Line Interface (CLI) can be used to configure and manage the Switch via the serial port or Telnet interfaces.
This manual provides a reference for all of the commands contained in the CLI. Every command will be introduced in terms of purpose, format, description, parameters, and examples. Configuration and management of the Switch via the Web-based management agent are discussed in the User Manual. For detailed information on installing hardware please also refer to the User Manual.
1-1 Accessing the Switch via the Serial Port
The Switch’s serial port’s default settings are as follows:
•115200 baud
•no parity
•8 data bits
•1 stop bit
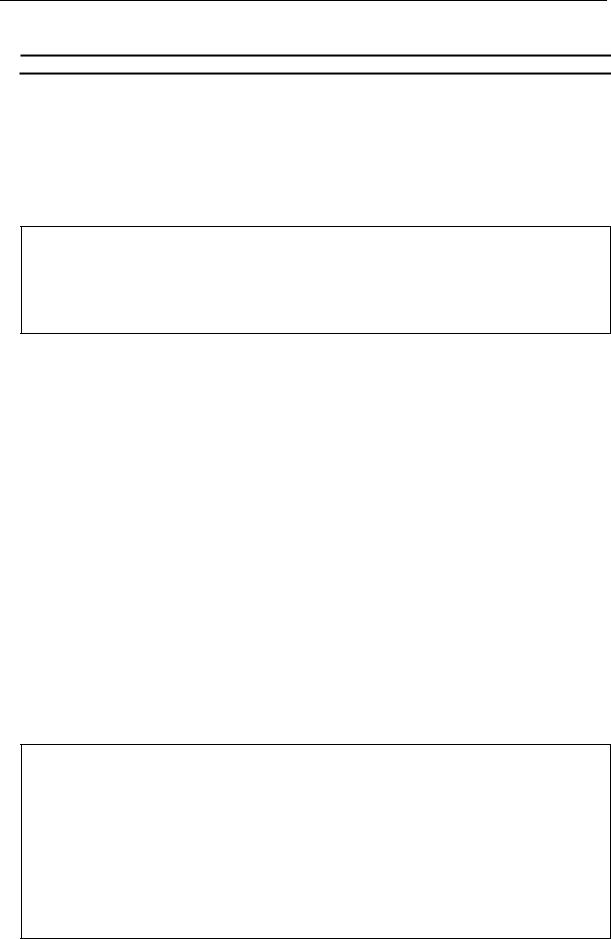
A computer running a terminal emulation program capable of emulating a VT-100 terminal and a serial port configured as above is then connected to the Switch’s serial port via an RS-232 DB-9 cable. With the serial port properly connected to a management computer, the following message will be displayed, “Press any key to login…”. After pressing any key on the keyboard, the following screen should be visible.
DGS-3710-12C Gigabit Ethernet Switch
Command Line Interface
Firmware: Build 1.00.029
Copyright(C) 2012 D-Link Corporation. All rights reserved. UserName:admin
PassWord:**** DGS-3710-12C:admin#
Enter the UserName and Password here and press the Enter key, after each entry, to display the CLI input cursor − DGS-3710-12C:admin#. This is the command line where all commands are input.
Note: By default, there is one administrator account already created. The username for this default account is admin and the password is 1234.
1

DGS-3710 Series Layer 2 Managed Gigabit Switch CLI Reference Guide
1-2 Setting the Switch’s IP Address
Each Switch must be assigned its own IP Address, which is used for communication with an SNMP network manager or other TCP/IP application (for example BOOTP, TFTP). The Switch’s default IP address is 10.90.90.90. You can change the default Switch IP address to meet the specification of your networking address scheme.
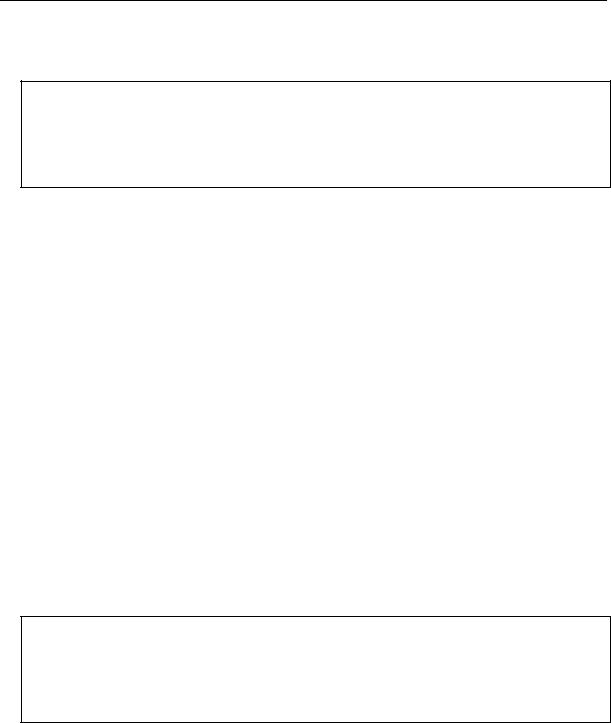
The Switch is also assigned a unique MAC address by the factory. This MAC address cannot be changed, and can be found on the initial boot console screen – shown below.
Boot Procedure |
V1.00.001 |
-------------------------------------------------------------------------------
Power On Self |
Test ........................................ |
100 |
% |
MAC Address |
: F0-7D-68-25-CB-40 |
|
|
H/W Version |
: A1 |
|
|
Please Wait, Loading V1.00.029 Runtime Image ............. |
100 % |
|
|
UART init ................................................. |
|
100 |
% |
Device Discovery .......................................... |
100 |
% |
|
Configuration |
init ........................................ |
100 |
% |
The Switch’s MAC address can also be found in the Web management program on the Switch Information (Basic Settings) window on the Configuration menu.
The IP address for the Switch must be set before it can be managed with the Web-based manager. The Switch IP address can be automatically set using BOOTP or DHCP protocols, in which case the actual address assigned to the Switch must be known.
Starting at the command line prompt, enter the commands config ipif System ipaddress xxx.xxx.xxx.xxx/yyy.yyy.yyy.yyy. Where the x’s represent the IP address to be assigned to the IP interface named System and the y’s represent the corresponding subnet mask.
Alternatively, you can enter config ipif System ipaddress xxx.xxx.xxx.xxx/z. Where the x’s represent the IP address to be assigned to the IP interface named System and the z represents the corresponding number of subnets in CIDR notation.
The IP interface named System on the Switch can be assigned an IP address and subnet mask which can then be used to connect a management station to the Switch’s Telnet or Web-based management agent
DGS-3710-12C:admin# config ipif System ipaddress 10.90.90.1/8
Command: config ipif System ipaddress 10.90.90.1/8
Success.
DGS-3710-12C:admin#
2

DGS-3710 Series Layer 2 Managed Gigabit Switch CLI Reference Guide
In the above example, the Switch was assigned an IP address of 10.90.90.1 with a subnet mask of 255.0.0.0. The system message Success indicates that the command was executed successfully. The Switch can now be configured and managed via Telnet, SNMP MIB browser and the CLI or via the Web-based management agent using the above IP address to connect to the Switch.
There are a number of helpful features included in the CLI. Entering the ? command will display a list of all of the top-level commands.
DGS-3710-12C:admin#?
Command: ?
Option Description
------------------------------------------------------------------------------
.. |
go to parent directory |
? |
Used to display all commands and specific command usage, |
|
descriptions. |
cable_diag |
cable diagnostic |
cfm |
|
clear |
|
config |
|
create |
|
debug |
|
delete |
|
disable |
|
download |
|
enable |
|
login |
Used to log in a user to the switch's console. |
logout |
Used to log out a user from the switch's console. |
no |
Close IP-MAC Binding debug event and DHCP. |
ping |
Used to test the connectivity between network devices. |
ping6 |
|
reboot |
Used to restart the switch. |
reconfig |
Used to re-telnet to member. |
CTRL+C ESC q Quit SPACE n Next Page ENTER Next Entry a All
When entering a command without its required parameters, the CLI will prompt you with a Next possible completions: message.
DGS-3710-12C:admin#config account
Command: config account
Next possible completions:
Option Description
------------------------------------------------------------------------------
<username> |
The username is between 1 and 15 characters |
DGS-3710-12C:admin# |
|
In this case, the command config account was entered with the parameter <username>. The CLI will then prompt to enter the <username> with the message, Next possible completions:. Every
3

DGS-3710 Series Layer 2 Managed Gigabit Switch CLI Reference Guide
command in the CLI has this feature, and complex commands have several layers of parameter prompting.
In addition, after typing any given command plus one space, users can see all of the next possible sub-commands, in sequential order, by repeatedly pressing the Tab key.
To re-enter the previous command at the command prompt, press the up arrow cursor key. The previous command will appear at the command prompt.
DGS-3710-12C:admin#config account
Command: config account
Next possible completions:
Option Description
------------------------------------------------------------------------------
<username> |
The username is between 1 and 15 characters |
DGS-3710-12C:admin# |
|
In the above example, the command config account was entered without the required parameter
<username>, the CLI returned the Next possible completions: <username> prompt. The up arrow cursor control key was pressed to re-enter the previous command (config account) at the command prompt. Now the appropriate username can be entered and the config account command re-executed.
If a command is entered, that is not recognized by the CLI, the top-level commands will be displayed under the Available commands: prompt.
DGS-3710-12C:admin#the
Available commands:
Option Description
------------------------------------------------------------------------------
.. |
go to parent directory |
? |
Used to display all commands and specific command usage, |
|
descriptions. |
cable_diag |
cable diagnostic |
cfm |
|
clear |
|
config |
|
create |
|
debug |
|
delete |
|
disable |
|
download |
|
enable |
|
login |
Used to log in a user to the switch's console. |
logout |
Used to log out a user from the switch's console. |
no |
Close IP-MAC Binding debug event and DHCP. |
ping |
Used to test the connectivity between network devices. |
ping6 |
|
|
4 |

|
|
|
|
|
DGS-3710 Series Layer 2 Managed Gigabit Switch CLI Reference Guide |
|
|||||||||||
|
|
|
|
|
|
|
|
|
|
|
|
|
|
|
|
|
|
|
|
|
|
|
|
|
|
|
|
|
|||||||
|
|
reboot |
|
|
|
|
|
|
Used to restart the switch. |
|
|||||||
|
|
reconfig |
|
|
|
|
Used to re-telnet to member. |
|
|||||||||
|
|
CTRL+C |
|
ESC |
|
q |
Quit |
SPACE |
|
n |
Next Page |
ENTER |
Next Entry |
a |
All |
|
|
|
|
|
|
|
|
|
|
|
|
|
|
|
|
|
|
|
|
The top-level commands consist of commands such as show or config. Most of these commands require one or more parameters to narrow the top-level command. This is equivalent to show what? or config what? Where the what? is the next parameter.
For example, entering the show command with no additional parameters, the CLI will then display all of the possible next parameters.
DGS-3710-12C:admin#show
Command: show
Next possible completions:
Option Description
------------------------------------------------------------------------------
802.1p |
|
|
802.1x |
|
|
access_profile |
Used to display current access list table. |
|
account |
Used to display user accounts. |
|
accounting |
Used to show accounting state |
|
acct_client |
Used to show RADIUS accounting client. |
|
address_binding |
|
|
arp_spoofing_prevention |
Show ARP spoofing prevention status. |
|
arpentry |
Used to display the ARP table. |
|
attack_log |
Show attack log messages. |
|
auth_client |
Used to show RADIUS authentication client. |
|
auth_diagnostics |
Used to show authentication diagnostics. |
|
auth_session_statistics |
Used to show session statistics. |
|
auth_statistics |
Used to show authentication statistics. |
|
authen |
|
|
authen_enable |
Used to show a user-defined or default or all method |
|
|
lists for promoting user's privilege to Admin level |
|
authen_login |
Used to show a user-defined or default or all method |
|
|
lists of authentication methods for user login |
|
CTRL+C ESC q Quit SPACE n Next Page ENTER Next Entry a All
In the above example, all of the possible next parameters for the show command are displayed. At the next command prompt, the up arrow was used to re-enter the show command, followed by the account parameter. The CLI then displays the user accounts configured on the Switch.
1-3 Command Syntax Symbols
Syntax |
Description |
|
|
angle brackets < > |
Encloses a variable or value. Users must specify the variable or value. |
|
For example, in the syntax |
|
create ipif <ipif_name 12> {<network_address>} <vlan_name 32> |
|
5 |

DGS-3710 Series Layer 2 Managed Gigabit Switch CLI Reference Guide
|
{state [enable | disable]} |
|
users must supply an IP interface name for <ipif_name 12> ,and a |
|
VLAN name for <vlan_name 32> when entering the command. DO |
|
NOT TYPE THE ANGLE BRACKETS. |
|
|
square brackets [ ] |
Encloses a required value or list of required arguments. Only one |
|
value or argument must be specified. For example, in the syntax |
|
create account [admin | operator | user] <username 15> |
|
users must specify either the admin-level, operator-level, or user-level |
|
account when entering the command. DO NOT TYPE THE SQUARE |
|
BRACKETS. |
|
|
vertical bar | |
Separates mutually exclusive items in a list, one of which must be |
|
entered. For example, in the syntax |
|
create account [admin | operator | user] <username 15> |
|
users must specify either the admin, operator or user parameter in the |
|
command. DO NOT TYPE THE VERTICAL BAR. |
|
|
braces { } |
Encloses an optional value or a list of optional arguments. One or |
|
more values or arguments can be specified. For example, in the syntax |
|
reset {[config | system {default}]} {force_agree} |
|
users may choose configure or system in the command. DO NOT |
|
TYPE THE BRACES. |
|
|
parentheses ( ) |
Indicates at least one or more of the values or arguments in the |
|
preceding syntax enclosed by braces must be specified. For example, |
|
in the syntax |
|
config dhcp_relay {hops <value 1-16> | time <sec 0-65535>} (1) |
|
users have the option to specify hops or time or both of them. The "(1)" |
|
following the set of braces indicates at least one argument or value |
|
within the braces must be specified. DO NOT TYPE THE |
|
PARENTHESES. |
|
|
ipif <ipif_name 12> |
12 means the maximum length of the IP interface name. |
metric <value 1-31> |
1-31 means the legal range of the metric value. |
|
|
1-4 |
Line Editing Keys |
|
|
|
|
Keys |
|
Description |
|
|
|
Delete |
|
Delete character under cursor and shift remainder of line to left. |
|
|
|
Backspace |
Delete character to left of cursor and shift remainder of line to left. |
|
|
|
|
CTRL+R |
Toggle on and off. When toggled on, inserts text and shifts previous |
|
|
|
text to right. |
|
|
|
Left Arrow |
Move cursor to left. |
|
|
|
|
Right Arrow |
Move cursor to right |
|
|
|
|
|
|
6 |
DGS-3710 Series Layer 2 Managed Gigabit Switch CLI Reference Guide
Tab |
Help user to select appropriate token. |
|
|
P or p |
Display the previous page. |
|
|
N or n or Space |
Display the next page. |
|
|
CTRL+C |
Escape from displayed pages. |
|
|
ESC |
Escape from displayed pages. |
|
|
Q or q |
Escape from displayed pages. |
|
|
R or r |
refresh the displayed pages |
|
|
A or a |
Display the remaining pages. (The screen display will not pause again.) |
|
|
Enter |
Display the next line. |
|
|
The screen display pauses when the show command output reaches the end of the page.
In the above example, all of the possible next parameters for the show command are displayed. At the next command prompt, the up arrow was used to re-enter the show command, followed by the account parameter. The CLI then displays the user accounts configured on the Switch.
7

DGS-3710 Series Layer 2 Managed Gigabit Switch CLI Reference Guide
Chapter 2 Basic Management
Commands
create account [admin | operator | user] <username 15>
enable password encryption
disable password encryption
config account <username> {encrypt [plain_text | sha_1] <password>}
show account
delete account <username>
show session
show switch
show environment
config temperature [trap | log] state [enable | disable]
config temperature threshold {high <temperature> | low <temperature>}(1)
show serial_port
config serial_port { baud_rate [ 9600 | 19200 | 38400 | 115200] | auto_logout [never | 2_minutes |
5_minutes | 10_minutes |15_minutes]}(1)
enable clipaging
disable clipaging
enable telnet {<tcp_port_number 1-65535>}
disable telnet
enable web {<tcp_port_number 1-65535>}
disable web
save {[config <config_id 1-2> | log | all]}
reboot {force_agree}
reset {[config | system {default}]} {force_agree}
login
logout
clear
config terminal width [default | <value 80-200>]
show terminal width
config external_alarm channel <value 1-4> message <sentence 1-128>
show external_alarm
show device_status
show current_alarm
2-1 create account
Description
This command creates user accounts. The username is between 1 and 15 characters, the password is between 0 and 15 characters. The number of accounts (including admin, operator, and user) is up to eight. By default, there is one administrator account already created. The username for this default account is admin and the password is 1234.
Format
create account [admin | operator |user] <username 15>
8

DGS-3710 Series Layer 2 Managed Gigabit Switch CLI Reference Guide
Parameters
admin - Specifies the name of the admin account.
operator - Specifies the name of the operator account.
user - Specifies the name of the user account.
<username 15> - Specifies a username of up to 15 characters.
Restrictions
Only Administrator-level users can issue this command.
Example
To create the admin-level user “dlink”:
DGS-3710-12C:admin#create account admin dlink
Command: create account admin dlink
Enter a case-sensitive new password:****
Enter the new password again for confirmation:****
Success.
DGS-3710-12C:admin#
To create the operator-level user “Sales”:
DGS-3710-12C:admin##create account operator Sales
Command: create account operator Sales
Enter a case-sensitive new password:****
Enter the new password again for confirmation:****
Success.
DGS-3710-12C:admin#
To create the user-level user “System”:
DGS-3710-12C:admin##create account user System
Command: create account user System
Enter a case-sensitive new password:****
Enter the new password again for confirmation:****
Success.
DGS-3710-12C:admin#
2-2 enable password encryption
Description
The user account configuration information will be stored in the configuration file, and can be applied to the system later. If the password encryption is enabled, the password will be in encrypted form when it is stored in the configuration file. When password encryption is disabled, the password will be in plain text form when it is stored in the configuration file. However, if the
9

DGS-3710 Series Layer 2 Managed Gigabit Switch CLI Reference Guide
created user account directly uses the encrypted password, the password will still be in the encrypted form.
Format
enable password encryption
Parameters
None.
Restrictions
Only Administrator-level users can issue this command.
Example
To enable password encryption:
DGS-3710-12C:admin#enable password encryption
Command: enable password encryption
Success.
DGS-3710-12C:admin#
2-3 disable password encryption
Description
The user account configuration information will be stored in the configuration file, and can be applied to the system later. If the password encryption is enabled, the password will be in encrypted form when it is stored in the configuration file. When password encryption is disabled, the password will be in plain text form when it is stored in the configuration file. However, if the created user account directly uses the encrypted password, the password will still be in the encrypted form.
Format
disable password encryption
Parameters
None.
Restrictions
Only Administrator-level users can issue this command.
10

DGS-3710 Series Layer 2 Managed Gigabit Switch CLI Reference Guide
Example
To disable password encryption:
DGS-3710-12C:admin#disable password encryption
Command: disable password encryption
Success.
DGS-3710-12C:admin#
2-4 config account
Description
When the password information is not specified in the command, the system will prompt the user to input the password interactively. For this case, the user can only input the plain text password.
If the password is present in the command, the user can select to input the password in the plain text form or in the encrypted form. The encryption algorithm is based on SHA-1.
Format
config account <username> {encrypt [plain_text | sha_1] <password>}
Parameters
<username 15> - Specifies the name of the account. The account must already be defined.
encrypt - (Optional) Specifies the encryption type, plain_text or sha_1.
plain_text - Specifies the password in plain text form. For the plain text form, passwords must have a minimum of 0 and a maximum of 15 characters. The password is case-sensitive
sha_1 - Specifies the password in the SHA-1 encrypted form. For the encrypted form password, the length is fixed to 35 bytes long. The password is case-sensitive.
<password> - Specifies the password.
Restrictions
Only Administrator-level users can issue this command.
Example
To configure the user password of the “dlink” account:
DGS-3710-12C:admin#config account dlink
Command: config account dlink
Enter a old password:****
Enter a case-sensitive new password:****
Enter the new password again for confirmation:****
Success.
DGS-3710-12C:admin#
To configure the user password of the “administrator” account:
11

DGS-3710 Series Layer 2 Managed Gigabit Switch CLI Reference Guide
DGS-3710-12C:admin#config account administrator encrypt sha_1
*@&NWoZK3kTsExUV00Ywo1G5jlUKKv+toYg
Command: config account administrator encrypt sha_1 *@&NWoZK3kTsExUV00Ywo1G5jlUKKv+toYg
Success.
DGS-3710-12C:admin#
2-5 show account
Description
This command is used to display user accounts that have been created.
Format show account
Parameters
None.
Restrictions
Only Administrator-level users can issue this command.
Example
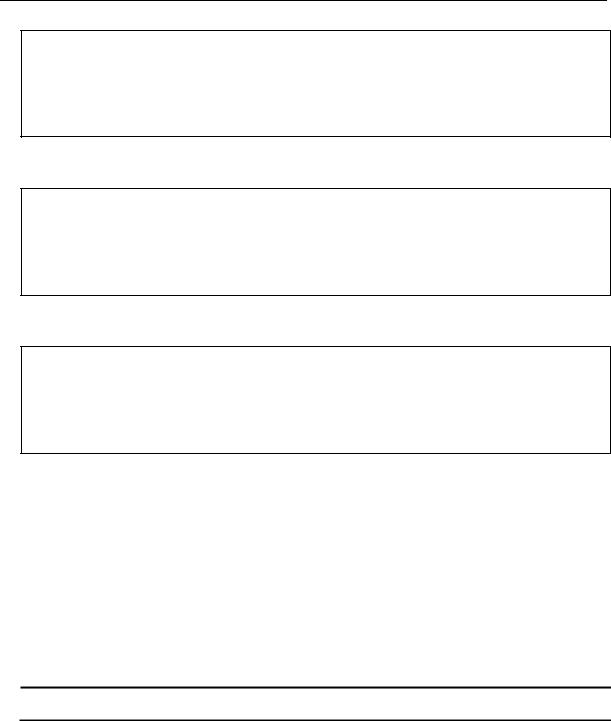
To display accounts that have been created:
DGS-3710-12C:admin#show account |
|
Command: show account |
|
Current Accounts: |
|
Username |
Access Level |
--------------- |
------------ |
System |
User |
Sales |
Operator |
dlink |
Admin |
DGS-3710-12C:admin# |
|
2-6 delete account
Description
This command is used to delete an existing account.
Format
delete account <username>
12
DGS-3710 Series Layer 2 Managed Gigabit Switch CLI Reference Guide
Parameters
<username> - Specifies the name of the user who will be deleted.
Restrictions
Only Administrator-level users can issue this command. One active admin user must exist.
Example
To delete the user account “System”:
DGS-3710-12C:admin#delete account System
Command: delete account System
Success.
DGS-3710-12C:admin#
2-7 show session
Description
This command is used to display a list of current users which are logged in to CLI sessions.
Format show session
Parameters
None.
Restrictions
Only Administrator and Operator-level users can issue this command.
Example
To display accounts a list of currently logged-in users:
DGS-3710-12C:admin#show session
Command: show session
ID |
Live Time |
From |
Level User |
--- |
------------ |
--------------------------------------- |
----- --------------- |
8 |
00:09:59.090 |
Serial Port |
admin Anonymous |
Total Entries: 1
CTRL+C ESC q Quit SPACE n Next Page p Previous Page r Refresh
13

DGS-3710 Series Layer 2 Managed Gigabit Switch CLI Reference Guide
2-8 show switch
Description
This command is used to display the switch information.
Format show switch
Parameters
None.
Restrictions
None.
Example
To display the switch information:
DGS-3710-12C:admin#show switch
Command: show switch
Device Type |
: DGS-3710-12C Gigabit Ethernet Switch |
MAC Address |
: F0-7D-68-25-CB-40 |
IP Address |
: 10.90.90.90 (Manual) |
VLAN Name |
: default |
Subnet Mask |
: 255.0.0.0 |
Default Gateway |
: 0.0.0.0 |
Boot PROM Version |
: Build 1.00.001 |
Firmware Version |
: Build 1.00.029 |
Hardware Version |
: A1 |
Customer ID |
: World-Wide |
System Name |
: |
System Location |
: |
System Uptime |
: 0 days, 1 hours, 35 minutes, 8 seconds |
System Contact |
: |
Spanning Tree |
: Disabled |
GVRP |
: Disabled |
IGMP Snooping |
: Disabled |
MLD Snooping |
: Disabled |
Telnet |
: Enabled (TCP 23) |
Web |
: Enabled (TCP 80) |
SNMP |
: Disabled |
SSL Status |
: Disabled |
CTRL+C ESC q Quit SPACE n Next Page ENTER Next Entry a All
14

DGS-3710 Series Layer 2 Managed Gigabit Switch CLI Reference Guide
2-9 show environment
Description
This command is used to display the device internal and external power and internal temperature status.
Format
show environment
Parameters
None.
Restrictions
None.
Example
To display the switch hardware status:
DGS-3710-12C:admin#show environment
Command: show environment
Left Fan 1 |
: Speed |
0 |
|
Left Fan |
2 |
: Speed |
0 |
Left Fan |
3 |
: Reserved |
|
Current Temperature(Celsius) : |
28 |
|
|
|
Fan High Temperature Threshold(Celsius) |
: |
51 |
||
Fan |
Low Temperature Threshold(Celsius) |
: |
40 |
|
High Warning Temperature Threshold(Celsius) : |
70 |
|||
Low |
Warning Temperature Threshold(Celsius) |
: |
5 |
|
CTRL+C ESC q Quit SPACE n Next Page p Previous Page r Refresh
2-10 config temperature
Description
This command is used to configure the warning trap or log state of the system internal temperature.
Format
config temperature [trap | log] state [enable | disable]
Parameters
trap - Specifies to configure the warning temperature trap.
log - Specifies to configure the warning temperature log.
state - Enable or disable either the trap or log state for a warning temperature event. The default
15

DGS-3710 Series Layer 2 Managed Gigabit Switch CLI Reference Guide
is enable.
enable - Enable either the trap or log state for a warning temperature event. disable - Disable either the trap or log state for a warning temperature event.
Restrictions
None.
Example
To enable the warning temperature trap state:
DGS-3710-12C:admin#config temperature trap state enable
Command: config temperature trap state enable
Success.
DGS-3710-12C:admin#
To enable the warning temperature log state:
DGS-3710-12C:admin#config temperature log state enable
Command: config temperature log state enable
Success.
DGS-3710-12C:admin#
2-11 config temperature threshold
Description
This command is used to configure the warning temperature high threshold or low threshold. When temperature is above the high threshold or below the low threshold, SW will send alarm traps or keep the logs.
Format
config temperature threshold {high <temperature> | low <temperature>}(1)
Parameters
high - Specifies the high threshold value. The high threshold must bigger than the low threshold.
<temperature> - Specifies the high threshold value.
low - Specifies the low threshold value.
<temperature> - Specifies the low threshold value.
Restrictions
None.
16
DGS-3710 Series Layer 2 Managed Gigabit Switch CLI Reference Guide
Example
To configure the alarm temperature threshold high of 80:
DGS-3710-12C:admin#config temperature threshold high 80
Command: config temperature threshold high 80
Success.
DGS-3710-12C:admin#
2-12 show serial_port
Description
This command is used to display the current console port setting.
Format
show serial_port
Parameters
None.
Restrictions
None.
Example
To display the console port setting:
DGS-3710-12C:admin#show serial_port
Command: show serial_port
Baud Rate |
: 115200 |
|
Data Bits |
: 8 |
|
Parity Bits |
: None |
|
Stop Bits |
: |
1 |
Auto-Logout |
: |
10 mins |
DGS-3710-12C:admin#
2-13 config serial_port
Description
This command is used to configure the serial bit rate that will be used to communicate with the management host and the auto logout time for idle connections.
17

DGS-3710 Series Layer 2 Managed Gigabit Switch CLI Reference Guide
Format
config serial_port {baud_rate [9600 | 19200 | 38400 | 115200] | auto_logout [never | 2_minutes | 5_minutes | 10_minutes | 15_minutes]}(1)
Parameters
baud_rate - Specifies the baud rate value. The default baud rate is 115200.
9600 - Specifies a baud rate of 9600.
19200 - Specifies a baud rate of 19200.
38400 - Specifies a baud rate of 38400.
115200 - Specifies a baud rate of 115200.
auto_logout - Specifies the timeout value. The default timeout is 10_minutes. never - Specifies to never timeout.
2_minutes - Specifies when the idle value is over 2 minutes, the device will auto logout. 5_minutes - Specifies when the idle value over 5 minutes, the device will auto logout. 10_minutes - Specifies when the idle value is over 10 minutes, the device will auto logout. 15_minutes - Specifies when the idle value is over 15 minutes, the device will auto logout.
Restrictions
Only Administrator and Operator-level users can issue this command.
Example
To configure the baud rate:
DGS-3710-12C:admin# config serial_port baud_rate 9600
Command: config serial_port baud_rate 9600
Success.
DGS-3710-12C:admin#
2-14 enable clipaging
Description
This command is used to enable pausing of the screen display when show command output reaches the end of the page. The default setting is enabled.
Format
enable clipaging
Parameters
None.
Restrictions
Only Administrator and Operator-level users can issue this command.
18
DGS-3710 Series Layer 2 Managed Gigabit Switch CLI Reference Guide
Example
To enable pausing of the screen display when show command output reaches the end of the page:
DGS-3710-12C:admin#enable clipaging
Command: enable clipaging
Success.
DGS-3710-12C:admin#
2-15 disable clipaging
Description
This command is used to disable pausing of the screen display when show command output reaches the end of the page. The default setting is enabled.
Format
disable clipaging
Parameters
None.
Restrictions
Only Administrator and Operator-level users can issue this command.
Example
To disable pausing of the screen display when show command output reaches the end of the page:
DGS-3710-12C:admin#disable clipaging
Command: disable clipaging
Success.
DGS-3710-12C:admin#
2-16 enable telnet
Description
This command is used to enable Telnet and configure a port number. The default setting is enabled and the port number is 23.
Format
enable telnet {<tcp_port_number 1-65535>}
19

DGS-3710 Series Layer 2 Managed Gigabit Switch CLI Reference Guide
Parameters
<tcp_port_number 1-65535> - (Optional) Specifies the TCP port number. TCP ports are numbered between 1 and 65535. The “well-known” TCP port for the Telnet protocol is 23.
Restrictions
Only Administrator and Operator-level users can issue this command.
Example
To enable Telnet and configure a port number:
DGS-3710-12C:admin#enable telnet 23
Command: enable telnet 23
Success.
DGS-3710-12C:admin#
2-17 disable telnet
Description
This command is used to disable Telnet.
Format disable telnet
Parameters
None.
Restrictions
Only Administrator and Operator-level users can issue this command.
Example
To disable Telnet:
DGS-3710-12C:admin#disable telnet
Command: disable telnet
Success.
DGS-3710-12C:admin#
20

DGS-3710 Series Layer 2 Managed Gigabit Switch CLI Reference Guide
2-18 enable web
Description
This command is used to enable Web UI and configure the port number. The default setting is enabled and the port number is 80.
Format
enable web {<tcp_port_number 1-65535>}
Parameters
<tcp_port_number 1-65535> - (Optional) Specifies the TCP port number. TCP ports are numbered between 1 and 65535. The “well-know” TCP port for the Web protocol is 80.
Restrictions
Only Administrator and Operator-level users can issue this command.
Example
To enable HTTP and configure port number:
DGS-3710-12C:admin#enable web 80
Command: enable web 80
Note: SSL will be disabled if web is enabled.
Success.
DGS-3710-12C:admin#
2-19 disable web
Description
This command is used to disable Web UI.
Format disable web
Parameters
None.
Restrictions
Only Administrator and Operator-level users can issue this command.
21

DGS-3710 Series Layer 2 Managed Gigabit Switch CLI Reference Guide
Example
To disable HTTP:
DGS-3710-12C:admin#disable web
Command: disable web
Success.
DGS-3710-12C:admin#
2-20 save
Description
This command is used to save the current configuration or log in non-volatile RAM.
Format
save {[config <config_id 1-2> | log | all]}
Parameters
config - (Optional) Specifies to save configuration.
<config_id 1-2> - Enter the configuration ID used here. This value can either be 1 or 2.
log - (Optional) Specifies to save log.
all - (Optional) Specifies to save changes to currently active configuration and save logs.
Note: If no keyword is specified, all changes will be saved to bootup configuration file.
Restrictions
Only Administrator and Operator-level users can issue this command.
Example
To save the current configuration to the bootup configuration file:
DGS-3710-12C:admin#save
Command: save
Saving all configurations to NV-RAM.......... |
Done. |
DGS-3710-12C:admin#
To save the current configuration to destination file, named 1:
22
DGS-3710 Series Layer 2 Managed Gigabit Switch CLI Reference Guide
DGS-3710-12C:admin#save config 1
Command: save config 1
Saving all configurations to NV-RAM.......... |
Done. |
DGS-3710-12C:admin#
To save a log to NV-RAM:
DGS-3710-12C:admin#save log
Command: save log
Saving all system logs to NV-RAM............. |
Done. |
DGS-3710-12C:admin#
To save all the configurations and logs to NV-RAM:
DGS-3710-12C:admin#save all
Command: save all
Saving configuration and logs to NV-RAM...... |
Done. |
DGS-3710-12C:admin#
2-21 reboot
Description
This command is used to restart the switch.
Format
reboot {force_agree}
Parameters
force_agree – (Optional) Specifies to immediately execute the reboot command without further confirmation.
Restrictions
Only Administrator -level users can issue this command.
Example
To restart the switch:
23

DGS-3710 Series Layer 2 Managed Gigabit Switch CLI Reference Guide
DGS-3710-12C:admin#reboot
Command: reboot
Are you sure you want to proceed with the system reboot?(y/n) Please wait, the switch is rebooting…
2-22 reset
Description
This command is used to reset all switch parameters to the factory defaults.
Format
reset {[config | system {default}]} {force_agree}
Parameters
config - (Optional) Specifies this keyword and all parameters are reset to default settings.
However, the device will neither save nor reboot.
system - (Optional) Specifies this keyword and all parameters are reset to default settings. Then the switch will do factory reset, save, and reboot.
default – (Optional) Specifies that the System will reset to factory defaults.
force_agree - (Optional) Specifies and the reset command will be executed immediately without further confirmation.
Note: If no keyword is specified, all parameters will be reset to default settings except
IP address, user account, and history log, but the device will neither save nor reboot.
Restrictions
Only Administrator-level users can issue this command.
Example
To reset all the switch parameters except the IP address:
DGS-3710-12C:admin#reset
Command: reset
Are you sure to proceed with system reset except IP address?(y/n) Success.
DGS-3710-12C:admin#
To reset the system configuration settings:
24

DGS-3710 Series Layer 2 Managed Gigabit Switch CLI Reference Guide
DGS-3710-12C:admin#reset config
Command: reset config
Are you sure to proceed with system reset?(y/n)
Success.
DGS-3710-12C:admin#
To reset all system parameters, save, and restart the switch:
DGS-3710-12C:admin#reset system
Command: reset system
Are you sure to proceed with system reset, save and reboot?(y/n) Loading factory default configuration… Done.
Saving all configuration to NV-RAM… Done. Please wait, the switch is rebooting…
2-23 login
Description
This command is used to log in to the switch.
Format login
Parameters
None.
Restrictions
None.
Example
To login to the switch:
DGS-3710-12C:admin#login
Command: login
UserName:
2-24 logout
Description
This command is used to log out of the switch.
25

DGS-3710 Series Layer 2 Managed Gigabit Switch CLI Reference Guide
Format logout
Parameters
None.
Restrictions
None.
Example
To logout of the switch:
DGS-3710-12C:admin#logout
Command: logout
***********
* Logout *
***********
DGS-3710-12C Fast Ethernet Switch
Command Line Interface
Firmware: Build 1.00.029
Copyright(C) 2012 D-Link Corporation. All rights reserved.
Username:
2-25 clear
Description
This command is used to clear the terminal screen.
Format clear
Parameters
None.
Restrictions
None.
Example
To clear the terminal screan:
26
Loading...