


DI-808HV
This product can be set up using
any current web browser, i.e.,
Internet Explorer 6 or Netscape
Navigator 6.2.3.
1. Thank you for purchasing this Router to share your high-speed Internet connection
with other computers. To share high-speed Broadband access, you must have
either an Ethernet-based cable or DSL modem with an established Internet account
from an Internet Service Provider (ISP).
2. It is best to use the same computer that is connected to your modem for
configuring the DI-808HV. The DI-808HV acts as a DHCP server and will assign all
the necessary IP address information on your network. See Appendix at the end
of this Quick Installation Guide or the Manual on the CD-ROM for setting each
network adapter to automatically obtain an IP address.
DI-808HV
8-Port Broadband
VPN Router
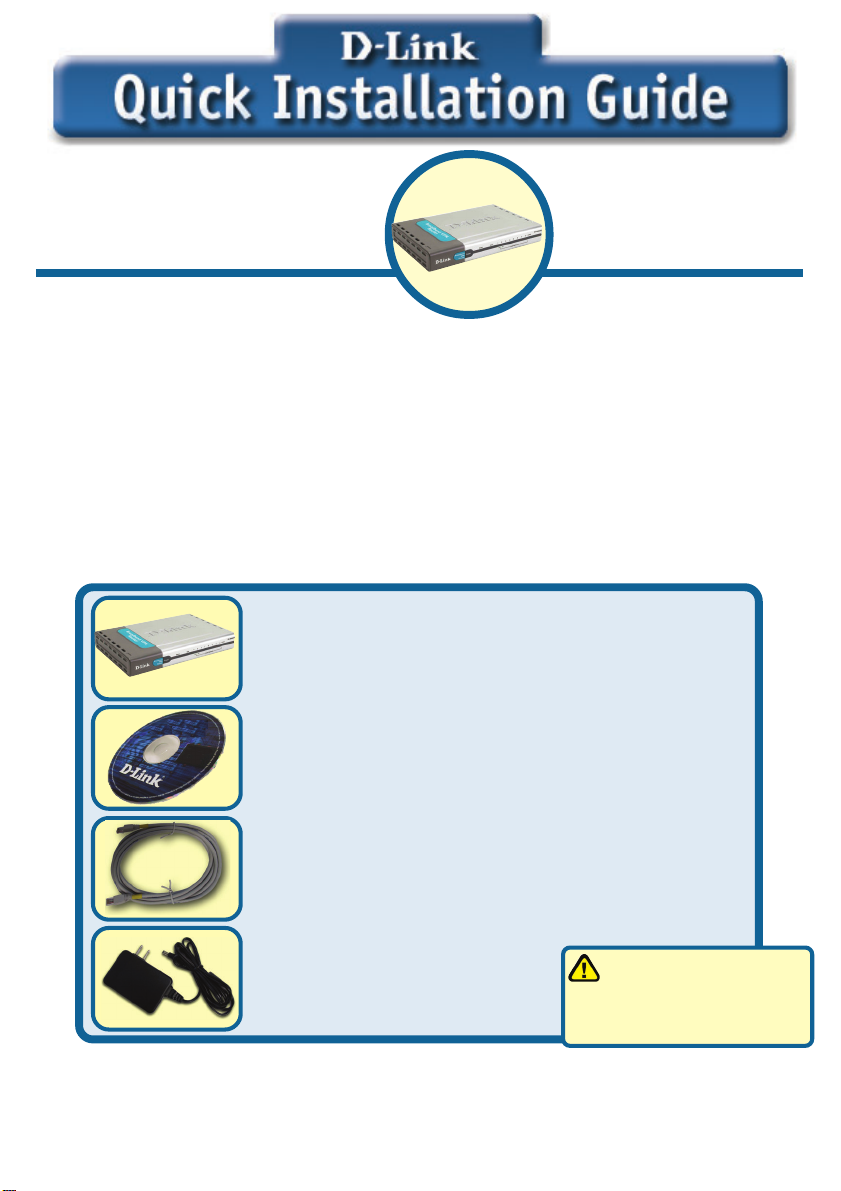
Check Your Package Contents
DI-808HV 8-Port BroadbandVPN Router
CD-ROM (containing Manual and Warranty)
Ethernet (CAT5 UTP/Straight-Through) Cable
5V DC Power Adapter
If any of the above items are missing, please contact your reseller.
©2003 D-Link Systems, Inc. All rights reserved. Trademarks or registered trademarks are the property of their respective holders. Software and
specifications subject to change without notice. DI-808HV. 09192003
1
Using a power supply
with a different voltage
rating will damage this
product and void the warranty
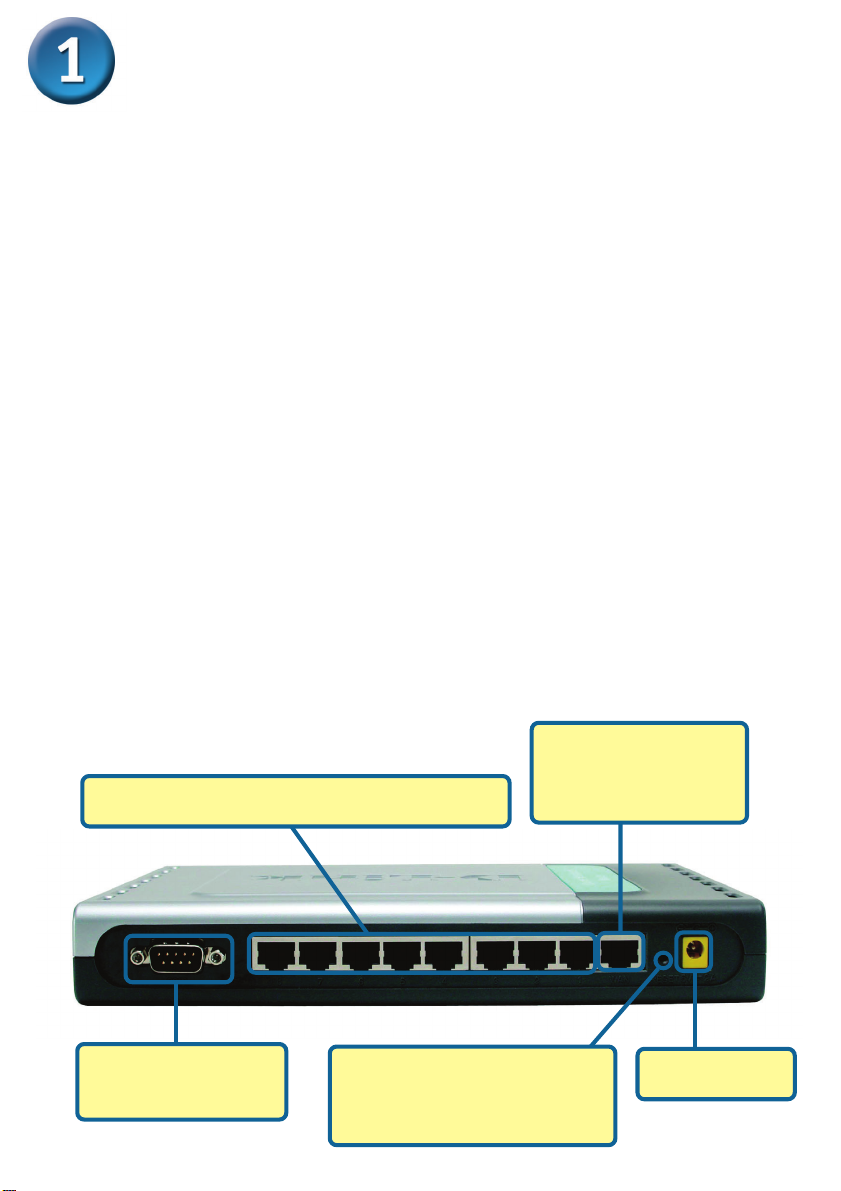
Connecting The DI-808HV 8-Port Broadband VPN Router To Your Network
A. First, connect the power adapter to the receptor at the back panel of the
DI-808HV and then plug the other end of the power adapter to a wall outlet or
power strip. The Power LED lights up indicating proper operation.
B. 1. Power off your cable or DSL modem; devices that do not have a on/off switch
will require you to unplug the power adapter. Now, the DI-808HV should be
powered on and the cable / DSL modem should be turned off.
cable / DSL modem (Power Off) – DI-808HV (Power On)
2.Connect an Ethernet cable to the Ethernet jack located on the cable / DSL
modem. After the Ethernet cable is securely connected, power on the cable / DSL
modem by turning on the unit or plugging in the power adapter.
cable / DSL modem (Power On) – DI-808HV (Power On)
3. Insert the other end of the Ethernet cable to the WAN PORT on the back panel
of the DI-808HV. The WAN LED light will illuminate to indicate proper connection.
If the WAN LED is not illuminated, please check your Ethernet connection or go
back to step B1 and repeat the steps.
C. Insert an Ethernet cable to LAN Port 1 on the back panel of the DI-808HV and an
available Ethernet port on the network adapter in the computer you are using to
configure the DI-808HV. The LED light for LAN Port 1 illuminates to indicate proper
connection. (Note: The LAN Ports on the DI-808HV are Auto MDI/MDIX. Meaning
you can use a straight-through or crossover Ethernet cable in the LAN Ports.)
D.
COM Port for dial-up Internet connection.
C. LAN PORTS These are the connections for
Ethernet cables to Ethernet enabled computers.
D. COM Port Used to
connect to an external
dial-up modem.
Reset Button
Pressing this button restores
the Router to its original factory
default settings.
2
B. WAN PORT This is
for the connection of an
Ethernet cable to the
Cable or DSL modem
A. Receptor for
Power Adapter.
Restart Your Computer
Connecting Additional Computers To
The DI-808HV
Using additional Ethernet (CAT5 UTP) cables, connect your Ethernet-equipped
computers to the remaining Ethernet LAN ports on the back panel of the DI-808HV.
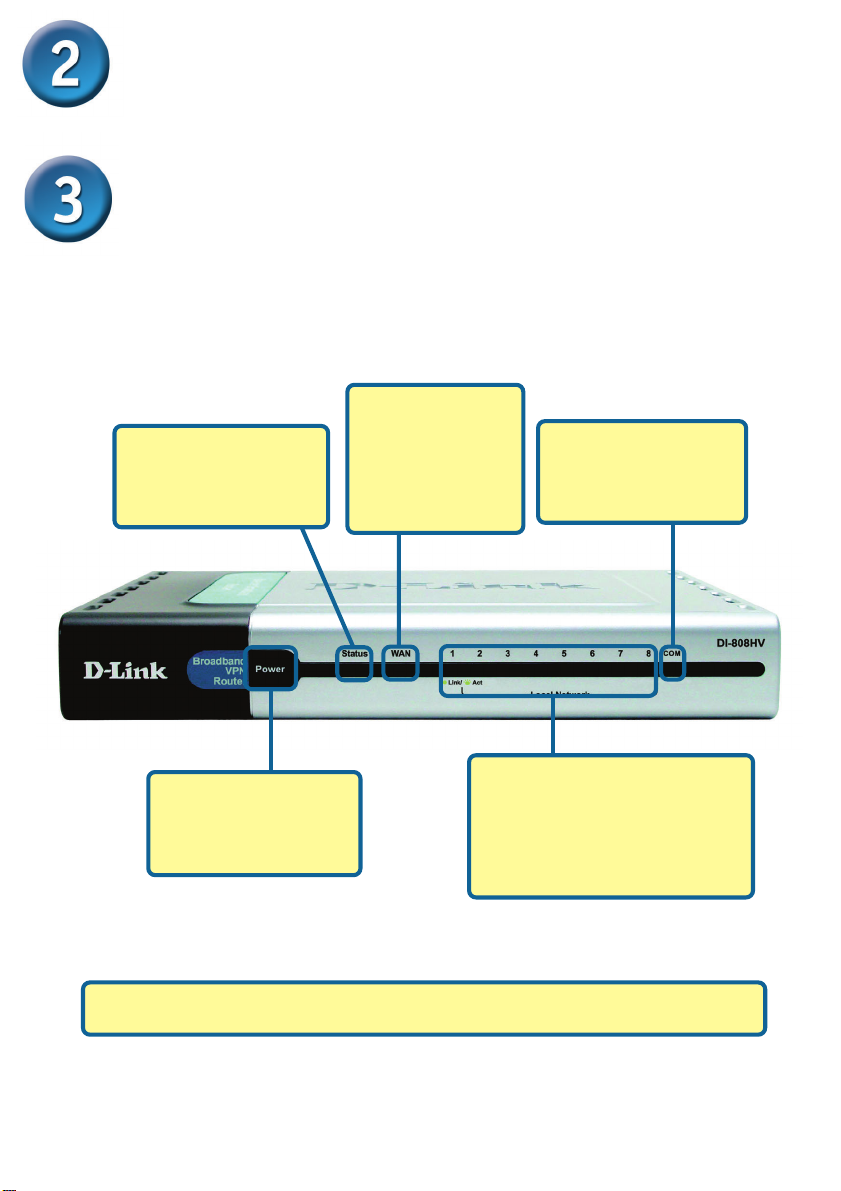
WAN LED – a solid
Status Status
Status – will flash
Status Status
consistently to indicate
that the DI-808HV is
working properly.
light indicates
connection on the
WAN port. This
LED blinks during
data transmission.
COM LED – a solid light
indicates a proper
connection to a dial-up
modem.
Power LED – a solid
light indicates a proper
connection to the
power supply.
The LAN Ports on the DI-808HV are Auto MDI/MDIX. Meaning you can
use a straight-through or crossover Ethernet cable in the LAN Ports.)
Local Network LEDs – a solid
light on the port indicates a
connection to an Ethernet
enabled computer on ports 1-8.
This LED blinks during data
transmission.
3
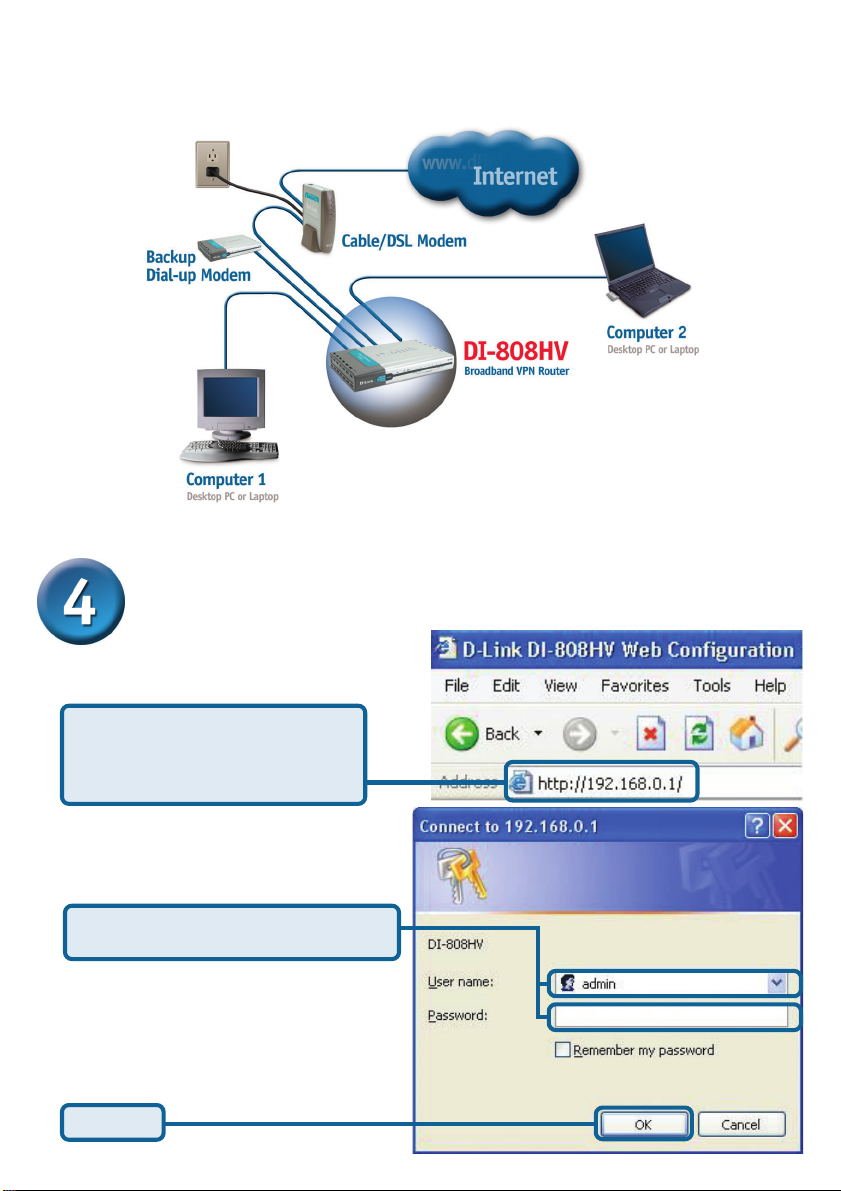
When you have completed the steps in this Quick Installation
Guide, your connected network should look similar to this:
Using The Setup Wizard
Open your Web browser and
type “http://192.168.0.1” into the
URL address box. Then press the
Enter or Return key.
The logon pop-up screen will appear.
Type “admin” for the username and
leave the password field blank.
Click OK
4
 Loading...