


BlackBerry RAN21CN User Guide

For RIM internal use only. Not for external distribution.
BlackBerry Wireless Handheld
User Guide

For RIM internal use only. Not for external distribution.
User Guide
BlackBerry 7750 Wireless Handheld™: 800/1900 MHz CDMA Network
Model Number: RAN21CN
Last modified: 3 December 2003
Part number: PDF-04780-012
At the time of publication, this documentation complies with handheld
software version 3.7.1.
© 2003 Research In Motion Limited. All Rights Reserved. The BlackBerry
and RIM families of related marks, images and symbols are the exclusive
properties of Research In Motion Limited. RIM, Research In Motion, 'Always
On, Always Connected,' the "envelope in motion" symbol, BlackBerry, and
the BlackBerry logo are registered with the U.S Patent and Trademark Office
and may be pending or registered in other countries. All other brands,
product names, company names, trademarks and service marks are the
properties of their respective owners.
The handheld and/or associated software are protected by copyright,
international treaties and various patents, including one or more of the
following U.S. patents: 6,278,442; 6,271,605; 6,219,694; 6,075,470; 6,073,318;
D445,428; D433,460; D416,256. Other patents are registered or pending in
various countries around the world. Visit www.rim.com/patents.shtml for a
current listing of applicable patents.
While every effort has been made to achieve technical accuracy, information
in this document is subject to change without notice and does not represent a
commitment on the part of Research In Motion Limited, or any of its
subsidiaries, affiliates, agents, licensors, or resellers. There are no warranties,
express or implied, with respect to the content of this document.
Licensed by QUALCOMM Incorporated under one or more of the following
United States Patents and/or their counterparts in other nations:
4,901,307 5,490,165 5,056,109 5,504,773 5,101,501
5,506,865 5,109,390 5,511,073 5,228,054 5,535,239
5,267,261 5,544,196 5,267,262 5,568,483 5,337,338
5,600,754 5,414,796 5,657,420 5,416,797 5,659,569
5,710,784 5,778,338
Research In Motion Limited
295 Phillip Street
Waterloo, ON N2L 3W8
Canada
Published in Canada

For RIM internal use only. Not for external distribution.
Contents
Messages.........................................................................................................................7
Email and PIN messages ......................................................... 8
Opening messages............................................................ 8
Sending email and PIN messages .................................. 9
Managing address book attachments .......................... 13
Managing file attachments ............................................ 16
Setting message options ................................................ 19
SMS messages ......................................................................... 20
Opening SMS messages ................................................. 21
Sending SMS messages .................................................. 21
Setting SMS message options ....................................... 24
Managing messages ............................................................... 25
Saving messages ............................................................. 25
Deleting messages .......................................................... 26
Reconciling email messages .......................................... 27
Filing email messages .................................................... 28
Searching for messages.................................................. 29
Marking messages .......................................................... 32
Address book............................................................................................................. ..35
Adding contacts ...................................................................... 36
Managing the address book .................................................. 39
Setting address book options................................................ 42
Phone.............................................................................................................................45
Making phone calls ................................................................ 46
Answering phone calls .......................................................... 50
Using phone features ............................................................. 50
Using speed dial ............................................................. 53
Managing phone call logs ..................................................... 55
Setting phone options ............................................................ 57
Setting call logging ......................................................... 57

For RIM internal use only. Not for external distribution.
Setting call forwarding .................................................. 58
Setting enhanced audio ................................................. 59
Setting general phone options ...................................... 59
Setting smart dialing options........................................ 60
Setting voice privacy sounds ........................................ 62
Setting voice mail options ............................................. 63
Setting TTY options........................................................ 64
Viewing phone information.................................................. 65
Browser..........................................................................................................................67
About the handheld browsers .............................................. 68
Configuring a browser........................................................... 68
Browsing web pages .............................................................. 69
Using bookmarks.................................................................... 73
Managing the browser ........................................................... 78
Setting browser options ......................................................... 80
Calendar........................................................................................................................81
Navigating in the calendar.................................................... 82
Managing appointments and meetings............................... 84
Setting calendar options ........................................................ 91
Other applications............................................................................. .........................93
Tasks......................................................................................... 94
MemoPad................................................................................. 96
Calculator................................................................................. 98
Alarm........................................................................................ 99
Games..................................................................................... 100
BrickBreaker .................................................................. 100
Options.......................................................................................................................103
Handheld options................................................................. 104
About.............................................................................. 105
Applications .................................................................. 105
Auto On/Off .................................................................. 106
AutoText ........................................................................ 107

For RIM internal use only. Not for external distribution.
Browser .......................................................................... 109
Date/Time ...................................................................... 110
Firewall .......................................................................... 111
Localization ................................................................... 112
Location Based Services............................................... 112
Message services........................................................... 113
Network ......................................................................... 113
Owner............................................................................. 114
Profiles............................................................................ 115
Screen/Keyboard........................................................... 119
Security........................................................................... 120
Service book................................................................... 123
SMS ................................................................................. 124
Status .............................................................................. 124
TLS .................................................................................. 124
WAP Push...................................................................... 125
WTLS .............................................................................. 126
Reference...................................................................................................................129
Icons........................................................................................ 130
Troubleshooting.................................................................... 133
Maintenance .......................................................................... 136
Index............................................................................................................................137

For RIM internal use only. Not for external distribution.

For RIM internal use only. Not for ex ternal
distribution.
Messages
This section provides information on the following topics:
• Email and PIN messages
• SMS messages
• Managing messages
1

For RIM internal use only. Not for external distribution.
1: Messages
Email and PIN messages
Email messages that are sent from or received by your handheld are
routed through your email account.
You can also send and receive PIN messages. A personal
identification number (PIN) uniquely identifies each BlackBerry
handheld on the network. If you know another person’s handheld
PIN, you can send a PIN message to that person. PIN messages are
not routed through an email account.
Tip: To locate your handheld PIN, open the options application. The Options
screen appears. Click Status. The PIN field displays your PIN.
Opening messages
You can receive email messages from any email account and you
can receive PIN messages from other BlackBerry handheld users.
Long messages are sent to your handheld in sections. As you read
the first section, the next section appears automatically.
Open a message
1. Open the messages application. The Messages screen appears.
2. Click a message. A menu appears.
3. Click Open. The message appears.
Tip: If, on the Message List Options screen, you set the Auto More field to
No, you can request more of a long message manually. In the open message,
click the trackwheel. A menu appears.
• To request the next section of the message, click More.
• To request the rest of the message, click More All.
Refer to "Set message options" on page 19 for more information.
8 BlackBerry Wireless Handheld
For RIM internal use only. Not for external distribution.
Email and PIN messages
Sending email and PIN messages
Prerequisite: To send messages, the following requirements must be met:
• The wireless coverage indicator must show a level of wireless coverage.
• 1X must appear with the wireless coverage indicator on the Home screen.
Send a message
1. Open the messages application. The Messages screen appears.
2. Click the trackwheel. A menu appears.
3. Select one of the following options:
• To send an email message, click Compose Email. The Select
Address screen appears.
• To send a PIN message, click Compose PIN. The Select
Address screen appears.
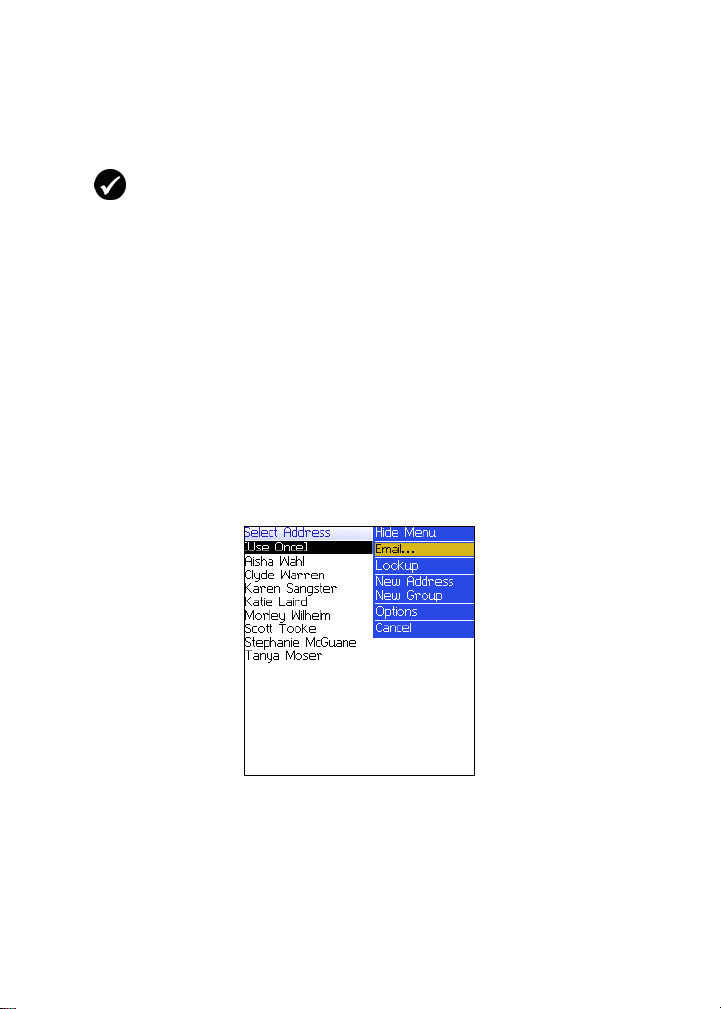
4. Click [Use Once]. A menu appears.
Select Address screen menu — Email item
5. Select one of the following options:
• To send an email message, click Email. The One Time Email
screen appears.
User Guide 9

For RIM internal use only. Not for external distribution.
1: Messages
To send a PIN message, click PIN. The One Time PIN screen
•
appears.
6. Type an email address or PIN number.
7. Click the trackwheel. A menu appears.
8. Click Continue.
Tip: To add additional contacts to your message, click the trackwheel. Click
Add To, Add Cc, or Add Bcc. Repeat steps 4 through 6.
9. In the Subject field, type a subject.
10. Press the Enter key.
11. Type a message.
Tip: To send the message from a specific service (for example, Desktop or
Web Client), scroll to the top of the message. In the Using field, press the
Space key until the preferred service appears. Any subsequent messages are
also sent from this service.
12. Click the trackwheel. A menu appears.
13. Select one of the following options:
• To save a draft of the message without sending it, click Save
Draft.
• To send the message, click Send.
If you send a message and you are not in an area of sufficient
wireless coverage, the handheld sends the message when you
return to an area of sufficient wireless coverage.
Send a message to a contact in your address book
1. Open the address book application. The Find screen appears.
Tip: To search for a contact, type the first letters of the contact.
2. Click a contact. A menu appears.
3. Select one of the following options:
10 BlackBerry Wireless Handheld

For RIM internal use only. Not for external distribution.
Email and PIN messages
To send an email message, click Email <contact name>.
•
• To send a PIN message, click PIN <contact name>.
4. In the Subject field, type a subject.
5. Press the Enter key.
6. Type a message.
7. Click the trackwheel. A menu appears.
8. Click Send. The message is sent.
Send an email message using a link
In messages and on web pages, links appear as underlined text.
1. Click an email address link. A menu appears.
2. Click Email.
3. In the Subject field, type a subject.
4. Press the Enter key.
5. Type a message.
6. Click the trackwheel. A menu appears.
7. Click Send. The message is sent.
Reply to a message
1. Open the messages application. The Messages screen appears.
2. Click a message. A menu appears.
3. Click Open.
4. Click the trackwheel. A menu appears.
5. Select one of the following options:
• To reply to only the sender, click Reply.
User Guide 11

For RIM internal use only. Not for external distribution.
1: Messages
To reply to the sender and all recipients of the original
•
message, click Reply To All.
Tip: To delete the original message from the reply, click the trackwheel. A
menu appears. Click Delete Original Text.
6. Type a message.
7. Click the trackwheel. A menu appears.
8. Click Send. The message is sent.
Forward a message
1. Open the messages application. The Messages screen appears.
2. Click a message. A menu appears.
3. Click Forward. The Select Address screen appears.
4. Click a contact. A menu appears.
5. Select one of the following options:
• To send an email message, click Email <contact name>.
• To send a PIN message, click PIN <contact name>.
6. Type a message.
7. Click the trackwheel. A menu appears.
8. Click Send. The message is sent.
Resend a message
1. Open the messages application. The Messages screen appears.
2. Click a sent message. A menu appears.
3. Click Open. The message appears.
4. Click the trackwheel. A menu appears.
5. Click Resend. The message is sent.
12 BlackBerry Wireless Handheld

For RIM internal use only. Not for external distribution.
Email and PIN messages
Edit and resend a message
1. Open the messages application. The Messages screen appears.
2. Click a sent message. A menu appears.
3. Click Open. The message appears.
4. Click the trackwheel. A menu appears.
5. Click Edit. The message appears.
6. Edit the message.
Tip: To replace a contact, place the cursor in the To field. Click a contact. A
menu appears. Click Change Address.
7. Click the trackwheel. A menu appears.
8. Click Send. The message is sent.
Managing address book attachments
An address book attachment contains contact information that
recipients of the message can view and add to their address book.
Send an address book attachment
1. Open the messages application. The Messages screen appears.
2. Click the trackwheel. A menu appears.
3. Select one of the following options:
• To send an email message, click Compose Email. The Select
Address screen appears.
• To send a PIN message, click Compose PIN. The Select
Address screen appears.
4. Click a contact. A menu appears.
5. Select one of the following options:
• To send an email message, click Email <contact name>.
User Guide 13
For RIM internal use only. Not for external distribution.
1: Messages
To send a PIN message, click PIN <contact name>.
•
6. Type a message.
7. Click the trackwheel. A menu appears.
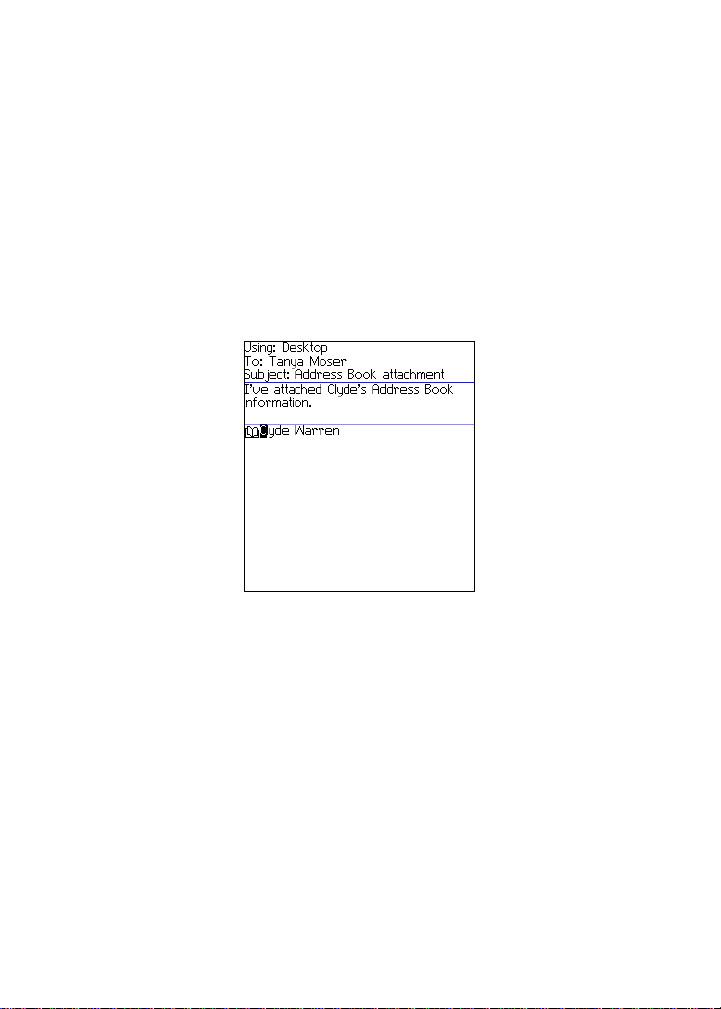
8. Click Attach Address. The Attach screen appears.
9. Click a contact. A menu appears.
10. Click Continue. The contact information is attached to the
message.
Composing a message — Address book attachment
11. Click the trackwheel. A menu appears.
12. Click Send. The message and attachment are sent.
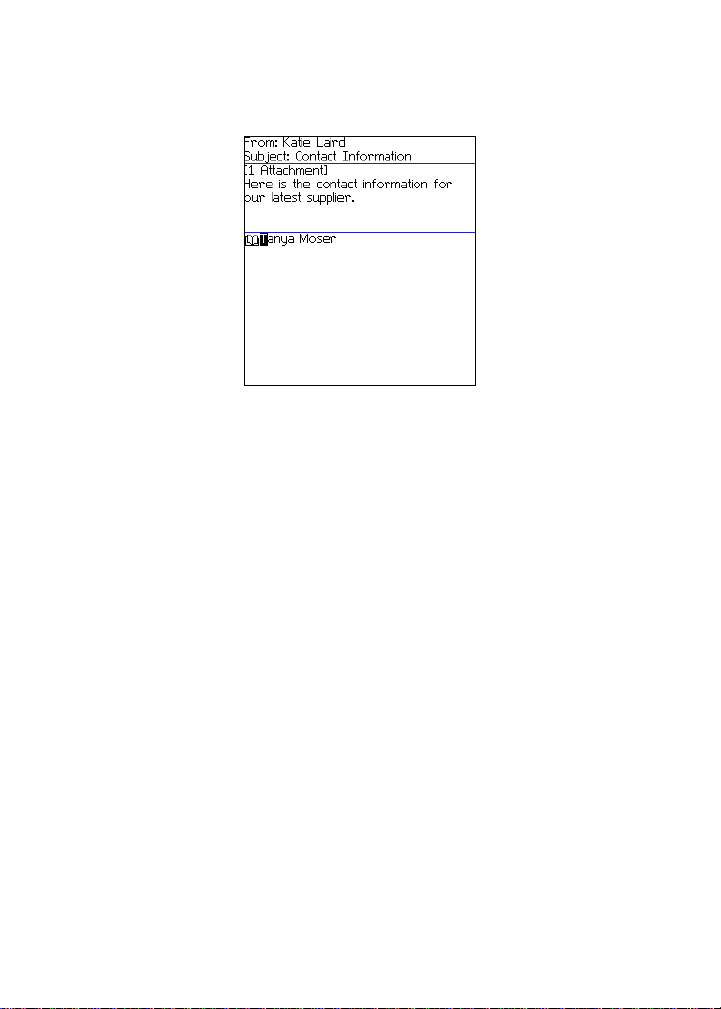
Open an address book attachment
1. In a message with an address book attachment, place the cursor
in the name of the address book attachment.
14 BlackBerry Wireless Handheld
For RIM internal use only. Not for external distribution.
Email and PIN messages
Open email message with address book attachment
2. Click the trackwheel. A menu appears.
3. Click View Attachment. The contact information appears.
4. Click the trackwheel. A menu appears.
5. Select one of the following options:
• To add the contact information to your address book, click
Add To Address Book.
• To update the contact information that is in your address
book, click Update Address.
• To return to the open message, click Close.
User Guide 15

For RIM internal use only. Not for external distribution.
1: Messages
Managing file attachments
If the attachment service is loaded on your handheld, you can open
file attachments on your handheld. You can open attachments with
a .zip, .html, .doc, .ppt, .pdf, .wpd, .txt, or .xls file extension.
Prerequisite: To open file attachments with a .doc, .ppt, .pdf, .wpd, .txt, or
.xls file extension, the following requirements must be met:
• Your handheld must be enabled for attachment service on a BlackBerry
Enterprise Server version 3.6 or later for Microsoft Exchange or a BlackBerry
Enterprise Server version 2.2 or later for Lotus Domino.
To open file attachments with a .zip or .html file extension, the following
additional requirement must be met:
• Your handheld must be enabled for attachment service on a BlackBerry
Enterprise Server version 3.6 Service Pack 1 or later for Microsoft Exchange
or a BlackBerry Enterprise Server version 2.2 Service Pack 1 or later for Lotus
Domino.
Spreadsheet format
Document format
Open the table of contents of a file attachment
1. In a message with a file attachment, click the trackwheel. A
menu appears.
2. Click Open Attachment. The Attachments screen appears.
16 BlackBerry Wireless Handheld

For RIM internal use only. Not for external distribution.
Email and PIN messages
3. Click Table of Contents. A menu appears.
4. Click Retrieve. The table of contents appears.
Tip: To request the content for a table of contents item, click the item. A
menu appears. Click Retrieve. The content appears.
Open a file attachment
1. In a message with a file attachment, click the trackwheel. A
menu appears.
2. Click Open Attachment. The Attachments screen appears.
Note: If you retrieve a .pdf file that is password-protected, you must type the
password. On the Attachments screen, click the trackwheel. A me nu appears.
Click Password. Type the password. Click the trackwheel. The Attachments
screen appears.
3. Click Full Content. A menu appears.
4. Click Retrieve. The content appears.
Tip: In document format, links appear as underlined text. To open a table,
click a table link. A menu appears. Click Retrieve.
Navigate in spreadsheet format
1. In spreadsheet format, click the trackwheel. A menu appears.
2. Select one of the following options:
• To move to a specific worksheet, click Select Worksheet. A
dialog box appears. Click a worksheet.
• To view the previous worksheet, click Prev Sheet.
• To view the next worksheet, click Next Sheet.
• To move to a specific cell, click Go to Cell. A dialog box
appears. Type the cell co-ordinates (for example, C16). Click
the trackwheel.
• To view the contents of a cell, click View Cell.
User Guide 17
For RIM internal use only. Not for external distribution.
1: Messages
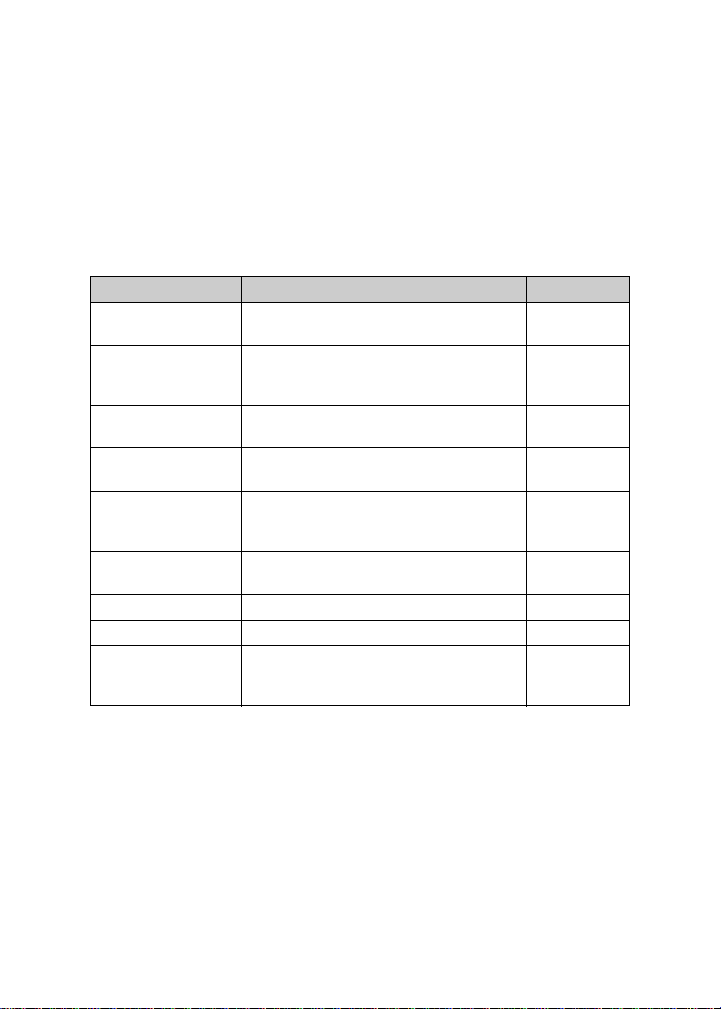
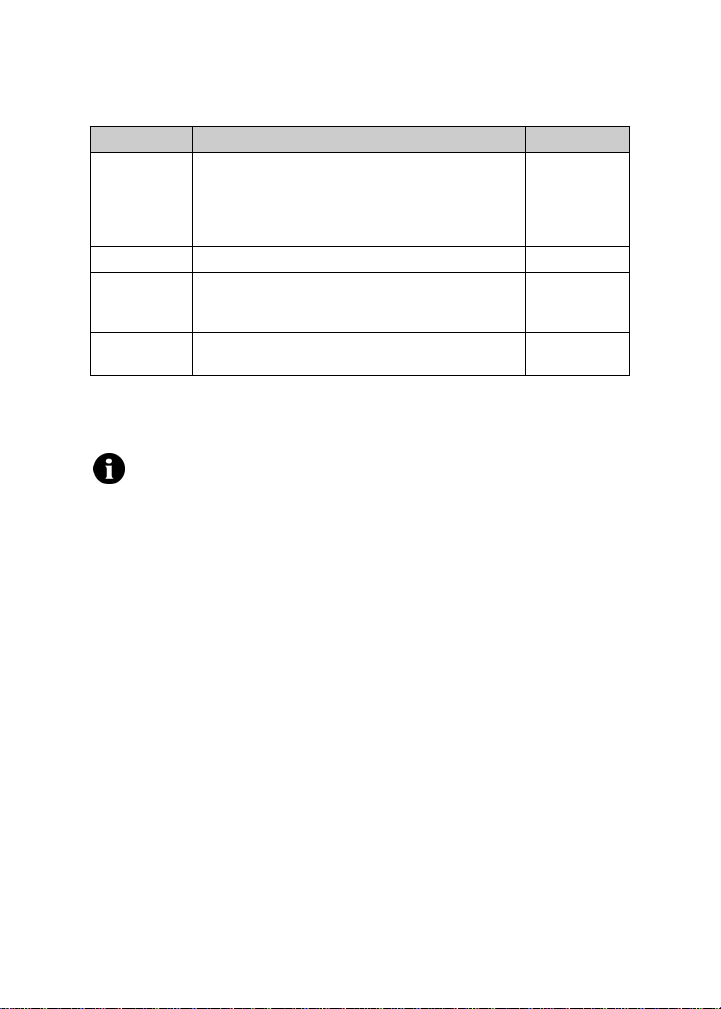
Set file attachment options
1. In a file attachment, click the trackwheel. A menu appears.
2. Click Options. The Options screen appears.
3. In the following fields, press the Space key until the preferred
option appears:
Field Description Default
Sheet Outline Cells Set whether the grid appears in
Sheet Horizontal
Scroll
Sheet Vertical
Scroll
Sheet Column
Width
Sheet Display
Labels
Case Sensitive
Search
Font Family Set the font for attachments. BBMillbank
Font Size Set the font size for attachments. 10
Cache Size Set how much handheld memory can be
spreadsheet format.
Set whether the information in cells
wraps around when you scroll
horizontally.
Set whether the information in cells
wraps around when you scroll vertically.
Set the column width for the spreadsheet. Medium
Set whether spreadsheet columns are
labeled with letters and rows are labeled
with numbers.
Set whether the Find feature is casesensitive when it searches attachments.
used by attachments that you have
viewed on your handheld.
Yes
No
No
Yes
No
500 KB
4. Click the trackwheel. A menu appears.
5. Click Save. The options are saved.
18 BlackBerry Wireless Handheld

For RIM internal use only. Not for external distribution.
Email and PIN messages
Setting message options
Prerequisite: To set the Hide Filed Messages and Delete On options, your
handheld must be integrated with an email account using the BlackBerry
Enterprise Server or the BlackBerry Desktop Redirector.
To set the Wireless Reconcile and Conflicts options, one of the following
requirements must be met:
• Your handheld must be enabled for wireless email reconciliation on a
BlackBerry Enterprise Server version 3.6 or later for Microsoft Exchange or a
BlackBerry Enterprise Server version 2.2 or later for Lotus Domino.
• Your handheld must be enabled for wireless email reconciliation on the
BlackBerry Web Client. Contact your service provider for more information
on whether this option is available.
Set message options
1. Open the messages application. The Messages screen appears.
2. Click the trackwheel. A menu appears.
3. Click Options. The Message List Options screen appears.
4. In the following fields, press the Space key until the preferred
option appears:
Field Description Default
Display
Time
Display
Name
Confirm
Delete
Hide Filed
Messages
Consider
PIN Level 1
Auto More Set whether the next section of a long message or
Set whether the Messages screen displays the time
that a message is sent or received.
Set whether the Messages screen displays the
name of the sender or recipient.
Set whether you are prompted before messages
are deleted.
Set whether the Messages screen displays filed
email messages.
Set whether PIN messages are considered as highimportance messages.
attachment is delivered to your handheld
automatically.
Yes
Yes
Yes
No
Yes
Yes
User Guide 19

For RIM internal use only. Not for external distribution.
1: Messages
Field Description Default
Delete On Set whether email messages are deleted from your
Wireless
Reconcile
Conflicts Set whether your handheld or your computer takes
5. Click the trackwheel. A menu appears.
6. Click Save. The options are saved.
handheld only or from both your handheld and
computer during an email reconciliation.
Set whether messages are reconciled over the
wireless network between your handheld and your
computer.
precedence if a message is moved or deleted from
both locations.
Handheld
On
Mailbox
wins
Set the importance level of a message
1. In a message, click the trackwheel. A menu appears.
2. Click Options. The Current Message Options screen appears.
3. In the following field, press the Space key until the preferred
option appears:
Field Description Default
Importance Set the priority level of the message. Normal
4. Click the trackwheel. A menu appears.
5. Click Save. The option is saved.
SMS messages
If you have an SMS-compatible phone number, you can send and
receive Short Message Service (SMS) messages. An SMS-compatible
number is a phone number (work, home, mobile, or pager) that
your service provider has enabled for SMS.
20 BlackBerry Wireless Handheld
For RIM internal use only. Not for external distribution.
SMS messages
Opening SMS messages
Open an SMS message
1. Open the messages application. The Messages screen appears.
2. Click an SMS message. A menu appears.
3. Click Open. The message appears.
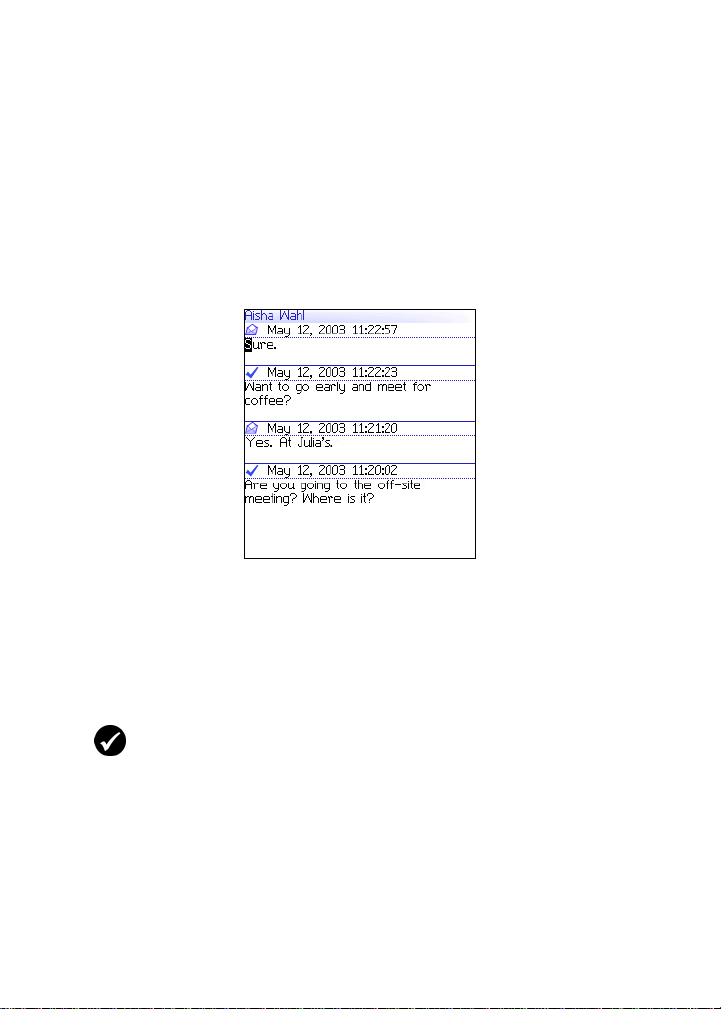
SMS message
Sending SMS messages
You can send SMS messages to contacts who have an SMScompatible phone number. SMS messages can contain up to 160
characters.
Prerequisite: To send SMS messages, the following requirements must be
met:
• The wireless coverage indicator must show a level of wireless coverage.
• 1X, 1x, or D must appear with the wireless coverage indicator on the Home
screen.
Send an SMS message
1. Open the messages application. The Messages screen appears.
User Guide 21
For RIM internal use only. Not for external distribution.
1: Messages
2. Click the trackwheel. A menu appears.
3. Click Compose SMS. The SMS screen appears.
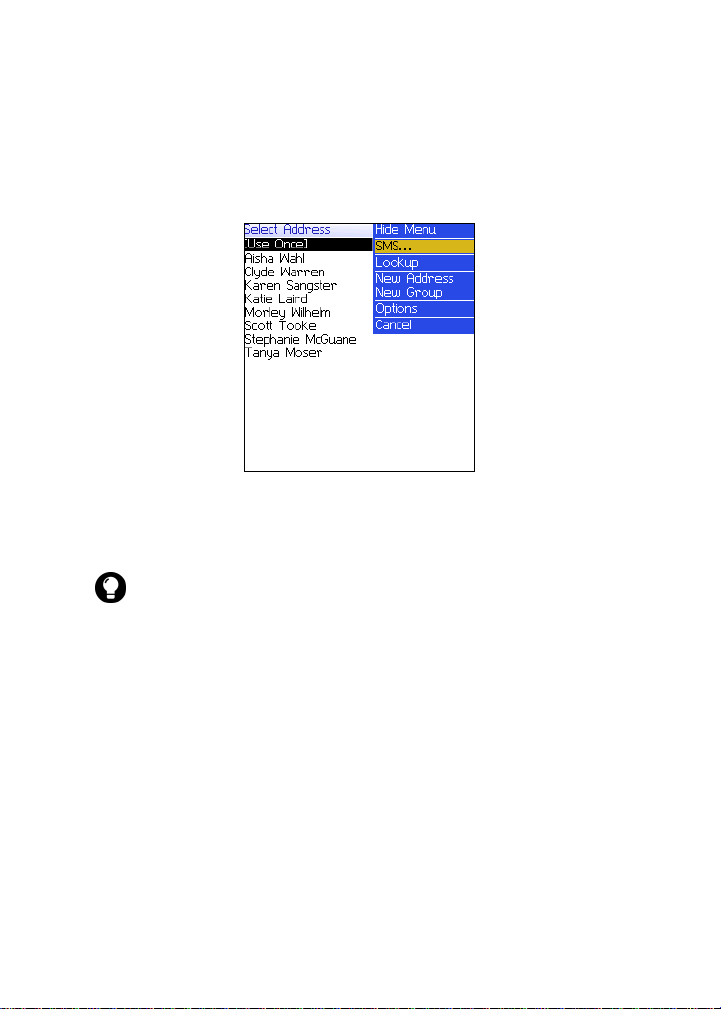
4. Click [Use Once]. A menu appears.
SMS screen menu — SMS item
5. Click SMS. The One Time SMS screen appears.
6. Type your contact’s SMS-compatible phone number.
Tip: Contact your service provider for more information on setting an SMScompatible number for your contact. Your service provider mi ght require that
all SMS-compatible phone numbers include the area code and other prefixes.
7. Click the trackwheel. A menu appears.
8. Click Continue.
9. Type a message.
10. Click the trackwheel. A menu appears.
11. Click Send. The message is sent.
22 BlackBerry Wireless Handheld

For RIM internal use only. Not for external distribution.
SMS messages
If you send a message and you are not in an area of sufficient
wireless coverage, the handheld sends the message when you
return to an area of sufficient wireless coverage
Note: Sending an SMS message to a wireless device that is registered on a
different wireless network might not function as expected. Contact your
service provider for more information on sending SMS messages between
wireless networks.
.
Send an SMS message to a contact in your address
book
1. Open the address book application. The Find screen appears.
2. Click a contact with an SMS-compatible number. A menu
appears.
3. Click SMS <contact name>.
4. Type a message.
5. Click the trackwheel. A menu appears.
6. Click Send. The message is sent.
Reply to an SMS message
1. Open the messages application. The Messages screen appears.
2. Click an SMS message. A menu appears.
3. Click Reply.
Tip: To delete the previous SMS messages from the screen, click the
trackwheel. A menu appears. Click Remove History.
4. Type a message.
5. Click the trackwheel. A menu appears.
6. Click Send. The message is sent.
User Guide 23

For RIM internal use only. Not for external distribution.
1: Messages
Forward an SMS message
1. Open the messages application. The Messages screen appears.
2. Click an SMS message. A menu appears.
3. Click Forward. The SMS screen appears.
4. Click a contact with an SMS-compatible number. A menu
appears.
5. Click SMS <contact name>.
6. Type a message.
7. Click the trackwheel. A menu appears.
8. Click Send. The message is sent.
Resend an SMS message
1. Open the messages application. The Messages screen appears.
2. Click an SMS message. A menu appears.
3. Click Open. The message appears.
4. Click the trackwheel. A menu appears.
5. Click Resend. The message is sent.
Setting SMS message options
1. Open the options application. The Options screen appears.
2. Click SMS. The SMS screen appears.
3. In the following fields, press the Space key until the preferred
option appears:
Field Description Default
Delivery
Reports
24 BlackBerry Wireless Handheld
Set whether you receive notification when your
SMS message is delivered to the contact.
Off
For RIM internal use only. Not for external distribution.
Managing messages
Field Description Default
Delivery
Period
Priority Set the priority level of SMS messages Normal
Number of
Previous
Items
Callback
Number
4. Click the trackwheel. A menu appears.
5. Click Save. The options are saved.
Note: Depending on your service provider plan, some SMS message options
might not be available on your handheld. Contact your service provider for
information on available options.
Set how long the service center keeps an SMS
message if it cannot be delivered to your contact
immediately. The time that you set in t his fie l d
begins when the service center receives the SMS
message.
Set the number of previous SMS messages that
appear when you view an SMS message.
Set a callback number that appears on your SMS
messages.
Immediate
7
Your SMS
number
Managing messages
Saving messages
You can save important messages in the saved messages
application. If your handheld must delete messages to free memory,
it does not delete saved messages.
Save a message
1. Open the messages application. The Messages screen appears.
2. Click a message. A menu appears.
3. Click Save. The message is saved.
User Guide 25

For RIM internal use only. Not for external distribution.
1: Messages
Deleting messages
You should delete unnecessary messages from your handheld. If
your handheld memory is full, your handheld deletes the oldest
messages from the messages application to accommodate new ones.
Delete a message
Note: If, on the Message List Options screen, the Delete On option is set to
Mailbox & Handheld, messages that you delete on your handheld are also
deleted from your computer during email reconciliation. Refer to "Set
message options" on page 19 for more information.
1. Select one of the following options:
• To delete a message from the messages application, open the
messages application. The Messages screen appears.
• To delete a saved message, open the saved messages
application. The Saved Messages screen appears.
2. Click a message. A menu appears.
3. Click Delete. A dialog box appears.
4. Click Delete. The message is deleted.
Delete messages prior to a specific date
1. Select one of the following options:
• To delete messages from the messages application, open the
messages application. The Messages screen appears.
• To delete saved messages, open the saved messages
application. The Saved Messages screen appears.
2. Click a date. A menu appears.
3. Click Delete Prior. A dialog box appears.
26 BlackBerry Wireless Handheld

For RIM internal use only. Not for external distribution.
Managing messages
4. Click Delete. The messages are deleted.
Note: Email messages that are deleted using the Delete Prior menu item
are not deleted from your computer during email reconciliation.
Empty the deleted messages folder on your computer
from your handheld
Prerequisite: To delete messages from the Deleted Items folder on your
computer, the following requirements must be met:
• Your handheld must be enabled for wireless email reconciliation on the
BlackBerry Enterprise Server version 3.6 or later for Microsoft Exchange.
Refer to "Set message options" on page 19 for more information.
1. Open the messages application. The Messages screen appears.
2. Click the trackwheel. A menu appears.
3. Click Options. The Message List Options screen appears.
4. Click the trackwheel. A menu appears.
5. Click Purge Deleted Items. A dialog box appears.
6. Click Yes. The Deleted Items folder on your computer is
emptied.
Reconciling email messages
When email messages are reconciled, any message that you open,
file, or delete on your handheld is also opened, filed, or deleted on
your computer depending on how you set your message options.
Note: If you use Lotus Notes, opened and unopened messages are not
reconciled between your computer and your handheld.
User Guide 27

For RIM internal use only. Not for external distribution.
1: Messages
If wireless email reconciliation is not enabled on your handheld,
you must use the BlackBerry Desktop Software to reconcile your
handheld and desktop messages. Refer to the Desktop Software:
Intellisync Help for more information.
Note: If you use Microsoft Outlook, and you use personal folders to manage
email messages, you must reconcile your personal folders manually using the
desktop software, even if you have enabled wireless email reconciliation.
Refer to the
Desktop Software: Intellisync Help
for more information.
If wireless email reconciliation is enabled on your handheld, your
handheld and desktop messages are reconciled over the wireless
network automatically. Refer to "Set message options" on page 19
for more information on enabling wireless email reconciliation.
Tip: If wireless email reconciliation is enabled on your handheld, and some
messages have not been reconciled between your desktop and handheld,
you can reconcile email messages manually. Open the messages application.
The Messages screen appears. Click the trackwheel. A menu appears. Click
Reconcile Now.
Filing email messages
Prerequisite: To file email messages, the following requirements must be
met:
• Your handheld must be integrat ed with an email account using the
BlackBerry Enterprise Server or the BlackBerry Desktop Redirector.
• You have created folde rs in your deskto p email program.
• You have reconciled your email messages so that the folders from your
desktop email program appear on your handheld.
File an email message
1. Open the messages application. The Messages screen appears.
2. Click an email message. A menu appears.
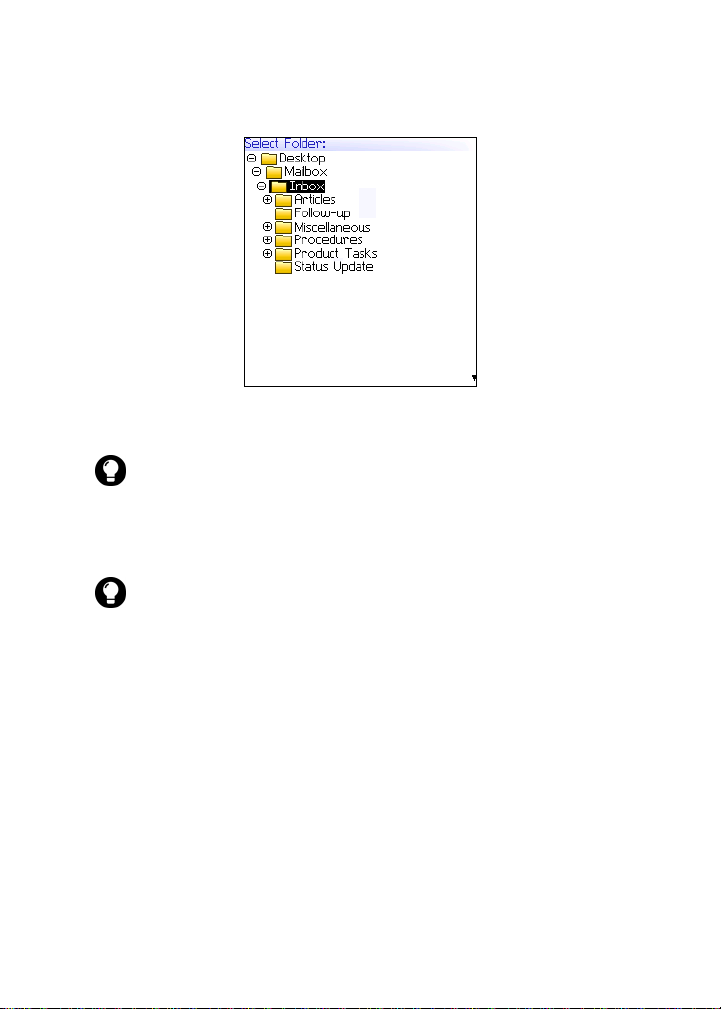
3. Click File. The Select Folder screen appears.
28 BlackBerry Wireless Handheld
For RIM internal use only. Not for external distribution.
Managing messages
Select Folder screen
4. Click a folder. A menu appears.
Tip: To expand a folder on the Select Folder screen, click a folder with a plus
sign (+) beside it. A menu appears. Click Expand.
To collapse a folder, click a folder with a minus sign (-) beside it. A menu
appears. Click Collapse.
5. Click File. The message is filed.
Tip: To display filed messages on the Messages screen, set the Hide Filed
Messages option on the Message List Options screen to No.
To remove a filed message from a folder, file the message in the Inbox folder.
Searching for messages
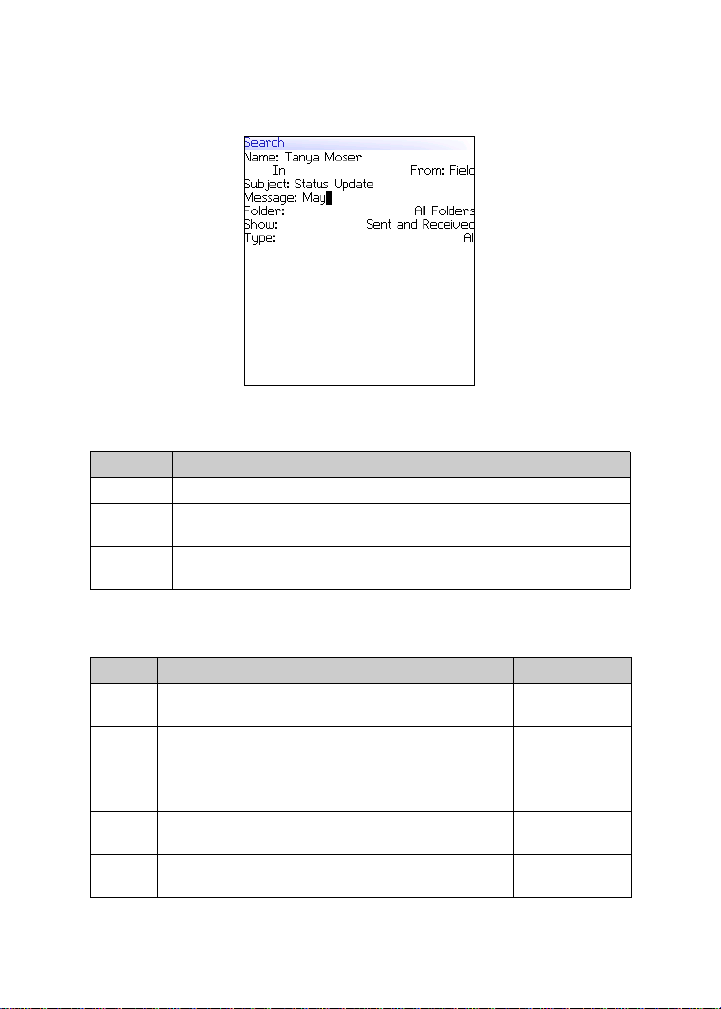
Search for a message
1. Open the search messages application. The Search screen
appears.
User Guide 29
For RIM internal use only. Not for external distribution.
1: Messages
Search screen — Specifying search criteria
2. In one or more of the following fields, type message information:
Field Description
Name Type a name, email address, PIN, or phone number.
Subject Type text that the handheld should search for in the subject of
messages.
Message Type text that the handheld should search for in the body of
messages.
3. In one or more of the following fields, press the Space key until
the preferred option appears:
Field Description Default
In Set the address field in which you want to search. Any Address
Field
Folder Set the folder in which you want to search.
! To select a folder, press the Space key. The Select
All Folders
Folder screen appears. Click a folder. A menu
appears. Click Select Folder.
Show Set whether you want to search for sent, received, or
saved messages.
Type Set the type of message for which you want to
Sent and
Received
All
search.
30 BlackBerry Wireless Handheld
 Loading...