


Adobe®
Audition™ 1.5
User Guide

© 2004 Adobe Systems Incorporated. All rights reserved.
Adobe® Audition™ 1.5 User Guide for Windows®.
If this guide is distributed with software that includes an end-user agreement, this guide, as well as the software described in it, is furnished under license and may be used or copied only in accordance with the terms of such license. Except as permitted by any such license, no part of this guide may be reproduced, stored in a retrieval system, or transmitted, in any form or by any means, electronic, mechanical, recording, or otherwise, without the prior written permission of Adobe Systems Incorporated. Please note that the content in this guide is protected under copyright law even if it is not distributed with software that includes an end-user license agreement.
The content of this guide is furnished for informational use only, is subject to change without notice, and should not be construed as a commitment by Adobe Systems Incorporated. Adobe Systems Incorporated assumes no responsibility or liability for any errors or inaccuracies that may appear in the informational content contained in this guide.
Please remember that existing artwork or images that you may want to include in your project may be protected under copyright law. The unauthorized incorporation of such material into your new work could be a violation of the rights of the copyright owner. Please be sure to obtain any permission required from the copyright owner.
Any references to company names in sample templates are for demonstration purposes only and are not intended to refer to any actual organization.
Adobe, the Adobe logo, Adobe Audition, Adobe Encore DVD, Adobe Premiere, and After Effects are either registered trademarks or trademarks of Adobe Systems Incorporated in the United States and/or other countries. Apple, Macintosh, and Mac OS are trademarks of Apple Computer, Inc., registered in the U. S. and other countries. Microsoft, Windows, and Windows NT are registered trademarks of Microsoft Corporation in the U.S. and/or other countries. mp3PRO audio coding technology licensed from Coding Technologies, Fraunhofer IIS and Thomson Multimedia. VST is a trademark of Steinberg Media Technologies AG. ReWire is a product of Propellerhead Software. All other trademarks are the property of their respective owners.
Supply of this product does not convey a license nor imply any right to distribute MP3-encoded or mp3PRO-encoded data created with this product in revenue-generating broadcast systems (terrestrial, satellite, cable, and/or other distribution channels), streaming applications (via Internet, intranets, and/or other networks), other content distribution systems (pay-audio or audio-on-demand applications and the like) or on physical media (compact discs, digital versatile discs, semiconductor chips, hard drives, memory cards, and the like). An independent license for such use is required. For details, please visit http://mp3licensing.com
Notice to U.S. government end users. The software and documentation are “Commercial Items,” as that term is defined at 48 C.F.R. §2.101, consisting of “Commercial Computer Software” and “Commercial Computer Software Documentation,” as such terms are used in 48 C.F.R. §12.212 or 48 C.F.R. §227.7202, as applicable. Consistent with 48 C.F.R. §12.212 or 48 C.F.R. §§227.7202-1 through 227.7202-4, as applicable, the Commercial Computer Software and Commercial Computer Software Documentation are being licensed to U.S. Government end users (a) only as Commercial items and (b) with only those rights as are granted to all other end users pursuant to the terms and conditions herein. Unpublished-rights reserved under the copyright laws of the United States. Adobe Systems Incorporated, 345 Park Avenue, San Jose, CA 95110-2704, USA. For U.S. Government End Users, Adobe agrees to comply with all applicable equal opportunity laws including, if appropriate, the provisions of Executive Order 11246, as amended, Section 402 of the Vietnam Era Veterans Readjustment Assistance Act of 1974 (38 USC 4212), and Section 503 of the Rehabilitation Act of 1973, as amended, and the regulations at 41 C.F.R Parts 60-1 through 6060, 60-250, and 60-741. The affirmative action clause and regulations contained in the preceding sentence shall be incorporated by reference.
Part number: 90050796 (05/2004)

iii
Contents |
|
|
|
Learning about Adobe Audition |
|
|
Getting help . . . . . . . . . . . . . . . . . . . . . . . . . . . . . . . . . . . . . . . . . . . . . . . . . |
. 1 |
|
Working with Adobe Audition . . . . . . . . . . . . . . . . . . . . . . . . . . . . . . . . |
. 3 |
|
What’s New in Adobe Audition 1.5 |
|
|
Use integrated tools . . . . . . . . . . . . . . . . . . . . . . . . . . . . . . . . . . . . . . . . . . |
. 5 |
|
Sound your best . . . . . . . . . . . . . . . . . . . . . . . . . . . . . . . . . . . . . . . . . . . . . |
. 6 |
|
Work efficiently . . . . . . . . . . . . . . . . . . . . . . . . . . . . . . . . . . . . . . . . . . . . . . |
. 7 |
Chapter 1 |
Looking at the Work Area |
|
|
About the work area . . . . . . . . . . . . . . . . . . . . . . . . . . . . . . . . . . . . . . . . . |
. 9 |
|
About using Edit View and Multitrack View . . . . . . . . . . . . . . . . . . . . |
10 |
|
Switching between views . . . . . . . . . . . . . . . . . . . . . . . . . . . . . . . . . . . . |
11 |
|
Choosing commands . . . . . . . . . . . . . . . . . . . . . . . . . . . . . . . . . . . . . . . . . |
12 |
|
Using toolbars . . . . . . . . . . . . . . . . . . . . . . . . . . . . . . . . . . . . . . . . . . . . . . . |
13 |
|
Using windows . . . . . . . . . . . . . . . . . . . . . . . . . . . . . . . . . . . . . . . . . . . . . . |
14 |
|
Navigating in the display window . . . . . . . . . . . . . . . . . . . . . . . . . . . . . |
17 |
|
Using the status bar . . . . . . . . . . . . . . . . . . . . . . . . . . . . . . . . . . . . . . . . . . |
21 |
|
Undoing and redoing changes . . . . . . . . . . . . . . . . . . . . . . . . . . . . . . . |
22 |
|
Organizing files and effects . . . . . . . . . . . . . . . . . . . . . . . . . . . . . . . . . . . |
24 |
|
Working with effects . . . . . . . . . . . . . . . . . . . . . . . . . . . . . . . . . . . . . . . . . |
28 |
Chapter 2 |
Setting up Adobe Audition |
|
|
About setting up Adobe Audition . . . . . . . . . . . . . . . . . . . . . . . . . . . . . |
35 |
|
Setting up devices . . . . . . . . . . . . . . . . . . . . . . . . . . . . . . . . . . . . . . . . . . . |
36 |
|
Setting Adobe Audition preferences . . . . . . . . . . . . . . . . . . . . . . . . . . |
43 |
|
Managing temporary files . . . . . . . . . . . . . . . . . . . . . . . . . . . . . . . . . . . . |
57 |

iv CONTENTS
Chapter 3 |
Importing, Recording, and Playing Audio |
|
|
Opening audio files and multitrack sessions . . . . . . . . . . . . . . . . . . |
. 61 |
|
Inserting audio files into multitrack sessions . . . . . . . . . . . . . . . . . |
. 63 |
|
Importing audio from CD . . . . . . . . . . . . . . . . . . . . . . . . . . . . . . . . . . . . |
. 64 |
|
Setting the current-time indicator . . . . . . . . . . . . . . . . . . . . . . . . . . . |
. 68 |
|
Monitoring time . . . . . . . . . . . . . . . . . . . . . . . . . . . . . . . . . . . . . . . . . . . . |
. 69 |
|
Using the transport controls . . . . . . . . . . . . . . . . . . . . . . . . . . . . . . . . . |
. 71 |
|
Recording audio . . . . . . . . . . . . . . . . . . . . . . . . . . . . . . . . . . . . . . . . . . . . |
. 72 |
|
Playing audio . . . . . . . . . . . . . . . . . . . . . . . . . . . . . . . . . . . . . . . . . . . . . . . |
. 75 |
|
Stopping, pausing, and adjusting the playback cursor . . . . . . . . |
. 78 |
|
Monitoring recording and playback levels . . . . . . . . . . . . . . . . . . . . |
. 79 |
Chapter 4 |
Editing Audio |
|
|
About editing audio . . . . . . . . . . . . . . . . . . . . . . . . . . . . . . . . . . . . . . . . . |
. 83 |
|
Creating new audio files . . . . . . . . . . . . . . . . . . . . . . . . . . . . . . . . . . . . . |
. 84 |
|
Viewing waveforms . . . . . . . . . . . . . . . . . . . . . . . . . . . . . . . . . . . . . . . . . |
. 85 |
|
Selecting audio data . . . . . . . . . . . . . . . . . . . . . . . . . . . . . . . . . . . . . . . . |
. 87 |
|
Copying, cutting, pasting, and deleting . . . . . . . . . . . . . . . . . . . . . . . |
. 92 |
|
Working with cues . . . . . . . . . . . . . . . . . . . . . . . . . . . . . . . . . . . . . . . . . . |
. 96 |
|
Creating play lists . . . . . . . . . . . . . . . . . . . . . . . . . . . . . . . . . . . . . . . . . . . |
102 |
|
Creating and deleting silence . . . . . . . . . . . . . . . . . . . . . . . . . . . . . . . . |
103 |
|
Inverting and reversing audio . . . . . . . . . . . . . . . . . . . . . . . . . . . . . . . |
106 |
|
Generating audio . . . . . . . . . . . . . . . . . . . . . . . . . . . . . . . . . . . . . . . . . . . |
106 |
|
Converting the sample type . . . . . . . . . . . . . . . . . . . . . . . . . . . . . . . . . |
110 |
|
Adding file properties . . . . . . . . . . . . . . . . . . . . . . . . . . . . . . . . . . . . . . . |
116 |
Chapter 5 |
Enhancing and Restoring Audio |
|
|
About enhancing and restoring audio . . . . . . . . . . . . . . . . . . . . . . . |
117 |
|
About the mastering process . . . . . . . . . . . . . . . . . . . . . . . . . . . . . . . . |
117 |
|
Analyzing frequency, phase, and dynamic range . . . . . . . . . . . . . . |
118 |
|
Removing noise . . . . . . . . . . . . . . . . . . . . . . . . . . . . . . . . . . . . . . . . . . . . . |
125 |
|
Filtering audio . . . . . . . . . . . . . . . . . . . . . . . . . . . . . . . . . . . . . . . . . . . . . . |
129 |
|
Optimizing amplitude . . . . . . . . . . . . . . . . . . . . . . . . . . . . . . . . . . . . . . . |
134 |

v
Chapter 6 |
Applying Stereo, Pitch, and Delay Effects |
|
|
About using stereo, pitch, and delay effects . . . . . . . . . . . . . |
. . . . .139 |
|
Changing stereo imagery . . . . . . . . . . . . . . . . . . . . . . . . . . . . . . . . |
. . . .139 |
|
Using chorus, flanger, and phaser effects . . . . . . . . . . . . . . . . . |
. . . .143 |
|
Changing pitch . . . . . . . . . . . . . . . . . . . . . . . . . . . . . . . . . . . . . . . . . |
. . . .145 |
|
Adding delays and echoes . . . . . . . . . . . . . . . . . . . . . . . . . . . . . . . |
. . . .147 |
|
Adding reverb . . . . . . . . . . . . . . . . . . . . . . . . . . . . . . . . . . . . . . . . . . |
. . . .150 |
|
Creating special effects . . . . . . . . . . . . . . . . . . . . . . . . . . . . . . . . . . |
. . . .153 |
|
Using multitrack-only effects . . . . . . . . . . . . . . . . . . . . . . . . . . . . |
. . . .156 |
Chapter 7 |
Mixing Multitrack Sessions |
|
|
About mixing multitrack sessions . . . . . . . . . . . . . . . . . . . . . . . . |
. . . .161 |
|
Working with sessions . . . . . . . . . . . . . . . . . . . . . . . . . . . . . . . . . . . |
. . . .162 |
|
Setting advanced session properties . . . . . . . . . . . . . . . . . . . . . |
. . . .167 |
|
Working with clips . . . . . . . . . . . . . . . . . . . . . . . . . . . . . . . . . . . . . . |
. . . .168 |
|
Working with audio tracks . . . . . . . . . . . . . . . . . . . . . . . . . . . . . . . |
. . . .179 |
|
Working with ReWire tracks . . . . . . . . . . . . . . . . . . . . . . . . . . . . . |
. . . .184 |
|
Working with MIDI tracks . . . . . . . . . . . . . . . . . . . . . . . . . . . . . . . . |
. . . .185 |
|
Using real-time effects . . . . . . . . . . . . . . . . . . . . . . . . . . . . . . . . . . |
. . . .185 |
|
Automating mixes with clip envelopes . . . . . . . . . . . . . . . . . . . |
. . . .188 |
|
Using the Mixers window . . . . . . . . . . . . . . . . . . . . . . . . . . . . . . . . |
. . . .190 |
|
Mixing down ReWire tracks and specific audio clips . . . . . . |
. . . .196 |
Chapter 8 |
Using Loops |
|
|
About loops . . . . . . . . . . . . . . . . . . . . . . . . . . . . . . . . . . . . . . . . . . . . |
. . . .197 |
|
Defining loops . . . . . . . . . . . . . . . . . . . . . . . . . . . . . . . . . . . . . . . . . . |
. . . .198 |
|
Calculating the tempo of selected ranges . . . . . . . . . . . . . . . . |
. . . .199 |
|
Setting permanent loop properties in Edit View . . . . . . . . . . |
. . . .200 |
|
Setting impermanent loop properties in Multitrack View |
. . . . .202 |
|
Setting the tempo, time signature, and key for sessions . . . |
. . . .204 |
|
Working with loops in the track display . . . . . . . . . . . . . . . . . . |
. . . .205 |

vi CONTENTS
Chapter 9 |
Working with Video |
|
|
About working with video . . . . . . . . . . . . . . . . . . . . . . . . . . . . . . . . . . . |
207 |
|
Working with Adobe Premiere Pro and After Effects . . . . . . . . . . |
207 |
|
Importing audio and video from video files . . . . . . . . . . . . . . . . . . |
208 |
|
Working with video clips . . . . . . . . . . . . . . . . . . . . . . . . . . . . . . . . . . . . |
209 |
|
Previewing video . . . . . . . . . . . . . . . . . . . . . . . . . . . . . . . . . . . . . . . . . . . . |
210 |
|
Preparing video mixdowns for export . . . . . . . . . . . . . . . . . . . . . . . . |
211 |
Chapter 10 |
Creating Surround Sound |
|
|
About surround sound . . . . . . . . . . . . . . . . . . . . . . . . . . . . . . . . . . . . . . |
213 |
|
Using the Multichannel Encoder . . . . . . . . . . . . . . . . . . . . . . . . . . . . . |
214 |
|
Panning tracks and buses for surround sound . . . . . . . . . . . . . . . . |
215 |
|
Adjusting volume levels . . . . . . . . . . . . . . . . . . . . . . . . . . . . . . . . . . . . . |
220 |
|
Zooming into and out of the waveform display . . . . . . . . . . . . . . . |
221 |
|
Previewing the multichannel project . . . . . . . . . . . . . . . . . . . . . . . . . |
221 |
|
Exporting surround-sound files . . . . . . . . . . . . . . . . . . . . . . . . . . . . . . |
223 |
Chapter 11 |
Saving, Exporting, and Closing Files |
|
|
Saving audio files . . . . . . . . . . . . . . . . . . . . . . . . . . . . . . . . . . . . . . . . . . . |
227 |
|
Saving and exporting sessions . . . . . . . . . . . . . . . . . . . . . . . . . . . . . . . |
228 |
|
Closing files . . . . . . . . . . . . . . . . . . . . . . . . . . . . . . . . . . . . . . . . . . . . . . . . . |
231 |
|
Choosing an audio file format . . . . . . . . . . . . . . . . . . . . . . . . . . . . . . . |
231 |
Chapter 12 |
Scripting and Batch Processing |
|
|
About scripting and batch processing . . . . . . . . . . . . . . . . . . . . . . . |
243 |
|
Batch processing cue ranges . . . . . . . . . . . . . . . . . . . . . . . . . . . . . . . . |
243 |
|
Normalizing groups of files . . . . . . . . . . . . . . . . . . . . . . . . . . . . . . . . . . |
244 |
|
Batch processing files . . . . . . . . . . . . . . . . . . . . . . . . . . . . . . . . . . . . . . . |
247 |
|
Working with scripts . . . . . . . . . . . . . . . . . . . . . . . . . . . . . . . . . . . . . . . . |
249 |
|
Using favorites (Edit View only) . . . . . . . . . . . . . . . . . . . . . . . . . . . . . . |
253 |

vii
Chapter 13 |
Burning Audio CDs |
|
|
Using CD Project View . . . . . . . . . . . . . . . . . . . . . . . . . . . . . . . . . . . . . . . |
257 |
|
Assembling tracks . . . . . . . . . . . . . . . . . . . . . . . . . . . . . . . . . . . . . . . . . . . |
257 |
|
Editing the source audio for tracks . . . . . . . . . . . . . . . . . . . . . . . . . . . |
260 |
|
Setting track properties . . . . . . . . . . . . . . . . . . . . . . . . . . . . . . . . . . . . . |
260 |
|
Writing a CD . . . . . . . . . . . . . . . . . . . . . . . . . . . . . . . . . . . . . . . . . . . . . . . . |
261 |
Appendix A |
Keyboard Shortcuts |
|
|
About keyboard shortcuts . . . . . . . . . . . . . . . . . . . . . . . . . . . . . . . . . . . |
263 |
|
Keys for playing audio . . . . . . . . . . . . . . . . . . . . . . . . . . . . . . . . . . . . . . . |
263 |
|
Keys for selecting ranges, channels, and tracks . . . . . . . . . . . . . . . |
264 |
|
Keys for copying waveforms . . . . . . . . . . . . . . . . . . . . . . . . . . . . . . . . . |
264 |
|
Keys for editing clips . . . . . . . . . . . . . . . . . . . . . . . . . . . . . . . . . . . . . . . . |
265 |
|
Keys for repeating commands . . . . . . . . . . . . . . . . . . . . . . . . . . . . . . . |
265 |
|
Keys for using markers . . . . . . . . . . . . . . . . . . . . . . . . . . . . . . . . . . . . . . |
265 |
|
Keys for scrolling waveforms and sessions . . . . . . . . . . . . . . . . . . . . |
266 |
|
Keys for viewing windows . . . . . . . . . . . . . . . . . . . . . . . . . . . . . . . . . . . |
266 |
Appendix B |
Digital Audio Primer |
|
|
Sound fundamentals . . . . . . . . . . . . . . . . . . . . . . . . . . . . . . . . . . . . . . . . |
267 |
|
Waveforms . . . . . . . . . . . . . . . . . . . . . . . . . . . . . . . . . . . . . . . . . . . . . . . . . . |
268 |
|
Analog audio . . . . . . . . . . . . . . . . . . . . . . . . . . . . . . . . . . . . . . . . . . . . . . . |
270 |
|
Digital audio . . . . . . . . . . . . . . . . . . . . . . . . . . . . . . . . . . . . . . . . . . . . . . . . |
270 |
|
Sampling rate . . . . . . . . . . . . . . . . . . . . . . . . . . . . . . . . . . . . . . . . . . . . . . . |
270 |
|
Bit depth . . . . . . . . . . . . . . . . . . . . . . . . . . . . . . . . . . . . . . . . . . . . . . . . . . . . |
271 |
|
Where Adobe Audition fits into the process . . . . . . . . . . . . . . . . . . |
272 |
|
Introducing MIDI . . . . . . . . . . . . . . . . . . . . . . . . . . . . . . . . . . . . . . . . . . . . |
273 |
|
Conclusion . . . . . . . . . . . . . . . . . . . . . . . . . . . . . . . . . . . . . . . . . . . . . . . . . . |
273 |
Appendix C |
Glossary . . . . . . . . . . . . . . . . . . . . . . . . . . . . . . . . . . . . . . . . . . . . . . . . . . . . . . |
275 |
Index . . . . . . . . . . . . . . . . . . . . . . . . . . . . . . . . . . . . . . . . . . . . . . . . . . . . . . .291


1
Learning about Adobe Audition
elcome to Adobe® AuditionTM 1.5, the ultimate software tool for audio editing, Wmixing, and mastering.
Adobe provides a variety of options you can use to learn Adobe Audition, including online Help and tool tips. You can also use the Adobe Web site to easily access a wide range of continually updated Web resources, from tutorials to technical support information.
Many files on the Adobe Web site are in Adobe PDF format. To view these files, use Adobe Reader®, included on the Adobe Audition CD.
Getting help
There are a number of ways to get the help you need in Adobe Audition. The following three tables can help you find specific resources related to Adobe Audition features, training resources, and support.
Finding Help for Adobe Audition features
If you . . . |
Try this . . . |
|
|
Want information about |
• Insert the Adobe Audition application CD into your CD drive, and follow |
installing Adobe Audition |
the on-screen installation instructions. (You cannot run Adobe Audition |
|
from the CD.) |
|
• See the ReadMe file on the application CD. |
|
|
Are new to Adobe Audition |
• For information about specific tasks, see “Working with Adobe Audition” |
and want an overview of tools |
on page 3. |
and features |
• For information about the user interface, see “About the work area” on |
|
|
|
page 9. |
|
• Move the pointer over tools and buttons to view tool and button names. |
|
• See the beginning tutorials in Help. |
|
|
Are upgrading from a previous |
See “What’s New in Adobe Audition 1.5” on page 5 to get an overview of |
version of Adobe Audition |
new features. Or, for more detailed information, see the NewFeatures.pdf |
|
file on the Adobe Audition application CD. |

2
Learning about Adobe Audition
Finding Help for Adobe Audition features
If you . . . |
Try this . . . |
|
|
Are looking for detailed |
• In Help, use the Index or Search tabs. |
information about a feature |
• In windows and dialog boxes, click the Help button or press F1. |
|
Want a list of keyboard shortcuts
See “Keyboard Shortcuts” on page 263.
Finding Adobe Audition training resources
If you . . . |
Try this . . . |
|
|
Want to obtain in-depth |
• See the tutorials on the Adobe Studio Web site at www.studio.adobe.com. |
Adobe Audition training |
• Browse the Adobe Press materials at www.adobepress.com (English only) |
|
|
|
and the training resources at www.adobe.com/support/training.html. |
|
• For step-by-step lessons, consider the Adobe Classroom in a Book series. |
|
|
Are looking for background |
See the “Glossary” on page 275 and “Digital Audio Primer” on page 267. |
information on digital audio |
|
|
|
Want information about |
Visit the Partnering with Adobe Web site at http://partners.adobe.com. |
becoming an Adobe Certified |
Certification is available for several different geographical regions. |
Expert |
|
|
|
Want training from an Adobe |
See the Training page of the Adobe Web site at |
Certified Training Provider |
www.adobe.com/support/training.html. |
ADOBE AUDITION 1.5 3
User Guide
Finding support for Adobe Audition
If you . . . |
Try this . . . |
|
|
Want customer or technical |
• Refer to the technical support card provided with your software. |
support |
• See the Adobe Audition support page at |
|
|
|
www.adobe.com/support/products/audition.html. |
|
• See the ReadMe file installed with Adobe Audition for information that |
|
became available after this guide went to press. |
|
|
Want answers to common |
Visit the Adobe Audition support page at |
troubleshooting questions |
www.adobe.com/support/products/audition.html. |
|
|
Want to register your copy of |
• When you first start Adobe Audition, you’re prompted to register online. |
Adobe Audition |
Fill out the form, and then submit it directly or fax a printed copy. |
|
• Fill out and return the registration card included with your software package. |
|
|
Want to access downloads or |
Visit the main Adobe Audition page at www.adobe.com/audition. |
links to user forums |
|
Working with Adobe Audition
You can work with Adobe Audition in many different ways. In this section, you’ll find directions to specific information to help you accomplish some common Adobe Audition tasks.
If you want to increase productivity
•Use the Organizer window to quickly organize files, preview loops, and apply effects. (See “Organizing files and effects” on page 24 and “Previewing audio by using the Organizer window” on page 77.)
•Automatically convert audio from a CD into an editable waveform. (See “Importing audio from CD” on page 64.)
•Store selections and start points in cues to speed up editing and navigation tasks. (See “Working with cues” on page 96.)
•Batch process files to quickly apply favorite processing or prepare audio for specific mediums, such as audio CD or the Web. (See “Scripting and Batch Processing” on page 243.)

4
Learning about Adobe Audition
If you want to create video soundtracks
•Easily create and remix soundtracks used in Adobe® Premiere® Pro and After Effects® projects. (See “Working with Adobe Premiere Pro and After Effects” on page 207.)
•Time stretch audio clips to match video. (See “Time stretching audio clips” on page 177.)
•Generate noises and tones for sound effects. (See “Generating audio” on page 106.)
•Create surround-sound mixes. (See “About surround sound” on page 213.)
If you want to record and mix musical compositions
•Nondestructively record and edit multitrack sessions of up to 128 tracks. (See “About mixing multitrack sessions” on page 161.)
•Automate mixes with clip envelopes. (See “Automating mixes with clip envelopes” on page 188.)
•Apply, edit, and rearrange real-time effects, without making any permanent changes. (See “Using real-time effects” on page 185.)
•Build compositions with musical loops. (See “About loops” on page 197.)
•Synchronize with ReWire and SMPTE. (See “Setting up ReWire connections” on page 42 and “Setting up for SMPTE synchronization” on page 40.)

5
What’s New in Adobe
Audition 1.5
his overview introduces you to the key new features of Adobe Audition 1.5, Tincluding streamlined workflow with other Adobe products, powerful new effects,
integrated CD burning, and more.
Use integrated tools
Adobe Audition tightly integrates with flexible audio technology like ReWire and VST, and video applications like Adobe Premiere Pro and Adobe After Effects.
ReWire support Stream full-resolution audio data in real-time between Adobe Audition and other audio software such as Propellerhead Reason and Ableton Live. (See “Setting up ReWire connections” on page 42.)
VST plug-in support Expand your options with integrated support for third-party VST plug-ins, which can also be used in Adobe Premiere Pro. (See “Using plug-in effects” on page 32.)
Enhanced video integration Edit video soundtracks with ease. View video frames in the track display, and import a wide range of video file formats, including AVI, MPEG, and WMV. (See “About working with video” on page 207.)
Improved workflow with other Adobe products Work smoothly with Adobe Premiere Pro, Adobe After Effects, and Adobe® EncoreTM DVD by using similar tools, menus, and keyboard shortcuts. (See “Working with Adobe Premiere Pro and After Effects” on page 207.)

6
What’s New in Adobe Audition 1.5
Sound your best
With high fidelity, 32-bit internal processing, Adobe Audition supports up to 32-bit files and sample rates up to 10 MHz. Powerful effects, restoration, and pitch correction tools let you create the exact sound you're after.
Pitch correction tool Correct off-pitch performances and create pitch-based effects. Use automatic mode for quick results, or manual mode for precise control. (See “Using the Pitch Correction effect (Edit View only)” on page 146.)
Frequency space editing Visually isolate, select, and modify sounds in frequency and time using the Marquee Selection tool. (See “Selecting audio frequencies in Spectral View” on page 88.)
Automatic elimination of clicks and pops Quickly and easily restore digital recordings of vinyl source material, wireless mics, DV cameras, and other production audio. (See “Using the Auto Click/Pop Eliminator effect (Edit View only)” on page 125.)
Studio reverb Apply high-quality reverb that conserves processing resources, while offering extensive controls. (See “Using the Studio Reverb effect” on page 153.)
New sample sessions Get up to speed quickly by using any of the 20 sample sessions included with Adobe Audition. Modify the samples to create your own music. (See “About mixing multitrack sessions” on page 161.)
New royalty-free loops Use more than 500 new music loops—for a total of more than 5,000—in a variety of styles including 70’s disco, classic rhumba, and wedding and event. (See “About loops” on page 197.)
Vocal extraction Quickly and easily extract the vocal portions of a track to create either a cappella or karaoke-ready tracks, while preserving the stereo image. (See “Using the Center Channel Extractor effect” on page 141.)
Flexible envelope scaling Rescale control points on pan, volume, and effects envelopes to quickly modify a clip in a multitrack mix. Scale all points simultaneously while maintaining relative or absolute relationships between points. (See “Automating mixes with clip envelopes” on page 188.)

ADOBE AUDITION 1.5 7
User Guide
Work efficiently
Adobe Audition puts all the tools you need at your fingertips so you can get your work done quickly and efficiently. An intuitive interface gets you up and running in no time, and integrated editing, mixing, and CD burning streamline your audio workflow.
Integrated CD burning Create masters of your audio compositions by burning gapless audio CDs directly from Adobe Audition. (See “Using CD Project View” on page 257.)
Time stretching Visually drag the edge of any audio clip in a multitrack mix to fit a specific length of time, with or without affecting the clip's pitch. Quickly fit sound effects and dialog to video clips. (See “Time stretching audio clips” on page 177.)
Preroll and postroll playback Speed the process of performing destructive edits and applying effects by listening to the audio preceding and following a selection. (See “Playing audio by using the transport controls” on page 75.)
Custom keyboard shortcut sets Customize keyboard shortcut sets to configure Adobe Audition for your working style. (See “Using shortcuts” on page 12.)
In-time loop previews Use the Organizer window to preview loops in the tempo and pitch of the current session before adding them to your mix. (See “Previewing audio by using the Organizer window” on page 77.)
Task-based documentation Quickly learn how to complete audio production tasks using an updated Help system and user guide organized by subjects such as editing, looping, and video.


9
Chapter 1: Looking at the
Work Area
elcome to Adobe Audition. Adobe Audition gives you an efficient work area and Wuser interface to edit and mix audio files.
About the work area
Adobe Audition is divided into three main work areas: Edit View, Multitrack View, and CD Project View. This division is intended to help you focus on the major tasks of editing audio files, mixing sessions, and burning CDs. For more information on the differences between Edit View and Multitrack View, see “About using Edit View and Multitrack View” on page 10. For more information on CD Project View, see “Using CD Project View” on page 257.
A B C
D
E
F
G
Adobe Audition work area
A. Edit View tab B. Multitrack View tab C. CD Project View tab D. menus E. toolbars F. display window G. various windows

10CHAPTER 1
Looking at the Work Area
All three views have a similar user interface, including the following components:
Menus The menus in the menu bar contain commands for performing tasks. (See “Choosing commands” on page 12.)
Toolbars The toolbars hold buttons for applying commonly used functions. (See “Using toolbars” on page 13.)
Windows Windows—including the Organizer, Transport Controls, Zoom Controls, Level Meters, and Selection/View Controls—help you monitor and modify audio files. (See “Using windows” on page 14.)
Display window The display window shows you sound in an easy-to-manipulate form. In Edit View, the display window is where you modify single waveforms. In Multitrack View, the display window is where you mix multiple audio files in a session. (See “About editing audio” on page 83 and “About mixing multitrack sessions” on page 161.)
You can change many aspects of Adobe Audition’s appearance, including the color scheme, the appearance of buttons, and the appearance of the waveform display, in the
Settings dialog box. (See “Setting Adobe Audition preferences” on page 43.)
About using Edit View and Multitrack View
Adobe Audition provides different work areas for editing single waveforms and creating multitrack mixes. To edit single waveforms, you use Edit View. To mix multiple waveforms with MIDI and video files, you use Multitrack View.
Edit View and Multitrack View use different editing methods, and each has unique advantages. Edit View uses a destructive method, which changes audio data, permanently altering saved files. Such permanent changes are preferable when converting sample rate and bit depth, mastering, or batch processing. Multitrack View uses a nondestructive method, which is impermanent and instantaneous, requiring more processing power, but increasing flexibility. This flexibility is preferable when gradually building and reevaluating a multilayered musical composition or video soundtrack.
ADOBE AUDITION 1.5 11
User Guide
You can combine destructive and nondestructive editing to suit the needs of a project. If a multitrack clip requires destructive editing, for example, simply double-click it to access Edit View. Likewise, if an edited waveform contains recent changes that you dislike, use the Undo command to revert to previous states—destructive edits aren’t applied until you save a file. For more information on using Edit View, see “About editing audio” on page 83; for more information on using Multitrack View, see “About mixing multitrack sessions” on page 161.
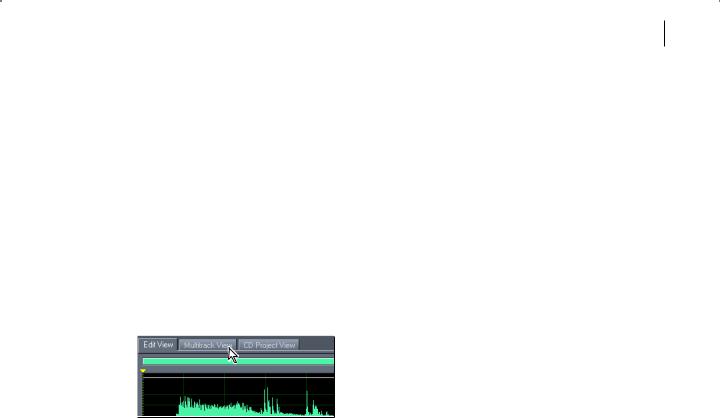
Switching between views
You can use the tabs above the display window or menu commands to switch between Edit View, Multitrack View, and CD Project View. If you prefer not to use the tabs above the display window, you can hide them.
View tabs above the display window
To switch between views:
Do one of the following:
•Choose View > Edit Waveform View, View > Multitrack View, or View > CD Project View.
•Click the Edit View tab, the Multitrack View tab, or the CD Project View tab above the display window.
•Click the Edit Waveform View button  , Multitrack View button
  , or CD Project View button
  in the View toolbar. (See “Using toolbars” on page 13.)
•In Multitrack View, double-click a file in the Files tab of the Organizer window or select a file and click the Edit File button  . Alternatively, double-click a waveform block in the display window.
To show and hide view tabs above the display window:
Choose View > Show View Tabs. A check mark indicates that the tabs are showing.

12CHAPTER 1
Looking at the Work Area
Choosing commands
Commands let you perform a wide variety of tasks. You can choose commands from the menus at the top of your screen or click buttons in a toolbar. You can also use contextsensitive (right-click) menus and keyboard shortcuts to quickly execute commands.
Using context-sensitive menus
Adobe Audition makes liberal use of context-sensitive menus. Whenever you see a simple function button, control, window, or waveform action, try right-clicking it. Chances are you’ll be surprised by a useful shortcut menu or a set of handy options that can make Adobe Audition’s operation even easier.
Using shortcuts
Adobe Audition provides a set of standard keyboard shortcuts to help you speed up the editing process. For example, instead of using your mouse to go to the Edit menu and choose the Cut command, you can simply press Ctrl + X to cut the selected portion of a waveform. When available, the keyboard shortcut appears to the right of the command name in the menu or in the tool tip for a button or icon. Adobe Audition also provides keyboard shortcuts for performing certain mouse actions. These shortcuts are listed in the Keyboard Shortcuts appendix.

 If a shortcut isn’t working, it’s likely that the window you’re trying to run the shortcut in doesn’t have focus. For example, if you’re in Edit View and you push F11 to bring up the Convert Sample Type dialog box and nothing happens, the waveform display probably isn’t the
active window. Click the waveform display to give it focus, and then try the shortcut again.
You can change nearly all of the default shortcuts and add shortcuts for other functions. In addition, you can add shortcuts that let you execute commands using keys on a MIDI keyboard, a sequencer, or any other device capable of issuing a MIDI command. This type of shortcut is referred to as a MIDI Trigger. For example, you can assign the Play command in Adobe Audition to the C4 note on your MIDI keyboard.
To enable MIDI triggering:
Choose Options > MIDI Trigger Enable. A check mark indicates the MIDI triggering is on.
Important: Before attempting to enable MIDI triggering, you must choose a device for MIDI In that’s recognized by Windows. For more information, see “Designating which devices you want to use” on page 36.
ADOBE AUDITION 1.5 13
User Guide
To customize a shortcut:
1Choose Options > Keyboard Shortcuts And MIDI Trigger.
2Select the function you want to assign the shortcut to.
Note: You can filter the list of functions by choosing an option from the Category menu and clicking the Multitrack View or Edit View button. To show all functions, choose (show all) from the Category menu, and deselect the Multitrack View and Edit View buttons.
3 Do any of the following:
•To assign a keyboard shortcut to the function, click in the Keyboard Shortcut text box and press the desired keyboard combination. Many Adobe Audition users find single key shortcuts (such as n for Normalize) faster to use and easier to remember.
•To assign a MIDI trigger to the function, click in the MIDI Trigger text box and press the desired key on the MIDI keyboard. You can also apply MIDI events other than pressing keys (such as pressing the foot pedal).
•To remove a keyboard shortcut or MIDI trigger from the function, click Clear.
4If you enter a key combination that’s already in use, Adobe Audition notifies you of the conflict in the Conflicting Keys text box. Click Clear, and enter a different shortcut before continuing.
5Click OK.
To restore the default keyboard shortcuts:
1Choose Options > Keyboard Shortcuts And MIDI Trigger.
2Choose Adobe Audition Default from the Set list, and click OK.
Using toolbars
Many of Adobe Audition’s most commonly used functions are represented as buttons within toolbars, which appear near the top of the main interface. These buttons give you instant access to effects, file handling functions, viewing options, and more, at the press of a button.
To see what a button does, hold your mouse pointer over it to display a tool tip that describes the function in simple terms.

14CHAPTER 1
Looking at the Work Area
To show or hide a toolbar:
Choose View > Toolbars, and choose a toolbar name from the submenu. A check mark indicates that the toolbar is showing.
To specify how many rows of buttons are displayed:
Choose View > Toolbars, and choose a number of rows from the submenu.
Using windows
Many windows in the Adobe Audition interface can be repositioned and resized to better suit your requirements. You can also hide windows that you’re not currently using, and then show them again when needed. For more information on specific windows, see the index or search Help.
Repositioning and resizing windows
When you reposition a window, you can dock it in a specific location in the interface, or you can undock the window so that it floats above the main window. To identify docked windows, look for two thin vertical or horizontal lines. These lines are the handle (or grab bar) of a docked window. Move your mouse over a handle, and the cursor looks like a plus sign with arrows at each end  .
.
Some docked windows can also be resized. If resizing is possible, the docked window will have a single, thicker horizontal or vertical bar, called a resize bar. When you move your mouse over a resize bar, the cursor takes on the appearance of two lines with two arrows  .
.
A B
Docked window
A. Handle B. Resize bar

ADOBE AUDITION 1.5 15
User Guide
To undock a window:
Drag the window’s handle to the middle of the work area until you see an outline of the window.
The window is now a standard floating window. You can move the window by dragging its title bar.

 Press Ctrl while moving a floating window around to force it to not dock. That way you can float the window over an area that it would normally try to dock to. To disable this feature, select Ctrl Key Allows Dockable Windows to Dock in the General tab of the Settings
dialog box. (See “Setting Adobe Audition preferences” on page 43.)
To dock a window in a different location:
1Drag the window’s handle around the work area to locate potential docking areas. The resize bars of other docked windows will light up wherever docking is possible.
2When you locate the desired docking area, release the mouse button. The window snaps into its new location.
If a window is docked in the same row with other windows, you can force the window into a new row by right-clicking the window’s handle and selecting Force New Row. Likewise,
deselecting Force New Row causes the window to dock in the previous row (if there’s room).
To resize a docked window:
Drag the window’s resize bar.
Even if the resize bar is visible, resizing might not be possible due to the other windows that are in the row with the window you’re trying to resize.
To reset windows to the default layout, select Restore Default Workspace in the General tab of the Settings dialog box. (See “Setting Adobe Audition preferences” on page 43.)
Showing and hiding windows
You can free up space in the work area by closing windows when you aren’t using them, and then redisplay the windows as needed. The Window menu lists all available windows; a check mark indicates that a window is currently showing.

16CHAPTER 1
Looking at the Work Area
To hide a window:
Do one of the following:
•Choose the window name from the Window menu.
•Click the button that corresponds to the window name in the View toolbar. (See “Using toolbars” on page 13.)
•For docked windows, right-click the window’s handle and choose Close.
•For undocked windows, click the X button on the window’s title bar.
To show a window:
Choose the window name from the Window menu, or click the window’s button in the View toolbar.
Using placekeeper windows
Placekeeper windows let you define the aspect ratio of a docking area. For example, if you try docking the Track EQ controls above the transport controls, they end up going underneath the whole session display, which creates a view that isn’t very useful (or aesthetically pleasing). You can use a placekeeper, though, on either side of the Track EQ to force the EQ into a certain aspect ratio. You can also use placekeepers just for appearance’s sake, just because you like the way they let you customize the work area.
You can create up to four placekeeper windows, and insert them wherever docking is allowed. You can also change the appearance of placekeeper windows by filling them with a pattern.
To insert a placekeeper window:
1Choose Window > Placekeeper.
2Dock the placekeeper in the desired location. The window is automatically resized to fit the docked area.
To change the appearance of a placekeeper window:
Right-click the window’s handle, and choose a fill option: Nothing, Cool Texture, or Squares. To make future placekeeper windows adopt the current appearance, choose Make Default.

ADOBE AUDITION 1.5 17
User Guide
To delete a placekeeper window:
Right-click the window’s handle, and choose Close.
Navigating in the display window
The display window shows you the current waveform (in Edit View) or session (in Multitrack View). You can control how much of the waveform or session is displayed by zooming and scrolling. You can also use the selection and view controls to determine the beginning time, ending time, and length of audio data in the display window.
Zooming
Zooming lets you adjust the view in the display window to best meet your needs. For example, you can zoom in to clearly see the samples in a waveform, or you can zoom out to get a visual overview of a waveform or session.
The Zoom Controls window provides a variety of tools for zooming. You can also zoom by dragging in the horizontal scroll bar, vertical scroll bar (Multitrack View only), or vertical ruler.
Zoom controls
To show or hide the zoom controls:
Do one of the following:
•Choose Window > Zoom Controls. A check mark indicates that the controls are visible.
•Click the Hide/Show Zoom Controls button  in the View toolbar. (See “Using toolbars” on page 13.)
If you don’t like the default location of the zoom controls, you can reposition them or detach them so they float above the main window. (See “Using windows” on page 14.)

18CHAPTER 1
Looking at the Work Area
To zoom in or out by using the zoom controls:
Do any of the following:
•Click the Zoom In Horizontally button  to zoom in on the center of the visible waveform window or session.
•Click the Zoom In Vertically button  to increase the vertical scale resolution of a waveform’s amplitude display (in Edit View) or decrease the number of viewed tracks in the session display (in Multitrack View).
•Click the Zoom To Selection button  to zoom in on the actively selected waveform or session range.
•Click the Zoom In To Right Edge Of Selection button  to zoom in on the right boundary of the actively selected waveform range or session.
•Click the Zoom In To Left Edge Of Selection button  to zoom in on the left boundary of the actively selected waveform range or session.
•Click the Zoom Out Horizontally button  to zoom out from the center of the visible waveform window or session.
•Click the Zoom Out Full Both Axis button  to zoom out to display the entire waveform or blocks that are contained within a session.
•Click the Zoom Out Vertically button  to decrease the vertical scale resolution of a waveform’s amplitude display (in Edit View) or to show more tracks in the session display (in Multitrack View).
To zoom in or out by using a scroll bar or ruler:
Do either of the following:
•To change the viewable range of time, position the pointer in the timeline or over the left or right edge of the horizontal scroll bar. Then drag to the left or right. A magnifying glass with arrows icon  appears as you drag.
•To change the viewable range of amplitude (in Edit View) or tracks (in Multitrack View), hold down the right mouse button in the vertical ruler, and drag up or down. The magnifying glass with arrows icon appears as you drag.

ADOBE AUDITION 1.5 19
User Guide
You can also use the wheel on your mouse to zoom in and out. To do so, place the pointer over the horizontal scroll bar, timeline, vertical scroll bar (Multitrack View only), or
vertical ruler, and roll the mouse wheel. To set a zoom percentage for the mouse wheel, enter a value for Zoom Factor in the General tab of the Settings dialog box. (See “Setting Adobe Audition preferences” on page 43.)
Scrolling
The display window provides several scrolling devices. The horizontal scroll bar—which, by default, is at the top of the display window—lets you scroll forwards and backwards in time throughout a waveform (in Edit View) or session (in Multitrack View). The vertical ruler on the right side of the display window lets you scroll through amplitude ranges (in Edit View) or tracks (in Multitrack View). In Multitrack View, there’s an additional vertical scroll bar on the left side of the display window that lets you scroll through tracks.
B
A
C
Scrolling devices
A. Vertical scroll bar B. Horizontal scroll bar C. Vertical ruler
To scroll in the display window:
Do either of the following:
•To scroll to the left or right, drag the horizontal scroll bar. Or, click to the left or right of the scroll bar to page through the display one screen at a time.
•To scroll up or down, drag in the vertical ruler. In Multitrack View, you can also drag the vertical scroll bar or click above or below the scroll bar to page through the display one screen at a time.

20CHAPTER 1
Looking at the Work Area
You can also use the wheel on your mouse to scroll in the display window. To do so, place the pointer over the display window, and roll the mouse wheel.
To change the position of the horizontal scroll bar:
Right-click the horizontal scroll bar, and choose a display option: Above Display or Below Display.
Using the selection and view controls
The Selection/View Controls window shows the beginning and ending points, as well as the total length of both the selection and the section of the waveform or session that’s currently visible. Both the selection and display range is shown in the current time-display format. For information on changing the time-display format, see “Monitoring time” on page 69.
In addition to viewing time information, you can also use the selection and view controls to adjust selections and change the section of audio data that is visible in the display window. Simply enter new values for Begin, End, and Length. After you click in a text box, you can right-click to access additional context-menu commands.
Selection and view controls
To display the selection and view controls:
Do one of the following:
•Choose Window > Selection/View Controls. A check mark indicates that the window is showing.
•Click the Hide/Show Selection/View Controls button  in the View toolbar. (See “Using toolbars” on page 13.)
If you don’t like the default location of the selection and view controls, you can reposition them or detach them so they float above the main window. (See “Using windows” on page 14.)
ADOBE AUDITION 1.5 21
User Guide
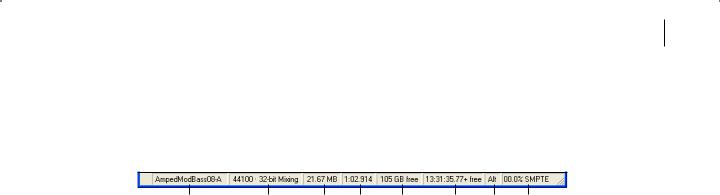
Using the status bar
The status bar runs along the very bottom of Adobe Audition’s main window. It can display information such as sample format, file size, and free disk space.
A B C D E F G H
Status bar
A. Data Under Cursor B. Sample Format C. File Size D. File Size (time) E. Free Space
F. Free Space (time) G. Keyboard Modifiers H. SMPTE Slave Stability
To show or hide the status bar:
Do one of the following:
•Choose View > Status Bar > Show. A check mark indicates that the status bar is visible.
•Click the Hide/Show Status Bar button  in the View toolbar. (See “Using toolbars” on page 13.)
To change the type of information that is displayed in the Status Bar:
Choose View > Status Bar or right-click the Status Bar, and select the desired display options. Selected items appear in the Status Bar; unselected items are hidden.
You can choose from the following options:
Data Under Cursor Shows useful information such as the channel (if a current waveform is stereo), the amplitude (measured in decibels), and the time (hours:minutes:seconds:hundredths of seconds) from the beginning of the audio file. This data is computed at the precise point where your mouse pointer is placed within the wave display, and changes dynamically when you move the pointer. For example, if you see R: –15.2 dB @ 0:00:242 in the Status Bar when in Edit View, this means that your pointer is over the right channel at 0.242 seconds into the waveform, and the amplitude at that precise point is –15.2 dB.
In the Multitrack View, you’ll see even more beneficial data such as Pan and Volume envelope positions, envelope positions for effects envelopes, dynamic effect settings, and the current position of the wave block as you drag it around.
Sample Format Displays sample information about the currently opened waveform. For example, a 44,100 kHz 16-bit stereo file shows up as 44100 – 16-bit – stereo.

22CHAPTER 1
Looking at the Work Area
File Size) Represents how large the active audio file is, measured in kilobytes. If you see 308 K in the Status Bar, then the current waveform or session is 308 kilobytes (KB) in size.
File Size (time) Shows you the length (measured in time) of the current waveform or session. For example, 0:01:247 means the waveform or session is 1.247 seconds long.
Free Space In Edit View and Multitrack View, shows how much space is available on your hard drive. In CD Project View, shows how much space remains on a CD based on which View menu item is selected: 74 min CD or 80 min CD.
Free Space (time) In Edit View and Multitrack View, displays the amount of available time left for recording, based upon the currently selected sample rate. This value is shown as minutes, seconds, and thousandths of seconds. For example, if Adobe Audition is set to record an 8-bit mono waveform at 11,025 kHz, the time left might read something like 4399:15.527 free. Change the recording options to 16-bit stereo at 44,100 kHz, and the remaining time value becomes 680:44.736 free.
In CD Project View, shows how much space remains on a CD based on which View menu item is selected: 74 min CD or 80 min CD.
Keyboard Modifiers Displays the status of your keyboard’s Ctrl, Shift, and Alt keys.
SMPTE Slave Stability Indicates the stability of incoming SMPTE timecode compared to Adobe Audition’s internal clock. For example, 95.0% SMPTE indicate a very strong SMPTE signal. Percentages above 80% should be stable enough to maintain sync. For more information on SMPTE synchronization, see “Setting up for SMPTE synchronization” on page 40 and “Using sessions as SMPTE masters or slaves” on page 166.
Undoing and redoing changes
Adobe Audition keeps track of the edits you perform during the course of an editing session. These changes are stored in a temporary file on your hard drive. They aren’t permanently applied to the file until you save and close it, giving you unlimited undo and redo capability.
When you work with very large audio files, you might not have enough free disk space to save the Undo data before continuing with an edit. In addition, the time required to save the Undo information might slow down your work. You can solve either problem by disabling the Undo function.
 Loading...