


Acrobat 9 Pro
Table of contents
 Loading...
USING ADOBE
ACROBAT 9 PRO
®
®

Last updated 9/30/2011
Copyright
© 2010 Adobe Systems Incorporated. All rights reserved.
Using Adobe® Acrobat® 9 Pro for Windows® and Mac OS
This user guide is protected under copyright law, furnished for informational use only, is subject to change without notice, and should not be construed as a
commitment by Adobe Systems Incorporated. Adobe Systems Incorporated assumes no responsibility or liability for any errors or inaccuracies that may appear
in the informational content contained in this guide.
This user guide is licensed for use under the terms of the Creative Commons Attribution Non-Commercial 3.0 License. This License allows users to copy,
distribute, and transmit the user guide for noncommercial purposes only so long as (1) proper attribution to Adobe is given as the owner of the user guide; and
(2) any reuse or distribution of the user guide contains a notice that use of the user guide is governed by these terms. The best way to provide notice is to include
the following link. To view a copy of this license, visit
http://creativecommons.org/licenses/by-nc-sa/3.0/
Adobe, the Adobe logo, Adobe Garamond, the Adobe PDF logo, Acrobat, ActionScript, Buzzword, Creative Suite, Distiller, Flash, FrameMaker, FreeHand,
Illustrator, InDesign, LiveCycle, Photoshop, PostScript, and Reader are either registered trademarks or trademarks of Adobe Systems Incorporated in the United
States and/or other countries.
Apple, Macintosh, and Mac OS are trademarks of Apple Inc., registered in the United States and other countries. Microsoft, MS-DOS, OpenType, OS/2,
Windows, and Windows Vista are either registered trademarks or trademarks of Microsoft Corporation in the United States and/or other countries. UNIX is a
registered trademark of The Open Group in the US and other countries. Helvetica and Times are trademarks of Heidelberger Druckmaschinen AG exclusively
licensed through Linotype Library GmbH, and may be registered in certain jurisdictions. ITC Zapf Dingbats is a registered trademark of International Typeface
Corporation. All other trademarks are the property of their respective owners.
Updated Information/Additional Third Party Code Information available at http://www.adobe.com/go/thirdparty.
The Spelling portion of this product is based on Proximity Linguistic Technology. © Copyright 1989, 2004 All Rights Reserved Proximity Technology A Division
of Franklin Electronic Publishers, Inc. Burlington, New Jersey USA. © Copyright 1990 Merriam – Webster Inc. © Copyright 1990 All Rights Reserved Proximity
Technology A Division of Franklin Electronic Publishers, Inc. Burlington, New Jersey USA. © Copyright 2003, 2004 Franklin Electronic Publishers, Inc. ©
Copyright 2003, 2004 All Rights Reserved Proximity Technology A Division of Franklin Electronic Publishers, Inc. Burlington, New Jersey USA. © Copyright
1991 Dr. Lluis de Yzaguirre I Maura. © Copyright 1991 All Rights Reserved Proximity Technology A Division of Franklin Electronic Publishers, Inc. Burlington,
New Jersey USA. © Copyright 1990 Munksgaard International Publishers Ltd. © Copyright 1990 All Rights Reserved Proximity Technology A Division of
Franklin Electronic Publishers, Inc. Burlington, New Jersey USA. © Copyright 1990, 1995 Van Dale Lexicografie bv © Copyright 1990, 1996 All Rights Reserved
Proximity Technology A Division of Franklin Electronic Publishers, Inc. Burlington, New Jersey USA. © Copyright 1990, 2004 IDE a.s. © Copyright 1990, 2004
All Rights Reserved Proximity Technology A Division of Franklin Electronic Publishers, Inc. Burlington, New Jersey USA. © Copyright 1992 Hachette / Franklin
Electronic Publishers, Inc. © Copyright 2004 All Rights Reserved Proximity Technology A Division of Franklin Electronic Publishers, Inc. Burlington, New
Jersey USA. © Copyright 2004 Bertelsmann Lexikon Verlag © Copyright 2004 All Rights Reserved Proximity Technology A Division of Franklin Electronic
Publishers, Inc. Burlington, New Jersey USA. © Copyright 2004 MorphoLogic Inc. © Copyright 2004 All Rights Reserved Proximity Technology A Division of
Franklin Electronic Publishers, Inc. Burlington, New Jersey USA. © Copyright 1990 William Collins Sons & Co. Ltd. © Copyright 1990 All Rights Reserved
Proximity Technology A Division of Franklin Electronic Publishers, Inc. Burlington, New Jersey USA. © Copyright 1993, 1994, 1995 Russicon Company Ltd. ©
Copyright 1995 All Rights Reserved Proximity Technology A Division of Franklin Electronic Publishers, Inc. Burlington, New Jersey USA.
This product contains either BSAFE and/or TIPEM software by RSA Security, Inc.
Portions include technology used under license from Autonomy, and are copyrighted.
This product includes software developed by the Apache Software Foundation (http://www.apache.org/).
Portions © Dainippon Ink and Chemicals, Incorporated 1967, 1988.
Flash CS3 video compression and decompression is powered by On2 TrueMotion video technology. © 1992-2005 On2 Technologies, Inc. All Rights Reserved.
http://www.on2.com.
This product includes software developed by the OpenSymphony Group (http://www.opensymphony.com/).
Speech compression and decompression technology licensed from Nellymoser, Inc. (www.nellymoser.com).
Sorenson Spark™ video compression and decompression technology licensed from Sorenson Media, Inc.
MPEG Layer-3 audio coding technology licensed from Fraunhofer IIS and Thomson.
Portions copyright Focoltone Colour System.
Adobe Systems Incorporated, 345 Park Avenue, San Jose, California 95110, USA.
Notice to U.S. Government End Users. The Software and Documentation are “Commercial Items,” as that term is defined at 48 C.F.R. §2.101, consisting of
“Commercial Computer Software” and “Commercial Computer Software Documentation,” as such terms are used in 48 C.F.R. §12.212 or 48 C.F.R. §227.7202,
as applicable. Consistent with 48 C.F.R. §12.212 or 48 C.F.R. §§227.7202-1 through 227.7202-4, as applicable, the Commercial Computer Software and
Commercial Computer Software Documentation are being licensed to U.S. Government end users (a) only as Commercial Items and (b) with only those rights
as are granted to all other end users pursuant to the terms and conditions herein. Unpublished-rights reserved under the copyright laws of the United States.
Adobe agrees to comply with all applicable equal opportunity laws including, if appropriate, the provisions of Executive Order 11246, as amended, Section 402
of the Vietnam Era Veterans Readjustment Assistance Act of 1974 (38 USC 4212), and Section 503 of the Rehabilitation Act of 1973, as amended, and the
regulations at 41 CFR Parts 60-1 through 60-60, 60-250, and 60-741. The affirmative action clause and regulations contained in the preceding sentence shall be
incorporated by reference.

iii
Last updated 9/30/2011
Contents
Chapter 1: Getting started
Activation and registration . . . . . . . . . . . . . . . . . . . . . . . . . . . . . . . . . . . . . . . . . . . . . . . . . . . . . . . . . . . . . . . . . . . . . . . . . . . . . . . . . . . . . . . . . . . . 1
Help and support . . . . . . . . . . . . . . . . . . . . . . . . . . . . . . . . . . . . . . . . . . . . . . . . . . . . . . . . . . . . . . . . . . . . . . . . . . . . . . . . . . . . . . . . . . . . . . . . . . . . . . 2
Services, downloads, and extras . . . . . . . . . . . . . . . . . . . . . . . . . . . . . . . . . . . . . . . . . . . . . . . . . . . . . . . . . . . . . . . . . . . . . . . . . . . . . . . . . . . . . . . . 3
What’s new . . . . . . . . . . . . . . . . . . . . . . . . . . . . . . . . . . . . . . . . . . . . . . . . . . . . . . . . . . . . . . . . . . . . . . . . . . . . . . . . . . . . . . . . . . . . . . . . . . . . . . . . . . . 4
Getting started tutorials . . . . . . . . . . . . . . . . . . . . . . . . . . . . . . . . . . . . . . . . . . . . . . . . . . . . . . . . . . . . . . . . . . . . . . . . . . . . . . . . . . . . . . . . . . . . . . . 6
Chapter 2: Workspace
Work area basics . . . . . . . . . . . . . . . . . . . . . . . . . . . . . . . . . . . . . . . . . . . . . . . . . . . . . . . . . . . . . . . . . . . . . . . . . . . . . . . . . . . . . . . . . . . . . . . . . . . . . 22
Customizing the work area . . . . . . . . . . . . . . . . . . . . . . . . . . . . . . . . . . . . . . . . . . . . . . . . . . . . . . . . . . . . . . . . . . . . . . . . . . . . . . . . . . . . . . . . . . . 25
Viewing PDF pages . . . . . . . . . . . . . . . . . . . . . . . . . . . . . . . . . . . . . . . . . . . . . . . . . . . . . . . . . . . . . . . . . . . . . . . . . . . . . . . . . . . . . . . . . . . . . . . . . . . 30
Adjusting PDF views . . . . . . . . . . . . . . . . . . . . . . . . . . . . . . . . . . . . . . . . . . . . . . . . . . . . . . . . . . . . . . . . . . . . . . . . . . . . . . . . . . . . . . . . . . . . . . . . . . 41
Grids, guides, and measurements . . . . . . . . . . . . . . . . . . . . . . . . . . . . . . . . . . . . . . . . . . . . . . . . . . . . . . . . . . . . . . . . . . . . . . . . . . . . . . . . . . . . . 47
Organizer . . . . . . . . . . . . . . . . . . . . . . . . . . . . . . . . . . . . . . . . . . . . . . . . . . . . . . . . . . . . . . . . . . . . . . . . . . . . . . . . . . . . . . . . . . . . . . . . . . . . . . . . . . . . 50
Maintaining the software . . . . . . . . . . . . . . . . . . . . . . . . . . . . . . . . . . . . . . . . . . . . . . . . . . . . . . . . . . . . . . . . . . . . . . . . . . . . . . . . . . . . . . . . . . . . . 54
Non-English languages . . . . . . . . . . . . . . . . . . . . . . . . . . . . . . . . . . . . . . . . . . . . . . . . . . . . . . . . . . . . . . . . . . . . . . . . . . . . . . . . . . . . . . . . . . . . . . . 56
Acrobat in Mac OS . . . . . . . . . . . . . . . . . . . . . . . . . . . . . . . . . . . . . . . . . . . . . . . . . . . . . . . . . . . . . . . . . . . . . . . . . . . . . . . . . . . . . . . . . . . . . . . . . . . . 57
Chapter 3: Creating PDFs
Overview of creating PDFs . . . . . . . . . . . . . . . . . . . . . . . . . . . . . . . . . . . . . . . . . . . . . . . . . . . . . . . . . . . . . . . . . . . . . . . . . . . . . . . . . . . . . . . . . . . . 58
Creating simple PDFs with Acrobat . . . . . . . . . . . . . . . . . . . . . . . . . . . . . . . . . . . . . . . . . . . . . . . . . . . . . . . . . . . . . . . . . . . . . . . . . . . . . . . . . . . 60
Scan documents to PDF . . . . . . . . . . . . . . . . . . . . . . . . . . . . . . . . . . . . . . . . . . . . . . . . . . . . . . . . . . . . . . . . . . . . . . . . . . . . . . . . . . . . . . . . . . . . . . 64
Using the Adobe PDF printer . . . . . . . . . . . . . . . . . . . . . . . . . . . . . . . . . . . . . . . . . . . . . . . . . . . . . . . . . . . . . . . . . . . . . . . . . . . . . . . . . . . . . . . . . 69
Creating PDFs with PDFMaker (Windows) . . . . . . . . . . . . . . . . . . . . . . . . . . . . . . . . . . . . . . . . . . . . . . . . . . . . . . . . . . . . . . . . . . . . . . . . . . . . . 73
Converting web pages to PDF . . . . . . . . . . . . . . . . . . . . . . . . . . . . . . . . . . . . . . . . . . . . . . . . . . . . . . . . . . . . . . . . . . . . . . . . . . . . . . . . . . . . . . . . 88
Creating PDFs with Acrobat Distiller . . . . . . . . . . . . . . . . . . . . . . . . . . . . . . . . . . . . . . . . . . . . . . . . . . . . . . . . . . . . . . . . . . . . . . . . . . . . . . . . . . 93
Adobe PDF conversion settings . . . . . . . . . . . . . . . . . . . . . . . . . . . . . . . . . . . . . . . . . . . . . . . . . . . . . . . . . . . . . . . . . . . . . . . . . . . . . . . . . . . . . . . 97
Fonts . . . . . . . . . . . . . . . . . . . . . . . . . . . . . . . . . . . . . . . . . . . . . . . . . . . . . . . . . . . . . . . . . . . . . . . . . . . . . . . . . . . . . . . . . . . . . . . . . . . . . . . . . . . . . . . 110
Chapter 4: PDF Portfolios and combined PDFs
Combining files into a PDF Portfolio . . . . . . . . . . . . . . . . . . . . . . . . . . . . . . . . . . . . . . . . . . . . . . . . . . . . . . . . . . . . . . . . . . . . . . . . . . . . . . . . . . 112
Other options for combining files . . . . . . . . . . . . . . . . . . . . . . . . . . . . . . . . . . . . . . . . . . . . . . . . . . . . . . . . . . . . . . . . . . . . . . . . . . . . . . . . . . . . 119
Adding unifying page elements . . . . . . . . . . . . . . . . . . . . . . . . . . . . . . . . . . . . . . . . . . . . . . . . . . . . . . . . . . . . . . . . . . . . . . . . . . . . . . . . . . . . . . 121
Rearranging pages in a PDF . . . . . . . . . . . . . . . . . . . . . . . . . . . . . . . . . . . . . . . . . . . . . . . . . . . . . . . . . . . . . . . . . . . . . . . . . . . . . . . . . . . . . . . . . . 130
Chapter 5: Saving and exporting PDFs
Saving PDFs . . . . . . . . . . . . . . . . . . . . . . . . . . . . . . . . . . . . . . . . . . . . . . . . . . . . . . . . . . . . . . . . . . . . . . . . . . . . . . . . . . . . . . . . . . . . . . . . . . . . . . . . . 135
Exporting PDFs to other file formats . . . . . . . . . . . . . . . . . . . . . . . . . . . . . . . . . . . . . . . . . . . . . . . . . . . . . . . . . . . . . . . . . . . . . . . . . . . . . . . . . . 137
Reusing PDF content . . . . . . . . . . . . . . . . . . . . . . . . . . . . . . . . . . . . . . . . . . . . . . . . . . . . . . . . . . . . . . . . . . . . . . . . . . . . . . . . . . . . . . . . . . . . . . . . 142
Chapter 6: Collaboration
File sharing and real-time collaboration . . . . . . . . . . . . . . . . . . . . . . . . . . . . . . . . . . . . . . . . . . . . . . . . . . . . . . . . . . . . . . . . . . . . . . . . . . . . . . 145
Preparing for a PDF review . . . . . . . . . . . . . . . . . . . . . . . . . . . . . . . . . . . . . . . . . . . . . . . . . . . . . . . . . . . . . . . . . . . . . . . . . . . . . . . . . . . . . . . . . . . 148
Starting a review . . . . . . . . . . . . . . . . . . . . . . . . . . . . . . . . . . . . . . . . . . . . . . . . . . . . . . . . . . . . . . . . . . . . . . . . . . . . . . . . . . . . . . . . . . . . . . . . . . . . 151

iv
USING ACROBAT 9 PRO
Contents
Last updated 9/30/2011
Participating in a PDF review . . . . . . . . . . . . . . . . . . . . . . . . . . . . . . . . . . . . . . . . . . . . . . . . . . . . . . . . . . . . . . . . . . . . . . . . . . . . . . . . . . . . . . . . 153
Tracking and managing PDF reviews . . . . . . . . . . . . . . . . . . . . . . . . . . . . . . . . . . . . . . . . . . . . . . . . . . . . . . . . . . . . . . . . . . . . . . . . . . . . . . . . . 156
Commenting . . . . . . . . . . . . . . . . . . . . . . . . . . . . . . . . . . . . . . . . . . . . . . . . . . . . . . . . . . . . . . . . . . . . . . . . . . . . . . . . . . . . . . . . . . . . . . . . . . . . . . . . 160
Managing comments . . . . . . . . . . . . . . . . . . . . . . . . . . . . . . . . . . . . . . . . . . . . . . . . . . . . . . . . . . . . . . . . . . . . . . . . . . . . . . . . . . . . . . . . . . . . . . . . 173
Importing and exporting comments . . . . . . . . . . . . . . . . . . . . . . . . . . . . . . . . . . . . . . . . . . . . . . . . . . . . . . . . . . . . . . . . . . . . . . . . . . . . . . . . . 177
Approval workflows . . . . . . . . . . . . . . . . . . . . . . . . . . . . . . . . . . . . . . . . . . . . . . . . . . . . . . . . . . . . . . . . . . . . . . . . . . . . . . . . . . . . . . . . . . . . . . . . . 181
Chapter 7: Forms
Forms basics . . . . . . . . . . . . . . . . . . . . . . . . . . . . . . . . . . . . . . . . . . . . . . . . . . . . . . . . . . . . . . . . . . . . . . . . . . . . . . . . . . . . . . . . . . . . . . . . . . . . . . . . 183
Creating and distributing forms . . . . . . . . . . . . . . . . . . . . . . . . . . . . . . . . . . . . . . . . . . . . . . . . . . . . . . . . . . . . . . . . . . . . . . . . . . . . . . . . . . . . . . 185
Form fields behavior . . . . . . . . . . . . . . . . . . . . . . . . . . . . . . . . . . . . . . . . . . . . . . . . . . . . . . . . . . . . . . . . . . . . . . . . . . . . . . . . . . . . . . . . . . . . . . . . . 197
Setting action buttons . . . . . . . . . . . . . . . . . . . . . . . . . . . . . . . . . . . . . . . . . . . . . . . . . . . . . . . . . . . . . . . . . . . . . . . . . . . . . . . . . . . . . . . . . . . . . . . 207
Publishing interactive web forms . . . . . . . . . . . . . . . . . . . . . . . . . . . . . . . . . . . . . . . . . . . . . . . . . . . . . . . . . . . . . . . . . . . . . . . . . . . . . . . . . . . . 211
Using QuickBooks data in forms (Windows) . . . . . . . . . . . . . . . . . . . . . . . . . . . . . . . . . . . . . . . . . . . . . . . . . . . . . . . . . . . . . . . . . . . . . . . . . . 214
Collecting and managing form data . . . . . . . . . . . . . . . . . . . . . . . . . . . . . . . . . . . . . . . . . . . . . . . . . . . . . . . . . . . . . . . . . . . . . . . . . . . . . . . . . . 215
Filling in forms . . . . . . . . . . . . . . . . . . . . . . . . . . . . . . . . . . . . . . . . . . . . . . . . . . . . . . . . . . . . . . . . . . . . . . . . . . . . . . . . . . . . . . . . . . . . . . . . . . . . . . 218
Chapter 8: Security
Opening secured documents . . . . . . . . . . . . . . . . . . . . . . . . . . . . . . . . . . . . . . . . . . . . . . . . . . . . . . . . . . . . . . . . . . . . . . . . . . . . . . . . . . . . . . . . 223
Choosing a security method . . . . . . . . . . . . . . . . . . . . . . . . . . . . . . . . . . . . . . . . . . . . . . . . . . . . . . . . . . . . . . . . . . . . . . . . . . . . . . . . . . . . . . . . . 229
Securing documents with passwords . . . . . . . . . . . . . . . . . . . . . . . . . . . . . . . . . . . . . . . . . . . . . . . . . . . . . . . . . . . . . . . . . . . . . . . . . . . . . . . . 231
Securing documents with certificates . . . . . . . . . . . . . . . . . . . . . . . . . . . . . . . . . . . . . . . . . . . . . . . . . . . . . . . . . . . . . . . . . . . . . . . . . . . . . . . . 233
Securing documents with Adobe LiveCycle Rights Management ES . . . . . . . . . . . . . . . . . . . . . . . . . . . . . . . . . . . . . . . . . . . . . . . . . . . 240
Setting up security policies . . . . . . . . . . . . . . . . . . . . . . . . . . . . . . . . . . . . . . . . . . . . . . . . . . . . . . . . . . . . . . . . . . . . . . . . . . . . . . . . . . . . . . . . . . 241
Creating or obtaining digital IDs . . . . . . . . . . . . . . . . . . . . . . . . . . . . . . . . . . . . . . . . . . . . . . . . . . . . . . . . . . . . . . . . . . . . . . . . . . . . . . . . . . . . . 247
Removing sensitive content . . . . . . . . . . . . . . . . . . . . . . . . . . . . . . . . . . . . . . . . . . . . . . . . . . . . . . . . . . . . . . . . . . . . . . . . . . . . . . . . . . . . . . . . . 252
Chapter 9: Digital signatures
Digital signatures . . . . . . . . . . . . . . . . . . . . . . . . . . . . . . . . . . . . . . . . . . . . . . . . . . . . . . . . . . . . . . . . . . . . . . . . . . . . . . . . . . . . . . . . . . . . . . . . . . . . 257
Signing PDFs . . . . . . . . . . . . . . . . . . . . . . . . . . . . . . . . . . . . . . . . . . . . . . . . . . . . . . . . . . . . . . . . . . . . . . . . . . . . . . . . . . . . . . . . . . . . . . . . . . . . . . . . 260
Validating signatures . . . . . . . . . . . . . . . . . . . . . . . . . . . . . . . . . . . . . . . . . . . . . . . . . . . . . . . . . . . . . . . . . . . . . . . . . . . . . . . . . . . . . . . . . . . . . . . . 265
Chapter 10: Accessibility, tags, and reflow
Accessibility features . . . . . . . . . . . . . . . . . . . . . . . . . . . . . . . . . . . . . . . . . . . . . . . . . . . . . . . . . . . . . . . . . . . . . . . . . . . . . . . . . . . . . . . . . . . . . . . . 270
Checking the accessibility of PDFs . . . . . . . . . . . . . . . . . . . . . . . . . . . . . . . . . . . . . . . . . . . . . . . . . . . . . . . . . . . . . . . . . . . . . . . . . . . . . . . . . . . 273
Reading PDFs with reflow and accessibility features . . . . . . . . . . . . . . . . . . . . . . . . . . . . . . . . . . . . . . . . . . . . . . . . . . . . . . . . . . . . . . . . . . 276
Creating accessible PDFs . . . . . . . . . . . . . . . . . . . . . . . . . . . . . . . . . . . . . . . . . . . . . . . . . . . . . . . . . . . . . . . . . . . . . . . . . . . . . . . . . . . . . . . . . . . . 282
Making existing PDFs accessible . . . . . . . . . . . . . . . . . . . . . . . . . . . . . . . . . . . . . . . . . . . . . . . . . . . . . . . . . . . . . . . . . . . . . . . . . . . . . . . . . . . . . 287
Editing document structure with the Content and Tags tabs . . . . . . . . . . . . . . . . . . . . . . . . . . . . . . . . . . . . . . . . . . . . . . . . . . . . . . . . . . 297
Chapter 11: Editing PDFs
Page thumbnails and bookmarks . . . . . . . . . . . . . . . . . . . . . . . . . . . . . . . . . . . . . . . . . . . . . . . . . . . . . . . . . . . . . . . . . . . . . . . . . . . . . . . . . . . . 305
Links and attachments . . . . . . . . . . . . . . . . . . . . . . . . . . . . . . . . . . . . . . . . . . . . . . . . . . . . . . . . . . . . . . . . . . . . . . . . . . . . . . . . . . . . . . . . . . . . . . . 310
Actions and scripting . . . . . . . . . . . . . . . . . . . . . . . . . . . . . . . . . . . . . . . . . . . . . . . . . . . . . . . . . . . . . . . . . . . . . . . . . . . . . . . . . . . . . . . . . . . . . . . . 315
Converted web pages . . . . . . . . . . . . . . . . . . . . . . . . . . . . . . . . . . . . . . . . . . . . . . . . . . . . . . . . . . . . . . . . . . . . . . . . . . . . . . . . . . . . . . . . . . . . . . . 318
Articles . . . . . . . . . . . . . . . . . . . . . . . . . . . . . . . . . . . . . . . . . . . . . . . . . . . . . . . . . . . . . . . . . . . . . . . . . . . . . . . . . . . . . . . . . . . . . . . . . . . . . . . . . . . . . . 319
Optimizing . . . . . . . . . . . . . . . . . . . . . . . . . . . . . . . . . . . . . . . . . . . . . . . . . . . . . . . . . . . . . . . . . . . . . . . . . . . . . . . . . . . . . . . . . . . . . . . . . . . . . . . . . . 321
Editing text and objects . . . . . . . . . . . . . . . . . . . . . . . . . . . . . . . . . . . . . . . . . . . . . . . . . . . . . . . . . . . . . . . . . . . . . . . . . . . . . . . . . . . . . . . . . . . . . 326

v
USING ACROBAT 9 PRO
Contents
Last updated 9/30/2011
Setting up a presentation . . . . . . . . . . . . . . . . . . . . . . . . . . . . . . . . . . . . . . . . . . . . . . . . . . . . . . . . . . . . . . . . . . . . . . . . . . . . . . . . . . . . . . . . . . . . 333
Document properties and metadata . . . . . . . . . . . . . . . . . . . . . . . . . . . . . . . . . . . . . . . . . . . . . . . . . . . . . . . . . . . . . . . . . . . . . . . . . . . . . . . . . 336
Layers . . . . . . . . . . . . . . . . . . . . . . . . . . . . . . . . . . . . . . . . . . . . . . . . . . . . . . . . . . . . . . . . . . . . . . . . . . . . . . . . . . . . . . . . . . . . . . . . . . . . . . . . . . . . . . . 340
Processing in batches . . . . . . . . . . . . . . . . . . . . . . . . . . . . . . . . . . . . . . . . . . . . . . . . . . . . . . . . . . . . . . . . . . . . . . . . . . . . . . . . . . . . . . . . . . . . . . . 344
Using Geospatial PDFs . . . . . . . . . . . . . . . . . . . . . . . . . . . . . . . . . . . . . . . . . . . . . . . . . . . . . . . . . . . . . . . . . . . . . . . . . . . . . . . . . . . . . . . . . . . . . . . 348
Chapter 12: Searching and indexing
Searching PDFs . . . . . . . . . . . . . . . . . . . . . . . . . . . . . . . . . . . . . . . . . . . . . . . . . . . . . . . . . . . . . . . . . . . . . . . . . . . . . . . . . . . . . . . . . . . . . . . . . . . . . . 351
Creating PDF indexes . . . . . . . . . . . . . . . . . . . . . . . . . . . . . . . . . . . . . . . . . . . . . . . . . . . . . . . . . . . . . . . . . . . . . . . . . . . . . . . . . . . . . . . . . . . . . . . . 357
Chapter 13: Multimedia and 3D models
Multimedia in PDFs . . . . . . . . . . . . . . . . . . . . . . . . . . . . . . . . . . . . . . . . . . . . . . . . . . . . . . . . . . . . . . . . . . . . . . . . . . . . . . . . . . . . . . . . . . . . . . . . . . 363
Adding 3D models to PDFs . . . . . . . . . . . . . . . . . . . . . . . . . . . . . . . . . . . . . . . . . . . . . . . . . . . . . . . . . . . . . . . . . . . . . . . . . . . . . . . . . . . . . . . . . . 372
Interacting with 3D models . . . . . . . . . . . . . . . . . . . . . . . . . . . . . . . . . . . . . . . . . . . . . . . . . . . . . . . . . . . . . . . . . . . . . . . . . . . . . . . . . . . . . . . . . . 374
Chapter 14: Color management
Understanding color management . . . . . . . . . . . . . . . . . . . . . . . . . . . . . . . . . . . . . . . . . . . . . . . . . . . . . . . . . . . . . . . . . . . . . . . . . . . . . . . . . . 390
Keeping colors consistent . . . . . . . . . . . . . . . . . . . . . . . . . . . . . . . . . . . . . . . . . . . . . . . . . . . . . . . . . . . . . . . . . . . . . . . . . . . . . . . . . . . . . . . . . . . 392
Color-managing imported images . . . . . . . . . . . . . . . . . . . . . . . . . . . . . . . . . . . . . . . . . . . . . . . . . . . . . . . . . . . . . . . . . . . . . . . . . . . . . . . . . . . 395
Color-managing documents for online viewing . . . . . . . . . . . . . . . . . . . . . . . . . . . . . . . . . . . . . . . . . . . . . . . . . . . . . . . . . . . . . . . . . . . . . . 397
Proofing colors . . . . . . . . . . . . . . . . . . . . . . . . . . . . . . . . . . . . . . . . . . . . . . . . . . . . . . . . . . . . . . . . . . . . . . . . . . . . . . . . . . . . . . . . . . . . . . . . . . . . . . 398
Color-managing documents when printing . . . . . . . . . . . . . . . . . . . . . . . . . . . . . . . . . . . . . . . . . . . . . . . . . . . . . . . . . . . . . . . . . . . . . . . . . . 400
Working with color profiles . . . . . . . . . . . . . . . . . . . . . . . . . . . . . . . . . . . . . . . . . . . . . . . . . . . . . . . . . . . . . . . . . . . . . . . . . . . . . . . . . . . . . . . . . . 402
Color settings . . . . . . . . . . . . . . . . . . . . . . . . . . . . . . . . . . . . . . . . . . . . . . . . . . . . . . . . . . . . . . . . . . . . . . . . . . . . . . . . . . . . . . . . . . . . . . . . . . . . . . . 407
Chapter 15: Printing
Basic printing tasks . . . . . . . . . . . . . . . . . . . . . . . . . . . . . . . . . . . . . . . . . . . . . . . . . . . . . . . . . . . . . . . . . . . . . . . . . . . . . . . . . . . . . . . . . . . . . . . . . . 412
Other ways to print PDFs . . . . . . . . . . . . . . . . . . . . . . . . . . . . . . . . . . . . . . . . . . . . . . . . . . . . . . . . . . . . . . . . . . . . . . . . . . . . . . . . . . . . . . . . . . . . 416
Printing custom sizes . . . . . . . . . . . . . . . . . . . . . . . . . . . . . . . . . . . . . . . . . . . . . . . . . . . . . . . . . . . . . . . . . . . . . . . . . . . . . . . . . . . . . . . . . . . . . . . . 418
Advanced print settings . . . . . . . . . . . . . . . . . . . . . . . . . . . . . . . . . . . . . . . . . . . . . . . . . . . . . . . . . . . . . . . . . . . . . . . . . . . . . . . . . . . . . . . . . . . . . 419
Printing color . . . . . . . . . . . . . . . . . . . . . . . . . . . . . . . . . . . . . . . . . . . . . . . . . . . . . . . . . . . . . . . . . . . . . . . . . . . . . . . . . . . . . . . . . . . . . . . . . . . . . . . 426
Chapter 16: Print production tools
Tools for high-end output . . . . . . . . . . . . . . . . . . . . . . . . . . . . . . . . . . . . . . . . . . . . . . . . . . . . . . . . . . . . . . . . . . . . . . . . . . . . . . . . . . . . . . . . . . . 431
Trapping color . . . . . . . . . . . . . . . . . . . . . . . . . . . . . . . . . . . . . . . . . . . . . . . . . . . . . . . . . . . . . . . . . . . . . . . . . . . . . . . . . . . . . . . . . . . . . . . . . . . . . . 432
Previewing output . . . . . . . . . . . . . . . . . . . . . . . . . . . . . . . . . . . . . . . . . . . . . . . . . . . . . . . . . . . . . . . . . . . . . . . . . . . . . . . . . . . . . . . . . . . . . . . . . . 440
Color conversion and ink management . . . . . . . . . . . . . . . . . . . . . . . . . . . . . . . . . . . . . . . . . . . . . . . . . . . . . . . . . . . . . . . . . . . . . . . . . . . . . . 443
Printer marks and hairlines . . . . . . . . . . . . . . . . . . . . . . . . . . . . . . . . . . . . . . . . . . . . . . . . . . . . . . . . . . . . . . . . . . . . . . . . . . . . . . . . . . . . . . . . . . . 448
Transparency flattening . . . . . . . . . . . . . . . . . . . . . . . . . . . . . . . . . . . . . . . . . . . . . . . . . . . . . . . . . . . . . . . . . . . . . . . . . . . . . . . . . . . . . . . . . . . . . 450
Chapter 17: Preflight
Analyzing documents . . . . . . . . . . . . . . . . . . . . . . . . . . . . . . . . . . . . . . . . . . . . . . . . . . . . . . . . . . . . . . . . . . . . . . . . . . . . . . . . . . . . . . . . . . . . . . . 457
Viewing preflight results, objects, and resources . . . . . . . . . . . . . . . . . . . . . . . . . . . . . . . . . . . . . . . . . . . . . . . . . . . . . . . . . . . . . . . . . . . . . . 460
Preflight reports . . . . . . . . . . . . . . . . . . . . . . . . . . . . . . . . . . . . . . . . . . . . . . . . . . . . . . . . . . . . . . . . . . . . . . . . . . . . . . . . . . . . . . . . . . . . . . . . . . . . . 464
Advanced inspections . . . . . . . . . . . . . . . . . . . . . . . . . . . . . . . . . . . . . . . . . . . . . . . . . . . . . . . . . . . . . . . . . . . . . . . . . . . . . . . . . . . . . . . . . . . . . . . 466
Preflight profiles . . . . . . . . . . . . . . . . . . . . . . . . . . . . . . . . . . . . . . . . . . . . . . . . . . . . . . . . . . . . . . . . . . . . . . . . . . . . . . . . . . . . . . . . . . . . . . . . . . . . . 467
Additional checks . . . . . . . . . . . . . . . . . . . . . . . . . . . . . . . . . . . . . . . . . . . . . . . . . . . . . . . . . . . . . . . . . . . . . . . . . . . . . . . . . . . . . . . . . . . . . . . . . . . 473
Correcting problem areas . . . . . . . . . . . . . . . . . . . . . . . . . . . . . . . . . . . . . . . . . . . . . . . . . . . . . . . . . . . . . . . . . . . . . . . . . . . . . . . . . . . . . . . . . . . . 478

vi
USING ACROBAT 9 PRO
Contents
Last updated 9/30/2011
PDF/X-, PDF/A-, and PDF/E-compliant files . . . . . . . . . . . . . . . . . . . . . . . . . . . . . . . . . . . . . . . . . . . . . . . . . . . . . . . . . . . . . . . . . . . . . . . . . . . 482
Automating document analysis . . . . . . . . . . . . . . . . . . . . . . . . . . . . . . . . . . . . . . . . . . . . . . . . . . . . . . . . . . . . . . . . . . . . . . . . . . . . . . . . . . . . . . 483
Output intents . . . . . . . . . . . . . . . . . . . . . . . . . . . . . . . . . . . . . . . . . . . . . . . . . . . . . . . . . . . . . . . . . . . . . . . . . . . . . . . . . . . . . . . . . . . . . . . . . . . . . . 485
Chapter 18: Job Definition Format
About JDF files . . . . . . . . . . . . . . . . . . . . . . . . . . . . . . . . . . . . . . . . . . . . . . . . . . . . . . . . . . . . . . . . . . . . . . . . . . . . . . . . . . . . . . . . . . . . . . . . . . . . . . 487
View JDF job definitions . . . . . . . . . . . . . . . . . . . . . . . . . . . . . . . . . . . . . . . . . . . . . . . . . . . . . . . . . . . . . . . . . . . . . . . . . . . . . . . . . . . . . . . . . . . . . 488
Create JDF job definitions . . . . . . . . . . . . . . . . . . . . . . . . . . . . . . . . . . . . . . . . . . . . . . . . . . . . . . . . . . . . . . . . . . . . . . . . . . . . . . . . . . . . . . . . . . . 488
Edit JDF job definitions . . . . . . . . . . . . . . . . . . . . . . . . . . . . . . . . . . . . . . . . . . . . . . . . . . . . . . . . . . . . . . . . . . . . . . . . . . . . . . . . . . . . . . . . . . . . . . 489
Specify contact information for a print job . . . . . . . . . . . . . . . . . . . . . . . . . . . . . . . . . . . . . . . . . . . . . . . . . . . . . . . . . . . . . . . . . . . . . . . . . . . 490
Define media specifications for a print job . . . . . . . . . . . . . . . . . . . . . . . . . . . . . . . . . . . . . . . . . . . . . . . . . . . . . . . . . . . . . . . . . . . . . . . . . . . . 491
Add and remove JDF job definitions . . . . . . . . . . . . . . . . . . . . . . . . . . . . . . . . . . . . . . . . . . . . . . . . . . . . . . . . . . . . . . . . . . . . . . . . . . . . . . . . . 492
Converting job definition files to HTML . . . . . . . . . . . . . . . . . . . . . . . . . . . . . . . . . . . . . . . . . . . . . . . . . . . . . . . . . . . . . . . . . . . . . . . . . . . . . . . 493
Submitting print jobs . . . . . . . . . . . . . . . . . . . . . . . . . . . . . . . . . . . . . . . . . . . . . . . . . . . . . . . . . . . . . . . . . . . . . . . . . . . . . . . . . . . . . . . . . . . . . . . . 493
Chapter 19: Keyboard shortcuts
Keyboard shortcuts . . . . . . . . . . . . . . . . . . . . . . . . . . . . . . . . . . . . . . . . . . . . . . . . . . . . . . . . . . . . . . . . . . . . . . . . . . . . . . . . . . . . . . . . . . . . . . . . . . 496
Index ...............................................................................................................501

1
Last updated 9/30/2011
Chapter 1: Getting started
Before you begin working with your software, take a few moments to read an overview of activation and the many
resources available to you. You have access to instructional videos, plug-ins, templates, user communities, seminars,
tutorials, RSS feeds, and much more.
Activation and registration
License activation (Windows)
During the installation process, your Adobe software may attempt to contact Adobe to complete the license activation
process. No personal data is transmitted. For more information on product activation, visit the Adobe website at
www.adobe.com/go/activation.
A single-user retail license activation supports two computers. For example, you can install the product on a desktop
computer at work and on a laptop computer at home. If you want to install the software on a third computer, you must
first deactivate it on one of the other two computers. Choose Help
> Deactivate.
If you are using Acrobat with Creative Suite 4 and you get an error message about expired licensing, see the technote
http://kb2.adobe.com/cps/405/kb405970.html.
For more information about activation and deactivation, see the service note
http://kb2.adobe.com/cps/100/1008779.html.
Register
Register your product to receive complimentary installation support, notifications of updates, and other services.
❖ To register, follow the onscreen instructions in the Registration dialog box, which appears after you install and
activate the software.
If you postpone registration, you can register at any time by choosing Help > Registration.
Adobe Product Improvement Program (Windows)
After you have used your Adobe software a certain number of times, a dialog box will appear, asking you whether you
would like to participate in the Adobe Product Improvement Program.
If you choose to participate, data about your use of Adobe software will be sent to Adobe. No personal information is
recorded or sent. The Adobe Product Improvement Program only collects information about the features and tools
you use in the software and how often.
You can opt in to or opt out of the program at any time:
• To participate, choose Help > Improvement Program Options and click Yes.
• To stop participating, choose Help > Improvement Program Options and click No, Thank You.

2
USING ACROBAT 9 PRO
Getting started
Last updated 9/30/2011
Adobe Customization Wizard
Adobe Customization Wizard 9 helps IT professionals take greater control of enterprise-wide deployments of
Adobe®
Acrobat® 9 Pro and Adobe Reader®. With it, you can customize the installer and application features before
deployment. The Customization Wizard is a free downloadable utility. Providing a graphical interface to the Windows
Installer for Acrobat, the Customization Wizard enables IT administrators to:
• Optimize the behavior of the installer by including silent installation, pre-serialization, restart, multilingual, and
custom setup choices.
• Customize key application preferences—turn off automatic updates, add and set default job options, and customize
collaboration and security settings.
• Help prevent users from modifying certain preferences.
Read Me
The installation disc may contain a Read Me file for your software. Open the file to read important information about
topics such as the following:
• System requirements
• Installation (including uninstalling the software)
• Activation and registration
• Customer support
• Legal notices
Help and support
Community Help
Community Help is an integrated environment on adobe.com that gives you access to community-generated content
moderated by Adobe and industry experts. Comments from users help guide you to an answer.
Community Help draws on a number of resources, including:
• Videos, tutorials, tips and techniques, blogs, articles, and examples for designers and developers.
• Complete online product Help, which is updated regularly by the Adobe documentation team.
• All other content on Adobe.com, including knowledgebase articles, downloads and updates, Developer
Connection, and more.
Use the help search field in your product’s Help interface to access Community Help directly, or go to
www.adobe.com/support/acrobat to access the product Help and Support page, a portal to all of the Community Help
content for your product.
The sites searched by the default Community Help search engine are hand-selected and reviewed for quality by Adobe
and Adobe Community Experts. Adobe experts also work to ensure that the top search results include a mixture of
different kinds of content, including results from online product Help.
For more information on using Community Help, see http://help.adobe.com/en_US/CommunityHelp/.
For a video overview of Community Help, see www.adobe.com/go/lrvid4117_xp.

3
USING ACROBAT 9 PRO
Getting started
Last updated 9/30/2011
Product Help
Adobe provides a comprehensive user guide for Acrobat as online product Help and PDF. Topics from online product
Help are included in your results whenever you search Community Help.
If you want to consult or search online product Help only, you can access it by clicking the product Help link in the
upper-right corner of the Help and Support page. Be sure to select the This Help System Only option on the Help page
before you do your search.
The Help menu within the product opens local Help, a subset of the content available in online product Help. Because
local Help is not as complete or up-to-date as online product Help, Adobe recommends that you use the PDF version
of product Help if you want to stay off-line. A downloadable PDF of complete product Help is available from two
places:
• The product’s Help and Support page (upper-right corner of the page)
• Web Help (top of the Help interface)
For more information on accessing product help, see http://help.adobe.com/en_US/CommunityHelp/.
Support resources
Visit the Adobe Support website at www.adobe.com/support to learn about free and paid technical support options.
Services, downloads, and extras
You can enhance your product by integrating a variety of services, plug-ins, and extensions in your product. You can
also download samples and other assets to help you get your work done.
Adobe creative online services
Adobe® Creative Suite® 4 includes new online features that bring the power of the web to your desktop. Use these
features to connect with the community, collaborate, and get more from your Adobe tools. Powerful creative online
services let you complete tasks ranging from color matching to data conferencing. The services seamlessly integrate
with desktop applications so you can quickly enhance existing workflows. Some services offer full or partial
functionality when you’re offline too.
Visit Adobe.com to learn more about available services. Some Creative Suite 4 applications include these initial
offerings:
Kuler™ panel Quickly create, share, and explore color themes online.
Adobe® ConnectNow Collaborate with dispersed working teams over the web, sharing voice, data, and multimedia.
Resource Central Instantly access tutorials, sample files, and extensions for Adobe digital video applications.
Adobe Exchange
Visit the Adobe Exchange at www.adobe.com/go/exchange to download samples as well as thousands of plug-ins and
extensions from Adobe and third-party developers. The plug-ins and extensions can help you automate tasks,
customize workflows, create specialized professional effects, and more.

4
USING ACROBAT 9 PRO
Getting started
Last updated 9/30/2011
Adobe downloads
Visit www.adobe.com/go/downloads to find free updates, tryouts, and other useful software.
Adobe Labs
Adobe Labs at www.adobe.com/go/labs gives you the opportunity to experience and evaluate new and emerging
technologies and products from Adobe. At Adobe Labs, you have access to resources such as these:
• Prerelease software and technologies
• Code samples and best practices to accelerate your learning
• Early versions of product and technical documentation
• Forums, wiki-based content, and other collaborative resources to help you interact with like-minded users.
Adobe Labs fosters a collaborative software development process. In this environment, customers quickly become
productive with new products and technologies. Adobe Labs is also a forum for early feedback. The Adobe
development teams use this feedback to create software that meets the needs and expectations of the community.
Adobe TV
Visit Adobe TV at http://tv.adobe.com to view instructional and inspirational videos.
Extras
The installation disc contains a variety of extras to help you make the most of your Adobe software. Some extras are
installed on your computer during the setup process; others are located on the disc.
To view the extras installed during the setup process, navigate to the application folder on your computer.
• Windows®: [startup drive]\Program Files\Adobe\[Adobe application]
• Mac OS®: [startup drive]/Applications/[Adobe application]
To view the extras on the disc, navigate to the Goodies folder in your language folder on the disc. Example:
• /English/Goodies/
What’s new
PDF creation, editing, and searching
Unify a wide range of content into a PDF Portfolio Combine documents, drawings, email, and spreadsheets into a
single, compressed PDF Portfolio. Use professionally designed templates that can be branded with your logo and
include descriptions to guide recipients through the contents.
Convert paper documents to PDF New optical character recognition (OCR) technology and support for a broader
range of scanners improves searchability and appearance of the scanned documents. See
“Scan a paper document to
PDF” on page 64.
Convert web pages to PDF Improved web capture allows you to convert complete web pages or just the portions you
want, including or excluding rich and interactive media. PDF versions of web pages are easy to print, archive, mark
up, and share. See
“Converting web pages to PDF” on page 88.

5
USING ACROBAT 9 PRO
Getting started
Last updated 9/30/2011
Convert documents from new versions of Lotus Notes and AutoCAD Acrobat now supports Lotus Notes 8.5. Acrobat
Pro and Acrobat Pro Extended now support Autodesk AutoCAD 2009.
Compare PDF documents Acrobat Automatically highlights the differences between two versions of a PDF document,
including text and images, so you can quickly and easily identify what has changed. See
“Compare a revised PDF to an
earlier version” on page 36.
Search across multiple PDFs Enhanced functionality enables you to search multiple PDF files in the same folder to
help you quickly find the information you need.
Collaboration
Use Acrobat.com for shared reviews Participants download the file from Acrobat.com, and add comments or data
using Acrobat or Adobe Reader. When finished, participants publish comments or submit responses to Acrobat.com.
When using Acrobat.com for shared reviews, you can also allow reviewers to open and share the PDF in a live chat
session. See
“Starting a review” on page 151.
Collaborating in online meetings Use Adobe ConnectNow, a personal web-conference tool, to conduct real-time
meetings on your desktop. Attendees join the meeting by logging into a web-based meeting space from their own
computers. In a ConnectNow online meeting, you can share your desktop, use live chat, share online whiteboards, and
use many other collaboration features. See
“Collaborate in online meetings” on page 147.
Use Acrobat.com to upload and share large documents From Acrobat or Reader, you can create your own user
account on Acrobat.com. Use Acrobat.com to upload and share most document types, and to share PDFs or your
desktop in online meetings. See
“Share documents with others” on page 145.
Synchronize document views Ensure colleagues, clients, and partners are on the same page at the same time with the
ability to co-navigate documents. Use Collaborate Live to provide clarity, enhance discussion, and walk recipients
through a document in real time. See
“Collaborate with others in a PDF” on page 146.
Forms
Easily create and edit electronic forms (Windows) Use the new Forms Wizard to convert Microsoft® Word and Excel
documents or scanned paper into PDF forms. Form fields are automatically recognized and converted to fillable fields.
Quickly add, edit, and name form fields. Use the Tracker to see when forms have been completed and who has
completed them. See
“Create forms using Acrobat” on page 187.
Collect and export form data Easily collect user data and export the data to a spreadsheet for analysis and reporting.
See
“Collecting and managing form data” on page 215.
Track forms Use the Tracker to see when forms have been completed and who has completed them. See “About Forms
Tracker” on page 217.
Use QuickBooks data in forms (Windows English only) Import and export Intuit QuickBooks data using custom
templates. See
“Using QuickBooks data in forms (Windows)” on page 214.
Create and distribute online forms Create and distribute online forms using your web browser and the Adobe
FormsCentral service. Recipients fill out these forms using any Internet-connected device. See
“Create online forms
using FormsCentral” on page 187.
Multimedia and 3D models
Isolate parts in an assembly Display the geometry, PMI, and PMI views for an isolated part, and hide or deselect these
elements for all other parts. See
“Hide, isolate, and change the appearance of parts” on page 378.

6
USING ACROBAT 9 PRO
Getting started
Last updated 9/30/2011
Include Flash content in PDFs Add Flash® videos and animations to your PDF documents. Native support for Flash
enables reliable cross-platform playback. No additional media player is necessary. See
“Add multimedia to PDFs” on
page 365.
Add comments to videos Add comments to a video as you are watching it. Each comment is attached to a specific
frame, so that when you view the comments, they appear in the context in which they were made. You can also enable
Acrobat Standard and Adobe Reader users to add comments to videos. See
“Add comments to videos” on page 368.
View and interact with PDF maps Search, measure, and mark up geospatially enabled PDF maps. Discover the
longitude and latitude by placing your cursor over a location. Measure PDF maps in kilometers or miles. See
“Using
Geospatial PDFs” on page 348.
Digital signatures
Long-term signature validation enhancements Embed the certificate chain, revocation status, and timestamp after
signature creation. Allow valid, but expired timestamps to be used. See “Establish long-term signature validation” on
page 266.
Create ink signatures Add a simple handwritten signature on a page. See “Sign a PDF” on page 261.
Legal
Search and redact Search and redact a list of words or phrases or a specific text pattern (for example, phone numbers,
credit card numbers, email addresses, or dates). See
“Search and redact words” on page 254.
Bates numbering for PDF Portfolios When designating documents for Bates numbering, you can add PDFs, PDF
Portfolios, and any non-PDF files that can be converted to PDF. The process converts non-PDF file types to PDF, and
then adds Bates numbers to the resulting PDF. If you add Bates numbering to a PDF Portfolio, any non-PDF files in
the PDF Portfolio are replaced with the converted and numbered PDFs. See
“Add a Bates numbering header or footer”
on page 123.
Creative professional
Output preview enhancements Use the Object Inspector to quickly inspect content in a document. The information
displayed is for all content that is directly underneath where the cursor is clicked.
Preflight enhancements Validate PDF/E compliance and save documents as PDF/E. Run checks and fixups on
selected objects. View improved reports.
Color conversion enhancements Set the transparency blending space. Remap spot colors using the Pantone library.
Easily convert colors using the new design.
Getting started tutorials
The step-by-step tutorials in this section help you get started with Acrobat 9. You’ll learn how to create PDFs using
PDFMaker; share documents with colleagues for review and discussion; create interactive, electronic forms; assemble
documents of various formats into a single PDF Portfolio; and securely sign documents digitally.
For more tutorials and videos about all that you can do with Acrobat, see the following resources:
• Exploring key features of Acrobat 9: www.adobe.com/go/learn_acr_portfolio_pro_en
• What is Acrobat?: www.adobe.com/go/lrvid4200_a9
7
USING ACROBAT 9 PRO
Getting started
Last updated 9/30/2011
• Introducing Acrobat 9: www.adobe.com/go/lrvid4081_a9
• Using multiple applications in a creative workflow: www.adobe.com/go/lrvid4205_a9
• Using multiple applications in a business workflow: www.adobe.com/go/lrvid4204_a9
Create PDF
Creating PDFs using Acrobat PDFMaker (Windows)
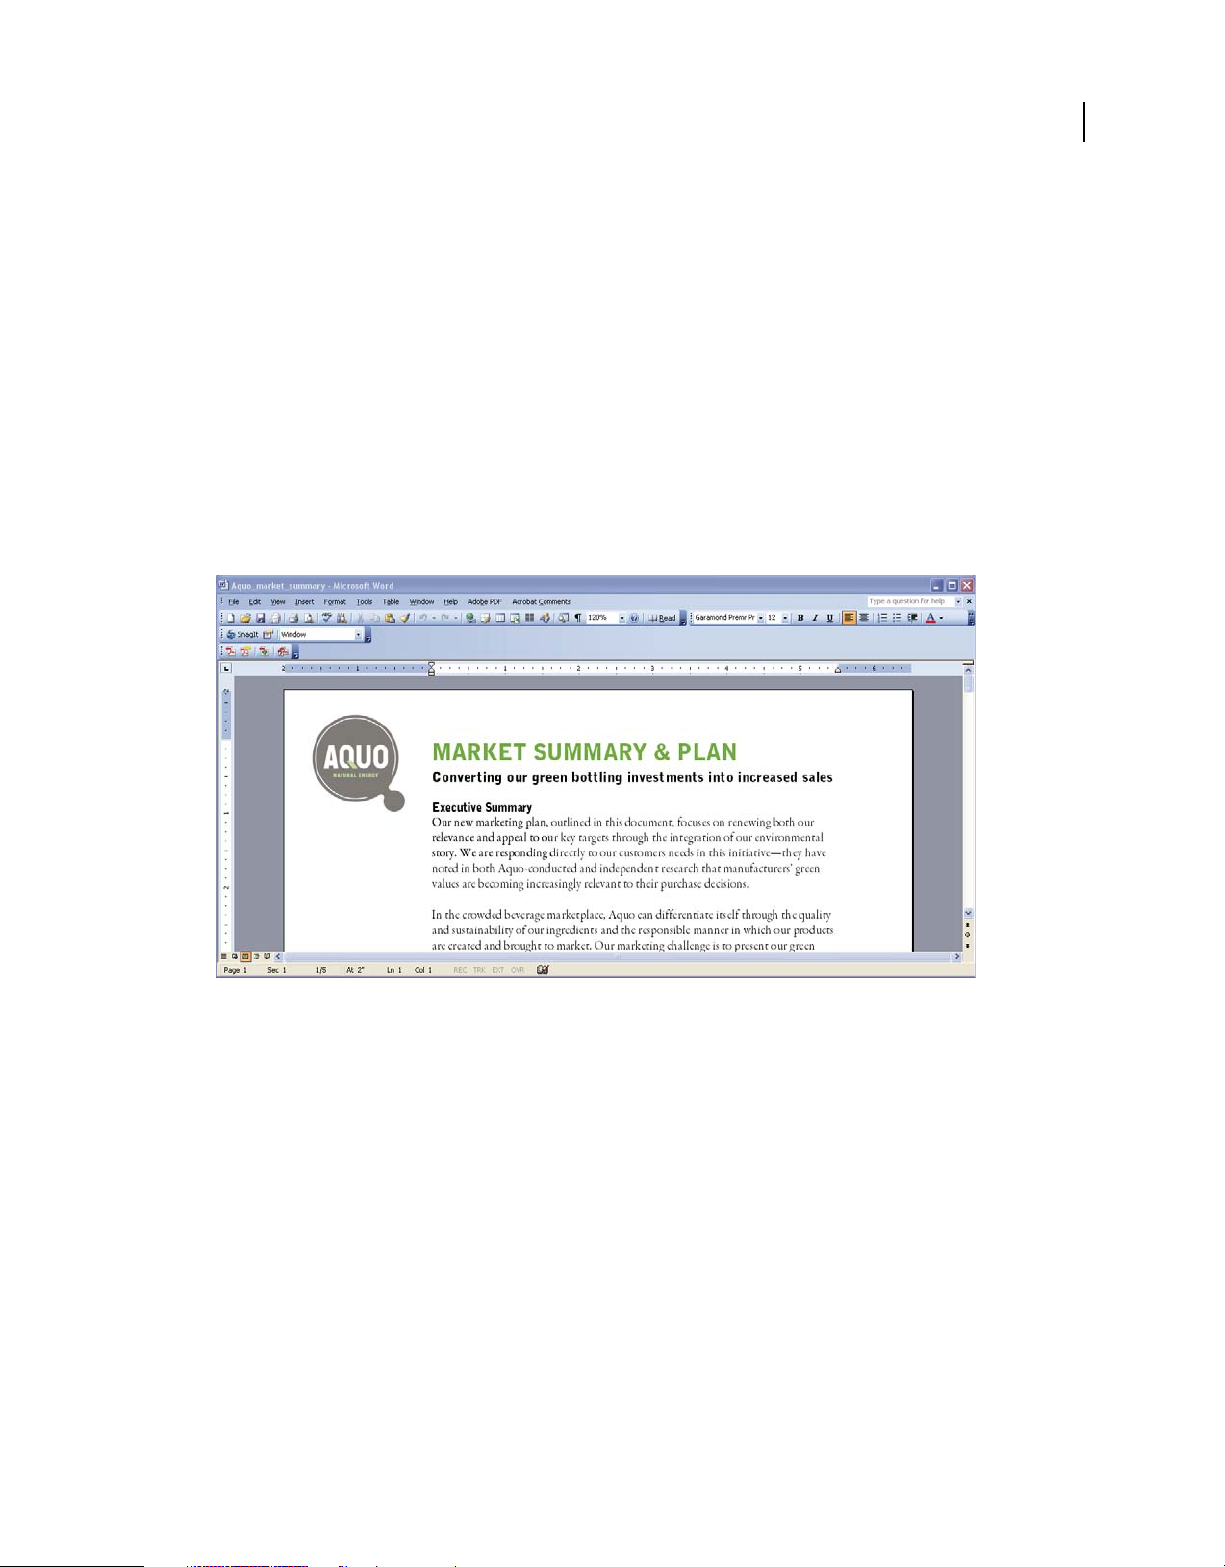
Convert your business documents to Adobe PDF with a single click. Acrobat PDFMaker simplifies the process of
converting documents to PDF in several business applications, including Microsoft Office applications and Lotus
Notes. When you install Acrobat, it adds PDFMaker controls to compatible applications automatically.
1 Create your document.
Create and finalize the document in the authoring application that supports PDFMaker. Save the document.
Document in an application that converts to Adobe PDF
2 Select PDF conversion settings.
In the authoring application, choose Adobe PDF > Change Conversion Settings. If you’re using Lotus Notes, choose
Actions > Change Adobe PDF Conversion Settings. If you’re using a Microsoft Office 2007 application, click
Preferences in the Acrobat ribbon.
In the PDFMaker Settings area of the Acrobat PDFMaker dialog box, choose the appropriate PDF preset from the
Conversion Settings menu. The PDF preset determines file compression, image resolution, whether fonts are
embedded, and other PDF conversion settings. If you are preparing a document for professional printing, use the
High Quality Print or Press Quality preset. If you are preparing a document for online viewing, choose Small File
Size. The Standard default setting is appropriate for many business uses and desktop printing.
8
USING ACROBAT 9 PRO
Getting started
Last updated 9/30/2011
Settings for creating PDFs
Once you’ve selected conversion settings, those settings are used every time you create a PDF from that application
until you change the settings.
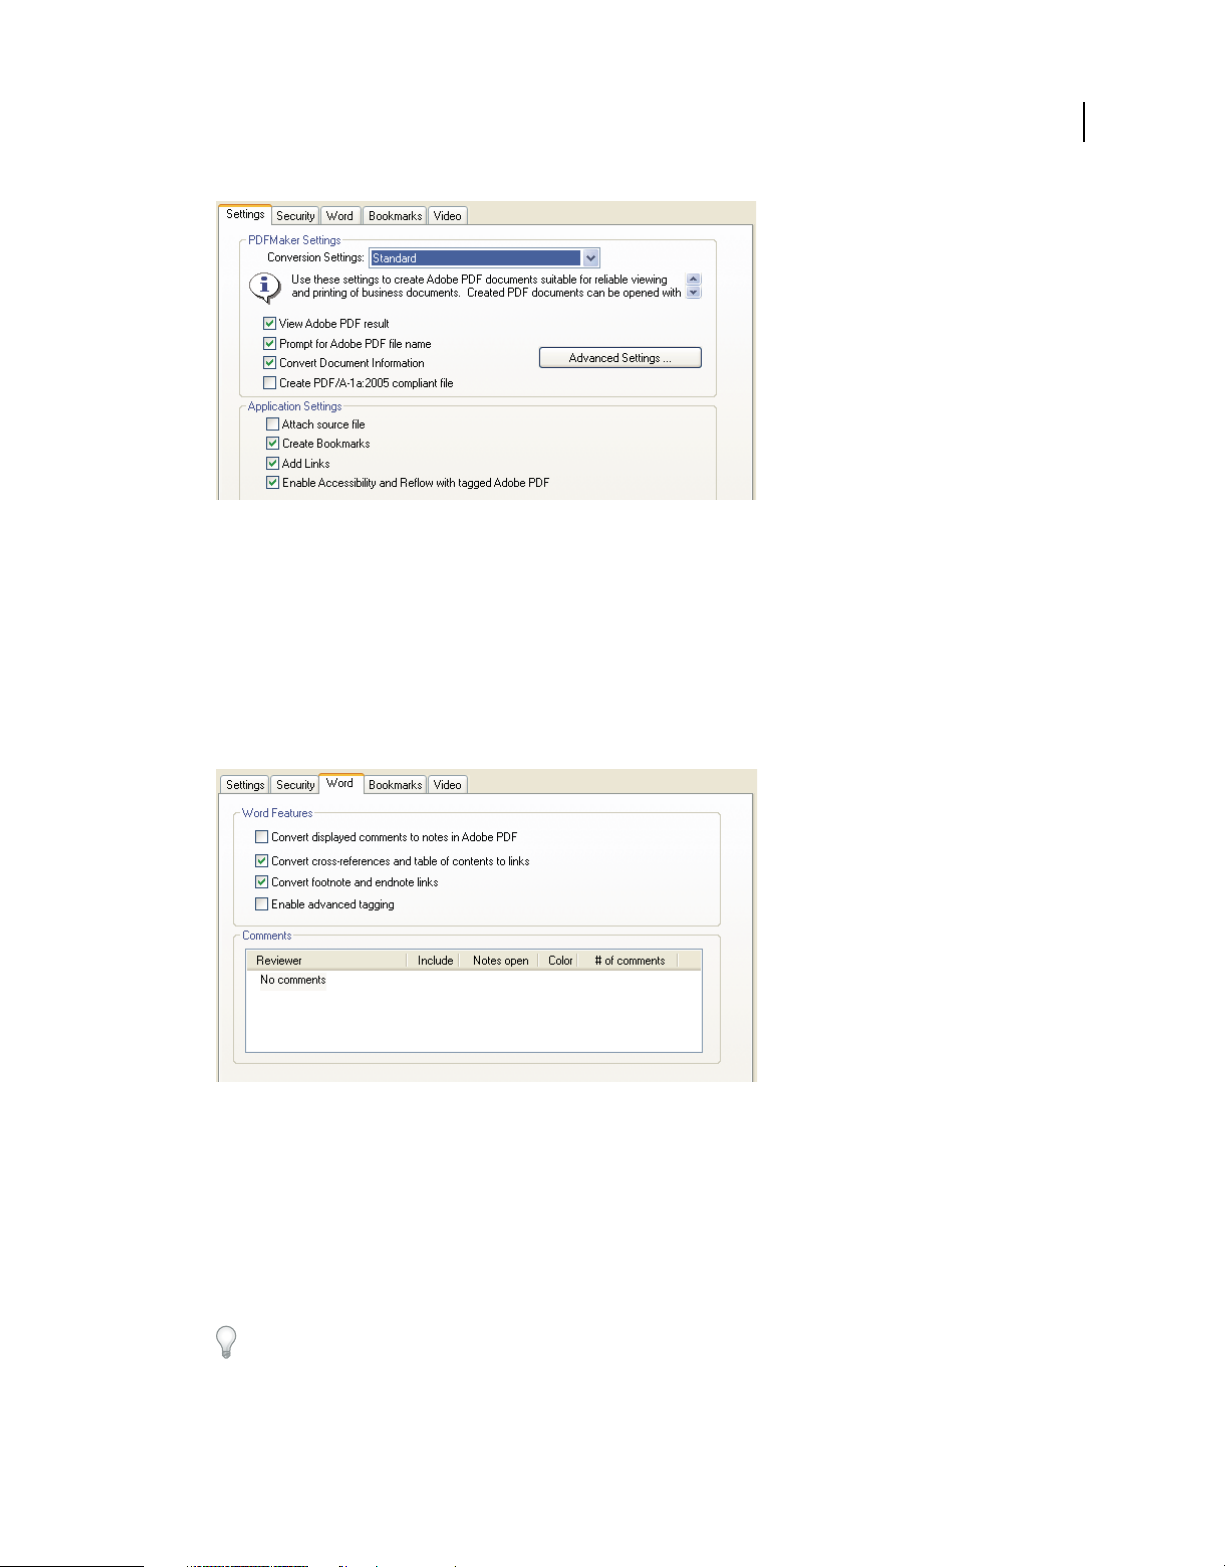
3 Select application settings.
In the Application Settings area of the dialog box, select whether to include bookmarks, hyperlinks, accessibility
features, and other options. Click the application tab (for example, the Word tab) to see options that are specific to
your application. In Word, for example, you can convert footnotes and links. In Visio (supported in Acrobat 9 Pro
Extended and Acrobat 9 Pro), you can flatten layers. Click OK to close the Acrobat PDFMaker dialog box.
Application-specific settings for creating PDFs
4 Create the PDF.
Click the Convert To Adobe PDF button on the Acrobat PDFMaker toolbar or, in Microsoft Office 2007, click the
Create PDF button on the Acrobat ribbon. You can automatically email the PDF or send it out for a review, using
other commands in the Adobe PDF menu.
When prompted, enter a name and location for the PDF. Depending on the application you’re using and your
settings, prompts may appear allowing you to select other options when you create the PDF.
You can also convert web pages to PDF directly using Internet Explorer. To convert, visit a website in the Internet
Explorer browser, and then click the Convert button in the toolbar.
9
USING ACROBAT 9 PRO
Getting started
Last updated 9/30/2011
Collaborate
Initiating a shared review
In a shared review, all participants can view and respond to comments. It’s a great way to let reviewers resolve
conflicting opinions, identify areas for research, and develop creative solutions during the review process. You can
host a shared review on a network folder, WebDAV folder, SharePoint workspace, or on Acrobat.com, a new secure
web-based service. All you need is Acrobat, a PDF, and a free Adobe ID to get started.
1 Prepare the PDF.
Save the PDF you want participants to review. If you want to call attention to particular questions or topics for
discussion, add comments to the PDF.
2 Send the PDF for a shared review.
Choose Comments > Send For Shared Review. Acrobat opens the Send For Shared Review wizard. You can share
any document that can be modified with comments. If a document has security settings that do not allow
comments, Acrobat notifies you.
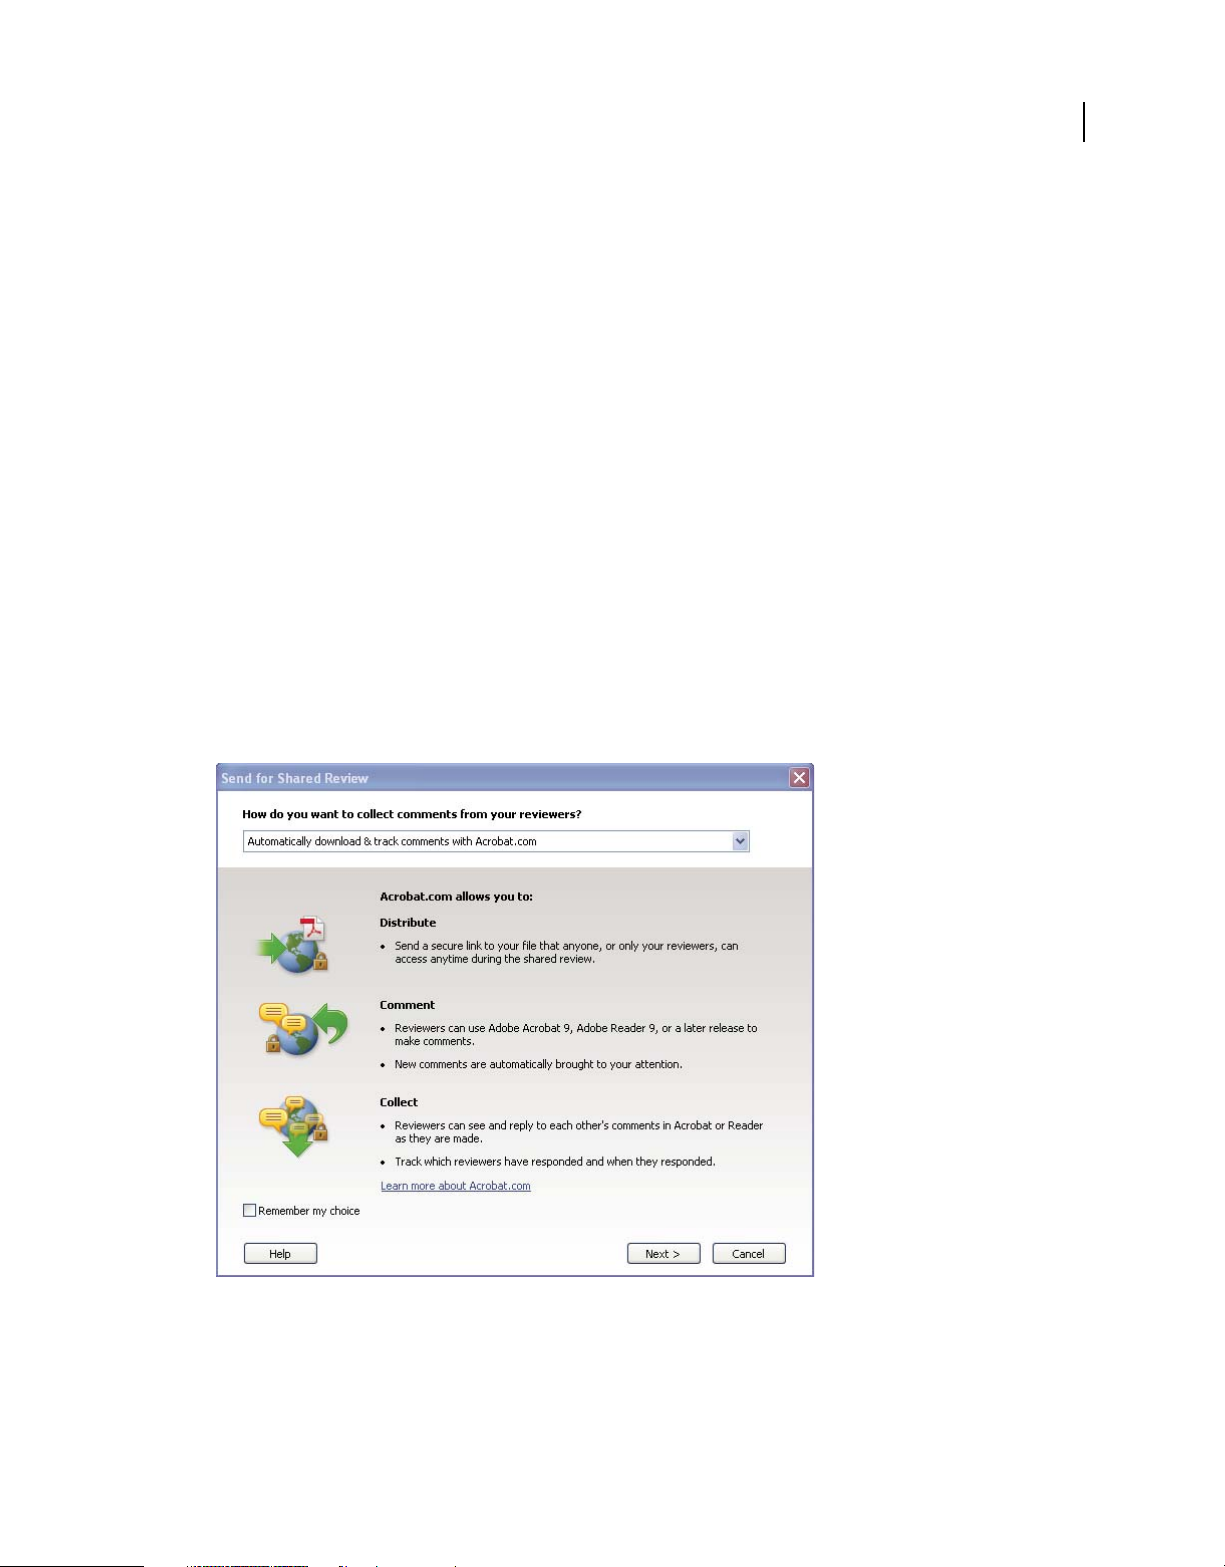
3 Select a method for collecting comments.
Choose how you want to post the PDF and collect comments from reviewers. Choose Automatically Download &
Track Comments With Acrobat.com if you want to use Acrobat.com to share the review. Choose Automatically
Collect Comments On My Own Internal Server to use a network server, a WebDAV server, or a SharePoint
workspace.
The Send For Shared Review wizard guides you through different ways to manage comments.
If you’re hosting the PDF on your own server, select the type of server and enter its path. If you’re hosting the PDF
on Acrobat.com, enter your Adobe ID. If you don’t have an Adobe ID, click Create Adobe ID to create one within
Acrobat.
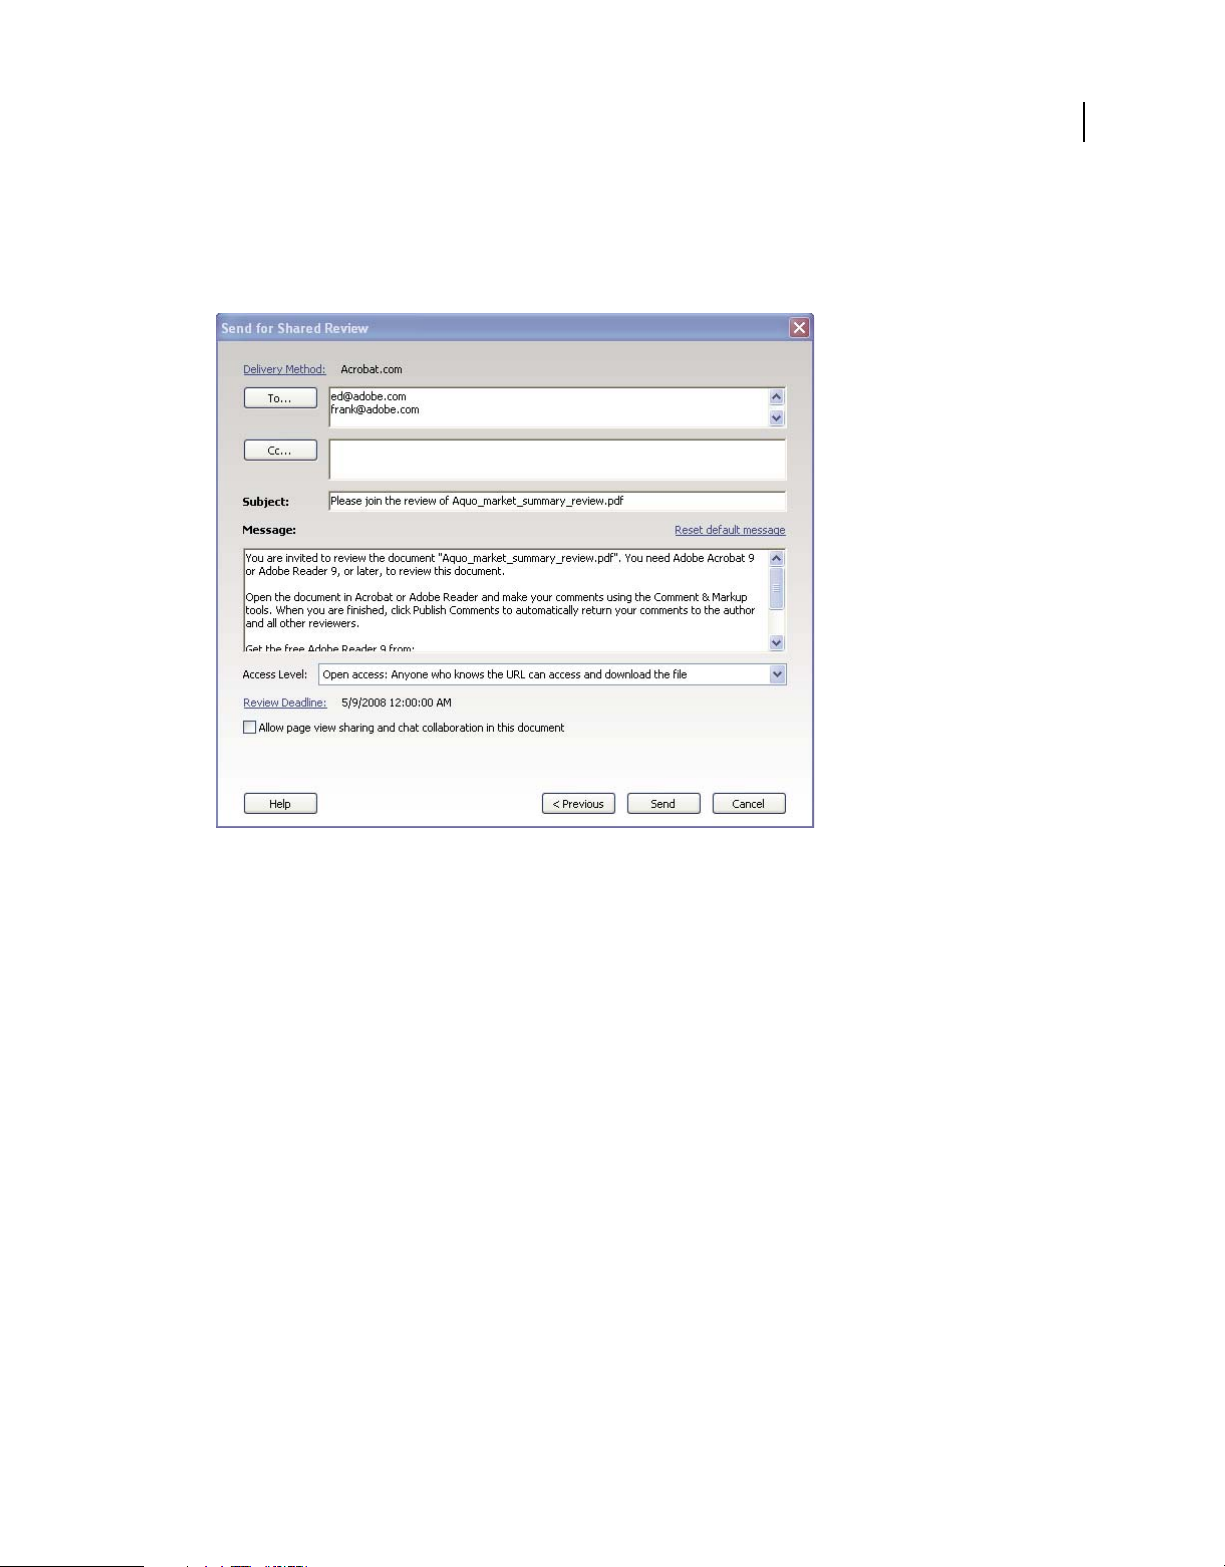
4 Invite reviewers.
10
USING ACROBAT 9 PRO
Getting started
Last updated 9/30/2011
Enter the email addresses for the people you want to invite to the review, or select the addresses from your email
address book. Then, customize the message for reviewers. Set a review deadline. After the deadline, commenting
tools will no longer be available on the shared review server. If you’re using Acrobat 9 Pro Extended or Acrobat 9
Pro, then Adobe Reader users can participate in the shared review.
Preparing the review invitation
5 Send the PDF.
Click Send to post the PDF to the server and send email invitations to the review participants. Acrobat saves a copy
of the shared review file in the same location, with the word “_review” appended to it.
Once you’ve started a shared review, you can read and reply to comments on the shared review server. You can also
read all the comments after the review is over. Use Tracker, within Acrobat, to see who has commented, send email
reminders to reviewers, or change the deadline.
Enabling live collaboration
You can review a PDF live, online, with one or more colleagues using Acrobat.com. The live collaboration feature lets
you share pages, so that all viewers are seeing the same thing at the same time. Use the live chat window to discuss the
document you’re viewing. You can invite anyone with Acrobat 9 or Reader 9 to participate in live collaboration.
Note: The live collaboration feature is not available in all languages.
1 Prepare the document.
Create and save the document you want to discuss in live collaboration. If it’s not already a PDF, convert it to PDF
using Adobe PDF printer, Acrobat PDFMaker (Windows), or the Create PDF commands in Acrobat.
Open the PDF you want to discuss in Acrobat.
2 Start collaboration.
11
USING ACROBAT 9 PRO
Getting started
Last updated 9/30/2011
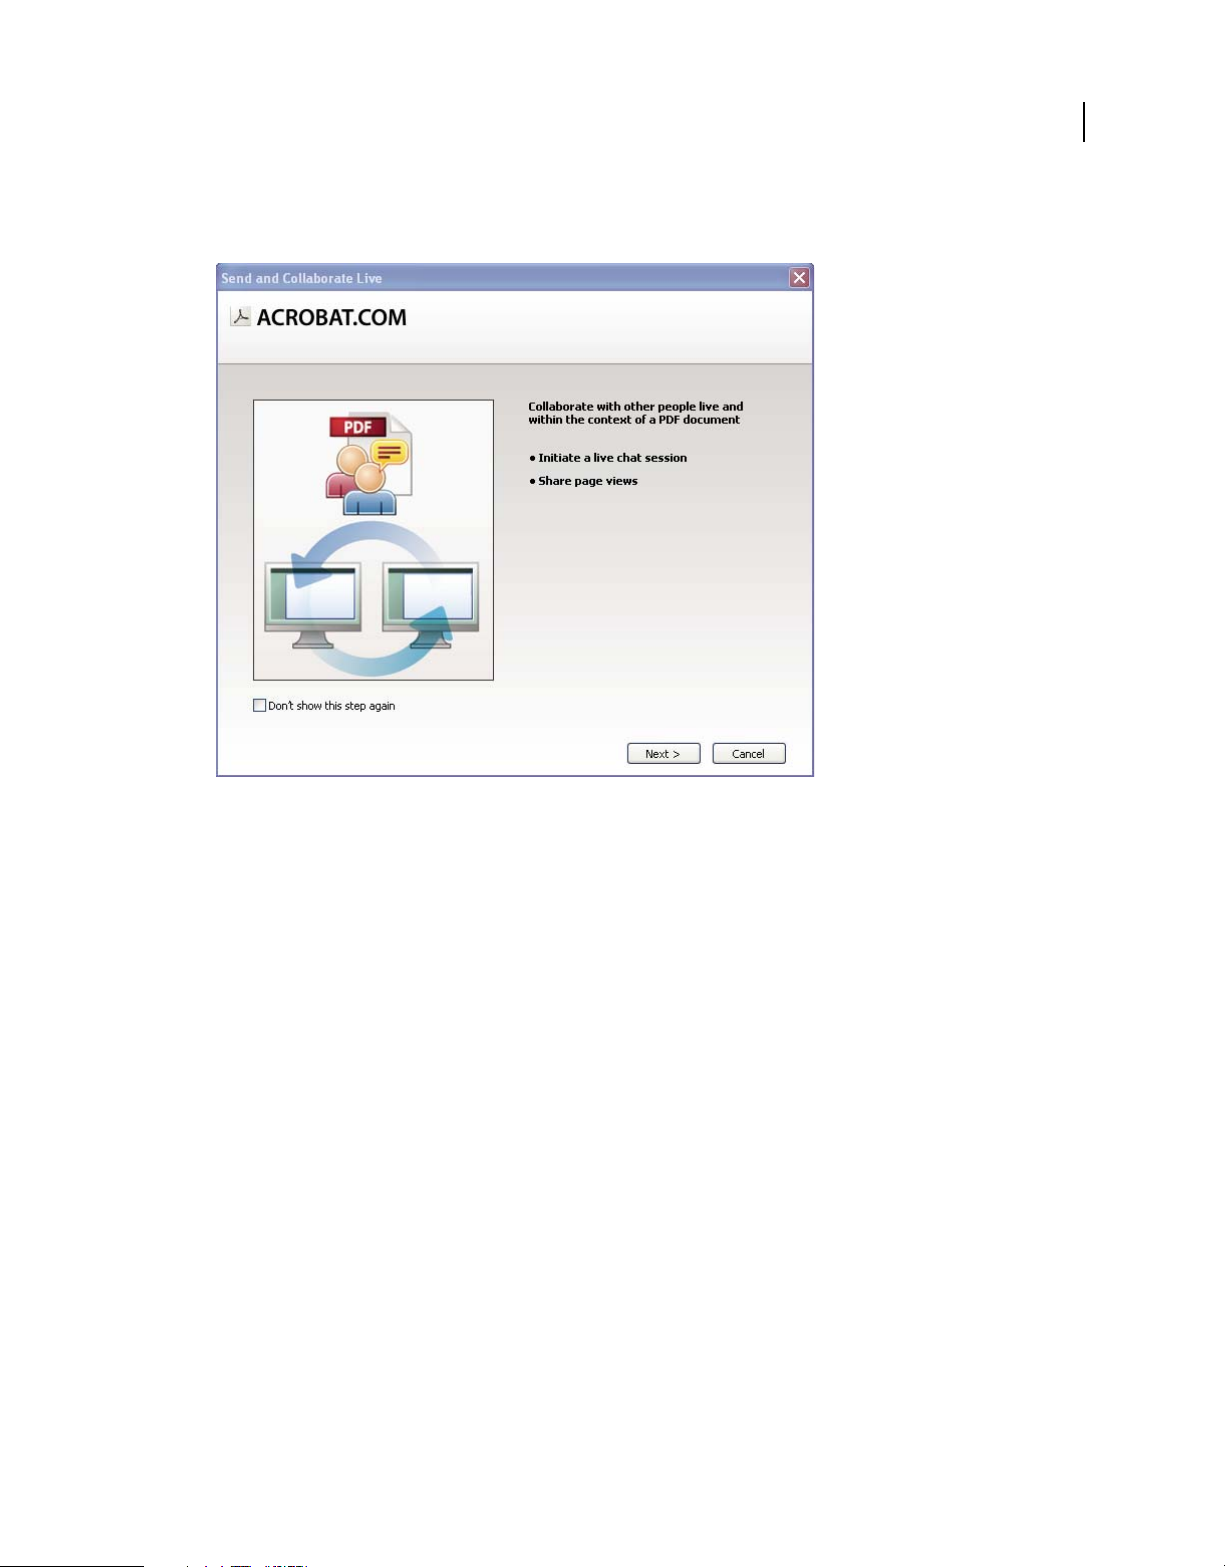
Choose File > Collaborate > Send & Collaborate Live. Log on to Acrobat.com, if prompted. If you don’t have an
Adobe ID, create one.
Use the Send and Collaborate Live wizard to start a live chat session.
3 Invite participants.
Enter the email addresses of the colleagues you want to collaborate with, placing a semicolon or return between
addresses. You can also add email addresses from the address book of your email application, such as Microsoft
Outlook.
12
USING ACROBAT 9 PRO
Getting started
Last updated 9/30/2011
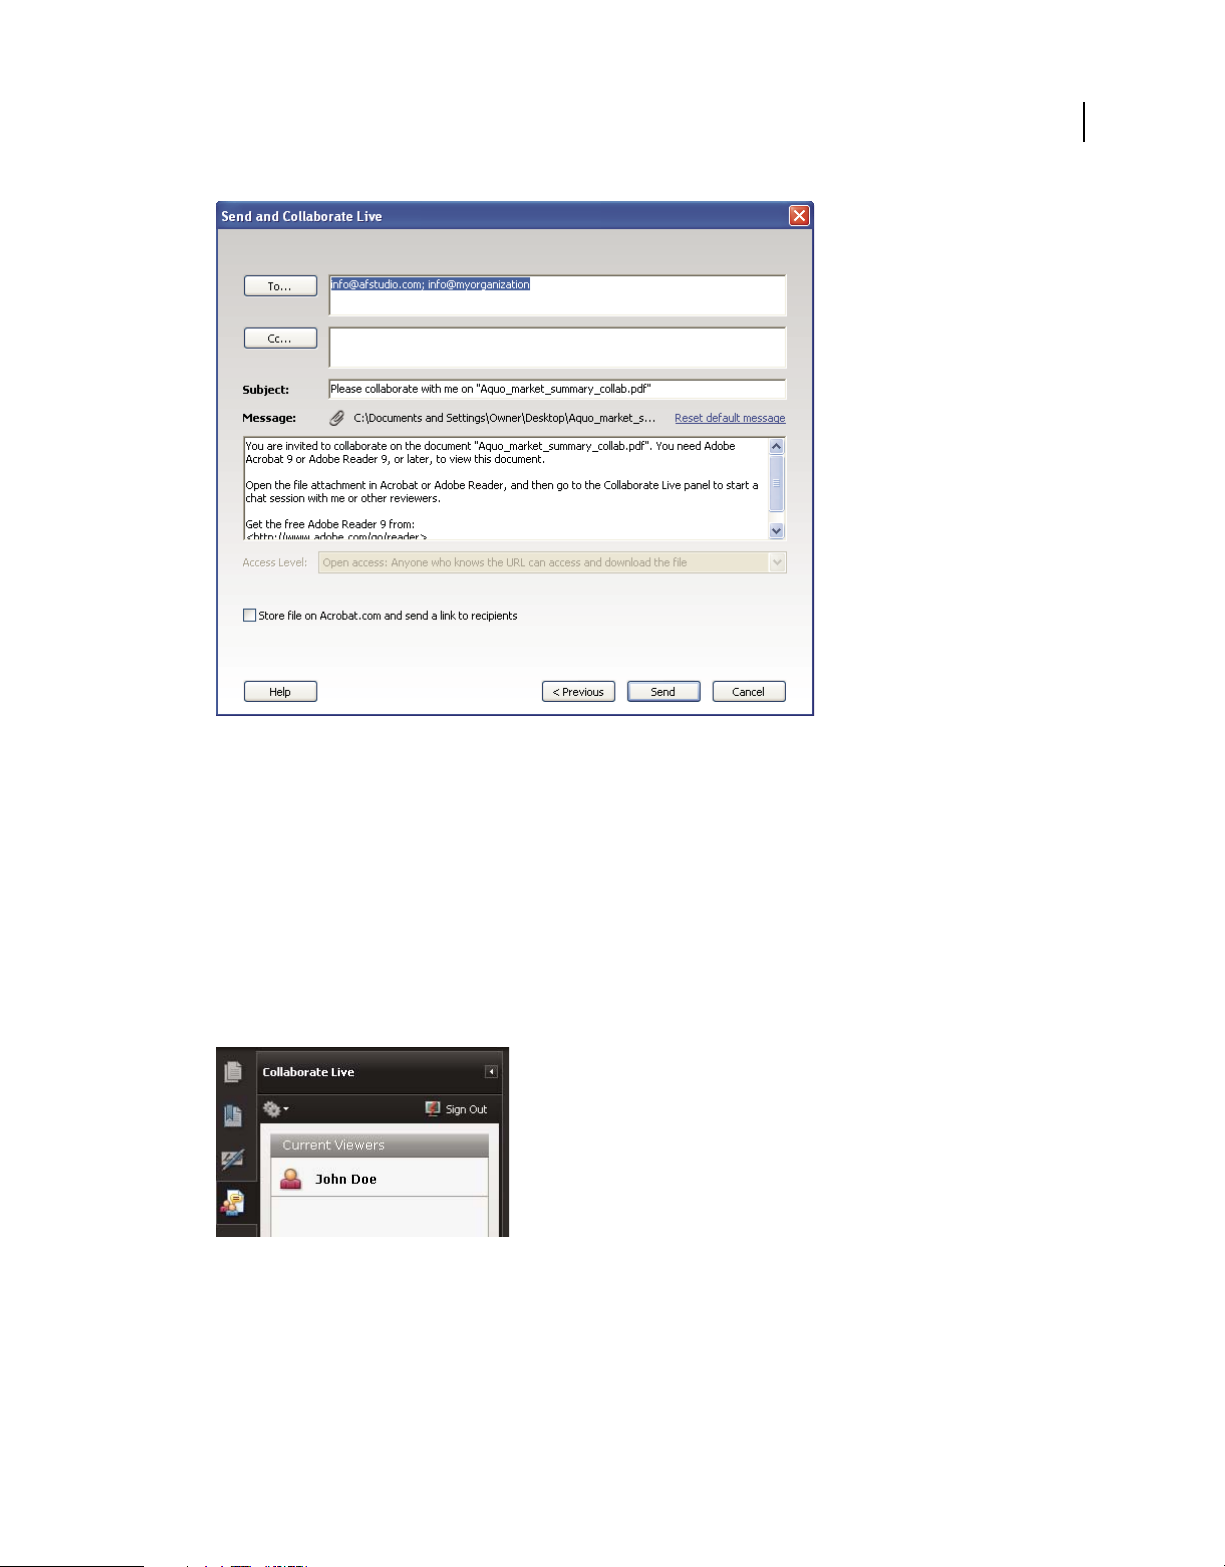
Preparing the collaboration invitation
Edit the subject and message to customize the email invitation for your collaboration. To post the document to
Acrobat.com, select Store File On Acrobat.com And Send A Link To Recipients. Select a level of access to determine
who can access the document from Acrobat.com. If you don’t select Store File On Acrobat.com, Acrobat sends the
document to participants as an attachment.
The Collaborate Live navigation pane opens in the document.
4 Wait for other participants.
To share pages or chat online, at least one other person must join you. Using Acrobat 9 or Reader 9, participants
can join by clicking the PDF attachment or clicking the URL in the invitation. After participants log in with their
Adobe ID and password or join as a guest, they can double-click the PDF to open it.
Watching participants join the session
5 Share pages.
After at least one other person joins the live collaboration session, you can synchronize page views so that everyone
participating sees the same page view. To share pages, click the Start Page Sharing button. When you want to stop
page sharing, click Stop Page Sharing.
6 Chat online.

13
USING ACROBAT 9 PRO
Getting started
Last updated 9/30/2011
To discuss the document, type chat messages in the box at the bottom of the Collaborate Live navigation pane. Click
the color box to choose a color for your chat text. To save the chat history, choose Save Chat from the options menu
in the navigation pane.
Send instant messages to attendees.
Forms
Creating an interactive form
You can convert any form into an interactive form that users can fill out and return electronically. Start with a paper
form you’ve scanned or a form document you’ve created in any application.
1 Create the PDF.
You can scan a paper form directly into Acrobat (choose File > Create PDF > From Scanner). You can also convert
any electronic document to PDF using Acrobat PDFMaker, the Adobe PDF printer, or the Create PDF commands
in Acrobat.
2 Use the Form wizard to automatically create form fields.
Choose Forms > Start Form Wizard. Follow the onscreen instructions in the wizard, and click OK to close the
Welcome To Form Editing Mode dialog box. When you run the wizard, Acrobat analyzes the document and
automatically creates electronic form fields.
14
USING ACROBAT 9 PRO
Getting started
Last updated 9/30/2011
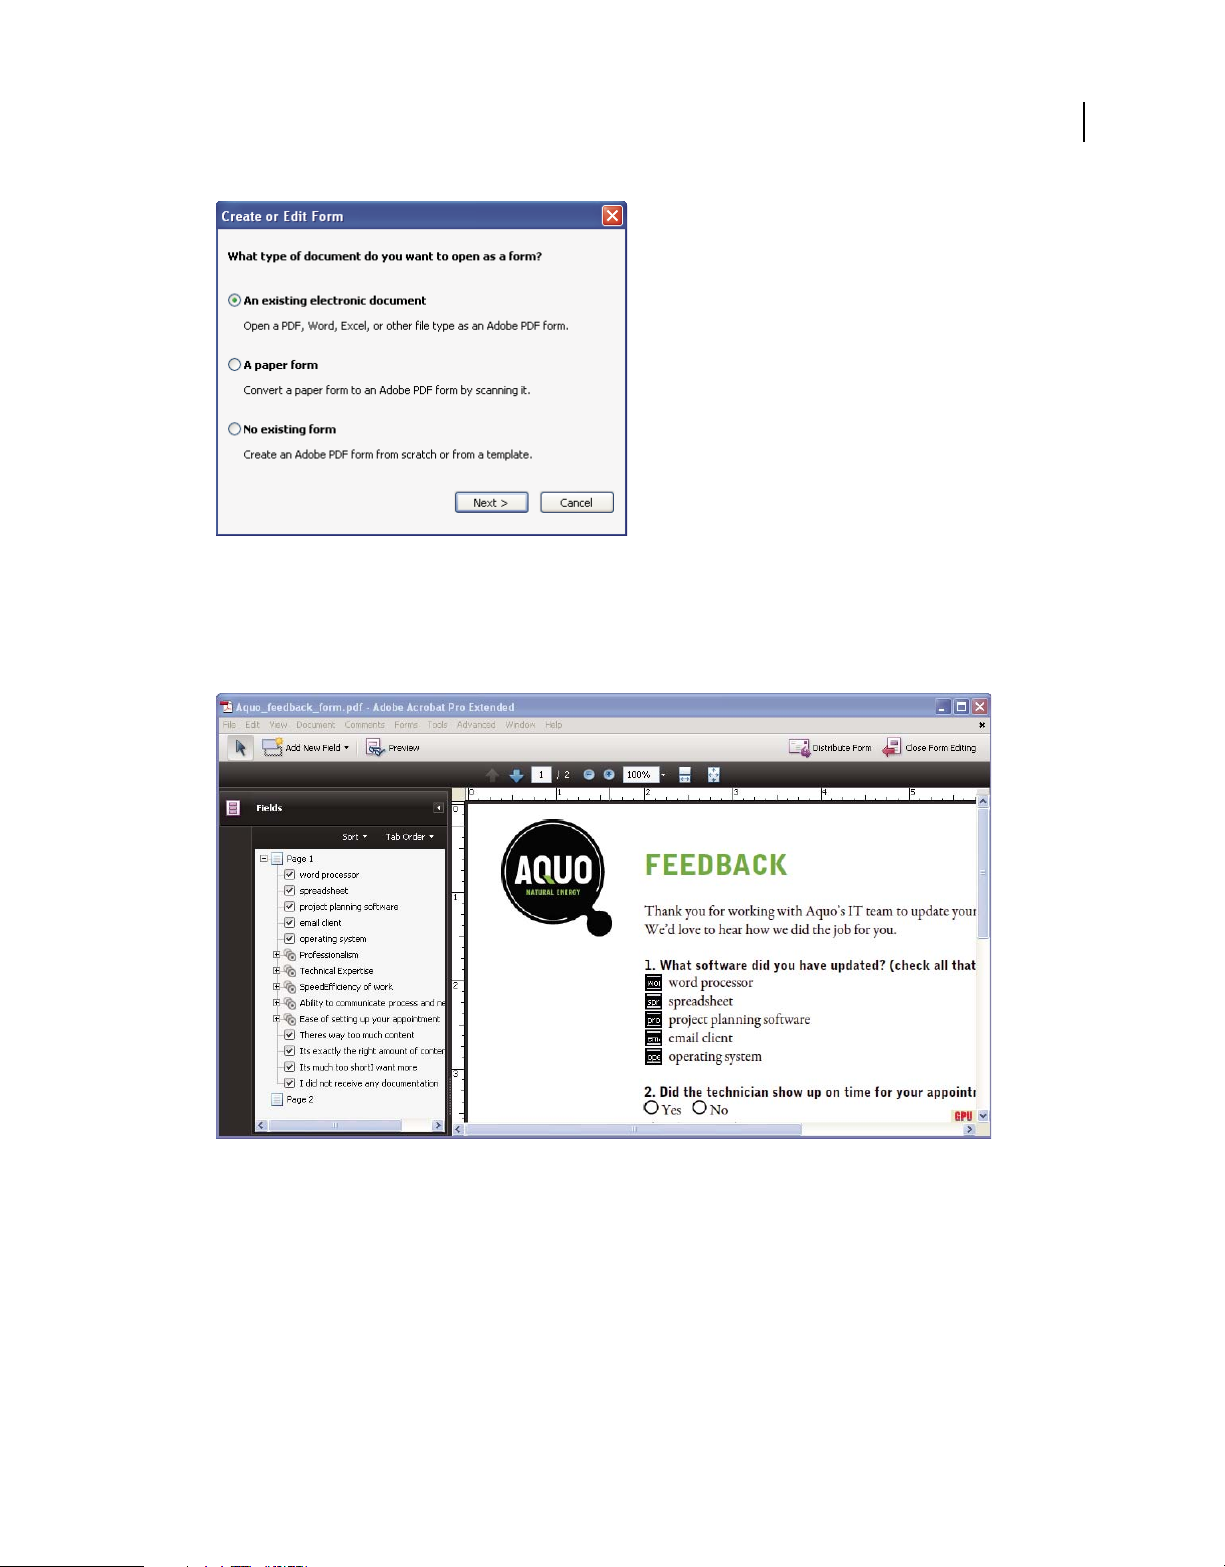
The Create Or Edit Form wizard creates form fields automatically.
3 Evaluate the form fields Acrobat created.
Acrobat lists the form fields it created in the Fields pane. Scroll through the document to see whether Acrobat
missed any fields or created any extra fields. To delete a field, select it in the Fields pane and press Delete.
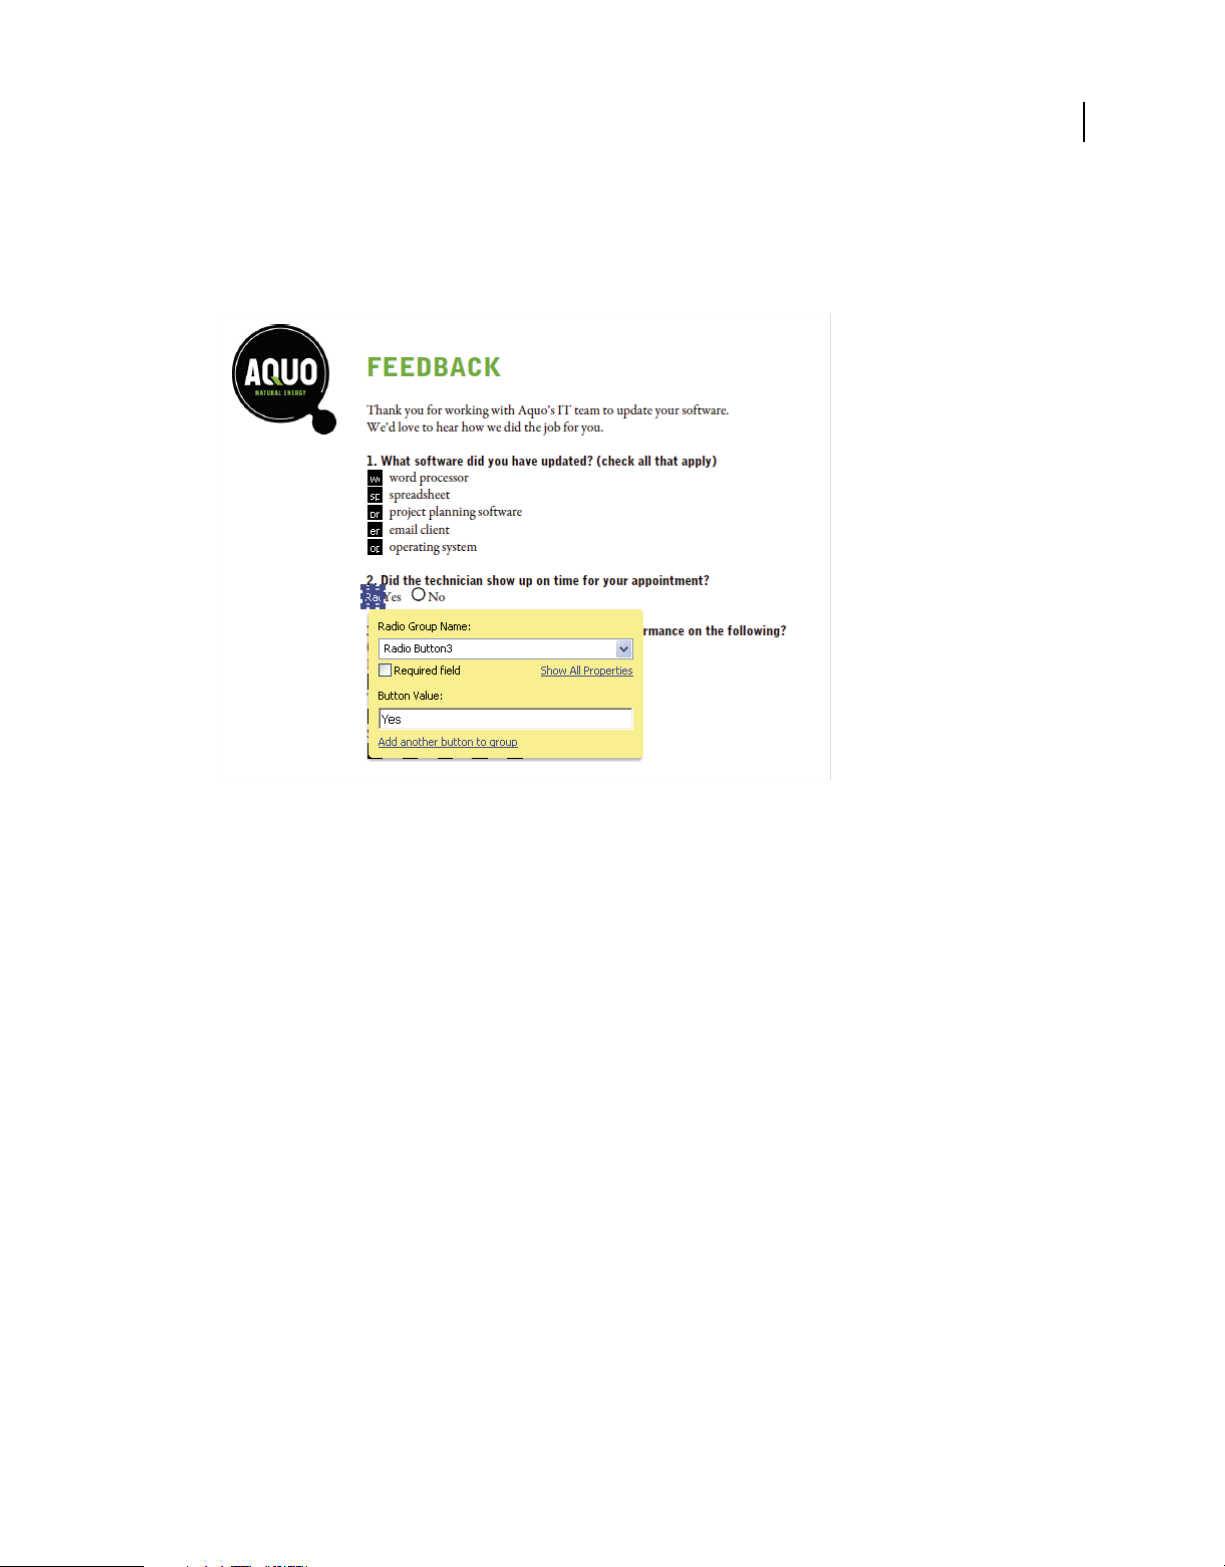
Acrobat missed fields for the Yes and No radio buttons.
4 Add and edit form fields as needed.
Add form fields where you need them. You can add text fields, check boxes, list boxes, combo boxes, radio buttons,
action buttons, digital signature fields, and even barcodes to the PDF. Select the type of form field from the Add
New Field list in the Forms toolbar, and then click where you want the field to appear. Give each new field a unique
and descriptive name. The name doesn’t appear on the form that users see, but it identifies the field if you work
with the data in databases or spreadsheets.
15
USING ACROBAT 9 PRO
Getting started
Last updated 9/30/2011
Click Show All Properties in the field name dialog box if you want to make other changes. You can change the field
appearance, set a text field to accept multiple lines of text, create a label for users, or set other properties. To edit a
field, make sure you’re in Form mode, and then double-click the field. (To switch to Form mode, choose Forms >
Add Or Edit Fields.) To preview the form, click Preview in the Forms toolbar.
Editing form fields
5 Save the form.
Be sure to save the form with all the fields you’ve added. Choose File > Save As to save the form with a different
name, so that your original static document remains intact.
PDF Portfolios
Creating a PDF Portfolio
Quickly pull together all the files for a project into a single, coherent PDF Portfolio. These files can include text
documents, email messages, spreadsheets, CAD drawings, PowerPoint presentations, videos, PDFs, and more. You
don’t have to convert the component documents to PDF, and you can edit each component independently without
affecting anything else in the PDF Portfolio.
1 Create the PDF Portfolio file.
In Acrobat, choose File > Create PDF Portfolio. The PDF Portfolio toolbar appears below the menu bar; Acrobat
displays this toolbar whenever you open a PDF Portfolio. In Acrobat 9 Pro and Acrobat 9 Pro Extended, the Edit
PDF Portfolio pane is open on the right side of the window.
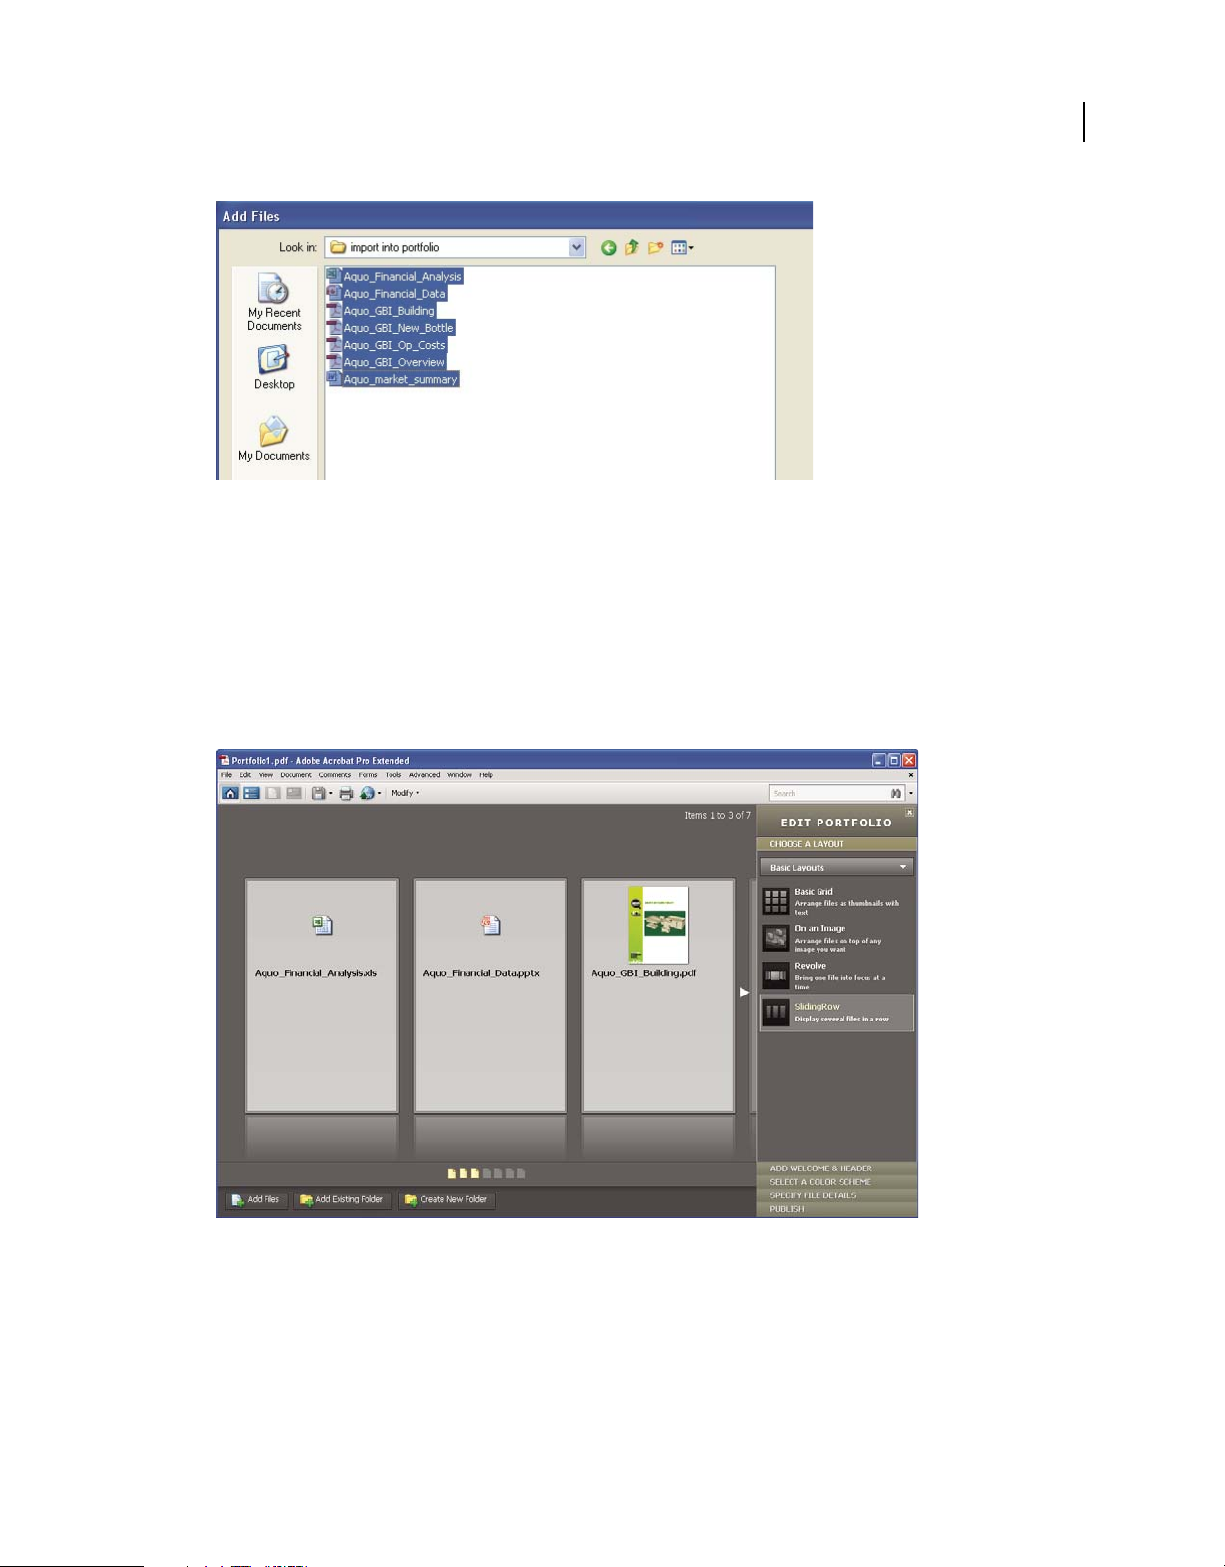
2 Add files to the PDF Portfolio.
Choose Modify > Add Files in the PDF Portfolio toolbar. Navigate to the files you want to include. Select a file, and
click Open. Shift-select to add multiple contiguous files; press Ctrl to select multiple files in any order.
16
USING ACROBAT 9 PRO
Getting started
Last updated 9/30/2011
Selecting files for a PDF Portfolio
When you add a file to the PDF Portfolio, a copy of the original document is included. If the document isn’t a PDF,
anyone who receives the PDF Portfolio may have to install the native application to preview that particular
document. For example, if you include a PowerPoint presentation, someone viewing your PDF Portfolio must have
Office installed to view that component.
3 Select a layout.
Click Choose A Layout in the Edit PDF Portfolio pane. Select a category, such as Basic Layouts, from the pop-up
menu, and then select a layout.
Layout options
The layout provides navigational aids and determines how component documents are displayed on the home page
of the PDF Portfolio. By default, the Basic Grid layout is applied when you first create a PDF Portfolio, but you can
use any layout.
4 Add a header.
You can give a PDF Portfolio a consistent look by applying a header to the top of the page. A header can include
text and graphics, such as a logo, company name, or contact information.

17
USING ACROBAT 9 PRO
Getting started
Last updated 9/30/2011
To add a header, click Add Welcome & Header in the Edit PDF Portfolio pane, click Header, and then select a
template. Each template contains an image placeholder, a text placeholder, or both. Click an image placeholder to
replace it with a GIF, JPEG, or PNG file. Click a text placeholder to type and format text.
A header unifies the PDF Portfolio contents.
5 Add a welcome page.
A welcome page appears when the PDF Portfolio is opened. A welcome page can include text, images, or a Flash
animation (SWF file or FLV file).
A welcome page introduces the PDF Portfolio.
18
USING ACROBAT 9 PRO
Getting started
Last updated 9/30/2011
To add a welcome page, click Welcome Page in the Edit PDF Portfolio pane. Select a template, and then click a
placeholder to replace it with your text, image, or SWF file.
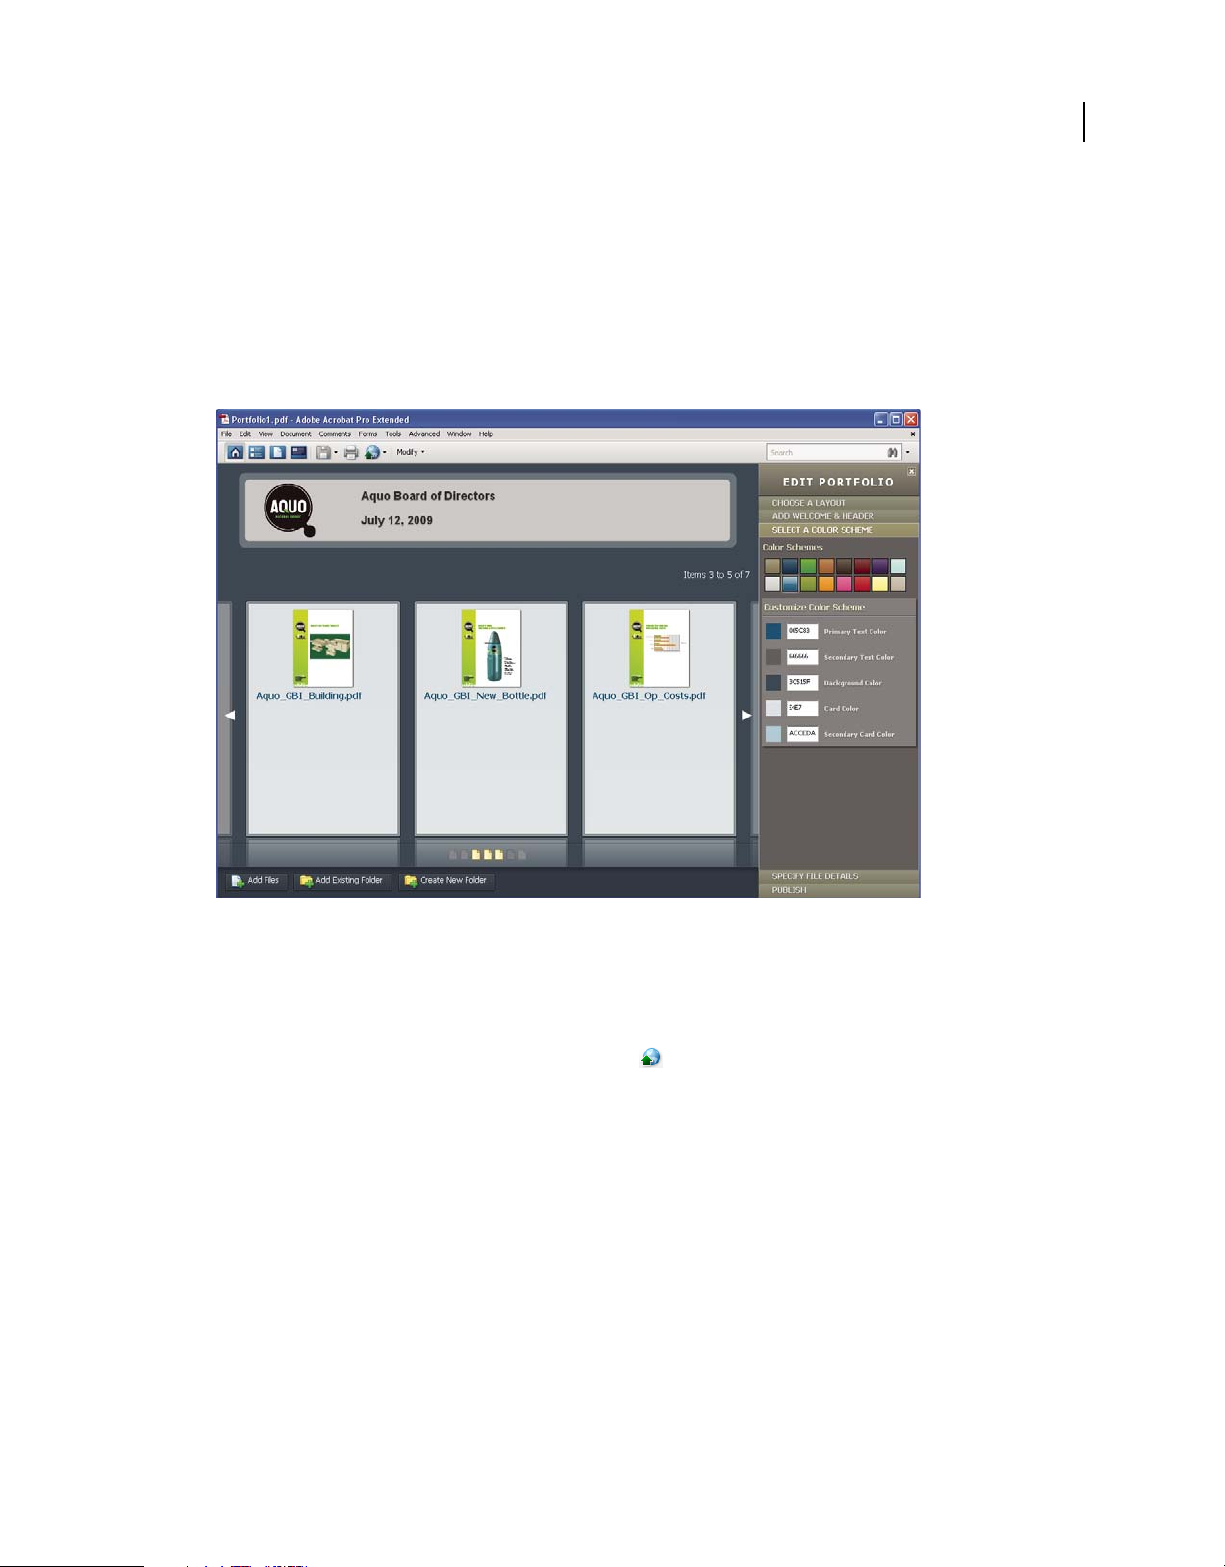
6 Select a color scheme.
You can further customize a PDF Portfolio by selecting which colors to use for text, backgrounds, and the cards
that display component data. Click Select A Color Scheme in the Edit PDF Portfolio pane. Click the color swatch
that represents the scheme you want to use, or click Customize Color Scheme to develop your own. To create a
custom color scheme, select a color for each of the categories, such as Primary Text Color.
Color scheme options
7 Publish the PDF Portfolio.
When you’ve completed your PDF Portfolio, you can share it through email or on Acrobat.com, a secure web-based
service. You can burn it to a CD or DVD, or distribute it as you would share any other PDF.
First, choose File > Save Portfolio. From the share menu in the PDF Portfolio toolbar, choose Email to send the
PDF Portfolio as an email attachment. You can also share it on Acrobat.com, which is especially useful if the PDF
Portfolio file size is too large for many email servers. From the share menu, choose Share Portfolio On Acrobat.com,
and then log on to Acrobat.com.
19
USING ACROBAT 9 PRO
Getting started
Last updated 9/30/2011
Security
Signing a document electronically
Like a handwritten signature, a digital signature is uniquely yours. Acrobat includes features to keep your digital
signature secure. Unlike traditional signatures, digital signatures can contain additional information, such as the date
and time of signature and the reason for signing. Just as you developed your own signature style early in life, you can
add your own flair to your signature appearance, as well.
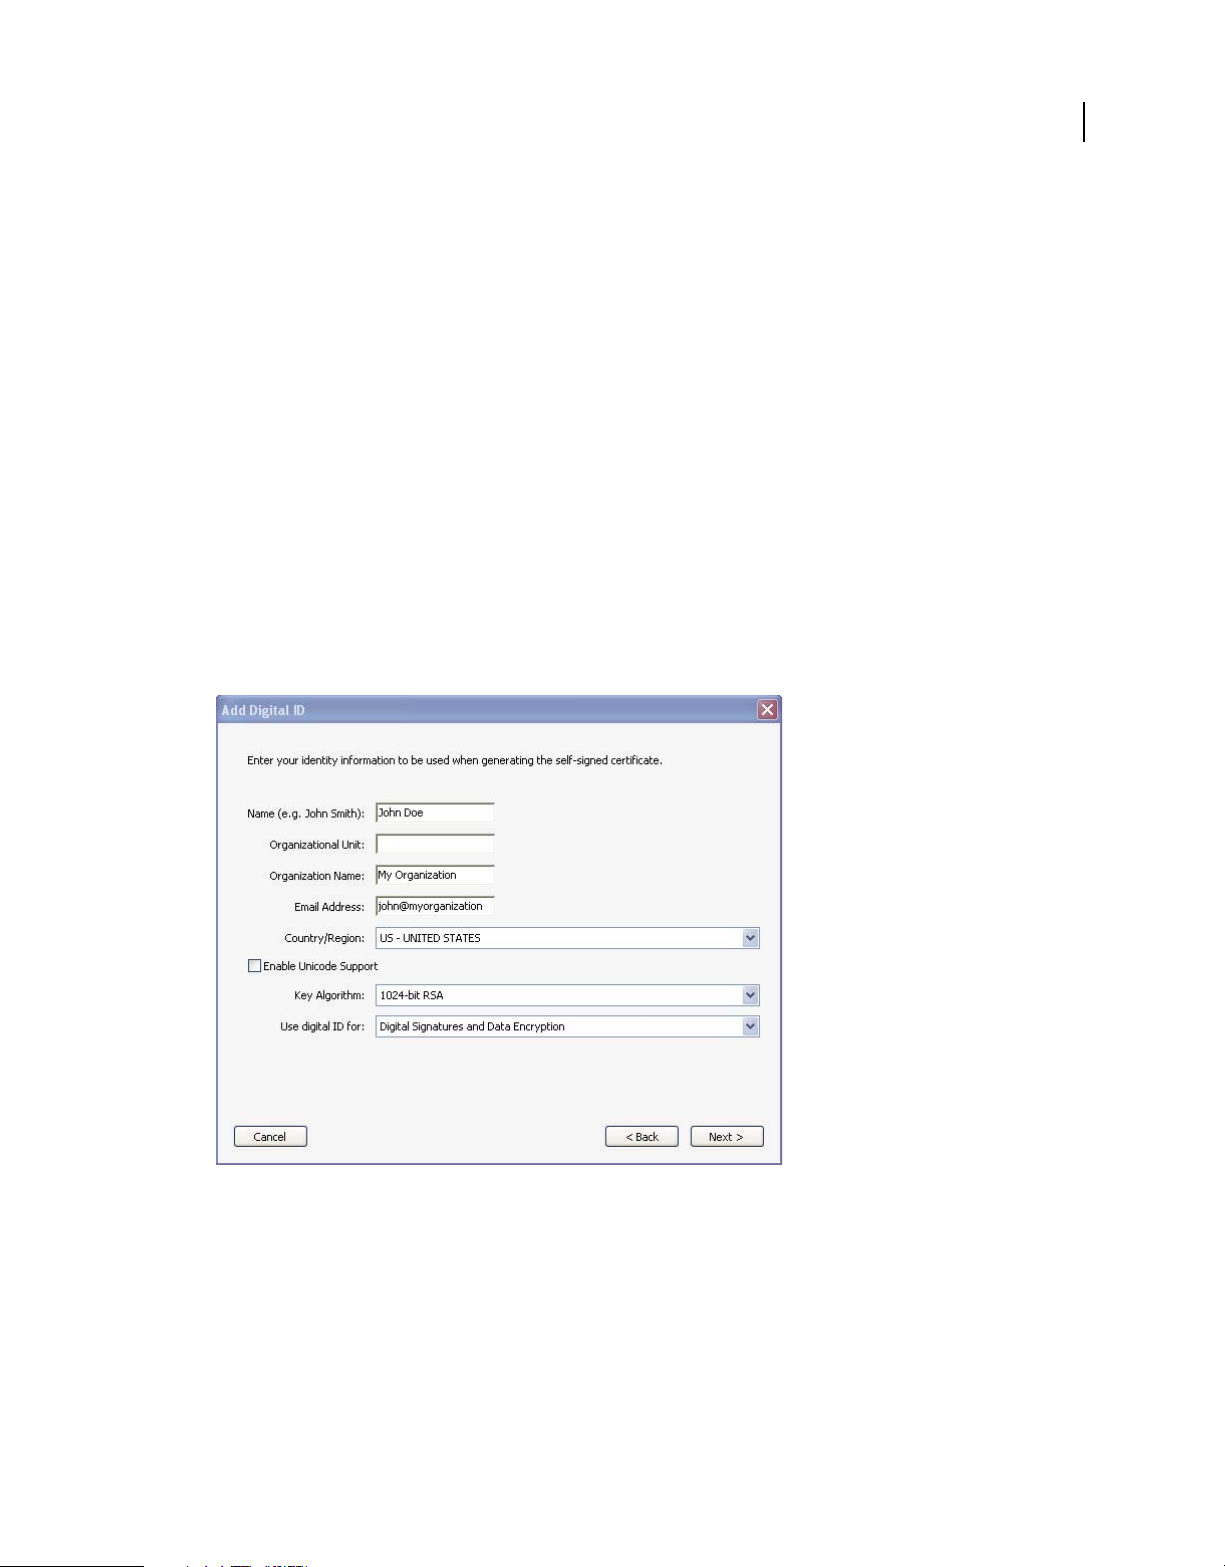
1 Obtain a digital ID.
If you don’t already have a digital ID, create a self-signed digital ID in Acrobat. A self-signed digital ID includes an
encrypted private key for signing or decrypting documents. It also includes a public key in a certificate used to
validate signatures and encrypt documents.
To create a self-signed digital ID, choose Advanced > Security Settings. Select Digital IDs on the left, and then click
the Add ID button in the toolbar. Select A New Digital ID I Want To Create Now, and continue through the wizard.
Type the personal information for your digital ID, including your name. When you certify or sign a document, the
name appears in the Signatures panel and in the signature field. Name your digital ID and create a password for it
that contains at least six characters, with no punctuation marks or special characters. Click Finish. Make a backup
copy of your digital ID file, in case the original is lost or damaged.
Personal information for the digital ID
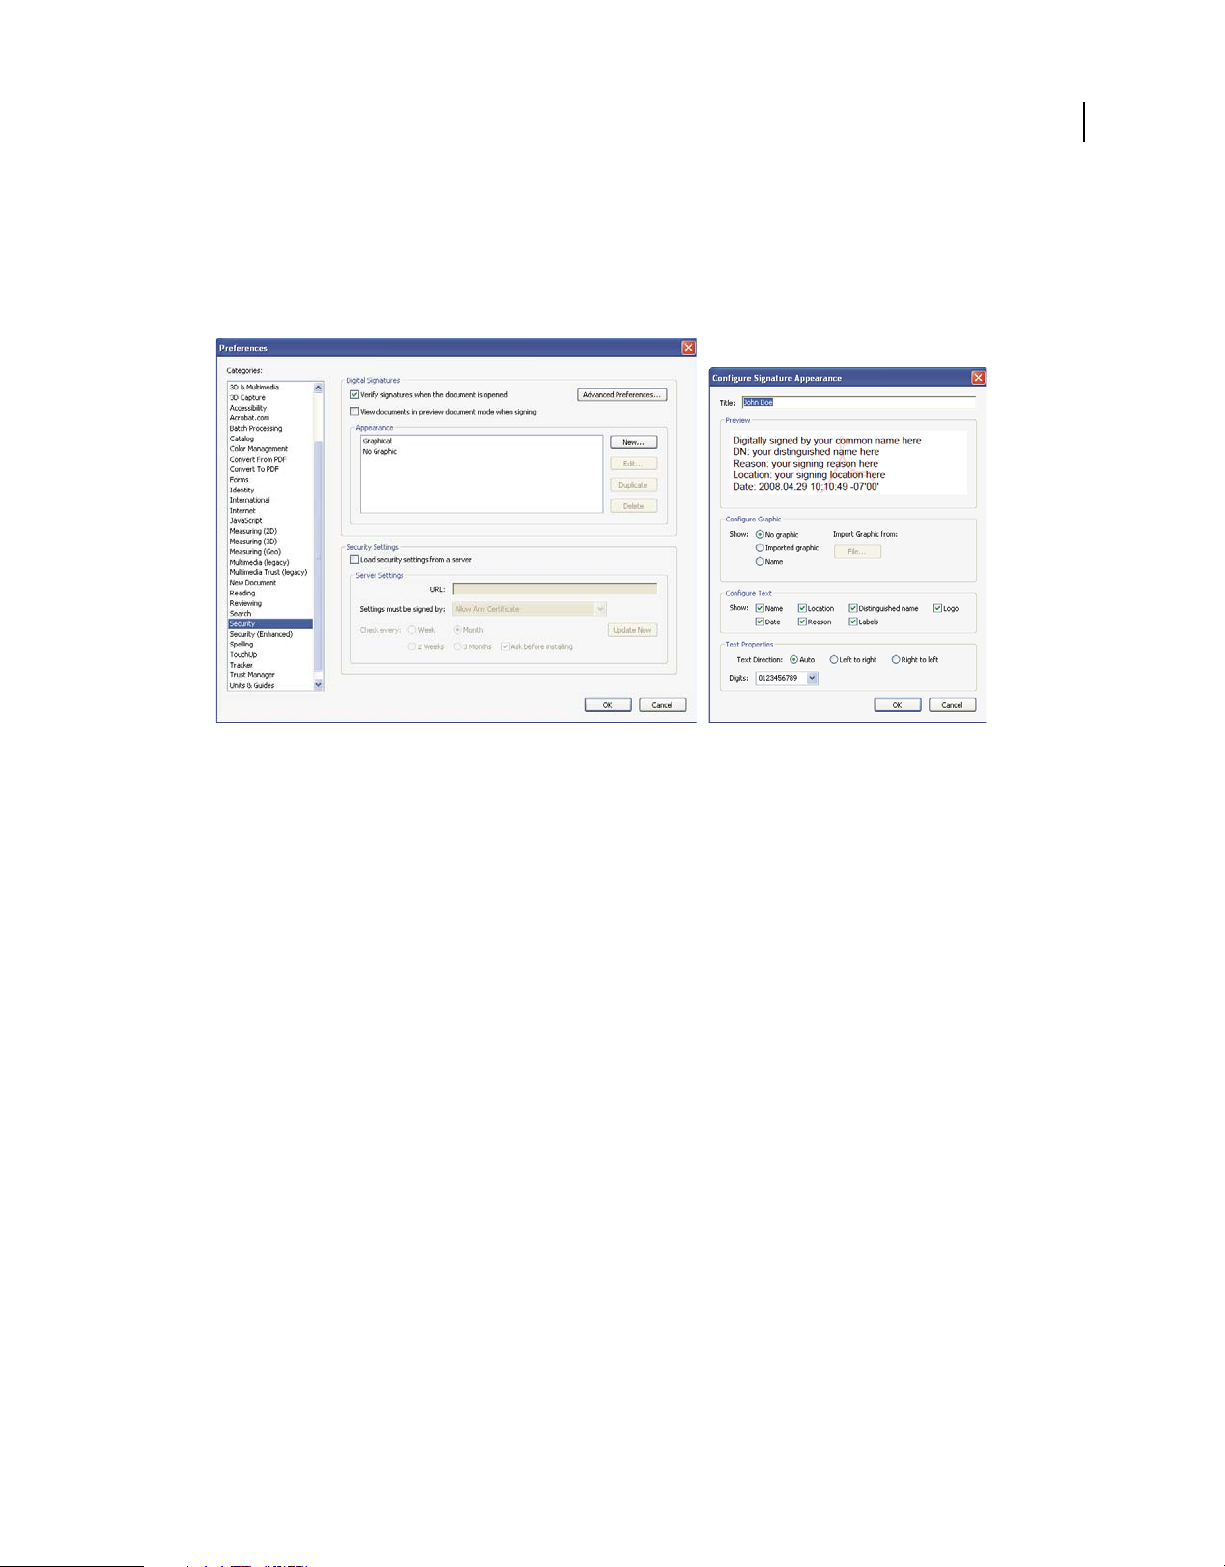
2 Create an appearance for your digital signature.
Your digital signature can be simple or complex. It can look like a handwritten signature or a typed name. It can
contain a company logo, include the date and time you signed, and state a reason for signing. You can create
multiple signature appearances for different uses; select one each time you sign a document. If you want to include
an image of your signature, scan your signature and save it as a PDF.
20
USING ACROBAT 9 PRO
Getting started
Last updated 9/30/2011
To create an appearance, choose Edit > Preferences (Windows) or Acrobat > Preferences (Mac OS). Select Security
on the left, and then click New in the Digital Signatures section. Give the signature appearance a short, descriptive
title that you’ll recognize when you’re signing a document. Select options, including whether you want to include
an imported graphic, such as a scanned signature. As you make changes, your edited signature appears in the
preview window. Click OK.
Use Security preferences to customize how your signature appears.
If you selected Reason, click Advanced Preferences, and, in the Creation pane, select Show Reasons When Signing.
If you selected Location, select Show Location And Contact Information When Signing.
3 Review the document carefully.
Before you sign any document, physically or electronically, make sure that you know what you are signing and
where all the signature fields are. Because dynamic content might alter the appearance of the PDF and mislead you,
view the document in Preview Document mode before signing. To use Preview Document mode, open the
Preferences dialog box and select Security on the left; then, select View Documents In Preview Document Mode
When Signing.
Check each page of a document for signature fields. You may need to sign a document in more than one place. Each
signature field is unique, so your signature won’t automatically be copied from one field to the other signature fields
in the document.
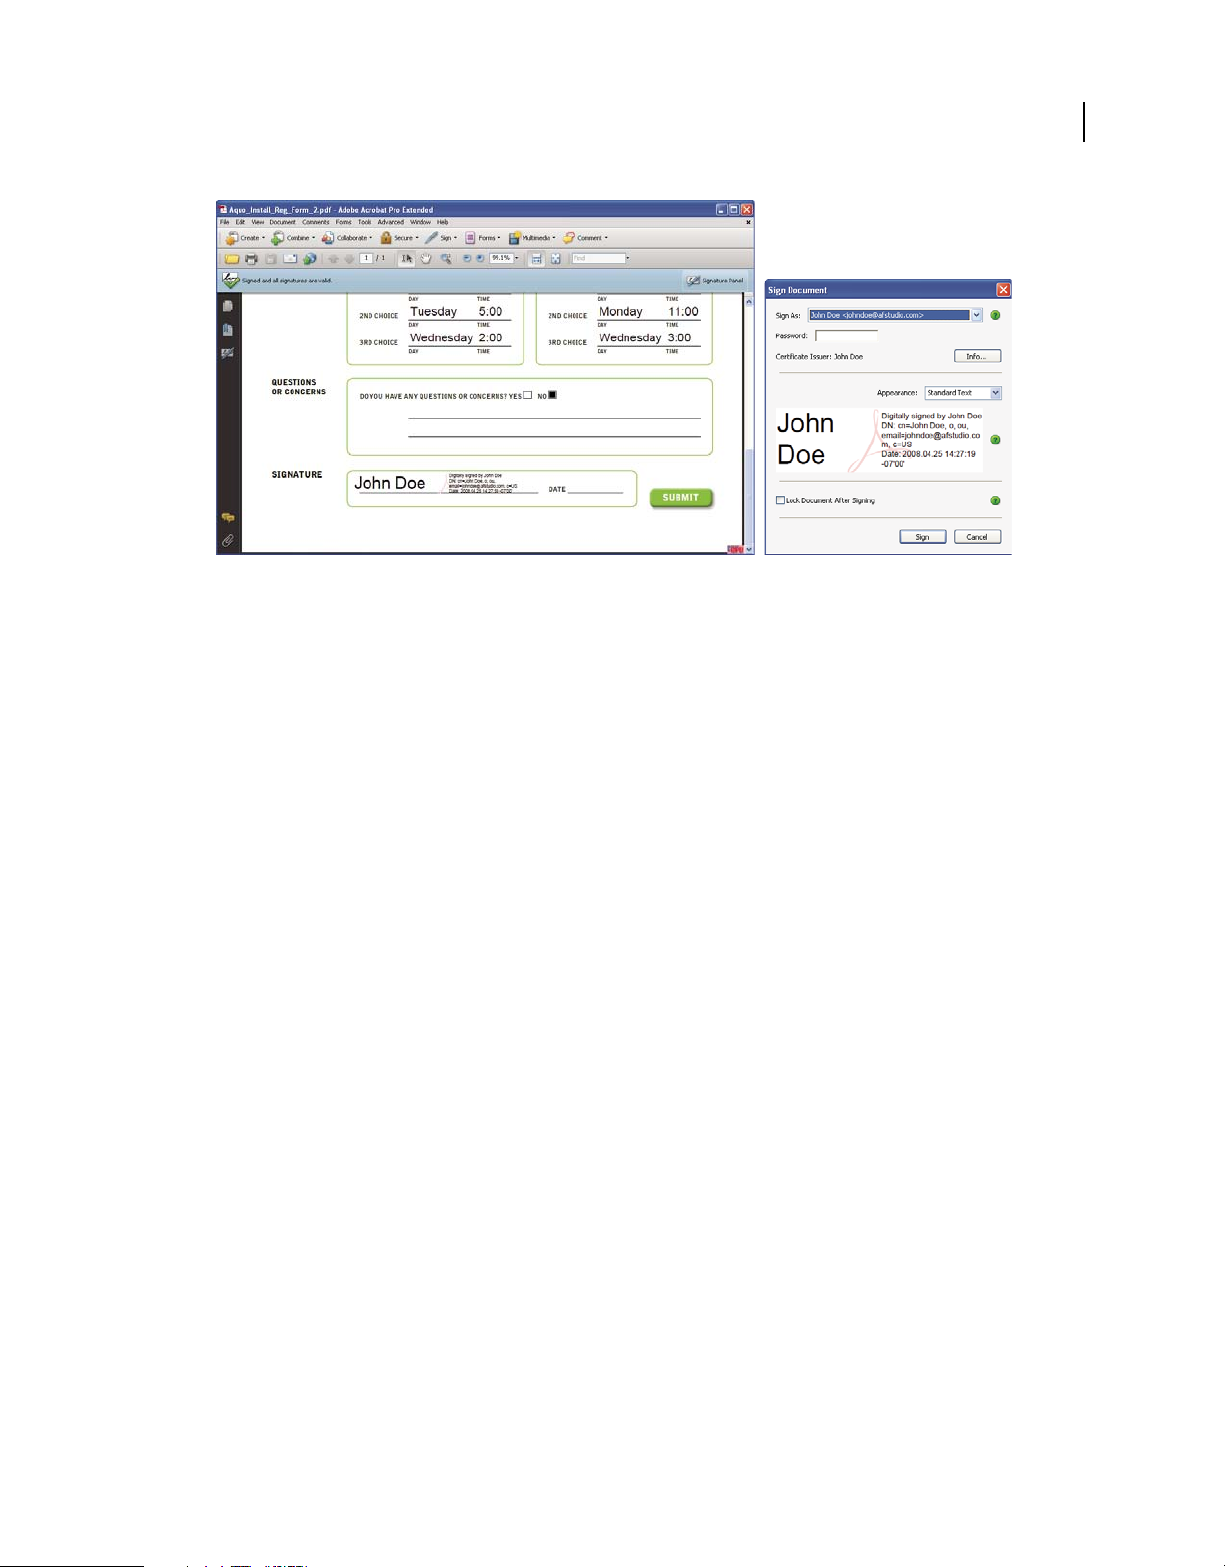
4 Sign the PDF.
To sign the document, click the signature field. If no signature field exists, choose Sign > Place Signature from the
Tasks toolbar and draw a signature field on the page.
If you’ve set Acrobat to display documents in Preview Document mode before signing, a document message bar
reports whether any dynamic content exists in the document. When you’ve reviewed the document, click Sign
Document in the document message bar to proceed.
21
USING ACROBAT 9 PRO
Getting started
Last updated 9/30/2011
Choose a signature appearance when signing a document.
In the Sign Document dialog box, select an appearance, and then add any information it requires, such as the
location or the reason for signing. Enter a password if your digital ID requires it. Click Sign. Give the document a
new name so that you can change the original PDF without invalidating the signature, and click Save.
When you apply a digital signature, Acrobat embeds an encrypted message digest in the PDF. Acrobat also embeds
the details from your certificate and a version of the document at the time it was signed.
5 Distribute your certificate.
To verify your digital ID, others who view your document must have the public certificate from your digital ID. To
send your certificate, choose Advanced > Security Settings, and select Digital IDs on the left. Expand the list, select
the digital ID you want to share, and click Export. Follow the onscreen instructions to email your certificate as an
FDF file to someone or to save the certificate as a different file type.
22
Last updated 9/30/2011
Chapter 2: Workspace
As you get acquainted with your product, make setting up your work environment a priority. The more you learn
about its potential, the better you can take advantage of its features, tools, and options.
There’s much more to the application than you see at first glance. Various hidden tools, preferences, and options can
enhance your experience and give you greater control over how your work area is arranged and displayed.
Work area basics
View the work area
Adobe® Acrobat® 9 Pro opens in two different ways: as a stand-alone application, and in a web browser. The associated
work areas differ in small but important ways.
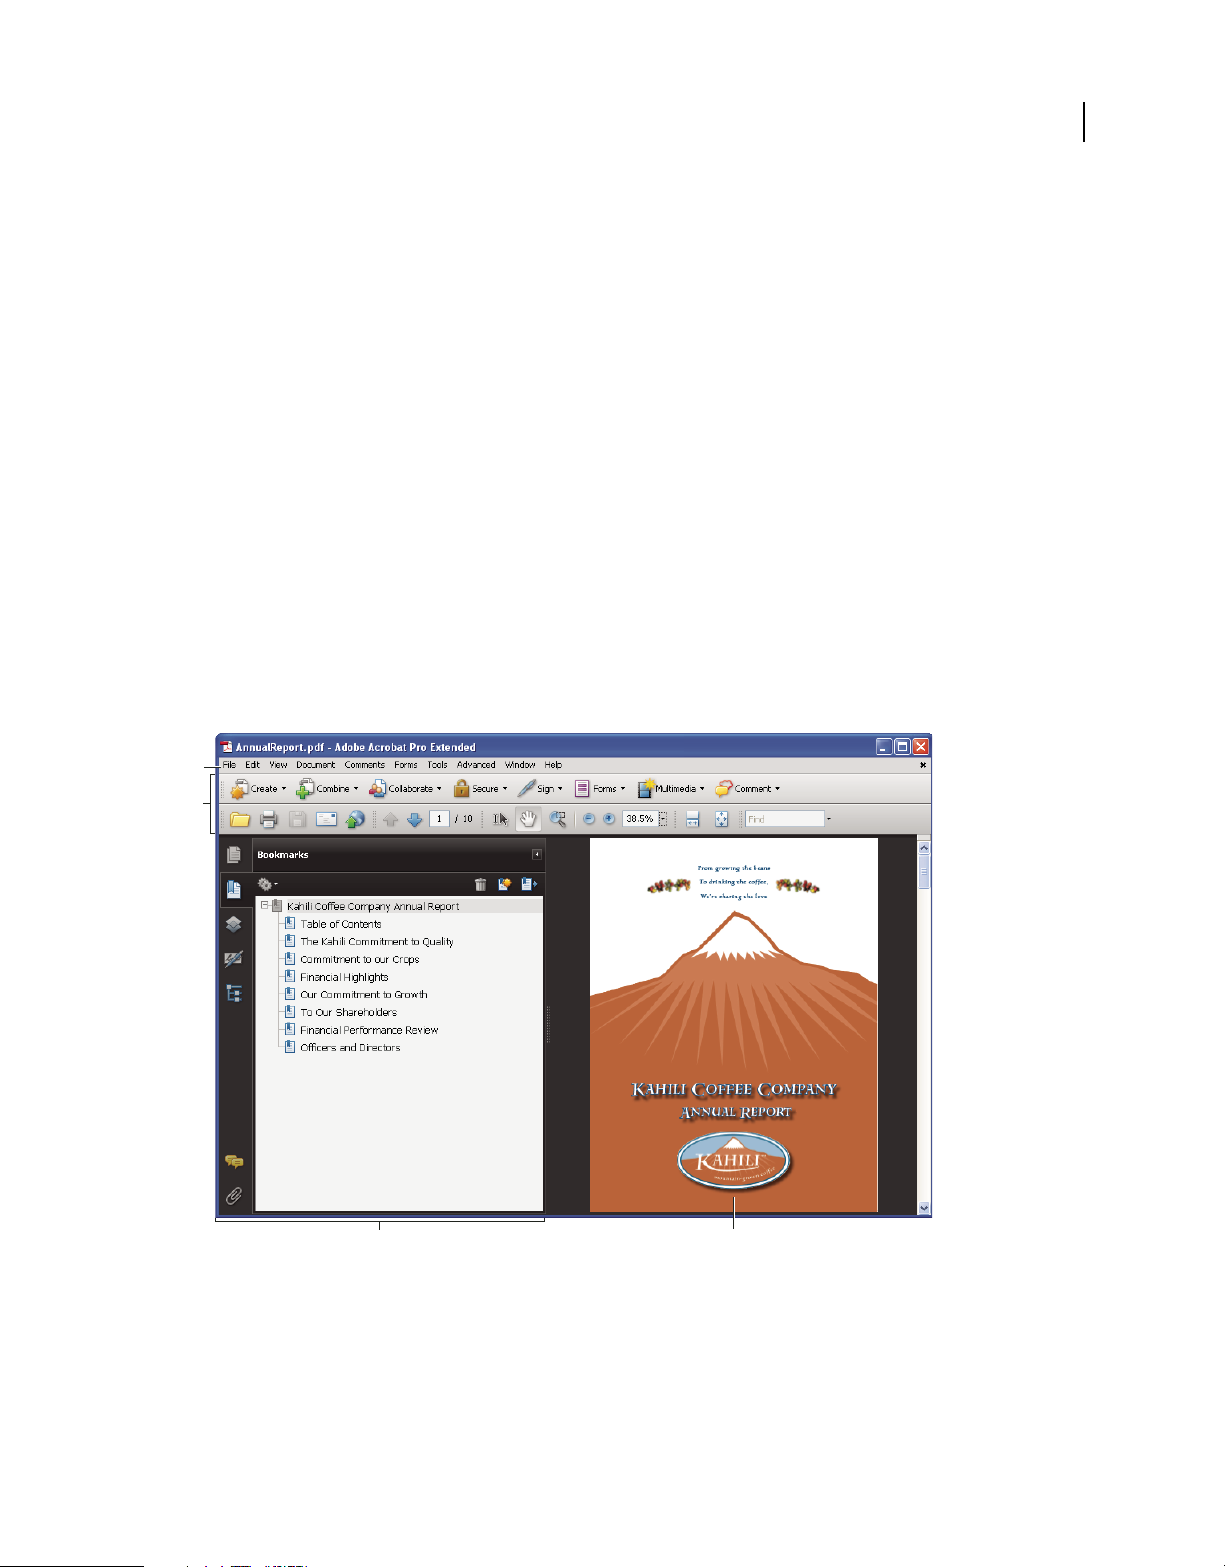
The work area for the stand-alone application includes a document pane and a navigation pane. The document pane
displays Adobe® PDFs. The navigation pane on the left side helps you browse through the PDF. Toolbars near the top
of the window provide other controls that you can use to work with PDFs.
Work area as it appears in Acrobat
A. Menu bar B. Toolbars C. Navigation pane (Bookmarks panel displayed) D. Document pane
When you open a PDF inside a web browser, the toolbars, navigation pane, and document pane are available. To access
commands in the menu bar, download the PDF and open it in Acrobat or Adobe Reader.
Note: Some, but not all, PDFs appear with a document message bar. PDF Portfolios appear with a specialized work area.
A
D
B
C

23
USING ACROBAT 9 PRO
Workspace
Last updated 9/30/2011
More Help topics
“View the PDF Portfolio work area” on page 113
“Document message bar” on page 24
Opening PDFs
You can open a PDF in many ways: from within the Acrobat application, from your email application, from your file
system, or on a network from within a web browser. The initial view of the PDF depends on how its creator set the
document properties. For example, a document may open at a particular page or magnification.
Some PDFs are restricted and open only after you enter a password provided to you by the PDF owner. If a document
is encrypted, you may need the permission of its creator to open it. In the case of some restricted or certified
documents, you may be prevented from printing a file or copying information to another application. If you have
trouble opening a PDF or can’t use certain features, contact its author or owner.
If a document is set to open in Full Screen mode, the toolbar, command bar, menu bar, and window controls are not
visible. You can quit Full Screen mode by pressing Ctrl+L.
More Help topics
“Defining initial view as Full Screen mode” on page 333
“View the PDF Portfolio work area” on page 113
“Opening secured documents” on page 223
Select another tool
By default, the Select tool is active when Acrobat opens, because it is the most versatile tool.
Specialized tools, such as those for zooming in or adding review comments, are available in toolbars and in the Tools
menus.
More Help topics
“Keys for selecting tools” on page 496
Select a tool
❖ Do one of the following:
• Select a tool in a toolbar.
• Choose Tools > [toolbar name] > [tool].
Switch temporarily to the Zoom In or Hand tool
You can use these tools temporarily, without deselecting the current tool.
• To select the Hand tool temporarily, hold down the spacebar.
• To select the Zoom In tool temporarily, hold down Ctrl+spacebar.
When you release the keys, Acrobat reverts to the previously active tool.
24
USING ACROBAT 9 PRO
Workspace
Last updated 9/30/2011
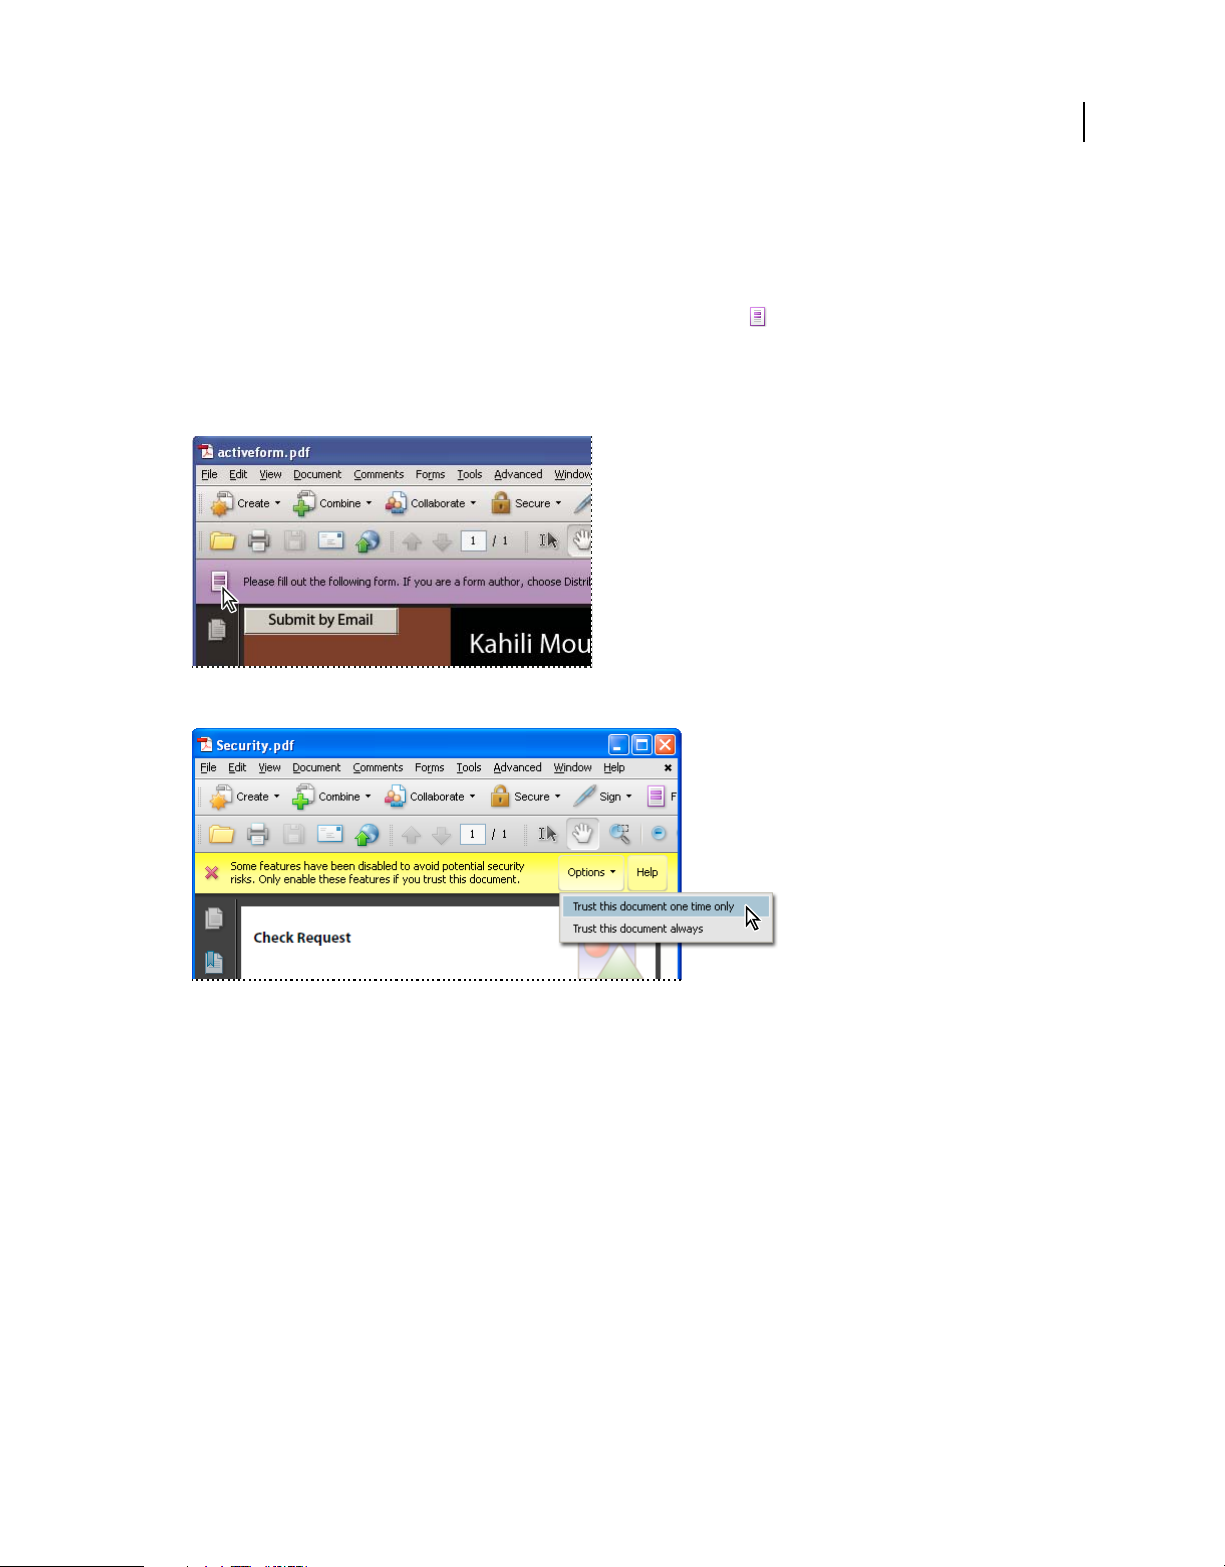
Document message bar
The document message bar appears only in certain types of PDFs. Typically, you see this area when you open a PDF
form, a PDF that has been sent to you for review, a PDF with special rights or security restrictions, or a PDF that is
compliant with PDF/A, PDF/E, or PDF/X standards. The document message bar appears immediately below the
toolbar area. To show or hide the document message bar, click its button
on the left side of the work area.
Look on the document message bar for instructions on how to proceed and for any special buttons associated with the
task. The bar is color coded: purple for forms, yellow for reviews or security alerts, and blue for certified PDFs or PDFs
with password security or document restrictions.
Document message bar for a form
Document message bar for a security alert
More Help topics
“Security alerts” on page 223
“Enhanced security” on page 225
“Filling in forms” on page 218
“Commenting” on page 160
Set preferences
Many program settings are specified in the Preferences dialog box, including settings for display, tools, conversion,
and performance. Once you set preferences, they remain in effect until you change them.
1 Choose Edit > Preferences (Windows) or Acrobat > Preferences (Mac OS).
2 Under Categories, select the type of preference you want to change.
Loading...