


twentieth anniversary mac
Table of contents
 Loading...
Service Source
K
T wentieth Anni versary
Macintosh

Service Source
K
Basics
T wentieth Anni versary Macintosh
Basics Overview - 1
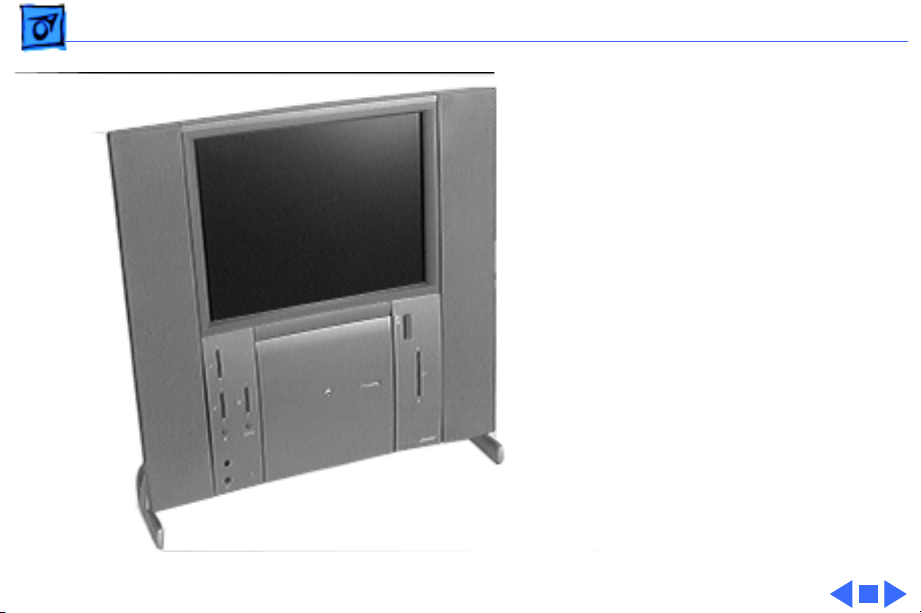
Overview
Because the Twentieth
Anniversary Macintosh is a
limited production product,
not everyone will have an
opportunity to personally
view this computer. Some
basic overview information
and the Twentieth Anniver-
sary Macintosh User
Manual have been included
here to familiarize all
Service Source customers
with the basic features and
operation of this product.
Due to the unique nature of

Basics Overview - 2
this computer, any service requiring removal of enclosure
screws must be handled by a centralized repair center;
therefore, detailed repair instructions will not be
distributed via Service Source CD.
Details on the Twentieth Anniversary Macintosh service
strategy will be documented on the next Service Source CD
and through a Service Program notice.
Basics Rear Panel Connectors - 3
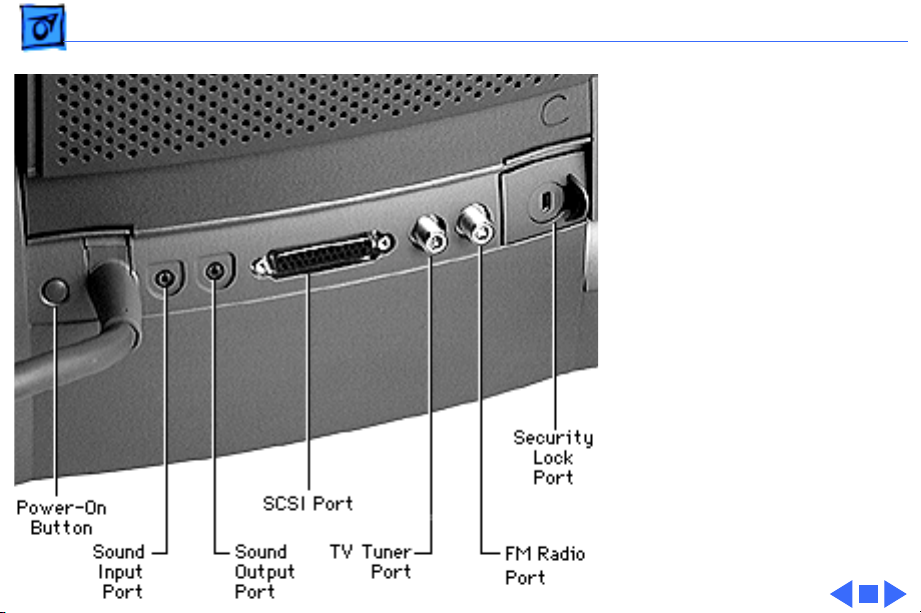
Rear Panel
Connectors
The graphic at left shows the
connectors on the rear
panel of the Twentieth
Anniversary Macintosh
computer.
Basics Back Panel View - 4
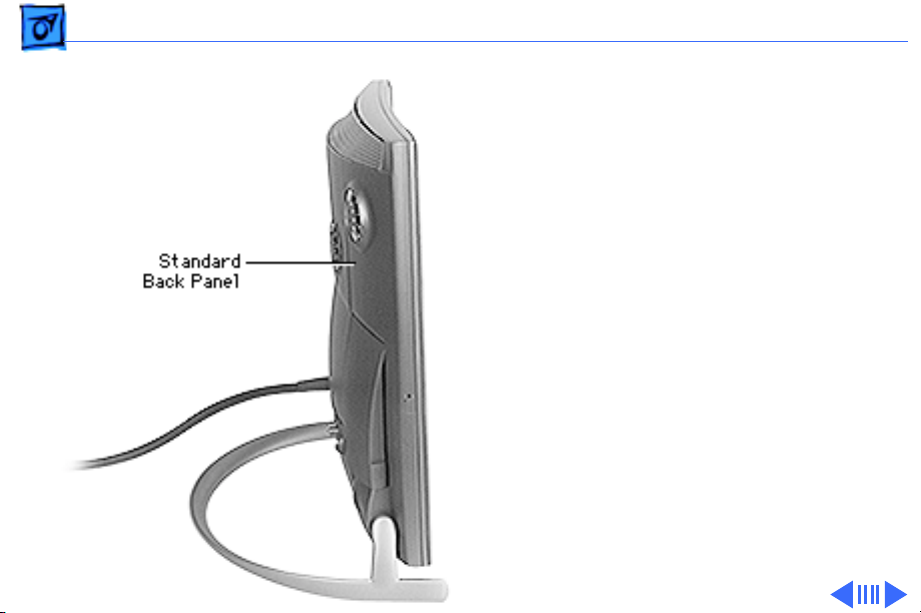
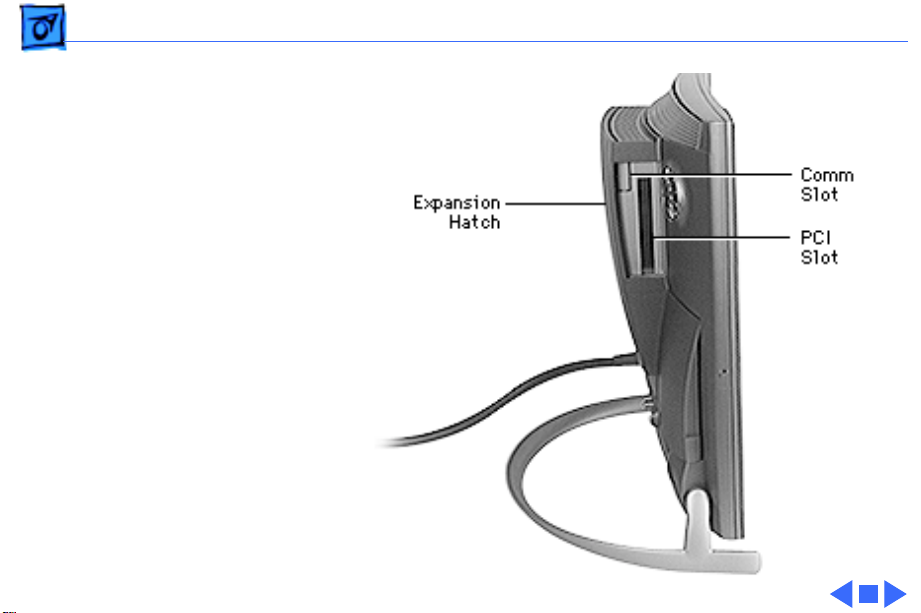
Back Panel View
There are two back panels
that can be installed on the
Twentieth Anniversary
Macintosh main unit: the
standard back panel, and the
expansion hatch that is used
when optional cards are
installed in the unit.
The graphic at left shows the
standard back panel. The
graphic on the following
page shows the expansion
hatch installed on the main
unit.
Basics - 5
Basics Connecting the Base Unit to the Main Unit - 6
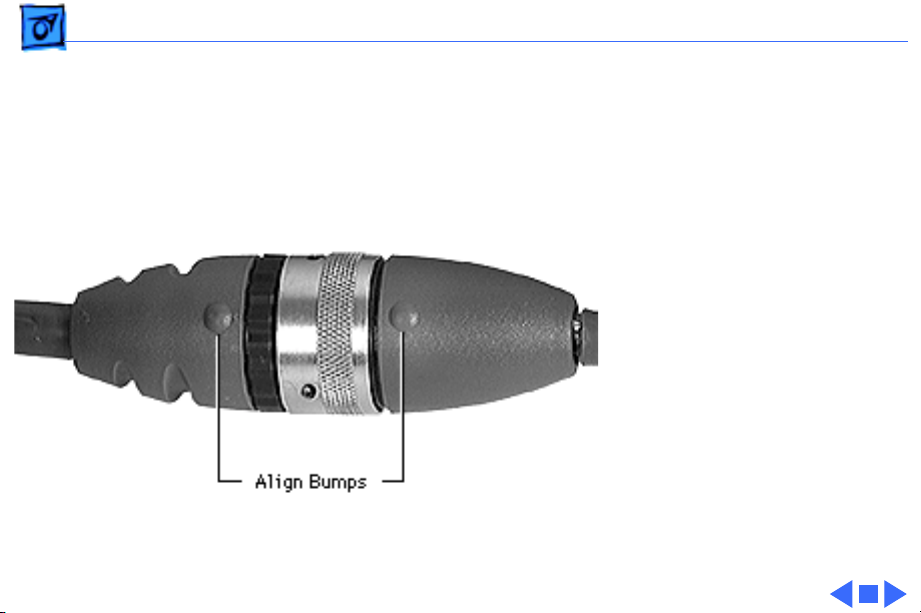
Connecting the
Base Unit to the
Main Unit
When connecting the base
unit to the main unit, be
sure to align the bumps on
the cable connectors as
shown and then twist the
metal ring to secure the
connection.
Basics Sound System - 7
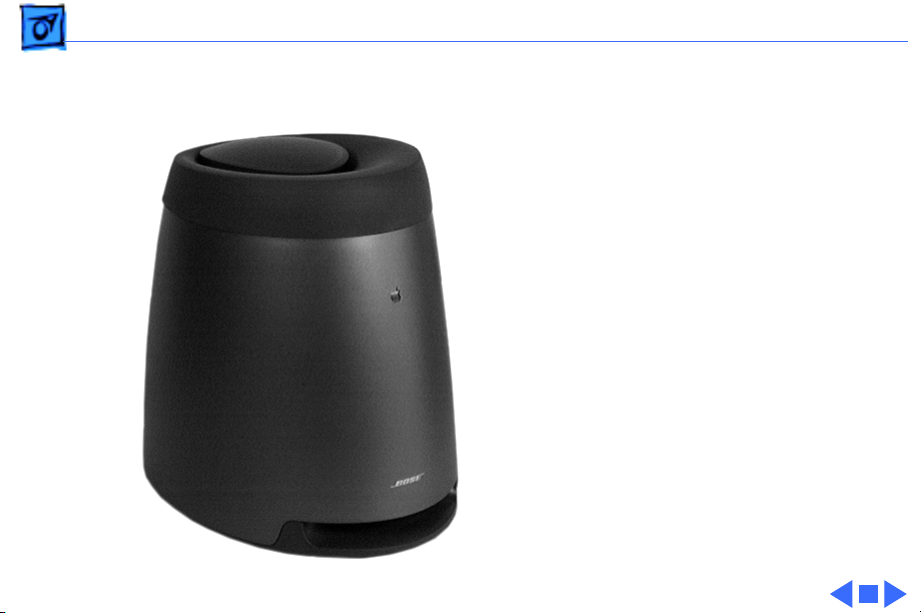
Sound System
The Twentieth Anniversary
Macintosh features a custom
Acoustimass sound system
by Bose with integrated
stereo speakers (built into
the main unit) and
subwoofer (built into the
Base unit pictured on the
left).

Service Source
K
Specifications
T wentieth Anni versary Macintosh

Specifications Processor - 1
Processor
CPU
250 MHz PowerPC 603e processor
Built-in floating point unit (FPU)
32K of on-chip cache memory

Specifications Memory - 2
Memory
DRAM
32 MB DRAM, installed as either a single 32 MB DIMM or two 16
MB DIMMs.
Each DIMM socket can accommodate a DIMM up to 64 MB, for a
maximum of 128 MB. Requires 64-bit wide, 5 V, 168-pin
EDO or FPM, 60 ns or faster DIMMs with 2K refresh rate.
Note:
SIMMs from older Macintosh systems
cannot
be used in
this machine. DIMMs that require a 4K refresh rate and 3.3 V
DIMMs
cannot
be used in this machine.
ROM
4 MB

Specifications Memory - 3
VRAM
2 MB of built-in video memory using synchronous graphic RAM
(SGRAM)
Cache
256K level 2 cache
Clock/calendar
CMOS custom chip with long-life lithium battery

Specifications Disk Storage - 4
Disk Storage
Hard Drive
2 GB IDE hard drive
CD-ROM
Custom front-loading CD-ROM drive
Floppy Drive
1.4 MB Apple SuperDrive Manual Insert

Specifications I/O Interfaces - 5
I/O Interfaces
SCSI
One external SCSI port; supports up to six external devices
Serial
Two RS-232/RS-422 GeoPort-compatible serial ports; mini
DIN-9 connectors
Apple Desktop Bus
One Apple Desktop Bus (ADB) port; mini-Din-4 connector
Maximum power draw 500 mA; maximum of three devices
total; additional ADB port on back of keyboard
TV/Radio
One TV tuner card that provides connection to an external TV
antenna or cable TV (F-type connector) and FM radio antenna.
(The Apple TV/FM Radio System card is already installed.)

Specifications I/O Interfaces - 6
Video Input
Built-in video card provides S-video input port for VCR,
camcorder, or other video input device; adapter for composite
video input devices; supports NTSC, PAL, and SECAM video
standards. (Note: this card is different than the video cards used
in earlier entry-level Macintosh systems.)
Sound
16-bit stereo input and output ports (3.5 mm) on back panel
Sample rates of 11.025, 22.05, and 44.1 kHz
Built-in Bose sound system, including Bose bass unit
Front-panel push-button control for volume level and muting
Front headphone jack (3.5 mm)
Built-in omnidirectional electret type microphone
Sound input port (3.5 mm) for stereo sound related to video
recording
Sound Input Port (on
back panel)
Input impedance: >3.5 kilohms nominal, each channel

Specifications I/O Interfaces - 7
Video A udio Input
Port (next to S-video
port)
Signal-to-noise ratio (SNR): 75 dB minimum, 80 dB typical (A-
weighted, 2 Vpp output, 1 kHz, digital record and playback,
sound input port to sound output port)
Frequency response: 20 Hz-18 kHz (-3 dB relative to 1 kHz
under the same conditions as the SNR measurement)
Expansion Slots
COMM II slot
One internal (comm slot II) expansion slot, supporting
communication cards, such as an internal modem or Ethernet
card
PCI slot
One internal PCI expansion slot, supporting 6.88-inch, 15 W PCI
cards.
Note:
Install only PCI expansion cards that come with
Macintosh drivers and are compliant with the PCI 2.0 standard.

Specifications I/O Interfaces - 8
Video slot
One internal video expansion slot, supporting a video input card
using the NTSC, PAL, and SECAM formats. (The video input card
is already installed in this slot.)

Specifications I/O Devices - 9
I/O Devices
Keyboard
Twentieth Anniversary Macintosh custom keyboard; draws
25-80 mA (varies with keyboard model used)
Trackpad
Solid-state keyboard-mounted trackpad (ADB device); can be
removed and repositioned; draws up to 10 mA
Microphone
Apple PlainTalk microphone (optional)

Specifications Video Support - 10
Video Support
Display
12.1-in. diagonal, active matrix flat-panel display with
backlighting; 800x600 pixels; color liquid crystal; 256 or
thousands of colors; color depth: 6 bits each R, G, B
Graphics Modes
Supported
Resolution Color Bit Depth* Vertical Scan Rate
640x480 8 60
640x480 16 60
800x600 8 60
800x600 16 60
Video input and 2D acceleration supported in all modes. 1st and
3rd mode do not support 3D acceleration; 2nd mode supports 3D
acceleration, as does 4th mode, depending on the window size.
*16 bit color depth displays 32,768 colors, 8 bit displays
256 colors.

Specifications Electrical - 11
Electrical
A/C Line Input
Voltage
90-130 V or 180-264 VAC; RMS single phase, manually
configured
Input Line
Frequency
47-63 Hz
Input Power
140 W maximum continuous
Power Supply DC
Output
70 W maximum continuous output
Sleep Mode
AC power usage in sleep mode (without PCI cards) less than 30 W

Specifications Physical - 12
Physical
Main Unit
Height: 17.25 in. (43.8 cm)
Width: 16.5 in. (41.9 cm)
Depth: 10.0 in. (25.4 cm)
Weight: 14.9 lbs. (6.8 Kg)
Bass Unit
Height: 10.63 in. (27 cm)
Width: 8.31 in. (21.1 cm)
Depth: 11.75 in. (29.8 cm)
Weight: 10.5 lbs. (4.8 Kg)
Keyboard
Height: 1.0 in. (2.5 cm)
Width: 11.5 in. (29.2 cm)
Depth: 8.13 in. (20.7 cm)
Weight: 1.86 lbs. (.84 Kg)

Specifications Environmental - 13
Environmental
Operating
Temperature
10–35° C (50–95° F)
Storage
Temperature
–40 to 47° C (–40 F to 116.6° F)
Relative Humidity
5–95% (noncondensing)
Altitude
0–3,048 m (0–10,000 ft.)

Chapter One
Setting Up 2
Chapter Two
Learning to Use Your Computer 30
Chapter Three
Using Software 40
Part One
Getting Started

Mono audio adapter cable
Batteries PCI card adapter
Communication card adapter Expansion panel
Expansion back cover
The illustration below and on the next page shows all the equipment you received with your
computer, including everything you’ll need to set up your computer and begin using it.
Before following the setup instructions in this chapter, you may want to read “Arranging Your Office” in
Appendix A (in the section on health-related information) for tips on adjusting your work furniture so
that you’re comfortable when using the computer.
You will follow these general steps in setting up your equipment:
m Unpacking the equipment
m Connecting the bass unit to the computer
m Plugging in the power cord
m Connecting the keyboard
m Connecting the GeoPort Telecom Adapter (for the modem)
m Turning on the computer
Chapter
One
2
Chapter One
Setting Up

Setting Up
3
Bass unit
Power cord
Keyboard and trackpad
Telephone cord
Composite video to S-video adapter cable
Stereo audio adapter cable
GeoPort Telecom Adapter
(In some locations the GeoPort Telecom
Adapter has only one port.)
Remote control
FM antenna
Computer
Unpacking the equipment
Take all the parts of your computer out of the boxes. Then follow these instructions:
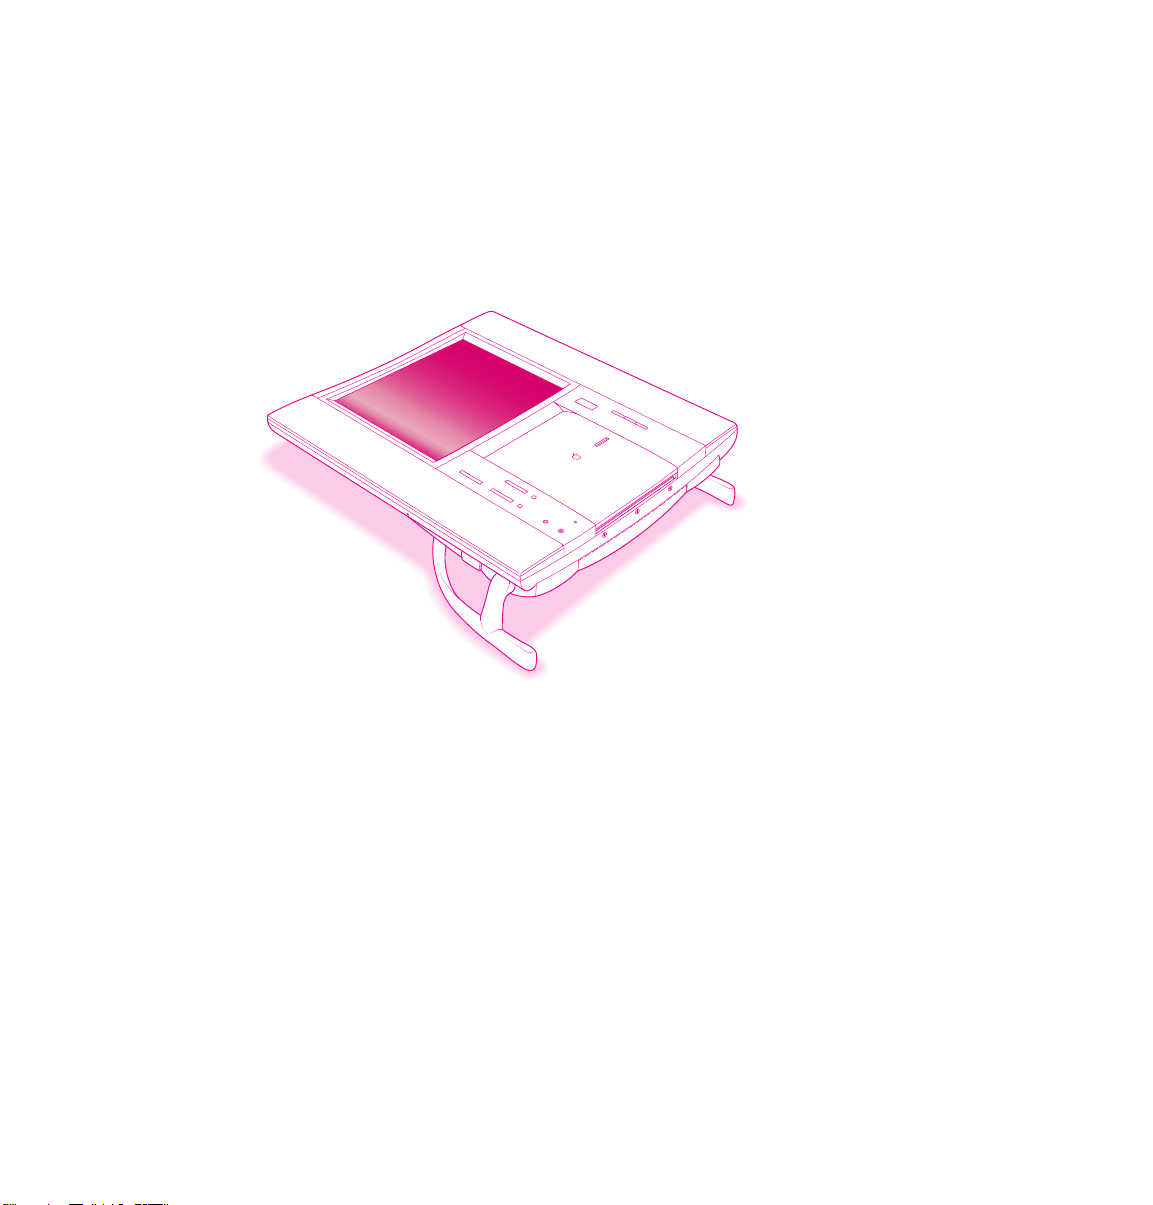
1 Place the computer face-up on your work surface.
Choose a sturdy, flat surface near a telephone jack.
Place the
computer on a
flat, clean, stable surface.
Chapter
One
4
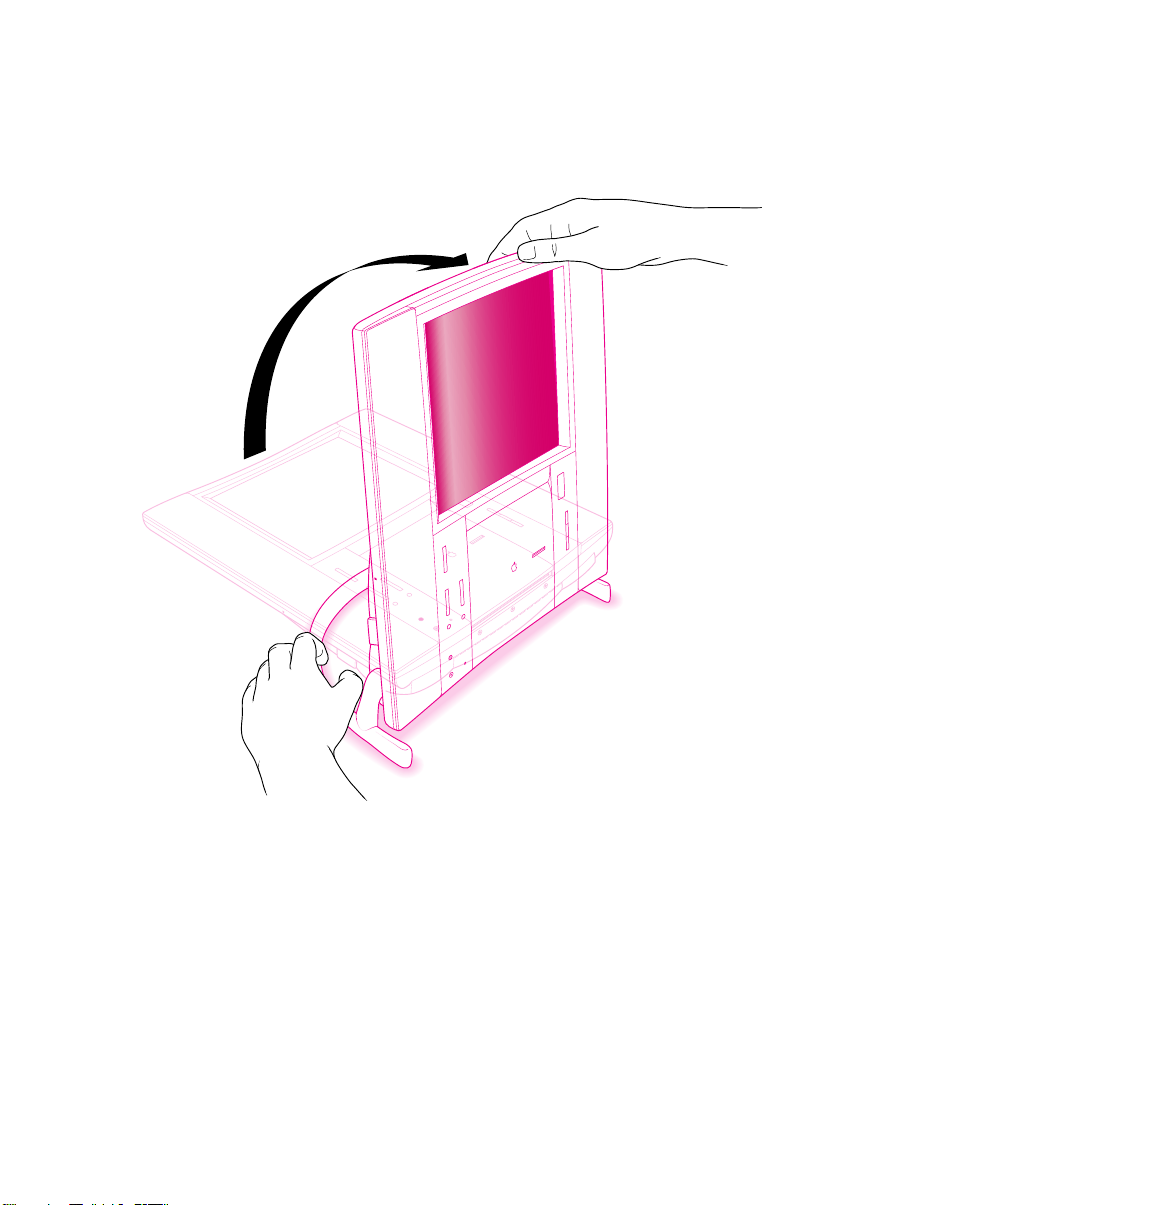
2 While holding the computer’s base firmly, raise the computer to a comfortable viewing position.
Setting Up
5
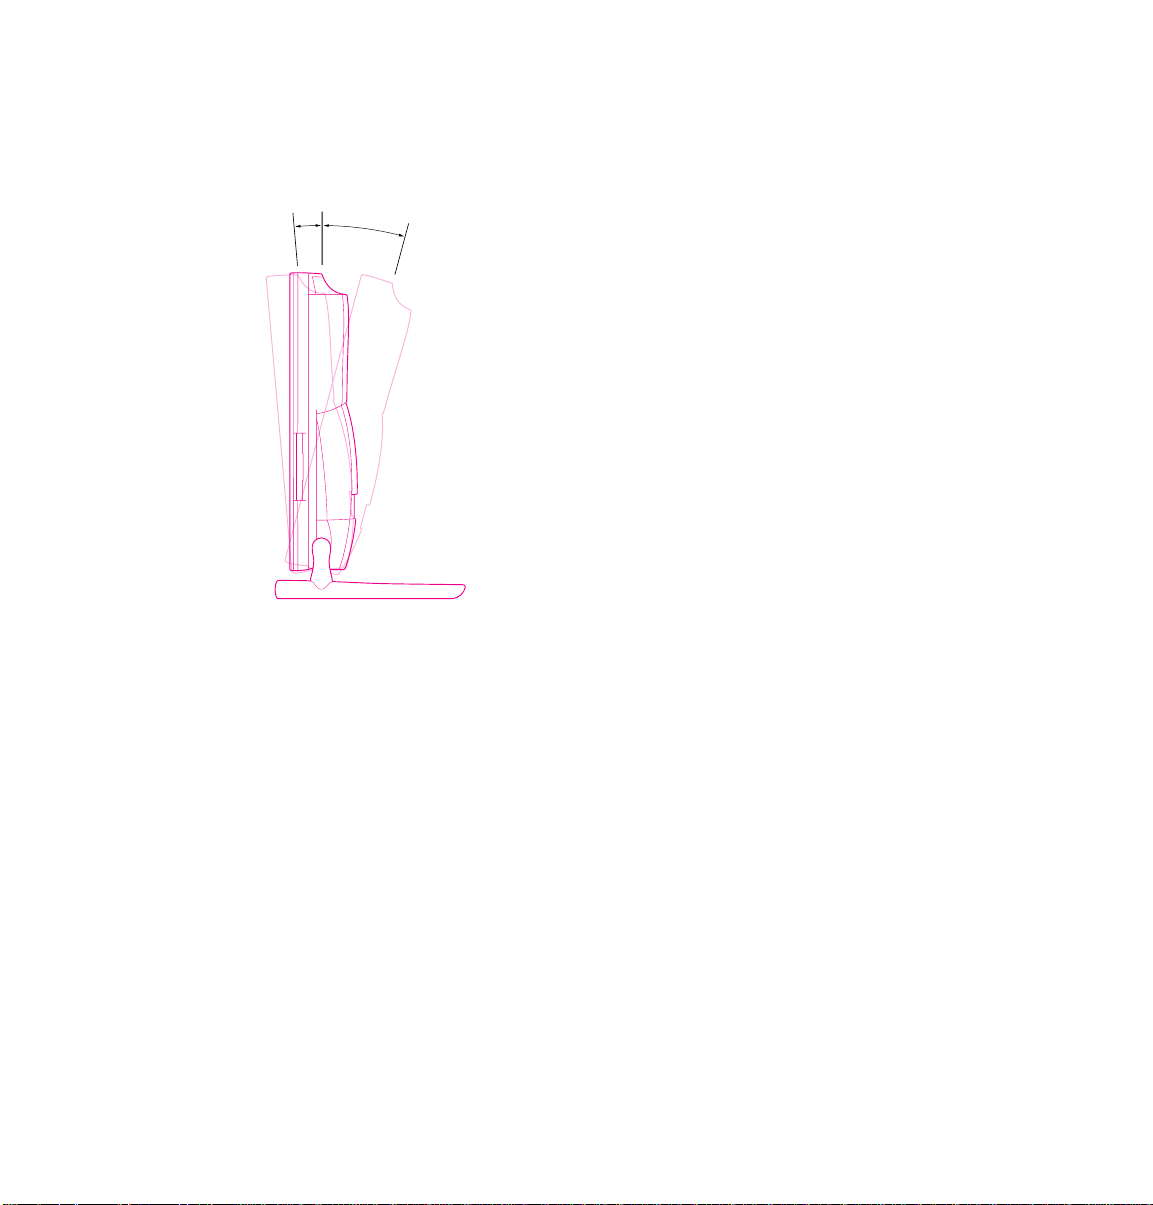
The screen should be vertical, tilted back by no more than a 15-degree angle, or tilted forward by no
more than a 5-degree angle (to ensure that the CD-ROM drive operates correctly).
5° 15°
Chapter
One
6

Positioning the bass unit
Place the bass unit near a grounded outlet, within six feet of the computer. The bass unit is designed to
be placed under your work surface and will perform best acoustically when placed on the floor. It can
also be placed on any stable, flat surface. For proper cooling, be sure that the air flow around the bass
unit is not restricted.
Important The bass unit contains a very strong magnet. To prevent the magnet from interfering with
the computer’s operation, do not place the bass unit next to the computer. Do not place floppy disks
on top of the bass unit (data may be lost).
Plugging in your equipment
Before you plug your equipment into a wall socket, carefully read all the setup instructions in this
chapter. Then, before you connect anything to your computer, follow the instructions in this section
to plug it in. The plug grounds the computer and protects it from electrical damage while you are
setting up.
Setting Up
7
Loading...