


Apple Wireless Keyboard
Apple Wireless Mouse
Read this first for important information about setting up your computer
Lisez ce manuel pour obtenir des informations importantes sur
la configuration de votre ordinateur
Lea este manual para obtener información importante sobre la configuración del ordenador

Congratulations on selecting the Apple Wireless Keyboard and Mouse as your input devices. The information in this booklet supplements the setup instructions in the manual that came with your computer.
Setting Up Your Mac Using the Wireless Keyboard and Mouse
Follow the steps below to install batteries in the keyboard and mouse, set up your computer, and use the Setup Assistant to set up your keyboard and mouse with your computer.
Step 1: Install the Batteries
Your Apple Wireless Mouse comes with two nonrechargeable AA lithium batteries.
To install batteries in the mouse:
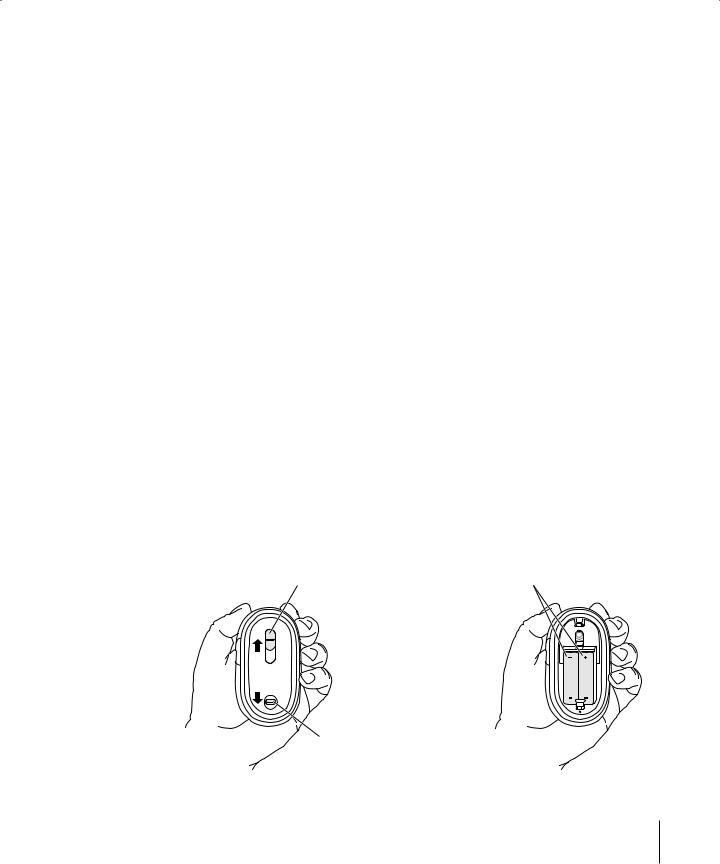
1 Turn the mouse over and remove the bottom cover.
2 Slide the batteries into the battery bay as shown in the illustration below.
3Replace the bottom cover and leave the mouse turned off until you are ready to start up your computer.
Slide this switch up to cover the LED. This turns the mouse off.
Insert two AA batteries in the mouse. The positive (+) terminals on both batteries should be oriented toward the LED.
To open the mouse, push this latch downward slightly. This releases the bottom cover.
3
Your Apple Wireless Keyboard comes with four nonrechargeable AA alkaline batteries.
To install batteries in the keyboard:
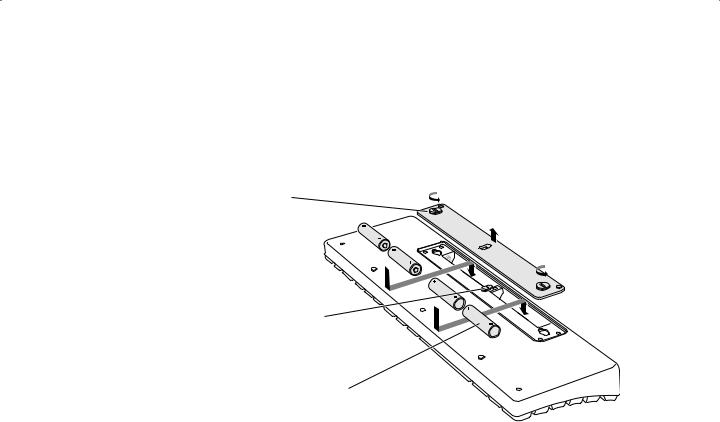
1 Turn the keyboard over and remove the battery compartment cover.
2 Slide the batteries into the battery compartment as shown in the illustration below.
3Replace the battery compartment cover and leave the keyboard turned off until you are ready to start up your computer.
Turn the two latches with
a coin to remove the battery compartment cover.
This switch turns the keyboard on and off. Slide the switch toward the back of the keyboard to turn it off.
Insert four AA batteries in the keyboard. Position the positive (+) and negative (–) terminals on the batteries as shown.
For more information about batteries, see “About Your Batteries” on page 5.
Important: Don’t turn on your mouse or keyboard until just before you are ready to start up your computer in Step 3. When the keyboard’s switch is in the off position with no green showing, the keyboard is off. When the LED on the bottom of the mouse is covered, the mouse is off.
Step 2: Set Up Your Computer
Set up your computer following the instructions in the manual that came with your computer. Because you have a wireless keyboard and mouse, you should skip the instructions to connect a USB keyboard and mouse.
Wait to start up your computer until instructed to do so in Step 3 below.
Note: If you have a Power Mac G5 computer, remember to attach the external Bluetooth® antenna that came with your computer to the Bluetooth antenna port on the back of the Power Mac G5.
Step 3: Set Up Your Keyboard and Mouse With Your Computer
To use your Apple Wireless Keyboard and Mouse, you have to “pair” them with your computer. Pairing allows your keyboard and mouse to communicate wirelessly with your computer. You only have to pair your keyboard and mouse once.
4 |
English |
|
|

The first time you start up your computer, the Setup Assistant welcomes you and guides you through the steps to set up your Apple Wireless Keyboard and Mouse and pair them with your computer.
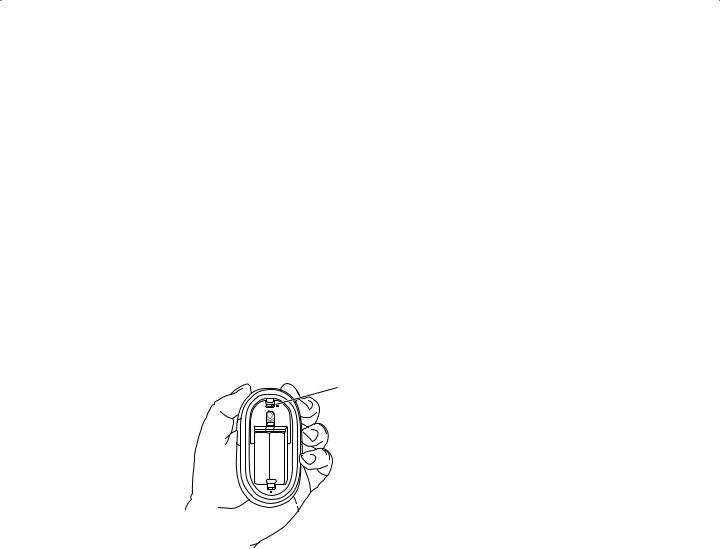
1Turn on the Apple Wireless Mouse by sliding the switch that covers the LED to expose the LED.
This switch turns the keyboard on and off. Slide the switch toward the front of the keyboard to turn it on.
Slide this switch to |
Power On light |
turn the mouse on |
|
and off. When the |
|
switch uncovers the |
|
LED, the mouse is on. |
|
2Turn on the Apple Wireless Keyboard by moving the switch to the on position (toward the Power On light, or LED).
3 Turn on your computer.
4 Once your computer starts up, follow the onscreen instructions in the Setup Assistant.
About Your Apple Wireless Keyboard and Mouse
Naming Your Keyboard and Mouse
Your computer automatically gives your wireless keyboard and mouse a unique name the first time you pair them. You can rename your keyboard or your mouse using Keyboard & Mouse preferences. Choose Apple (K) > System Preferences and click Keyboard & Mouse. Click Bluetooth and enter a new name in the field.
About Your Batteries
Your Apple Wireless Keyboard comes with four alkaline batteries and your Apple Wireless Mouse comes with two nonrechargeable lithium batteries. You can use alkaline, lithium, or rechargeable AA batteries in the keyboard or the mouse.
Warning: When replacing the batteries, replace them all at the same time. Don’t mix battery types. Don’t open or puncture the batteries, install them backwards, or expose them to fire, high temperatures, or water. Keep batteries out of the reach of children. If batteries are swallowed or lodged in the ear or nose, promptly see a doctor.
English |
5 |
|
|
Battery Indicator
Use Keyboard & Mouse preferences to check the battery charge level. Choose
Apple (K) > System Preferences. Click Keyboard & Mouse, then click Bluetooth.
Note: To conserve battery power, your keyboard and mouse automatically switch to low-power mode after a few minutes of inactivity. If you’re not planning to use your keyboard or mouse for an extended period (for example, over a weekend or holiday), you can turn them off using the switch on the back. If you are not planning to use your keyboard or mouse for a longer period, you should remove the batteries.
Adjusting Your Mouse
You can adjust the tension or feel of your Apple Wireless Mouse. More tension makes clicking the mouse feel stiffer; less tension makes clicking the mouse feel easier.
1 Remove the bottom cover of the mouse.
2Move the switch above the LED to adjust the tension.
•For more tension, move the switch toward the plus sign.
•For less tension, move the switch toward the minus sign.
3 Replace the bottom cover.
Slide the switch to “+” for more tension, and to “–” for less tension.
You can also adjust the tracking speed (how fast the onscreen pointer moves) and the double-click speed (how fast you have to double-click to select something).
1 Choose Apple (K) > System Preferences.
2 Click Keyboard & Mouse, then click Mouse.
3Adjust the tracking or double-click speed to a speed that’s comfortable for you.
For information about ergonomics, health, and safety, visit the Apple ergonomics website at www.apple.com/about/ergonomics.
Support Information
For support and troubleshooting information, user discussion boards, and the latest
Apple software downloads, go to www.apple.com/support.
6 |
English |
|
|
 Loading...