

Redeem one point on any manual of your choice by selecting "Download" or "Unhide" on the manual's page. Your file will be ready for viewing or download without further points deductions for repeated accesses.
- Register to receive a welcome bonus of 1 point, available when signing up with mainstream email providers. Further details are provided on our website.
- Upload unique manuals to earn points, with guidance on the process available through our upload tutorial.
- Gain points when your uploads are downloaded by others.
- Purchase additional points if needed, with a direct link to the purchase page provided.
The welcome points are automatically credited upon signing up through Google, Facebook, or using specific email services, as part of our measure to prevent automated sign-ups.
There are no additional charges for downloading the same manual multiple times; once unlocked, a manual can be revisited and downloaded as needed from your profile.
Track your points history through the profile page to oversee your activities and rewards on Manualmachine.
- Log in to your account and access "My files" for uploading.
- Only PDFs are acceptable; select "Upload" and choose the file from your device.
- Post-upload, your manual is marked "In Progress" for validation.
- If a manual already exists, it's identified, and no point is awarded. If it's new, complete the upload by providing brand, model, and type information.
- Upon verification and approval, the manual is listed as "Approved," and you earn points for your contribution.
- Manage and track all your uploads, along with their status, in an easy-to-use format, similar to an Excel spreadsheet on your profile.
Bulk uploads are supported for files compressed in zip or rar formats, with a maximum size limit per archive and automatic extraction provided.
For non-PDF manual formats, conversion is required using recommended online tools before uploading to Manualmachine. For example:
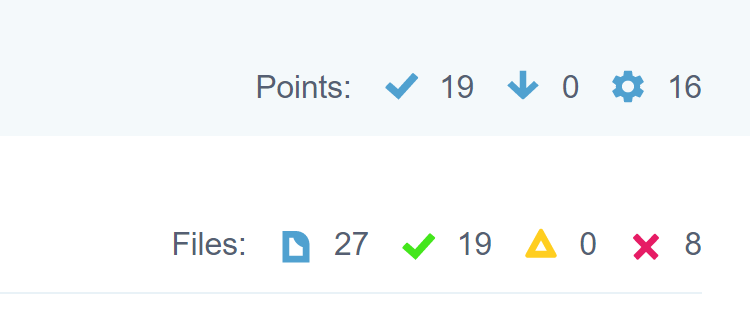
The "Points" row:
 "For files" – counter reflects points from file uploads. It may differ from "Approved" as one upload with multiple models counts once here but separately in approvals.
 "For downloads" – shows points earned when users download your manuals.
 "Total" – displays your current point balance, accounting for points earned and spent.
The "Files" row:
 "All" – indicates the total files you've uploaded.
 "Approved" – reflects the number of files that have been accepted.
 "Uploaded" – denotes files pending your action.
 "Deleted" – tracks the number of files you've removed.
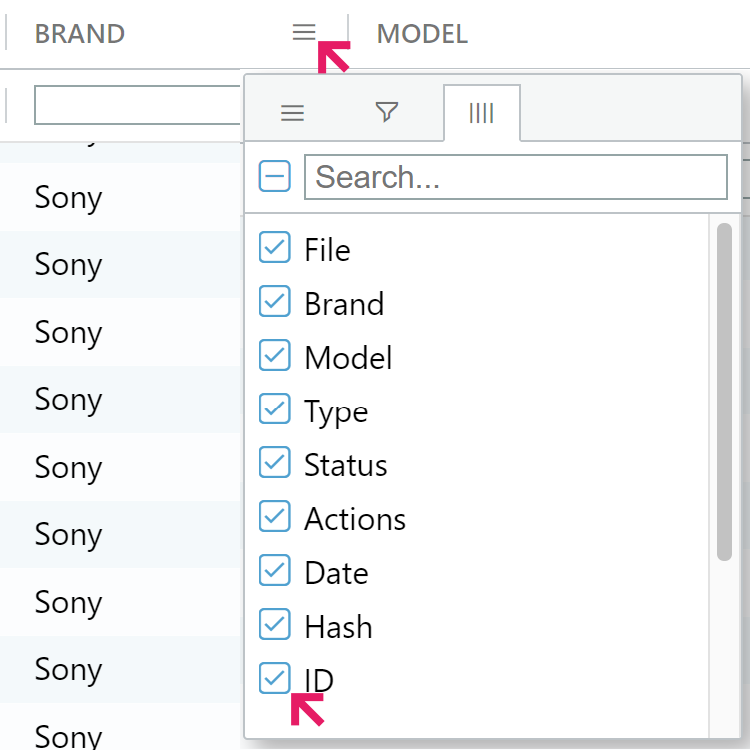
- Alter column widths by dragging the column header's edge.
- Reorder columns by dragging them to new positions.
- Hide columns by unchecking them in the header menu.
- Apply filters with the "Filter" button to sort through data.
- Reset to the default layout with the "Reset - Table Layout" button to revert any changes made to the table view.

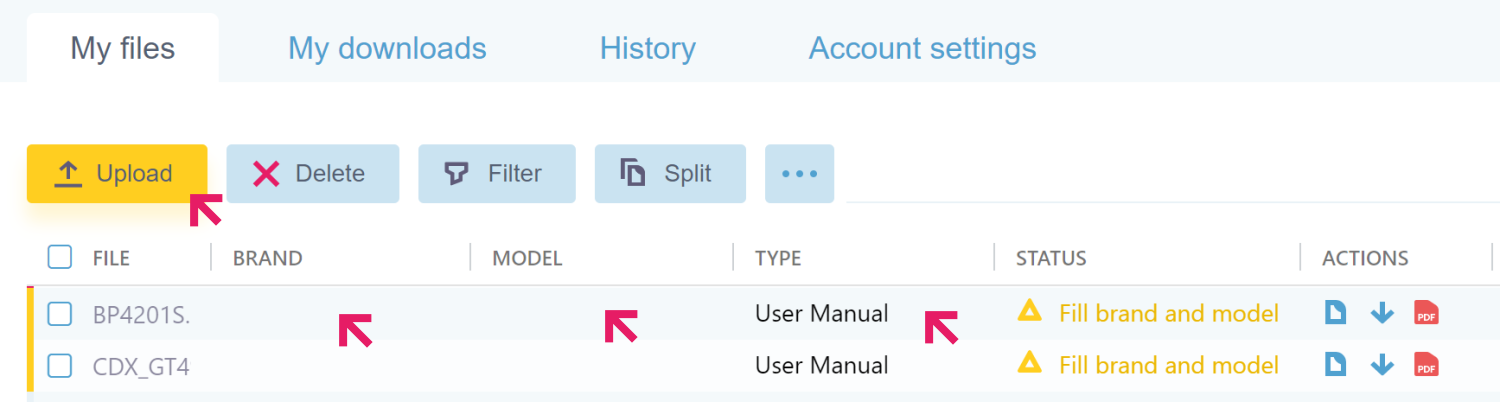
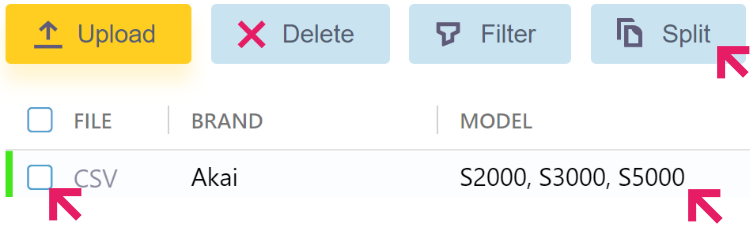
There is a menu above the table with file managing buttons:
- "Upload" – upload new files to the site
- "Delete" – delete files. Before you click Delete, tick the checkboxes of the files you want to delete
- "Filter" – toggle the display of the filter options
- "Split" – to divide a multi-model manual into separate entries. For example, you have a manual for several models of any device "PET730, PET732, PET735"; after clicking "Split", this manual will be divided into separate models "PET730" "PET732" "PET735".
- "Reset Table Layout" – restore original table settings
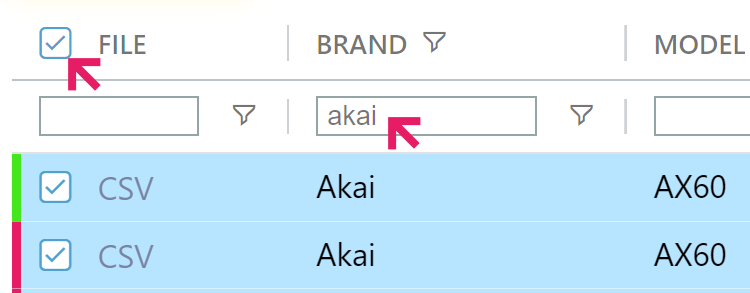
To manage your files efficiently, use the checkbox system to perform operations like "Delete" and "Split." You can select multiple files simultaneously using two methods:
- Filtering Method: Apply filters to display only the desired files, then use the header checkbox to select all visible entries.
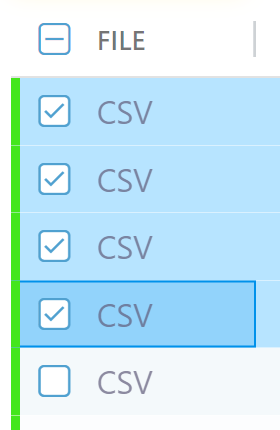
- Range Selection Method: Tick the checkbox for the first file, navigate to the last required file, press Shift and tick the checkbox of the last file

The file table includes several columns, each serving a specific purpose:
- File – The PDF file name you've uploaded.
- Brand – The manufacturer of the device
- Model – The specific model of the device
- Type – The category of manual, such as "User Manual," "Service Manual," or "Parts Catalog."
- Status – The current processing stage of your file
- Actions – Provides buttons to view, download, or open the PDF in a browser, aiding in data entry.
- Date – (hidden column by default) The upload date for each file, available for use by enabling the column in settings.
- Hash – (hidden column by default) A unique identifier for the file's content, used to prevent duplicates.
- ID – (hidden column by default) A unique identification number for each file within Manualmachine, hidden by default but can be displayed via settings.
Hidden columns can be enabled in the table settings.
Your uploads can be in various stages, indicated by their status:
- Approved – Your upload is verified and has contributed to your points.
- In Progress – Your file is being reviewed or processed.
- Unpacking. Please wait – Archives are currently being extracted.
- Fill out brand, model and type – Additional information is required to complete the upload process.
- Awaiting moderation – The file is under review for approval.
- Please fix file description. There is an error in the brand, model or type field – Errors detected by moderators need correction.
- File already exists – The uploaded file is a duplicate.
- File is corrupted – The file cannot be used and needs replacement.
- Deleted by owner – The file has been removed by the uploader.
- Deleted by admin – The file has been removed by an administrator.
- File banned – The file has been prohibited from re-upload due to administrative actions.

For a manual applicable to several models, list each model in the manual's entry, separated by commas, like "P552E, P552C, K550V." Select this manual's checkbox and click the "Split" button on the table. This action divides the entry into individual rows for each model, facilitating specific searches and organization within your library.


To edit multiple entries at once within the file table, start by selecting and copying the desired cells. Paste the copied data into a text editor and make the necessary changes, such as using find-and-replace functions or other text editing features. Once edited, copy the modified information back into the table by selecting the starting cell of the range and pasting the edited text, updating the table in bulk.


To quickly designate the same brand across multiple file entries, copy the brand name onto your clipboard. Then select the intended cells in the 'Brand' column and paste. The pasted brand name will populate all selected cells, streamlining data consistency for multiple files. This method is applicable for the 'Brand,' 'Model,' and 'Type' columns, enabling efficient and uniform data entry.

Manualmachine's auto-fill capability simplifies the data entry process by automatically populating the "Brand," "Model," and "Type" fields based on the PDF file name. The system identifies the brand from the start and the manual type from the end of the file name. Text situated between these points is registered as the model. For instance, the file “01 canon 600d user manual camera.pdf” will have the brand and model fields filled automatically as "Canon" and "600d," with "User Manual" as the type. When uploading archive files, the system extracts these details from the directory structure within the archive, ensuring accurate autofill even for files contained in "zip" or "rar" formats.
Enhance your productivity on the "My files" page using keyboard shortcuts:
- Ctrl + U – Upload selected files
- Ctrl + D – Delete selected files
- Ctrl + F – hide/show filter
- Ctrl + S – Split selected files
- Ctrl + L – Full screen mode
- Ctrl + Q – Open pdf preview
- Ctrl + E – Open preview page
- Arrows – Navigation through table cells
- Space – Tick the checkbox of a file
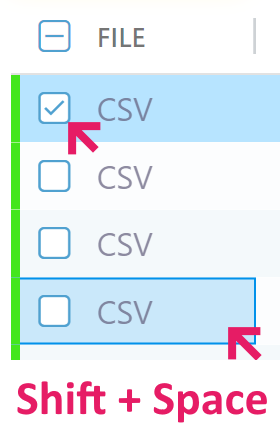
- Shift + Space – Tick the checkboxes of multiple files. More details here.
- Enter – Start/stop editing the current cell
- Esc – Cancel editing of the current cell
- Alt + Z – Undo changes to a cell
- Alt + Y – Redo changes to a cell
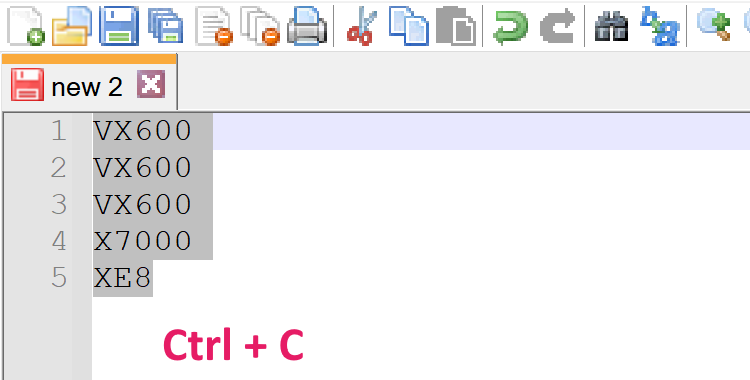
- Ctrl + С – Copy the contents of the selected cells to the clipboard
- Ctrl + V – Paste data from the clipboard into cells
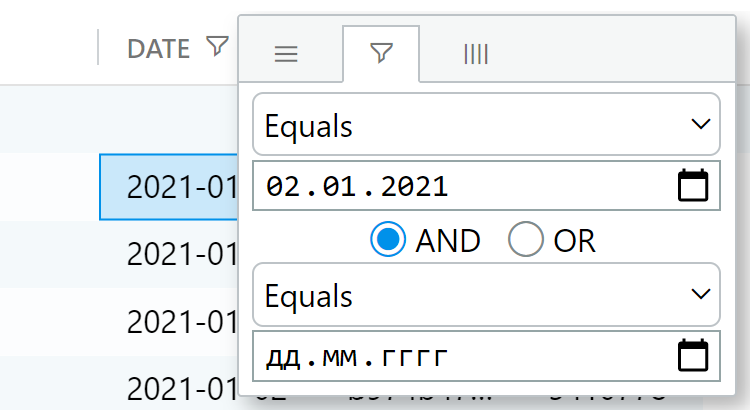
To isolate and manage files uploaded on the current date, access table settings and activate the "Date" column. Use the filter function to specify today's date, enabling a focused view of recent uploads without the clutter of older files.
Cell color changes to blue during the update process to signify data transmission to the server. A white cell background indicates the completion of the save operation. To preserve your edits, wait for the cell to turn white before closing the browser tab, ensuring you don't lose any progress.