


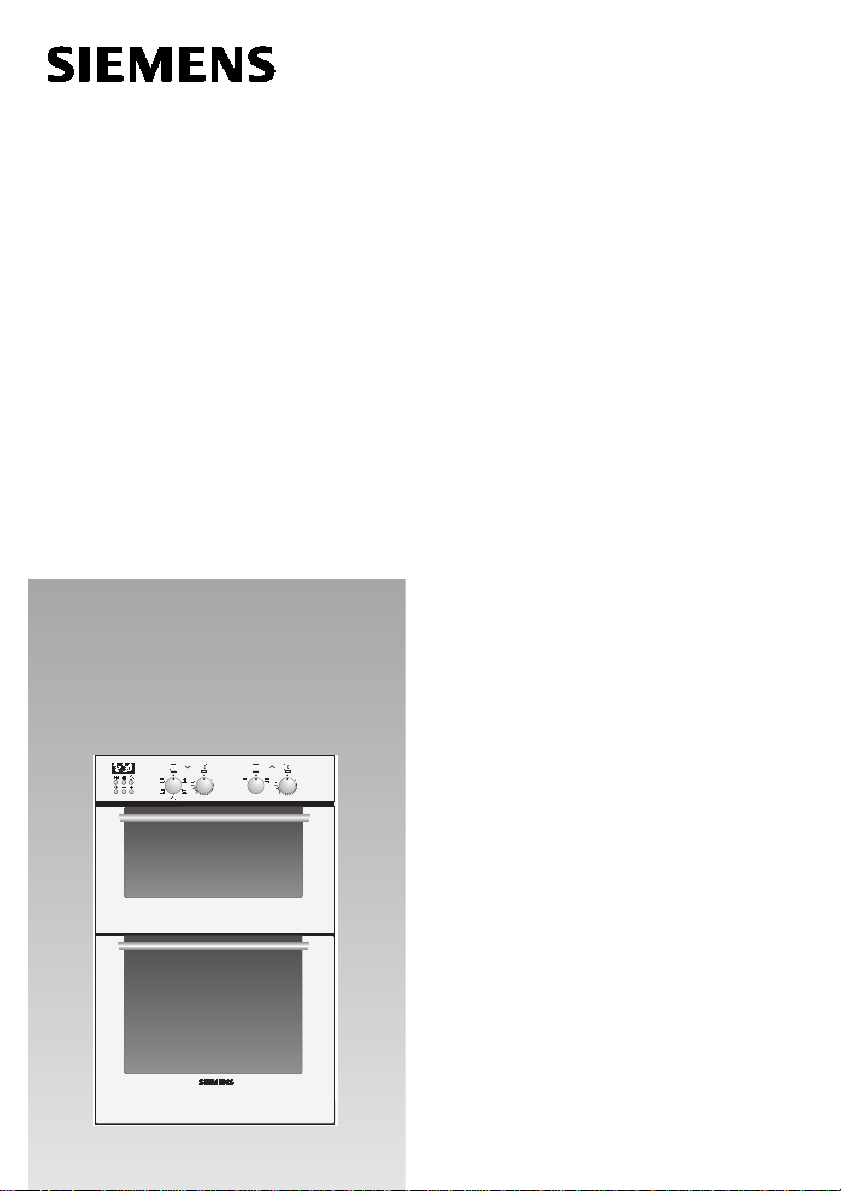
HB91554GB
Siemens HB91554GB, HB91525GB, HB91555GB, HB91564GB, HB91565GB operating instructions
...
Installation
and Operating
Instructions
HB 915..
min
h
sec
min
°
50
100
250
150
200
°
50
100
250
150
200

2
Table of Contents
Page
Grilling – Main oven 14
❑ Roasting – Mini oven 15
❑ Grilling – Mini oven 15
Cooking Tips and Helpful Hints 16
Defrosting and Cooking – Main oven 17
Cleaning and Care
❑ Important cleaning basics 18
❑ Enamel and glass 18
❑ Stainless steel front 18
❑ Oven interior 18
❑ Removing/installing the oven door 19
❑ Removing shelf railings 19
Service and Repair Information 20
Trouble-shooting Guide 21
Assembly Instructions
❑ For the installer and kitchen expert 22
❑ Installation of the built-in oven 23
❑ The appliance should only be used for
the preparation of food.
❑ The surfaces of heating and cooking
appliances get hot during operation.
The interior oven walls and the heating
elements get extremely hot. Always
keep children away from the appliance.
❑ Never leave the appliance unattended
when cooking with fat or oil. They can
catch fire if overheated.
❑ Clean the oven regularly.
Fatty or oily remants could ignite when
the oven is switched on.
❑ In the case of a defect, switch off at the
mains.
❑ Do not store combustible items in the
oven. They could ignite if the oven is
switched on accidentally.
❑ Do not clean the oven with steam or
high-pressure cleaners.
❑ Make sure that the power cord does not
get caught in the hot oven door. The
plastic insulation could melt.
❑ If using hot air
‰
, do not place
greaseproof paper loosely in the oven
(e.g. when heating the oven).
The hot-air fan could draw in the paper
which may damage the heater and fan.
❑ Do not insert a baking sheet at the
bottom of the oven, or cover it with
aluminium foil, because a heat build-up
would result. Roasting and baking times
would change, and the enamel would be
damaged.
❑ Never pour water directly into the hot
oven. Damage to the enamel could result.
❑ Dripping juices may leave spots on the
oven lining. Always place a baking tray
below to prevent this form happening.
❑ Never stand or sit on the open oven door.
❑ The oven door must close properly. Keep
the door sealing surfaces clean.
Page
Important Information
❑ Appliance safety considerations 2
❑ Notes on disposal 3
❑ Before connecting your
new appliance 3
Before Using Your Appliance for the
First Time
❑ Preliminary cleaning 3
❑ Initial burn-in 3
Introducing: Your New Oven
❑ Control panel overview 4
❑ Accessories 5
❑ Shelf positions 5
Electronic Timer
❑ Time of day 6
❑ Alarm function 7
❑ Automatic OFF 8
❑ Automatic ON and OFF 9
Baking, Roasting and Grilling
❑ Definition of Oven Features 10
❑ Switching the oven ON and OFF 11
❑ Baking – Main oven 12
❑ Roasting – Main oven 13
Appliance safety considerations

3
Notes on disposal
❑ Old appliances still have some residual
value. An environment-friendly method
of disposal will ensure that valuable raw
materials can be recovered and used
again.
Before you dispose of your old
appliance, make sure that it has been
rendered inoperable.
❑ Your new appliance was protected by
suitable packaging while it was on its
way to you. All materials used for this
purpose are environment-friendly and
suitable for recycling. Please make a
contribution to protecting the
environment by disposing of the
packaging appropriately.
Up-to-date information concerning
options for disposing of your old
appliance and the packaging from the
new one can be obtained from your
retailer or local government office.
Before connecting your new
appliance
❑ Before using your new appliance, please
read these Instructions for Use carefully.
They contain important information
concerning your personal safety as well
as on use and care of the appliance.
❑ The Instructions for Use apply to several
versions of this appliance. Accordingly,
you may find descriptions of individual
features that do not apply to your
specific appliance.
❑ Please keep the operating and
installation instructions in a safe place;
this important documentation may also
be of use to a possible subsequent
owner.
❑ Do not use the appliance if it is
damaged in any way.
❑ Installation and connection of the
appliance should be performed
according to the instructions and
connection diagram provided, and
should be entrusted to a competent
electrician. In the event of a damage
that occurs as a result of improper
connection, the warranty will be void.
❑ Our appliances meet the applicable
safety regulations for electrical
appliances. Repairs must only be
performed by service engineers trained
by the manufacturer. Repairs carried out
by incompetent service agents can
make the appliance unsafe.
Important Information
Before Using Your Appliance for the First Time
Preliminary cleaning:
1. Clean the appliance exterior with a soft
damp cloth.
2. Clean the oven interior and the
accessories with a hot detergent
solution.
Initial burn-in
1. Heat the empty oven for approx.
30 minutes.
Select conventional heat at a setting of
240 °C.
During the initial burn-in phase, please
open the kitchen windows to dissipate
unpleasant odours.
200
50
100
150
250
200
50
100
150
250
min
sec
h
min
°
°
4
Introducing: Your new Oven
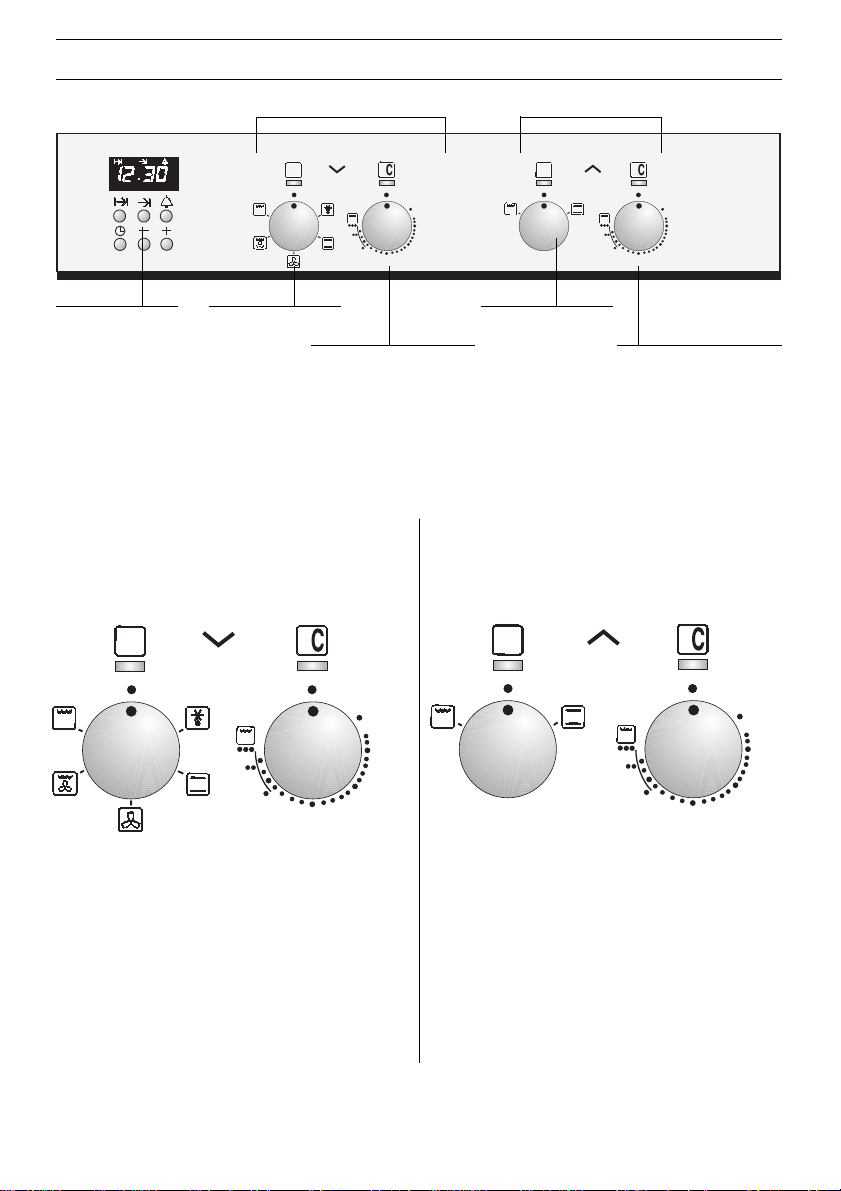
Settings:
k
”Defrost” setting
t
Conventional
(top and bottom
heat)
‰
Hot air
ˆ
Hot air grilling
x
Radiant grilling
Main oven Mini oven
Settings:
50–250
temperature in °C
• •• •••
temperature for
radiant grilling
Settings:
50–250
temperature in °C
• •• •••
temperature for
radiant grilling
Settings:
t
Conventional
(top and bottom
heat)
x
Radiant grilling
Function Temperature
selector selector
Function Temperature
selector selector
200
50
100
150
250
°
200
50
100
150
250
°
Temperature selector
with control lamp
Function selector
Temperature selector
with control lamp
Function selectorElectronic timer
controls
Main oven Mini oven
The control panel:
❑ The switches are retractable. To engage
and disengage, depress the switch,
making sure that it is in OFF position.
5
Introducing: Your new Oven
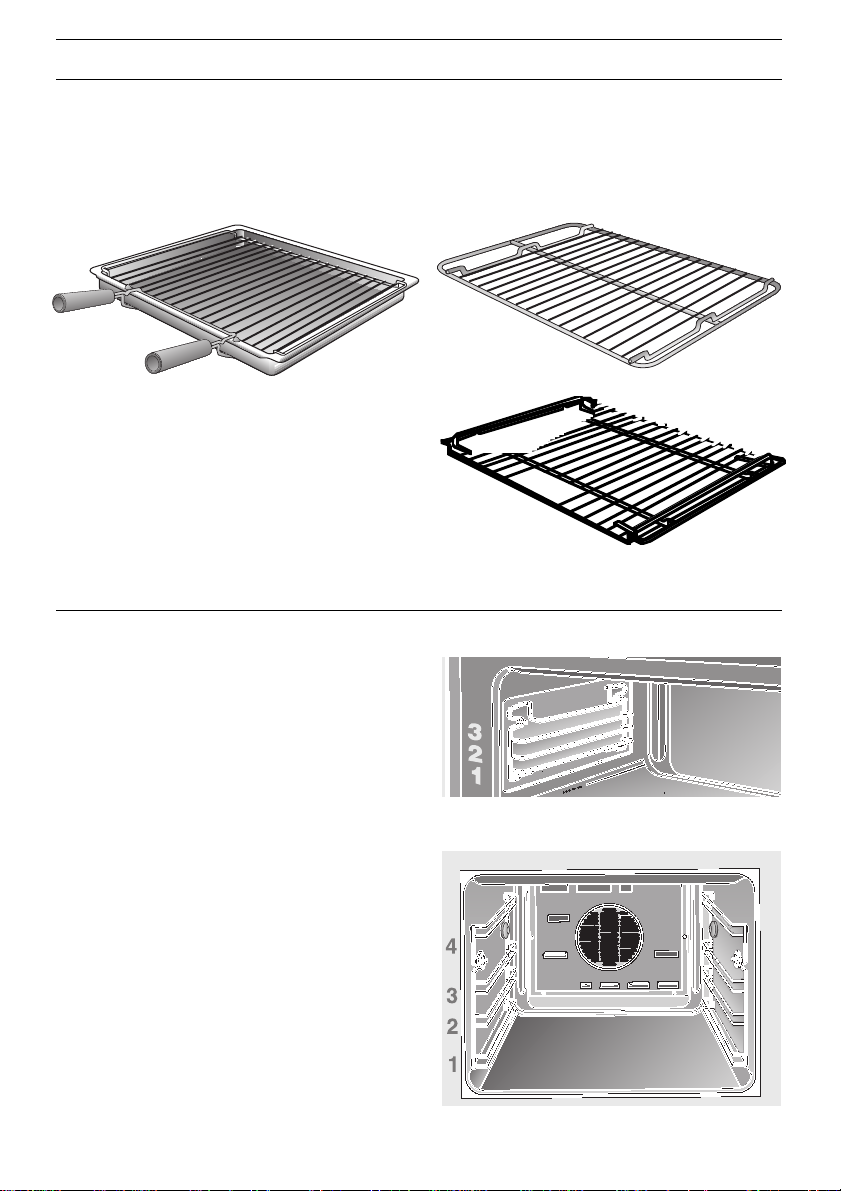
Accessories
Your oven comes with the following
accessories:
Universal baking pan / shelf
wire shelf
Additional accessories are available from your dealer.
Main oven
Shelf positions
Your oven features 3 shelf positions.
The shelf positions are counted from
bottom to top. The numbers are marked in
the oven.
Your oven features 4 shelf positions.
The shelf positions are counted from
bottom to top. The numbers are marked in
the oven.
When using hot air do not use shelf »2«,
in order not to block air circulation.
Mini oven

6
Electronic timer
Notes:
❑ If you keep the button – or + pressed
down, you can set the time in steps of
10 minutes.
Hinweise:
❑ The time of day is not displayed if you
have already set the timer, a duration or
an end. Should you wish to know the
time, simply press the clock button
6
.
The time appears in the display for a few
seconds.
Time of day
❑ Before you use your appliance for the
first time, it is necessary to set the
current time on the electronic timer.
❑ After connecting to the mains, or after a
power failure, the display
{.{{ will blink.
Setting the time of day:
1. Press the clock button 6.
2. Set the current time with the – or +
button. The time will automatically be
taken over after a few seconds.
Changing the time (e.g. transition from
summer to winter time):
Caution! The time of day cannot be
changed whilst a duration or an end is set.
1. Press the clock button
6.
2. Set the current time with the – or +
button.
Set time
min
sec
h min
Dauer
Ende Wecker
Minute timer
Cooking time
Off time
Time
min
sec
hmin
Dauer
Ende Wecker
2.
1.
7
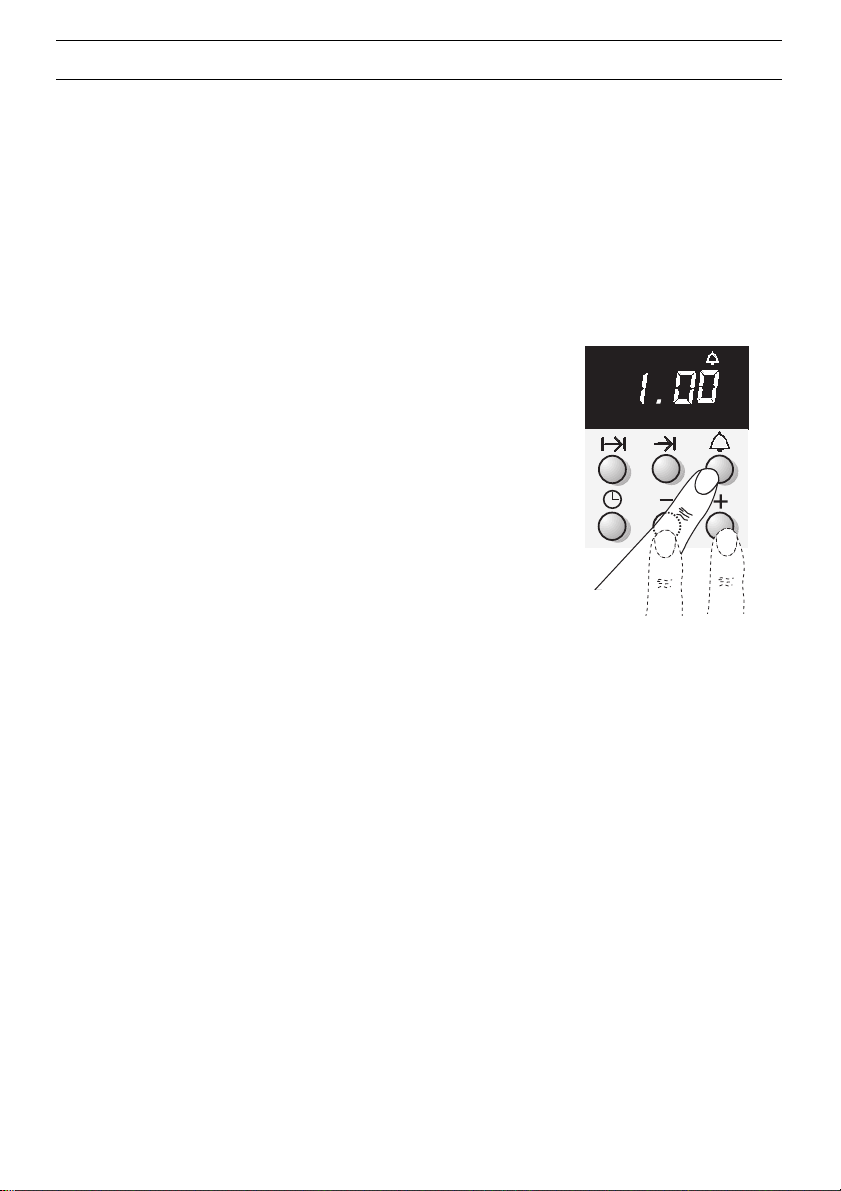
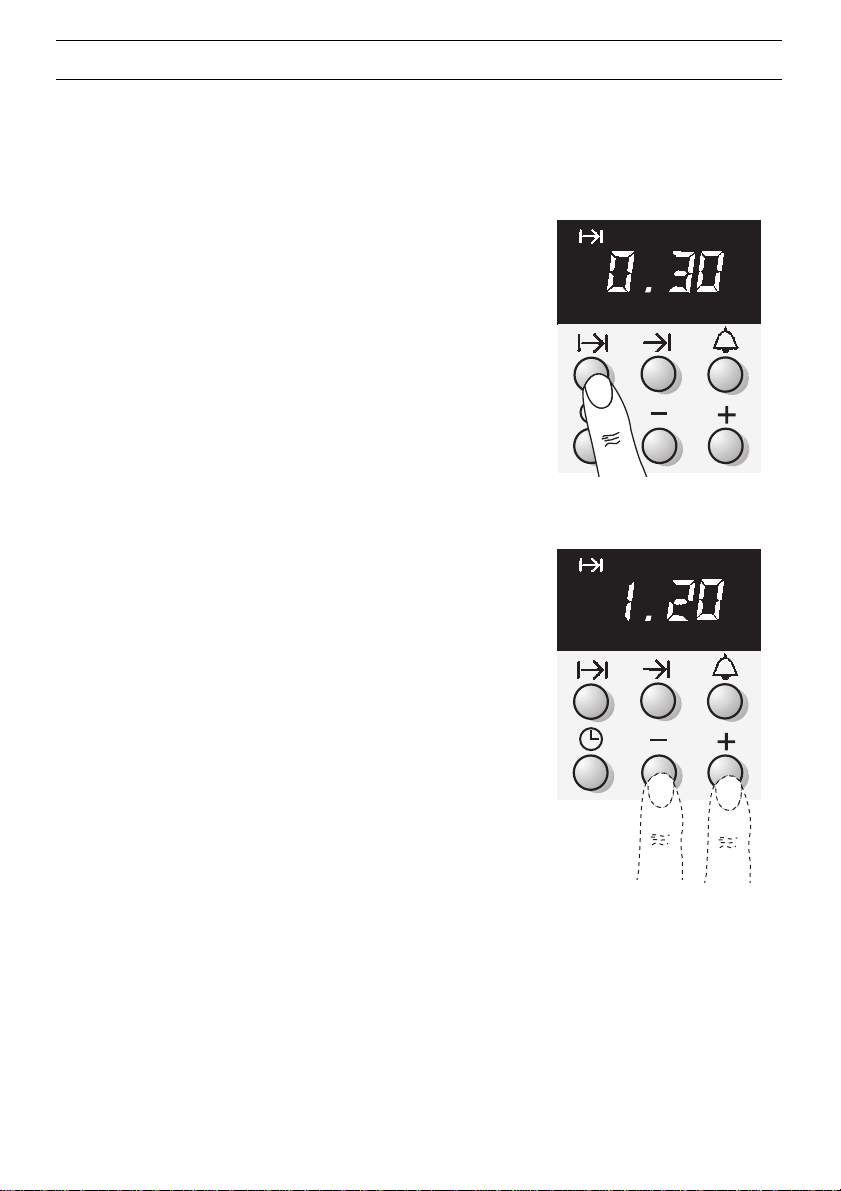
The alarm
❑ The alarm (timer) can be set at any time.
This applies even if a duration or an end has already
been set.
❑ The alarm time always counts down visibly in the
display.
The alarm also features a special acoustic signal.
This enables you to hear when the alarm time or a
selected duration has expired.
Setting procedure:
1. Press the alarm button
8
.
2. Set the desired alarm time with the – or + button.
❑ The selected time is automatically registered after a
few seconds. The alarm time begins to count down in
the clock display.
❑ On completion of the selected time, an acoustic
signal sounds and the alarm symbol flashes. It is
possible to switch off the signal prematurely by
pressing the alarm button
8
.
Correction:
❑ Press the alarm button
8
.
Change the time with the – or + button.
Cancelling:
❑ Press the alarm button
8
twice in quick succession.
Setting:
Electronic timer
min
sec
h min
Dauer
Ende Wecker
2.
1.
8
Automatic timer for the main oven
❑ You can switch the oven on and off via the
electronic clock.
Automatic switch off:
❑ If you wish to bake or roast food immediately, it is
only necessary to set the cooking time.
1. Select the heating system and the oven
temperature.
2. Press the time button
?.
3. Change the recommended cooking time with the
– or + button.
The oven starts after a few seconds.
❑ An acoustic signal sounds when the time expires.
The oven switches off. You may switch off the
signal prematurely by pressing the time button
?.
❑ If the meal is not yet ready, make a new time
setting using the knob.
❑ Switch off the function selector when your meal is
ready.
Correction:
❑ The duration can be changed at any time. Press
the cooking time button
? and correct the
duration of cooking time with the – or + button.
Cancel:
❑ Switch off the function selector.
Notes:
❑ The alarm time counts down in the clock display. If
you want to know how much longer the meal in the
oven will take, simply press the time button
?. The
time remaining is then displayed for a few seconds.
❑ You can set any time between 1 minute and 23
hours, 59 minutes.
Electronic timer
min
sec
hmin
Dauer
Ende Wecker
2.
min
sec
hmin
Dauer
Ende Wecker
3.
 Loading...