


 Loading...
English 4
Deutsch 23
Español 44
Français 65
Italiano 86
Nederlands 107
Português 128
Türkçe 149
HQ7782, HQ7780

English
Introduction
The shaver comes with two different kinds of NIVEA FOR MEN cartridges: Extra Fresh Shaving Gel for a fresh sensation during and after shaving and Moisturising Shaving Lotion for sensitive skin. This gives you the opportunity to try them out and discover which one suits your skin type best.
Important
Read this user manual carefully before you use the appliance and save it for future reference.
-This appliance is not intended for use by persons (including children) with reduced physical, sensory or mental capabilities, or lack of experience
and knowledge, unless they have been given supervision or instruction concerning use of the appliance by a person responsible for their safety.
-Children should be supervised to ensure that they do not play with the appliance.
-Only use the powerplug and the charging stand supplied.
-The powerplug transforms 100-240 volts to a safe low voltage of less than 24 volts.
-The powerplug contains a transformer. Do not cut off the powerplug to replace it with another plug, as this causes a hazardous situation.
-Do not use a damaged powerplug or charging stand.
-If the powerplug or charging stand is damaged, always have it replaced with one of the original type in order to avoid a hazard.
-Charge, store and use the appliance at a temperature between 5°C and 35°C.
-Make sure the powerplug does not get wet.
English
-Never immerse the charging stand in water nor rinse it under the tap.
-Do not leave the shaver in the plugged-in charging stand for more than 24 hours.
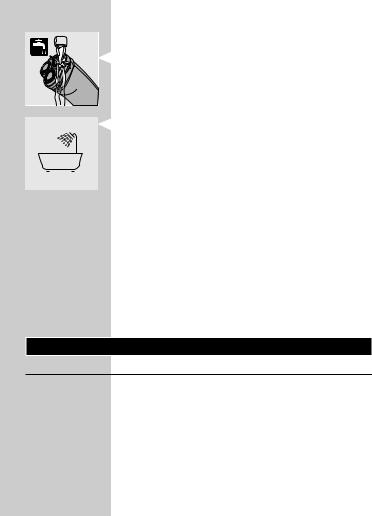
-The appliance is watertight and can be cleaned under the tap.
Be careful with hot water. Always check if the water is not too hot, to prevent your hands from getting burnt.
-The appliance complies with the internationally approved IEC safety regulations and can be safely used in the bath or shower.
-Check if the gel and lotion supplied with the appliance contain ingredients (see back of cartridge) to which you are allergic before you start using the appliance. Do not use the gel and/or lotion if you are allergic to one or more ingredients.
Electromagnetic fields (EMF)
This Philips appliance complies with all standards regarding electromagnetic fields (EMF). If handled properly and according to the instructions in this user manual, the appliance is safe to use based on scientific evidence available today.
The display
Living Light Display
This model features the unique Living Light display. This 3D colour LED display gives you all the information you need with special ‘living light’ effects.
,Remove any sticker or protective foil from the Living Light Display.

English
Demonstration program
The appliance has a unique demonstration program.
1 Press the on/off button for 7 seconds.
The demonstration will start automatically.
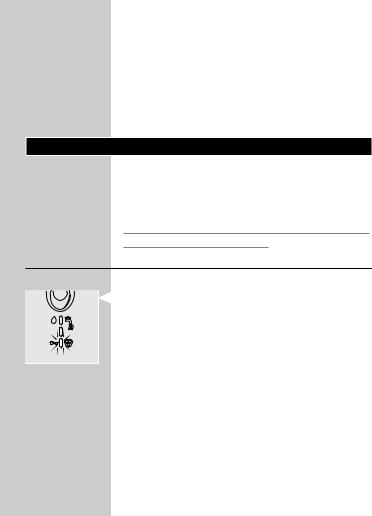
,When the demonstration starts, all indications light up at the same time.Then all indications of the shaver are shown separately for 3 seconds in
the following order:
ãCharging/Battery full indication æShaving
± Shaving gel indication
å Cleaning reminder/ ã Battery capacity æShaving
± Shaving gel indication
ãBattery low indication
å Cleaning reminder/ ã Battery low indication Î Shaving head check indication
ä Travel lock indication
Note:The whole demonstration program lasts approx. 1 minute (including intervals).
2You can stop the demonstration by pressing the on/off button.
Indications during use
All indications mentioned below are shown during every shaving session and they are always displayed in the same order, which makes it very easy for you to maintain a regular shaving ritual
As a result, some symbols will light up even when you have already taken the appropriate action.
Note:When you switch the appliance on, the battery capacity indication appears briefly.After this,the shaving gel indication flashes three times.If you have
English
already applied enough shaving gel or lotion, you can ignore this indication.
Note:When you switch the appliance off,the cleaning reminder is displayed.This cleaning reminder consists of a green tap (lights up) and a green water jet (flashes). If you have already cleaned the shaver before switching it off,you can ignore the cleaning reminder.
After the cleaning reminder has been displayed, the battery capacity indication appears briefly.
Charging
When you charge the shaver for the first time or after a long period of disuse, let it charge continuously for 4 hours. Charging normally takes approx. 1 hour.
Do not leave the shaver in the plugged-in charging stand for more than 24 hours.
Charge indications
Battery running low
,When the battery is running low, the bottom battery light burns red during shaving.
,When you switch the shaver off while the battery is nearly empty, the bottom battery light flashes red twice.This will happen four times with brief pauses in between.
,When you start charging the shaver while the battery is running low, the bottom battery light flashes red for max.3 minutes.
Battery fully charged
,During charging the three battery lights flash green until the shaver is fully charged
(approx.1 hour).
English
,The three battery lights burn green continuously when the battery is fully charged.
Battery indications during shaving
The three battery lights show the remaining battery capacity for 5 seconds after you switch the shaver on or off.
-The lower two battery lights burn green: 66% of the entire battery capacity is left.
-The bottom battery light burns green: 33% of the battery capacity is left.
-The bottom battery light burns red: the battery is almost empty (see also section ‘Battery running low’).
Charging the appliance
Charge the shaver before using it for the first time and when the shaver indicates that the battery is running low.
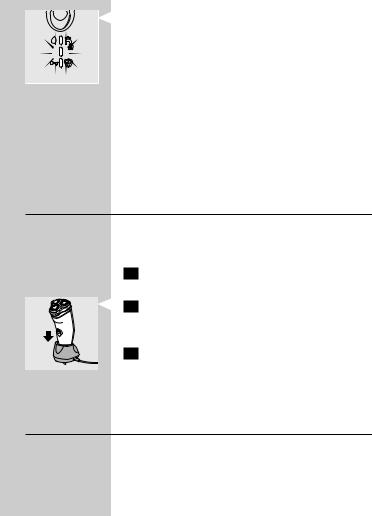
1Insert the small plug into the charging stand and put the powerplug in the wall socket.
2 Place the shaver in the charging stand.
The shaver automatically switches off when it is placed in the charging stand.
3 Remove the powerplug from the wall socket and pull the small plug out of the charging stand when the battery has been fully charged. You can then leave the appliance in the charging stand.
Cordless shaving time
A fully charged shaver has a cordless shaving time of up to 55 minutes.

English
2
 1
1
Cartridges
Cartridges with NIVEA FOR MEN shaving gel/lotion are available in boxes containing five cartridges and one small plastic pump.
The NIVEA FOR MEN shaving gel/lotion in the cartridges will keep for 32 months when stored at temperatures between 0 cC and +40 cC.
Only use Philips NIVEA FOR MEN Cool Skin (HQ170 and HQ171) cartridges.
One Philips NIVEA FOR MEN Cool Skin cartridge contains enough gel/lotion for approx. 10 shaves. For hygienic reasons, we advise you to insert a new pump when you start using a new set of five cartridges.
Do not throw the pump away when you replace an empty cartridge.You will need it for all five cartridges.
Remove the shaving gel/lotion cartridge from the appliance when you are not going to use the shaver for more than one week.
When you have run out of shaving gel/lotion cartridges and you do not know where to buy them, contact the Customer Care Centre in your country (see ‘Guarantee & service’).
Inserting cartridges
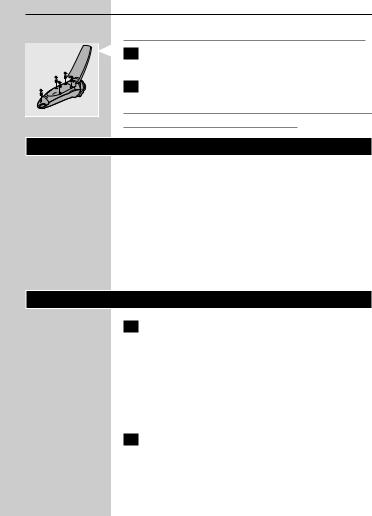
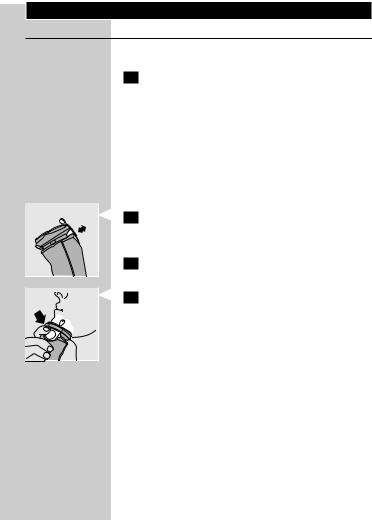
When you start using a new set of cartridges, take the pump out of its bag and push it into a cartridge until it locks into position with a click.
Press the release button (1) and open the cover of the cartridge compartment (2).

10 English
2
 1
1
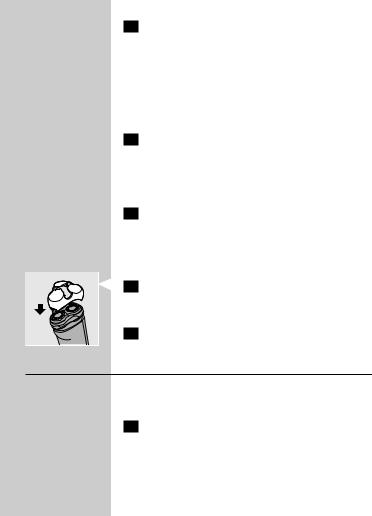
Slide the cartridge with the pump into the shaver.It only fits properly if the white side of the pump is pointing upwards.
4Close the cover (you will hear a click).
5Press the yellow pump button a few times until the NIVEA FOR MEN shaving gel/lotion appears.The shaver is now ready for use.
Replacing cartridges
Do not throw the pump away when you replace an empty cartridge.You will need it for the other cartridges.
Press the release button (1) and open the cover of the cartridge compartment (2).
2Remove the empty cartridge and pull out the pump.
Push the pump into a new cartridge until it locks into position with a click.
Slide the cartridge with the pump into the shaver.It only fits properly if the white side of the pump is pointing upwards. Close the cover.
Storing cartridges
You can conveniently store the other cartridges by attaching them to the wall holder supplied. The holder has suction caps which allow you to attach it to the wall easily. In this way you always have the cartridges close at hand, which is very convenient, especially when you shave in the shower.

English 11
The wall holder is only suitable for storing cartridges. Never hang or place the shaver on the wall holder. If you do, the shaver may fall!
Using the appliance
Shaving
Switching on the shaver
1Press the on/off button once to switch on the shaver.
After the battery capacity has been shown briefly, the yellow teardrop-shaped shaving gel light ± flashes 3 times to indicate that shaving gel/lotion can be applied.
If the shaver does not go on when you press the on/ off button, the travel lock may have been activated. Deactivate the travel lock (see chapter ‘Travel lock’).
Press the yellow pump button to apply NIVEA FOR MEN shaving gel/lotion to your skin.
3Move the shaving heads over your skin, making both straight and circular movements.
While shaving, press the pump button frequently to apply more NIVEA FOR MEN shaving gel/lotion so that the shaver keeps
gliding smoothly over your face.
Do not press the shaver too hard against your skin while shaving. If you prefer, you can wet your face before shaving.
,For the best shaving results, shaving gel/lotion should be pumped up frequently.
,The shaver will not perform optimally when used without shaving gel/lotion.
,Your skin may need 2 or 3 weeks to get accustomed to the Philips shaving system.

12 English
Switching off the shaver
1Press the on/off button once to switch off the shaver.
The cleaning reminder å (green tap symbol with flashing water jet) lights up for 6 seconds to indicate that the shaver should be cleaned.
After this, the remaining battery capacity is shown for 5 seconds.
2 Clean the shaver (see chapter ‘Cleaning and maintenance’).
Rinse the shaver after each shave. Remove the cartridge if you are not going to use the appliance for more than one week.
3
5
If necessary, check the remaining battery capacity by pressing the on/off button. One or more battery lights will go on for 5 seconds to indicate the remaining battery capacity.
Put the protection cap on the shaver every time you have used it, to prevent damage.
If necessary, activate the travel lock (see chapter‘Travel lock’).
Trimming
For grooming sideburns and moustache.
Attaching the trimmer
1 Switch off the shaver.
Clean the shaver before you attach the trimmer (see chapter ‘Cleaning and maintenance’).
|
English 13 |
|
Press the release button (1) and pull the |
2 |
shaving unit off the shaver (2). |
1 
Tilt the trimmer slightly backwards.
the trimmer onto the shaver (you will hear click).The trimmer is now ready for use.
5 Activate the trimmer by pressing the on/off button once.
Removing the trimmer
1
2
3
Switch off the shaver.
Remove the trimmer by pressing the release button again and pulling the trimmer off the shaver.
Put the shaving unit back onto the shaver.
Travel lock
If you are going to store the shaver for a longer period or if you are going to travel, it is possible to lock the shaver.The travel lock prevents the shaver from being switched on by accident.

14 English
Activating the travel lock
1Press the on/off button for 3 seconds.The motor is switched off.
2The travel lock indication ä, a yellow key symbol,flashes 3-4 times and then burns continuously for 4 seconds.The travel lock has now been activated.
The yellow key symbol goes out.
Deactivating the travel lock
1Press the on/off button for at least 3 seconds. The yellow key symbol lights up.
2The yellow key symbol flashes 3-4 times.Then the motor starts running to indicate that the
shaver has been unlocked.The shaver is now ready for use again.
The yellow key symbol goes out.
Note:The shaver unlocks automatically when you place the shaver in the plugged-in charging stand.
Checking if the appliance is locked
1Press the on/off button briefly (less than 3 seconds).
2The yellow key symbol lights up for 3 seconds to confirm that the travel lock is active.
Cleaning and maintenance
Regular cleaning guarantees better shaving performance.
To maintain optimal shaving performance and to keep the shaver clean, you have to thoroughly rinse the shaving unit and hair chamber with hot water after every shave.

English 15
Be careful with hot water.Always check if the water is not too hot, to prevent your hands from getting burnt.
Cleaning reminder
,When you have switched off the shaver, the cleaning reminder å (green tap symbol with flashing water jet) lights up for 6 seconds to remind you that the shaver should be cleaned.
,If the red shaving unit symbol Î and the cleaning reminder å light up together, the shaving heads have become so dirty or damaged that they might cause the motor to become blocked. If the shaving heads are dirty, you have to clean them. If the shaving heads are damaged, you have to replace them (see chapter‘Replacement’).
Note:We advise you to avoid this situation by cleaning the shaving heads regularly.
Cleaning
The shaver reminds you that it needs to be cleaned by showing the cleaning reminder å after every shaving session.
Shaving unit:Quick Clean after every shave
1Make sure the appliance is switched on.
2Keep the shaving unit closed.
3Rinse the shaving unit and the hair chamber under a hot tap by letting the water run through the openings below the shaving unit for at least 30 seconds.
4Shake off excess water.
Never dry the shaving unit with a towel or tissue, as this may damage the shaving heads.

16 English
Shaving unit and hair chamber:every week
We advise you to clean the appliance thoroughly at least once a week to maintain optimal shaving performance.
You can also follow this procedure when the shaving heads have to be cleaned.
1 Switch off the shaver.
Press the release button to open the shaving unit.
Rinse the inside of the shaving unit.
Rinse the outside of the shaving unit.
Rinse the hair chamber.
6 Make sure the inside of the shaving unit and the hair chamber have been cleaned properly.
7 Close the shaving unit and shake off excess water.
8Open the shaving unit again and leave it open to let the appliance dry completely.
Charging stand
1Unplug the charging stand.
2Clean the charging stand with a moist cloth.

English 17
Trimmer
1Clean the outside of the trimmer with the brush supplied after every use.
The trimmer can also be cleaned by rinsing it under the tap.
the trimmer is used frequently, lubricate the trimmer teeth with a drop of sewing machine oil every six months.
Storage
stand
shaver can be stored in the charging stand, when it is wet.
Always unplug the charging stand before storing the wet or dry shaver in it.
Pouch
,The shaver can be stored in the pouch supplied. There is also room for two NIVEA FOR MEN Cool Skin cartridges.The pouch will provide extra protection during travel.
Hanging cord
,The shaver can also be stored by hanging it from the hanging cord supplied. Storing the shaver
by means of the hanging cord ensures optimal drying conditions.
Replacement
Replace the shaving heads every two years for optimal shaving results.
Replace damaged or worn shaving heads with HQ177 Philips Cool Skin shaving heads only.

18 English
Shaving head check indication
After two years of use the red shaving unit symbol
Î will flash for 30 seconds during 7 shaves to indicate that you should check the condition of the shaving heads.This indication is based on an average shaving time of 3 minutes per shave.When the shaving head symbol flashes, all other symbols and lights are out.When the shaver is switched off, the shaving unit symbol disappears.
When the red shaving unit symbol starts flashing, you should check the shaving heads for possible damage. If the shaving heads are damaged in any way, they must be replaced in order to obtain optimal shaving results.
Replacing the shaving heads
|
1 Switch off the shaver. |
|
Press the release button to open the shaving |
|
unit. |
2 |
Turn the wheel anticlockwise (1) and remove |
1 |
the retaining frame (2). |
|
|
|
Remove the shaving heads and place new ones |
|
in the shaving unit. |

English 19
1Put the retaining frame back into the shaving unit,press the wheel (1) and turn it clockwise
2 (2).
Accessories
The following accessories are available:
-HQ8500/HQ8000 powerplug.
-HQ177 Philips Cool Skin shaving heads.
-HQ170 NIVEA FOR MEN Cool Skin Moisturising Shaving Lotion.
-HQ171 NIVEA FOR MEN Cool Skin Extra Fresh Shaving Gel.
Environment
not throw away the appliance with the normal household waste at the end of its life, but hand
it in at an official collection point for recycling. By doing this, you help to preserve the environment.
- The built-in rechargeable shaver battery contains substances that may pollute the environment. Always remove the battery before you discard and hand in the shaver at an official collection point. Dispose of the battery at an official collection point for batteries. If you have trouble removing the battery, you can also take the shaver to a Philips service centre.The staff of this centre will remove the battery for you and will dispose of it in an environmentally safe way.
20 English
Disposal of the battery
Only remove the battery if it is completely empty.
Let the shaver run until it stops, undo the screws and open the shaver.
2 Remove the battery.
Do not put the shaver back into the charging stand after the battery has been removed.
Guarantee & service
If you need information or if you have a problem, please visit the Philips website at www.philips.com or contact the Philips Customer Care Centre
in your country (you find its phone number in the worldwide guarantee leaflet). If there is no
Customer Care Centre in your country, go to your local Philips dealer or contact the Service Department of Philips Domestic Appliances and Personal Care BV.
Troubleshooting
1The shaving heads do not move smoothly over the skin.
-Cause: not enough shaving gel/lotion has been
applied.
Press the pump button a few times until sufficient
NIVEA FOR MEN shaving gel/lotion has been released to allow the shaving heads to move smoothly over your face again.
2Reduced shaving performance
-Cause 1: the shaving heads are dirty.
The shaver has not been cleaned immediately after use and/or has not been rinsed long enough and/or

English 21
the water used to rinse the shaver was not hot enough.
Clean the shaver thoroughly before you continue shaving. See chapter ‘Cleaning and maintenance’. - Cause 2: long hairs are obstructing the shaving
heads.
Press the release button to open the shaving unit. Turn the wheel anticlockwise (1) and remove the retaining frame (2).
Clean the cutters and guards.
Do not clean more than one cutter and guard at a time, since they are all matching sets. If you accidentally mix up the cutters and guards, it may take several weeks before optimal shaving performance is restored.
Remove the hairs with the brush supplied.
Put the shaving heads back into the shaving unit. Put the retaining frame back into the shaving unit and turn the lock clockwise.
To prevent long hairs from obstructing the shaving heads, remove the shaving heads once a month and clean them with the brush supplied.
- Cause 3: the shaving heads are damaged or worn. Replace the shaving heads. See chapter ‘Replacement’.
3The shaver does not work when the on/off button is pressed.
-Cause 1: the battery is empty.
Recharge the battery. See chapter ‘Charging’.
- Cause 2: dried-up shaving gel/lotion is blocking the shaving heads.
Clean the shaving heads thoroughly. See chapter ‘Cleaning and maintenance’.
- Cause 3: the shaving heads are damaged. Replace the shaving heads. See chapter ‘Replacement’.

22 English
4The cover of the cartridge compartment cannot be closed
-Cause 1: the cartridge has not been inserted correctly.
Insert the cartridge correctly. It only fits properly into the shaver if the white side of the pump is pointing upwards.
- Cause 2: the cartridge has not been pushed far enough into the shaver.
Press the cartridge until it is properly seated.
5The NIVEA FOR MEN shaving gel/lotion has changed colour or has turned watery.
-Cause: the NIVEA FOR MEN shaving gel/lotion has not been stored at the right temperature.
Insert a new cartridge.
6Skin irritation occurs
-Cause 1: your skin has not yet become accustomed to this shaving system.
Allow 2-3 weeks for your skin to get accustomed to this shaving system.
- Cause 2: the shaving gel/lotion irritates your skin. Try the other type of NIVEA FOR MEN cartridge. Wet your face before shaving with the shaving gel/lotion.
If the irritation does not disappear within 24 hours, we advise you to stop using the shaving gel/lotion.
Deutsch 23
Einführung
Der Rasierer wird mit zwei Sorten NIVEA FOR MEN-Kartuschen geliefert: Extra Fresh-Frischegel für ein erfrischendes Gefühl während und nach der Rasur sowie eine Feuchtigkeit spendende
Rasieremulsion für empfindliche Haut. Sie können beide Sorten ausprobieren und ermitteln, welche sich für Ihren Hauttyp am besten eignet.
Wichtig
Lesen Sie diese Bedienungsanleitung vor dem Gebrauch des Geräts aufmerksam durch und bewahren Sie sie für eine spätere Verwendung auf.
-Dieses Gerät ist für Benutzer (einschl. Kinder) mit eingeschränkten physischen, sensorischen oder psychischen Fähigkeiten bzw. ohne jegliche
Erfahrung oder Vorwissen nur dann geeignet, wenn eine angemessene Aufsicht oder ausführliche Anleitung zur Benutzung des Geräts durch eine verantwortliche Person sichergestellt ist.
-Achten Sie darauf, dass Kinder nicht mit dem Gerät spielen.
-Verwenden Sie nur das mitgelieferte Netzteil und die mitgelieferte Ladestation.
-Das Netzteil wandelt Netzspannungen von 100 bis 240 Volt in eine sichere Betriebsspannung von unter 24 Volt um.
-Das Netzteil enthält einen Transformator. Ersetzen Sie das Netzteil keinesfalls durch einen anderen Stecker, da dies den Benutzer gefährden kann.
-Benutzen Sie keinesfalls ein beschädigtes Netzteil oder eine beschädigte Ladestation.
-Wenn das Netzteil oder die Ladestation defekt oder beschädigt ist, darf es/sie nur von einem Philips Service-Center oder einer von Philips

24 Deutsch
autorisierten Werkstatt durch ein OriginalErsatzteil ausgetauscht werden, um Gefährdungen zu vermeiden.
-Laden und benutzen Sie das Gerät bei Temperaturen zwischen 5° C und 35° C. Bewahren Sie es auch in diesem Temperaturbereich auf.
-Achten Sie darauf, dass das Netzteil nicht nass wird.
-Tauchen Sie die Ladestation niemals in Wasser.
Spülen Sie sie auch nicht unter fließendemWasser
ab.
- Lassen Sie den Rasierer nicht länger als 24 Sunden in der am Netz angeschlossenen Ladestation.
- Der Rasierer ist wasserdicht und kann unter fließendemWasser gereinigt werden.
Gehen Sie vorsichtig mit heißemWasser um.Achten Sie darauf, dass dasWasser nicht zu heiß ist und Sie sich nicht die Hände verbrühen.
- Das Gerät erfüllt die internationalen IECSicherheitsvorschriften und kann ohne Bedenken unter der Dusche oder in der Badewanne benutzt werden.
-Prüfen Sie vor dem Gebrauch des Geräts, ob das Gel bzw. die Emulsion Substanzen enthält, gegen die Sie allergisch sind (siehe Rückseite der Kartusche).Verwenden Sie das Gel bzw. die Emulsion nicht, wenn Sie auf eine oder mehrere Substanzen allergisch reagieren.
Elektromagnetische Felder (EMF;Electro Magnetic Fields)
Dieses Philips Gerät erfüllt sämtliche Normen bezüglich elektromagnetischer Felder (EMF). Nach aktuellen wissenschaftlichen Erkenntnissen ist das
Gerät sicher im Gebrauch, sofern es ordnungsgemäß

Deutsch 25
und entsprechend den Anweisungen in dieser Bedienungsanleitung gehandhabt wird.
Das Display
Living Light Display
Dieses Rasierermodell ist mit dem innovativen Living Light Display ausgestattet. Dieses 3D LED Farbdisplay liefert Ihnen durch spezielle Effekte alle wesentlichen Informationen.
,Entfernen Sie Aufkleber bzw. Schutzfolie vom Living Light Display.
Das Einführungsprogramm
Das Gerät verfügt über ein spezielles
Einführungsprogramm.
1Drücken Sie den Ein-/Ausschalter 7 Sekunden lang.
Das Programm beginnt automatisch.
,Zu Beginn leuchten alle Anzeigen gleichzeitig auf.Anschließend werden die Rasiereranzeigen einzeln für 3 Sekunden in folgender Reihenfolge angezeigt:
ãLadeanzeige/Anzeige Akku aufgeladen æRasieren
± Frischegel-Anzeige
å Reinigungsanzeige/ ã Akkustandsanzeige æRasieren
± Frischegel-Anzeige
ãWarnanzeige bei geringem Ladestand
å Reinigungsanzeige/ ã Anzeige Akku schwach Î Scherkopf-Prüfanzeige
ä Reisesicherung
Hinweis:Das gesamte Einführungsprogramm dauert ca. 1 Minute (mit Intervallen).

26 Deutsch
2Sie können das Programm durch Drücken des Ein-/Ausschalters abbrechen.
Anzeigen bei Betrieb
Alle unten aufgeführten Anzeigen erscheinen während jeder Rasur und stets in derselben Reihenfolge. So können Sie leicht eine regelmäßige
Routine einhalten.
Deshalb leuchten einige Symbole auch auf, wenn Sie den entsprechenden Schritt bereits durchgeführt haben.
Hinweis: Beim Einschalten des Geräts erscheint kurz die Akkustandsanzeige.Anschließend blinkt die
Frischegelanzeige drei Mal.Wenn Sie bereits genügend Frischegel bzw.Rasieremulsion aufgetragen haben, können Sie diese Anzeige ignorieren.
Hinweis:Beim Ausschalten des Geräts erscheint die Reinigungsanzeige.Diese Anzeige besteht aus einem grün aufleuchtendenWasserhahnsymbol und einem grün blinkendenWasserstrahl.Wenn Sie den Rasierer bereits vor dem Ausschalten gereinigt haben,können Sie diese Anzeige ignorieren.
Nach der Reinigungsanzeige erscheint kurz die Akkuladestandsanzeige.
Laden
Beim erstmaligen Laden, und wenn der Rasierer längere Zeit nicht benutzt wurde, beträgt die Ladedauer 4 Stunden. Normalerweise ist der Akku nach ungefähr 1 Stunde vollständig geladen.
Lassen Sie den Rasierer nicht länger als 24 Sunden in der am Netz angeschlossenen Ladestation.

Deutsch 27
Ladeanzeigen
Akku fast leer
,Wenn die Akkukapazität zur Neige geht, leuchtet die untere Kontrollanzeige beim Rasieren rot.
,Wenn Sie den Rasierer bei fast leerem Akku ausschalten, blinkt die untere Kontrollanzeige zweimal rot. Dies wird viermal mit kurzen Intervallen wiederholt.
,Wenn Sie den Rasierer bei niedrigem
Akkuladestand aufladen,blinkt die untere Kontrollanzeige maximal 3 Minuten lang rot.
Akku voll aufgeladen
,BeimAufladen blinken die dreiAkkuanzeigen grün, bis der Rasierer voll geladen ist (nach ca. 1
Stunde).
,Die drei Akkuanzeigen leuchten kontinuierlich grün, sobald der Akku vollständig geladen ist.
Ladeanzeigen beim Rasieren
Beim Einoder Ausschalten des Rasierers wird anhand der 3 Akkuanzeigen 5 Sekunden lang die verbleibende Akkuleistung eingeblendet.
-Die unteren beiden Akkuanzeigen leuchten grün: 66% der gesamten Akkukapazität ist noch vorhanden.
-Die unterste Akkuanzeige leuchtet grün: 33% der Akkukapazität ist noch vorhanden.
-Die unterste Akkuanzeige leuchtet rot: Der Akku ist fast leer (siehe auch “Akku fast leer”).
Das Gerät laden
Laden Sie das Gerät vor dem ersten Gebrauch auf. Laden Sie es auch, wenn der Rasierer einen niedrigen Akkustand anzeigt.

28 Deutsch
1Stecken Sie den kleinen Stecker in die Ladestation und das Netzteil in die Steckdose.
Setzen Sie den Rasierer in die Ladestation.
Rasierer schaltet sich automatisch aus, wenn Sie ihn in die Ladestation stellen.
3 Ziehen Sie das Netzteil aus der Steckdose und den kleinen Stecker vom Rasierer, sobald der Akku vollständig geladen ist. Sie müssen den Rasierer nicht aus der Ladestation nehmen.
Kabellose Rasierzeit
Mit vollständig aufgeladenem Akku können Sie sich bis zu 55 Minuten kabellos rasieren.
Kartuschen
Die Kartuschen mit NIVEA FOR MEN Frischegel bzw. Rasieremulsion werden in Packungen mit je
5 Kartuschen und einer kleinen Kunststoffpumpe geliefert.
NIVEA FOR MEN Kartuschen mit Frischegel bzw. Rasieremulsion sind 32 Monate haltbar, wenn sie bei Temperaturen zwischen 0 cC und +40 cC aufbewahrt werden.
Verwenden Sie ausschließlich Philips NIVEA FOR
MEN Cool Skin Kartuschen (HQ170 bzw. HQ171). Eine Philips NIVEA FOR MEN Cool Skin Kartusche enthält genügend Gel bzw. Emulsion
für ca. 10 Rasuren.
Verwenden Sie beim Öffnen einer neuen Packung mit 5 Kartuschen aus hygienischen Gründen die neue Pumpe.
Werfen Sie die Pumpe nicht weg, wenn Sie eine neue Kartusche einsetzen. Sie benötigen die Pumpe für alle fünf Kartuschen aus derselben Packung.

2
 1
1
Deutsch 29
Falls Sie den Rasierer länger als eine Woche nicht verwenden, sollten Sie die Gelbzw. Emulsionskartusche aus dem Gerät nehmen. Sind Ihnen die Kartuschen mit Frischegel bzw. Rasieremulsion ausgegangen und Sie wissen nicht, wo sie erhältlich sind, wenden Sie sich bitte an das Philips Service-Center in Ihrem Land (siehe “Garantie und Kundendienst”).
Kartuschen einsetzen
Nach dem Öffnen einer neuen Packung Kartuschen nehmen Sie die Pumpe aus der Hülle, und schieben Sie sie in eine Kartusche, bis sie hörbar einrastet.
Drücken Sie die Entriegelungstaste (1),und
öffnen Sie die Abdeckung des Kartuschenfachs
(2).
Schieben Sie die Kartusche mit der Pumpe in den Rasierer. Sie lässt sich nur richtig einsetzen, wenn die weiße Seite der Pumpe nach oben zeigt.
4Schließen Sie die Abdeckung, bis sie hörbar einrastet.
5Drücken Sie mehrmals die gelbe Taste, bis etwas NIVEA FOR MEN Frischegel bzw.
Rasieremulsion austritt.Der Rasierer ist jetzt einsatzbereit.
Kartuschen austauschen
Werfen Sie die Pumpe nicht weg, wenn Sie eine neue Kartusche einsetzen. Sie benötigen die Pumpe für alle Kartuschen in der Packung.

30 Deutsch
2
 1
1
1Drücken Sie die Entriegelungstaste (1),und
öffnen Sie die Abdeckung des Kartuschenfachs
(2).
2Entnehmen Sie die leere Kartusche, und ziehen Sie die Pumpe heraus.
3Schieben Sie die Pumpe in eine neue Kartusche, bis sie hörbar einrastet.
4Schieben Sie die Kartusche mit der Pumpe in den Rasierer. Sie lässt sich nur dann richtig einsetzen, wenn die weiße Seite der Pumpe nach oben zeigt. Schließen Sie die Abdeckung.
Kartuschen aufbewahren
,Sie können die übrigen Kartuschen bequem in der mitgelieferten Wandhalterung aufbewahren. Die Halterung ist mit Saugnäpfen versehen und lässt sich leicht an der Wand befestigen.Auf diese Weise haben Sie die Kartuschen stets zur Hand. Das ist besonders praktisch, wenn Sie sich unter der Dusche rasieren.
Die Wandhalterung ist ausschließlich zur Aufbewahrung der Kartuschen vorgesehen. Stellen Sie den Rasierer nicht in die Wandhalterung, hängen Sie ihn auch nicht daran auf. Er könnte herunterfallen!
Deutsch 31
Das Gerät benutzen
Rasieren
Den Rasierer einschalten
1Drücken Sie den Ein-/Ausschalter einmal, um den Rasierer einzuschalten.
Nach der kurzen Anzeige der Akkukapazität blinkt die tropfenförmige Frischegel-Anzeige ± drei Mal und signalisiert, dass Frischegel bzw. Rasieremulsion aufgetragen werden kann.
Kann der Rasierer durch Drücken des Ein-/ Ausschalters nicht eingeschaltet werden, wurde ggf. die Reisesicherung aktiviert. Deaktivieren Sie die Reisesicherung (siehe “Reisesicherung”).
Drücken Sie die gelbe Taste an der Pumpe, um NIVEA FOR MEN Frischegel bzw. Rasieremulsion auf die Haut aufzutragen.
3Führen Sie die Scherköpfe mit geraden und kreisenden Bewegungen über die Haut.
Drücken Sie während des Rasierens regelmäßig die gelbe Taste, um erneut NIVEA FOR MEN Frischegel bzw. Rasieremulsion aufzutragen.
Der Rasierer gleitet so sanft über Ihr Gesicht.
Drücken Sie den Rasierer dabei nicht zu stark auf die
Haut. Sie können Ihre Haut auch vor dem Rasieren nach Belieben anfeuchten.
,Pumpen Sie regelmäßig Gel bzw. Emulsion nach, um eine optimale Rasur zu erzielen.
,Der Rasierer arbeitet nicht optimal, wenn er ohne Frischegel bzw. Rasieremulsion verwendet wird.
,Es kann 2 bis 3 Wochen dauern, bis sich Ihre Haut an das Philips Schersystem gewöhnt hat.
32 Deutsch
Den Rasierer ausschalten
1Drücken Sie den Ein-/Ausschalter einmal, um den Rasierer auszuschalten.
Die Reinigungsanzeige å (grünes Wasserhahnsymbol mit blinkendem Wasserstrahl) leuchtet 6 Sekunden lang und signalisiert, dass der Rasierer gereinigt werden sollte.
Anschließend wird die verbleibende Akkukapazität 5
Sekunden lang angezeigt.
2 Reinigen Sie den Rasierer (siehe “Reinigung und
Wartung”).
Spülen Sie den Rasierer nach jedem Gebrauch ab. Falls Sie das Gerät länger als eine Woche nicht
verwenden, sollten Sie die Kartusche herausnehmen.
3
5
Prüfen Sie bei Bedarf die verbleibende Akkukapazität durch Drücken des Ein-/ Ausschalters. Mindestens eine Kontrollanzeige leuchtet für 5 Sekunden und zeigt die verbleibende Akkukapazität an.
Setzen Sie die Schutzkappe nach jedem
Gebrauch auf den Rasierer, um Beschädigungen zu vermeiden.
Sie können bei Bedarf die Reisesicherung aktivieren (siehe“Reisesicherung”).
Schneiden
Zum Trimmen von Koteletten und Schnurrbart.
Den Langhaarschneider aufsetzen
1 Schalten Sie den Rasierer aus.
Reinigen Sie den Rasierer, bevor Sie den Langhaarschneider aufsetzen (siehe “Reinigung und Wartung”).
Loading...