


Elance
GC3135, GC3130, GC3126, GC3125, GC3121, GC3120, GC3117, GC3116, GC3115, GC3111, GC3110, GC3106

2

3
ENGLISH 4
NORSK 11
SVENSKA 18
SUOMI 25
DANSK 32
39
DEUTSCH 47
GC3135, GC3130, GC3126, GC3125, GC3121, GC3120, |
GC3117, GC3116, GC3115, GC3111, GC3110, GC3106 |
4 ENGLISH
Important
For optimal safety, first read these instructions before you are going to use the iron:
-The user must not leave the iron unattended while it is connected to the supply.
-This appliance is not intended for use by young children or infirm persons without supervision.
-Young children should be supervised to ensure that they do not play with the appliance.
-The soleplate of the iron can become extremely hot and may cause burns if touched.
-Never use the appliance if it is damaged in any way.
-After finished ironing, during filling or emptying the water tank or even when you leave the iron for a while, unplug from the wall socket, set the steam control to position 0 and put the iron on its heel.
-If the supply cord is damaged, it must be replaced by Philips or its service agent or a similarly qualified person in order to avoid a hazard.
Before first use
1Check if the voltage rating on the typeplate corresponds to the mains supply in your home.
C 2 Remove any sticker or protective foil from the soleplate.
3 Heat up the iron to maximum temperature and iron over a piece of damp cloth for several minutes to remove any residue on the soleplate.
The iron may give out some smoke when using it for the first time.
After a short while this will cease.
Filling the water tank
Do not immerse the iron in water.
|
|
|
|
|
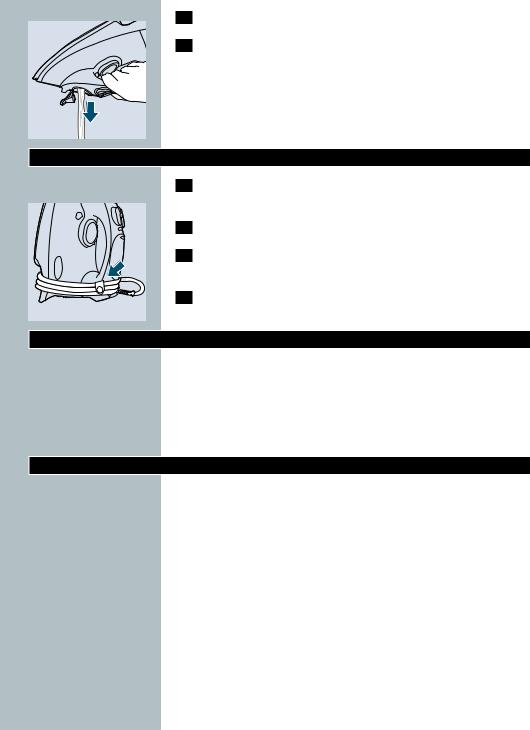
1 |
Remove the mains plug from the wall socket. |
|
|
|
|
|
C |
|
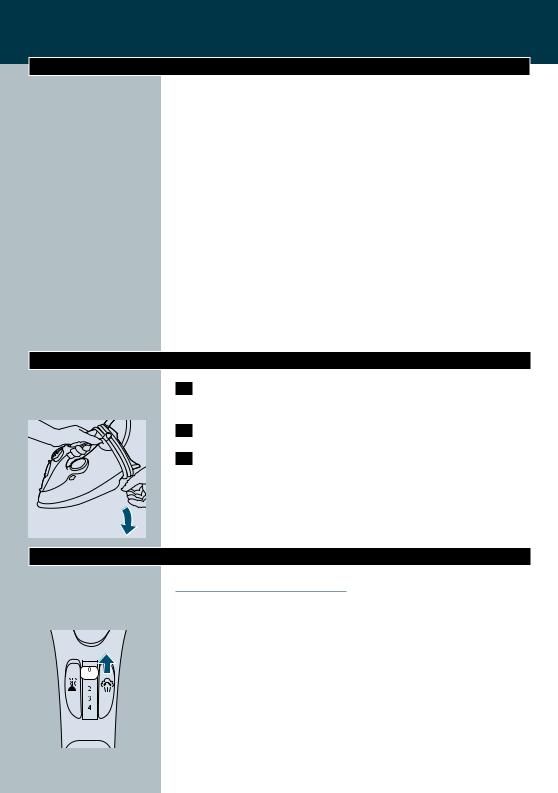
Set the steam control to position O (= no steam). |
|
|
|
|
|
|
|||
2 |
|||||||
|
|||||||
|
|
|
|
|
|
Open the filling cap. |
|
3 |
|||||||
|
|
|
|
|
|||
|
|
|
|
|
|
Hold the iron in a tilted position. |
|
|
|
|
|
|
|
||
4 |
|||||||
|
|
|
|
|
|
|

S I L K
S
E
D A
|
W |
N |
OTT |
O |
C |
O |
NO |
DO |
|||
O |
AL |
|
G |
||
L |
N |
|
|
|
|
A |
|
|
LA |
||
NI |
|
|
|
|
|
N |
LO |
N |
|
|
|
YL |
|
|
|
||
|
|
|
|
|
|
|
ON |
|
|
|
|
N OE
N
N I I L
L
ENGLISH 5
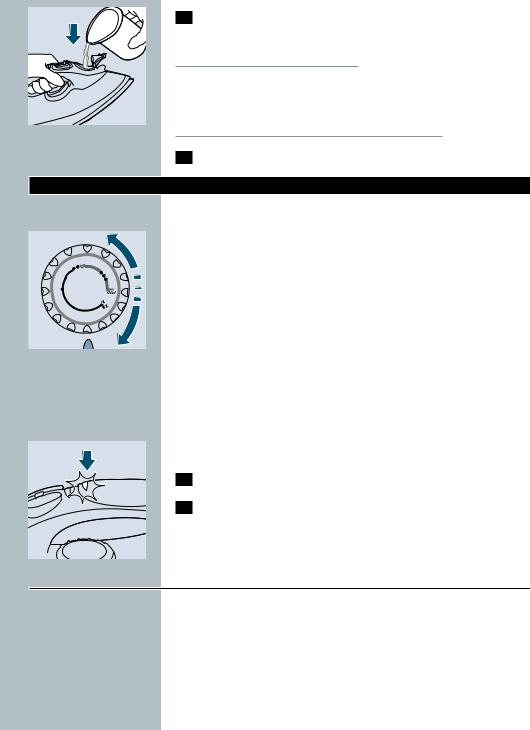
 C 5 Pour tap water from the filling jug into the water tank up to the maximum level.
Do not fill the tank beyond the MAX indication.
If the tap water in your area is very hard, we advise you to mix it with an equal portion of distilled water, or to use distilled water only.
Do not use vinegar, starch or chemically descaled water.
6 Press to close the filling cap (click!).
Setting the temperature
|
1 |
|
|
Put the iron on its heel. |
C |
|
|
|
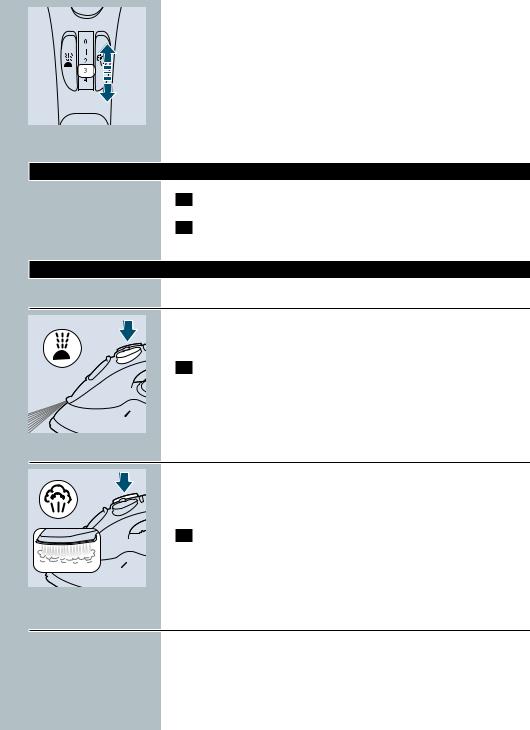
Set the temperature control to the required ironing |
2 |
|
|
||
|
|
|
|
temperature by turning it to the position of the temperature |
|
|
|
|
indicator. |
- |
Check the garment label for the required ironing temperature. |
|||
- |
1 |
Synthetic fabrics (e.g. acrylic, viscose, polyamide, polyester) |
||
- |
1 |
Silk |
||
-2 Wool
-3 Cotton, linen
-When you do not know what kind of fabric(s) the article is made of, try to iron on a spot which will be invisible when you wear it.
-Silk, woolen and synthetic materials: iron the reverse side of the fabric to prevent shiny spots.To prevent stains, avoid using the spray function.
-Start ironing the articles that require the lowest ironing temperature, such as those made of synthetic fibers.
3 |
Put the mains plug in an earthed wall socket. |
C 4 |
When the amber temperature pilot light has first gone out, |
|
wait for a while before start ironing. |
B The amber pilot light will come on from time to time during ironing.
For Auto-shut-off versions (type GC3135 only)
If the Auto-shut-off is activated (red pilot light blinks), move the iron slightly to deactivate it (blinking stops).
Steam-ironing
Make sure that there is enough water in the water tank.
1 Set the temperature control to the recommended position.
See section 'Setting the temperature'.
6 ENGLISH
C |
|
|
|
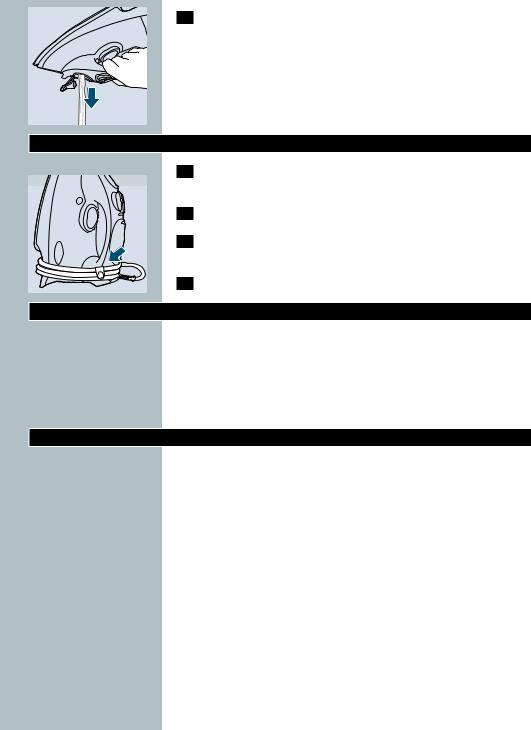
Set the steam control to the appropriate steam position. |
2 |
|
|
||
- |
1 |
- 2 for moderate steam (temperature settings 2 to 3) |
||
- |
3 |
- 4 for maximum steam (temperature settings 3 to MAX) |
||
B Steaming will start as soon as the set temperature has been reached.
If the selected ironing temperature is too low, water may drip from the soleplate.Types GC3135, GC3130, GC3126, GC3125, GC3121, GC3120, GC3115 are equipped with a drip stop system (refer to 'Drip stop' further on).
Ironing without steam
1Set the steam control to position O (= no steam).
2Set the temperature control to the recommended position.
See section 'Setting the temperature'.
Other features
Spraying
To remove stubborn creases at any temperature.
Make sure that there is enough water in the water tank.
C 1 |
Press the spray button a couple of times to moisten the |
|
laundry. |
Shot of Steam
A powerful "shot" of steam helps remove stubborn creases.
The Shot-of-Steam function can only be used at temperature settings between 2 and MAX.
 C 1 Press and release the Shot-of-Steam button.
Drip Stop (types GC3135, GC3130, GC3126, GC3125,
GC3121, GC3120, GC3115 only)
This iron features a "Drip Stop" steam shut-off facility: the iron automatically stops steaming at too low temperatures to prevent water from dripping out of the soleplate.When this happens you may hear a sound.

ENGLISH 7
Vertical Shot of Steam (types GC3135, GC3130, GC3126,
GC3125, GC3121, GC3120, GC3117, GC3116, GC3115,
GC3111, GC3110 only).
C 1 The Shot of Steam function can also be used when you hold the iron in vertical position.
Never direct the steam towards people.
Automatic Anti-Calc (types GC3135, GC3130, GC3126,
GC3125, GC3121, GC3120, GC3117, GC3116, only).
|
C |
|
The built-in Automatic Anti-Calc system reduces deposit of |
1 |
|||
|
|
|
scale and ensures a longer life of the iron. |
|
|
|
|
Auto-shut-off (type GC3135 only)
C 1 An electronic safety device will automatically switch off the iron if it has not been moved for a while.
To indicate that the iron has been switched off, the red auto-off pilot light will start blinking.
To heat up the iron again:
-Pick up the iron or move it slightly.
-The red auto-off pilot light will go out.The amber temperature pilot light may come on, depending on the soleplate temperature.
-If the amber pilot light comes on after the iron is moved, wait for it to go out before start ironing.
-If the amber pilot light does not come on after the iron is moved, the iron is ready for use.

8 ENGLISH
Cleaning and maintenance
Calc-Clean
This is a Calc-Cleaning function which removes scale and impurities. Use the Calc-Clean function once every two weeks. If the water in your area is very hard (when flakes coming out from the soleplate during ironing), the Calc-Clean function should be used more frequently.
1 Set the steam control to position O.
|
|
|
|
|
|
NIL |
||
|
|
|
|
|
|
E |
NI |
|
|
|
|
|
|
|
N |
||
|
|
|
|
|
|
O |
L |
|
T |
O |
C |
|
G |
L |
A |
|
|
|
O |
|
|
|
||||
T |
|
D |
|
|
|
|
|
|
O |
|
|
|
|
|
|
|
|
N |
O |
|
|
|
|
|
|
|
N |
|
|
|
|
|
|
||
L |
|
|
|
|
|
|||
WA |
|
|
|
|
|
|||
ON |
|
|
|
|
||||
OA |
|
|
|
|||||
L |
|
|
|
|
|
|||
SEDA
SILK
N
I
O N
N Y
L
O
N
2 Fill the water tank to the maximum level.
Do not use vinegar or other descaling agents.
C 3 Set the temperature control to MAX.
4Put the plug in the wall socket.
5Unplug the iron when the amber pilot light has gone out.
C 6 Hold the iron over the sink, press and hold the calc-clean button and gently shake the iron.
BSteam and boiling water will come out of the soleplate. Impurities and flakes (if any) will be flushed out.
7Release the Calc-Clean button as soon as all the water in the tank has been used up.
Repeat the calc-cleaning process if the iron still contains a lot of impurities.
After calc-cleaning
-Plug in the iron to let the soleplate dry up.
-Unplug the iron when the amber pilot light has gone out.
-Move the hot iron gently over a piece of used cloth to remove any water stains that may have formed on the soleplate.
-Let the iron cool down before you store it.
After ironing
1Remove the mains plug from the wall socket and let the iron cool down.
2Wipe flakes and any other deposits off the soleplate with a damp cloth and a non-abrasive (liquid) cleaner.
Keep the soleplate smooth: avoid hard contact with metal objects.
3 Clean the upper part of the iron with a damp cloth.
ENGLISH 9
C 4 Regularly rinse the water tank with water. Empty the water tank after cleaning.
Storage
1Remove the mains plug from the wall socket and set the steam control to position 0.
2Empty the water tank.
C 3 Let the iron cool down.Wind the mains cord around the cord storage facility and fix it with the cord clip.
4 Store the iron standing on its heel in a safe and dry place.
Guarantee & service
If you need information or if you have a problem, please visit the Philips Web site at www.philips.com or contact the Philips Customer Care Centre in your country (you will find its phone number in the worldwide guarantee leaflet). If there is no Customer Care Centre in your country, turn to your local Philips dealer or contact the Service Department of Philips Domestic Appliances and Personal Care BV.
Troubleshooting
This chapter summarizes the most common problems you could encounter with your iron. Please read the different sections for more details. If you are unable to solve the problem, please contact the nearest Philips Service Centre or one of its representatives. See the worldwide guarantee leaflet for telephone numbers of the Philips Helpdesk or visit our website at www.philipsonline.com.
10 ENGLISH
Problem |
Possible cause(s) |
Solution |
The iron is plugged in but the soleplate |
Connection problem. |
Check the mains cord, the plug and |
is cold. |
|
the wall socket. |
|
|
|
|
Temperature control set at MIN. |
Set the iron to the appropriate |
|
|
temperature (see setting the |
|
|
temperature). |
No steam |
Not enough water in the water tank. |
Fill the water tank (see Filling the |
|
|
water tank). |
|
|
|
|
The steam control has been set to |
Set to steam position between 1-4 |
|
position O. |
(see Steam ironing). |
|
The iron is not hot enough and/or |
Set the temperature control to the |
|
Drip Stop is activated. |
steam area (2 to MAX). Put the |
|
|
iron on its heel and wait until the |
|
|
amber pilot light has gone out before |
|
|
you start ironing. |
|
|
|
No Shot of Steam or No Vertical Shot of |
The (Vertical) Shot of Steam function |
Put the iron in horizontal position and |
Steam (GC3135, GC3130, GC3126, |
has been used too often within a very |
wait for a while before using the |
GC3125, GC3121, GC3120, GC3117, |
short period. |
(Vertical) Shot of Steam function |
GC3116, GC3115, GC3111, GC3110 only) |
|
again. |
|
|
|
The iron is not hot enough.
Set the temperature control to the steam area (2 to MAX). Put the iron on its heel and wait until the amber pilot light has gone out before you start ironing.
Water droplets on fabric |
The filling cap is not closed properly. |
Press to close the filling cap tightly |
|
|
until you hear a click. |
|
|
|
The iron is not hot enough.
Set the iron to the appropriate temperature (see Steam ironing). Types GC3117, GC3116, GC3111, GC3110, GC3106 do not use steam when using temperature lower than 2 dots (2) ..
Water drips from the soleplate after |
The iron is put in horizontal position |
Empty the water tank before you |
the iron has been stored or cooled |
with water still left in the water tank. |
store the iron. Set the steam control |
down. |
|
to position O and store the iron |
|
|
upright on its heel. |
|
|
|
Flakes and impurities coming out from soleplate during ironing.
Hard water form flakes inside the soleplate.
Apply Calc-Clean a few times (see Calc-Clean).
Red pilot light blinks (type GC3135 |
Auto-shut-off is activated. See "Auto- |
Shake the iron slightly to deactivate |
only). |
shut-off" section. |
the Auto-shut-off, the lamp will stop |
|
|
blinking. |
|
|
|
NORSK 11
Viktig
For optimal sikkerhet, les først disse instruksjonene før De begynner å ta i bruk strykejernet:
-Brukeren må ikke forlate strykejernet uten tilsyn mens det er tilkoplet.
-Dette apparatet er ikke til bruk for barn.
-Pass på at barn ikke leker med apparatet.
-Strykesålen på strykejernet kan bli ekstremt varm og berøring av denne kan forårsake forbrenning.
-Bruk aldri apparatet hvis det på noen måte er skadet.
-Når De har avsluttet strykingen, når De fyller eller tømmer vannbeholderen eller når De forlater strykejernet for en kort stund, må nettledningen trekkes ut av stikkontakten, dampkontrollen må settes til posisjon 0 og strykejernet må settes i vertikal posisjon.
-Dersom ledningen på dette apparatet blir skadet, må den erstattes av Philips eller Philips' service verksted slik at farlige situasjoner unngås.
Før første gangs bruk
1Kontroller at spenningen som er angitt på apparatet, er den samme som på strømnettet, før De setter i støpslet.
C |
|
Fjern alle klistremerker og beskyttelsesdeksel fra sålen. |
2 |
||
|
3Varm strykejernet opp til maksimumstemperaturen og stryk over et fuktig klede i noen minutter for å fjerne eventuelt smuss fra strykesålen.
Det kan forekomme at jernet gir fra seg litt røyk ved første gangs bruk. Etter en kort stund vil dette opphøre.
Fylle på vann
Senk ikke strykejernet ned i vann.
|
1 |
Fjern nettledningen fra stikkontakten. |
C |
|
Sett dampkontrollen til posisjon 0 (= ingen damp). |
2 |
||
|
3Åpne lokket på fyllingshullet.
4Hold strykejernet på skrå.
12 NORSK
|
|
|
W |
N |
OT |
TO |
C |
|
||
|
O |
NOD |
|
|
||||||
|
O |
AL |
O |
|
|
|||||
|
L |
N |
|
|
GL |
|
||||
|
A |
|
|
|
|
|
N |
|||
|
|
|
|
|
|
|
|
|
A |
|
|
|
|
|
|
|
|
|
|
|
E |
|
|
|
|
|
|
|
|
|
|
O N |
|
|
|
|
|
|
|
|
|
|
N I |
|
|
|
|
|
|
|
|
|
|
I L |
|
|
|
|
|
|
|
|
|
|
L |
S |
S |
|
|
|
|
|
|
|
|
|
E |
|
|
|
|
|
|
|
|
|
|
I |
|
|
|
|
|
|
|
|
|
|
L D |
|
|
|
|
|
|
|
|
|
|
K A |
|
|
|
|
|
|
|
|
|
|
|
NI |
|
|
|
|
|
|
|
||
|
N |
|
LO |
N |
|
|
|
|
|
|
|
YL |
|
|
|
|
|
|
|||
|
|
|
|
|
|
|
|
|
||
|
|
|
ON |
|
|
|
|
|
|
|
C 5 |
Fyll fyllingskannen med springvann. Hell vannet fra |
|
fyllingskannen opp i jernets vannbeholder til maksimumsnivået |
nåes.
Fyll ikke vann over maksimumsnivået.
Hvis springvannet der De bor er svært hardt, anbefaler vi at De blander det med en like stor del destillert vann, eller at De kun bruker destillert vann.
Bruk ikke eddik, stivelse eller kjemisk avkalkingsmiddel.
6 Trykk for å lukke lokket på fyllingshullet (klikk).
Stille inn temperatur
|
1 |
|
|
Sett strykejernet på hælen. |
C |
|
|
|
Sett temperaturkontrollen til den ønskelige |
2 |
|
|
||
|
|
|
|
stryketemperaturen ved å vri den til rette posisjon på |
|
|
|
|
temperaturindikatoren. |
- |
Kontroller vaskeseddelen på klesplaggene for å finne den riktige |
|||
|
|
stryketemperaturen. |
||
- |
1 |
Syntetiske stoffer (f.eks. akryl, viskose, polyamid, polyester) |
||
- |
1 |
Silke |
||
- |
2 Ull |
|||
-3 Bomull, lin
-Hvis De ikke vet hva slags stoff(er) plagget er laget av, prøv å stryke på en liten bit som ikke vil være synlig når De har på Dem plagget.
-Silke, ull og syntetiske materialer: stryk på vrangen av stoffet for å unngå blanke flekker. Ikke bruk spray-funksjonen hvis De vil unngå flekker.
-Begynn med å stryke plaggene som krever lavest temperatur, for eksempel plagg som er laget av syntetiske fibre.
3 |
Sett nettledning inn i en jordet stikkontakt. |
C 4 |
Når den gule temperaturlampen slukkes, venter De en liten |
|
stund før De begynner å stryke. |
BUnder stryking vil den gule temperaturlampen fra tid til annen slukkes og tennes.
For Auto-off versjoner (kun type GC 3135)
Hvis funksjonen for automatisk avstenging er aktivert (den røde kontrollampen blinker), beveger De stykejernet litt for å deaktivere den (blinkingen stopper).

NORSK 13
Damp-stryking
Sørg for at det er tilstrekkelig med vann i vanntanken.
1 Sett temperaturkontrollen på den anbefalte posisjonen.
Se avsnittet 'Stille inn temperatur'
C |
|
|
|
Sett dampkontrollen til den egnede dampposisjonen. |
2 |
|
|
||
- |
1 |
- 2 for moderat damp (temperaturinnstillinger 2 til 3) |
||
- |
3 |
- 4 for maksimal damp (temperaturinnstillinger 3 til MAX) |
||
B Dampen vil starte så fort den valgt temperaturen har blitt oppnådd.
Dersom den valgte stryketemperaturen er for lav, kan det komme til å dryppe vann fra sålen.Typene GC3135, GC3130, GC3126, GC3125, GC3121, GC3120, GC3115 are utstyrt med et dryppstopp-system (se kapittelet 'Dryppstopp' lenger ut i denne bruksanvisningen).
Stryking uten damp
1Sett dampkontrollen til posisjon 0 (= ingen damp).
2Sett temperaturkontrollen til den anbefalte posisjonen.
Se avsnittet 'Stille inn temperatur'
Andre funksjoner
Spraying
For å fjerne gjenstridige folder på hvilken som helst temperatur.
Sørg for at det er tilstrekkelig med vann i vanntanken.
 C 1 Trykk ned sprayknappen et par ganger for å fukte tøyet.
Dampstøt
Et intenst støt av damp hjelper Dem å fjerne gjenstridige folder. Dampstøtfunksjonen må bare brukes ved temperaturinnstillinger mellom 2 og MAX.
 C 1 Trykk og hold nede Superdamp-knappen.

14 NORSK
Dryppstopp (kun typenr GC3135, GC3130, GC3126, GC3125,
GC3121, GC3120, GC3115).
Dette strykejernet har en "Dryppstopp"-funksjon: ved for lave temperaturer vil strykejernet stoppe dampingen automatisk, for å hindre at det drypper vann fra strykesålen. De vil høre en lyd når dette skjer.
Vertikalt dampstøt (kun typenr GC3135, GC3130, GC3126,
GC3125, GC3121, GC3120, GC3117, GC3116, GC3115,
GC3111, GC3110).
C 1 Dampstøtfunksjonen kan også brukes når De holder strykejernet vertikalt.
Rett aldri dampen mot noen.
Automatisk Anti-kalk (kun typenr GC3135, GC3130, GC3126,
GC3125, GC3121, GC3120, GC3117, GC3116).
|
C |
|
Det innebygde, automatiske Anti-kalksystemet reduserer |
|
1 |
||
|
|
|
kalkavleiringer og sikrer lenger levetid på strykejernet. |
|
|
|
|
Auto off (kun type GC 3135)
C 1 |
Apparatet har en elektronisk sikkerhetsfunksjon som vil slå av |
|
strykejernet automatisk, hvis det ikke har blitt beveget på en |
stund.
For å indikere at strykejernet har blitt slått av, vil den røde auto- off-lampen starte å blinke.
For å varme opp strykejernet igjen:
-Løft opp strykejernet eller beveg det litt.
-Den røde auto-off-lampen slukkes. Det kan hende at den gule temeperaturlampen tennes, dette avhenger av hvor varm strykesålener.
-Hvis den gule temperaturlampen tennes etter at De har beveget strykejernet, venter De til den slukkes før De begynner å stryke.
-Hvis den gule temeperaturlampen ikke tennes etter at De har beveget strykejernet, kan De begynne å stryke med en gang.

|
|
|
|
|
|
NIL |
||
|
|
|
|
|
|
E |
NI |
|
|
|
|
|
|
|
N |
||
|
|
|
|
|
|
O |
L |
|
|
|
C |
|
|
|
|
||
T |
O |
|
G |
L |
A |
|
|
|
|
O |
|
|
|
||||
|
|
|
|
|
|
|||
T |
|
D |
|
|
|
|
|
|
O |
|
|
|
|
|
|
|
|
N |
O |
|
|
|
|
|
|
|
N |
|
|
|
|
|
|
||
L |
|
|
|
|
|
|||
WA |
|
|
|
|
|
|||
ON |
|
|
|
|
||||
OA |
|
|
|
|||||
L |
|
|
|
|
|
|||
SEDA
SILK
N
I
O N
N Y
L
O
N
NORSK 15
Rengjøring og vedlikehold
Calc-Clean
Dette er en rengjøringsfunksjon som fjerner kalk og urenheter. Bruk Calc-Clean-funksjonen én gang hver fjortende dag. Hvis vannet der De bor er veldig hardt (når det kommer flak ut av strykesålen mens De stryker), bør Calc-Clean-funksjonen brukes oftere.
1Sett dampkontrollen til posisjon 0.
2Fyll vannbeholderen til maksimumsnivået.
Bruk ikke eddik eller andre avkalkningsmidler.
C 3 Sett temperaturkontrollen til MAX.
4Sett nettledningen i stikkontakten.
5Trekk ut ledningen når den gule temperaturlampen har slukket.
C 6 Hold strykejernet over vasken, trykk på og hold nede Calc- Clean-knappen og rist strykejernet forsiktig.
BDamp og kokende vann vill komme ut av strykesålen. Urenheter og eventuelle flak blir skylt ut.
7Slipp Calc-Clean-knappen så snart alt vannet i beholderen er brukt opp.
Gjenta avkalkningsprosessen hvis strykejernet fortsatt ikke er rent.
Etter avkalkingen
-Sett i nettledningen slik at strykesålen tørker.
-Trekk ut ledningen når den gule temperaturlampen har slukket.
-Beveg det varme strykejernet over et brukt tøystykke for å fjerne vannflekker som kan ha blitt dannet på strykesålen.
-La strykejernet avkjøles før De setter det bort.
Etter stryking
1Trekk ut nettledningen fra stikkontakten og la strykejernet avkjøles.
2Tørk av flak eller annet smuss fra strykesålen med en fuktig klut og et flytende regngjøringsmiddel uten slipeeffekt.
Hold sålen glatt: unngå hard kontakt med metall.
16 NORSK
3 |
Rengjør overdelen av strykejernet med en fuktig klut. |
C 4 |
Fra tid til annen bør innsiden av vannbeholderen renses med |
|
vann.Tøm så vannet ut etter rengjøringen. |
Oppbevaring
1Fjern nettledningen fra veggkontakten og sett dampkontrollen i posisjon 0.
2Tøm vannbeholderen.
C 3 La strykejernet kjøles ned. Surr nettledningen rundt hælen på strykejernet og feste den med ledningsklipset.
4 Oppbevar strykejernet stående på hælen på et trygt og tørt sted.
Garanti & service
Hvis De trenger service eller informasjon, kan De se Philips' Webområde på www.philips.com eller kontakte Philips Kundetjeneste (se telefonnummer i garantiheftet). Hvis det ikke er noe Philips Kundetjeneste-senter i landet hvor De befinner Dem, kan De kontakte den lokale Philips-forhandleren eller serviceavdelingen ved Philips Domestic Appliances and Personal Care BV.
Problemløsing
Dette kapitlet oppsummerer de vanligste problemene De kan støte på med strykejernet. Les de forskjellige avsnittene hvis De vil ha mer informasjon. Hvis De ikke kan løse problemet selv, kontakter De nærmeste Philips Kundetjeneste eller en av Philips' representanter. Se garantiheftet for å finne telefonnumrene til Philips Helpdesk eller besøk vårt Web-område på www.philipsonline.com.

|
|
NORSK 17 |
|
|
|
Problem |
Mulig årsak |
Løsning |
Strykejernet er tilkoblet men |
Tilkoblingsproblem. |
Kontroller strømledningen, støpselet |
strykesålen er kald. |
|
og veggkontakten. |
|
|
|
|
Temperaturkontrollen står på MIN. |
Still inn strykejernet til den rette |
|
|
temperaturen (se 'Stille inn |
|
|
temperatur') |
|
|
|
Ingen damp |
Ikke nok vann i vannbeholderen. |
Fyll på vann i vannbeholderen (se 'Fylle på vann')
Dampkontrollen har blitt satt til posisjon O.
Sett dampkontrollen til en dampposisjon mellom 1 - 4 (se 'Dampstryking')
Strykejernet er ikke varmt nok og/eller Dryppstopp er aktivert.
Sett temperaturkontrollen til dampområdet (2 til MAX). Sett jernet på hælen og vent til den gule temperaturlampen har slukket før De begynner å stryke.
Dampstøt eller vertikalt dampstøt |
(Den vertikale) dampstøtfunksjonen |
Legg strykejernet på sålen og vent en |
fungerer ikke (kun typenr GC3135, |
har blitt brukt for ofte i løpet av veldig |
stund før De bruker (den vertikale) |
GC3130, GC3126, GC3125, GC3121, |
kort tid. |
dampstøtfunksjonen igjen. |
GC3120, GC3117, GC3116, GC3115, |
|
|
GC3111, GC3110) |
|
|
|
|
|
Strykejernet er ikke varmt nok.
Sett temperaturkontrollen til dampområdet (2 til MAX). Sett jernet på hælen og vent til den gule temperaturlampen har slukket før De begynner å stryke.
Vanndråper på stoffet |
Lokket til fyllingshullet er ikke lukket |
Trykk til De hører et klikk for å lukke |
|
ordentlig. |
lokket til fylingshullet helt. |
Strykejernet er ikke varmt nok.
Sett temperaturkontrollen til den egnede temperaturen (se dampstryking).Typenr GC3117, GC3116, GC3111, GC3110, GC3106 bruker ikke damp når temperaturer under 2 prikker (2) blir benyttet.
Vann drypper fra sålen etter at jernet |
Strykejernet er satt i horisontal |
Tøm vanntanken før De setter bort |
er blitt kjølt ned eller satt bort for |
posisjon med rester av vann i |
strykejernet for oppbevaring. Sett |
oppbevaring. |
vanntanken. |
dampkontrollen til posisjon 0 og |
|
|
oppbevar strykejernet stående på |
|
|
hælen. |
|
|
|
Det kommer flak og urenheter fra strykesålen mens De stryker.
Hardt vann danner flak inne i |
Bruk Calc-Clean-funksjonen et par |
strykesålen. |
ganger (se Calc-Clean). |
Den røde indikatorlampen blinker (kun |
Funksjonen for automatisk avstenging |
Rist strykejernet lett for å deaktivere |
typenr GC 3135). |
er aktivert. Se avsnittet "Automatisk |
funksjonen for automatisk avstenging. |
|
avstegning". |
Lampen slutter å blinke. |
|
|
|
 Loading...