


 Loading...
Advanced Manual
DIGITAL CAMERA
D-590 ZOOM C-470 ZOOM X-500
1Taking Pictures
2Viewing
3Setting Up
4Printing Pictures
5Connecting Computer
6Appendix
 How to use this manual
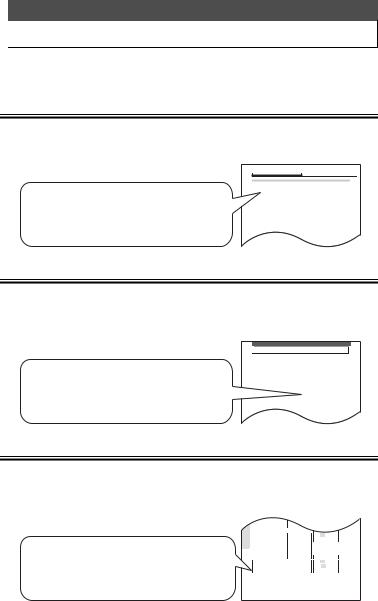
This manual contains a table of contents, an index and menus to enable you to easily find the topic that you want to use or learn out more about.
Using the table of contents gP. 5
All the titles in the manual are listed here, grouped into chapters. The chapters are composed of the shooting, playback, printing, etc. based on their purposes.
For example...
when you want to view pictures that you have taken as an index
Go to Chapter 2 Viewing for the page titled “Displaying several pictures at once G....P. 46.”
Contents |
|
2 Viewing ........................................................ |
45 |
Displaying several pictures at once G................................................ |
46 |
Selecting the number of pictures G.......................................... |
47 |
Enlarging pictures U............................................................................ |
49 |
Rotating pictures y.............................................................................. |
50 |
Displaying pictures one after another m............................................. |
53 |
Recording sound with pictures taken R................................................ |
54 |
Playing back movies q....................................................................... |
56 |
Creating an index........................................................................ |
58 |
Playback on a TV .................................................................................. |
60 |
Displaying shooting information ............................................................ |
63 |
Editing pictures...................................................................................... |
64 |
Creating black and white pictures ............................................... |
64 |
Creating sepia-toned pictures ..................................................... |
66 |
Changing the resolution Q....................................................... |
68 |
Protecting pictures 0......................................................................... |
70 |
Erasing one picture S........................................................................... |
72 |
Using the index gP. 181
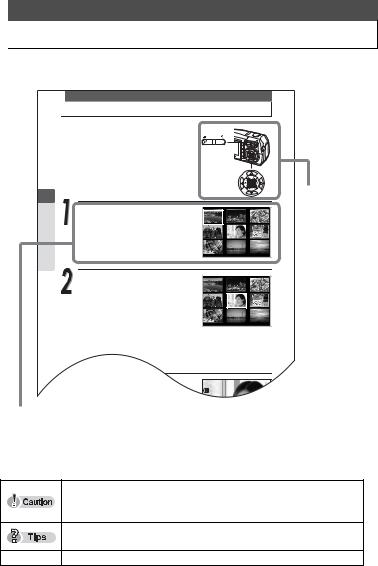
The index lists the camera’s functions, parts and terms used in this manual in alphabetical order. When you come across a word in the manual that you do not understand or when you want to find a certain term, use the index to find the page(s) where it is used.
For example...
when you want to know more about ESP metering
Go to the index at the end of the manual and look under E for “ESP ....31.”
 Index
Index
A |
|
DC-IN jack ............................. |
167 |
|
AC adapter ........................... |
167 |
DIGITAL ZOOM ...................... |
19 |
|
AF target mark ........................ |
10 |
DPOF .................................... |
105 |
|
ALL RESET ............................ |
80 |
DRIVE ..................................... |
36 |
|
All-frame reservation U |
...... 106 |
E |
|
|
Arrow pads |
169 |
|
||
Enlarging pictures U |
49 |
|||
AUTO (white balance) |
28 |
|||
Erasing all pictures R |
73 |
|||
Auto-flash |
21 |
|||
Erasing one picture S |
72 |
|||
AV cable |
60 |
|||
Error messages |
157 |
|||
A/V OUT jack |
61 |
|||
ESP |
31 |
|||
|
|
|||
B |
|
Exposure Compensation ..F 30 |
||
Battery .................................. |
180 |
F |
|
|
Battery charger |
180 |
|
||
FILE NAME |
94 |
|||
Battery check |
|
|||
|
File name |
94 |
||
indicator |
165, 170 |
|||
File number |
171 |
|||
Battery compartment/card |
||||
Fill-in flash # |
21 |
|||
cover |
169 |
|||
|
|
|||
Using the menu list gP. 172
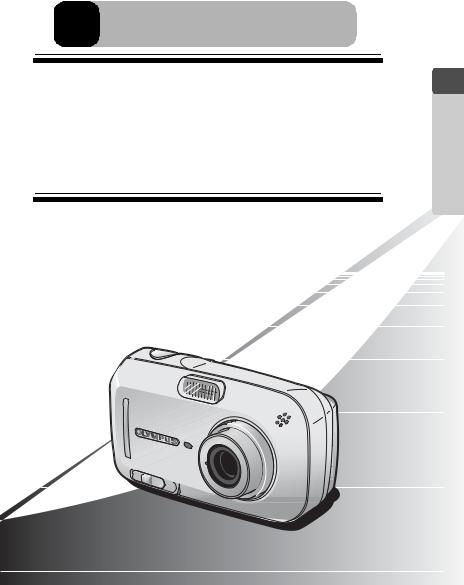
The camera's menus are laid out in the form of a tree diagram according to tab and show the setting options for each available function. First find the menu you are looking for, then look for the reference page number for each function.
For example...
when you want to find out which setting to choose for WB
Go through the menus until you find WB and look for the reference page number.
Appendix
|
|
|
|
|
|
|
|
|
|
8 |
|
OFF/ |
LOW |
/HIGH |
|
|
|
|
|
|
|
|
|
|
SETUP |
SHUTTER SOUND |
OFF/ 1 /2/3 |
||||
|
|
|
|
|
|
|
|
|
|
|
|
LOW |
/HIGH |
||
|
|
|
|
|
|
|
|
|
|
REC VIEW |
|
OFF/ ON |
|||
|
|
|
|
|
|
|
|
|
|
FILE NAME |
RESET |
/AUTO |
|||
|
|
|
|
|
|
|
|
|
|
PIXEL MAPPING |
|
|
|
|
|
|
|
|
|
|
|
|
|
|
|
s |
|
|
|
|
|
|
|
|
|
|
|
|
|
|
|
X |
|
|
|
|
|
|
|
|
|
|
|
|
|
|
|
VIDEO OUT |
NTSC/PAL |
||||
|
|
|
|
|
|
||
K |
|
SHQ/ HQ /SQ1/SQ2 |
|||||
|
|
|
|
|
|
||
F |
–2.0 - 0.0 - +2.0 |
||||||
|
|
|
|
|
|
|
|
0 |
|
|
|
AUTO |
/5/3/1/> |
||
 is the setting when shipped from the factory (default setting).Setting differs according to the region where the camera is sold.
P. 84
P. 86
P. 82
P. 94
P. 101
P. 99
P. 78
P. 60
P. 23
P. 30
P. 28
172
2
 How to read the instructions
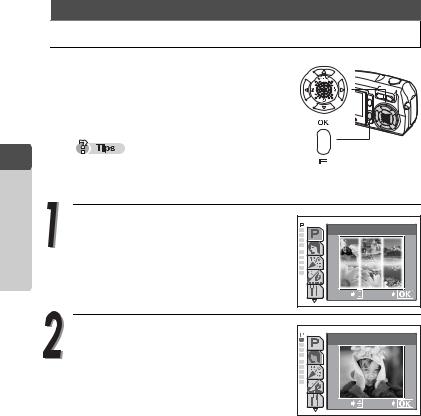
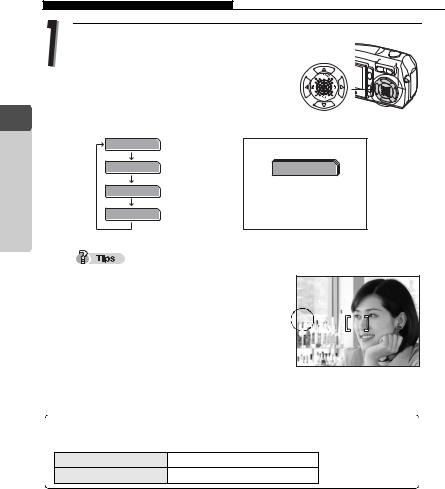
A sample page is shown below to explain how to read the instructions in this manual. Look at it carefully before taking or viewing pictures.
 Displaying several pictures at once G
2
Viewing
This function lets you view several thumbnail pictures on the monitor at once. It is useful when you are looking for a specific picture. You can change the number of pictures displayed.
g“Selecting the number of pictures G” (P. 47)
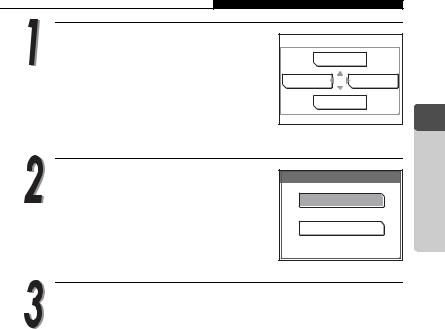
Press the Gside of the zoom button
in playback mode.
1 2 3
The index display appears.
4 5 6
7 8 9
This shows the buttons and button locations for the function concerned.
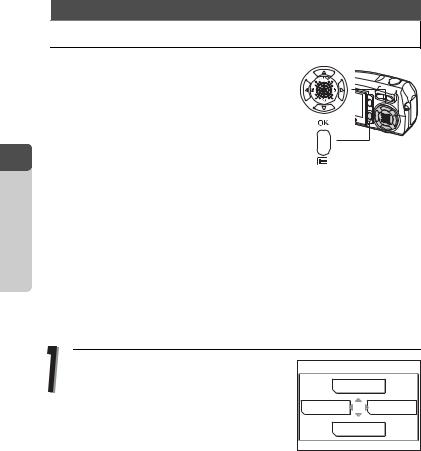
Use the arrow pads to select a
picture.
1 2 3
b: Moves to the previous picture.
4 5 6
d: Moves to the next picture.
7 8 9
a: Jumps to the previous index display. (the frames before the top left frame)
c: Jumps to the next index display.
(the frames following the bottom right frame)
Press the Uside of the zoom button.

 100-0005 HQ
The screen returns to single-frame
Procedure and the corresponding monitor display are shown.
zIndications used in this manual
Important information on factors which may lead to a malfunction or operational problems. Also warns of operations that should be absolutely avoided.
Useful information and hints that will help you get the most out of your camera.
g Reference pages describing details or associated information.
This sample page is only for your reference. It may differ from the actual page in this manual.
3

 Menu operations
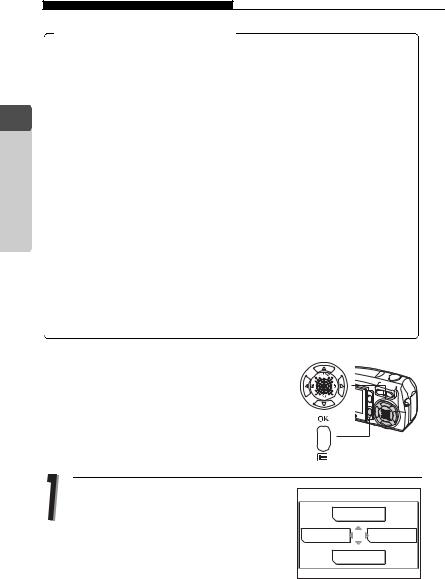
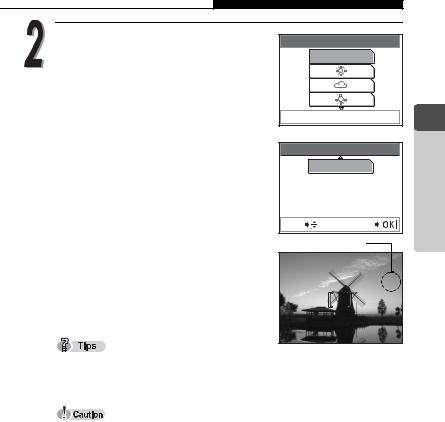
The screen that appears on the monitor when you turn the camera on and press the OK/MENU button is called the “Top menu.” There are three top menus as shown below.
|
F |
K |
MODE MENU |
|
WB |
Shooting mode
|
m |
INFO |
MODE MENU |
|
ERASE |
Playback mode (still picture)
MOVIE PLAYBACK |
|
INFO |
MODE MENU |
|
ERASE |
Playback mode (movie)
The shooting mode screens will be used here to explain how to use the menus.
|
|
|
|
|
|
F |
|
|
|
||||||||||
|
|
|
|
+ |
|
|
|
|
|
|
|
|
|
|
|||||
|
|
|
|
0.0 |
|
|
|
|
|
|
|
|
|
||||||
|
|
|
|
|
|
|
|
|
|
|
|
|
|
|
|
|
|
|
Operational buttons |
|
|
|
|
|
|
|
|
|
|
|
|
|
|
|
|
|
|
|
|
SELECT |
|
|
|
|
|
|
|
GO |
|||||||||||
|
|
|
|
|
|
|
|
|
|
|
|
|
|
|
|
|
|
|
(arrow pads and OK/MENU |
|
|
|
|
|
|
|
|
|
|
|
|
|
|
|
|
|
|||
|
|
|
|
|
|
|
|
|
|
|
|
|
|
|
|
|
|
|
button) |
|
|
|
|
|
|
|
|
|
|
|
|
|
|
|
|
|
|
|
|
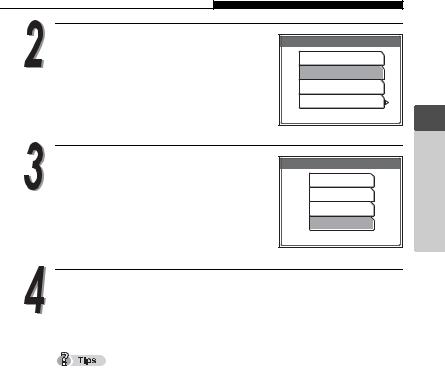
Press a
Exposure compensation
Image quality mode
Press b
|
K |
SHQ |
2272×1704 |
HQ |
2272×1704 |
SQ1 |
2048×1536 |
SQ2 |
640×480 |
SELECT |
GO |
Operational buttons (arrow pads and OK/MENU button)
|
F |
K |
MODE MENU |
|
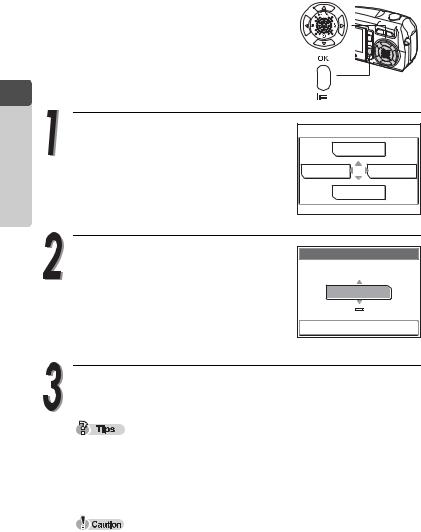
WB |
White Balance
MODE MENU
Press d
Press c
WB
AUTO
|
CAMERA |
DRIVE |
o |
|
|
|
ESP/n |
ESP |
|
Tab |
CARD |
DIGITAL ZOOM |
OFF |
Function |
|
|
|||
|
SET |
R |
OFF |
|
|
|
PANORAMA |
|
|
Use the arrow pads to select a tab and a mode.
SELECT |
GO |
Operational buttons (arrow pads and OK/MENU button)
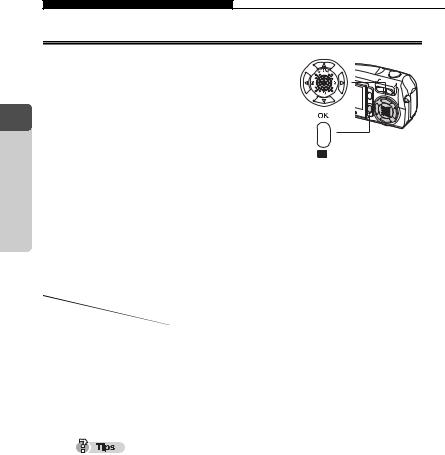
See gP. 172 for the Menu List.
To cancel the menu display, press the OK/MENU button again.
The arrow mark ( or
or  ) at the bottom or top of the menu indicates that there are more options available.
4

Contents |
|
How to use this manual........................................................................... |
2 |
How to read the instructions.................................................................... |
3 |
Menu operations ..................................................................................... |
4 |
1 Taking Pictures .............................................. |
9 |
Focusing on a subject that is not in center of frame (Focus lock) ......... |
10 |
Changing shooting scene modes l............................................ |
12 |
Shooting scene modes ............................................................... |
13 |
Recording movies N........................................................................... |
16 |
Using zoom systems ............................................................................. |
18 |
Using the optical zoom................................................................ |
18 |
Enabling digital zoom.................................................................. |
19 |
Using flash #........................................................................................ |
21 |
Changing resolution and quality K..................................................... |
23 |
Picture quality modes for still pictures......................................... |
23 |
Picture quality modes for movie.................................................. |
26 |
Selecting white balance according to surrounding lighting 0.......... |
28 |
Setting Exposure Compensation F.................................................... |
30 |
When brightness of subject and background differs n...................... |
31 |
Taking close-up pictures &.................................................................. |
33 |
Setting up Super macro mode %.............................................. |
34 |
Using self-timer Y................................................................................ |
35 |
Taking successive pictures j............................................................. |
36 |
Panoramic shooting .............................................................................. |
38 |
Stitching together two pictures /................................................. |
41 |
Recording sound with still pictures R.................................................... |
43 |
5

Contents
2 |
Viewing ........................................................ |
45 |
|
Displaying several pictures at once G................................................ |
46 |
|
Selecting the number of pictures G.......................................... |
47 |
|
Enlarging pictures U............................................................................ |
49 |
|
Rotating pictures y.............................................................................. |
50 |
|
Displaying pictures one after another m............................................. |
53 |
|
Recording sound with pictures taken R................................................ |
54 |
|
Playing back movies q....................................................................... |
56 |
|
Creating an index........................................................................ |
58 |
|
Playback on a TV .................................................................................. |
60 |
|
Displaying shooting information ............................................................ |
63 |
|
Editing pictures...................................................................................... |
64 |
|
Creating black and white pictures ............................................... |
64 |
|
Creating sepia-toned pictures ..................................................... |
66 |
|
Changing the resolution Q....................................................... |
68 |
|
Protecting pictures 0......................................................................... |
70 |
|
Erasing one picture S........................................................................... |
72 |
|
Erasing all pictures R......................................................................... |
73 |
3 |
Setting Up .................................................... |
75 |
|
Selecting a language W.................................................................. |
76 |
|
Setting date and time X..................................................................... |
78 |
|
Saving settings...................................................................................... |
80 |
|
Checking picture you have just taken ................................................... |
82 |
|
Setting beep/alert sound 8................................................................. |
84 |
|
Setting shutter sound ............................................................................ |
86 |
|
Setting volume ...................................................................................... |
88 |
|
Setting power-on screen and sound ..................................................... |
90 |
|
Setting screen color .............................................................................. |
92 |
|
Setting file names.................................................................................. |
94 |
|
Formatting a card .................................................................................. |
97 |
|
Adjusting brightness of monitor s...................................................... |
99 |
|
Adjust CCD and image processing functions...................................... |
101 |
6

|
Contents |
|
4 |
Printing Pictures......................................... |
103 |
|
Selecting printing method.................................................................... |
104 |
|
Making print reservations <............................................................... |
105 |
|
All-frame reservation U........................................................... |
106 |
|
Single-frame reservation <...................................................... |
108 |
|
Canceling print reservations ..................................................... |
110 |
|
Printing with PictBridge-compatible printer ......................................... |
112 |
|
Using the direct printing function............................................... |
112 |
|
Connecting the camera to a printer........................................... |
113 |
|
Printing pictures ........................................................................ |
115 |
|
Easiest Printing ......................................................................... |
116 |
|
PRINT mode/MULTI PRINT mode............................................ |
118 |
|
ALL PRINT mode...................................................................... |
122 |
|
ALL INDEX mode/PRINT ORDER mode.................................. |
125 |
|
Exiting direct printing................................................................. |
127 |
5 |
Connecting Computer................................ |
129 |
|
Operational Sequence ........................................................................ |
130 |
|
Using provided OLYMPUS Master software ....................................... |
131 |
|
What is OLYMPUS Master? ..................................................... |
131 |
|
Installing OLYMPUS Master ..................................................... |
132 |
|
Connecting the camera to computer ................................................... |
138 |
|
Activating OLYMPUS Master .............................................................. |
140 |
|
Displaying camera images on computer ............................................. |
142 |
|
Transferring and storing the camera images on a computer .... |
142 |
|
Viewing still images/movies ................................................................ |
145 |
|
Printing images ................................................................................... |
147 |
|
Transferring and storing camera images to a computer without using |
|
|
OLYMPUS Master application ............................................................ |
149 |
7

Contents
6 Appendix.................................................... |
151 |
Precautions ......................................................................................... |
152 |
Handling the camera................................................................. |
152 |
Battery handling precautions .................................................... |
154 |
Card handling precautions ........................................................ |
155 |
LCD monitor.............................................................................. |
156 |
Error messages................................................................................... |
157 |
If a problem arises............................................................................... |
161 |
Lamps, indicator, and mark................................................................. |
165 |
Camera maintenance.......................................................................... |
166 |
AC adapter (sold separately) .............................................................. |
167 |
Names of parts.................................................................................... |
168 |
Monitor Display List............................................................................. |
170 |
Menu List............................................................................................. |
172 |
List of functions by shooting mode...................................................... |
176 |
Camera specifications......................................................................... |
178 |
Specifications of accessories .............................................................. |
180 |
Index ................................................................................................... |
181 |
8
1 Taking Pictures
This chapter describes how to take successive pictures, movies and how to use the flash, zoom, etc.
To change the shooting settings, refer to “3: Setting Up.”
1 TakingPictures
9

 Focusing on a subject that is not in center of frame (Focus lock)
When the subject you want to focus on is not exactly in the center of the monitor and you cannot position the AF target mark on it, you can focus on another point at roughly the same distance (focus lock) and take the picture as explained below. This is called “focus lock.”
1 TakingPictures
In shooting mode, position the AF target mark on the subject you want to focus on.
When shooting a hard-to-focus subject, point the camera at an object about the same distance away as the subject.
P |
|
o |
20a |
HQ 2272*1704 |
AF target mark
Press the shutter button halfway.
When the green lamp lights steadily, the focus, exposure and white balance are locked.
When the green lamp blinks:
cYou are too close to the subject. Take the picture at least 50 cm/1.6 ft. away from the subject. When the distance from the camera to the subject is less than 50 cm/1.6 ft, select the macro mode. g“Taking close-up pictures &” (P. 33)
dFocus is not locked so release your finger from the shutter button, reposition your subject and press the shutter button halfway again.
Recompose your shot while keeping the shutter button pressed halfway.
P
(
o
HQ 2272*1704 20a
10
Focusing on a subject that is not in center of frame (Focus lock)
Press the shutter button completely down to take the picture.
Subjects that are difficult to focus on
The purpose of the camera’s auto focus feature is to bring the subject into focus automatically, but under certain conditions, the auto focus may not function effectively. If this happens, focus on an object with high contrast at the same distance as the intended subject (focus lock), recompose your shot and then take the picture.
For details of the focus lock procedure, refer to gP. 10.
1 TakingPictures
|
|
|
|
|
|
Subject |
|
Subject with an |
|
Subject |
|||||||||||||
|
|
with low contrast |
|
extremely bright area |
|
without vertical lines |
|||||||||||||||||
|
|
|
|
|
|
|
|
|
|
|
|
|
|
|
|
|
|
|
|
|
in the center of the frame |
|
(See “Tips” below) |
|
|
|
|
|
|
|
|
|
|
|
|
|
|
|
|
|
|
|
|
|
|
|
|
|
|
|
|
|
|
|
|
|
|
|
|
|
|
|
|
|
|
|
|
|
|
|
|
Subjects at different |
Fast-moving subject |
Subject is not in center |
distances |
|
of monitor |
If the subject has no vertical lines, hold the camera vertically and focus on the subject using the focus lock function by pressing the shutter button halfway, then return the camera to the horizontal position while keeping the shutter button pressed halfway and take the picture.
11
 Changing shooting scene modes l
There are 10 shooting scene modes to choose from on this camera. To create the effects you want, simply select the mode best suited to your purpose or shooting condition.
1 TakingPictures
Until you become familiar with the camera, it is  recommended that [PROGRAM AUTO] be used to take pictures.
Press a(l) in shooting mode.
The scene selection palette for selecting the shooting scene mode is displayed at left of the monitor.
PROGRAM AUTO |
|
|
For normal |
|
shooting |
SELECT |
GO |
Press aor cto select a shooting scene mode, and press the OK/MENU button.
The selected shooting scene mode is set.
|
PORTRAIT |
SELECT |
GO |
12

Changing shooting scene modes l
Shooting scene modes
PROGRAM AUTO P
All you need to do is press the shutter button. The camera automatically selects the optimal settings.
PORTRAIT I
Suitable for taking a full-frame portrait shot of a person. Ideal for capturing accurate skin tones.
INDOOR H
Suitable for taking pictures of the subject indoors together with background scene.
Picture quality mode can only be set to SQ2 “1280 × 960”, “1024 × 768” and “640 × 480”.
BEACH & SNOW R
Suitable for taking pictures at a beach or in snow. Lets you take beautiful pictures of scenery with white sand or snow.
1 TakingPictures
13
1 TakingPictures
Changing shooting scene modes l
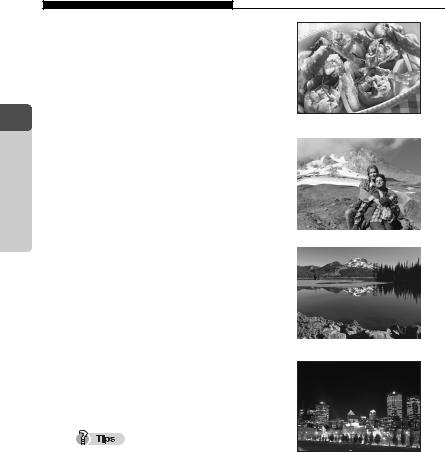
CUISINE G
Lets you take beautiful pictures of food. The saturation, sharpness and contrast settings are increased to take sharp, vivid pictures of the subject.
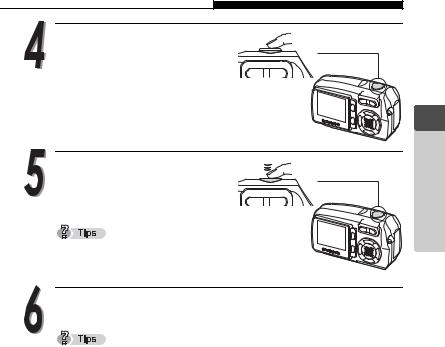
LANDSCAPE + PORTRAIT K
Suitable for taking pictures of both your subject and the landscape.
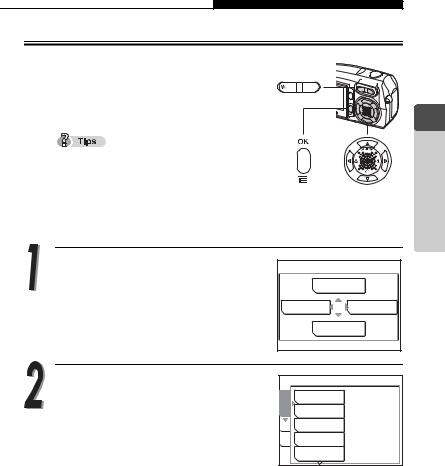
LANDSCAPE L
Lets you take clear and sharp pictures of distant scenery. Creates a very broad depth of field to keep the entire view in focus.
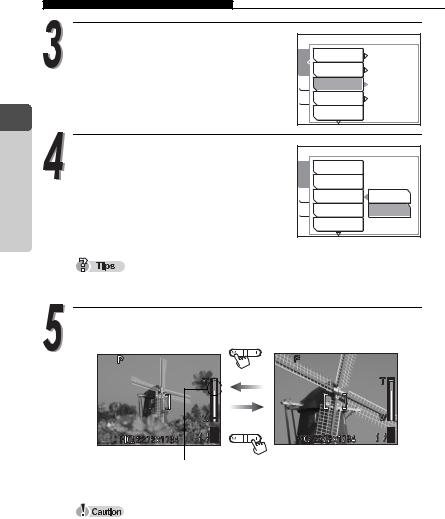
NIGHT SCENE m
Suitable for taking pictures of night views such as illuminated buildings.
Slower shutter speeds are used when m
(NIGHT SCENE) mode is set. The use of a tripod is recommended to prevent your pictures from being blurred by camera movement when the shutter speed is slow.
14

Changing shooting scene modes l
SELF PORTRAIT o
Enables you to take a picture of yourself while holding the camera.
The zoom function is locked at the W position
and cannot be changed while in self portrait mode. Spot metering is not available in this mode.
MOVIE N
Enables you to record movies. g“Recording movies N” (P. 16)
1 TakingPictures
15

|
|
|
|
Recording movies |
N |
You can record movies as well as still pictures with this camera.
The sound is automatically recorded when recording a movie.
1
Pictures Taking
Press a(l) in shooting mode.
The scene selection palette for selecting the shooting scene mode is displayed at left of the monitor.
PROGRAM AUTO |
|
|
For normal |
|
shooting |
SELECT |
GO |
Press aor cto select [MOVIE] (n), and press the OK/MENU button.
The Movie mode is set.
|
MOVIE |
SELECT |
GO |
Position the AF target mark on the subject while looking at the picture on the monitor.
During movie recording, the remaining recording time is displayed on the monitor.
AF target mark
|
N |
|
$ |
|
|
R |
HQ |
00:36 |
Remaining recording |
||
time |
|
|
16
Recording movies N
Press the shutter button halfway and hold.
The focus and white balance are locked and the green lamp lights steadily.
Press the shutter button the rest of the way and release it to start recording.
While a movie is taken, Nindicator lights red.
Press the shutter button again to stop recording.
When the remaining recording time has been used up, recording stops automatically.
To view the movie you have just taken, see g“Playing back movies q” (P. 56).
You cannot use the optical zoom during movie recording. If you intend to use the zoom during movie recording, set [DIGITAL ZOOM] to [ON]. g“Using zoom systems” (P. 18)
1 TakingPictures
17

1 TakingPictures
 Using zoom systems
This camera has two zoom systems, one is a normal optical zoom system and the other is a digital zoom system.
Using the zoom systems, you can change the scope and composition of the picture you are taking.
Optical zoom |
up to 3× |
Optical zoom + digital zoom |
up to 12× |
Using the optical zoom
Press the zoom button in shooting mode.
Press and hold the T side of the zoom button to zoom in on a distant object. (Telephoto)
Press and hold the W side of the zoom button to zoom out and obtain a broader view. (Wide-angle)
o |
o |
Wide-angle (W) |
Telephoto (T) |
The zoom bar goes up or down.
Shooting distance and shooting range
Zoom position |
Shooting distance |
Shooting range (W × H) |
|
(minimum shooting distance) |
|||
|
|
||
Macro mode (W) |
20 cm (0.7 ft.) to ) |
207 × 154 mm (20cm (0.7ft.)) |
|
Macro mode (T) |
20 cm (0.7 ft.) to ) |
70 × 53 mm (20cm (0.7ft.)) |
|
Normal shooting (W) |
50 cm (1.6 ft.) to ) |
502 × 373 mm (50cm (1.6ft.)) |
|
Normal shooting (T) |
50 cm (1.6 ft.) to ) |
170 × 127 mm (50cm (1.6ft.)) |
18
Using zoom systems
Enabling digital zoom
The optical zoom is operated simply by pressing the zoom button, but to use the digital zoom, [DIGITAL ZOOM] must be set to [ON] on the monitor.
The optical zoom magnifies the subject by extending the lens. The digital zoom, on the other hand, enlarges the picture by digitizing
the image captured by the camera. The area in the center of the image is cropped and magnified on the monitor. Pictures taken with the digital zoom may appear grainy as a result.
Press the OK/MENU button in shooting mode.
The top menu is displayed.
Press dto go to [MODE MENU].
|
F |
K |
MODE MENU |
|
WB |
Press aor cto select the [CAMERA] tab.
Press dto go to the [CAMERA] menu.
SET CARD CAMERA
ESP/n  ESP DRIVE
  o
o
DIGITAL ZOOM  OFF
OFF
R  OFF
OFF
PANORAMA
1 TakingPictures
19
Using zoom systems
Press aor cto select [DIGITAL ZOOM].
Press dto go to the digital zoom settings.
1
Taking |
Press aor cto select [ON] and |
|
|
|
press the OK/MENU button. |
Pictures |
The digital zoom is set. |
the menu. |
|
|
Press the OK/MENU button again to exit |
CAMERA |
DRIVE |
o |
|
ESP/n |
ESP |
CARD |
DIGITAL ZOOM |
OFF |
SET |
R |
OFF |
|
PANORAMA |
|
CAMERA |
ESP/n |
|
DRIVE |
|
|
CARD |
DIGITAL ZOOM |
OFF |
SET |
R |
ON |
|
PANORAMA |
|
The digital zoom cannot be used when [OFF] is selected.
Press the zoom button to operate the digital zoom.
o |
o |
White area: Range of optical zoom magnification
Red area : Range of digital zoom magnification
Pictures taken with the digital zoom may appear grainy.
Camera movement is likely to occur at higher magnifications. Stabilize the camera with a tripod, etc. to avoid camera movement.
The zoom cannot be used in the self portrait mode.
20
|
|
|
|
Using flash |
# |
The camera is initially set to Auto-flash, but you can select from the following four flash modes according to the shooting conditions.
Auto-flash (Factory default setting)
The flash fires automatically in low light or backlight conditions.
!Red-eye reduction flash
The light from the flash may make the subject’s eyes appear red in pictures taken in dark places. The red-eye reduction flash mode [!] reduces this phenomenon by emitting pre-flashes before firing the regular flash. This helps accustom the subject’s eyes to the bright light and minimizes the red-eye phenomenon.
After the pre-flashes, it takes about 1 second until the picture is taken. Hold the camera firmly to avoid camera movement.
Effectiveness may be limited if the subject is not looking directly at the preflashes, or if the subject is too far from the camera. Individual physical characteristics may also limit effectiveness.
#Fill-in flash
The flash fires regardless of the available light. This mode is useful for eliminating shadows on the subject’s face (such as shadows from tree leaves), in a backlight situation, or for correcting the color shift produced by artificial lighting (especially fluorescent light).
$Flash off
The flash does not fire even in low-light conditions. Use this mode in places such as art museums where flash photography is prohibited.
Since a slow shutter speed is automatically selected in low light situations when in the flash off mode, the use of a tripod is recommended to prevent camera movement.
1 TakingPictures
21
1 TakingPictures
Using flash #
Press d(#) repeatedly in shooting mode to change the flash setting.
The flash settings change in the order of the arrow. After [$], the setting returns to [AUTO].
AUTO |
P |
! |
AUTO |
# |
|
$ |
HQ 2272*1704 11a |
|
The flash charging lamp (#) blinks while the flash is charging.
Example: When [#] is set, the display shows # indicator.
The flash setting mode display automatically turns off.
Flash working range
P
Flash mode |
|
# |
|
||
indicator |
|
o |
|
|
HQ 2272*1704 11a
The appropriate shooting distance when using the flash is shown below.
Shooting distance (W) 0.5 to 3.6 m (1.64 to 11.8 ft.)
Shooting distance (T) 0.5 to 2.0 m (1.64 to 6.6 ft.)
22

|
|
|
|
Changing resolution and quality |
K |
Picture quality modes for still pictures
This function lets you select the resolution and quality when recording pictures on the card. It is best to choose the resolution and quality according to the purpose. The camera is preset to HQ mode.
Record |
Picture |
Resolution |
|
|
Usage examples |
|
mode |
quality |
|
|
|||
|
|
|
|
|
||
SHQ |
Detailed |
2272 × 1704 |
|
Large |
For making large prints |
|
(Low compression) |
|
|
|
or editing on a computer. |
||
|
|
2272 × 1704 |
|
|
|
For printing in postcard |
HQ |
|
(Hereafter standard |
|
|
|
|
|
|
|
|
size. |
||
|
|
compression) |
|
|
|
|
|
|
|
|
|
|
|
SQ1 |
Normal |
2048 × 1536 |
|
|
|
For printing 3" × 5" prints. |
|
1600 × 1200 |
|
|
|
For small prints, posting |
|
|
|
|
|
|
||
|
|
1280 × 960 |
|
|
|
|
SQ2 |
|
|
|
|
on the Internet or attach- |
|
|
1024 × 768 |
|
|
|
||
|
|
|
Small |
ing to e-mail. |
||
|
|
640 × 480 |
|
|||
|
|
|
|
|||
Card capacity and number of storable pictures (without sound recording)
Record |
|
|
|
|
SQ2 |
|
||
mode |
SHQ |
HQ |
SQ1 |
1600 × |
1280 × |
1024 × |
640 × |
|
Card |
||||||||
|
|
|
1200 |
960 |
768 |
480 |
||
capacity |
|
|
|
|
|
|
|
|
16MB |
5 |
16 |
20 |
24 |
38 |
58 |
90 |
|
32MB |
11 |
32 |
40 |
48 |
76 |
117 |
180 |
|
64MB |
22 |
65 |
81 |
97 |
153 |
234 |
362 |
|
128MB |
45 |
130 |
163 |
194 |
307 |
469 |
726 |
|
256MB |
90 |
262 |
326 |
389 |
614 |
940 |
1453 |
|
512MB |
180 |
523 |
652 |
779 |
1229 |
1879 |
2904 |
|
1 TakingPictures
The number of storable pictures listed in the table is approximate.
The number of remaining pictures may change according to the subject or print reservation.
The number of remaining pictures sometimes does not change even when a picture is taken or a stored picture is erased.
Recording sound with still pictures reduces the number of pictures you can take.
23
Changing resolution and quality K
1 TakingPictures
Resolution and Compression rate
Compression rate and picture quality
The quality of the picture depends on the compression rate. Images taken in a low compression record mode are clearer than pictures taken in standard compression record mode. However, lower compression makes the file size larger, reducing the number of pictures that can be stored on the card.
Resolution
This refers to the number of pixels (vertical × horizontal) used when saving a picture. If the picture will be printed, higher resolution (larger number of pixels) is recommended so that the picture will be clearer. However, higher resolution pictures make the file size (amount of data) larger, so the number of pictures that can be saved will be fewer.
Resolution and picture size on a computer screen
When a picture is transferred to a computer, the size of the picture on the computer screen varies depending on the computer’s monitor setting. For instance, a picture taken in 1024 × 768 resolution is the same size as the screen if you set the picture to 1× when the monitor setting is 1024 × 768. However, if the monitor setting is greater than 1024 × 768 (such as
1280 × 1024), the picture only takes up part of the screen.
Press the OK/MENU button in shooting mode.
The top menu is displayed.
Press bto select [K].
|
F |
K |
MODE MENU |
|
WB |
24
Changing resolution and quality K
Press aor cto select [SHQ], [HQ], [SQ1] or [SQ2].
If you selected [SHQ], [HQ] or [SQ1], go to step 4.
If you selected [SQ2], go to step 3.
K
SHQ 2272×1704
HQ 2272×1704
SQ1 2048×1536
SQ2 640×480
SELECT
 GO
GO

Press dto display the [SQ2] setup screen.
Press aor cto choose a resolution and press the OK/MENU button.
SQ2
1600×1200
1280×960
1024×768
640×480
CANCEL
 SELECT
 GO
GO

Press the OK/MENU button.
The selected record mode and the number of shootable still pictures are displayed.
1 TakingPictures
To save the selected picture quality mode for the next time you use the camera, set [ALL RESET] to [OFF]. g“Saving settings” (P. 80)
25
Changing resolution and quality K
1 TakingPictures
Picture quality modes for movie
You can select between two picture quality modes. The recording time varies depending on the picture quality mode.
|
|
|
|
|
|
|
|
|
|
|
|
|
|
|
|
|
|
|
|
|
Record mode |
Resolution |
Recording time (16MB) |
||||
(Frames per second) |
||||||
|
|
|
|
|
||
HQ |
320 × 240 |
|
|
Approx. 41 sec. |
||
(15 frames/sec.) |
|
|
||||
|
|
|
|
|
||
SQ |
160 × 120 |
|
Approx. 150 sec. |
|||
(15 frames/sec.) |
|
|||||
|
|
|
|
|
||
Total recording time per card |
|
|
|
|
||
|
|
|
|
|
|
|
Record mode |
HQ |
|
|
|
SQ |
|
Card capacity |
|
|
|
|||
|
|
|
|
|
||
16MB |
Approx. 41 sec. |
|
Approx. 150 sec. |
|||
32MB |
Approx. 83 sec. |
|
Approx. 300 sec. |
|||
64MB |
Approx. 170 sec. |
|
Approx. 600 sec. |
|||
128MB |
Approx. 330 sec. |
|
Approx. 1200 sec. |
|||
256MB |
Approx. 670 sec. |
|
Approx. 2400 sec. |
|||
512MB |
Approx. 1300 sec. |
|
Approx. 4800 sec. |
|||
The recording time listed in the table is approximate.
26
Changing resolution and quality K
Set the shooting mode to [MOVIE] (n) and press the OK/MENU button.
g“Recording movies N” (P. 16)
The top menu is displayed.
Press bto select [K].
Press aor cto select [HQ] or [SQ].
Press the OK/MENU button.
|
F |
K |
MODE MENU |
|
WB |
|
1 |
|
K |
Taking |
HQ |
320×240 |
Pictures |
|
||
SQ |
160×120 |
|
SELECT
 GO
GO

The selected record mode and time remaining are displayed.
27
1 TakingPictures
 Selecting white balance according to surrounding lighting 0
When daylight, the sun or tungsten lighting is reflected on white substance, the shade of white produced will differ for each. People’s eyes recognize white objects as being white irrespective of the surrounding lighting, but with a digital camera the color needs to be adjusted to suit the situational lighting so that white objects appear white in the picture. This adjustment function is called “white balance.”
AUTO |
The camera automatically adjusts the white balance according to |
||
the situational lighting so that colors look natural. |
|||
|
|||
|
Choose from one of the following white balance settings according |
||
|
to the situational lighting. |
||
|
5 |
Suitable for taking pictures under a clear sky. |
|
PRESET |
3 |
Suitable for taking pictures under a cloudy sky. |
|
|
1 |
Suitable for taking pictures under tungsten lighting |
|
|
(incandescent). |
||
|
> |
Suitable for taking pictures under fluorescent lighting. |
|
Press the OK/MENU button in shooting mode.
The top menu is displayed.
Press cto select [0].
|
F |
K |
MODE MENU |
|
WB |
28
Selecting white balance according to surrounding lighting 0
Press aor cto select [AUTO], [5], [3], [1] or [>], then press the OK/MENU button.
WB
AUTO
SELECT
 GO
GO

The selected white balance mode is set.
When the white balance mode is selected, the white balance indicators [5, 3, 1, >] are displayed at this point on the monitor.
No indication is displayed when [AUTO] white balance mode is set.
WB
>
SELECT |
GO |
Indicator
P |
-1.0 |
|
5 |
o |
11a |
HQ 2272*1704 |
Set the white balance to [5] or [3] to capture a sunrise or sunset with beautiful reddish tones.
1 TakingPictures
The white balance feature may not be effective under some special light sources, such situations where multiple lights are used.
If you set a white balance mode other than [AUTO], play back the picture and check the colors on the monitor.
When the flash is fired with a white balance setting other than [AUTO], colors may appear different in the resulting picture from those in the picture you see on the monitor.
29
|
|
|
|
Setting Exposure Compensation |
F |
If your subject is extremely bright or dark, or if the contrast between the subject and the background is high, you can adjust the brightness using the exposure compensation feature. You can adjust the exposure between +2.0 and –2.0 in 1/3 EV (Exposure Value) steps.
1
Pictures Taking
Press the OK/MENU button in shooting mode.
The top menu is displayed.
Press ato select [ F].
|
F |
K |
MODE MENU |
|
WB |
Press aor cto select the exposure compensation value.
a: Adjusts towards [+] to give a brighter picture.
c: Adjusts towards [–] to give a darker picture.
F
+
0.0
SELECT
 GO
GO

Press the OK/MENU button.
The selected exposure compensation value is set.
Often bright subjects (such as snow) will turn out darker on the picture than their natural colors. Adjusting towards [+] makes these subjects closer to their real shades. For the same reason, adjust towards [–] when shooting dark subjects. We recommend that you return the exposure compensation value to 0 after taking a picture with an adjusted exposure compensation.
If the flash is used, the picture brightness (exposure) may differ from the intended brightness (exposure).
30
Loading...