


 Loading...
HP Photosmart D7400 series
Windows Help

Contents
1 HP Photosmart D7400 series Help.......................................................................................... |
7 |
|
2 |
HP Photosmart overview |
|
|
The HP Photosmart at a glance................................................................................................. |
9 |
|
Control panel features.............................................................................................................. |
10 |
|
Display icons............................................................................................................................. |
11 |
|
Display sleep state................................................................................................................... |
11 |
|
Menu overview.......................................................................................................................... |
12 |
|
Photosmart Express Menu................................................................................................. |
12 |
|
Setup Menu........................................................................................................................ |
12 |
|
Help Menu.......................................................................................................................... |
13 |
|
Enter text using the visual keyboard......................................................................................... |
13 |
|
Use the HP Photosmart Software............................................................................................. |
13 |
3 |
Find more information............................................................................................................ |
15 |
4 Finish setting up the HP Photosmart |
|
|
|
Set your preferences................................................................................................................ |
17 |
|
Set your language and country/region................................................................................ |
17 |
|
Adjust the volume............................................................................................................... |
18 |
|
Set the default paper tray for PictBridge/DPOF/uPnP printing........................................... |
18 |
|
Enable faster browsing of photos....................................................................................... |
18 |
|
Set the paper tray for printing from a Bluetooth device...................................................... |
19 |
|
Restore the factory defaults................................................................................................ |
19 |
|
Play a slideshow on the display.......................................................................................... |
19 |
Contents
1

Contents
|
Computer connection information............................................................................................. |
20 |
|
Supported connection types............................................................................................... |
20 |
|
Connect using Ethernet...................................................................................................... |
21 |
|
Connect using integrated wireless WLAN 802.11.............................................................. |
21 |
|
Connect using the HP bt450, Printer and PC Adapter with Bluetooth® Wireless |
|
|
Technology......................................................................................................................... |
21 |
|
Find the device name and address.............................................................................. |
21 |
|
Set Bluetooth security for the HP Photosmart.............................................................. |
22 |
|
Use a Bluetooth® connection to print from your computer............................................ |
24 |
|
Use printer sharing............................................................................................................. |
26 |
|
Connect to a network................................................................................................................ |
26 |
|
Wired network setup........................................................................................................... |
27 |
|
What you need for a wired network.............................................................................. |
28 |
|
Connect the HP Photosmart to the network................................................................. |
28 |
|
Integrated wireless WLAN 802.11 network setup............................................................... |
29 |
|
What you need for an integrated wireless WLAN 802.11 network............................... |
30 |
|
Connect to an integrated wireless WLAN 802.11 network........................................... |
30 |
|
Wireless ad hoc network setup........................................................................................... |
33 |
|
What you need for an ad hoc network.......................................................................... |
33 |
|
Create a network profile for a Windows XP computer.................................................. |
33 |
|
Create a network profile for other operating systems................................................... |
35 |
|
Connect to a wireless ad hoc network.......................................................................... |
35 |
|
Install the software for a network connection..................................................................... |
36 |
|
Connect to additional computers on a network.................................................................. |
37 |
|
Change the HP Photosmart from a USB connection to a network connection................... |
38 |
|
Manage your network settings............................................................................................ |
38 |
|
Change basic network settings from the control panel................................................. |
39 |
|
Change advanced network settings from the control panel settings............................ |
41 |
|
Use the Embedded Web Server................................................................................... |
42 |
|
Network configuration page definitions......................................................................... |
44 |
|
Network glossary................................................................................................................ |
50 |
5 |
How do I?................................................................................................................................. |
53 |
6 |
Load paper |
|
|
Choose papers for printing....................................................................................................... |
55 |
|
Recommended papers for printing..................................................................................... |
55 |
|
Papers to avoid................................................................................................................... |
57 |
|
Load paper............................................................................................................................... |
57 |
|
Load full-size paper............................................................................................................ |
58 |
|
Load 10 x 15 cm (4 x 6 inch) photo paper.......................................................................... |
60 |
|
Load index cards................................................................................................................ |
61 |
|
Load envelopes.................................................................................................................. |
62 |
|
Load other types of paper................................................................................................... |
63 |
|
Avoid paper jams...................................................................................................................... |
64 |
7 Print from your computer |
|
|
|
Print from a software application.............................................................................................. |
65 |
|
Make the HP Photosmart the default printer............................................................................ |
66 |
2

Contents |
|
Change the print settings for the current job............................................................................ |
66 |
Set the paper size............................................................................................................... |
66 |
Set the paper type for printing............................................................................................ |
67 |
View the print resolution..................................................................................................... |
67 |
Change the print speed or quality....................................................................................... |
68 |
Change the page orientation.............................................................................................. |
68 |
Scale the document size.................................................................................................... |
69 |
Change the saturation, brightness, or color tone................................................................ |
69 |
Preview your print job......................................................................................................... |
69 |
Change the default print settings.............................................................................................. |
70 |
Printing shortcuts...................................................................................................................... |
70 |
Create printing shortcuts.................................................................................................... |
71 |
Delete printing shortcuts..................................................................................................... |
71 |
Perform special print jobs......................................................................................................... |
72 |
Print a borderless image..................................................................................................... |
72 |
Print a photo on photo paper.............................................................................................. |
73 |
Print custom CD/DVD labels .............................................................................................. |
74 |
Print using Maximum dpi................................................................................................... |
74 |
Print on both sides of the page........................................................................................... |
75 |
Print a multiple-page document as a booklet..................................................................... |
76 |
Print multiple pages on a single sheet................................................................................ |
78 |
Print a multiple-page document in reverse order................................................................ |
78 |
Reverse an image for iron-on transfers.............................................................................. |
79 |
Print on transparencies....................................................................................................... |
79 |
Print a group of addresses on labels or envelopes............................................................ |
80 |
Print a poster...................................................................................................................... |
81 |
Print a Web page................................................................................................................ |
81 |
Stop a print job......................................................................................................................... |
82 |
8 Use the photo features |
|
View and select photos............................................................................................................. |
86 |
Print your photos...................................................................................................................... |
87 |
Create special projects from your photos................................................................................. |
89 |
Share photos using HP Photosmart Software.......................................................................... |
90 |
Save photos to your computer.................................................................................................. |
91 |
Edit photos using the control panel.......................................................................................... |
93 |
Zoom and pan to crop a photo........................................................................................... |
93 |
Rotate a photo.................................................................................................................... |
94 |
Adjust the brightness of your photos.................................................................................. |
95 |
Print a frame around your photo......................................................................................... |
95 |
Apply special color effects to your photos.......................................................................... |
96 |
Remove red-eye................................................................................................................. |
97 |
Automatically enhance your photos.................................................................................... |
98 |
9 Print reports and forms |
|
Print a self-test report............................................................................................................... |
99 |
Print forms.............................................................................................................................. |
100 |
10 Maintain the HP Photosmart |
|
Check the estimated ink levels............................................................................................... |
101 |
Contents
3

Contents
Work with ink cartridges.......................................................................................................... |
102 |
Replace the ink cartridges................................................................................................ |
102 |
Align the printer................................................................................................................ |
105 |
Clean the print head......................................................................................................... |
106 |
Clean the ink cartridge contacts....................................................................................... |
107 |
Remove ink from your skin and clothing........................................................................... |
108 |
Clean the HP Photosmart....................................................................................................... |
108 |
Self-maintenance sounds....................................................................................................... |
109 |
Reduce energy consumption when the HP Photosmart is off................................................ |
109 |
Turn off the HP Photosmart.................................................................................................... |
109 |
11 Shop for ink supplies........................................................................................................... |
111 |
12 Troubleshooting |
|
Troubleshooting tips............................................................................................................... |
113 |
Communication problems over a USB connection........................................................... |
113 |
Information on ink cartridges and the print head.............................................................. |
114 |
Information on paper........................................................................................................ |
115 |
Clear paper jams.............................................................................................................. |
115 |
View the Readme file........................................................................................................ |
117 |
Hardware setup troubleshooting............................................................................................. |
117 |
Software installation troubleshooting...................................................................................... |
121 |
Uninstall and reinstall the software................................................................................... |
123 |
Network troubleshooting......................................................................................................... |
125 |
Wired network setup troubleshooting............................................................................... |
125 |
Wireless setup troubleshooting........................................................................................ |
128 |
Print quality troubleshooting................................................................................................... |
131 |
Print troubleshooting............................................................................................................... |
138 |
Memory card and front USB port troubleshooting.................................................................. |
145 |
Errors...................................................................................................................................... |
150 |
Device messages............................................................................................................. |
150 |
File messages................................................................................................................... |
152 |
Supported file types for the HP Photosmart............................................................... |
153 |
General user messages................................................................................................... |
154 |
Paper messages............................................................................................................... |
156 |
Power and connection messages..................................................................................... |
158 |
Ink cartridge messages.................................................................................................... |
161 |
13 HP warranty and support |
|
Warranty................................................................................................................................. |
169 |
Ink cartridge warranty information.......................................................................................... |
169 |
Support process..................................................................................................................... |
170 |
Before you call HP support..................................................................................................... |
170 |
HP support by phone.............................................................................................................. |
170 |
Phone support period....................................................................................................... |
171 |
Placing a call.................................................................................................................... |
171 |
After the phone support period......................................................................................... |
171 |
Additional warranty options.................................................................................................... |
171 |
HP Quick Exchange Service (Japan)..................................................................................... |
172 |
Call HP Korea customer support............................................................................................ |
172 |
4

Contents |
|
Prepare the HP Photosmart for shipment............................................................................... |
173 |
Secure the ink system...................................................................................................... |
173 |
Remove the control panel faceplate................................................................................. |
173 |
Pack the HP Photosmart........................................................................................................ |
174 |
14 Technical information |
|
Specifications......................................................................................................................... |
175 |
Environmental product stewardship program......................................................................... |
176 |
Paper use......................................................................................................................... |
177 |
Plastics............................................................................................................................. |
177 |
Material safety data sheets............................................................................................... |
177 |
Recycling program............................................................................................................ |
177 |
HP inkjet supplies recycling program............................................................................... |
177 |
Energy consumption......................................................................................................... |
177 |
Special handling of materials............................................................................................ |
177 |
Attention California users................................................................................................. |
177 |
NDL battery disposal........................................................................................................ |
177 |
Taiwan battery statement................................................................................................. |
178 |
Disposal of Waste Equipment by Users in Private Households in the European |
|
Union................................................................................................................................ |
178 |
Regulatory notices.................................................................................................................. |
179 |
Regulatory model identification number........................................................................... |
179 |
FCC statement.................................................................................................................. |
179 |
Notice to users in Korea................................................................................................... |
180 |
VCCI (Class B) compliance statement for users in Japan................................................ |
180 |
Notice to users in Japan about power cord...................................................................... |
180 |
Geräuschemission............................................................................................................ |
180 |
Regulatory wireless statements.............................................................................................. |
180 |
Wireless: Exposure to radio frequency radiation.............................................................. |
180 |
Wireless: Notice to users in Brazil.................................................................................... |
181 |
Wireless: Notice to users in Canada................................................................................ |
181 |
European Union Regulatory Notice.................................................................................. |
182 |
Wireless: Notice to users in Taiwan................................................................................. |
182 |
Declaration of conformity (European Economic Area)........................................................... |
183 |
HP Photosmart D7400 series declaration of conformity......................................................... |
183 |
Index............................................................................................................................................ |
185 |
Contents
5

Contents
6

1 HP Photosmart D7400 series Help
For information about the HP Photosmart, see:
•“HP Photosmart overview” on page 9
•“Find more information” on page 15
•“Finish setting up the HP Photosmart” on page 17
•“How do I?” on page 53
•“Load paper” on page 55
•“Print from your computer” on page 65
•“Use the photo features” on page 85
•“Print reports and forms” on page 99
•“Maintain the HP Photosmart” on page 101
•“Shop for ink supplies” on page 111
•“HP warranty and support” on page 169
•“Technical information” on page 175
HP Photosmart D7400 series Help
HP Photosmart D7400 series Help |
7 |

Chapter 1
Photosmart HP
series D7400
Help
8 HP Photosmart D7400 series Help
2 HP Photosmart overview
Use the HP Photosmart to quickly and easily accomplish tasks such as printing photos from a memory card. You can access many HP Photosmart functions directly from the control panel, without turning on your computer.
This section contains the following topics:
•The HP Photosmart at a glance
•Control panel features
•Display icons
•Display sleep state
•Menu overview
•Enter text using the visual keyboard
•Use the HP Photosmart Software
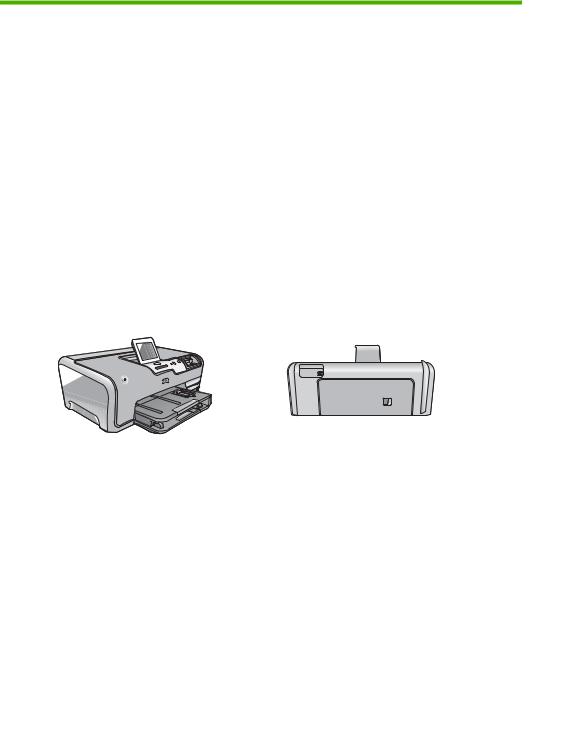
The HP Photosmart at a glance
Label Description
1On
2Ink cartridge door
3Color graphics display (also referred to as the display)
4 |
Control panel |
5 |
Memory card slots and Photo light |
|
|
6 |
Front USB port |
|
|
7 |
Photo tray |
|
|
8 |
Main input tray (also referred to as the input tray) |
9Paper tray extender (also referred to as the tray extender)
Overview
HP Photosmart overview |
9 |

Chapter 2
(continued)
Label Description
10Output tray
11Power connection*
12Ethernet port
13Rear USB port
14Rear door
*Use only with the power adapter supplied by HP.
Control panel features
The following diagram and related table provide a quick reference to the HP Photosmart control panel features.
Overview
Label |
Name and Description |
1Display: View menus, photos, and messages. The touch screen display can be adjusted to different positions. This enables the user to change the display angle to accommodate various device placements and lighting conditions.
2Print Photos: Depending on whether you access your photos from the View, Print, or Create menu, the Print Photos button will display the Print Preview screen or it will print any selected photo(s). If no photos are selected, a prompt appears asking if you want to print all the photos on your card or storage device.
3 |
Wireless light: Indicates that the 802.11 b and g wireless radio is turned on. |
4 |
Attention light: Indicates that a problem occurred. See the display for more information. |
|
|
5 |
Cancel: Stops the current operation, exits a menu, or exits settings. |
10 HP Photosmart overview
(continued)
Label |
Name and Description |
6Red Eye Removal: Turns the Red Eye Removal feature On or Off. By default, this feature is turned off. When the feature is turned on, the HP Photosmart automatically corrects red eye coloring in the photo currently shown on the display.
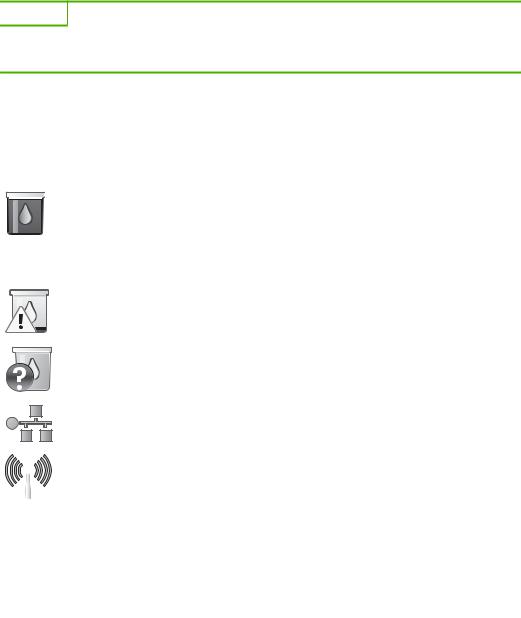
Display icons
The following icons can appear at the bottom of the display to provide important information about the HP Photosmart.
Icon |
|
Purpose |
|
||||||||||||
|
|
|
|
|
|
|
|
|
|
|
|
|
|
|
|
|
|
|
|
|
|
|
|
|
|
|
|
Shows the ink cartridge status. The color of the icon corresponds to the color of |
|||
|
|
|
|
|
|
|
|
|
|
|
|||||
|
|
|
|
|
|
|
|
|
|
|
|
the ink cartridge, and the fill level of the icon corresponds to the fill level of the |
|||
|
|
|
|
|
|
|
|
|
|
|
|
ink cartridge. |
|||
|
|
|
|
|
|
|
|
|
|
|
|||||
|
|
|
|
|
|
|
|
|
|
|
|
|
|
|
|
|
|
|
|
|
|
|
|
|
|
|
|
NOTE: The ink level icons will only appear if one of the ink cartridges is less |
|||
|
|
|
|
|
|
|
|
|
|
|
|
than 50% full. If the ink level for all ink cartridges is more than 50% full, the ink |
|||
|
|
|
|
|
|
|
|
|
|
|
|
cartridge icons do not appear on the display. |
|||
|
|
|
|
|
|
|
|
|
|
|
|
|
|
|
|
|
|
|
|
|
|
|
|
|
|
|
|
|
|
|
|
|
|
|
|
|
|
|
|
|
|
|
|
Shows that the ink cartridge is nearly empty, and will need to be replaced. |
|||
|
|
|
|
|
|
|
|
|
|
|
|
||||
|
|
|
|
|
|
|
|
|
|
|
|
|
|
||
|
|
|
|
|
|
|
|
|
|
|
|
|
|
||
|
|
|
|
|
|
|
|
|
|
|
|
|
|
|
|
|
|
|
|
|
|
|
|
|
|
|
|
Shows that an unknown ink cartridge is inserted. This icon might appear if an |
|||
|
|
|
|
|
|
|
|
|
|
|
|
||||
|
|
|
|
|
|
|
|
|
|
|
|
ink cartridge contains non-HP ink. |
|||
|
|
|
|
|
|
|
|
|
|
|
|
|
|
||
|
|
|
|
|
|
|
|
|
|
|
|
|
|
||
|
|
|
|
|
|
|
|
|
|
|
|
|
|
|
|
|
|
|
|
|
|
|
|
|
|
|
|
Indicates that there is a wired network connection. |
|
||
|
|
|
|
|
|
|
|
|
|
|
|
||||
|
|
|
|
|
|
|
|
|
|
|
|
|
|
|
|
|
|
|
|
|
|
|
|
|
|
|
|
|
|
||
|
|
|
|
|
|
|
|
|
|
|
|
|
|
|
|
|
|
|
|
|
|
|
|
|
|
|
|
Indicates the presence and signal strength of a wireless network connection. |
|
||
|
|
|
|
|
|
|
|
|
|
|
|
|
|
|
|
|
|
|
|
|
|
|
|
|
|
|
|
Indicates the presence of an Ad hoc wireless network connection. |
Overview |
||
|
|
|
|
|
|
|
|
|
|
|
|
|
|
|
|
|
|
|
|
|
|
|
|
|
|
|
|
Indicates that an HP bt450, Printer and PC Adapter with Bluetooth® Wireless |
|||
|
|
|
|
|
|
|
|
|
|
|
|
|
|||
|
|
|
|
|
|
|
|
|
|
|
|
Technology is connected to the front USB port. |
|||
|
|
|
|
|
|
|
|
|
|
|
|
|
|
|
|
Display sleep state
To prolong the life of the display, it dims after two minutes of inactivity. After 30 minutes of inactivity, the display goes into a sleep state and the screen shuts off completely. The display turns back on when you touch the display, press a control panel button, insert a memory card or connect a storage device, or access the HP Photosmart from a connected computer.
Display icons |
11 |

Chapter 2
Menu overview
The following topics provide a quick reference to top-level menus that appear on the HP Photosmart display.
•Photosmart Express Menu
•Setup Menu
•Help Menu
Photosmart Express Menu
The following options are available in the Photosmart Express menu when you insert a memory card or storage device.
Overview
View
|
|
|
|
|
|
|
|
|
|
|
|
|
|
|
|
|
|
|
|
|
|
|
|
|
|
|
|
|
|
|
|
|
|
|
|
|
|
|
|
Create |
|
Share |
|
|
Save |
||||
|
|
|
|
|
|
|
|
|
|
Setup Menu
The following options are available when you touch Setup from the Photosmart Express menu.
Printable School Papers
Help Menu
Tools
Preferences
Wireless
Bluetooth
 NOTE: The Bluetooth option only appears if an optional HP bt450, Printer and PC Adapter with Bluetooth® Wireless Technology is attached to the HP Photosmart.
12 HP Photosmart overview

Help Menu
The Help menu provides quick access to key help topics. It is available when you touch the ? icon in the idle state. You can also access this menu through the Setup menu. The following options are available. If you select one of the first four topics, the help appears on the display. If you select one of the last six topics, the help appears on your computer.
Insert Ink Cartridges
Load Paper
Load Paper in Photo Tray
Paper Jam
How Do I
Error Messages
General Troubleshooting
Networking Troubleshooting
Use Memory Cards
Get Support
Enter text using the visual keyboard
You can enter text or symbols by using the visual keyboard that automatically appears on the display when you need to enter text. For example, the visual keyboard automatically appears when you are setting up a wireless network or bluetooth device name.
To enter text using the visual keyboard
1. To select a letter, number, or symbol on the visual keyboard, touch the appropriate
selection. |
|
||
To enter lowercase letters, uppercase letters, numbers, and symbols |
|
||
• To enter lowercase letters, touch abc on the visual keyboard. |
|
||
• To enter uppercase letters, touch ABC on the visual keyboard. |
|
||
• To enter numbers, touch 123 on the visual keyboard. |
Overview |
||
• To enter symbols, touch .@! on the visual keyboard. |
|||
|
|||
2. After you touch the appropriate letter, number, or symbol, the selection appears in |
|
||
the white space above the visual keyboard. |
|
||
|
|
|
|
|
TIP: To erase a letter, number, or symbol, touch Del on the visual keyboard. |
|
|
3.When you are finished entering text, numbers, or symbols, touch Done on the visual keyboard.
Use the HP Photosmart Software
The HP Photosmart Software provides a fast and easy way to make prints of your photos. It also provides access to other basic HP imaging software features, such as saving and viewing your photos.
Enter text using the visual keyboard |
13 |

Chapter 2
For more information on using the HP Photosmart Software:
•Check the Contents panel on the left. Look for the HP Photosmart Software Help contents book at the top.
•If you do not see the HP Photosmart Software Help contents book at the top of the Contents panel, access the software help through the HP Solution Center.
Overview
14 HP Photosmart overview
3 Find more information
You can access a variety of resources, both printed and onscreen, that provide information about setting up and using the HP Photosmart.
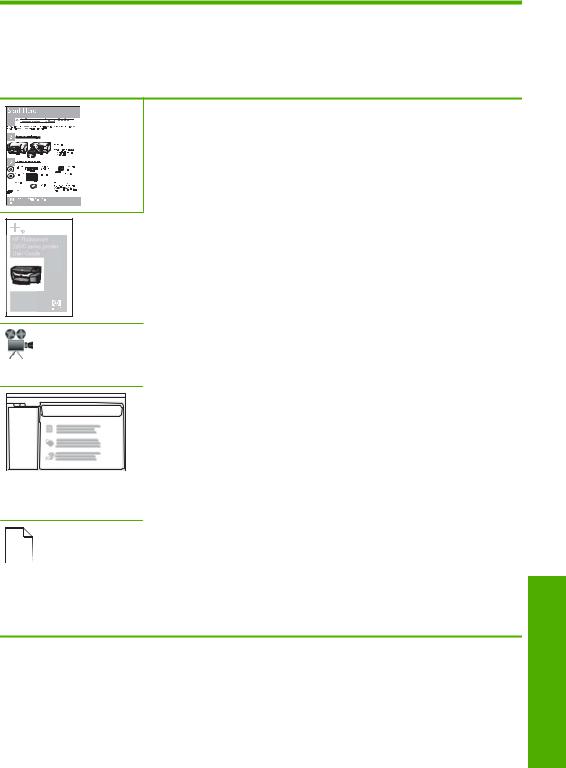
Setup Guide
The Setup Guide provides instructions for setting up the HP Photosmart and installing software. Make sure you follow the steps in the Setup Guide in order.
If you have problems during setup, check the Setup Guide for troubleshooting information, or see “Troubleshooting” on page 113 in this onscreen Help.
Basics Guide
The Basics Guide contains an overview of the HP Photosmart, including step- by-step instructions for basic tasks, troubleshooting tips, and technical information.
HP Photosmart Essential animations
The HP Photosmart Essential animations are an interactive way to get a brief overview of the software included with the HP Photosmart. You will learn how the software can help you create, share, organize, and print your photos.
Onscreen Help
The onscreen Help provides detailed instructions on using all features of the HP Photosmart.
• The How Do I? topic provides links so you can quickly find information on performing common tasks.
•The HP Photosmart overview topic provides general information about the main features of the HP Photosmart.
•The Troubleshooting topic provides information about resolving errors you might encounter with the HP Photosmart.
|
|
|
Readme |
|
|
|
The Readme file contains the most recent information which might not be found |
|
|
|
in other publications. |
|
|
|
|
|
|
|
Install the software to access the Readme file. |
|
|
||
www.hp.com/support |
If you have Internet access, you can get help and support from the HP Web |
||
|
|
|
site. This Web site offers technical support, drivers, supplies, and ordering |
|
|
|
information. |
Find more information
Find more information |
15 |

Chapter 3
more Find information
16 Find more information

4Finish setting up the HP Photosmart
After you have completed the steps in your Setup Guide, refer to this section to help you finish setting up the HP Photosmart. This section contains important setup-related information for your device, including information on setting preferences.
This section contains the following topics:
•Set your preferences
•Computer connection information
•Connect to a network
Finish setup
Set your preferences
You can change the settings on the HP Photosmart so that it behaves according to your preference. For example, you can set general device preferences, such as the language used to display messages. You can also restore the device settings to what they were when you purchased your device. This will erase any new defaults you have set.
This section contains the following topics:
•Set your language and country/region
•Adjust the volume
•Set the default paper tray for PictBridge/DPOF/uPnP printing
•Enable faster browsing of photos
•Set the paper tray for printing from a Bluetooth device
•Restore the factory defaults
•Play a slideshow on the display
Set your language and country/region
The language setting determines which language the HP Photosmart uses to show messages on the display. The country/region setting determines the default paper sizes and layouts for printing. You can change these settings at any time by using the following procedures.
To set the language
1.Touch Setup on the display.
2.Touch Preferences.
3.Touch Set Language.
4.Touch the language you want to select.
 NOTE: If the menu option you want is not visible on the screen, touch
  or
or
 to scroll through all the menu options.
5.When prompted, touch Yes to confirm your selection, or touch No to choose another language.
Finish setting up the HP Photosmart |
17 |

setup Finish
Chapter 4
To set the country/region
1.Touch Setup on the display.
2.Touch Preferences.
3.Touch Set Country/Region.
4.Touch the country/region you want to select.
 NOTE: If the menu option you want is not visible on the screen, touch
  or
or
 to scroll through all the menu options.
5.When prompted, touch Yes to confirm your selection, or touch No to choose another country/region.
Adjust the volume
The HP Photosmart provides three levels for adjusting the volume of sounds associated with device events and errors. The default setting is Medium.
To adjust the volume
1.Touch Setup on the display.
2.Touch Preferences.
3.Touch Sound Effects Volume, and then touch the volume you want to select.
Set the default paper tray for PictBridge/DPOF/uPnP printing
Set the default paper tray to use when you print photos from a Pictbridge device, DPOF file, or a UPnP device. The default setting is Photo Tray.
To set the default paper tray
1.Touch Setup on the display.
2.Touch Preferences.
3.Touch PictBridge/DPOF/uPnP Tray Select.
4.Touch Main Tray or Photo Tray.
Enable faster browsing of photos
You can set up the HP Photosmart to enable faster photo browsing by writing small thumbnails to the memory card. The thumbnails take up a relatively small amount of space and are used to speed up the browsing performance of photos on the card.
 NOTE: This feature is on by default.
To turn faster browsing on or off
1.Touch Setup on the display.
2.Touch Tools.
3.Touch  to scroll through the options, and then touch Enable Faster Browsing.
4.Touch On or Off to turn it on or off.
18 Finish setting up the HP Photosmart

Set the paper tray for printing from a Bluetooth device
Set the default paper tray to use when you print photos from a Bluetooth device.
To set the paper tray for printing from a Bluetooth device |
|
|
||||
1. |
Touch Setup. |
|
|
|||
2. |
Touch Bluetooth. |
|
|
|||
|
|
|
|
|
|
|
|
|
|
|
NOTE: If the menu option you want is not visible on the screen, touch |
or |
setup |
|
|
|
||||
|
|
|
||||
|
|
|
|
to scroll through all the menu options. |
|
|
|
|
|
|
|
|
|
|
|
|
|
Finish |
||
3. |
Touch Default Paper Tray. |
|
||||
4. |
Touch Main Tray or Photo Tray. |
|
||||
Restore the factory defaults
You can restore the current settings to what they were when you purchased the HP Photosmart.
You can perform this process from the control panel only.
To restore the factory defaults
1.Touch Setup on the display.
2.Touch Tools.
3. Touch  to scroll through the options, and then touch Restore Factory Defaults. The factory default settings are restored.
Play a slideshow on the display
You can set up the HP Photosmart to play a slideshow on the display, similar to a screensaver on a computer, when you are not using the device.
There are two types of slideshows that you can enable:
•Store Demo: appears after the HP Photosmart is inactive for one minute and shows a set of predefined graphics that describe features of the device. The slideshow plays until you press a button or use the device. If the HP Photosmart remains inactive for eight hours, the display turns off.
 NOTE: HP recommends leaving Store Demo off.
•Tips Slideshow: appears only after you print from the computer. The HP Photosmart shows a set of predefined slides with information about special features that you can do with the device. The slideshow plays through once and then the display returns to the main menu.
To turn the store demo on or off
1.Touch Setup on the display.
2.Touch Tools.
3. Touch  to scroll through the options, and then touch Store Demo. 4. Touch On or Off to turn it on or off.
Set your preferences |
19 |
setup Finish
Chapter 4
To turn tips slideshow on or off
1.Touch Setup on the display.
2.Touch Tools.
3.Touch  to scroll through the options, and then touch Tips Slideshow.
4.Touch On or Off to turn it on or off.
Computer connection information
The HP Photosmart comes equipped with a USB port so you can connect directly to a computer using a USB cable. You can also connect the HP Photosmart to either a wired or wireless network. If you insert an HP bt450, Printer and PC Adapter with Bluetooth® Wireless Technology into the front USB port, Bluetooth® devices such as PDAs and camera phones can print to the HP Photosmart.
 NOTE: In the remainder of this chapter, the HP bt450, Printer and PC Adapter with Bluetooth® Wireless Technology is referred to simply as an HP bt450.
This section contains the following topics:
•Supported connection types
•Connect using Ethernet
•Connect using integrated wireless WLAN 802.11
•Connect using the HP bt450, Printer and PC Adapter with Bluetooth® Wireless Technology
•Use printer sharing
Supported connection types
The following table contains a list of supported connection types.
Description |
Recommended number |
Supported software |
Setup instructions |
|
of connected |
features |
|
|
computers for best |
|
|
|
performance |
|
|
USB connection |
One computer connected |
All features are |
Follow the Setup Guide |
|
with a USB cable to the |
supported. |
for detailed instructions. |
|
rear USB 2.0 High Speed |
|
|
|
port on the |
|
|
|
HP Photosmart. |
|
|
|
|
|
|
Ethernet (wired) |
Up to five computers |
All features are |
Follow the instructions in |
connection |
connected to an |
supported, including |
“Wired network setup” |
|
HP Photosmart using a |
Webscan. |
on page 27. |
|
hub or router. |
|
|
|
|
|
|
Wireless WLAN 802.11 |
Up to five computers |
All features are |
Follow instructions in |
connection |
connected using a |
supported, including |
“Integrated wireless |
|
wireless router |
Webscan. |
WLAN 802.11 network |
|
(infrastructure mode). |
|
setup” on page 29. |
|
|
|
|
HP bt450, Printer and PC |
One Bluetooth device or |
Printing from a Bluetooth |
Follow the instructions in |
Adapter with Bluetooth® |
computer. |
device such as a PDA or |
“Connect using the |
Wireless Technology |
|
camera phone, or a |
HP bt450, Printer and PC |
|
|
|
Adapter with Bluetooth® |
20 Finish setting up the HP Photosmart

(continued) |
|
|
|
|
Description |
Recommended number |
Supported software |
Setup instructions |
|
|
of connected |
features |
|
|
|
computers for best |
|
|
|
|
performance |
|
|
|
|
|
Bluetooth-enabled |
Wireless Technology” |
|
|
|
computer. |
on page 21. |
|
|
|
|
|
|
Printer sharing |
Five. |
All features resident on |
Follow the instructions in |
|
|
The host computer must |
the host computer are |
“Use printer sharing” |
setup |
|
supported. Only printing |
on page 26. |
||
|
to print from the other |
|||
|
is supported from the |
|
||
|
be on at all times in order |
|
|
|
|
computers. |
other computers. |
|
Finish |
|
|
|
||
|
|
|
|
|
|
|
|
|
Connect using Ethernet
The HP Photosmart supports both 10 Mbps and 100 Mbps Ethernet network connections. For detailed instructions on connecting the HP Photosmart to an Ethernet (wired) network, see “Wired network setup” on page 27.
Connect using integrated wireless WLAN 802.11
The HP Photosmart uses an internal networking component that supports a wireless network. For detailed instructions on connecting the HP Photosmart to a wireless (802.11) network, see “Integrated wireless WLAN 802.11 network setup” on page 29.
Connect using the HP bt450, Printer and PC Adapter with Bluetooth® Wireless Technology
HP bt450, Printer and PC Adapter with Bluetooth® Wireless Technology allows you to print images from most Bluetooth devices, including computers. Simply insert the HP bt450 into the front USB port and print from a Bluetooth device such as a PDA or camera phone.
This section contains the following topics:
•Find the device name and address
•Set Bluetooth security for the HP Photosmart
•Use a Bluetooth® connection to print from your computer
Find the device name and address
Some Bluetooth devices exchange device addresses when they communicate with each other, so you might need to find out the device address of the HP Photosmart in order to establish a connection. Also, some Bluetooth devices display the name of the printer when connected. If you do not want the default name displayed as the name of the
HP Photosmart, you can change the device name.
To find out the device address of the HP Photosmart
1.Insert the HP bt450 into the front USB port.
2.Touch Setup on the display.
Computer connection information |
21 |

Chapter 4
setup Finish
3.Touch Bluetooth.
 NOTE: If the menu option you want is not visible on the screen, touch
  or
or
 to scroll through all the menu options.
4.Touch Device Address.
The Device Address is read only.
5.To enter the address into your device, follow the instructions that came with your Bluetooth device.
6.Touch OK to exit the Setup menu.
To change the device name of the HP Photosmart
1.Touch Setup on the display.
2.Touch Bluetooth.
 NOTE: If the menu option you want is not visible on the screen, touch
  or
or
 to scroll through all the menu options.
3.Touch Device Name.
 NOTE: The HP Photosmart ships with the predefined name of Photosmart D7400.
4.Touch Change.
5.Use the visual keyboard to enter a new name.
6.When you have finished entering a name for the HP Photosmart, touch OK.
The name you entered will appear on your Bluetooth device when you connect to the HP Photosmart to print.
7.Touch OK to exit the Setup menu.
Related topics
“Enter text using the visual keyboard” on page 13
Set Bluetooth security for the HP Photosmart
You can enable printer security settings through the Bluetooth menu on the
HP Photosmart. Touch Setup on the display, and then touch Bluetooth. From the Bluetooth menu, you can:
•Require passkey authentication prior to someone printing to the HP Photosmart from a Bluetooth device.
•Make the HP Photosmart visible or invisible to Bluetooth devices that are within range.
This section contains the following topics:
•Use a passkey to authenticate Bluetooth devices
•Set the HP Photosmart to be invisible to Bluetooth devices
•Turn the Bluetooth radio on and off
•Reset Bluetooth settings on the HP Photosmart
22 Finish setting up the HP Photosmart

Use a passkey to authenticate Bluetooth devices
You can set the security level of the HP Photosmart to either Low or High. The default security setting is Low. Low level security does not require authentication.
•Low: This is the default security setting. Low level security does not require a passkey, as it does not support authentication. Any Bluetooth device within range can print to it.
•High: High level security requires a passkey, as it supports authentication. The Bluetooth device must provide a passkey, before the HP Photosmart will allow the device to send a print job to it.
 NOTE: The HP Photosmart ships with a predefined passkey that is set to four zeroes "0000".
To set the HP Photosmart to require passkey authentication
1.Touch Setup on the display.
2.Touch Bluetooth.
 NOTE: If the menu option you want is not visible on the screen, touch
  or
or
 to scroll through all the menu options.
3.Touch Passkey.
4.Touch Change.
5.Use the visual keyboard to enter a new passkey.
 NOTE: The passkey must be 1 to 4 characters long, and can only consist of numbers.
6.When you have finished entering your passkey, touch OK. The Bluetooth menu appears.
7.Touch Security Level.
8.Touch High.
High level security requires authentication.
Passkey authentication is now set for the HP Photosmart.
Related topics
“Enter text using the visual keyboard” on page 13
Set the HP Photosmart to be invisible to Bluetooth devices
You can set the HP Photosmart to be either Visible to all Bluetooth devices (public) or Not visible to any (private).
•Visible to all: Any Bluetooth device within range can print to the HP Photosmart.
•Not visible: Only Bluetooth devices that have stored the device address of the HP Photosmart can print to it.
 NOTE: The HP Photosmart ships with a default accessibility level of Visible to all.
Finish setup
Computer connection information |
23 |

Chapter 4
setup Finish
To set the HP Photosmart to be Not visible
1.Touch Setup on the display.
2.Touch Bluetooth.
 NOTE: If the menu option you want is not visible on the screen, touch
  or
or
 to scroll through all the menu options.
3.Touch Visibility.
4.Touch Not visible.
The HP Photosmart is inaccessible to Bluetooth devices that have not stored its device address.
Turn the Bluetooth radio on and off
The Bluetooth radio is on by default, as indicated by the blue light on the front of the HP Photosmart. In order to stay connected to Bluetooth, the radio must stay on. However, if the HP Photosmart is connected to a wireless network or you have a USB connection, the radio is not used. In this case you might want to turn the radio off.
To turn the Bluetooth radio on and off
1.Touch Setup on the display.
2.Touch Bluetooth.
 NOTE: If the menu option you want is not visible on the screen, touch
  or
or
 to scroll through all the menu options.
3.Touch Bluetooth Radio.
4.Touch On or Off.
Reset Bluetooth settings on the HP Photosmart
You can reset all of the Bluetooth settings on the HP Photosmart to the factory defaults.
 NOTE: Only select Reset Bluetooth if you want all of the HP Photosmart Bluetooth settings returned to factory defaults.
To reset the Bluetooth settings
1.Touch Setup on the display.
2.Touch Bluetooth.
 NOTE: If the menu option you want is not visible on the screen, touch
  or
or
 to scroll through all the menu options.
3.Touch Reset Bluetooth.
Use a Bluetooth® connection to print from your computer
A Bluetooth connection provides a quick and easy way to print images from a Bluetoothenabled computer without using a cable. With a Bluetooth connection you can access many of the same printing features as with a USB connection. For example, you can check the printer status, as well as the estimated amount of ink remaining in your ink cartridges.
24 Finish setting up the HP Photosmart

Before you print, you must connect an HP bt450, Printer and PC Adapter with Bluetooth® Wireless Technology to the HP Photosmart.
You must have Windows XP or Windows Vista and either the Microsoft Bluetooth® Protocol Stack or the Widcomm Bluetooth® Protocol Stack installed in order to connect the HP Photosmart. It is possible to have both the Microsoft Stack and the Widcomm Stack on your computer, but you use only one of them to connect the HP Photosmart.
• |
Microsoft stack If you have Windows XP with Service Pack 2 or Windows Vista |
|
|
installed on your computer, then your computer has the Microsoft Bluetooth® Protocol |
setup |
|
Stack. The Microsoft stack allows you to install an external Bluetooth® adapter |
|
|
automatically. If your Bluetooth® adapter supports the Microsoft stack but it does not |
|
|
Check the documentation that came with the Bluetooth® adapter to see if it supports |
Finish |
|
install automatically, then you do not have the Microsoft stack on your computer. |
|
|
the Microsoft stack. |
|
• |
Widcomm stack: If you have an HP computer with Bluetooth® built in, or if you have |
|
|
installed an HP bt450, then your computer has the Widcomm stack. If you have an |
|
|
HP computer and plug in an HP bt450, it will install automatically using the Widcomm |
|
|
stack. |
|
To install and print using the Microsoft stack |
|
|
1. |
Make sure that you have installed the HP Photosmart software on the computer. |
|
 NOTE: The purpose of installing the software is to make sure the printer driver is available for the Bluetooth® connection. Therefore, if you have already installed the software, you do not need to reinstall it. If you want both a USB and a Bluetooth® connection to the HP Photosmart, install the USB connection first. For more information, see the Setup Guide. However, if you do not want a USB connection, select Directly to the computer on the Connection Type screen. Also, on the Connect Your Device Now screen, select the check box next to If you are unable to connect your device now... at the bottom of the screen.
2.Attach an HP bt450 to the front USB port of the HP Photosmart.
3.If you are using an external Bluetooth® adapter for your computer, make sure your computer is started and then attach the Bluetooth® adapter to a USB port on the computer. If you have Windows XP with Service Pack 2 or Windows Vista installed, the Bluetooth® drivers are installed automatically. If you are prompted to select a Bluetooth® profile, select HCRP.
If your computer has Bluetooth® built in, just make sure the computer is started.
4.On the Windows taskbar, click Start, and then click Printers and Faxes (or click
Control Panel, and then Printers).
5.Double-click the Add Printer icon (or click Add a printer).
6.Click Next, and then select A Bluetooth Printer.
7.Follow the onscreen instructions to finish the installation.
8.Print as you would to any printer.
Computer connection information |
25 |

Chapter 4
setup Finish
To install and print using the Widcomm stack
1.Make sure that you have installed the HP Photosmart software on the computer.
 NOTE: The purpose of installing the software is to make sure the printer driver is available for the Bluetooth® connection. Therefore, if you have already installed the software, you do not need to reinstall it. If you want both a USB and a Bluetooth® connection to the HP Photosmart, install the USB connection first. For more information, see the Setup Guide. However, if you do not want a USB connection, select Directly to the computer on the Connection Type screen. Also, on the Connect Your Device Now screen, select the check box next to If you are unable to connect your device now... at the bottom of the screen.
2.Attach an HP bt450 to the front USB port of the HP Photosmart.
3.Click the My Bluetooth Places icon on the desktop or in the taskbar.
4.Click View devices in range.
5.Once the available printers are discovered, double-click the name of HP Photosmart to finish the installation.
6.Print as you would to any printer.
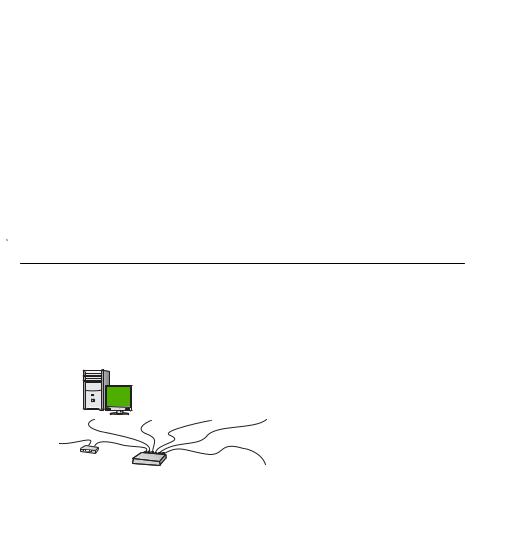
Use printer sharing
If your computer is on a network, and another computer on the network has an
HP Photosmart connected to it by a USB cable, you can print to that printer using printer sharing.
The computer directly connected to the HP Photosmart acts as the host for the printer and has full software functionality. The other computer, which is referred to as a client, has access only to the print features. You must perform other functions from the host computer or from the control panel on the HP Photosmart.
To enable printer sharing on a Windows computer
▲Refer to the user guide that came with your computer or see the Windows onscreen Help.
Connect to a network
This section describes how to connect the HP Photosmart to a network and how to view and manage network settings.
If you want to: |
See this section: |
|
|
Connect to a wired (Ethernet) network. |
“Wired network setup” on page 27 |
|
|
Connect to a wireless network with a wireless |
“Integrated wireless WLAN 802.11 network |
router (infrastructure). |
setup” on page 29 |
|
|
Connect directly to a wireless-capable |
“Wireless ad hoc network setup” on page 33 |
computer without a wireless router (ad hoc). |
|
|
|
Install the HP Photosmart software for use in a |
“Install the software for a network connection” |
networked environment. |
on page 36 |
26 Finish setting up the HP Photosmart
(continued)
|
If you want to: |
See this section: |
||
|
|
|
|
|
|
Add connections to more computers on the |
“Connect to additional computers on a |
||
|
network. |
network” on page 37 |
||
|
|
|
|
|
|
Change the HP Photosmart from a USB |
“Change the HP Photosmart from a USB |
||
|
connection to a network connection. |
connection to a network connection” |
||
|
|
|
|
on page 38 |
|
NOTE: Use the instructions in this section if |
|||
|
|
|||
|
you first installed the HP Photosmart with a USB |
|
||
|
connection, and you now want to change to |
|
||
|
either a wireless or Ethernet network |
|
||
|
connection. |
|
||
|
|
|
|
|
|
|
|
|
|
|
View or change the network settings. |
“Manage your network settings” on page 38 |
||
|
|
|
|
|
|
Find troubleshooting information. |
“Network troubleshooting” on page 125 |
||
|
|
|
|
|
|
|
|
|
|
 NOTE: You can connect the HP Photosmart to either a wireless or wired network, but not both at the same time.
Finish setup
Wired network setup
This section describes how to connect the HP Photosmart to a router, switch, or hub using an Ethernet cable and how to install the HP Photosmart software for a network connection. This is known as a wired or Ethernet network.
To set up the HP Photosmart on a wired |
See this section: |
network, you need to do the following: |
|
|
|
First, collect all of the required materials. |
“What you need for a wired network” |
|
on page 28 |
|
|
Next, connect to a wired network. |
“Connect the HP Photosmart to the network” |
|
on page 28 |
|
|
Finally, install the software. |
“Install the software for a network connection” |
|
on page 36 |
|
|
Connect to a network |
27 |

Chapter 4
What you need for a wired network
Before you connect the HP Photosmart to a network, make sure you have all of the required materials.
A functional Ethernet network that includes a router, switch, or hub with an Ethernet port.
CAT-5 Ethernet cable.
setup Finish
Although standard Ethernet cables look similar to standard telephone cables, they are not interchangeable. There is a different number of wires in each one, and each has a different connector. An Ethernet cable connector (also called an RJ-45 connector) is wider and thicker and always has 8 contacts on the end. A phone connector has between 2 and 6 contacts.
A desktop computer or laptop with an Ethernet connection.
 NOTE: The HP Photosmart supports both 10 Mbps and 100 Mbps Ethernet networks. If you are purchasing, or have purchased, a network interface card (NIC), make sure it can operate at either speed.
Connect the HP Photosmart to the network
To connect the HP Photosmart to the network, use the Ethernet port on the back of the device.
To connect the HP Photosmart to the network
1. Remove the yellow plug from the back of the HP Photosmart.
28 Finish setting up the HP Photosmart

2. Connect the Ethernet cable to the Ethernet port on the back of the HP Photosmart.
3. Connect the other end of the Ethernet cable to an available port on your Ethernet |
Finishsetup |
|
|
router or switch. |
|
4. Once you have connected the HP Photosmart to the network, install the software.
Related topics
“Install the software for a network connection” on page 36
Integrated wireless WLAN 802.11 network setup
For optimal performance and security in your wireless network, HP recommends you use a wireless router or access point (802.11) to connect the HP Photosmart and the other network elements. When network elements are connected through a wireless router or access point, this is called an infrastructure network.
Connect to a network |
29 |
Loading...