


 Loading...
HP Photosmart A610 series
User Guide |

Copyrights and trademarks
© 2006 Hewlett-Packard Development Company, L.P.
Hewlett-Packard Company notices
The information contained in this document is subject to change without notice.
All rights reserved. Reproduction, adaptation, or translation of this material is prohibited without prior written permission of Hewlett-Packard, except as allowed under copyright laws.
The only warranties for HP products and services are set forth in the express warranty statements accompanying such products and services. Nothing herein should be construed as constituting an additional warranty. HP shall not be liable for technical or editorial errors or omissions contained herein.
Trademarks
HP, the HP logo, and Photosmart are property of Hewlett-Packard Development Company, L.P.
The Secure Digital logo is a trademark of the SD Association.
Microsoft and Windows are registered trademarks of Microsoft Corporation. CompactFlash, CF, and the CF logo are trademarks of the CompactFlash Association (CFA).
Memory Stick, Memory Stick Duo, Memory Stick PRO, and Memory Stick PRO Duo are trademarks or registered trademarks of Sony Corporation. Microdrive is a trademark of Hitachi Global Storage Technologies. MultiMediaCard is a trademark of Infineon Technologies AG of Germany, and is licensed to the MMCA (MultiMediaCard Association). xD-Picture Card is a trademark of Fuji Photo Film Co., Ltd., Toshiba Corporation, and Olympus Optical Co., Ltd.
Mac, the Mac logo, and Macintosh are registered trademarks of Apple Computer, Inc.
The Bluetooth word mark and logos are owned by the Bluetooth SIG, Inc. and any use of such marks by HewlettPackard Company is under license. PictBridge and the PictBridge logo are trademarks of the Camera & Imaging Products Association (CIPA).
Other brands and their products are trademarks or registered trademarks of their respective holders.
Regulatory model identification number VCVRA-0608/VCVRA-0601
For regulatory identification purposes, the product is assigned a Regulatory Model Number. The Regulatory Model Number for the product is VCVRA-0608/VCVRA-0601. This regulatory number should not be confused with the marketing name (HP Photosmart A610 series) or product number (Q7110A).
Environmental statements
For Environmental Stewardship information, see the electronic Help.
Contents
1 |
Welcome................................................................................................................. |
3 |
|
Find more information ............................................................................................. |
4 |
|
Printer parts ............................................................................................................ |
4 |
|
Optional accessories .............................................................................................. |
9 |
|
Use the printer menus .......................................................................................... |
10 |
2 |
Photo printing overview...................................................................................... |
11 |
|
Start-to-finish printing ........................................................................................... |
11 |
3 |
Paper basics........................................................................................................ |
13 |
|
Choose and load paper ........................................................................................ |
13 |
|
Choose the right paper .................................................................................. |
13 |
|
Load your paper ............................................................................................ |
13 |
4 Print from a memory card................................................................................... |
15 |
|
|
Get photos from a memory card ........................................................................... |
15 |
|
Insert a memory card .................................................................................... |
15 |
|
Remove a memory card ................................................................................ |
17 |
|
Navigate through and view your photos ............................................................... |
17 |
|
Select multiple photos .......................................................................................... |
18 |
|
Choose a photo layout ......................................................................................... |
18 |
|
Print your photos .................................................................................................. |
19 |
5 |
Creative projects................................................................................................. |
21 |
|
Print panoramic photos ........................................................................................ |
21 |
|
Print photo stickers ............................................................................................... |
22 |
|
Print passport photos ........................................................................................... |
23 |
|
Print CD/DVD labels ............................................................................................. |
23 |
|
Print frames from a video clip ............................................................................... |
23 |
|
Improve the quality of your photos ....................................................................... |
24 |
|
Perfect photos automatically using Photo Fix ............................................... |
24 |
|
Improve the quality of your video clips .......................................................... |
24 |
|
Crop a photo ......................................................................................................... |
25 |
|
Add frames to your photos ................................................................................... |
25 |
|
Apply color effects to your photos ........................................................................ |
25 |
|
Add the date and time to your photos .................................................................. |
26 |
|
Set print quality ..................................................................................................... |
26 |
|
E-mail or upload photos using HP Photosmart Share .......................................... |
26 |
|
View a slide show ................................................................................................. |
27 |
6 Print from other devices..................................................................................... |
29 |
|
|
Print photos from a digital camera ........................................................................ |
29 |
|
Print photos from a Bluetooth device ................................................................... |
30 |
|
Print photos from a computer ............................................................................... |
30 |
|
Print photos from an iPod ..................................................................................... |
31 |
7 Maintain and transport the printer..................................................................... |
33 |
|
|
Replace the print cartridge ................................................................................... |
33 |
|
Clean and maintain the printer ............................................................................. |
35 |
|
Clean the outside of the printer ..................................................................... |
35 |
|
Automatically clean the print cartridge .......................................................... |
35 |
HP Photosmart A610 series User Guide |
1 |
|
Manually clean the print cartridge contacts |
...................................................36 |
|
Print a test page ............................................................................................ |
36 |
|
Align the print cartridge ................................................................................. |
37 |
|
Store the printer and print cartridge ...................................................................... |
38 |
|
Store the printer ............................................................................................. |
38 |
|
Store the print cartridge ................................................................................. |
39 |
|
Maintain the quality of photo paper ...................................................................... |
39 |
|
Transport the printer ............................................................................................. |
39 |
8 |
Troubleshooting.................................................................................................. |
41 |
|
Printer hardware problems ................................................................................... |
41 |
|
Printing problems .................................................................................................. |
44 |
|
Bluetooth printing problems .................................................................................. |
47 |
|
Error messages .................................................................................................... |
48 |
9 |
Specifications ..................................................................................................... |
51 |
|
System requirements ............................................................................................ |
51 |
|
Printer specifications ............................................................................................ |
52 |
10 |
HP support .......................................................................................................... |
55 |
|
Support process ................................................................................................... |
55 |
|
HP support by phone ............................................................................................ |
55 |
|
Phone support period .................................................................................... |
55 |
|
Placing a call ................................................................................................. |
55 |
|
After the phone support period ...................................................................... |
56 |
|
Additional warranty options .................................................................................. |
56 |
|
HP Warranty ......................................................................................................... |
57 |
A |
Install the software.............................................................................................. |
59 |
B |
Printer menus...................................................................................................... |
61 |
|
Printer menu ......................................................................................................... |
61 |
Index............................................................................................................................ |
65 |
|
2 |
HP Photosmart A610 series |
1 Welcome
Thank you for purchasing an HP Photosmart A610 series printer! This printer makes home photo printing simple, convenient, and fun, and it produces high-quality color prints you will be pleased to share with family and friends. With your printer, you can:
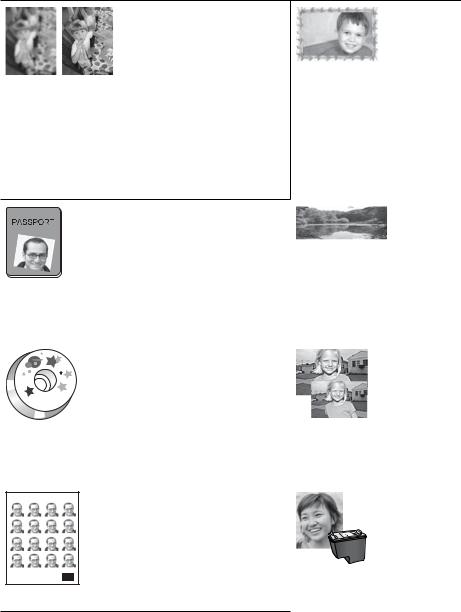
Add a decorative frame
Apply Photo Fix techniques
See Add frames to your See Perfect photos automatically using Photo Fix. photos. Frames are only
available on the
HP Photosmart A612, A614, A616, A617, and A618 models.
|
|
|
|
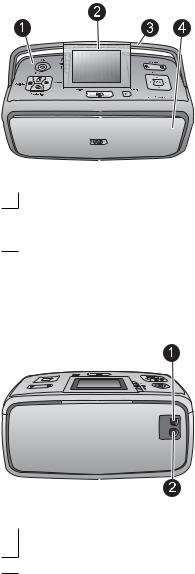
Print panoramas |
||
Print passport photos |
See Print panoramic photos. |
|||||
|
|
|
||||
See Print passport photos. |
|
|
|
|||
|
|
|
|
|
|
|
|
|
|
|
|
|
|
|
|
|
|
|
|
|
|
|
|
|
|
|
|
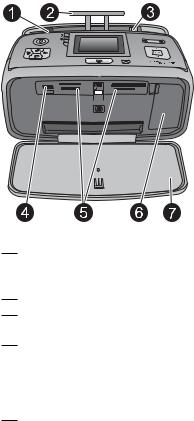
Print CD/DVD labels |
Print different photo sizes |
||
See Print CD/DVD labels |
See Choose the right paper. |
||
|
|
|
|
Print borderless photos
Print photo stickers
HP Photosmart A610 series User Guide |
3 |

Chapter 1
(continued)
See Print photo stickers.
Find more information
The printer comes with the following documentation:
●Setup Guide: Read this guide first! It explains how to set up the printer and print your first photo.
●User Guide: This is the book you are reading. This book describes the basic features of the printer, explains how to use the printer without connecting it to a computer, and contains hardware troubleshooting information. Appendix A contains information on installing the printer software.
●Printer Help Menu: The Help menu on the printer lets you read helpful printing tips and information about basic printer features right on the printer screen. For information on viewing the Help menu, see Use the printer menus.
●Electronic Help: The electronic Help describes how to use the printer with a computer and contains software troubleshooting information.
After you have installed the printer software on your computer, you can view the electronic Help:
●Windows: From the Windows Start menu, click Programs or All Programs, point to HP, HP Photosmart A610 series, and then click Photosmart Help.
●Mac: Choose Help, Mac Help in the Finder, and then choose Library, HP Photosmart Printer Help.
Printer parts
This section gives an overview of the parts of your printer, and provides references to sections where the parts and functions are described in more detail. Your model may vary slightly from the model shown in the illustrations.
4 |
HP Photosmart A610 series |
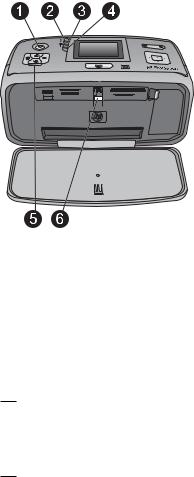
Front of printer
1Control panel: Control the basic functions of the printer from here.
2Printer screen: View photos and menus here. The printer screen pops up automatically when you open the output tray. Tilt the screen up to adjust the viewing angle. Fold the screen flat to store or transport the printer.
3Printer handle: Make sure the printer screen is in the flat (closed) position, and then pull up the printer handle from the back to carry the printer upright.
4Output tray (closed): Open this to print, insert a memory card, connect a compatible digital camera, connect an iPod, or open the print cartridge area. When you open the output tray, the input tray opens automatically, and the screen pops up.
Rear of printer
1USB port: Use this port to connect the printer to a computer or to an HP direct-printing digital camera using a USB cable.
2Power cord connection: Connect the power cord here.
HP Photosmart A610 series User Guide |
5 |
Chapter 1
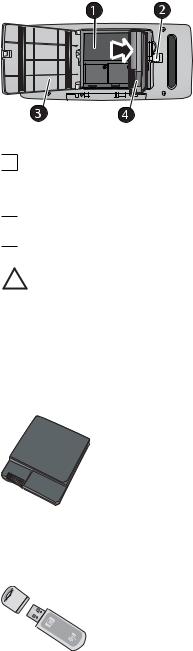
Input tray and inside front of printer
1Input tray: Load paper here. The input tray opens automatically when you open the output tray.
2Input tray extension: Pull out to support paper.
3Paper-width guide: Move to the width of the current paper to position the paper properly.
4Camera port: Connect a digital camera, the optional HP Bluetooth wireless printer adapter, or an iPod here.
5Memory card slots: Insert memory cards into these slots. See Get photos from a memory card.
6Print cartridge door: Open to insert or remove a print cartridge. See Replace the print cartridge.
7Output tray (open): The printer deposits printed photos here.
6 |
HP Photosmart A610 series |
Indicator lights
1On light: This light, surrounding the Power button, is solid green when the printer is on. It is green and flashing when the printer is busy, and it is red and flashing when the printer requires attention.
2Bluetooth light (HP Photosmart A618 models only): This light indicates wireless activity between the printer and a Bluetooth-enabled device. If your printer does not have integrated Bluetooth, you can purchase the optional Bluetooth wireless printer adapter. The adapter plugs into the camera port on the front of the printer and has its own activity light. For more information on Bluetooth wireless connectivity, see Print photos from a Bluetooth device.
3Battery light: This light indicates the battery state: charging or fully charged. For more information about the optional battery, refer to the instructions that came with the battery.
4Attention light : This light flashes red when an error occurs or the printer needs attention.
5Photo Fix light: This light is on when the Photo Fix feature is on and working.
6Memory card light: This light turns solid green after a memory card is correctly inserted. It flashes green when the memory card is being accessed. See Get photos from a memory card.
HP Photosmart A610 series User Guide |
7 |
Chapter 1
Control panel
1On: Press this button to turn the printer on or off.
2Layout: Press this button to select a print layout. Use the 4-way arrow button to scroll through layout selections. Press OK to select a layout.
3Printer screen: View photos and menus here. The screen pops up automatically when you open the output tray. Tilt the screen up to adjust the viewing angle. Fold the screen flat to store or transport the printer using the handle.
4Zoom: Press the Zoom + or Zoom - buttons repeatedly to increase or decrease the zoom level, to change to 9-up view, or from 9-up back to 1-up view.
5Delete: Press this button to delete the displayed photo or all selected photos from a memory card. For more information on selecting and deleting photos, see Select multiple photos.
6Photo Fix: Press this button to toggle the Photo Fix feature off and on. Photo Fix automatically improves your photos by adjusting the focus, lighting, brightening, and by removing red-eye. This feature is on by default. See Perfect photos automatically using Photo Fix.
7Menu: Press this button to open the printer menu.
8Print: Press this button to print highlighted or selected photos from a memory card. See Print your photos.
9Cancel: Press this button to deselect photos, exit a menu, or stop an action.
104–way arrow button: Use the arrows to scroll through photos on a memory card, navigate menus, or scroll through layout selections. Press OK to select a photo, menu, menu option, print layout.
8 |
HP Photosmart A610 series |
Internal battery compartment
1Internal battery compartment: Insert the optional HP Photosmart Internal Battery here.
2Battery compartment button: Slide this button to release the compartment cover.
3Battery compartment cover: Open this cover on the bottom of the printer to insert the optional HP Photosmart Internal Battery.
4Optional HP Photosmart Internal Battery: A fully-charged battery has sufficient charge to print approximately 75 photos. You must purchase the battery separately.
Caution Always make sure to unplug the printer power cord before opening the battery compartment cover. Do not touch the copper-colored contacts on the battery or the contacts inside the battery compartment.
Optional accessories
There are several optional accessories available for the printer that enhance its portability for printing anywhere, anytime. The appearance of the accessories may vary from what is shown.
Optional HP Photosmart Internal Battery
The HP Photosmart Internal Battery lets you take the printer with you wherever you go.
HP Bluetooth® wireless printer adapter
The HP Bluetooth wireless printer adapter goes into the camera port on the front of the printer and lets you use Bluetooth wireless technology for printing. To establish the connection, follow the instructions that came with your HP Bluetooth wireless printer
HP Photosmart A610 series User Guide |
9 |
Chapter 1
adapter. This optional adapter is only used with the HP Photosmart A610, A612, A614, A616, and A617 models.
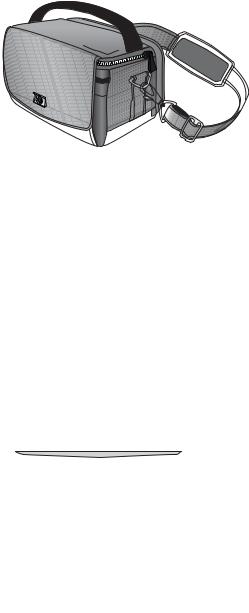
HP Photosmart Carrying Case
The lightweight, durable HP Photosmart Carrying Case holds and protects everything needed for hassle-free printing on the go.
Use the printer menus
The printer menu gives you many print options, allows you to change the printer defaults, provides maintenance and troubleshooting tools, and provides how-to information for common printing tasks. For descriptions of all the menus and their options, see Printer menus.
HP Photosmart
To use the printer menus
Press Menu (1) on the printer control panel to open the printer menu.
–Press Cancel (2) to exit the current menu.
–Use the 4–way arrow button (3) to navigate through the menu options displayed on the printer screen. Menu items that are unavailable are grayed out.
–Press OK (4) to open a menu or select an option.
Note For a list of all the printer menu options, see Printer menus.
10 |
HP Photosmart A610 series |
2 Photo printing overview
Start-to-finish printing
This sections gives you a high-level overview of the steps involved in printing your photos. Subsequent sections describe each step in more detail.
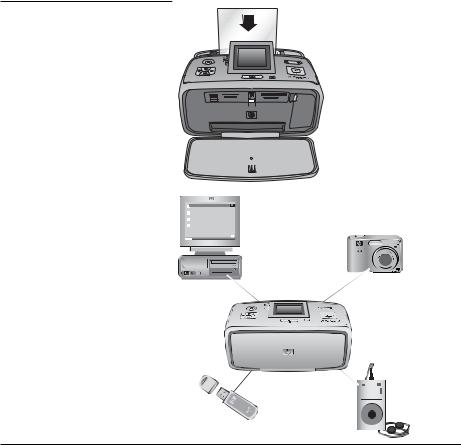
Step 1
Choose and load paper
See Choose and load paper.
Step 2
Get photos
You can connect the printer to various devices from which you can print. See Get photos from a memory card and Print from other devices.
|
|
|
|
|
|
|
|
|
|
HP Photosmart A610 series User Guide |
|
|
11 |
|
Chapter 2
(continued)
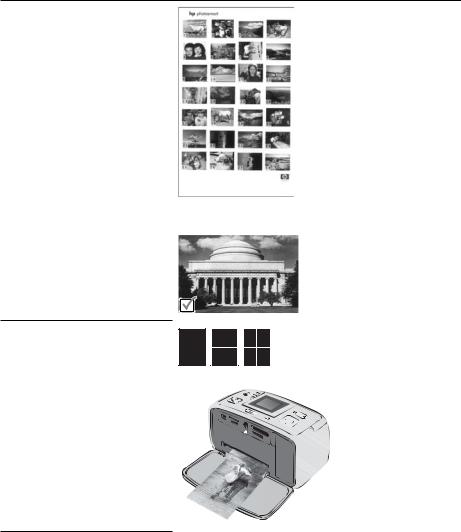
Step 3
Navigate through and view your photos
See Navigate through and view your photos.
Index page
Step 4
Select photos to print
See Select multiple photos.
Step 5
Choose a photo layout
See Choose a photo layout.
Step 6
Print photos
See Print your photos.
12 |
HP Photosmart A610 series |
3 Paper basics
Choose and load paper
Learn how to choose the right paper for your print job and how to load it into the input tray for printing.
Choose the right paper
Use HP Advanced Photo Paper. It is especially designed to work with the inks in your printer to create beautiful photos. Other photo papers will produce inferior results.
For a list of available HP-designed photo paper, or to purchase supplies, go to:
●www.hpshopping.com (U.S.)
●www.hp.com/eur/hpoptions (Europe)
●www.hp.com/jp/supply_inkjet (Japan)
●www.hp.com/paper (Asia/Pacific)
The printer is set by default to print the best quality photos on HP Advanced Photo Paper. If you print on a different type of paper, be sure to change the paper type from the printer menu. See To change the paper type.
Load your paper
Some supported paper sizes:
●10 x 15 cm (4 x 6 inch) photo paper
●13 x 18 cm (5 x 7 inch) photo paper
●Index cards
●L-size cards
●Hagaki cards
HP Photosmart A610 series User Guide |
13 |

Chapter 3
For a full list of supported paper sizes, see Specifications.
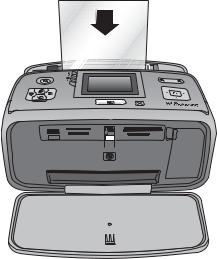
To load paper
1.Open the output and input trays, and pull out the input tray extension.
2.Load up to 20 sheets of paper with the print side or glossy side facing the front of the printer. When loading, slide the paper to the left side of the input tray and push the paper down firmly until it stops.
Note If you are using panorama photo paper, only load up to 10 sheets. If you are using photo sticker paper, only load a single sheet at a time.
3.Move the paper-width guide to the left to fit close to the edge of the paper without bending the paper.
To change the paper type
1.Press Menu.
2.Press  to select Preferences, and then press OK.
3.Press  to select Paper type, and then press OK.
4.Press  to select one of the following paper types:
–HP Advanced Photo Paper (default)
–HP Premium Photo Paper
–Other Photo
–Other Plain
5.Press OK.
14 |
HP Photosmart A610 series |

4 Print from a memory card
This section describes the steps for printing photos that are stored on a memory card. This section contains the following topics:
●Get photos from a memory card
●Navigate through and view your photos
●Select multiple photos
●Choose a photo layout
●Print your photos
Get photos from a memory card
After you have taken pictures with a digital camera, you can remove the memory card from the camera and insert it into the printer to view and print your photos. The printer can read the following types of memory cards: CompactFlash™, Memory Sticks, Microdrive, MultiMediaCard™, Secure Digital™, and xD-Picture Card™.
Caution Using any other type of memory card may damage the memory card and the printer.
To learn about other ways of transferring photos from a digital camera to the printer, see Print photos from a digital camera.
Insert a memory card
Find your memory card in the following table and use the instructions to insert the card into the printer.
Guidelines:
●Insert only one memory card at a time.
●Gently push the memory card into the printer until it stops. The memory card does not insert all the way into the printer; do not try to force it.
●When the memory card is inserted correctly, the memory card light flashes and then remains solid green.
Caution 1 Inserting the memory card any other way may damage the card and the printer.
Caution 2 Do not pull out a memory card while the memory card light is flashing. For more information, see Remove a memory card.
Memory card |
How to insert the memory card |
|
|
|
|
CompactFlash |
● |
Front label faces up, and if the label has an arrow, the arrow points |
|
|
toward the printer |
|
● |
Edge with metal pinholes goes into the printer first |
|
|
|
HP Photosmart A610 series User Guide |
15 |

Chapter 4 (continued)
Memory card |
How to insert the memory card |
Microdrive |
● |
Front label faces up, and if the label has an arrow, the arrow points |
|
|
toward the printer |
|
● |
Edge with metal pinholes goes into the printer first |
|
|
|
|
|
|
|
|
|
|
MultiMediaCard |
● |
Angled corner is on the right |
||
|
|
|
● |
Metal contacts face down |
Secure Digital |
● |
Angled corner is on the right |
|
|
|
● Metal contacts face down |
|
|
|
● |
If you are using a miniSD card, attach the adapter that came with |
|
|
||
|
|
|
the card before you insert the card into the printer |
16 |
HP Photosmart A610 series |

(continued)
Memory card |
How to insert the memory card |
||
|
|
|
|
Memory Stick |
● Angled corner is on the left |
||
|
|
|
● Metal contacts face down |
|
|
|
|
|
|
|
● If you are using a Memory Stick Duo™ or Memory Stick PRO |
|
|
|
Duo™ card, attach the adapter that came with the card before you |
|
|
|
insert the card into the printer |
xD-Picture Card |
● |
Curved side of the card points toward you |
|
● |
Metal contacts face down |
Remove a memory card
Caution Do not pull out the memory card while the memory card light is flashing. A flashing light means the printer or computer is accessing the memory card. Wait until the light remains solid. Removing a memory card while it is being accessed may corrupt information on the card or damage the printer and card.
To remove a memory card
When the memory card light on the printer is solid, it is safe to pull the card out of the slot.
Navigate through and view your photos
This section explains how to navigate through and view your photos on the printer screen. As you navigate through the photos using the 4–way arrow button, each photo is framed by a highlighted border.
To view photos one by one
1.Insert a memory card.
2.Press  or
or to view the photos one by one. Press and hold the button to view the photos rapidly. When you reach the last photo in either direction, the display returns to the first or last photo and continues.
HP Photosmart A610 series User Guide |
17 |
Chapter 4
To view photos nine at a time
1.Insert a memory card.
2.Press to view nine photos at a time.
3.Press  or
or to highlight one of the nine photos.
4.Press  to change back to viewing one by one.
Select multiple photos
If you want to print more than one photo, or delete a group of photos all at once, you need to select the photos. When you select a photo, a check mark appears in the lower left corner of the photo on the screen.
To select several photos
1.Insert a memory card and view photos.
2.Press OK to select each photo you want to print.
To deselect photos
Highlight the photo you want to deselect, and then press Cancel. The check mark disappears from the lower left corner of the photo.
To select a continuous range of photos
1.Insert a memory card.
2.Press Menu.
3.Select Print Options, and then press OK.
4.Select Print Range, and then press OK.
5.Press  or
or until the first photo you want to print appears, and then press OK.
6.Press  or
or until the last photo you want to print appears, and then press OK.
To select more than one copy of a photo
1.Insert a memory card and view photos.
2.Press OK once for each copy of the current photo you want to print. Press Cancel to decrease the number of copies by one.
Choose a photo layout
You can choose from several print layouts by pressing Layout after you insert a memory card. By default the printer prints one photo per page.
To choose a photo layout
1.Insert a memory card.
2.Press Layout.
18 |
HP Photosmart A610 series |
Loading...