


 Loading...
FinePixViewer
DP Editor
User's Guide
This User's Guide contains the instructions for using the FinePixViewer
and DP Editor software. Read this manual carefully before using these
programs.

FinePixViewer/DP Editor
IMPORTANT
Be sure to read this page before using the Software Set.
Notes on the Software and User's Guide
(1)Unauthorized transfer or duplication of all or any part of the enclosed software or User's Guide is forbidden.
(2)The enclosed software and User's Guide can be used with only one device.
(3)We accept no liability whatsoever for any loss or injury incurred by the owner or any third party while using a device with the enclosed software or User's Guide.
(4)Every effort has been made to ensure that the product is flawless. If any defect is found that is due to a fault on the part of the manufacturer, the product will be replaced free of charge, at our discretion. No responsibility is accepted for defects not caused by the manufacturer.
(5)The contents of the enclosed software and User's Guide are subject to change without notice.
Do not attempt to play the CD-ROM enclosed with this product on an audio CD player.
Doing so could damage your hearing or could damage your speakers or headphones.
•Microsoft, Windows are trademarks of the Microsoft Corporation of the U.S. registered in the U.S. and other countries.
•Macintosh and QuickTime™ are registered trademarks of Apple Computer,Inc.
•Windows is an abbreviated term referring to the Microsoft Windows Operating System.
•Adobe Photoshop and PhotoDeluxe are trademarks of Adobe Systems Incorporated of the U.S.
•SmartMedia™ is a trademark of Toshiba Corpration.
•All other company or product names are trademarks or registered trademarks of the respective companies.
2

FinePixViewer/DP Editor
Introduction
This User's Guide describes how to use the FinePixViewer and DP Editor software.
In this Guide, it is assumed that the reader has a basic grasp of how to use a personal computer (PC). For information on how to use your PC, refer to the manuals supplied with the PC.
The screens and menus shown in this Guide differ slightly in the Windows and Macintosh versions. Where "(Windows)" or "(Macintosh)" is shown in the Guide, refer to the relevant description for your type of PC.
3

FinePixViewer/DP Editor |
|
Contents |
|
IMPORTANT ...................................................................... |
2 |
Introduction ....................................................................... |
3 |
Contents ........................................................................... |
4 |
Using FinePixViewer |
|
Starting Up FinePixViewer ................................................. |
7 |
FinePixViewer Main Window and Menus ........................................ |
8 |
Main Window Configuration........................................................... |
9 |
Pop-up Menus ............................................................................ |
10 |
Viewing Images ................................................................ |
11 |
Selecting the folder .................................................................... |
11 |
Viewing image file information .................................................... |
11 |
File information .......................................................................... |
11 |
Viewing the file information......................................................... |
12 |
Viewing images .......................................................................... |
12 |
Enlarging and reducing the displayed image ................................ |
13 |
Scrolling around the image display.............................................. |
13 |
Playing back movies................................................................... |
13 |
To save a movie frame................................................................ |
14 |
Playing back sound files ............................................................. |
14 |
Using the folder selection history ................................................ |
14 |
Using bookmarks ....................................................................... |
15 |
Registering a folder in the bookmarks .......................................... |
15 |
Browsing the bookmarks ............................................................. |
15 |
Editing the bookmarks ................................................................ |
15 |
Changing the thumbnail display mode ......................................... |
16 |
To change the thumbnail display sequence .................................. |
16 |
To change the thumbnail size ...................................................... |
16 |
To change the thumbnail frame and background design................ |
16 |
Viewing slide shows ................................................................... |
17 |
Slide show playback ................................................................... |
18 |
Working with Files ........................................................... |
19 |
Selecting files ............................................................................ |
19 |
To select a single file .................................................................. |
19 |
To select multiple files ................................................................ |
19 |
To select all the files................................................................... |
19 |
4

FinePixViewer/DP Editor |
|
Moving and copying files ............................................................ |
19 |
Selecting folders ........................................................................ |
19 |
Moving and Copying folders........................................................ |
20 |
Renaming files and folders ......................................................... |
20 |
Creating folders ......................................................................... |
20 |
Deleting files and folders ............................................................ |
20 |
Sending images as e-mail attachments ....................................... |
21 |
Sending E-mail Mesages............................................................. |
21 |
Editing Images ................................................................. |
22 |
Image windows .......................................................................... |
22 |
Cropping (Trimming) the image ................................................... |
23 |
Copying the image to the clipboard ............................................. |
23 |
Resizing the image..................................................................... |
24 |
(1) Resizing the image.................................................................... |
24 |
(2) Resizing multiple files at once ................................................... |
25 |
Superimposing text on images .................................................... |
26 |
Moving the Superimposed Characters onto the Image .................. |
26 |
Rotating the image ..................................................................... |
27 |
(1) Rotating the image .................................................................... |
27 |
(2) Rotating multiple images at once ............................................... |
27 |
Saving the image ....................................................................... |
27 |
Editing the image file information ................................................ |
28 |
Specifying the settings for automatic image taking ....................... |
29 |
Registering other applications..................................................... |
30 |
Printing the Image............................................................ |
31 |
Page setup ................................................................................ |
31 |
Printing images .......................................................................... |
31 |
Printing an index ........................................................................ |
33 |
Exiting FinePixViewer ...................................................... |
35 |
Ordering Prints (Using DP Editor) |
|
Starting Up DP Editor....................................................... |
36 |
Selecting the Media.......................................................... |
37 |
Registering Ordering Information .................................... |
38 |
Main Window ............................................................................. |
38 |
Registering Images .................................................................... |
39 |
Selecting images ........................................................................ |
39 |
Specifying the number of prints ................................................... |
39 |
5

FinePixViewer/DP Editor |
|
Editing Index Print Information .................................................... |
40 |
Index window ............................................................................. |
40 |
Adding images............................................................................ |
40 |
Undo Image Registration ............................................................ |
41 |
Confirming an Order (Saving an Order) ....................................... |
41 |
Displaying Registered Images..................................................... |
42 |
Image window ............................................................................ |
42 |
Enlarging / Reducing the displayed image.................................... |
42 |
Scrolling around the image display .............................................. |
42 |
Trimming a Registered Image ..................................................... |
43 |
Setting the rotation for a registered image ................................... |
43 |
Setting the print information for a registered image ...................... |
44 |
Exiting DP Editor........................................................................ |
45 |
DPOF......................................................................................... |
45 |
When Problems Arise |
|
Troubleshooting.............................................................. |
46 |
Problems with FinePixViewer ..................................................... |
46 |
Problems with DP Editor ............................................................ |
49 |
Common Problems .................................................................... |
50 |
Appendix |
|
Glossary.......................................................................... |
51 |
6
Using FinePixViewer
Starting Up FinePixViewer
Screen at startup
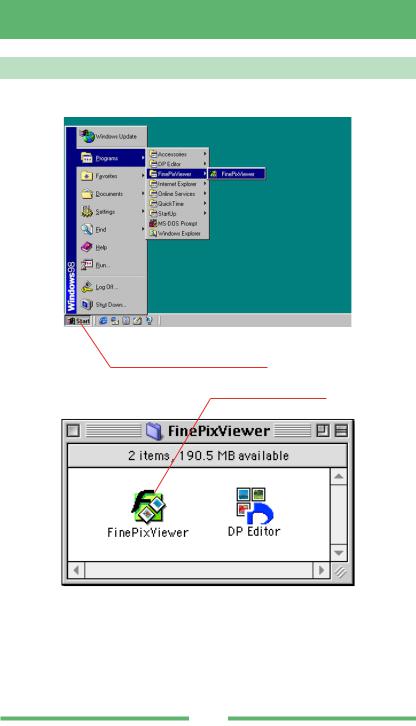
Windows
From the Start menu, select [Programs]- [FinePixViewer].
Double-click [FinePixViewer].
Macintosh
7

FinePixViewer
 FinePixViewer Main Window and Menus
When you launch FinePixViewer, the window shown below appears.
Main Window
Folder tree display area:
Internet link display area:
Windows
Thumbnail display area:
Sound playback application display area:
Movie playback application display area:
Picture playback application display area:
Macintosh
NOTE: FinePixViewer supports the following file formats: Exif-JPEG, Exif-TIFF, JPEG, BMP (Windows), PICT (Macintosh), FlashPix, AVI, QuickTime Movie, WAV.
 TIP: If you can no longer open FinePixViewer on your Macintosh, the Preferences file is probably corrupted. Open the "Preferences" folder in the "System Folder" on the startup disk and move the "FinePixViewer Prefs" file to the Trash. Then empty the Trash and start up FinePixViewer again.
8

FinePixViewer
 Main Window Configuration
Folder tree display area:
Displays a list of the drives and folders.
Registered application display area:
To use another application to play back or edit still images, movies or sound files, register the application in this area. ( P.30)
Thumbnail display area:
Displays thumbnails of the images contained in the selected folder.
Internet link display area:
Displays buttons that link to sites for print services, software downloading, etc.
Show/Hide Folder Tree button:
Clicking this button alternately shows and hides the folder tree display area and registered application display area.
Show/Hide Playback Pane button:
Clicking this button alternately shows and hides the playback pane between the folder tree display area and the Internet display area.
Back button:
Click this button to redisplay the folder selected last. ( P.14)
Forward button:
After you have used the Back button to move to the last selected folder, click the Forward button to return to the original folder. ( P.14)
Stop button:
Click this button to cancel thumbnail display.
Refresh button:
Click this button to bring the displayed information up to date.
Print button:
Click this button to open the Print dialog box and print an image. ( P.31)
Print Order button:
Click this button to launch DP Editor and specify print orders. ( P.36)
Batch Rotation button:
Clicking this button opens the Batch Rotation dialog box and allows you to rotate all the selected images at once. ( P.27)
9

FinePixViewer
Camera Settings button* (not shown in initial state):
Clicking on this button opens the Camera Settings dialog box. From this window you can specify the camera function settings.
* To use this function, you must obtain the setup application.
Automatic Taking button:
When you click this button, files are copied as specified in the Automatic Taking settings. ( P.29)
Slide Show button:
Click this button to view a slide show. ( P.17)
Videoconference button (Windows only):
Click this button to open the Videoconference window and take part in videoconferencing sessions.
 Pop-up Menus
Display Mode pop-up menus:
Click these buttons to change the size of the thumbnail images and to change the way the detailed information is displayed. ( P.12)
10
FinePixViewer
Viewing Images
Selecting the folder
Select the desired folder by clicking it in the folder tree display area in the Main Window. The images in that folder are then displayed.
Clicking the [  ] (Windows) or [
  ] (Macintosh) to the left of the folder shows a drop-down display of the folders contained in the selected folder.
Viewing image file information
When you click the " [  ] " button, the playback pane (information display frame) appears between thumbnail display area and the Internet display area. This pane displays information for the selected image.
The playback pane shows the image along with the file and photography information. There are two ways to display images in the playback pane:
A.Displayed as thumbnails (160 x 120 pixels)
B.Fit to the size of the display area in the playback pane (This is useful when you want to view the image enlarged.)
You can select the display mode by clicking on the " [ |
] (Display thumbnail)" button or the " |
|
[ |
] (Auto Size)" button. |
|
When a movie or sound file is selected, the movie or sound recording is played back.
Main Window Showing Playback Pane
Macintosh
Windows
Playback pane
File information
 File information
Click the tabs along the bottom of the file information window to select the information displayed. The information shown differs depending on the image file format.
11

FinePixViewer
Viewing the file information
Using either of the following methods, the file information details shown in the figure below can be displayed in the thumbnail display area:
A.Select "Details" in the "Display Mode" pop-up menu.
B. |
In the "View" menu, select "View mode" → "Details". |
Main Window Showing Image File Details
Macintosh
Windows
Thumbnail display area switched to detail display mode:
Viewing images
To display an image in a new window, double-click the thumbnail in the Main window directly or select a thumbnail and select "Open" from the "File" menu.
Image Window
Macintosh
Windows
12
FinePixViewer
Enlarging and reducing the displayed image
To enlarge or reduce the image displayed, switch to enlarged or reduced display mode by clicking the [  ] or [
  ]button in the Toolbar or by selecting [Zoom In Tool] or [Zoom Out Tool] from the [Image] menu. Clicking the mouse on the image then enlarges or reduces the image using the clicked point as the center of the image.
Scrolling around the image display
You can use the scroll bars in the Image Window to scroll to different parts of the image. Also, by clicking the [  ] button in the Toolbar or selecting [Hand tool] from the [Image] menu, you can switch to the free scroll mode which allows you to move the image around inside the window by dragging it around with the mouse.
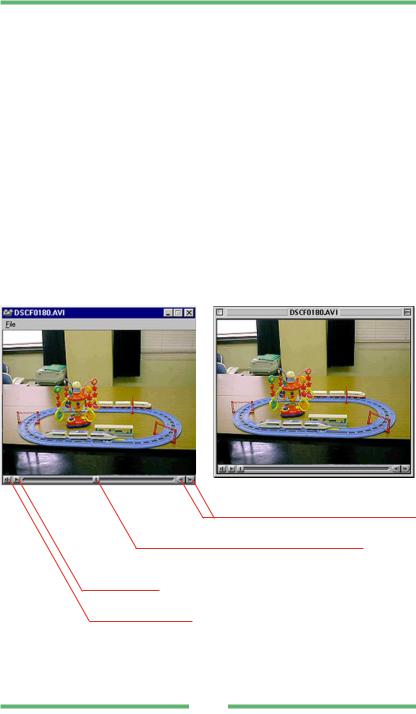
Playing back movies
You can open a movie playback window and play a movie by either double clicking directly on a thumbnail marked with the movie icon  , or by selecting the thumbnail and selecting "Open" from the "File" menu.
Movie Playback Window
Windows |
Macintosh |
|
|
|
[Frame advance] button: |
Advances or rewinds the movie one frame at a time.
[Playback progress] button:
Shows the playback progress. Playback can be started at any point by dragging the button to the desired frame.
[Playback] button
Starts playback.
[Volume] button
Adjusts the sound volume.
13
FinePixViewer
 To save a movie frame
When movie playback is paused, you can save the currently displayed frame as a still image by selecting [Save As] from the [File] menu.
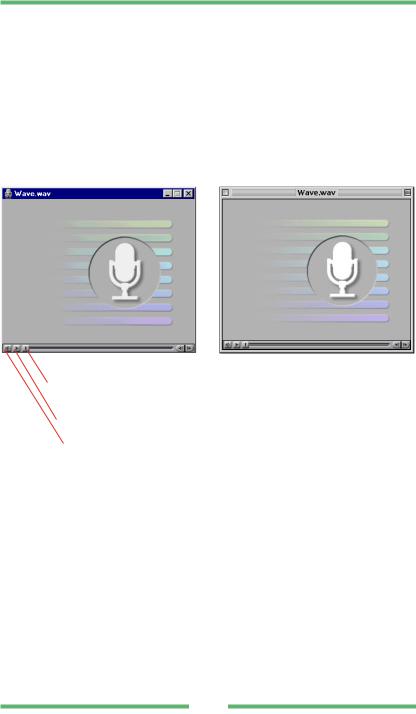
Playing back sound files
You can open a sound playback window and play a sound file by either double clicking directly on a thumbnail marked with the sound icon [  ] , or by selecting the thumbnail and selecting "Open" from the "File" menu.
Sound Playback Window
|
|
|
Windows |
Macintosh |
||
Playback progress button: |
||||||
|
||||||
Indicates the playback progress. You can play back the file from |
|
|||||
a different point by dragging this button to the desired position. |
|
|||||
|
|
Playback button: |
|
|
||
|
|
Starts playback. |
|
|||
|
|
Volume control button |
|
|
||
Using the folder selection history
Up to 20 recently selected folder names are automatically recorded. When you select a recorded folder name from the [Go] menu, the images in the selected folder are displayed.
Clicking the [  ] button or selecting [Back] from the [Go] menu displays the last folder selected before the current folder. When there is no previously selected folder, this button or menu is grayed out.
If you have gone back to the previous folder, clicking the [  ] button or selecting [Forward] from the [Go] menu displays the next folder after the folder currently displayed. If there is no next folder, this button or menu is grayed out.
14
FinePixViewer
Using bookmarks
 Registering a folder in the bookmarks
Selecting [Add to Bookmarks] from the [Bookmarks] menu registers the currently selected folder as one of the bookmarks.
The name of the registered folder is used as the title.
Up to 100 bookmarks may be registered.
NOTE: Once 100 bookmarks have been registered, the [Add to Bookmarks] menu will be grayed out and cannot be used.
 Browsing the bookmarks
When you select the title from the [Bookmarks] menu, the images in the folder with the corresponding title are displayed.
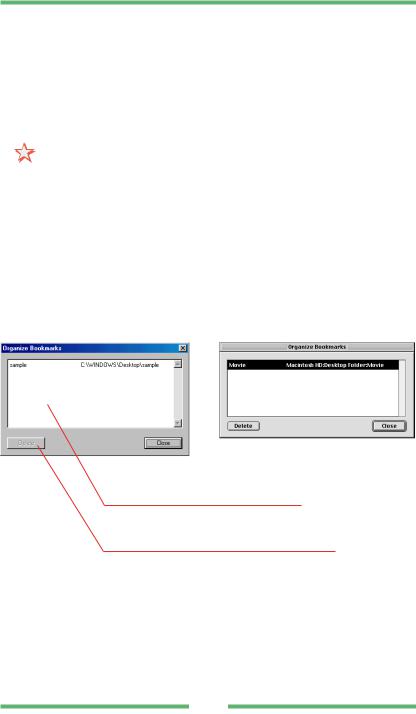
 Editing the bookmarks
To edit the bookmarks, open the Bookmarks dialog box by selecting [Organize Bookmarks] from the [Bookmarks] menu.
Bookmarks dialog box
Macintosh
Windows
Title / path display:
Displays the title and folder path.
The title name can be modified by clicking the title.
[Delete] button:
Click the [Delete] button or press the Delete key (Windows) to delete the selected bookmark.
15
FinePixViewer
Changing the thumbnail display mode
 To change the thumbnail display sequence
By selecting "Arrange" in the "View" menu, you can specify any of the following thumbnail display sequences:
by Name/by Type/by File Size/by Date&Time/by Image Size/by Duration
 To change the thumbnail size
Select [Display Mode] from the [View] menu or [Display Mode] pop-up menu and specify one of the following as the thumbnail display size.
Large Thumbnail |
(160 x 120 pixels) |
Medium Thumbnail |
(80 x 60 pixels) |
Small Thumbnail |
(40 x 30 pixels) |
 To change the thumbnail frame and background design
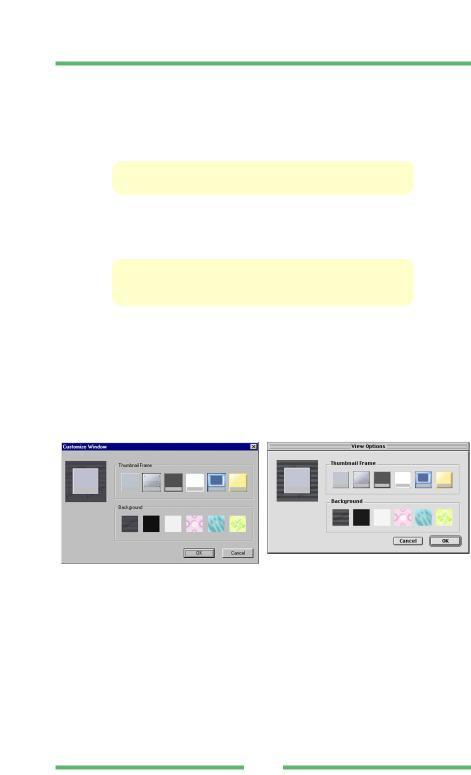
By selecting [Customize Window] (Windows) or [View Options] (Macintosh) from the [View] menu, you can open the [Customize Window] dialog box and change the design of the thumbnail frame or Main Window background.
[Customize Window] dialog box
Macintosh
Windows
16
Loading...