


Welcome to Leopard
Welcome to Leopard

1
How to get started
www.apple.com/support
Apple Inc.
© 2007 Apple Inc. All rights reserved. Apple, the Apple logo, Boot Camp, Exposé, FireWire, iCal, iPhoto,
Keynote, Mac, and Mac OS are trademarks of Apple Inc., registered in the U.S. and other countries. Aperture, Cover Flow, Finder, iPhone, Leopard, Safari, and Spotlight are trademarks of Apple Inc. AppleCare is a service mark of Apple Inc., registered in the U.S. and other countries. .Mac is a service mark of Apple Inc. Other product and company names mentioned herein may be trademarks of their respective companies.
Microsoft product screen shot(s) reprinted with permission from Microsoft Corporation.
Because Apple frequently releases new versions and updates to its software, images shown in this book may be different from what you see on your screen.
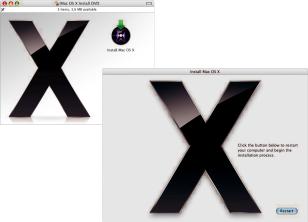
Install Leopard
To upgrade to Mac OS X Leopard, insert your installation disc and double-click Install Mac OS X.Then click Restart.Your computer restarts, and the Mac OS X Installer opens.
Install Leopard
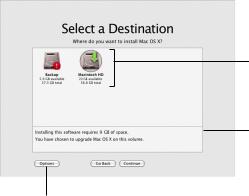
Select a destination
Select your startup disk or the volume that has the version of Mac OS X you want to upgrade.
Select a volume.You may not be able to install Leopard on some volumes.
Look here for important information about the installation.
Click Options if you want to select a different type of installation.
For additional information, see the Instructions folder on your installation disc.
Install Leopard
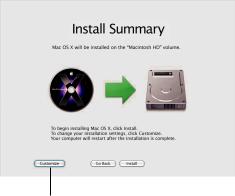
Begin installation
When you’re ready, click Install to begin installing Mac OS X Leopard.When the installation is finished, your computer will restart.
Click Customize if you want to change what’s installed.
Install Leopard

2
Meet Leopard
www.apple.com/macosx
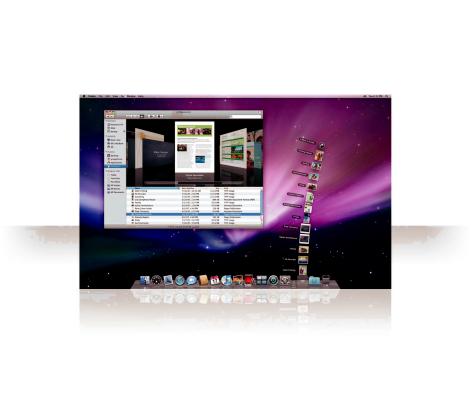
Desktop
From the menu to the Dock, Leopard introduces a great new look and Stacks—a brand-new way to stay organized.
Desktop
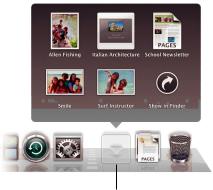
Stacks
Stacks provide a convenient way to get to your documents. Folders already in the Dock become stacks automatically.To create a stack, drag a folder of documents to the Dock.
When you click a stack, the items appear in a grid or a fan above the icon.
Desktop
The Downloads stack
The Dock includes a Documents stack and a Downloads stack. Items you download in Safari, Mail, or iChat always go to the Downloads stack so that you can find them quickly.
The latest download appears here.
Click the Downloads stack to see items you’ve downloaded.
10 Desktop
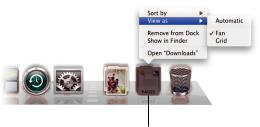
Customization
Stacks appear as a fan or a grid automatically based on the number of items in the stack. You can specify which style you want to use and change the stack’s sort order.
To customize a stack, position the pointer over the stack icon and then hold down the mouse button until a menu appears.
Desktop 11
Finder
See your files in Cover Flow and browse through them quickly.
12 Finder
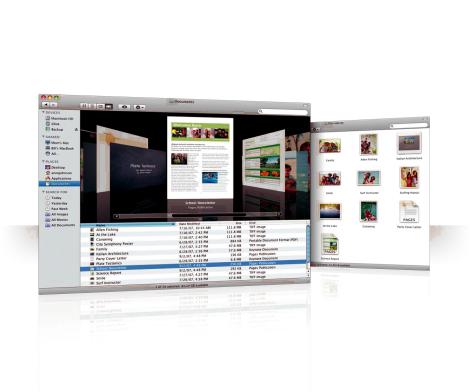
Cover Flow
Cover Flow lets you see your movies, presentations, PDF files, and more in large-size previews as you flip through them.
Click this button for Cover Flow.
Move the pointer over an item to play a movie or see the pages of a document, for example.
Drag the slider to thumb through your documents.
Finder 13
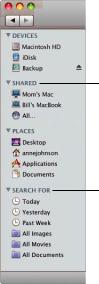
Sidebar
The Finder sidebar makes it easy to get to folders on your computer, shared computers on your network, and your saved searches.
Shared computers available on your network automatically appear here.
Commonly used searches are included in the sidebar, and you can add your own searches.
14 Finder
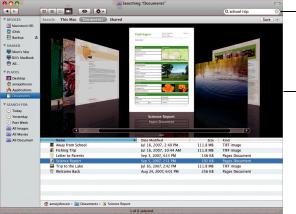
Spotlight
In a Finder window or the menu bar, use Spotlight to search for items on your computer. If you use the same search often, save it in the Search For section of the sidebar.
Type your search in the search field.

 Click Save to add a Smart Folder to the sidebar.
See your search results in Cover Flow.
Finder 15
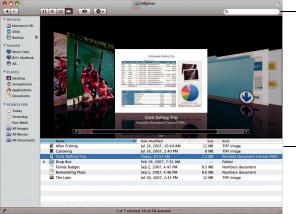
Shared computers
Shared computers on your network automatically appear in the sidebar so that you can quickly find the documents they contain.
Search for documents on shared computers.
Get immediate access to the Public folder on any shared computer.
16 Finder
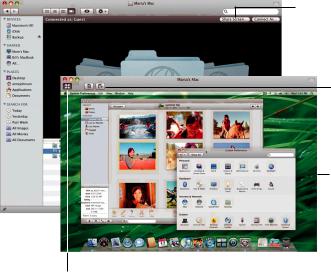
Screen sharing
Use screen sharing to get to the desktop of shared computers on your network.You can monitor use, change settings, and much more from your computer.
Select the computer and then click Share Screen.
To see the toolbar, choose View > Show Toolbar.
You’ll see the desktop of the other computer in a window.
To use all of your screen, click the Full-screen button.
Finder 17
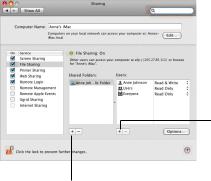
Sharing
You can share your files, your website, your screen, and much more with other computers on your network.To start, open System Preferences and then click Sharing.
Click the Add (+) button to select any folder you want to share.
Click the Add (+) button to select users and groups who can share your files.
18 Finder
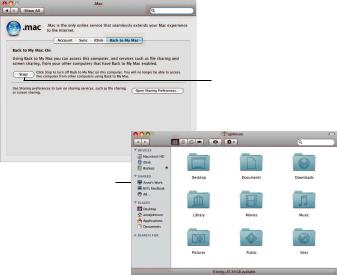
Back to My Mac
With your .Mac membership, an Internet connection, and Back to My Mac and sharing services turned on, you can access any of your computers from anywhere on the Internet.
Back to My Mac is on automatically.
Back to My Mac computers appear in the sidebar.
Finder 19

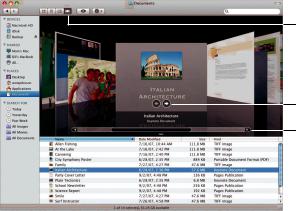
Quick Look
See stunning previews of movies, PDF files, presentations, spreadsheets, and more without opening an application.
20 Quick Look
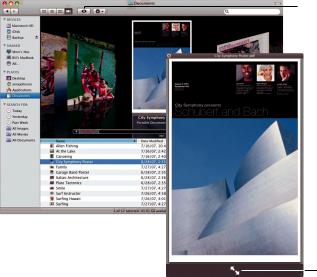
View documents
You can use Quick Look in the Finder,Time Machine, and Mail.To view an item in Quick Look, select it and then press the Space bar.
Click the Quick Look button in the Finder window toolbar.
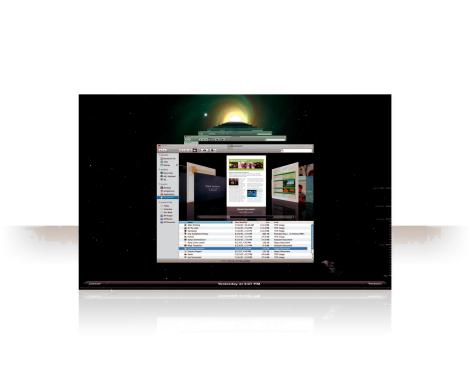
Click here for a full-screen preview.
Quick Look 21

Browse contents
When you view the documents in Quick Look, you can flip through each page of your document or view each slide of a Keynote presentation.
Each slide of a Keynote presentation appears here.
22 Quick Look

Show collections
You can use Quick Look to view several items at once.To automatically scan through the items, click the Play button.
Click a picture in the index sheet to view it.
Click the Index Sheet |
|
|
|
Click the Camera button |
|
|
|||
button to view all the items. |
|
|
|
to add a photo to iPhoto. |
Quick Look 23
Time Machine
Automatically back up your Mac.If you’re missing a document, travel back in time to recover it.
24 Time Machine
 Loading...