


3-094-635-13(1)
Mini Hi-Fi
Component
System
Operating Instructions
MHC-GNZ888D
MHC-GNZ777D
©2007 Sony Corporation
WARNING
To reduce the risk of fire or electric shock, do not expose this apparatus to rain or moisture.
To prevent fire, do not cover the ventilation of the apparatus with newspapers, tablecloths, curtains, etc. And don’t place lighted candles on the apparatus.
To prevent fire or shock hazard, do not place objects filled with liquids, such as vases, on the apparatus.
To avoid electrical shock, do not open the cabinet. Refer servicing to qualified personnel only.
Do not install the appliance in a confined space, such as a bookcase or built-in cabinet. Install this system so that the power cord can be unplugged from the wall socket immediately in the event of trouble.
This appliance is classified as a CLASS 1 LASER product. This label is located on the rear exterior.
Don’t throw away the battery with general house waste, dispose of it correctly as chemical waste.
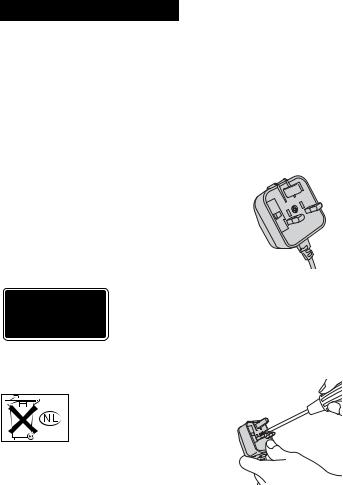
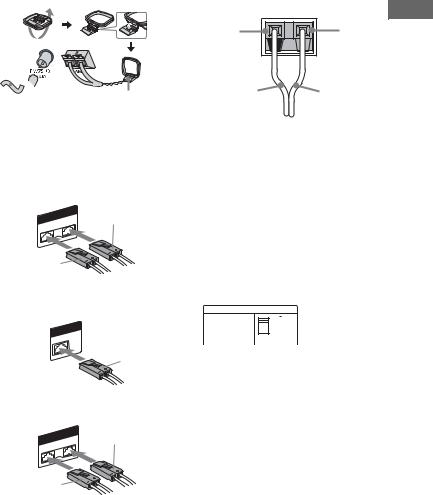
Note on power cord plug shapes (Saudi Arabian model only)
For AC 220 V wall sockets
1Make the appropriate voltage setting on the system (only for models with a voltage selector).
2Make sure that the 13 A 3-pin plug (Type BF) is securely attached to the power cord. (The 13 A 3-pin plug is attached when shipped from the factory.)
For AC 127 V wall sockets
1Make the appropriate voltage setting on the system (only for models with a voltage selector).
2Remove the 13 A 3-pin plug using a screwdriver.
2GB
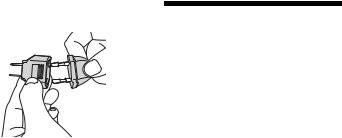
3 Attach the supplied parallel blade
plug (Type A). |
About this manual |
|
|
||
|
• The instructions in this manual are for |
|
|
models MHC-GNZ888D and |
|
|
MHC-GNZ777D. In this manual, |
|
|
MHC-GNZ888D is used for |
|
|
illustration purpose unless stated |
|
|
otherwise. |
|
|
The MHC-GNZ888D consists of: |
|
|
– Tuner/DVD player/Stereo cassette |
|
|
deck/Amplifier (unit) |
|
|
|
HCD-GNZ888D |
|
– Speaker System |
|
|
• Front speaker |
SS-GNZ888D |
|
• Center speaker |
SS-CT888D |
|
• Surround speaker |
SS-RSX888D |
The MHC-GNZ777D consists of:
– Tuner/DVD player/Stereo cassette deck/Amplifier (unit)
HCD-GNZ777D
– Speaker System |
|
• Front speaker |
SS-GNZ888D |
• Icons, such as  , listed at the top of each explanation indicate the type of media that can be used with the function being explained.
• The English on-screen display is used for illustration purposes only.
• The Control Menu items may be different depending on the disc.
• The Setup Menu items may be different depending on the area.
3GB

Table of Contents |
|
About this manual ....................... |
3 |
Playable discs .............................. |
5 |
Guide to parts and controls.......... |
9 |
Getting Started |
|
Hooking up the system .............. |
16 |
Hooking up the TV.................... |
19 |
Positioning the speakers ............ |
21 |
Setting the clock ........................ |
22 |
Performing QUICK SETUP...... |
23 |
Using the THEATRE SYNC |
|
function................................. |
24 |
Disc |
|
Playing a disc............................. |
26 |
— Normal Play |
|
Using play mode........................ |
31 |
Searching/selecting a disc.......... |
34 |
Playing MP3/JPEG discs........... |
37 |
Enjoying DivX® video files ...... |
41 |
(MHC-GNZ777D Russian |
|
model only/MHC-GNZ888D) |
|
Adjusting the delay between the |
|
picture and sound.................. |
42 |
— A/V SYNC |
|
Restricting playback of the |
|
disc........................................ |
43 |
— CUSTOM PARENTAL |
|
CONTROL, PARENTAL |
|
CONTROL |
|
Using the DVD setup menu....... |
46 |
Tuner |
|
Listening to the radio................. |
53 |
Tape |
|
Playing a tape............................. |
55 |
Recording onto a tape................ |
56 |
Sound Adjustment |
|
Adjusting the sound................... |
58 |
Singing along: Karaoke ............. |
61 |
Other Operations |
|
Using the timer .......................... |
65 |
Changing the display ................. |
67 |
Viewing information about |
|
the disc.................................. |
67 |
Hooking up the optional |
|
components........................... |
71 |
Additional Information |
|
Troubleshooting......................... |
74 |
Precautions................................. |
83 |
Specifications............................. |
84 |
Guide to the Control Menu |
|
display................................... |
87 |
Language code list ..................... |
90 |
Glossary..................................... |
92 |
Index .......................................... |
95 |
4GB
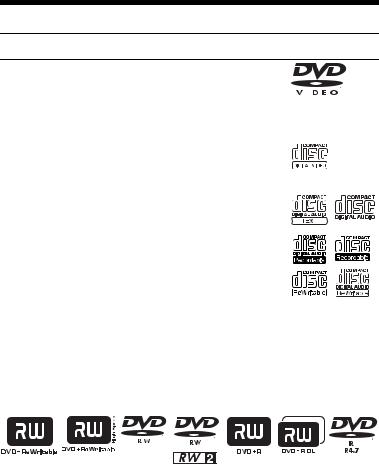
Playable discs
Type |
Characteristics |
Icon used in |
Logo |
|
this manual |
||||
|
|
|
DVD VIDEO |
• DVD VIDEO |
|
|
|
|
|
|
|
|
|
• DVD-R*/-RW*/+R/+RW |
|
|
|
|
|
|
|
|
|
in DVD VIDEO format |
|
|
|
|
||||
|
|
||||||||
|
* also in video mode |
||||||||
|
|
|
|
|
|
|
|
|
|
VR mode |
• DVD-R/-RW in VR (Video |
|
|
|
|
|
|||
|
|
||||||||
|
Recording) mode |
|
|
|
|
|
|||
|
|
|
|
|
|
|
|
|
|
VIDEO CD |
• VIDEO CD |
|
|
|
|
|
|||
|
|
|
|
|
|
|
|||
|
• Super VCD |
|
|
|
|
|
|||
|
• CD-R/-RW in VIDEO CD or Super |
||||||||
|
VCD format |
||||||||
|
|
|
|
|
|
|
|
|
|
CD |
• AUDIO CD |
|
|
|
|
||||
|
|||||||||
|
• CD-R/-RW in AUDIO CD format |
|
|
|
|
||||
|
|
|
|
|
|
|
|
|
|
DATA CD |
• CD-ROM/-R/-RW in DATA CD |
|
|
|
|
||||
|
|||||||||
|
format, containing MP3 audio |
|
|
|
|
||||
|
tracks1), JPEG image files2) or DivX |
||||||||
|
video files3), and conforming to ISO |
||||||||
|
96604) Level 1 or Level 2, or Joliet |
||||||||
|
(expansion format). |
|
|
||||||
|
|
|
|||||||
|
|
|
|
|
|
|
|
|
|
DATA DVD |
• DVD-ROM/-R/-RW/+R/+RW in |
|
|
||||||
|
|||||||||
|
DATA DVD format, containing |
|
|
||||||
|
MP3 audio tracks1), JPEG image |
||||||||
|
files2) or DivX video files3), and |
||||||||
|
conforming to UDF (Universal Disk |
||||||||
|
Format). |
||||||||
|
|
|
|
|
|
|
|
|
|
This system can also play back discs with the following disc logos:
Continued l
5GB
1)MP3 (MPEG 1 Audio Layer 3) is a standard format defined by ISO/MPEG which compresses audio data. MP3 audio tracks must be in MPEG 1 Audio Layer 3 format.
2)JPEG image files must conform to the DCF image file format. (DCF “Design rule for Camera File System”: Image standards for digital cameras regulated by Japan Electronics and Information Technology Industries Association (JEITA)).
3)DivX video files must be recorded in DivX format with the extension “.AVI” or “.DIVX”.
4)A logical format of files and folders on CD-ROMs, defined by ISO (International Organization for Standardization).
DivX® is a video file compression technology, developed by DivX, Inc..
DivX, DivX Certified, and associated logos are trademarks of DivX, Inc. and are used under license.
“DVD+RW”, “DVD-RW”, “DVD+R”, “DVD VIDEO”, and the “CD” logos are trademarks.
6GB

Discs that cannot be played
•CD-ROMs recorded in PHOTO CD format
•DATA CDs recorded in MP3 PRO format
•Data part of CD-Extras1)
•Data part of Mixed CDs2)
•Super Audio CDs
•DVD Audio discs
•DVD-RAMs
•A DVD VIDEO with a different region code.
•A disc that has a non-standard shape (e.g., heart, square, star).
•A disc that has the adhesive cellophane tape or a sticker still left on it.
•CPRM3) compatible DVD-Rs/-RWs recorded in Copy-Once programs.
1)CD-Extra: This format records audio (AUDIO CD data) on the tracks in session 1 and data on the tracks in session 2.
2)Mixed CD: This format records data on the first track and audio (AUDIO CD data) on the second and subsequent tracks of a session.
3)CPRM: Content Protection for Recordable Media is a coding technology that protects copyright for Copy-Once programs.
Region code of DVD VIDEOs you can play back on this system
Your system has a region code printed on the back of the unit and will only play back DVD VIDEOs labeled with identical region code.
DVD VIDEOs labeled ALL will also be played back on this system.
If you try to play back any other region code DVD VIDEO, the message “Playback prohibited by area limitations.” will appear on the TV screen. Depending on the DVD VIDEO, no region code indication may be labeled even though playing the DVD VIDEO is prohibited by area restrictions.
Note on DualDiscs
A DualDisc is a two sided disc product which mates DVD recorded material on one side with digital audio material on the other side. However, since the audio material side does not conform to Compact Disc (CD) standard, playback on this product is not guaranteed.
Notes on CD-R/-RW and
DVD-R/-RW/+R/+RW
•In some cases, CD-Rs/-RWs and DVD-Rs/-RWs/+Rs/+RWs cannot be played back on this system due to the recording quality or physical condition of the disc, or the characteristics of the recording device and authoring software. The disc will not be played back if it has not been correctly finalized. For more information, see the operation instructions for the recording device.
•Note that some playback functions may not work with some DVD+Rs/+RWs, even if they have been correctly finalized. In this case, view the disc by normal playback.
•A disc created in Packet Write format cannot be played back.
Note on playback operations of DVD VIDEOs and VIDEO CDs
Some playback operations of DVD VIDEOs and VIDEO CDs may be intentionally set by software producers. Since this system play back DVD VIDEOs and VIDEO CDs according to the disc contents the software producers designed, some playback features may not be available. Also, refer to the instructions supplied with the DVD VIDEOs or VIDEO CDs.
7GB

Music discs encoded with copyright protection technologies
This product is designed to play back discs that conform to the Compact Disc (CD) standard. Recently, various music discs encoded with copyright protection technologies are marketed by some record companies. Please be aware that among those discs, there are some that do not conform to the CD standard and may not be playable by this product.
Notes on Multi Session disc
•This system can play back Multi Session discs when an MP3 audio track (or a JPEG image file) is contained in the first session. Any subsequent MP3 audio tracks (or JPEG image files) recorded in later sessions can also be played back.
•If the first session is recorded in AUDIO CD or VIDEO CD format, only the first session will be played back.
•The system will recognize a Multi Session disc as an AUDIO CD if there is a session recorded in AUDIO CD format on the disc. However, the system will only play back the disc if the first session is recorded in AUDIO CD format.
•With DATA CD or DATA DVD, the system will only play back DivX video files even if it contains MP3 audio tracks or JPEG image files.
Copyrights
This product incorporates copyright protection technology that is protected by U.S. patents and other intellectual property rights. Use of this copyright protection technology must be authorized by Macrovision, and is intended for home and other limited viewing uses only unless otherwise authorized by Macrovision. Reverse engineering or disassembly is prohibited.
This system incorporates Dolby* Digital, Dolby Pro Logic (II) adaptive matrix surround decoder, and the DTS** Digital Surround System.
*Manufactured under license from Dolby Laboratories.
“Dolby”, “Pro Logic”, and the double-D symbol are trademarks of Dolby Laboratories.
**Manufactured under license from DTS, Inc. “DTS” and “DTS Digital Surround” are registered trademarks of DTS, Inc.
8GB

Guide to parts and controls
This manual mainly explains operations using the remote, but the same operations can also be performed using the buttons on the unit having the same or similar names.
Front panel
1 234 5 6789
wf |
|
q; |
wd |
|
|
ws |
|
qa |
|
qs |
|
wa |
|
|
|
|
|
w; |
|
qd |
ql |
|
|
qk |
|
|
qj |
qh |
qg qf |
Top panel
wg
Continued l
controls and parts to Guide
9GB
1"/1 STANDBY (pages 17, 18, 19, 22, 23, 54, 73, 74, 80, 81)
Press to turn the unit on or off.
BGROOVE (page 58)
Press to reinforce the bass.
3EQ BAND/MEMORY (page 58)
Press to select a frequency band when adjusting the equalizer.
4DISPLAY (pages 20, 67)
Press to display disc information in the front panel display or to change the front panel display during Power Saving Mode.
5ILLUMINATION (page 67)
Press to change the power illuminator.
F Display (pages 12, 67, 82)
G Disc tray (pages 12, 26, 76)
HCD SYNC (page 56)
Press to select CD Synchro Recording.
IREC PAUSE/START (page 56)
Press to start recording.
JDISC 1 ~ 3 (page 27)
Press to select a disc.
DISC SKIP/EX-CHANGE (pages 18, 26, 27)
Press to exchange other discs during playback.
Z OPEN/CLOSE (pages 18, 26,
KTUNING +/– (pages 53, 54)
Press to tune in a radio station.
M /m
/m (fast forward/ rewind) (page 27)
Press to fast forward or rewind.
nN (play) (pages 26, 55, 56, 74)
X (pause) (pages 26, 55)
x (stop) (pages 26, 53, 55, 56, 80)
Press to start, pause or stop playback.
LDIRECTION (pages 55, 56, 66)
Press to select the tape playback option.
MZ PUSH (Eject B) (page 55)
Press to insert or eject tape B.
Deck B (pages 55, 56, 66)
NECHO LEVEL (page 61, 62)
Turn to adjust the microphone echo effect.
OMIC 1/2 (jack) (pages 57, 62, 74)
Connect the microphones.
MIC 1/2 LEVEL (pages 57, 61, 74)
Turn to adjust the microphone volume.
PVIDEO INPUT (jacks) (page 71)
Connect an audio or video component.
76)Q PHONES (jack) (page 74)
Press to load or eject a disc.
Connect the headphones.
RMASTER VOLUME (pages 26, 65, 67, 74)
Turn to adjust the volume.
S Power illuminator (pages 67)
10GB
TZ PUSH (Eject A) (page 55)
Press to insert or eject tape A.
Deck A (page 55)
USOUND FIELD (page 59)
Press to select a sound field.
VPRESET EQ (page 58)
Press to select a preset effect.
WVIDEO (pages 67, 73) TV/SAT (pages 67, 73, 75) TAPE A/B (pages 55, 66, 67) TUNER/BAND (pages 53, 67) DVD (pages 18, 26, 56, 61, 67, 78)
Press to select a function.
wf Remote sensor (page 75)
wg . OPERATION DIAL > (pages 27, 53, 56, 58, 59)
Turn to select a setting.
controls and parts to Guide
Continued l
11GB
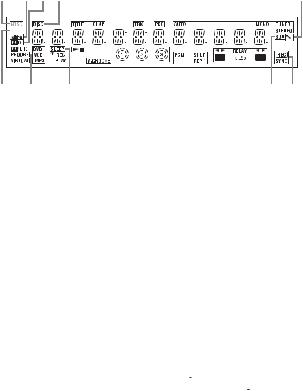
DISPLAY
1 234 5 6 7 8 |
|
9 |
|
q; |
||||||||||||
|
|
NTSC |
|
|
|
|
|
|
|
|
|
|
|
|||
|
|
|
|
|
|
|
|
|
|
|
|
|
||||
|
|
DCS |
|
|
|
|
|
|
|
|
|
|||||
|
|
PL |
|
|
|
|
||||||||||
|
|
|
|
|
|
|||||||||||
|
|
|
|
|
1 |
|
|
|
|
A |
B |
|||||
|
|
|
|
|
|
|
|
|
|
|
|
|
||||
|
|
|
|
|
|
|
|
|
|
|
|
|
|
|
|
|
|
|
|
|
|
|
|
|
|
|
|
|
|
|
|
|
|
ws waw;qlqkqj qh qg qf |
|
qd |
qs qa |
|||||||||||||
ALights up when the color system of the video output is NTSC (page 19).
BLights up when DTS source is played back (page 49).
CLights up when Dolby Digital source is played back (page 49).
DLights up when disc number is displayed.
ELights up when the elapsed playing time and the remaining playing time for the title or chapter is displayed (page 67).
FDisplays the current status and information (page 67).
GLights up when the track information is displayed.
HLights up when VIDEO CD with PBC functions is played back (page 29).
IIndicators for the TUNER function (page 53).
JLights up when Karaoke Mode is turned on (page 61).
K Lights up during recording (page 56).
LIndicators for sound field (page 59). (MHC-GNZ888D only)
“SUR” lights up when “LINK SUR” or “2CH SUR” is selected.
(MHC-GNZ777D only)
“SUR” lights up when “HP SUR” or “2CH SUR” is selected.
MIndicators for the TAPE function (page 55).
“A” and “B” lights up when the system is turned on.
“b” or “B” lights up when there is a tape in the deck and indicates the tape playback direction. “RELAY”, “g” and “j” indicates the tape playback option.
NIndicates the selected play mode (page 31).
“SHUF” lights up when Shuffle Play is activated. “PGM” lights up when Program Play is activated. “REP” lights up when Repeat Play is set to “ALL DISCS”, “ONE DISC”, “ALBUM” or “ON”. “REP 1” lights
up when Repeat Play is set to “TITLE”, “CHAPTER”, “TRACK” or “FILE”.
OIndicators for the disc tray (page 26). “
 ” lights up when there is a disc on
the disc tray. “
 ”, “1”, “2” and “3” light up when the system is turned on.
P“GROOVE” lights up when “GROOVE ON” is selected.
“V GROOVE” lights up when “V-GROOVE ON” is selected (page 58).
QIndicates the disc playback condition. “N” lights up when source is played back. “X” lights up when the source is paused.
12GB

RLights up when the Sleep Timer is activated (page 65).
SLights up when the Play Timer or Timer Recording is set (page 65).
TIndicators for the DVD function (page 26).
“DVD” lights up when DVD VIDEO, DVD-R/-RW in VR mode or DATA DVD is detected. “MP3” lights up when MP3 audio tracks are played back. “VCD” lights up when VIDEO CD or Super VCD is detected. “CD” lights up when AUDIO CD or DATA CD is detected.
ULights up when “P AUTO” or “P VIDEO” is selected (page 20).
VIndicators for sound field (page 59). (MHC-GNZ888D only) “VIRTUAL” and “DCS” light up when “V.M.DIM.” is selected. “; PL” or “; PL II” lights up when Pro Logic decoding or Pro Logic II Movie/Music decoding is performed.
(MHC-GNZ777D only) “VIRTUAL” lights up when “VIRTUAL A”, “VIRTUAL B” or “HP VIRTUAL” is selected.
Remote
wh |
1 |
|
wg |
2 |
|
wf |
3 |
|
wd |
4 |
|
ws |
||
5 |
||
|
||
|
6 |
|
|
7 |
|
wa |
8 |
|
|
9 |
|
w; |
q; |
|
|
qa |
|
ql |
qs |
qk
qd
qj
qf
qg
qh
1THEATRE SYNC (page 25)
Press to operate the THEATRE SYNC function.
BTV "/1 (on/standby) (page 21)
Press to turn the TV on or off.
"/1 (on/standby) (pages 17, 22, 74)
Press to turn the unit on or off.
CDISC SKIP (page 27)
Press to skip a disc.
DFUNCTION +/– (pages 26, 53, 55, 73)
Press to select a function.
EPICTURE NAVI (pages 36, 38)
Press to search for a scene or a file.
Continued l
controls and parts to Guide
13GB
FREPEAT/FM MODE (pages 33, 54, 79)
Press to change the Repeat Play setting.
Press to select the FM monaural or stereo reception.
GAUDIO (pages 28, 62, 69)
Press to select the audio format.
HSUBTITLE/D.TUNING (pages 28, 54)
Press to turn off or change the language of the subtitle.
Press to enter direct tuning mode.
IANGLE (page 28)
Press to change the angle.
J  (pages 24, 27)
Press to select an album.
KDVD/TUNER MENU (pages 34, 38, 53)
Press to display the menu of the DVD player.
Press to preset a radio station.
LSOUND FIELD (page 59)
Press to select a sound field.
MTV VOL +/–* (page 21)
Press to adjust the TV volume.
VOLUME +/–* (pages 26, 65, 74)
Press to adjust the volume.
N  DISPLAY (pages 31, 46, 63, 87)
Press to turn on or off or change the Control Menu display on the TV screen.
OTV CH +/– (page 21)
Press to select a TV channel.
PRESET +/– (page 53)
Press to select a preset station.
./> (go backward/go forward) (pages 27, 37, 56)
Press to go backward or go forward.
c STEP C (page 27)
Press to watch one frame at a time.
REPLAY /ADVANCE
 (page 27)
Press to replay the previous scene or fast forward the current scene.
TUNING +/– (pages 53, 54)
Press to tune in a radio station.
SLOW /SLOW
/SLOW  (page 27)
Press to watch frame by frame.
m/M (rewind/fast forward (page 27)
Press to rewind or fast forward.
H* (play) (pages 26, 55, 74) X (pause) (pages 26, 55)
x (stop) (pages 26, 53, 55)
Press to start, pause or stop playback.
PTV (page 21)
Hold down TV and press the button you want to operate the TV.
QO RETURN (pages 30, 36, 38)
Press to return to the previous display.
14GB

RV/v/B/b (pages 22, 31, 53, 63, 65)
Press to select the settings.
ENTER (pages 22, 31, 53, 58, 65)
Press to enter the selection.
SDVD TOP MENU (page 34)
Press to display the DVD title.
T-/-- (page 21)
Press to enter a double digit channel number for TV.
CLEAR (pages 23, 24, 31, 38)
Press to cancel the play mode or clear a mistake when you press the incorrect numeric button.
UNumeric buttons* (pages 21, 27, 43, 53)
Press to tune or preset a radio station, enter a track or file number, etc.
VKEY CONTROL 2/# (page 64) SCORE (page 64)
KARAOKE MODE (page 62) KARAOKE PON (page 64)
Press to enjoy the karaoke function.
WDISPLAY (pages 67)
Press to display disc information in the front panel display or to change the front panel display during Power Saving Mode.
wf TIME/TEXT (pages 67, 69)
Press to check the elapsed playing time, remaining time, etc.
wg TV INPUT (page 21)
Press to switch the TV’s input source.
SLEEP (pages 24, 65)
Press to activate the sleep timer.
wh TIMER MENU (pages 22, 65)
Press to set the time and timer.
*The numeric button 5, TV VOL +, VOLUME + and H buttons have a tactile dot. Use the tactile dot as a reference when operating the system.
controls and parts to Guide
15GB

Getting Started
Hooking up the system
MHC-GNZ888D
|
|
1To AM loop antenna |
A |
2 |
2To FM lead antenna |
|
1 |
3To front speaker (right) |
|
|
4To front speaker (left) |
5To surround speaker (right)
6To surround speaker (left)
7To center speaker
C
34567
B

 D
D
MHC-GNZ777D
|
|
1To AM loop antenna |
A |
2 |
2To FM lead antenna |
|
1 |
3To front speaker (right) |
|
|
4To front speaker (left) |
C
34
B

 D
D
16GB
AAntennas
Set up the AM loop antenna, then connect it.

 AM loop antenna Extend the FM lead
antenna horizontally
BSpeakers
The speaker connectors are color-coded with their respective speaker terminals.
Front speakers
SPEAKE |
White |
FRONT R |
|
L |
|
R |
|
Red |
|
Center speaker |
|
(MHC-GNZ888D only) |
|
CENTER |
|
SPEAKER |
|
Green
Surround speakers (MHC-GNZ888D only)
SURROUND |
Blue |
SPEAKER |
|
R |
|
Grey |
|
Tip
(MHC-GNZ888D only)
Connect the speaker cords to the terminals on the center and surround speakers.
Black (#) |
Red (3) |
Black (#) |
|
|
Red (3) |
|
|
|
|
|
|
|
|
Notes
•Be sure to use only the supplied speakers.
•Be sure to connect the speakers securely and correctly. When connecting speaker cords, insert the connector straight into the terminals.
CVOLTAGE SELECTOR
For models equipped with a voltage selector, set VOLTAGE SELECTOR to the position of your local power line voltage.
Depending on the model, the VOLTAGE SELECTOR may differ.
VOLTAGE SELECTOR
220V
240V
120V*
* Saudi Arabian model: 120 - 127V
DPower
Connect the power cord to a wall outlet. The demonstration appears in the display. When you press "/1 (or "/1 STANDBY on the unit), the system turns on and the demonstration automatically ends.
If the supplied adaptor on the plug does not fit your wall outlet, detach it from the plug (only for models equipped with an adaptor). For Saudi Arabian model, see “Note on power cord plug shapes” on page 2.
Started Getting
17GB
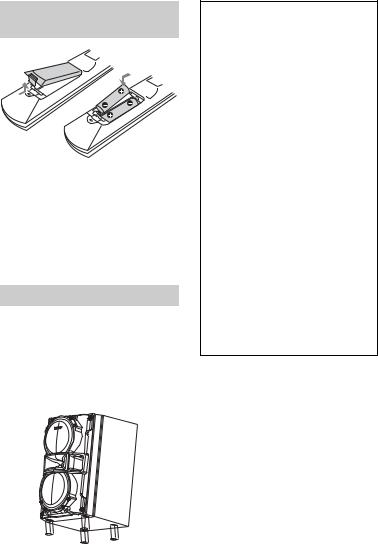
Inserting two R6 (size AA) batteries into the remote
Note
If you do not use the remote for a long period of time, remove the batteries to avoid possible damage from battery leakage and corrosion.
Tip
With normal use, the batteries should last for about six months. When the remote no longer operates the system, replace both batteries with new ones.
Attaching the speaker pads
Attach the supplied speaker pads at each corner on the bottom of the speakers to stabilize the speakers and to prevent them from slipping.
Example
Front speakers
When carrying the unit
Do the following procedure to protect the disc mechanism.
Use the buttons on the unit for the operation.
1Press "/1 STANDBY to turn on the system.
2Press DVD.
3Press Z OPEN/CLOSE to open the disc tray and remove the disc. If there are more than one disc in the disc tray, press DISC SKIP/EX-CHANGE to remove the discs.
4Press Z OPEN/CLOSE again to close the disc tray. Wait until “DVD NO DISC” appears in the display.
5Hold down DVD and then press "/1 STANDBY until “STANDBY” appears in the display. Then, “MECHA LOCK” appears in the display.
6Unplug the AC power cord.
18GB
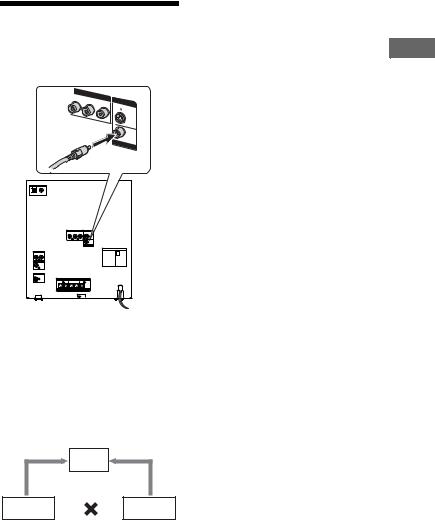
Hooking up the TV
Connect the video input jack of your TV to the VIDEO OUT jack with the supplied video cord.
COM |
|
|
|
|
|
PONE |
|
|
|
|
NT V |
|
|
|
|
|
IDEO |
|
|
Y |
PB/CB |
OUT |
S VID |
EO OUT |
|
PR/CR |
|
||
|
|
|
|
|
|
|
|
VIDEO |
|
|
|
|
|
OUT |
When connecting a video deck
Connect the video deck to the TV using a video cord (not supplied). However, do not connect this unit to the TV through the video deck. Otherwise, you may experience video leakage when watching video images from this system. Connect this unit directly to the TV as shown below.
TV
Video deck |
|
Unit |
|
Do not connect directly
Tip
For higher quality video images:
–Use the optional component video cords to connect the COMPONENT VIDEO input jacks on your TV to the COMPONENT VIDEO OUT jacks of this unit. If your TV is compatible with progressive format file signals, use this connection and set to progressive format (page 20).
–You can use an optional S Video cord to connect the S VIDEO input jack on your TV to the S VIDEO OUT jack of this unit.
Changing the color system
(Except for Russian models)
Set the color system to PAL or NTSC depending on the color system of your TV.
The default setting for color system is different depending on the area. Each time you perform the procedure below, the color system changes as follows:
NTSC y PAL
Use the buttons on the unit for the operation.
1Press "/1 STANDBY to turn on the system.
2Press DVD.
3Press "/1 STANDBY to turn off the system.
4When demonstration appears, press "/1 STANDBY while holding down X.
The system turns on automatically and the color system is changed. “COLOR NTSC” or “COLOR PAL” appears in the display.
Started Getting
19GB

Changing the format of the video signal from COMPONENT VIDEO OUT jacks
Progressive is a method for displaying TV images which reduces flickering and sharpens the image. To use this method, you need to connect to a TV that can accept progressive signals.
You can output video signals from COMPONENT VIDEO OUT jacks in INTERLACE or PROGRESSIVE format. Use the buttons on the unit for the operation.
1 Press DVD.
2 Hold down DVD and press DISPLAY repeatedly.
Select “P AUTO” or “P VIDEO” if your TV accepts progressive signals and the TV is connected to the COMPONENT VIDEO OUT jacks. Otherwise, select “INTERLACE”.
P AUTO (PROGRESSIVE AUTO)
The system automatically detects the software type and selects the appropriate conversion method.
P VIDEO (PROGRESSIVE VIDEO)
The system fixes the conversion method to PROGRESSIVE VIDEO for video-based software.
Select this if the image is not clear when you select “P AUTO”.
About DVD VIDEO software types and the conversion method
The DVD VIDEO software can be divided into 2 types:
•Film-based software
Film-based software is derived from film and displays the images at
24 frames per second.
•Video-based software
Video-based software is derived from TV, such as dramas and sitcoms and displays images at 30 frames or 60 fields per second.
Some DVD VIDEO contains both types of software. In order for these images to appear in your TV naturally when the video output is in progressive format, the progressive signals need to be converted to match your DVD VIDEO software.
Note
There would be no image on your TV or the image is not clear if your setting does not match your TV or connection.
20GB
When using a TV
Turn on the TV and select the video input so that you can view the images from this system.
Operating a Sony TV
You can use the following buttons to operate a Sony TV. These buttons have been marked in orange.
To |
Hold down TV and |
|
press |
|
|
Turn the TV on or off |
TV "/1 |
|
|
Switch the TV’s |
TV INPUT |
input source between |
|
the TV and other input |
|
sources |
|
|
|
Select the TV |
TV CH +/– or |
channels |
numeric buttons* |
|
|
Adjust the volume of |
TV VOL +/– |
the TV speaker(s) |
|
|
|
*For double digit number, hold down TV and press -/--, then press the number. (For example, hold down TV, press -/--, then 2 and 5 for entering 25.)
Positioning the speakers
Place the front speakers at an angle of 45 degrees from your listening position.
AFront speaker (left)
BFront speaker (right)
CCenter speaker1)
DSurround speaker (left)1)
ESurround speaker (right)1)
FSubwoofer (not supplied)2)
GUnit
HTV
A G H B
C 
F
45
D E
1)MHC-GNZ888D only.
2)When optional subwoofer is connected.
Continued l
Started Getting
21GB

Notes
•Do not place the surround speakers on top of a TV. This may cause distortion of the colors in the TV screen.
•Do not place the surround speakers further away from your listening position than the front speakers.
•If you place the center speaker on the unit, be sure to place it at the front side of the unit.
•Place the subwoofer on solid floor where resonance is unlikely to occur so that a better bass reproduction could be obtained.
•Always place the subwoofer vertically, keeping it a few centimeters away from the wall.
•If the subwoofer is placed in the center of a room, the bass could be extremely weakened. This is due to the influence of the standing wave of the room. If this happens, move the subwoofer away from the center of the room or eliminate the cause of the standing wave, by placing a bookshelf against the wall, etc.
Speaker settings
To enjoy DVD VIDEOs and other discs with multi-channel sound and Dolby surround effects, you need to adjust the speaker settings.
For details, see “Setting the speakers1) – SPEAKER SETUP” on page 50.
Setting the clock
1 Press "/1 (or "/1 STANDBY on the unit) to turn on the system.
2 Press TIMER MENU.
The hour indication flashes in the display.
If “PLAY SET” flashes in the display, press V or v repeatedly to select “CLOCK SET”, then press ENTER.
3 Press V or v repeatedly to set the hour.
4 Press ENTER.
The minute indication flashes in the display.
5 Press V or v repeatedly to set the minute.
6 Press ENTER.
The clock starts functioning.
Note
The clock settings are canceled when you disconnect the power cord or if a power failure occurs.
22GB
Performing QUICK
SETUP
Before using the system, you can make the minimum basic adjustments in QUICK SETUP. If you do not want to perform QUICK SETUP, press CLEAR in step 3. The guide message will disappear from the TV screen.
1 Turn on your TV and select the video input.
2 Press "/1 (or "/1 STANDBY on the unit) to turn on the system.
Note
Make sure that the headphones or microphones are not connected. Otherwise, you cannot perform SPEAKER SETUP.
3 Press FUNCTION +/– repeatedly to select “DVD” (or press DVD on the unit).
The guide message appears at the bottom of the TV screen.
4 Press ENTER without opening the disc tray or inserting a disc.
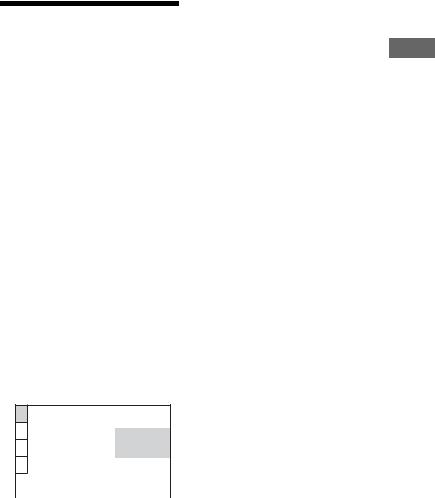
The “LANGUAGE SETUP” display appears on the TV screen.
LANGUAGE SETUP
|
|
OSD: |
ENGLISH |
|
|
MENU: |
ENGLISH |
|
|
AUDIO: |
FRENCH |
|
|
SUBTITLE: |
SPANISH |
|
|
|
PORTUGUESE |
|
|
|
|
5 Press V or v repeatedly to select a language, then press ENTER.
Tips
•The selected language is for “OSD”, “MENU” and “SUBTITLE”.
•The selectable language is different depending on the area.
The setting is selected and the “SCREEN SETUP” display appears on the TV screen.
6 Press V or v repeatedly to select the setting that matches your TV type.
If you have a 4:3 standard TV:
Select 4:3 LETTER BOX or 4:3 PAN SCAN (page 48)
If you have a wide-screen TV or a 4:3 standard TV with wide-screen mode:
Select 16:9 (page 48)
7 Press ENTER.
x For MHC-GNZ888D
The setting is selected and the “SPEAKER SETUP” display appears on the TV screen.
x For MHC-GNZ777D
The setting is selected and “QUICK SETUP is complete” appears on the TV screen.
Continued l
Started Getting
23GB

8 (MHC-GNZ888D only) Press V or v repeatedly to
select the front speaker distance from your listening position, then press ENTER.
Repeat this step to adjust the center and surround speaker distance.
The setting is selected and “QUICK SETUP is complete.” appears on the TV screen.
The system is ready for playback. If you want to change each setting individually, see “Using the DVD setup menu” on page 46.
To quit QUICK SETUP
Press  DISPLAY.
To recall QUICK SETUP
1Press  DISPLAY when playback is stopped.
The Control Menu appears on the TV screen.
2Press V or v repeatedly to select
 (SETUP), then press
ENTER.
3Press V or v repeatedly to select “QUICK”, then press ENTER.
Note
The guide message appears at the bottom of the TV screen when you turn on the system for the first time or after performing “RESET”
(page 81).
Using the THEATRE SYNC function
THEATRE SYNC allows you to turn on your Sony TV and this system, changes the system’s function to “DVD” and then switches the TV’s input source you have set with just one button.
Preparing to use the THEATRE SYNC function
Install the unit near the TV, then register the TV’s input source connected to this system.
Hold down |
To select the following |
SLEEP and |
TV’s input source |
press |
|
0No input source (Default)
1 to 8 |
VIDEO 1 to VIDEO 8 |
9 |
COMPONENT 1 |
|
|
CLEAR |
COMPONENT 2 |
|
|
– |
COMPONENT 3 |
|
|
+ |
COMPONENT 4 |
|
|
The selected TV’s input source is memorized into the remote.
24GB

Operating the THEATRE SYNC function
Point the remote in the direction of the TV and this unit. Then, hold down THEATRE SYNC until the TV is turned on and the input source is changed correctly.
If this function does not work, change the transmission time. The transmission time varies depending on the TV.
To change the transmission time
Hold down > To select the following and press transmission time
10.5 (Default)
21
31.5
42
52.5
63
73.5
84
Started Getting
25GB

Disc
Playing a disc
— Normal Play
Before playing a DVD VIDEO, a DVD-R/-RW in VR mode, a VIDEO CD, JPEG image files or DivX video files1), turn on your TV and select the video input.
Depending on the DVD VIDEO or VIDEO CD, some operations may be different or restricted. Refer to the operating instructions supplied with the disc.
1)MHC-GNZ777D Russian model only/MHCGNZ888D.
Example: When playing a DVD VIDEO:
Elapsed playing time
1 |
1 |
1 |
A |
B |
B
Disc playing indicator
1 Press FUNCTION +/– repeatedly to select “DVD” (or press DVD on the unit).
2 Press Z OPEN/CLOSE on the unit.
3 Load a disc with the label side facing up on the disc tray.
When you play back an 8 cm disc such as a
CD single, place  it on the inner
circle of the tray
To load additional discs, press
DISC SKIP/EX-CHANGE on the unit to rotate the disc tray.
4 Press Z OPEN/CLOSE on the unit to close the disc tray.
Do not forcibly push the disc tray to close it as this may cause a malfunction.
5 Press H (or nN on the unit).
6 Press VOLUME +/– (or turn MASTER VOLUME on the unit) to adjust the volume.
Note
Depending on the system status, the volume level may not appear on the TV screen.
Other operations
To |
Do this |
Stop playback |
Press x |
|
|
Pause playback |
Press X. Press X again |
|
or H (or nN on the |
|
unit) to resume playback. |
|
|
26GB
To |
Do this |
|
|
Select a track1), |
• Press . or > |
||
chapter or video |
repeatedly during |
||
file |
playback, or |
|
|
|
• Turn . |
|
|
|
OPERATION DIAL |
||
|
> on the unit |
|
|
|
clockwise or |
|
|
|
counterclockwise |
||
|
during playback, or |
||
|
• Press the numeric |
||
|
buttons when the |
||
|
Control Menu is turned |
||
|
off, then press |
|
|
|
ENTER2). |
|
|
Select an album3) |
Press |
+/– repeatedly |
|
|
during playback or when |
||
|
playback is paused. |
||
|
|
||
Locate a point |
Press m or M (or |
||
quickly in fast |
M |
or m on |
|
forward or fast |
the unit) during |
|
|
reverse (Lock |
playback. Each time you |
||
Search)4)5) |
press m or M (or |
||
|
M |
or m on |
|
|
the unit), the playback |
||
|
speed changes |
|
|
|
cyclically. |
|
|
|
To return to normal |
||
|
playback, press H |
||
|
(or nN on the unit). |
||
|
|
|
|
Watch frame by |
Press SLOW |
or |
|
frame (Slow- |
SLOW |
(or M |
|
motion Play)6) |
or m on the unit) |
||
|
when playback is |
|
|
|
paused. Each time you |
||
|
press SLOW |
or |
|
|
SLOW |
(or M |
|
|
or m on the unit), |
||
|
the playback speed |
||
|
changes. |
|
|
To return to normal playback, press H (or nN on the unit).
To |
Do this |
Play one frame |
Press STEP C to go to |
at a time (Freeze |
the next frame when |
Frame)6) |
playback is paused. |
|
Press c STEP7) to go |
|
to the preceding frame |
|
when playback is |
|
paused. |
|
To return to normal |
|
playback, press H |
|
(or nN on the unit). |
|
|
Replay the |
Press REPLAY |
previous scene |
during playback. |
(Instant Replay)7) |
|
Briefly fast |
Press ADVANCE |
forward the |
during playback. |
current scene |
|
(Instant |
|
Advance)7) |
|
Select a disc |
Press DISC SKIP on the |
|
remote (or one of the |
|
DISC 1 ~ 3 buttons on |
|
the unit). |
|
|
Switch to DVD |
Press one of the DISC 1 |
function from |
~ 3 buttons on the unit |
another source and (Automatic Source |
|
start playback |
Selection). |
automatically |
|
|
|
Exchange other |
Press DISC SKIP/ |
discs while |
EX-CHANGE on the |
playing |
unit. |
|
|
1)You cannot select an audio track during Lock Search operation of MP3 audio tracks.
2)DVD VIDEO, DVD-R/-RW in VR mode, VIDEO CD, AUDIO CD and DivX video files only.
3)MP3 audio tracks, JPEG image files and DivX video files only.
4)Except for JPEG image files.
5)Depending on the disc, the actual speed may differ.
6)DVD VIDEO, DVD-R/-RW in VR mode, DivX video files and VIDEO CD only.
7)DVD VIDEO and DVD-R/-RW in VR mode only.
Continued l
Disc
27GB

Notes
•You cannot search for a still picture on a DVD-R/-RW in VR mode.
•You may not be able to use the Instant Replay or Instant Advance function in Repeat Play mode or with some scenes.
Displaying multi-angles and subtitles
Changing the angles
(DVD VIDEO only)
You can change the viewing angle while playing a DVD VIDEO on which various angles (multi-angles) for a scene are recorded.
Press ANGLE repeatedly during playback. Each time you press ANGLE, the angle changes.
Note
Depending on the DVD VIDEO, you may not be able to change the angle, even if multi-angles are recorded on the DVD VIDEO.
Displaying the subtitles
(DVD VIDEO, DVD-R/-RW in VR mode and DivX video files only)
While playing a DVD VIDEO, DVD-R/-RW in VR mode or DivX video files, you can
–turn the subtitles on or off if the subtitles are recorded.
–change the language of the subtitles if multilingual subtitles are recorded.
Press SUBTITLE repeatedly during playback. Each time you press SUBTITLE, the subtitle language changes or turns off.
Notes
•Depending on the DVD VIDEO, you may not be able to change the subtitles even if multilingual subtitles are recorded. You also may not be able to turn the subtitles off.
•You can change the subtitles if the DivX video file has an “.AVI” or “.DivX” extension and contains subtitle information within the same file.
Other useful functions
Selecting the audio format
When playing a DVD VIDEO or a DivX video file recorded in multiple audio formats, you can select the audio format you want. If the DVD VIDEO is recorded with multilingual tracks, you can also change the language.
When playing a VIDEO CD, AUDIO CD or MP3 audio tracks, you can select the sound from the right or left channel and listen to the sound of the selected channel through both the right and left speakers. For example, when playing a track with the vocals on the right channel and the instruments on the left channel, you can hear the instruments from both speakers by selecting the left channel.
Press AUDIO repeatedly during playback to select the audio signal you want.
The default settings are underlined.
When playing a DVD VIDEO:
Depending on the DVD VIDEO, the option of language and audio format varies.
When a 4-digit number is displayed, the digits represent a language code (see “Language code list” on page 90). When the same language is displayed two or more times, the DVD VIDEO is recorded in multiple audio formats. Note that the sound changes automatically depending on the disc.
28GB

When playing a DVD-R/-RW in VR mode:
The number of audio tracks recorded on a disc are displayed.
Example:
•1: MAIN: the main sound of the audio track 1.
•1: SUB: the sub sound of the audio track 1.
•1: MAIN+SUB: the main and sub sound of the audio track 1.
•2: MAIN*: the main sound of the audio track 2.
•2: SUB*: the sub sound of the audio track 2.
•2: MAIN+SUB*: the main and sub
sound of the audio track 2.
*These items do not appear if only one audio stream is recorded on the disc.
When playing a DivX video file:
The options for audio format differ depending on the DivX video files.
When playing a VIDEO CD, AUDIO CD or MP3 audio track:
•STEREO: the standard stereo sound.
•1/L: the sound of the left channel (monaural).
•2/R: the sound of the right channel (monaural).
When playing a Super VCD:
•1: STEREO: the stereo sound of the audio track 1.
•1: 1/L: the sound of the left channel of the audio track 1 (monaural).
•1: 2/R: the sound of the right channel of the audio track 1 (monaural).
•2: STEREO: the stereo sound of the audio track 2.
•2: 1/L: the sound of the left channel of the audio track 2 (monaural).
•2: 2/R: the sound of the right channel of the audio track 2 (monaural).
Playing VIDEO CDs with PBC functions (Version 2.0) – PBC Playback
(VIDEO CD only)
You can use the PBC (Playback Control) menus on your TV screen to enjoy the disc’s interactive software. The menu format and structure may differ depending on each disc.
1Press H (or nN on the unit) to start playing a VIDEO CD with PBC functions (Version 2.0).
The PBC menu appears on the TV screen. Depending on the VIDEO CD, the menu may not appear.
2Press the numeric buttons to select the item number you want.
3Press ENTER.
Depending on the VIDEO CD, “Press ENTER” may appear as “Press SELECT” in the operating instructions supplied with the disc. In this case, press H (or nN on the unit).
4Continue playback according to the instructions on the menus.
Refer to the operating instructions supplied with the VIDEO CD, as the operating procedure may differ depending on the VIDEO CD.
Continued l
Disc
29GB
 Loading...