


ENGLISH
FRANÇAIS
KD-X40/KD-X30
DIGITAL MEDIA RECEIVER /
RÉCEPTEUR MULTIMÉDIA NUMÉRIQUE
For canceling the display demonstration, see page 3. /
Pour annuler la démonstration des affichages, référez-vous à la page 3.
For installation and connections, refer to the separate manual.
Pour l’installation et les raccordements, se référer au manuel séparé.
INSTRUCTIONS
MANUEL D’INSTRUCTIONS
ʷʾʿʺƖʷʷʺ
ƾ ƭ ƿ
Thank you for purchasing a JVC product.
Please read all instructions carefully before operation, to ensure your complete understanding and to obtain the best possible performance from the unit.
.
|
|
|
|
|
|
|
|
|
|
|
Warning: |
|
|
|
|
|
|
|
|
|
|
||
|
|
|
|
|
|
|
|
|
Stop the car before operating the unit. |
||
|
|
|
|
|
|
|
|
||||
|
|
|
|
|
Battery |
|
|
|
Caution: |
||
|
|
|
|
|
|
|
|||||
|
|
|
|
|
|
Adjust the volume so that you can hear sounds |
|||||
|
|
|
|
|
|||||||
|
Products |
|
outside the car. Driving with the volume too high |
||||||||
|
Information for Users on Disposal |
|
may cause an accident. |
||||||||
|
|
Avoid using the USB device or iPod/iPhone if it |
|||||||||
|
of Old Equipment and Batteries |
|
|||||||||
|
|
might hinder driving safety. |
|||||||||
|
[European Union only] |
|
|||||||||
|
|
|
|
Caution on volume setting: |
|||||||
|
These symbols indicate that the product |
|
|
|
|||||||
|
|
|
|||||||||
|
and the battery with this symbol should |
|
Digital devices (USB) produce very little noise |
||||||||
|
not be disposed as general household |
|
compared with other sources. Lower the volume |
||||||||
|
waste at its end-of-life. |
|
before playing these digital sources to avoid |
||||||||
|
If you wish to dispose of this product and |
|
damaging the speakers by the sudden increase of |
||||||||
|
the battery, please do so in accordance |
|
the output level. |
||||||||
|
with applicable national legislation or other |
|
|
|
Temperature inside the car: |
||||||
|
|
|
|||||||||
|
rules in your country and municipality. |
|
If you have parked the car for a long time in hot |
||||||||
|
By disposing of this product correctly, you |
|
|||||||||
|
|
or cold weather, wait until the temperature in the |
|||||||||
|
will help to conserve natural resources and |
|
|||||||||
|
|
car becomes normal before operating the unit. |
|||||||||
|
will help prevent potential negative effects |
|
|||||||||
|
|
|
|
|
|||||||
|
on the environment and human health. |
|
|
|
|
||||||
|
|
|
|
How to read this manual: |
|||||||
|
Notice: |
|
|
|
|||||||
|
|
This manual mainly explains operations using |
|||||||||
|
The sign Pb below the symbol for batteries |
|
|
|
the buttons on the control panel. |
||||||
. |
indicates that this battery contains lead. |
|
< > indicates the displays on the control |
||||||||
|
|
|
|
|
|
|
|
|
|
panel. |
|
|
|
|
|
|
|
|
|
|
|
|
|
|
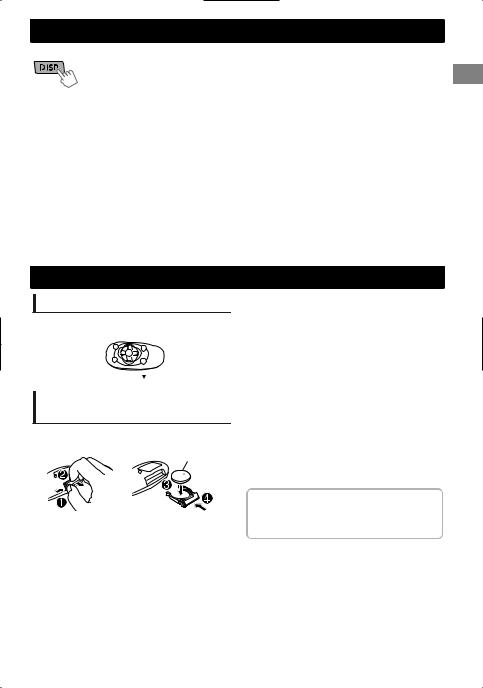
How to reset your unit |
|
[XX] indicates the initial setting of a menu |
||||||||
|
|
|
|
|
|
|
|
|
|
|
item. |
|
|
|
|
|
Your preset adjustments will |
||||||
|
|
|
|
|
|
|
|
|
|||
|
|
|
|
|
also be erased. |
|
|
|
|
||
|
|
|
|
|
|
|
|||||
|
Maintenance |
|
|
|
|
||||||
|
|
Cleaning the unit |
|
|
|
|
|||||
|
|
|
|
|
|
||||||
Wipe off the dirt on the panel with a dry silicon or |
|
|
|
|
|||||||
soft cloth. Failure to observe this precaution may |
|
|
|
|
|||||||
result in damage to the unit. |
|
|
|
|
|||||||
2 | ENGLISH

Contents |
|
Preparation ............................................................ |
3 |
Canceling the display demonstration |
|
Setting the clock |
|
Basic operations ................................................... |
4 |
Remote controller .................................................. |
5 |
Radio ........................................................................ |
6 |
USB ............................................................................ |
8 |
iPod/iPhone (KD-X40 only) .................................. |
9 |
External components ...................................... |
10 |
Bluetooth ............................................................ |
10 |
Illumination color adjustments |
|
(KD-X40 only) ......................................................... |
11 |
Brightness adjustments .................................. |
12 |
Sound adjustments .......................................... |
12 |
Menu operations ............................................... |
13 |
Additional information ................................... |
16 |
Troubleshooting ................................................ |
18 |
Specifications ..................................................... |
19 |
Preparation
Canceling the display demonstration
The display demonstration is always turned on unless you cancel it.
1


 (Hold)
2
(Initial setting)
3 Select <DEMO OFF>.
4 Press MENU to exit.
Setting the clock
1


 (Hold)
2 Select <CLOCK>.
3 Select <CLOCK SET>.
4 Adjust the hour.
(Initial setting)
5 Adjust the minute.
6 Select <24H/12H>.
7 Select <24 HOUR> or <12 HOUR>.
8 Press MENU to exit.
ENGLISH | 3

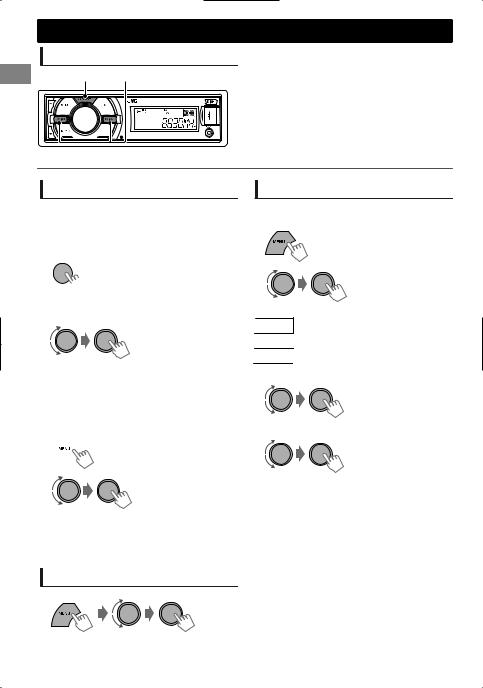
Basicoperations
|
Control panel |
Remote controller |
|
|
Display window |
(For KD-X40 only) |
|
|
|||
|
|
|
|
|
|
|
|
Control dial
Remote sensor
 Aim the remote controller directly at the sensor.
 DO NOT expose to bright sunlight.
When you press or hold the following button(s)...
|
Control panel |
Remote |
|
General function |
||
|
controller |
|
||||
|
|
|
|
|
|
|
|
|
|
Turns on. |
|
|
|
|
|
— |
Turns off. (Hold) |
|
|
|
|
/SOURCE |
Press the /SOURCE button on the control panel and turn |
||||
|
|
|||||
|
|
|
|
the control dial within 2 seconds to select the source. |
||
|
|
SOURCE |
Press repeatedly to select the source. |
|||
|
Control dial |
VOL - / + |
Adjusts the volume level. |
|
|
|
|
(turn) |
— |
Selects items. |
|
|
|
|
|
|
Mutes the sound or pauses playback. |
|||
|
Control dial |
|
Press the button again to cancel muting or resume |
|||
|
(press) |
|
|
playback. |
|
|
|
|
— |
Confirms selection. |
|
|
|
|
|
— |
Enters <BRIGHTNESS> menu directly. (KD-X30 only) |
|||
|
( page 12) |
|
|
|||
|
|
|
|
|
||
|
iPod |
— |
Switches to iPod source. (KD-X40 only) |
|||
|
Switches the iPod mode when in the iPod source. (KD-X40 |
|||||
|
|
|
|
only) ( page 9) |
|
|
|
EQ |
SOUND |
Selects the preset sound mode. ( |
page 12) |
||
|
|
|
|
Activates/deactivates TA Standby Reception. ( page 7) |
||
|
|
— |
|
Enters PTY Search mode. (Hold) ( |
page 7) |
|
|
Returns to the previous menu. |
|
||||
|
|
|
|
|||
|
|
|
Exits from the menu. (Hold) |
|
|
|
/ |
/ |
|
Selects a preset station. ( |
page 6) |
||
|
Selects MP3/WMA folder. ( |
page 8) |
||||
|
|
|
|
|||
|
|
|
|
|
||
|
|
|
|
Searches for a station automatically. ( page 6) |
||
/ |
/ |
Searches for a station manually. (Hold) |
||||
|
Selects track. ( page 8, 9) |
|
|
|||
|
|
|
|
|
|
|
. |
|
Fast-forwards or reverses track. (Hold) |
||||
|
|
|
|
|
||
KD-X30 can be remotely controlled as instructed here (with an optionally purchased remote controller). We recommend that you use remote controller RM-RK52 with your unit.
4 | ENGLISH
Basic operations
 Display information
Changes the display information. (Press)
Scrolls the current display information. (Hold)
|
Source |
Display |
|
Radio |
Non-Radio Data System station: Frequency ) Clock |
|
|
FM Radio Data System station: Station name (PS) -Frequency - |
|
|
Programme type (PTY) -Clock -(back to the beginning) |
|
|
|
|
USB |
Album title/Artist -Track title - Track no./Playing time -Track no./ |
|
iPod/iPhone (HEAD MODE/ |
Clock - (back to the beginning) |
|
IPOD MODE) *1 |
|
|
|
|
|
iPod/iPhone (EXT MODE) *1 |
EXT MODE )Clock |
|
|
|
|
External Components (AUX) |
F-AUX or R-AUX )Clock |
|
|
|
|
Bluetooth Audio |
BT AUDIO )Clock |
|
|
|
*1 For KD-X40 only.
Remote controller
Preparing
When you use the remote controller for the first time, pull out the insulation sheet.
Insulation sheet 

Replacing the lithium coin battery
If the effectiveness of the remote controller decreases, replace the battery.
CR2025
 Caution:
Danger of explosion if battery is incorrectly replaced. Replace only with the same or equivalent type.
Battery shall not be exposed to excessive heat such as sunshine, fire, or the like.
 Warning:
Do not install any battery other than CR2025 or its equivalent.
Do not leave the remote controller in places (such as dashboards) exposed to direct sunlight for a long time.
Store the battery in places out of reach of children.
Do not recharge, short, disassemble, heat the battery, or dispose of it in a fire.
Do not place the battery with other metallic materials.
Do not poke the battery with tweezers or similar tools.
Insulate the battery by wrapping it with tape when disposing or storing it.
This unit is equipped with the steering wheel remote control function. For details, refer also to the instructions supplied with the remote adapter.
ENGLISH | 5
Radio
Searching for a station
A |
B |
Select <FM> or <AM>. |
|
|
Auto search. (Press) |
|
|
Manual search. (Hold) |
|
|
“M” flashes, then press the button repeatedly. |
“ST” lights up when receiving an FM stereo broadcast with sufficient signal strength.
Storing stations in memory
 Manual presetting
You can preset up to 18 stations for FM and 6 stations for AM.
While listening to a station...
1 
 (Hold)
“PRESET MODE” flashes.
2 Select preset number.
The preset number flashes and “MEMORY” appears.
 Auto presetting (FM only)
SSM (Strong-station Sequential Memory)
You can preset up to 18 stations for FM.
1 
(Hold)
2 |
-<TUNER> |
|
-<SSM> |
|
-<SSM 01 – 06> |
“SSM” flashes. When all the stations are stored,
“SSM” stops flashing.
To preset <SSM 07 – 12>/<SSM 13 – 18>, repeat steps 1 and 2.
Selecting a preset station
You can also select a preset station using / .
6 | ENGLISH
Setting the Radio Timer
You can tune in to a preset station at a specific time regardless of the current source.
1 |
|
(Hold) |
|
|
|
2 |
|
-<TUNER> |
|
|
-<RADIO TIMER> |
|
|
-<OFF>/<ONCE>/ |
|
|
<DAILY> |
|
[OFF] |
Cancels Radio Timer. |
|
ONCE |
Activates once. |
|
DAILY |
Activates daily. |
3 |
Select the preset station. |
|
|
|
-<FM>/<AM> |
|
|
-<01> ... <18> for FM/ |
|
|
<01> ... <06> for AM |
4 Set the activation time.
5Press MENU to exit.
lights up after the Radio Timer has been set.
Only one timer can be set. Setting a new timer will override the previous setting.
The Radio Timer will not activate if the unit is turned off or if <AM> is set to <OFF> after selecting an AM station for the timer.
The following features are available only for FM Radio Data System stations.
Searching for your favorite Programmes—Programme Type (PTY) Search
1


 (Hold)
2 Select a PTY code.
PTY Search starts.
If there is a station broadcasting a programme of the same PTY code as you have selected, that station is tuned in.
|
PTY codes |
|
|
|
|
|
|
|
|||
|
NEWS, AFFAIRS, INFO, SPORT, EDUCATE, DRAMA, CULTURE, |
|
|
|
|
|
SCIENCE, VARIED, POP M (music), ROCK M (music), EASY M |
|
|
|
|
|
(music), LIGHT M (music), CLASSICS, OTHER M (music), |
|
|
|
|
|
WEATHER, FINANCE, CHILDREN, SOCIAL, RELIGION, |
|
|
|
|
|
PHONE IN, TRAVEL, LEISURE, JAZZ, COUNTRY, NATION M |
|
|
|
|
|
(music), OLDIES, FOLK M (music), DOCUMENT |
|
|
|
|
|
|
|
|
|
|
Activating TA/News Standby
Reception
Standby Reception allows the unit to switch temporarily to Traffic Announcement (TA) or NEWS programme from any source other than AM.
 TA Standby Reception
TP indicator |
TA Standby Reception |
The unit will temporarily switch Lights up to Traffic Announcement (TA) if
available.
Not yet activated. Tune in to Flashes another station providing the
Radio Data System signals.
To deactivate, press again.
Radio
NEWS Standby Reception
1
(Hold)
2 |
-<TUNER> |
-<NEWS-STBY> -<NEWS ON>
The unit will temporarily switch to News Programme if available.
If the volume is adjusted during reception of Traffic Announcement or News, the adjusted volume is automatically memorized. It will be applied the next time the unit switches to Traffic Announcement or News.
Tracking the same programme —Network-Tracking Reception
When driving in an area where FM reception is not sufficient enough, this unit automatically tunes in to another FM Radio Data System station of the same network, possibly broadcasting the same programme with stronger signals.
1 
(Hold)
2 |
-<TUNER> |
|
|
|
-<AF-REG> * |
|
|
|
|
|
Switches to another station. |
|
[AF ON] |
The programme may differ |
|
from the one currently received |
|
|
|
|
|
|
(the AF indicator lights up). |
|
|
Switches to another station |
|
AF-REG ON |
broadcasting the same |
|
programme (the AF indicator |
|
|
|
|
|
|
lights up). |
|
|
|
|
OFF |
Cancels. |
|
|
|
* AF-REG: Alternative Frequencies-Regional
Automatic station selection— Programme Search
When the signal of a preset station you have selected is weak, this unit searches for another station possibly broadcasting the same programme as the original preset station is broadcasting.
<P-SEARCH> ( page 15)
ENGLISH | 7
USB
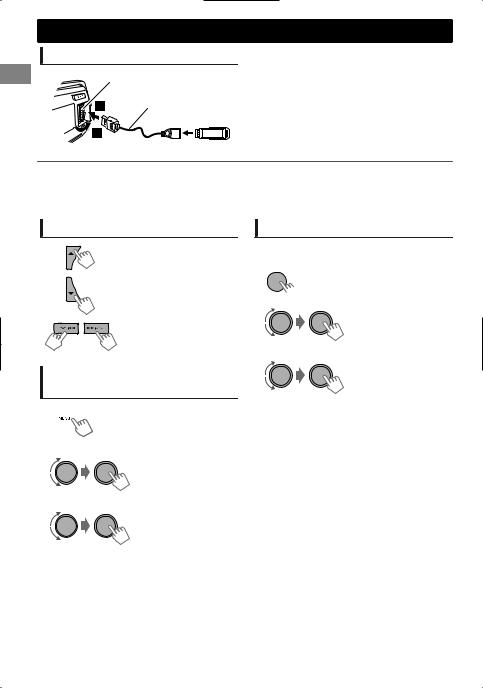
Playing a USB device
USB input terminal
USB 2.0 cable (not supplied)
The source changes to “USB” and playback starts.
This unit can play MP3/WMA files stored in USB mass storage device (such as a USB memory and Digital Audio Player).
Make sure all important data has been backed up. We shall bear no responsibility for any loss of data in USB mass storage class device while using this system.
Selecting a folder/track
Selects folder.
Selects track. (Press)
Fast-forwards or reverses the track. (Hold)
Selecting a track/folder from the list
1 
2 Select a folder.
3 Select a track.
Selecting the playback modes
You can select one of the following playback modes at a time.
1 
 (Hold)
2
#<REPEAT>)<RANDOM>
3
REPEAT
|
RPT OFF |
Cancels repeat playback. |
|
TRACK RPT |
Repeats current track. |
|
FOLDER RPT |
Repeats current folder. |
|
|
|
RANDOM |
|
|
|
RND OFF |
Cancels random playback. |
|
|
Randomly plays all tracks of |
|
FOLDER RND |
current folder, then tracks of |
|
|
next folders. |
|
ALL RND |
Randomly plays all tracks. |
|
|
|
If the USB device contains many folders or tracks, you can fast search for desired folder or track by turning the control dial quickly.
8 | ENGLISH
iPod/iPhone
KD-X40 only
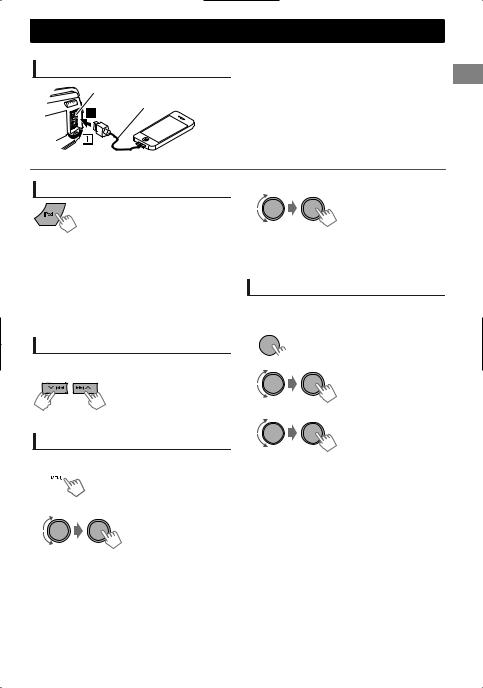
Playing an iPod/iPhone
USB input terminal
USB 2.0 cable (accessory of the iPod/iPhone)
The source changes to “USB” - “USB-IPOD” and playback starts.
Selecting the control mode
|
|
#<HEAD MODE>/<IPOD MODE>/ |
|
|
<EXT MODE> |
|
|
|
|
HEAD |
Controls iPod playback through this |
|
MODE |
unit. |
|
IPOD |
Controls iPod playback from the |
|
MODE |
iPod/iPhone. |
|
EXT |
Allows any audio signals from iPod/ |
|
MODE |
iPhone. |
You can also change the setting using <IPOD SWITCH> in the menu. ( page 15)
Selecting a track
Applicable under <HEAD MODE/IPOD MODE> only.
Selects track/chapter. (Press)
Fast-forwards or reverses the track. (Hold)
Selecting a track from the list
3 Select the desired track.
Repeat this step until the desired track is selected.
If the selected menu contains many tracks, you can fast search for the desired track by turning the control dial quickly.
Selecting the playback modes
Applicable under <HEAD MODE> only.
You can select one of the following playback modes at a time.
1 
 (Hold)
2
#<REPEAT>)<RANDOM>
3
Applicable under <HEAD MODE> only.
1 
2 Select the desired list.
PLAYLISTS)ARTISTS)ALBUMS)SONGS) PODCASTS)GENRES)COMPOSERS) (back to the beginning)
REPEAT
|
ONE RPT |
Functions the same as “Repeat |
|
One” of the iPod. |
|
|
|
|
|
ALL RPT |
Functions the same as “Repeat |
|
All” of the iPod. |
|
|
|
|
RANDOM |
|
|
|
RND OFF |
Cancels random playback. |
|
SONG RND |
Functions the same as “Shuffle |
|
Songs” of the iPod. |
|
|
|
|
|
ALBUM RND |
Functions the same as “Shuffle |
|
Albums” of the iPod. |
|
|
|
“ALBUM RND” is not applicable for some iPod/ iPhone.
ENGLISH | 9
Externalcompcomponents
For details, refer also to the instructions supplied with the external components.
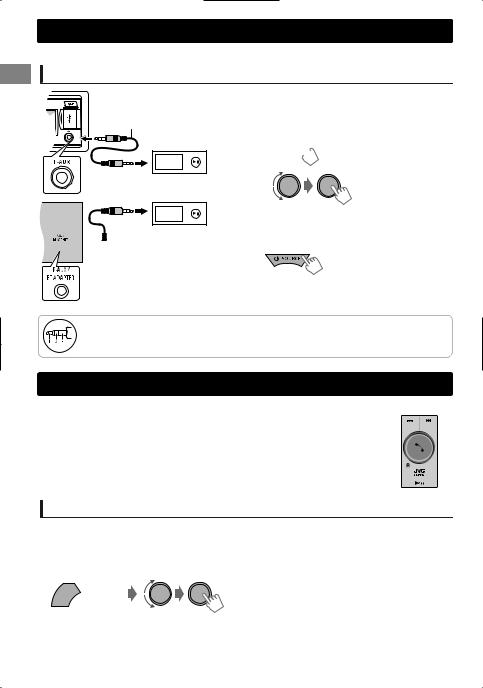
Playing an external component from Front/Rear AUX
3.5 mm stereo mini plug (not supplied)
Portable audio player, etc.


 3.5 mm stereo mini plug (with “L” shaped connector) (not supplied)
1Connect to F-AUX on the control panel and/or R-AUX on the rear panel.
2 Set the source as necessary.
 (Hold)
-<SRC SELECT> -<F-AUX>/<R-AUX>
-<F-AUX ON> or <R-AUX ON>
Press MENU to exit.
3 Select <F-AUX> or <R-AUX>.
4Turn on the connected component and start playing the source.
Use a 3-terminal plug head stereo mini plug for optimum audio output. Otherwise, sound may be interrupted or unclear while listening to an external component.
Bluetooth
For Bluetooth operations, it is required to connect the Bluetooth adapter, KS-BTA100 |
KS-BTA100 |
||
(separately purchased) to the auxiliary input jack (R-AUX/BT ADAPTER) on the rear of |
|||
|
|
||
|
|
||
the unit. ( Installation/Connection Manual) |
|
|
|
|
|
||
KS-BTA100 is not available in some countries. Please contact your dealer where you purchased this unit.
Operations may be different depending on the connected Bluetooth device. For details, refer also to the instructions supplied with the device.
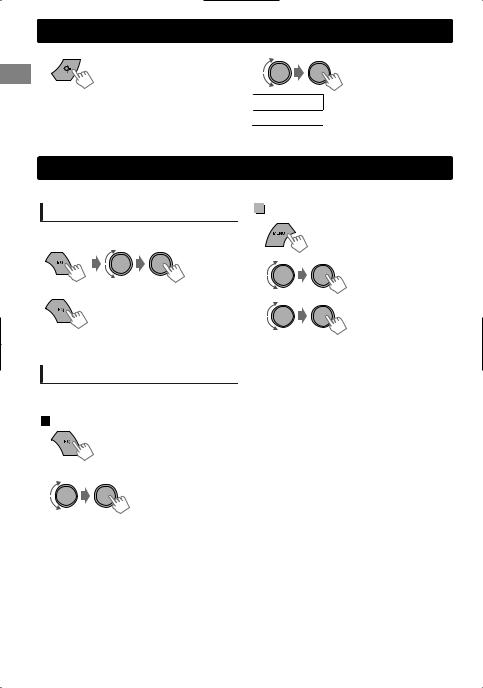
Preparation
For details on registering and using the Bluetooth device, refer to the instructions manual supplied with KS-BTA100.
1 Register (pair) a Bluetooth device with KS-BTA100.
2 Change the <SRC SELECT> settings of this unit.


 (Hold)
3 Press MENU to exit.
-<SRC SELECT> -<R-AUX> -<BT ADAPTER>
10 | ENGLISH
Illumination color adjustments
KD-X40 only
All zone |
All zone: Includes both Button zone and |
|
Display zone. |
Button zone |
Display zone |
Selecting the preset color
You can select a preset color for <BUTTON ZONE>, <DISP ZONE>, and <ALL ZONE> separately.
1 
(Hold)
2 Select <COLOR>.
3
|
BUTTON ZONE |
COLOR 01-29/USER/ |
|
|
COLOR FLOW 01-03* |
|
DISP ZONE |
|
|
* Color changes in |
|
|
ALL ZONE |
different speeds. |
|
|
|
|
|
|
Initial color: BUTTON ZONE [06], DISP ZONE [01], ALL ZONE [06].
If <ALL ZONE> is selected, the button and display illumination will change to the current/ selected <BUTTON ZONE> color.
4 Press MENU to exit.
Storing your own adjustments
You can store your own day and night colors for <BUTTON ZONE> and <DISP ZONE> separately.
1
(Hold)
2 Select <COLOR SETUP>.
3
|
|
BUTTON |
Select a primary |
|
|
color <RED/GREEN/ |
|
|
DAY |
ZONE |
BLUE>, and then |
|
|
adjust the level |
|
|
COLOR |
DISP |
<00-31>. Repeat this |
|
|
procedure until you |
|
|
|
ZONE |
have adjusted all the |
|
|
|
three primary colors. |
|
|
BUTTON |
Your adjustment is |
|
|
automatically stored |
|
|
|
ZONE |
|
|
NIGHT |
to “USER”. |
|
|
|
If “00” is selected for |
|
|
|
||
|
COLOR |
DISP |
all the primary colors |
|
|
for <DISP ZONE>, |
|
|
|
ZONE |
nothing appears on |
|
|
|
the display. |
|
|
ON |
Changes the display and |
|
MENU |
buttons illumination |
|
|
|
||
|
|
during menu, list search, |
|
|
COLOR |
|
|
|
OFF |
and playback mode |
|
|
|
||
|
|
|
operations. |
|
|
|
|
NIGHT COLOR/DAY COLOR is changed by turning on/off your car’s headlight.
4 Press MENU to exit.
ENGLISH | 11
Brightnessadjustmentsadjustments
You can select your preferred brightness for <BUTTON ZONE>, <DISP ZONE> separately.
1 |
|
|
2 |
|
Brightness button is only available for KD-X30. |
BUTTON ZONE |
BUTTON 00 to 31 |
||
|
For KD-X40, |
page 13. |
||
|
DISP ZONE |
DISP 00 to 31 |
||
|
|
|
||
3 Press MENU to exit.
Sound adjustments
This unit memorizes sound settings adjusted for each individual source.
Selecting the preset sound
You can select a preset sound mode, for each individual source, suitable for the music genre.
- - - - - - - - or - - - - - - - -
Press repeatedly.
|
Pro Equalizer |
1 |
(Hold) |
|
|
2 |
-<PRO EQ> |
|
-<BASS>**/<MIDDLE>/ |
|
<TREBLE> |
3
DYNAMIC-VOCAL BOOST-BASS BOOST- USER-FLAT-NATURAL-(back to the beginning)
Storing your own adjustments
While listening, you can adjust and store the tone level for each individual source.
 Easy Equalizer
1
(Hold)
2 Adjust the level.
(Initial: [XX])
|
SUB.W* |
00 to 08 [08] |
|
|
BASS LVL** |
-06 to +06 |
[+05] |
|
|
|
|
|
MID LVL |
-06 to +06 |
[00] |
|
|
|
|
|
TRE LVL |
-06 to +06 |
[+05] |
|
|
|
|
The adjustments are stored and <USER> is activated.
Adjust the sound elements of the selected tone.
|
|
|
|
|
BASS |
(Initial: [XX]) |
|
|
Frequency |
60/80/[100]/200 Hz |
|
|
|
|
|
|
Level |
LVL -06 to +06 [+05] |
|
|
|
|
|
|
Q |
[Q1.0]/Q1.25/Q1.5/Q2.0 |
|
|
|
|
|
|
MIDDLE |
|
|
|
Frequency |
0.5/[1.0]/1.5/2.5 kHz |
|
|
|
|
|
|
Level |
LVL -06 to +06 [00] |
|
|
|
|
|
|
Q |
Q0.75/Q1.0/[Q1.25] |
|
|
|
|
|
|
TREBLE |
|
|
|
Frequency |
10.0/[12.5]/15.0/17.5 kHz |
|
|
|
|
|
|
Level |
LVL -06 to +06 [+05] |
|
|
|
|
|
|
Q |
[Q FIX] |
|
4 Repeat steps 2 and 3 to adjust other tones.
The adjustments are stored and <USER> is activated.
5 Press MENU to exit.
* Available only when <L/O MODE> is set to <SUB.W>. ( page 14)
**Available only when <HPF> is set to <OFF>. ( page 14)
12 | ENGLISH
 Loading...