


 Loading...
BOHANDL40/BOHANDL50
en Handle Installation Instructions |
es Instrucciones de instalación de |
fr Instructions d'installation des |
manijas |
poignées |
|
en
BOHANDL40/BOHANDL50
Handle Installation Instructions
m Warning
Do not lift appliance by door handle. This could result in injury or damage to the unit.
Designed exclusively for use with Bosch branded products.
Tools and Parts Included
DESCRIPTION |
QUANTITY |
Instructions |
1 |
Door handle |
4 (BOHANDL40) |
|
3 (BOHANDL50) |
Allen wrench |
1 |
Removing Handles
1.On the closed door, while holding the handle, insert the short end of the Allen wrench into a setscrew hole.
2.Loosen the setscrew counter-clockwise a quarterturn at a time. Repeat for each of the setscrews.
3.The bottom door handle setscrews can be accessed beneath the handle. Repeat steps 1 and 2 for the bottom drawer.
Attaching Handles
Only attach the handles once the appliance has been positioned in its installation location and has been leveled (see the Installation Instructions that came with the appliance).
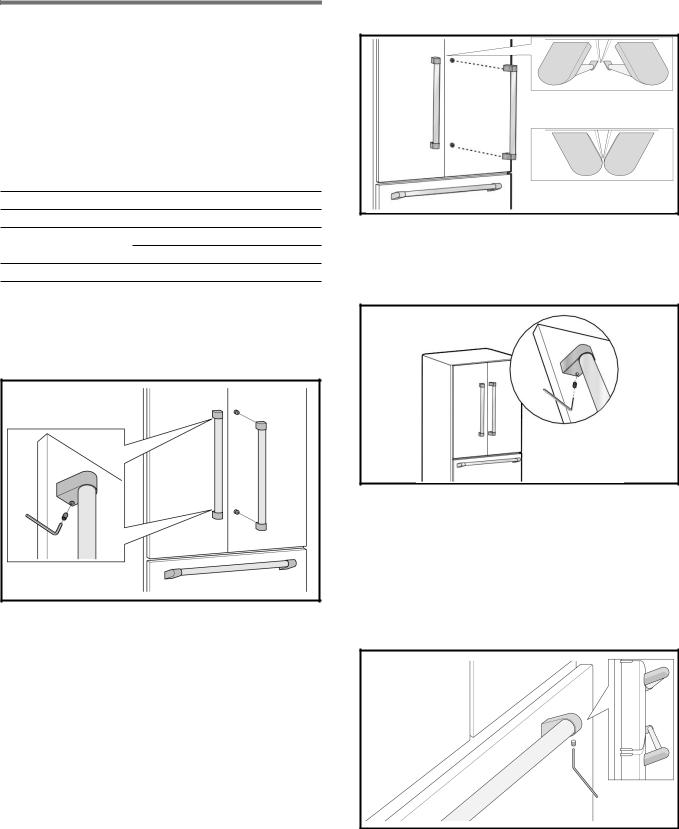
1.On the closed door, place a handle onto the shoulder bolts, as shown in image.
2.Firmly push the handle toward the door until the handle base is flush against the door.
Right Assembly
Wrong Assembly
3.While holding the handle, insert the short end of the Allen wrench into the setscrew. Using a clockwise motion tighten the setscrew just until it begins to contact the shoulder bolt. Do not fully tighten the screw.
4.Repeat steps 2 and 3 to secure the lower setscrew.
5.Once both setscrews have been partially tightened, fully tighten both setscrews.
6.Repeat steps 1 through 5 to install the other two handles onto the adjacent door.
7.For the bottom door handles, with the bottom door closed, place the handle onto the shoulder screws.
8.Repeat steps 2 and 3 to secure the setscrew to the shoulder bolts, as shown in image.
9.Once both setscrews have been partially tightened as instructed in the previous steps, fully tighten both setscrews.
2
Loading...