


 Loading...
BeoSound 1
Guide
Legal Notice for the US market:
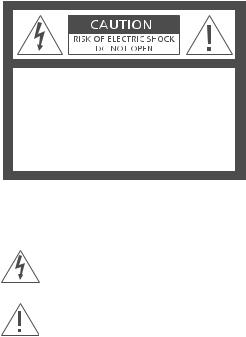
CAUTION: To reduce the risk of electric shock, do not remove cover (or back).
No User-serviceable parts inside. Refer servicing to qualified service personnel.
WARNING: To prevent fire or electric shock, do not expose this appliance to rain or moisture.
This symbol indicates that a dangerous voltage constituting a risk of electric shock is present within this unit.
This symbol indicates that there are important operating and maintenance instructions in the literature accompanying this unit.
For the Canadian market only!
CAUTION: To prevent electric shock do not use the polarized plug, attached to this apparatus, with an extension cord, receptacle or other outlet unless the blades can be fully inserted to prevent blade exposure.

A movable music centre |
3 |
|
Place your BeoSound 1 where you like. The compact design enables you to bring it with you anywhere.
BeoSound 1 gives you an excellent sound experience no matter how near or far you are from the speakers. The sound is optimised and no additional settings are required.
Connect BeoSound 1 to the mains and press a button to listen to sound of your choice – it’s as simple as that.
4 |
Before you start… |
|
Placement |
Connections |
Maintenance |
|
|
|
|
|
|
AUX
(A)
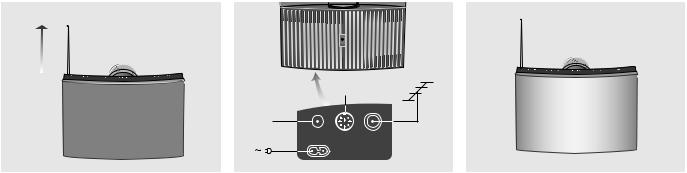
Allow enough space above the BeoSound 1 to enable the built-in aerial to extend and the CD compartment to raise.
Make sure that the BeoSound 1 is always placed on a firm, stable surface.
The BeoSound 1 is designed for indoor use in dry, domestic environments only, and for use within a temperature range of 10–40°C (50–105°F).
If you connect external sources to the BeoSound 1, do not switch on the mains until you have made all connections.
The socket panel is located underneath the BeoSound 1. The socket panel contains mains, aerial and AUX sockets.
Auxiliary equipment…
Use the AUX socket to connect auxiliary equipment, e.g. an audio tape recorder or a mini disc player. Please consult a Bang & Olufsen retailer for details.
If a recorder is connected to your BeoSound 1, you can make recordings from the radio and CD player. Please refer to the user’s guide supplied with the recorder.
However, if you operate the BeoSound 1 while such a recording is in progress, the recording will be disrupted.
The AUX socket is activated by pressing both  CD
CD  simultaneously.
External aerial…
If you wish to connect an external aerial to BeoSound 1, move the built-in aerial plug to the position marked (A), and connect the external one to the socket instead.
Do not use alcohol or other solvents to clean any part of the BeoSound 1. We do not recommend using special cleaning CDs in the BeoSound 1.
Before you clean the BeoSound 1, we recommend that you disconnect it from the mains to prevent inadvertent operation.
Clean dusty surfaces using a dry, soft cloth.
If necessary remove grease stains or persistent dirt with a lint-free, firmly wrung cloth, dipped in a solution of water containing only a few drops of mild detergent, such as washing–up liquid.
The front may also be cleaned with a soft brush mounted on a vacuum cleaner set to the lowest level.

Contents of the Guide |
5 |
|
Key to using this guide |
BeoSound 1 |
Use the PIN code system |
|||
Use this Key to identify what a button |
6 |
Buttons on the close-up operation panel |
20 |
Enter a PIN code |
|
or a display looks like in an instruction |
|
|
20 |
Switch on the PIN code |
|
sequence. |
|
|
|
21 |
Change the PIN code |
|
|
Basic daily operations |
21 |
Switch off the PIN code |
|
RADIO |
Buttons on the BeoSound 1 |
|
|
21 |
Using a Master code |
VOLUME |
close-up operation panel or |
8 |
Switch on the radio |
|
|
STOP |
on the Beo4 remote control |
8 |
Switch on the CD player |
|
|
|
|
9 |
Adjust volume |
|
|
Pr 4 |
Display on BeoSound 1 |
9 |
What you see in the display |
|
|
|
|
9 |
Changing the display mode or light |
|
|
Making the radio stop at a specific time
10 Setting a Stop Timer
Set the time
11 Set the time for the built-in clock
Making the radio or CD player start at a specific time
12 Setting a Wake-up Timer
Playing favourite CD tracks only
14 Choose tracks to listen to
Tuning in radio stations
16Automatic tuning
17Manual tuning
17 Delete a radio station
Remote control operation
18 Operating BeoSound 1 with Beo4
6 |
Your key to using BeoSound 1 |
|
Operation is easy. The buttons essential to daily operation are on the right-hand
side, while those on the left-hand side have secondary functions.
Just press a single button to listen to sound of your choice. The display will show your choice.
AERIAL is used to extend and retract the built-in aerial |
AERIAL |
DELETE is used to delete station settings and to omit |
DELETE |
CD tracks from playback |
|
STORE is used to store radio stations, volume level, |
STORE |
clock and Wake-up Timer |
|
and are used for searching through a CD, for |
|
tuning in radio stations and for programming the |
|
clock and setting a Wake-up Timer |
|
STOP is used to pause and stop the CD player, for |
STOP |
programming Stop Timers and tuning in radio stations |
|
LOAD is used to open and close the CD compartment |
LOAD |
CD |
Is used to switch on the CD player. and steps |
|
backwards and forwards through tracks. Pressing |
|
both buttons at the same time activates the AUX |
|
socket |
RADIO |
Is used to switch on the radio. and steps |
|
backwards and forwards through radio stations |
VOLUME |
Is used to adjust volume. and turns the |
|
volume down and up. |
|
Press simultaneously to mute the speakers. |
|
Press one of the buttons to recall sound |
STAND BY |
Switches BeoSound 1 to standby |
BeoSound 1 presents essential audio sources in a compact and easily operated way.
The compact design and the built-in handle lets you to take the music with you.
The radio finds the first available station the first time you press the RADIO button. Press AERIAL to extend or retract the built-in aerial. You can also push the aerial down manually.
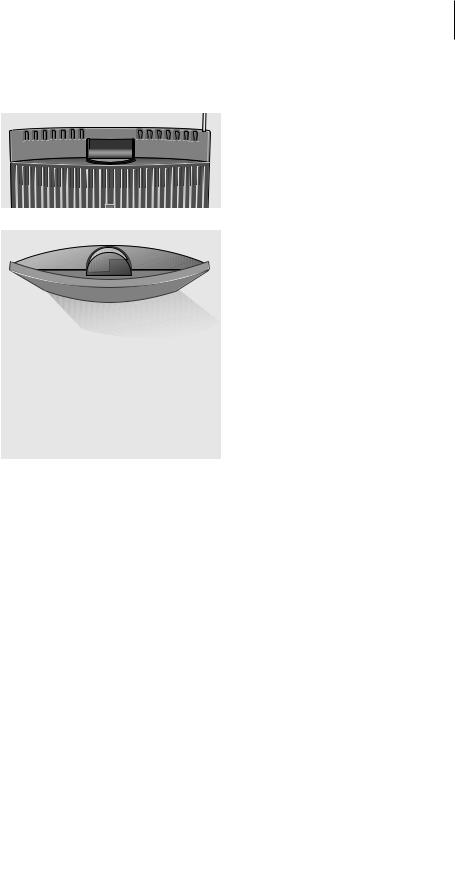
If no CD is loaded when you press CD, the CD compartment raises automatically, ready to be loaded with your favourite CD.
7
All buttons are located at the back of the operation panel.
The CD compartment is located behind the operation panel.
•Press LOAD to raise the CD compartment.
•When the CD compartment is raised, slip the CD into the slot provided.
Always load the CD with the CD label facing you.
•Press LOAD again to lower the compartment or just press CD to play your CD.
Remove the cover at the back of BeoSound 1 and connect the headphones to the socket.
The speakers will be muted when headphones are connected.
Just use the handle when moving BeoSound 1.

8
To listen to the radio, just press one of the radio buttons, the radio will start playing on the radio station you last listened to.
You extend the built-in aerial by pressing the AERIAL button. You can store up to 59 different radio stations in your BeoSound 1 (see page 12). To step between stored radio stations, the program number or frequency must be shown in the display.
If no CD is loaded when you press one of the CD buttons, the CD compartment raises, ready for you to load a CD. When the CD has stopped playing and no commands have been received for 30 minutes, BeoSound 1 switches to standby.
You can adjust and store the volume level at any time.
The display will keep you informed of what you have chosen and you can set the display light to the level suitable for you. Also, choose the display mode you prefer for radio stations; program number or frequency.
Daily operation of radio and CD player
Switch on the radio |
Switch on the CD player |
When you press RADIO before any radio stations have been stored, the radio will find the first available station.
RADIO |
Press RADIO to switch on the |
|
radio |
Pr 12 |
The program number or |
|
frequency is shown in the |
|
display |
RADIO |
Press to step down and to |
|
step up through the stored |
|
stations. Keep the button |
|
pressed down to ‘search’ |
|
through stored stations |
STAND BY |
Press to switch BeoSound 1 to |
|
standby |
AERIAL |
Press AERIAL to extend or retract |
|
the built-in aerial |
Note: When the program number is shown, press  or
or  to check the frequency for the current radio
program number.
When you search through a CD, searching will continue as long as you keep the button pressed down. The CD resumes playing, when the button is released.
CD |
Press CD to switch on the CD |
|
|
player |
|
CD 1 |
The track number is shown in |
|
|
the display |
|
CD |
Press |
to step to the previous |
|
track. Press to step to the next |
|
|
track |
|
|
Press |
to search backwards |
|
through the CD |
|
|
Press |
to search forwards |
|
through the CD |
|
STOP |
Press STOP to pause the CD |
|
STOP |
Press STOP again to resume |
|
|
playback |
|
LOAD |
Press LOAD to open or close the |
|
|
CD compartment |
|
Loading...