


SPECIAL MESSAGE SECTION
This product utilizes batteries or an external power supply (adapter). DO NOT connect this product to any power supply or adapter other than one described in the manual, on the name plate, or specifically recommended by Yamaha.
This product should be used only with the components supplied or; a cart, rack, or stand that is recommended by Yamaha. If a cart, etc., is used, please observe all safety markings and instructions that accompany the accessory product.
SPECIFICATIONS SUBJECT TO CHANGE:
The information contained in this manual is believed to be correct at the time of printing. However, Yamaha reserves the right to change or modify any of the specifications without notice or obligation to update existing units.
This product, either alone or in combination with an amplifier and headphones or speaker/s, may be capable of producing sound levels that could cause permanent hearing loss. DO NOT operate for long periods of time at a high volume level or at a level that is uncomfortable. If you experience any hearing loss or ringing in the ears, you should consult an audiologist.
IMPORTANT: The louder the sound, the shorter the time period before damage occurs.
NOTICE:
Service charges incurred due to a lack of knowledge relating to how a function or effect works (when the unit is operating as designed) are not covered by the manufacturer’s warranty, and are therefore the owners responsibility. Please study this manual carefully and consult your dealer before requesting service.
ENVIRONMENTAL ISSUES:
Yamaha strives to produce products that are both user safe and environmentally friendly. We sincerely believe that our products and the production methods used to produce them, meet these goals. In keeping with both the letter and the spirit of the law, we want you to be aware of the following:
Battery Notice:
This product MAY contain a small non-rechargeable battery which (if applicable) is soldered in place. The average life span of this type of
battery is approximately five years. When replacement becomes necessary, contact a qualified service representative to perform the replacement.
This product may also use “household” type batteries. Some of these may be rechargeable. Make sure that the battery being charged is a rechargeable type and that the charger is intended for the battery being charged.
When installing batteries, do not mix batteries with new, or with batteries of a different type. Batteries MUST be installed correctly. Mismatches or incorrect installation may result in overheating and battery case rupture.
Warning:
Do not attempt to disassemble, or incinerate any battery. Keep all batteries away from children. Dispose of used batteries promptly and as regulated by the laws in your area. Note: Check with any retailer of household type batteries in your area for battery disposal information.
Disposal Notice:
Should this product become damaged beyond repair, or for some reason its useful life is considered to be at an end, please observe all local, state, and federal regulations that relate to the disposal of products that contain lead, batteries, plastics, etc. If your dealer is unable to assist you, please contact Yamaha directly.
NAME PLATE LOCATION:
The name plate is located on the bottom of the product. The model number, serial number, power requirements, etc., are located on this plate. You should record the model number, serial number, and the date of purchase in the spaces provided below and retain this manual as a permanent record of your purchase.
Model
Serial No.
Purchase Date
PLEASE KEEP THIS MANUAL
92-BP
FCC INFORMATION (U.S.A.)
IMPORTANT NOTICE: DO NOT MODIFY THIS UNIT! |
the instructions found in the users manual, may cause interference |
|
This product, when installed as indicated in the instructions contained in |
harmful to the operation of other electronic devices. Compliance with |
|
this manual, meets FCC requirements. Modifications not expressly ap- |
FCC regulations does not guarantee that interference will not occur in |
|
proved by Yamaha may void your authority, granted by the FCC, to use |
all installations. If this product is found to be the source of interference, |
|
the product. |
which can be determined by turning the unit “OFF” and “ON”, please try |
|
|
to eliminate the problem by using one of the following measures: |
|
IMPORTANT: |
• Relocate either this product or the device that is being affected by the |
|
When connecting this product to accessories and/or another product use |
||
interference. |
||
only high quality shielded cables. Cable/s supplied with this product |
||
|
||
MUST be used. Follow all installation instructions. Failure to follow in- |
• Utilize power outlets that are on different branch (circuit breaker or |
|
structions could void your FCC authorization to use this product in the |
fuse) circuits or install AC line filter/s. |
|
USA. |
• In the case of radio or TV interference, relocate/reorient the antenna. |
|
|
||
NOTE: |
If the antenna lead-in is 300 ohm ribbon lead, change the lead-in to |
|
co-axial type cable. |
||
This product has been tested and found to comply with the requirements |
||
|
||
listed in FCC Regulations, Part 15 for Class “B” digital devices. Compli- |
If these corrective measures do not produce satisfactory results, please |
|
ance with these requirements provides a reasonable level of assurance |
contact the local retailer authorized to distribute this type of product. If |
|
that your use of this product in a residential environment will not result in |
you can not locate the appropriate retailer, please contact Yamaha |
|
harmful interference with other electronic devices. This equipment gener- |
Corporation of America, Electronic Service Division, 6600 |
|
ates/uses radio frequencies and, if not installed and used according to |
Orangethorpe Ave, Buena Park, CA90620 |
• This applies only to products distributed by Yamaha Corporation of America.
PRECAUTIONS
PLEASE READ CAREFULLY BEFORE PROCEEDING
* Please keep these precautions in a safe place for future reference.
WARNING
Always follow the basic precautions listed below to avoid the possibility of serious injury or even death from electrical shock, short-circuiting, damages, fire or other hazards. These precautions include, but are not limited to, the following:
•Do not open the instrument or attempt to disassemble the internal parts or modify them in any way. The instrument contains no user-serviceable parts. If it should appear to be malfunctioning, discontinue use immediately and have it inspected by qualified Yamaha service personnel.
•Do not expose the instrument to rain, use it near water or in damp or wet conditions, or place containers on it containing liquids which might spill into any openings.
•If the AC adaptor cord or plug becomes frayed or damaged, or if there is a sudden loss of sound during use of the instrument, or if any unusual smells or smoke should appear to be caused by it, immediately turn off the power
switch, disconnect the adaptor plug from the outlet, and have the instrument inspected by qualified Yamaha service personnel.
•Use the specified adaptor (PA-6 or an equivalent recommended by Yamaha) only. Using the wrong adaptor can result in damage to the instrument or overheating.
•Before cleaning the instrument, always remove the electric plug from the outlet. Never insert or remove an electric plug with wet hands.
•Check the electric plug periodically and remove any dirt or dust which may have accumulated on it.
CAUTION
Always follow the basic precautions listed below to avoid the possibility of physical injury to you or others, or damage to the instrument or other property. These precautions include, but are not limited to, the following:
•Do not place the AC adaptor cord near heat sources such as heaters or radiators, and do not excessively bend or otherwise damage the cord, place heavy objects on it, or place it in a position where anyone could walk on, trip over, or roll anything over it.
•When removing the electric plug from the instrument or an outlet, always hold the plug itself and not the cord.
•Do not connect the instrument to an electrical outlet using a multiple-con- nector. Doing so can result in lower sound quality, or possibly cause overheating in the outlet.
•Unplug the AC power adaptor when not using the instrument, or during electrical storms.
•Always make sure all batteries are inserted in conformity with the +/– polarity markings. Failure to do so might result in overheating, fire, or battery fluid leakage.
•Always replace all batteries at the same time. Do not use new batteries together with old ones. Also, do not mix battery types, such as alkaline batteries with manganese batteries, or batteries from different makers, or different types of batteries from the same maker, since this can cause overheating, fire, or battery fluid leakage.
•Do not dispose of batteries in fire.
•Do not attempt to recharge batteries that are not intended to be charged.
•If the instrument is not to be in use for a long time, remove the batteries from it, in order to prevent possible fluid leakage from the battery.
•Keep batteries away from children.
•Before connecting the instrument to other electronic components, turn off the power for all components. Before turning the power on or off for all components, set all volume levels to minimum.
•Do not expose the instrument to excessive dust or vibrations, or extreme cold or heat (such as in direct sunlight, near a heater, or in a car during the day) to prevent the possibility of panel disfiguration or damage to the internal components.
•Do not use the instrument near other electrical products such as televisions, radios, or speakers, since this might cause interference which can affect proper operation of the other products.
•Do not place the instrument in an unstable position where it might accidentally fall over.
•Before moving the instrument, remove all connected adaptor and other cables.
•When cleaning the instrument, use a soft, dry cloth. Do not use paint thinners, solvents, cleaning fluids, or chemical-impregnated wiping cloths. Also, do not place vinyl or plastic objects on the instrument, since this might discolor the panel or keyboard.
•Do not rest your weight on, or place heavy objects on the instrument, and do not use excessive force on the buttons, switches or connectors.
•Use only the stand specified for the instrument. When attaching the stand, use the provided screws only. Failure to do so could cause damage to the internal components or result in the instrument falling over.
•Do not operate the instrument for a long period of time at a high or uncomfortable volume level, since this can cause permanent hearing loss. If you experience any hearing loss or ringing in the ears, consult a physician.
■ SAVING USER DATA
•Save all data to an external device such as the Yamaha MIDI Data Filer MDF2, in order to help prevent the loss of important data due to a malfunction or user operating error.
Yamaha cannot be held responsible for damage caused by improper use or modifications to the instrument, or data that is lost or destroyed.
Always turn the power off when the instrument is not in use. |
|
Make sure to discard used batteries according to local regulations. |
(4) |
|
1
Congratulations!
You are the proud owner of a fine electronic keyboard. The Yamaha PSR-530 PortaTone combines the most advanced tone generation technology with state-of-the-art digital electronics and features to give you stunning sound quality with maximum musical enjoyment. A large graphic display and easy-to-use interface also greatly enhance the operability of this advanced instrument.
In order to make the most of your PortaTone’s features and extensive performance potential, we urge you to read the manual thoroughly while trying out the various features described. Keep the manual in a safe place for later reference.
Important Features
 Touch-sensitive 61-key keyboard for a wide range of dynamic musical expression.
 An outstanding range of 200 panel voices and 12 drum kits, plus a full set of 480 XG voices.
 Voice set feature automaticaly selects the appropriate voice parameter settings for the panel voices.
 Advanced auto-accompaniment technology gives you 100 fully-orchestrated accompaniment “styles” to back up what you play on the keyboard.
 Virtual Arranger feature lets you add chord progressions to any of the auto-accompaniment styles for more musical, refined accompaniment.
 One Touch Setting feature automatically selects appropriate voice, effect, and other settings for the selected accompaniment style — all you have to do is select a style and play.
ndPno |
|
|||
VOICE R2 |
51 |
VOICE R1 |
1 |
Large multi-function LCD display panel |
|
|
|||
|
|
makes it easy to select and edit parameters. |
||
REGISTRATION |
||||
|
|
|
|
Registration Memory saves your favorite |
panel settings for instant recall when needed.

 Digital effects add depth and ambience to your sound.
 Minus-one and Repeat functions are ideal for learning new songs and polishing your keyboard technique.
2
 Song recording feature lets you record four melody tracks with an accompaniment track.
 Create original accmpaniment styles with the User Style feature.
 Multi Pads record and play short rhythmic and melodic sequences that can be used to add impact and variety to your performances.
GM System Level 1
“GM System Level 1” is an addition to the MIDI standard which ensures that any GM-compatible music data can be accurately played by any GM-compatible tone generator, regardless of manufacturer. The GM mark is affixed to all software and hardware products that support the “GM System Level 1”.
PSR-530 supports GM System Level 1.
 Optional Yamaha Music Cartridges can be plugged in for enjoyable automated performance, keyboard practice, and extra accompaniment styles.
 Built-in amplifier and speaker system delivers top-quality sound without the need for external equipment.
 A range of MIDI functions for expanded musical enjoyment (General MIDI System Level 1 and Yamaha XG compatible).
XG
XG is a new MIDI format created by Yamaha which significantly improves and expands upon the “GM System Level 1” standard by providing a greater variety of high-quality voices plus considerably enhanced effect operation while being fully compatible with GM.
PSR-530 supports the XG format.
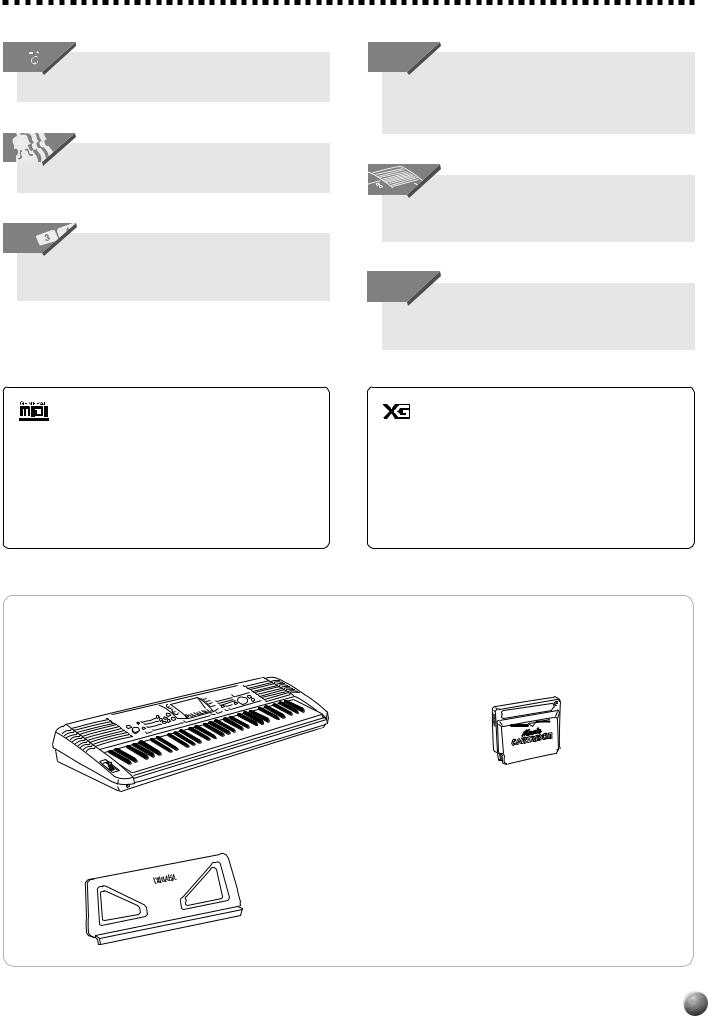
Packing List
• PSR-530 |
• Music Cartridge |
• Music Stand |
• Owner’s manual |
3
Contents
Panel Controls |
6 |
The Music Stand .................................................... |
7 |
Basic Display Operation |
8 |
The Display Icons ............................................................ |
8 |
The Menus ..................................................................... |
10 |
Shortcuts ............................................................. |
11 |
Setting Up |
12 |
Power Supply ................................................................. |
12 |
Using An Optional AC Power Adaptor ................... |
12 |
Using Batteries ...................................................... |
12 |
Connections .................................................................. |
13 |
The PHONES Jack ................................................ |
13 |
SUSTAIN Jack ....................................................... |
13 |
The AUX OUT R and L/L+R Jacks ........................ |
13 |
MIDI IN/OUT and TO HOST Connectors ............... |
13 |
The Demonstration |
14 |
Playing the PSR-530 |
16 |
The PSR-530 Voices ...................................................... |
16 |
A Word About the “R1”, “R2”, and “L” Voices .......... |
16 |
Selecting & Playing Voices ........................................... |
17 |
Keyboard Percussion ............................................ |
19 |
The Dual Voice Mode ..................................................... |
19 |
The Split Voice Mode ..................................................... |
20 |
Changing the SPLIT VOICE Split Point ....................... |
21 |
Auto Accompaniment |
22 |
Using Auto Accompaniment ........................................ |
22 |
The Synchro Stop Function ................................... |
26 |
Using Virtual Arranger .................................................. |
27 |
Accompaniment Track Muting ..................................... |
27 |
Muting Individual Tracks ........................................ |
28 |
Accompaniment Volume Control ................................. |
28 |
Changing the Accompaniment Split Point .................. |
29 |
Interaction Between the AUTO ACCOMPANIMENT |
|
and SPLIT VOICE Split Points .......................... |
30 |
The Auto Accompaniment Fingering Modes .............. |
30 |
The Stop Accompaniment Function ....................... |
34 |
One Touch Setting ......................................................... |
34 |
Digital Effects |
36 |
Reverb ............................................................................ |
36 |
Turning the Reverb Effect On or Off ............................ |
36 |
Selecting a Reverb Type .............................................. |
37 |
Reverb Return Level .................................................... |
38 |
Chorus ............................................................................ |
38 |
Turning the Chorus Effect On or Off ............................ |
38 |
Selecting a Chorus Effect ............................................ |
39 |
Chorus Return Level ................................................... |
39 |
DSP ................................................................................. |
40 |
Turning the DSP Effect On or Off ................................ |
41 |
Selecting a DSP Effect ................................................ |
41 |
DSP Return Level ........................................................ |
42 |
Harmony ......................................................................... |
42 |
Turning the Harmony Effect On or Off ......................... |
43 |
Selecting a Harmony Type .......................................... |
43 |
Adjusting the Harmony Volume ................................... |
44 |
The Pitch Bend Wheel |
45 |
Setting the Pitch Bend Range ...................................... |
45 |
Transpose |
46 |
Setting Transposition .................................................... |
46 |
Registration Memory |
47 |
Registering the Panel Settings .................................... |
47 |
Recall the Registered Panel Settings .......................... |
48 |
The Accompaniment Freeze Function ........................ |
48 |
The Multi Pads |
49 |
Selecting a MULTI PAD Set ........................................... |
49 |
Playing the MULTI PADs ............................................... |
50 |
Turning the CHORD MATCH Function On/Off ............ |
51 |
Song Playback |
52 |
Song Playback Procedure ............................................ |
52 |
Song Volume Control .................................................... |
53 |
Play from a Specified Measure .................................... |
54 |
Minus-one Practice ....................................................... |
55 |
Minus-one Track Assignment ...................................... |
55 |
Repeat Play .................................................................... |
57 |
4
Song Recording |
58 |
Song Recording Procedure .......................................... |
59 |
About the Recording with |
|
the Digital Effects Applied ................................ |
62 |
Clearing Song Data ....................................................... |
63 |
Clearing an Entire Song .............................................. |
63 |
Clearing Selected Melody Tracks ................................ |
63 |
Style Recording |
64 |
Style Recording Procedure .......................................... |
64 |
Drum Cancel ............................................................... |
68 |
Quantize ...................................................................... |
69 |
Clearing User Style Data .............................................. |
70 |
Clearing an Entire Style .............................................. |
70 |
Clearing Selected Style Tracks .................................... |
70 |
Multi Pad Recording |
71 |
MUTI PAD Recording Procedure .................................. |
71 |
Clearing MULTI PAD Data ............................................. |
74 |
Clearing an Entire Pad Set .......................................... |
74 |
Clearing Selected MULTI PADs ................................... |
74 |
Using Music Cartridges |
75 |
Inserting a Music Cartridge ................................... |
75 |
Music Cartridge Handling Precautions ................... |
75 |
Cartridge Songs ............................................................ |
76 |
Cartridge Song Playback ............................................ |
76 |
Cartridge Accompaniment Styles ............................... |
77 |
Revoicing |
78 |
Revoicing the R1, R2, and L Voices ............................. |
78 |
Revoicing a Style ........................................................... |
80 |
Revoicing a User Song ................................................. |
81 |
Overall Functions |
83 |
Touch Sensitivity .................................................... |
84 |
Pitch Bend Range ................................................. |
84 |
Master Tuning ........................................................ |
84 |
Scale Tuning .......................................................... |
84 |
Song Transpose ..................................................... |
85 |
Metronome ............................................................ |
85 |
Split Voice Split Point ............................................. |
85 |
Accompaniment Split Point .................................... |
85 |
Fingering Mode ..................................................... |
85 |
Voice Set ............................................................... |
85 |
MIDI Functions |
86 |
What’s MIDI? .................................................................. |
86 |
MIDI Terminal/TO HOST Terminal ....................... |
88 |
What You Can Do with MIDI .......................................... |
88 |
Connecting to a Personal Computer |
|
(TO HOST Terminal/HOST SELECT Switch) ............ |
90 |
Connect using the PSR-530 MIDI terminals .......... |
90 |
Connect using the TO HOST terminal ................... |
91 |
The PSR-530 MIDI Functions ....................................... |
92 |
Transmit Channel & Transmit Track ........................ |
92 |
Receive Channel & Receive Mode ....................... |
93 |
Local Control ......................................................... |
94 |
Clock ...................................................................... |
94 |
Bulk Data Send ...................................................... |
95 |
Initial Data Send .................................................... |
95 |
Appendix |
|
PSR-530 Display MENU/SUB MENU Structure |
........... 96 |
Data Backup & Initialization ......................................... |
98 |
Data Backup .......................................................... |
98 |
Data Initialization ................................................... |
98 |
Voice List ....................................................................... |
99 |
Maximum Polyphony ............................................. |
99 |
Drum Kit List ................................................................ |
104 |
About Digital Effects (Reverb/Chorus/DSP) ............. |
106 |
When DSP type Is |
|
Selected as a System Effect ............................ |
106 |
When DSP type Is |
|
Selected as a Insertion Effect .......................... |
107 |
Troubleshooting .......................................................... |
109 |
MIDI Data Format ......................................................... |
110 |
MIDI Implementation Chart ........................................ |
122 |
Specifications .............................................................. |
124 |
Index ............................................................................. |
125 |
5
,,,,,,,,,,,,,,QQQQQQQQQQQQQQ¢¢¢¢¢¢¢¢¢¢¢¢¢¢
Panel Controls
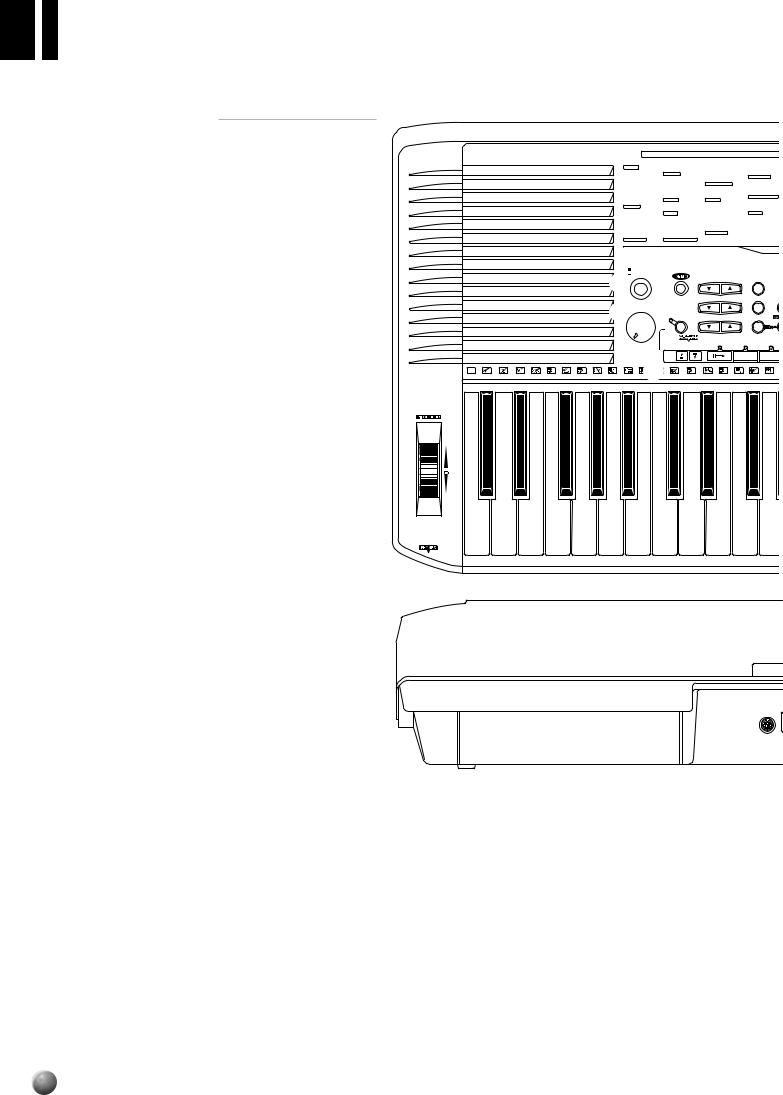
■ Top Panel Controls
q STAND BY/ON Switch ................................. |
|
page 14 |
w MASTER VOLUME Control |
......................... |
page 14 |
e DEMO Button ............................................... |
|
page 14 |
r TEMPO Buttons ........................................... |
|
page 23 |
t TRANSPOSE Buttons .................................. |
|
page 46 |
y ACCOMPANIMENT/SONG VOLUME |
||
Buttons ................................................. |
|
pages 28, 53 |
u AUTO ACCOMPANIMENT SECTION |
||
• AUTO ACCOMPANIMENT |
|
|
ON/OFF Button ......................................... |
|
page 23 |
• SYNC STOP Button .................................. |
|
page 26 |
• SYNC START Button ................................ |
|
page 24 |
• INTRO Button ........................................... |
|
page 24 |
• MAIN/AUTO FILL A & B Buttons ............... |
page 24 |
|
• ENDING Button......................................... |
|
page 26 |
i RECORD Button ............................ |
|
pages 59, 65, 71 |
o START/STOP Button...................... |
|
pages 15, 24, 26 |
!0DIGITAL EFFECT SECTION |
|
|
• REVERB Button ........................................ |
|
page 36 |
• CHORUS Button ....................................... |
|
page 38 |
• DSP Button ............................................... |
|
page 41 |
• VARIATION Button .................................... |
|
page 41 |
• HARMONY Button .................................... |
|
page 43 |
!1DISPLAY & RELATED CONTROLS |
|
|
• DISPLAY ..................................................... |
|
page 8 |
• MENU Buttons .......................................... |
|
page 10 |
• SUB MENU Buttons .................................. |
|
page 10 |
• VOICE Button ........................................... |
|
page 10 |
• STYLE Button ........................................... |
|
page 10 |
• SONG Button ............................................ |
|
page 10 |
• CARTRIDGE Button ................................. |
|
page 10 |
• REVOICE Button ...................................... |
|
page 78 |
• TRACK Buttons............... |
pages 19, 20, 28, 60, 79 |
|
!2REGISTRATION MEMORY SECTION |
||
• MEMORY Button....................................... |
|
page 48 |
• 1, 2, 3, 4 Buttons ....................................... |
|
page 48 |
• FREEZE Button ........................................ |
|
page 48 |
!3ONE TOUCH SETTING Button .................... |
page 35 |
|
!4NUMBER Buttons ........................................ |
|
page 17 |
!5+ and – Buttons .................................... |
|
pages 15, 17 |
!6Data Dial ...................................................... |
|
page 18 |
|
|
|
|
|
|
|
|
|
8BEAT |
|
|
|
22 |
SLOW ROCK 2 |
42 |
FUNK 2 |
|
|
62 |
MARIACHI |
|
|||
|
|
|
|
|
|
|
|
|
1 |
|
8BEAT POP 1 |
|
23 |
6/8 BALLAD |
|
43 |
SOUL |
|
|
63 |
TEJANO |
|
||
|
|
|
|
|
|
|
|
|
2 |
|
8BEAT POP 2 |
|
DANCE |
|
44 |
GOSPEL SHUFFLE |
64 |
CUMBIA |
|
|||||
|
|
|
|
|
|
|
|
|
3 |
|
8BT UPTEMPO |
|
24 |
DANCE POP 1 |
45 |
6/8 GOSPEL |
|
TRAD JAZZ |
|
|||||
|
|
|
|
|
|
|
|
|
4 |
|
8BT STANDARD |
|
25 |
DANCE POP 2 |
46 |
4/4 BLUES |
|
65 |
SWING |
|
||||
|
|
|
|
|
|
|
|
|
5 |
|
FOLKROCK |
|
|
26 |
TECHNO |
|
ROCK & ROLL |
|
66 |
B B SWING |
||||
|
|
|
|
|
|
|
|
|
6 |
|
POP ROCK 1 |
|
27 |
EUROBEAT |
|
47 |
ROCK&ROLL 1 |
|
67 |
B B BALLAD |
||||
|
|
|
|
|
|
|
|
|
7 |
|
POP ROCK 2 |
|
28 |
EURO HOUSE |
48 |
ROCK&ROLL 2 |
|
68 |
JAZZ QUARTET |
|||||
|
|
|
|
|
|
|
|
|
8 |
|
8BEAT MEDIUM |
|
29 |
HIP HOP |
|
49 |
BOOGIE |
|
|
69 |
DIXIELAND |
|||
|
|
|
|
|
|
|
|
|
9 |
|
8BEAT BALLAD |
|
30 |
SYNTH BOOGIE |
50 |
TWIST |
|
|
CONTEMP JAZZ |
|||||
|
|
|
|
|
|
|
|
|
10 |
|
EPIC BALLAD |
|
DISCO |
|
C & W |
|
|
70 |
COOL JAZZ |
|||||
|
|
|
|
|
|
|
|
|
11 |
|
PIANO BALLAD |
|
31 |
70S DISCO |
|
51 |
BLUEGRASS 1 |
|
71 |
JAZZ BALLAD |
||||
|
|
|
|
|
|
|
|
|
16BEAT |
|
|
|
32 |
DISCO TROP |
|
52 |
BLUEGRASS 2 |
|
72 |
JAZZ WALTZ |
||||
|
|
|
|
|
|
|
|
|
12 |
|
16BEAT POP |
|
33 |
POLKA POP |
|
53 |
COUNTRY 2/4 |
|
73 |
FUSION |
|
|||
|
|
|
|
|
|
|
|
|
13 |
|
16BT SHUFFLE 1 |
|
ROCK |
|
54 |
8BT COUNTRY |
|
LATIN |
|
|||||
|
|
|
|
|
|
|
|
|
14 |
|
16BT SHUFFLE 2 |
|
34 |
8BT ROCK BLD |
55 |
COUNTRY ROCK |
|
74 |
BOSSA NOVA 1 |
|||||
|
|
|
|
|
|
|
|
|
15 |
|
16BT BALLAD 1 |
|
35 |
16BT ROCK BLD |
56 |
COWBOY BOOG |
|
75 |
BOSSA NOVA 2 |
|||||
|
|
|
|
|
|
|
|
|
16 |
|
16BT BALLAD 2 |
|
36 |
HARD ROCK |
|
57 |
C BALLAD |
|
76 |
BOSSA NOVA 3 |
||||
|
|
|
|
|
|
|
|
|
17 |
|
16BT BALLAD 3 |
|
37 |
ROCK SHUFFLE |
58 |
C SHUFFLE |
|
77 |
SALSA |
|
||||
|
|
|
|
|
|
|
|
|
18 |
|
FUNK 1 |
|
|
|
38 |
6/8HVY ROCK |
|
59 |
C WALTZ |
|
|
78 |
SAMBA |
|
|
|
|
|
|
|
|
|
|
19 |
|
SOUL BALLAD |
|
39 |
US ROCK |
|
AMERICAS |
|
|
79 |
MAMBO |
|
|||
|
|
|
|
|
|
|
|
|
20 |
|
FUSION BALLAD |
|
40 |
16BEAT ROCK |
60 |
CAJUN |
|
|
80 |
BEGUINE |
|
|||
|
|
|
|
|
|
|
|
|
6/8 BALLAD |
|
|
|
RHYTHM & BLUES |
61 |
BANDA |
|
|
81 |
MERENGUE |
|||||
|
|
|
|
|
|
|
|
|
21 |
|
SLOW ROCK 1 |
|
41 |
R&B |
|
|
|
|
|
|
|
|
||
|
|
|
|
|
|
|
|
|
|
|
STAND BY |
|
|
e |
|
|
r |
!0 |
|
|||||
|
|
|
|
|
|
|
|
|
|
|
ON |
|
|
|
|
|
|
|
|
DIGITAL EF |
||||
|
|
|
|
|
|
|
|
|
q |
|
|
|
|
|
|
|
|
|
TEMPO |
|
REVERB |
|
||
|
|
|
|
|
|
|
|
|
|
|
|
|
|
|
|
t |
TRANSPOSE |
|
CHORUS |
HA |
||||
|
|
|
|
|
|
|
|
|
|
|
MASTER |
|
|
|
|
|
|
|
|
|
|
|||
|
|
|
|
|
|
|
|
|
w |
|
yACCOMPANIMENT/SONG VOLUME |
|
|
|
||||||||||
|
|
|
|
|
|
|
|
|
VOLUME |
|
|
|
||||||||||||
|
|
|
|
|
|
|
|
|
|
|
|
|
DSP |
|
||||||||||
|
|
|
|
|
|
|
|
|
|
|
|
|
|
|
ON/ |
|
|
|
|
|
|
|
|
|
|
|
|
|
|
|
|
|
|
|
|
|
|
|
|
OFF |
|
|
|
|
|
|
|
|
|
|
|
|
|
|
|
|
|
|
|
|
|
|
|
|
|
SYNC |
SYNC |
|
INTRO |
MAIN/AUTO FILL |
||||
|
|
|
|
|
|
|
|
|
|
MIN |
|
MAX |
|
|
STOP START |
|
|
|
|
|
|
|
||
|
|
|
|
|
|
|
|
|
|
|
|
|
AUTO |
|
|
|
|
|
|
A |
|
B |
||
|
|
|
|
|
|
|
|
|
ACCOMPANIMENT |
|
|
|
|
|
|
|
||||||||
|
|
|
|
|
|
|
|
|
|
|
|
|
|
|
|
|
|
|
||||||
|
T 37 |
|
S 39 |
|
R 41 |
|
L 43 |
|
L 45 |
|
|
u |
|
|
M 50 |
|
|
H 52 |
L 53 |
|
|
H 55 |
||
CLICK 36 |
38 |
40 |
42 |
44 |
|
46 |
M |
47 |
H |
48 |
49 |
|
51 |
|
54 |
|||||||||
C1 |
|
D1 |
|
E1 |
F1 |
|
G1 |
|
A1 |
|
|
|
B1 |
|
C2 |
|
D2 |
|
|
E2 |
F2 |
|
|
G2 |
@1
@2
TO HOST
@3
!7MUSIC CARTRIDGE Slot |
............................ page 75 |
!8KEYBOARD SECTION |
|
• DUAL VOICE Button ................................. |
page 19 |
• SPLIT VOICE Button ................................ |
page 20 |
!9MULTI PAD SECTION |
|
• STOP Button ............................................. |
page 50 |
• 1, 2, 3, 4 Buttons ............................... |
pages 50, 72 |
@0Keyboard ...................................................... |
page 18 |
@1PITCH BEND Wheel .................................... |
page 45 |
@2PHONES Jack ............................................. |
page 13 |
6

,,,,,,,,,,,,,,,QQQQQQQQQQQQQQQ¢¢¢¢¢¢¢¢¢¢¢¢¢¢¢
Panel Controls
82BOLERO LENTO
83ESPAGNOLE CARIBBEAN
84REGGAE 12
85POP REGGAE BALLROOM LATIN
86CHA CHA
87RHUMBA
88PASODOBLE
89TANGO BALLROOM STD
90FOXTROT
91JIVE
MARCH & WALTZ
92MARCH 1
93MARCH 2
946/8 MARCH
95POLKA
96STANDARD WALTZ
97POP WALTZ
98GERMAN WALTZ
99VIEN WALTZ
100MUSETTE
i
FECT
RMONY
START/STOP 
 / o
/ o
ENDING
56 |
L |
57 |
58 |
M 59 |
M 60 |
|
A2 |
|
L B2 |
H C3 |
!1
|
001 GrandPno |
||||||||
|
|
|
VOICE L |
76 VOICE R2 101 VOICE R1 |
1 |
||||
REGIST |
|
0 |
A |
B REPEAT |
ONE TOUCH |
VOICE |
|||
MEMORY |
REVERB TRANSPOSE |
FREEZE |
SETTING |
MEASURE |
1 |
||||
|
|
116 |
REGISTRATION |
|
MULTI PAD |
||||
MULTI PAD |
HARMONY |
TEMPO |
1 |
2 |
3 4 |
1 |
2 3 |
4 |
|
|
|
|
|
|
|
|
|
|
|
|
CHORUS |
DSP VARIATION |
SYNC |
FINGERING |
mM 7 |
STYLE |
|||
|
STOP |
|
|||||||
MIDI |
RHYTHM RHYTHM |
BASS |
CHORD |
CHORD |
PAD |
PHRASE |
PHRASE |
||
1 |
2 |
|
|
1 |
2 |
|
1 |
2 |
|
DIGITAL |
|
|
|
|
|
|
|
|
SONG |
|
|
|
|
|
|
|
|
|
|
EFFECT |
|
|
|
|
|
|
|
|
|
|
MELODY MELODY |
MELODY |
MELODY |
ACCOM- |
VOICE |
VOICE |
VOICE |
||
OVERALL |
1 |
2 |
|
3 |
4 |
PANIMENT |
L |
R2 |
R1 |
|
|
|
|
|
|
|
|
|
|
|
|
MINUS ONE |
|
|
|
SPLIT |
DUAL |
||
REVOICE |
!2 |
|
TRACK |
|
|
FREEZE |
|||
|
|
REGISTRATION MEMORY |
|||||||
|
|
PANEL VOICE |
|
XG VOICE |
SHORTCUT |
|||
1 |
~ |
18 |
PIANO |
213 ~ 251 |
PIANO |
REGIST MEMORY |
REGIST BANK |
|
19 |
~ |
30 |
CHROMATIC PERCUSSION |
252 ~ 271 |
CHROMATIC PERCUSSION |
|
|
|
31 |
~ |
57 |
ORGAN |
272 ~ 307 |
ORGAN |
MULTI PAD STOP |
MULTI PAD SET |
|
58 |
~ |
73 |
GUITAR |
308 ~ 336 |
GUITAR |
|||
|
|
|||||||
74 |
~ |
88 |
BASS |
337 ~ 378 |
BASS |
REVERB |
REVERB TYPE |
|
89 |
~ 100 |
SOLO STRINGS |
379 ~ 390 |
STRINGS |
||||
101 |
~ 118 |
ENSEMBLE |
391 ~ 424 |
ENSEMBLE |
CHORUS |
CHORUS TYPE |
||
119 |
~ 126 |
SOLO BRASS |
425 ~ 456 |
BRASS |
HARMONY |
HARMONY TYPE |
||
127 |
~ 140 |
BRASS ENSEMBLE |
457 ~ 469 |
REED |
DSP |
DSP TYPE |
||
141 |
~ 155 |
REED |
470 ~ 477 |
PIPE |
||||
156 |
~ 163 |
PIPE |
478 ~ 513 |
SYNTH LEAD |
VARIATION |
DSP TYPE |
||
164 |
~ 181 |
SYNTH LEAD |
514 ~ 542 |
SYNTH PAD |
|
|
||
182 |
~ 200 |
SYNTH PAD |
543 ~ 598 |
SYNTH EFFECTS |
ACMP ON / OFF |
FINGERING |
||
|
|
|
|
599 ~ 619 |
ETHNIC |
|||
|
|
|
|
620 ~ 642 |
PERCUSSIVE |
DUAL VOICE |
REVOICE R2 |
|
|
|
|
|
643 ~ 651 |
SOUND EFFECTS |
|||
201 |
~ 212 |
DRUM KITS |
652 ~ 692 |
SFX |
SPLIT VOICE |
REVOICE L |
||
|
|
|
|
|
|
PRESS AND HOLD FOR A WHILE. |
||
!4 |
!7 |
|
1 |
2 |
3 |
!6 |
KEYBOARD !8 |
4 |
5 |
6 |
|
|
|
|
|
|
DUAL VOICE |
7 |
8 |
9 |
|
|
!5 |
0 |
|
|
SPLIT VOICE |
|
NO |
YES |
|
|
STOP |
|
|
MUTLI PAD |
|
|
1 |
|
|
2 |
|
|
3 |
|
|
4 |
|
!3 |
|
|
|
|
1 |
|
|
|
2 |
|
|
|
3 |
|
|
4 |
|
|
|
PSR-530 |
|
|
|
|
|
|
|
|
|
|
|
|
|||
C 61 |
|
62 |
R 63 |
64 |
|
65 |
66 |
|
67 |
68 C 69 |
70 R 71 |
74 |
|
75 |
|
76 |
|
77 |
|
78 |
|
!9 |
81 |
82 |
|
83 |
|
84 |
85 |
86 |
87 |
|
88 |
|
89 |
90 |
91 |
92 |
93 |
94 |
95 |
96 |
|||||
1 |
H |
D3 |
1 |
E3 |
R |
F3 |
|
S |
G3 |
2 A3 |
2 B3 |
H |
C4 |
L |
D4 |
H |
|
L |
E4 |
H |
F4 |
L |
|
H |
G4 |
L |
|
A4 |
|
H |
B4 |
L |
C5 |
|
D5 |
|
H |
E5 |
L |
F5 |
|
G5 |
|
A5 |
|
B5 |
C6 |
@0
• • • • • • • • • • • • • • • • |
MIDI |
|
• • • • • • • • • |
AUX OUT |
DC IN 10-12V |
|
• • • • • • • • • • • • • • • • |
|
• • • • • • • • • |
|
|
||
HOST SELECT IN |
OUT |
SUSTAIN |
R |
L/L+R |
|
|
PC-1 PC-2 |
|
|
|
|
|
|
Mac MIDI |
|
|
|
|
|
|
@4 |
@5 |
@6 |
|
|
@7 |
@8 |
■ Rear Panel Controls |
|
|
|
|
||
@3TO HOST Connector |
|
page 88 |
The Music Stand |
|||
|
|
|||||
@4HOST SELECT Switch ................................. |
|
page 90 |
|
|||
@5MIDI IN and OUT Connectors ...................... |
|
page 88 |
|
|||
@6SUSTAIN Jack ............................................. |
|
page 13 |
|
|||
@7AUX OUT R, L/L+R Jacks ............................ |
|
page 13 |
|
|||
@8DC IN 10-12V Jack ...................................... |
|
page 12 |
|
|||
The PSR-530 is supplied with a music stand that can be attached to the instrument by inserting it into the slot at the rear of the control panel.
7
,,,,,,,,,,,,,,QQQQQQQQQQQQQQ¢¢¢¢¢¢¢¢¢¢¢¢¢¢
Basic Display Operation
The PSR-530 LCD panel is a large multi-function type that simultaneously displays and provides access to a number of important parameters. Basic operation of the display as well as the MENU and SUB MENU buttons, and the meaning of the icons which appear in the display, are summarized briefly below.
The Display Icons
CART (Cartridge)
Appears when a Music Cartridge song or style is selected (page 76).
XG
Appears when one of the PSR-530’s XG voices is selected (page 16).
REVERB
Appears when the REVERB effect is turned on (page 36).
HARMONY
Appears when the HARMONY effect is turned on (page 43).
CHORUS
Appears when the CHORUS effect is turned on (page 38).
0TRANSPOSE
The current transpose value (page 46).
116 TEMPO
Shows the current tempo of accompaniment/song playback (page 23).
DSP
Appears when the DSP effect is turned on (page 41).
DSP VARIATION
Appears when the DSP effect variation is turned on (page 41).
VOICE L 76 VOICE R2 101 VOICE R1 1
VOICE L, VOICE R2, and VOICE R1
The currently selected L (Left-hand), R2 (Right-hand 2) and R1 (Right-hand 1) voice numbers are displayed in these display locations (page 16).
001 GrandPno
|
VOICE L |
76 VOICE R2 101 VOICE R1 |
1 |
||||||
|
0 |
A |
B REPEAT |
|
ONE TOUCH |
|
1 |
||
REVERB TRANSPOSE |
FREEZE |
|
|
SETTING |
MEASURE |
||||
|
116 |
|
|
|
|||||
|
REGISTRATION |
1 |
MULTI PAD |
||||||
HARMONY |
TEMPO |
1 |
2 |
3 |
4 |
2 |
3 |
4 |
|
|
|
|
|
|
|
|
|
||
CHORUS |
DSP VARIATION |
SYNC |
FINGERING |
mM 7 |
|
|
|||
STOP |
|
|
|||||||
RHYTHM RHYTHM BASS |
CHORD |
CHORD |
PAD |
PHRASE |
PHRASE |
||||
1 |
2 |
|
1 |
|
2 |
|
1 |
|
2 |
MELODY |
MELODY |
MELODY |
MELODY |
ACCOM- |
VOICE |
VOICE |
VOICE |
1 |
2 |
3 |
4 |
PANIMENT |
L |
R2 |
R1 |
|
MINUS ONE |
|
|
SPLIT |
|
DUAL |
|
8
,,,,,,,,,,,,,,,QQQQQQQQQQQQQQQ¢¢¢¢¢¢¢¢¢¢¢¢¢¢¢
Basic Display Operation
A B |
REPEAT |
BEAT |
 ONE TOUCH
SETTING
1 |
2 |
3 |
4 |
Indicates the“A” and “B”repeat points when programming a repeat section, and whether REPEAT PLAY is on or off (page 57).
ONE TOUCH SETTING
Appears when the ONETOUCH SETTING feature is engaged (page 34).
REGISTRATION 1 … 4 (Registration Memory)
Indicates the currently selected REGISTRATION MEMORY or ONE TOUCH SETTING number (page 47).
FREEZE FREEZE
Appears when the REGISTRATION MEMORY “FREEZE” function is on (page 48).
1 2 3 4 |
MULTI PAD 1 … 4 |
Indicates the currently playing MULTI
PAD number (page 50).
Flashes at the current tempo and indicates the current beat during accompaniment and song playback. (page 25)
MEASURE
1Indicates the current measure number during song recording and playback (page 54).
SYNC STOP
Appears when the AUTO ACCOMPANIMENT SYNC STOP function is engaged (page 26).
FINGERING
Shows the currently selected fingering mode (page 30).
CHORD
Displays the current chord name during AUTO ACCOMPANIMENT  mM 7 playback or SONG recording/play-
back (page 25).
RHYTHM |
RHYTHM |
BASS |
CHORD |
CHORD |
PAD |
PHRASE |
PHRASE |
1 |
2 |
|
1 |
2 |
|
1 |
2 |
MELODY |
MELODY |
MELODY |
MELODY |
ACCOM- |
VOICE |
VOICE |
VOICE |
1 |
2 |
3 |
4 |
PANIMENT |
L |
R2 |
R1 |
|
MINUS ONE |
|
|
SPLIT |
DUAL |
||
ACCOMPANIMENT TRACKS
The top row of 8 icons light to indicate which of the 8 possible accompaniment tracks are being used for accompaniment playback. They are also used to specify tracks when using the REVOICE function (page 27).
VOLUME
These icons show the volume (actually velocity) of each accompaniment track during accompaniment playback, the volume of the melody and accompaniment tracks during song playback, and the volume of the R1, R2 and L voices (page 16).
RHYTHM |
RHYTHM |
BASS |
CHORD |
CHORD |
PAD |
PHRASE |
PHRASE |
1 |
2 |
|
1 |
2 |
|
1 |
2 |
MELODY |
MELODY |
MELODY |
MELODY |
ACCOM- |
VOICE |
VOICE |
VOICE |
1 |
2 |
3 |
4 |
PANIMENT |
L |
R2 |
R1 |
|
MINUS ONE |
|
|
SPLIT |
DUAL |
||
MELODY TRACKS 1 … 4, ACCOMPANIMENT TRACK
These icons indicate the playback on/off status of each song track, and are used to specify tracks for song recording (page 60). They are also used to specify tracks when using the REVOICE function (page 81).
VOICE L, VOICE R2, VOICE R1
These icons indicate the on/off status of the L, R2, and R1 voices when the DUAL VOICE and/or SPLIT VOICE functions are used (page 16). They are also used to specify tracks when using the REVOICE function (page 79).
9
,,,,,,,,,,,,,,QQQQQQQQQQQQQQ¢¢¢¢¢¢¢¢¢¢¢¢¢¢
Basic Display Operation
The Menus
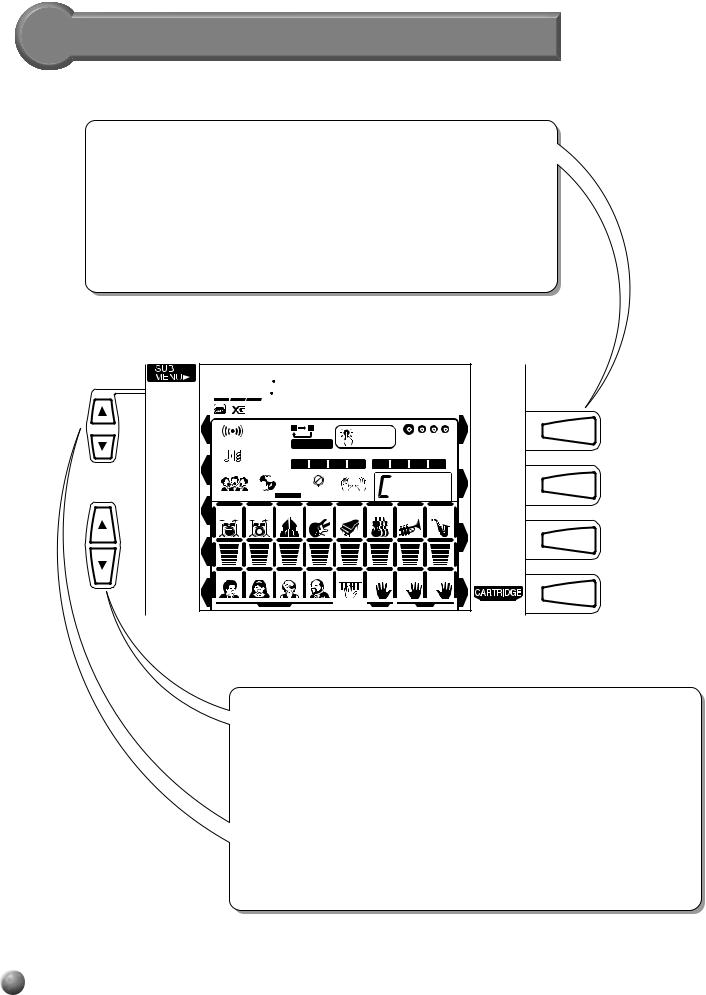
The buttons to the right of the display directly select one of the PSR-530’s four main function menus: VOICE, STYLE, SONG, and CARTRIDGE. The currently selected menu is indicated by a triangular indicator in the display next to the menu list printed immediately to the right of the display panel. In addition to the menus and functions which are available directly via the PSR-530 panel controls, there is also a range of important “background” functions which can be selected via the MENU and SUB MENU [▲] and [▼] buttons.
001 GrandPno |
VOICE L 76 VOICE R2 101 VOICE R1 1 |
The MENU [▲] and [▼] buttons are used to select the menu: REGISTRATION MEMORY, MULTI PAD, MIDI, DIGITAL EFFECT, or OVERALL. The currently selected MENU category is indicated by a triangular indicator in the display next to the menu list printed immediately to the left of the display panel. All of the listed menu categories can be selected by pressing either the MENU [▲] or [▼] button as many times as necessary until the triangular indicator in the display appears next to the name of the desired category. Once a MENU has been selected, the SUB MENU [▲] and [▼] buttons can be used to select the desired function. The SUB MENU functions will be described in detail in the appropriate chapters throughout this manual.
10

,,,,,,,,,,,,,,,QQQQQQQQQQQQQQQ¢¢¢¢¢¢¢¢¢¢¢¢¢¢¢
Basic Display Operation
 Shortcuts
To make operation as easy and as efficient as possible, the PSR-530 features a number of “shortcuts” which allow you to jump directly to certain functions without having to use the MENU and SUB MENU buttons. All of these shortcuts work in the same way: press and hold a panel button for a few seconds to go to the related function. For example, if you press and hold the [REVERB] button for a few seconds, you will go directly to the REVERB type selection function. The shortcut buttons and the functions they access are listed on the PSR-530 panel, near the upper left corner of the display. The shorcuts will also be described where appropriate throughout this manual.
REVERB
 Reverb
11
 ¢¢¢¢¢¢¢¢¢¢¢¢¢¢QQQQQQQQQQQQQQ,,,,,,,,,,,,,,Setting Up
This section contains information about setting up your PSR-530 and preparing to play. Be sure to go through this section carefully before using your PSR-530.
Power Supply
Although the PSR-530 will run either from an optional AC adaptor or batteries, Yamaha recommends use of the more environmentally safe AC adaptor. Follow the instructions below according to the power source you intend to use.
• Never interrupt the power supply (e.g. remove the batteries or unplug the AC adaptor) during any PSR-530 record operation! Doing so can result in a loss of data.
■ Using An Optional AC Power Adaptor
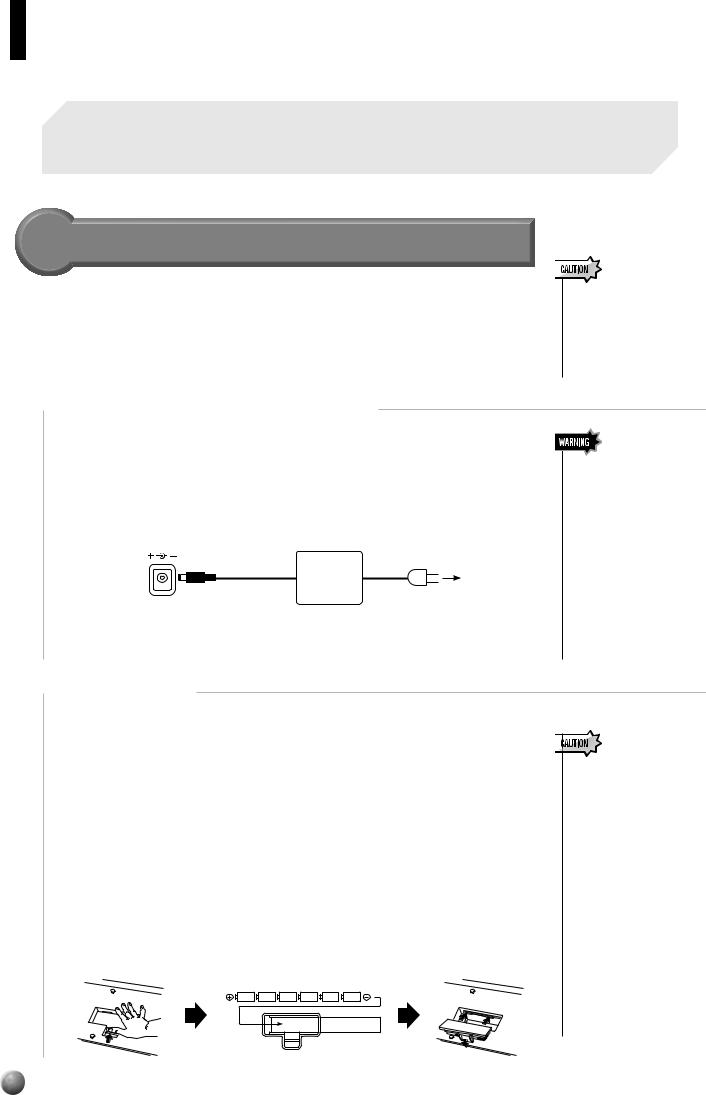
z Plug an optional Yamaha PA-6 Power Adaptor into a wall AC outlet.
xThen plug the DC output cable from the PA-6 into the DC IN 10-12V jack on the rear panel of the PSR-530. The internal batteries are automatically disconnected when an AC Power Adaptor is used.
DC IN 10-12V
PA-6
When turning the power OFF, simply reverse the procedure.
•Use ONLY a Yamaha PA-6 AC Power Adaptor (or other adaptor specifically recommended by Yamaha) to power your instrument from the AC mains. The use of other adaptors may result in irreparable damage to both the adaptor and the PSR530.
•Unplug the AC Power Adaptor when not using the PSR-530, or during electrical storms.
■ Using Batteries
For battery operation the PSR-530 requires six 1.5V SUM-1, “D” size, R-20 or equivalent batteries.
When the batteries need to be replaced “LoBattry” may appear on top of the display, the volume may be reduced, the sound may be distorted, and other problems may occur. When this happens, turn the power off and replace the batteries.
Replace the batteries as follows:
z Open the battery compartment cover located on the instrument’s bottom panel.
xInsert the six new batteries, being careful to follow the polarity markings on the inside of the compartment.
c Replace the compartment cover, making sure that it locks firmly in place.
•When the batteries run down, replace them with a complete set of six new batteries. NEVER mix old and new batteries.
•Do not use different kinds of batteries (e.g. alkaline and manganese) at the same time.
•If the instrument is not to be in use for a long time, remove the batteries from it, in order to prevent possible fluid leakage from the battery.
•Plugging or unplugging the AC power adaptor while the batteries are installed will reset the PSR530 to the defaults.
12
,,,,,,,,,,,,,,,QQQQQQQQQQQQQQQ¢¢¢¢¢¢¢¢¢¢¢¢¢¢¢
Setting Up
Connections
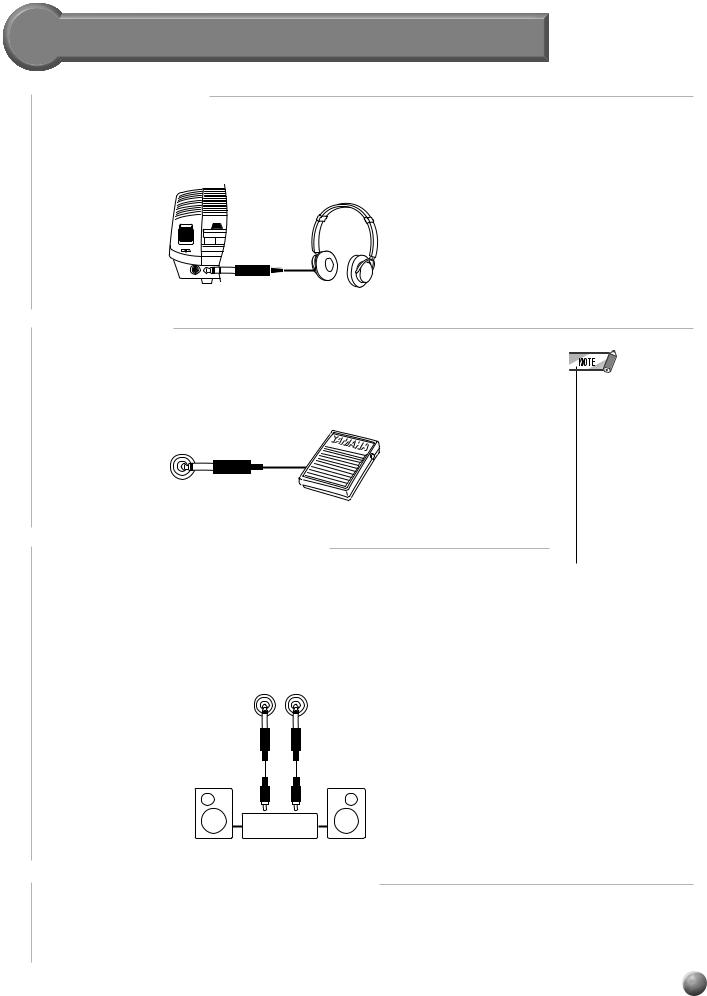
■ The PHONES Jack
A standard pair of stereo headphones can be plugged in here for private practice or late-night playing. The internal stereo speaker system is automatically shut off when a pair of headphones is plugged into the PHONES jack.
■ SUSTAIN Jack
An optional Yamaha FC4 or FC5 footswitch can be plugged into the rear-panel SUSTAIN jack for sustain control. The footswitch functions like the damper pedal on a piano — press for sustain, release for normal sound.
SUSTAIN
■ The AUX OUT R and L/L+R Jacks
The rear-panel AUX OUT R and L/L+R jacks deliver the output of the PSR-530 for connection to a keyboard amplifier, stereo sound system, a mixing console, or tape recorder. If you will be connecting the PSR-530 to a monaural sound system, use only the L/L+R jack. When a plug is inserted into the L/L+R jack only, the leftand rightchannel signals are combined and delivered via the L/L+R jack so you don’t lose any
of the PSR-530 sound.
• • • • • • • • • AUX OUT• • • • • • • • •
R L/L+R
Stereo
System
•Be sure that you do not press the footswitch while turning the power on. If you do, the ON/OFF status of the footswitch will be reversed.
•Some voices may sound continuously or have a long decay after the notes have been released while the sustain pedal (footswitch) is held.
■ MIDI IN/OUT and TO HOST Connectors
See page 88.
13

 ¢¢¢¢¢¢¢¢¢¢¢¢¢¢QQQQQQQQQQQQQQ,,,,,,,,,,,,,,The Demonstration
Once you’ve set up your PSR-530, try listening to the pre-programmed demonstration songs. A total of 12 demo songs are provided.
1 Switch ON
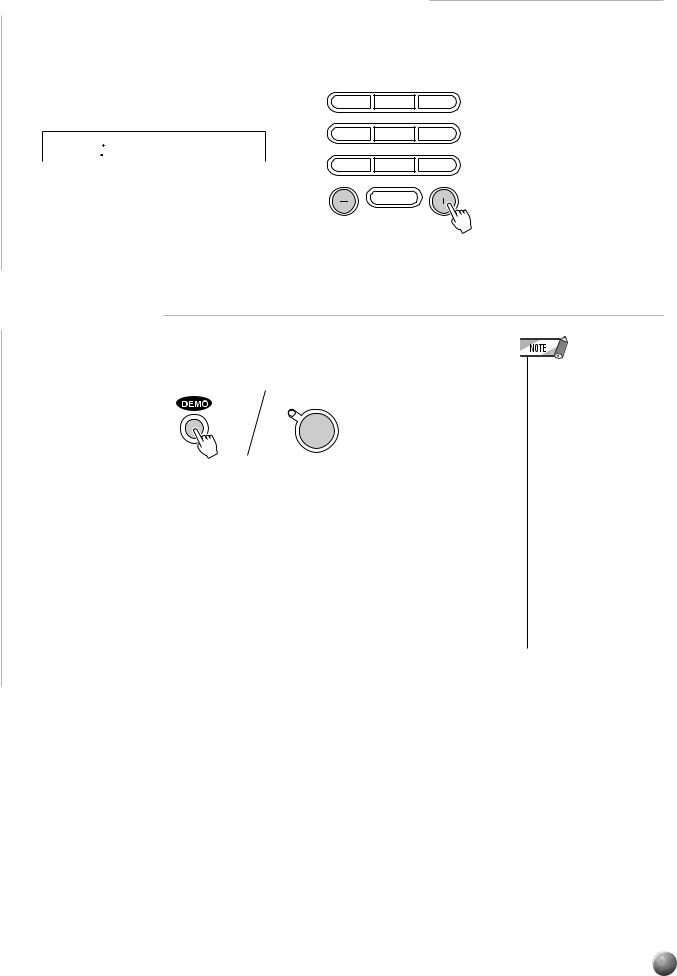
Turn the power ON by pressing the [STAND BY/ON] switch.
 STAND BY
  ON
ON
• Even when the switch is in the “STAND BY” position, electricity is still flowing to the instrument at the minimum level. When you are not using the PSR-530 for a long time, make sure you unplug the AC power adoptor from the wall AC outlet, and/or remove the batteries from the instrument.
2 Set an Initial Volume Level
Turn the [MASTERVOLUME] control up (clockwise) about a quarter-turn from its minimum position. You can re-adjust the [MASTER VOLUME] control for the most comfortable overall volume level after playback begins.
MASTER
VOLUME
MIN MAX
3 Press the [DEMO] Button
•If you play the PSR-530 with the volume at its maximum level when the batteries are used, the life of the batteries will be shorter.
Press the [DEMO] button to start demo playback. The PSR-530 SONG menu will automatically be selected and the number and name of the first demo song will appear on the top line of the display. The demo will begin playing automatically. The demo songs will play in sequence, and the sequence will repeat until stopped.
•You can play along on the PSR-530 keyboard while the demonstration is playing.
•The volume icons will move in response to the data in each track while the demonstration plays.
01 PeterGun
14
,,,,,,,,,,,,,,,QQQQQQQQQQQQQQQ¢¢¢¢¢¢¢¢¢¢¢¢¢¢¢
The Demonstration
4 Skip to the Beginning Of a Different Demo Song
While the demonstration is playing you can select any of the demo songs by using the [–]and [+] buttons. Playback will skip to the beginning of the selected song.
1 |
2 |
3 |
4 |
5 |
6 |
02 R&B |
8 |
9 |
7 |
||
|
0 |
|
NO |
|
YES |
5 Stop When Done
Press the [DEMO] button or the [START/STOP] button to stop demo playback.
START/STOP
 /
/ 
•Demo playback can be restarted after it has been stopped by pressing the [START/STOP] button. In this case the selected demo song will play through to the end and then playback will stop automatically.
•Since playing the demo automatically selects the SONG menu, the SONG menu will remain active when demo playback is stopped. To select and play voices after stopping the demo, for example, you will have to press the [VOICE] button to go to the VOICE menu. The same applies for other menus.
15
 ¢¢¢¢¢¢¢¢¢¢¢¢¢¢QQQQQQQQQQQQQQ,,,,,,,,,,,,,,Playing the PSR-530
The PSR-530 Voices
The PSR-530 actually includes two voice sets: the “panel” voices and percussion kits, and the XG voices. The panel voices include 200 “pitched” voices (voice numbers 1 through 200) and 12 percussion kits (numbers 201 through 212), while the XG voice set includes 480 voices (voice numbers 213 through 692).
Panel voices |
1 |
… 200 |
|
|
|
Panel drum kits |
201 |
… 212 |
|
|
|
XG voices |
213 |
… 692 |
|
|
|
See the “Voice List” on page 99.
■ A Word About the “R1”, “R2”, and “L” Voices
The PSR-530 allows up to three voices to be selected at the same time: “R1” (Righthand 1), “R2”, (Right-hand 2) and “L” (Left-hand). Only the “R1” voice is used when you’re playing a single voice over the entire range of the keyboard. When you’re using the DUAL VOICE and/or SPLIT VOICE modes (decribed on pages 19 and 20), however, the “R2” and/or “L” voice will be used as well. The numbers of the currently selected R1, R2, and L voices are all shown on the display panel.
|
|
|
|
|
|
|
|
|
|
|
VOICE L 76 VOICE R2 101 VOICE R1 |
1 |
|
|
||||||||||||||||||||||||
|
|
|
|
|
|
|
|
|
|
|
|
|
|
|
|
|
|
|
|
|
|
|
|
|
|
|
|
|
|
|
|
|
|
|
|
VOICE |
VOICE |
VOICE |
|
|
|
|
|
|
|
|
|
|
|
|
|
|
|
|
|
|
|
|
|
|
|
|
|
|
|
|
|
|
|
|
|
|
|
|
L |
R2 |
R1 |
|
|
|
|
|
|
|
|
|
|
|
|
|
|
|
|
|
|
|
|
|
|
|
|
|
|
|
|
|
|
|
|
|
|
|
|
SPLIT |
|
DUAL |
|
|
|
|
|
|
|
|
|
|
|
|
|
|
|
|
|
|
|
|
|
|
|
|
|
|
|
|
|
|
|
|
|
|
|
|
|
||
|
|
|
|
|
|
|
|
|
|
|
|
|
|
|
R1 Voice |
|
|
|
|
|
|
|
|
|
|
|
|
|
|
|
VOICE |
VOICE |
VOICE |
|||||
|
|
|
|
|
|
|
|
|
|
|
|
|
|
|
|
|
|
|
|
|
|
|
|
|
|
|
|
|
|
|||||||||
|
|
|
|
|
|
|
|
|
|
|
|
|
|
|
|
|
|
|
|
|
|
|
|
|
|
|
|
|
|
|||||||||
|
|
|
|
|
|
|
|
|
|
|
|
|
|
|
|
|
|
|
|
|
|
|
|
|
|
|
|
|
|
|
|
|
|
|
|
|||
|
|
|
|
|
|
|
|
|
|
|
|
|
|
|
|
|
|
|
|
|
|
|
|
|
|
|
|
|
|
|
|
|
|
|
|
L |
R2 |
R1 |
|
|
|
|
|
|
|
|
|
|
|
|
|
|
|
|
|
|
|
|
|
|
|
|
|
|
|
|
|
|
|
|
|
|
|
|
SPLIT |
|
DUAL |
|
|
|
|
|
|
|
|
|
|
|
|
|
|
|
|
|
|
|
|
|
|
|
|
|
|
|
|
|
|
|
|
|
|
|
|
|
||
|
|
|
|
|
|
|
|
|
|
|
|
R1 Voice + R2 Voice |
|
|
|
|
|
|
|
|
|
|
|
|
||||||||||||||
|
|
|
|
|
|
|
|
|
|
|
|
|
|
|
|
|
|
|
|
|
|
|
VOICE |
VOICE |
VOICE |
|||||||||||||
|
|
|
|
|
|
|
|
|
|
|
|
|
|
|
|
|
|
|
|
|
|
|
||||||||||||||||
|
|
|
|
|
|
|
|
|
|
|
|
|
|
|
|
|
|
|
|
|
|
|
||||||||||||||||
|
|
|
|
|
|
|
|
|
|
|
|
|
|
|
|
|
|
|
|
|
|
|
|
|
|
|
|
|
|
|
|
|
|
|
|
|||
|
|
|
|
|
|
|
|
|
|
|
|
|
|
|
|
|
|
|
|
|
|
|
|
|
|
|
|
|
|
|
|
|
|
|
|
L |
R2 |
R1 |
|
|
|
|
|
|
|
|
|
|
|
|
|
|
|
|
|
|
|
|
|
|
|
|
|
|
|
|
|
|
|
|
|
|
|
|
SPLIT |
|
DUAL |
|
|
|
|
|
|
|
|
|
|
|
|
|
|
|
|
|
|
|
|
|
|
|
|
|
|
|
|
|
|
|
|
|
|
|
|
|
||
|
|
|
|
|
|
L Voice |
|
|
|
|
|
R1 Voice |
|
|
|
|
|
|||||||||||||||||||||
|
|
|
|
|
|
|
|
|
|
|
|
|
|
|
|
|||||||||||||||||||||||
|
|
|
|
|
|
|
|
|
|
|
|
|
|
|
|
|||||||||||||||||||||||
|
|
|
|
|
|
|
|
|
|
|
|
|
|
|
|
|
|
|
|
|
|
|
|
|
|
|
|
|
|
|
|
|
|
|||||
|
|
|
|
|
|
|
|
|
|
|
|
|
|
|
|
|
|
|
|
|
|
|
|
|
|
|
|
|
|
|
|
|
|
|
|
VOICE |
VOICE |
VOICE |
|
|
|
|
|
|
|
|
|
|
|
|
|
|
|
|
|
|
|
|
|
|
|
|
|
|
|
|
|
|
|
|
|
|
|
|
L |
R2 |
R1 |
|
|
|
|
|
|
|
|
|
|
|
|
|
|
|
|
|
|
|
|
|
|
|
|
|
|
|
|
|
|
|
|
|
|
|
|
SPLIT |
|
DUAL |
|
|
|
|
|
|
|
|
|
|
|
|
|
|
|
|
|
|
|
|
|
|
|
|
|
|
|
|
|
|
|
|
|
|
|
|
|
||
|
|
|
|
|
|
|
|
|
|
|
|
|
|
|
|
|
|
|
|
|
|
|
|
|
|
|
|
|
|
|
|
|
|
|
|
|
||
|
|
|
|
|
|
|
|
|
|
|
|
|
|
|
|
|
|
|
|
|
|
|
|
|
|
|
|
|
|
|
|
|
|
|
|
|
|
|
L Voice 
 R1 Voice + R2 Voice
(Split Voice Mode + Dual Voice Mode)
The R2 and L voices will be discussed in more detail in the DUAL VOICE and SPLIT VOICE sections. For now we’ll describe how to select and play the main R1 voice.
16
,,,,,,,,,,,,,,,QQQQQQQQQQQQQQQ¢¢¢¢¢¢¢¢¢¢¢¢¢¢¢
Playing the PSR-530
Selecting & Playing Voices
Here’s how you can select and play the panel voices.
1 Select the VOICE Menu
Press the [VOICE] button so that the triangular indicator appears in the display next to “VOICE” to the right of the display. The number and name of the currently selected “R1” voice appears on the top line of the display panel when the VOICE menu is selected.
001 GrandPno
VOICE R1 1
VOICE
2 Select a Panel Voice
The PSR-530 voices can be selected by using the [–]and [+] buttons, the number buttons, the data dial, or the [VOICE] button.
●The [–] and [+] Buttons
When the VOICE menu is selected these buttons step up or down through the PSR530’s voices. Press either button briefly to step to the next voice in the corresponding direction, or hold the button to scroll rapidly through the voices in the corresponding direction.
7 |
8 |
9 |
002 BritePno 0
VOICE R1 |
2 |
NO |
YES |
|
|
●The Number Buttons
The number buttons can be used to directly enter the number of the desired voice, thereby immediately selecting that voice without having to step through a number of other voices. To select voice number 109 (TremoloStrs), for example, press the [1], [0], and [9] number buttons in sequence.
|
1 |
2 |
3 |
|
109 Trem.Str |
4 |
5 |
6 |
|
7 |
8 |
9 |
||
VOICE R1 109 |
||||
|
|
|
||
|
|
0 |
|
|
|
NO |
|
YES |
17
,,,,,,,,,,,,,,QQQQQQQQQQQQQQ¢¢¢¢¢¢¢¢¢¢¢¢¢¢
Playing the PSR-530
Oneor two-digit voice numbers can be entered without leading zeros. To select voice number “23” (SteelDrums), for example, simply press the [2] button and then the [3] button. The bars below the voice number on the display will flash for a few seconds, and then disappear when the selected voice number has been recognized by the PSR-530.
1 |
2 |
3 |
4 |
5 |
6 |
023 SteelDrm
VOICE R1 23 |
7 |
8 |
9 |
|
|
|
|
|
|
0 |
|
|
NO |
|
YES |
Oneor two-digit voice numbers can also be entered with leading zeroes: e.g. “23” can be entered as “023” by pressing the [0], [2], and [3] buttons. In this case the specified voice number will be immediately recognized by the PSR-530.
●The Data Dial
Simply rotate the dial clockwise to increment the voice number, or counterclockwise to decrement the voice number.
●The [VOICE] Button
Pressing the [VOICE] button increments the voice number. Press briefly to increment by one, or hold for continuous incrementing.
VOICE
3 Play & Adjust Volume
You can now play the selected voice on the PSR-530 keyboard. Use the [MASTER VOLUME] control to adjust the overall volume level.
If the Voice Set function (page 85) is turned “on”, whenever a panel voice is selected appropriate “R2” and “L” voices (i.e. DUAL VOICE and SPLIT VOICE modes) as well as digital effects, etc., will be automatically selected at the same time.
MASTER
VOLUME
MIN MAX
•The PSR-530’s XG voices are selected in the same way as the panel voices, as described above.
•When a XG voice is selected the XG icon will appear below the voice number.
•Refer to page 99 for a complete list of the panel and XG voices.
18
,,,,,,,,,,,,,,,QQQQQQQQQQQQQQQ¢¢¢¢¢¢¢¢¢¢¢¢¢¢¢
Playing the PSR-530
Keyboard Percussion
When one of the 12 panel DRUM KIT voices are selected (voice numbers 201 through 212) you can play different drums and percussion instruments on the keyboard. The drums and percussion instruments played by the various keys are marked by symbols above the keys.
201 Std.Kit1
VOICE R1 201
VOICE
● The Drum Kits
201 |
Standard Kit1 |
|
207 |
Dance Kit |
|
|
|
|
|
202 |
Standard Kit2 |
|
208 |
Jazz Kit |
|
|
|
|
|
203 |
Room Kit |
|
209 |
Brush Kit |
|
|
|
|
|
204 |
Rock Kit |
|
210 |
Classic Kit |
|
|
|
|
|
205 |
Electronic Kit |
|
211 |
SFX Kit 1 |
|
|
|
|
|
206 |
Analog Kit |
|
212 |
SFX Kit 2 |
|
|
|
|
|
•The HARMONY effect (page 42) cannot be turned on while a drum kit is selected for the “R1” voice, and will automatically be turned off if a drum kit is selected while HARMONY is on.
•The TRANSPOSE parameter (page 46) has no effect on the drum kit voices.
•See page 104 for a complete listing of the keyboard percussion drum instrument assignments.
The Dual Voice Mode
When the DUAL VOICE mode is engaged you can play two voices (the R1 and R2 voices) simultaneously across the entire keyboard.
The DUAL VOICE mode is turned on and off by pressing the [DUAL VOICE] button. When the DUAL VOICE mode is turned on both R1 and R2 icons in the display will light. Press the [DUAL VOICE] button a second time to turn the DUAL VOICE mode off: the R2 icon in the display will go out leaving only the R1 icon lit.
VOICE VOICE VOICE
L R2 R1
DUAL VOICE
DUAL
The R2 TRACK button below the display can also be used to turn the R2 voice on or off, only when a frame appears around the voice icons, or in the Song mode including the Demo song playback.
|
MELODY |
MELODY |
MELODY |
MELODY |
ACCOM- |
VOICE |
VOICE |
VOICE |
|
|
1 |
2 |
3 |
4 |
PANIMENT |
L |
R2 |
R1 |
|
|
|
MINUS ONE |
|
|
|
|
DUAL |
|
|
|
|
|
|
|
|
|
|
|
|
•The R1/R2 voice settings can be changed as required by using the REVOICE function, described on page 78.
•The R1 voice cannot be turned off.
•The DUAL VOICE mode can be used at the same time as the SPLIT VOICE mode, described below. In this case the L voice is played on the lefthand section of the keyboard while both the R1 and R2 voices are played on the right-hand section of the keyboard. See the “The Split Voice Mode” section, below, for more information.
TRACK
19
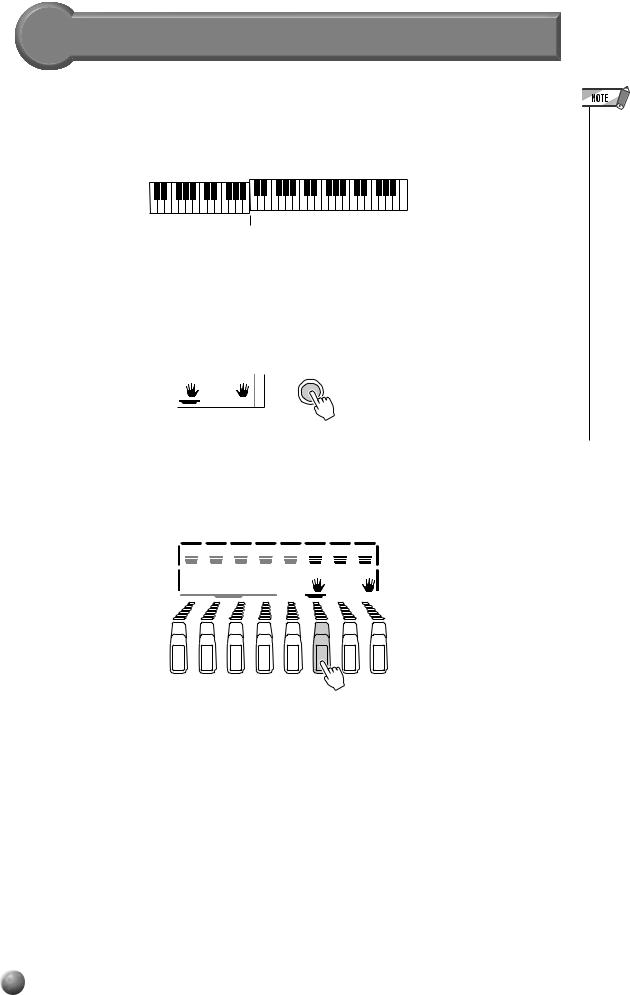
,,,,,,,,,,,,,,QQQQQQQQQQQQQQ¢¢¢¢¢¢¢¢¢¢¢¢¢¢
Playing the PSR-530
The Split Voice Mode
The SPLIT VOICE mode lets you play different voices with the left and right hands. You could, for example, play bass with the left hand (the L voice) while playing piano with the right (the R1 or R1 and R2 voices). The “split point” is initially set at B2 (note number 59), but it can be set at any key on the keyboard.
 Split Point (59)
The SPLIT VOICE mode is engaged by pressing the [SPLIT VOICE] button. When turned on, the L icon in the display will light in addition to the R1 or R1 and R2 icons. Press the [SPLIT VOICE] button a second time to disengage the SPLIT VOICE mode: the L icon will go out leaving only the R voice.
VOICE |
VOICE |
VOICE |
L |
R2 |
R1 |
|
|
SPLIT VOICE |
SPLIT |
|
|
The L TRACK button below the display can also be used to turn the L voice on or off, only when a frame appears around the voice icons, or in the Song mode including the Demo song playback.
•The L/R1/R2 voice settings can be changed as required by using the REVOICE function, described on page 78.
•The split point can be changed as required as described below.
•The SPLIT VOICE mode can be used at the same time as the DUAL VOICE mode, described above. In this case the L voice is played on the lefthand section of the keyboard while both the R1 and R2 voices are played on the right-hand section of the keyboard. See the “The Dual Voice Mode” section, above, for more information.
|
MELODY |
MELODY |
MELODY |
MELODY |
ACCOM- |
VOICE |
VOICE |
VOICE |
|
|
1 |
2 |
3 |
4 |
PANIMENT |
L |
R2 |
R1 |
|
|
|
MINUS ONE |
|
|
SPLIT |
|
|
|
|
|
|
|
|
|
|
|
|
|
|
TRACK
20
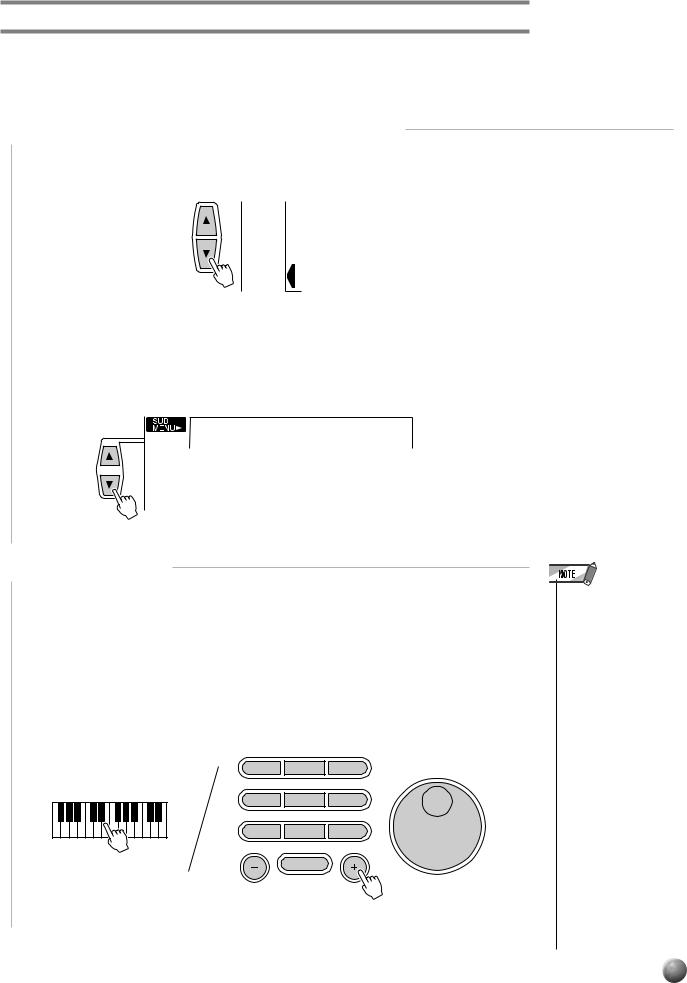
,,,,,,,,,,,,,,,QQQQQQQQQQQQQQQ¢¢¢¢¢¢¢¢¢¢¢¢¢¢¢
Playing the PSR-530
Changing the SPLIT VOICE Split Point
The SPLIT VOICE split point can be set to any key on the PSR-530 keyboard to match your individual playing requirements.
1 Select the SPLIT VOICE Split Point Function
Use the MENU [▲] and [▼] buttons to the left of the display to move the triangular indicator next to “OVERALL” on the left side of the display.
MIDI
DIGITAL
EFFECT
OVERALL
Then use the SUB MENU [▲] and [▼] buttons to select the “S.Split” function from within the OVERALL menu . The MIDI note number corresponding to the current split point will appear to the left of “S.Split” on the top line of the display.
059 S.Split
2 Set As Required
Simply press the key you want to assign as the split point. The key number of the key you press will appear to the left of “S.Split” on the top line of the display. You can also use the [–]and [+] buttons, number buttons, or data dial to enter the split point key number. The lowest key on the keyboard (C1) is key number “36”, middle C (C3) is “60”, and the highest key (C5) is 96. The split point can be set at any key number from 0 through 127, allowing the split point to be set outside the range of the PSR-530 keyboard for MIDI applications.
1 |
2 |
3 |
4 |
5 |
6 |
7 |
8 |
9 |
|
0 |
|
•The split point key becomes the highest key in the left-hand section of the keyboard.
•The default split point (59) can be instantly recalled by pressing the [–] and [+] buttons at the same time.
•For the relationship between the SPLIT VOICE split point and the AUTO ACCOMPANIMENT split point, see page 30.
•When setting the split point, that is, the sub menu “S.Split” is shown on the display, pressing the key on the keyboard doesn’t either produce notes or detect chords in the accompaniment section, but only designates the split point.
21
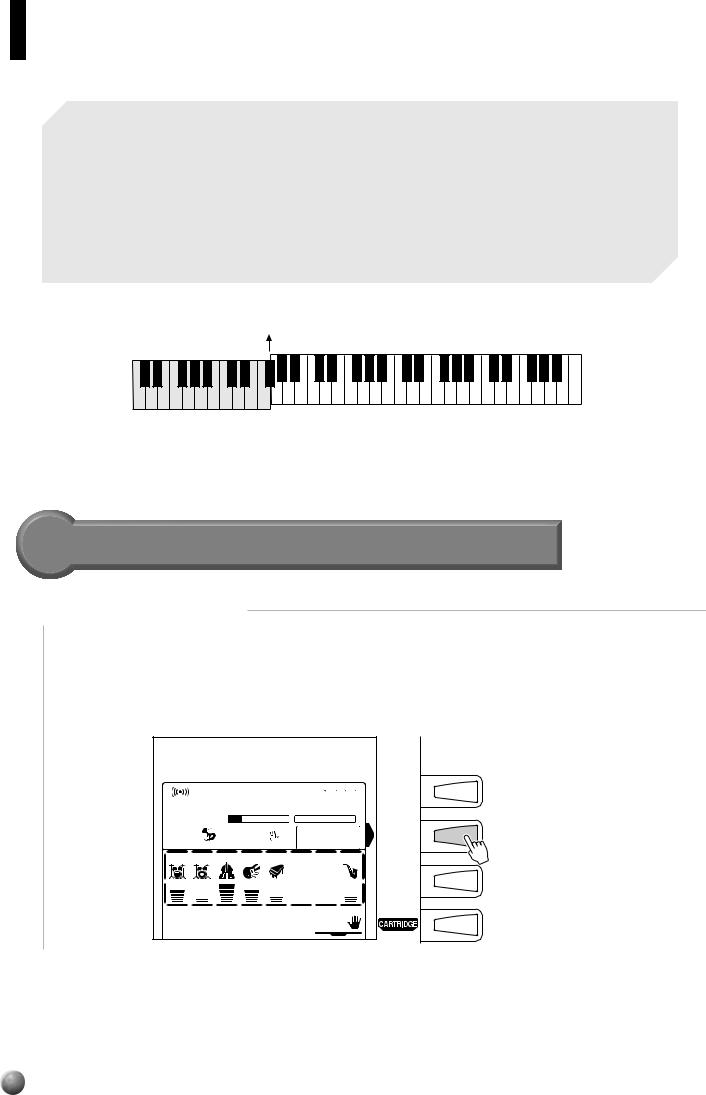
 ¢¢¢¢¢¢¢¢¢¢¢¢¢¢QQQQQQQQQQQQQQ,,,,,,,,,,,,,,Auto Accompaniment
The PSR-530 has 100 different accompaniment “styles” that can be used to provide fullyorchestrated or rhythm-only accompaniment. The PSR-530’s sophisticated AUTO ACCOMPANIMENT system can provide automated bass and chord backing that is perfectly matched to the selected accompaniment style.
When Auto-Accompaniment is turned on, the specified left-hand section of the keyboard becomes the “auto accompaniment” section, and chords played in this section are automatically detected and used as a basis for fully automatic accompaniment with the selected style.
AUTO ACCOMPANIMENT split point (54)
 “auto accompaniment”
  section
Using Auto Accompaniment
1 Select the Style Menu
Press the [STYLE] button to select the STYLE menu (the triangular indicator will appear next to “STYLE” to the right of the display). The number and name of the currently selected style will appear on the top line of the display, and the accompaniment track and volume icons in the display will appear framed.
001 8BtPop1
|
VOICE L |
76 VOICE R2 101 VOICE R1 |
1 |
|||
|
0 |
|
REPEAT |
|
|
1 |
REVERB TRANSPOSE |
|
|
|
MEASURE |
||
|
116 |
|
|
|
||
|
REGISTRATION |
MULTI PAD |
||||
HARMONY |
TEMPO |
1 |
|
|
|
|
CHORUS |
DSP |
|
SYNC |
FINGERING |
|
|
|
STOP |
|
|
|||
RHYTHM RHYTHM BASS |
|
CHORD |
CHORD |
PAD PHRASE |
PHRASE |
|
1 |
2 |
|
1 |
2 |
1 |
2 |
VOICE
STYLE
SONG
MELODY |
MELODY |
MELODY |
MELODY |
ACCOM- |
VOICE |
VOICE |
VOICE |
1 |
2 |
3 |
4 |
PANIMENT |
L |
R2 |
R1 |
|
|
|
|
|
|
|
DUAL |
22
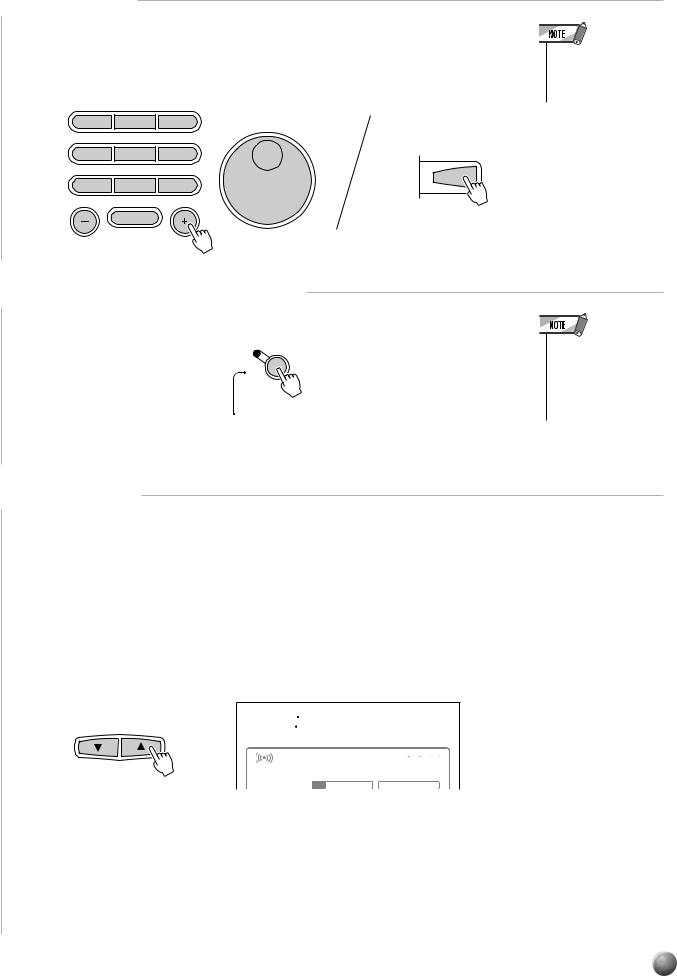
,,,,,,,,,,,,,,,QQQQQQQQQQQQQQQ¢¢¢¢¢¢¢¢¢¢¢¢¢¢¢
Auto Accompaniment
2 Select a Style
The PSR-530 has 100 styles that can be selected by using the [–]and [+] buttons, the number buttons, the data dial, or the [STYLE] button (these controls function in the same way as for voice selection — see page 17). The styles are listed in the STYLE list printed at the top of the instrument’s control panel.
1 |
2 |
3 |
4 |
5 |
6 |
7 |
8 |
STYLE |
9 |
||
|
0 |
|
•See page 77 for details on selecting cartridge styles.
3 Turn AUTO ACCOMPANIMENT On
Press the AUTO ACCOMPANIMENT [ON/OFF] so that its indicator lights.
ON/
OFF
AUTO
ACCOMPANIMENT
•If AUTO ACCOMPANIMENT is off, only rhythm (drums and percussion) accompaniment will be produced.
4 Set the Tempo
When you select a different style while the accompaniment is not playing, the “default” tempo for that style is also selected, and the tempo is displayed immediately above “TEMPO” in the display in quarter-note beats per minute. If the accompaniment is playing, the same tempo is maintained even if you select a different style.
You can change the tempo to any value between 32 and 280 beats per minute, however, by using the TEMPO [▼] and [▲] buttons. Press either button briefly to decrement or increment the tempo value by one, or hold the button for continuous decrementing or incrementing.
TEMPO |
120 Tempo |
|
|
|
VOICE L 76 VOICE R2 101 VOICE R1 1 |
||
|
0 |
REPEAT |
|
|
REVERB TRANSPOSE |
|
MEASURE |
|
120 |
|
|
|
REGISTRATION |
MULTI PAD |
|
|
HARMONY TEMPO |
1 |
|
When either of the TEMPO buttons is pressed the current tempo value will appear on the top line of the display for a few seconds — during this time the [–]and [+] buttons, number buttons, or data dial can also be used to set the tempo. The default tempo for the selected style can be recalled at any time by pressing both the TEMPO [▼] and [▲] buttons simultaneously (or by pressing the [–]and [+] buttons simultaneously while the tempo value is showing on the top line of the display).
23
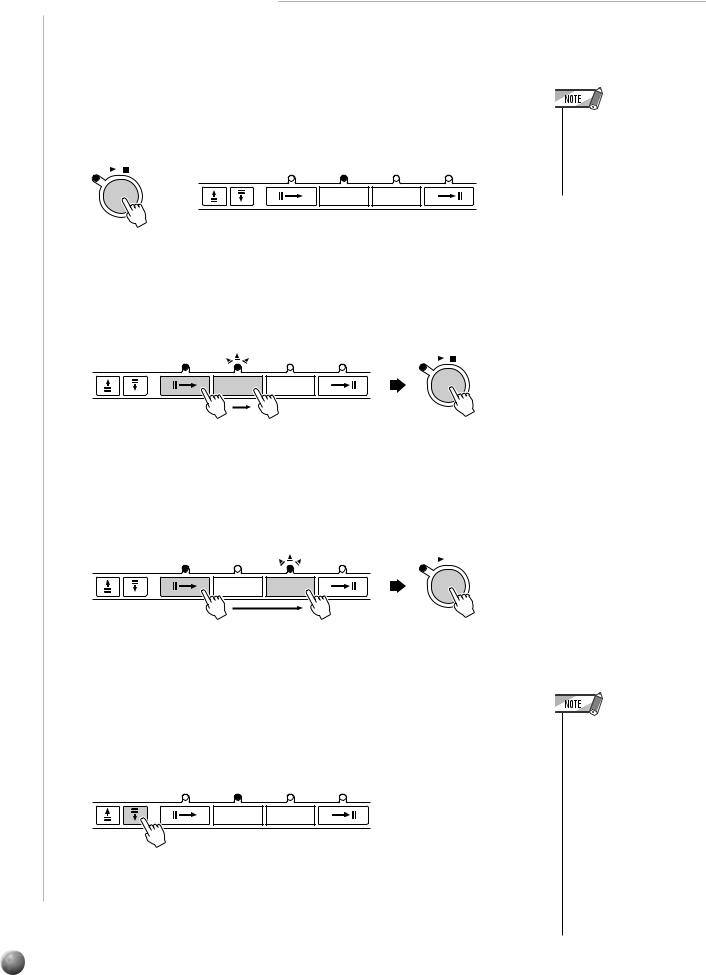
,,,,,,,,,,,,,,QQQQQQQQQQQQQQ¢¢¢¢¢¢¢¢¢¢¢¢¢¢
Auto Accompaniment
5 Start the Accompaniment
There are several ways to start the accompaniment:
●Straight start
Press the [START/STOP] button. The rhythm will begin playing immediately without bass and chord accompaniment. The currently selected MAIN [A] or [B] section will play.
START/STOP
/ |
SYNC SYNC |
INTRO |
MAIN/AUTO FILL |
ENDING |
|
STOP START |
|
|
|
A B
●Start with an introduction followed by the MAIN A section
Press the [INTRO] button so that its indicator lights, press the MAIN/AUTO FILL [A] button (not necessary if its indicator is already flashing), then press
[START/STOP].
|
INTRO |
MAIN/AUTO FILL |
ENDING |
START/STOP |
SYNC SYNC |
/ |
|||
STOP START |
|
|
|
|
A |
B |
•It is possible to select the MAIN A or B section prior to a straight start — refer to “7. Select the MAIN A and B Sections as Required,” below.
●Start with an introduction followed by the MAIN B section
Press the [INTRO] button so that its indicator lights, press the MAIN/AUTO FILL [B] button (not necessary if its indicator is already flashing), then press
[START/STOP].
SYNC SYNC |
INTRO |
STOP START |
|
MAIN/AUTO FILL |
ENDING |
START/STOP |
||
/ |
|
|
||
|
|
|||
A |
B |
● Synchronized start
Any of the above start types can be synchronized to the first note or chord played on the left-hand section of the keyboard (i.e. keys to the left of and including the split-point key — normally 54) by first pressing the [SYNC START] button.
SYNC SYNC |
INTRO |
MAIN/AUTO FILL |
ENDING |
STOP START |
|
|
|
A B
•If you press the [SYNC START] button while the accompaniment is playing, the accompaniment will stop and the synchro start mode will be engaged.
•The [INTRO] button can be used to select the INTRO section even while the accompaniment is playing.
•The accompaniment split point can be changed via the “Accompaniment Split Point” function in the OVERALL menu — see page 29.
24
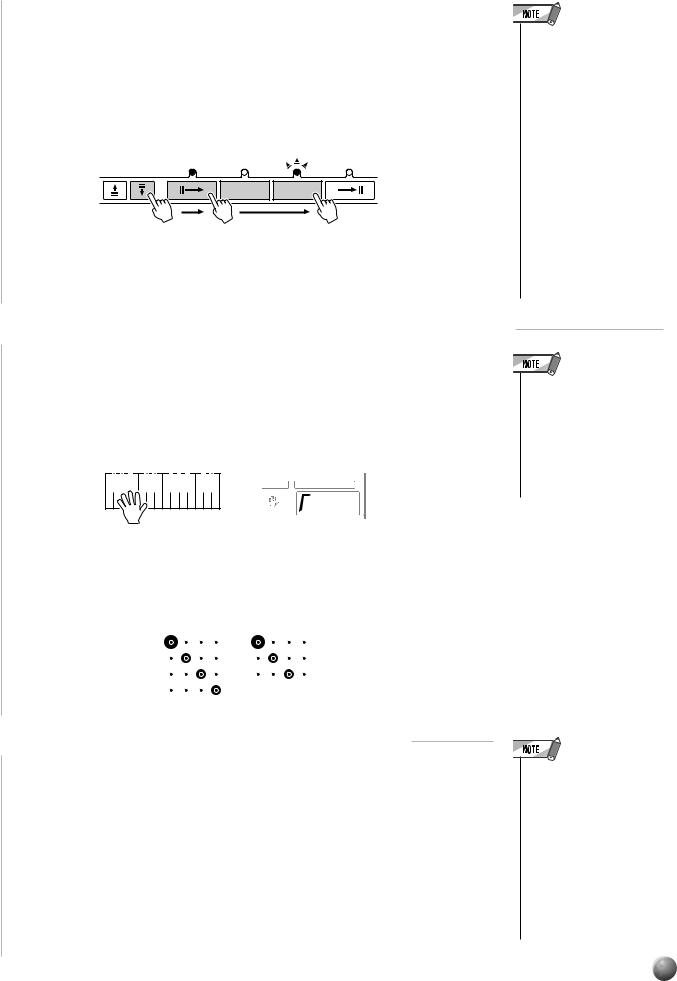
,,,,,,,,,,,,,,,QQQQQQQQQQQQQQQ¢¢¢¢¢¢¢¢¢¢¢¢¢¢¢
Auto Accompaniment
Pressing the [SYNC START] button alone causes a straight start to occur when the first note or chord is played. Press the [SYNC START] button and then the appropriate [INTRO] and [MAIN/AUTO FILL] buttons for a synchronized introduction start. The BEAT indicator will flash at the current tempo when a synchronized start mode has been selected. The synchro start mode can be disengaged prior to actually starting the accompaniment by pressing the [SYNC START] button a second time.
SYNC SYNC |
INTRO |
MAIN/AUTO FILL |
ENDING |
STOP START
A |
B |
•When the AUTO ACCOMPANIMENT split point and SPLIT VOICE split point are set at different keys, the L voice can be played between the AUTO ACCOMPANIMENT split point and SPLIT VOICE split point when the AUTO ACCOMPANIMENT function is on.
•When the AUTO ACCOMPANIMENT split point and SPLIT VOICE split point are set to the same key, the L voice can be played anywhere to the left of the AUTO ACCOMPANIMENT split point and SPLIT VOICE split point while AUTO ACCOMPANIMENT is not playing.
6 Play On the Auto-accompaniment Section Of the Keyboard
As soon as you play any chord that the PSR-530 can “recognize” on the lefthand section of the keyboard, the PSR-530 will automatically begin to play the chord along with the selected rhythm and an appropriate bass line. The name of the current chord will appear on the display. The accompaniment will continue playing even if you release the keys (unless the Synchro Stop function is engaged
— page 26).
|
|
|
|
|
|
|
|
|
|
|
|
|
|
|
|
|
|
|
ATION |
MULTI PAD |
|
|
|
|
|
|
|
|
|
|
|
|
|
|
|
|
|
|
|
|
|
FINGERING  mM 7
mM 7
•The PSR-530 has several fingering modes which allow you to play chords in different ways. See “The Auto Accompaniment Fingering Modes” on page 30 for details.
●The Beat Indicator
The four dots of the BEAT indicator provide a visual indication of the selected tempo as shown below.
4/4 time |
3/4 time |
1st beat
2nd beat
3rd beat
4th beat
7 Select the MAIN A and B Sections as Required
The MAIN A and MAIN B sections can be selected at any time during playback by pressing the corresponding button. Whenever you press the MAIN/AUTO FILL [A] or [B] button during playback, the PSR-530 will generate an appropriate “fill-in” (one of four types: AA, AB, BA, and BB) which will smoothly connect the current section to the selected section — even if it is the same section. For example, if you press the MAIN/AUTO FILL [A] button while the MAIN A section is playing, a fill-in will be produced, then the MAIN A section will continue playing. When you select a different section, the fill-in will begin immediately and the new section will actually begin playing from the top of the next measure unless the MAIN/AUTO FILL [A] or [B] button is pressed during
•The MAIN A section is automatically selected whenever the PSR-530 power is initially turned on.
•The indicator of the destination section (MAIN A or B) will flash while the corresponding fill-in is playing. During this time you can change the destination section by pressing the appropriate MAIN/AUTO FILL [A] or [B] button.
25
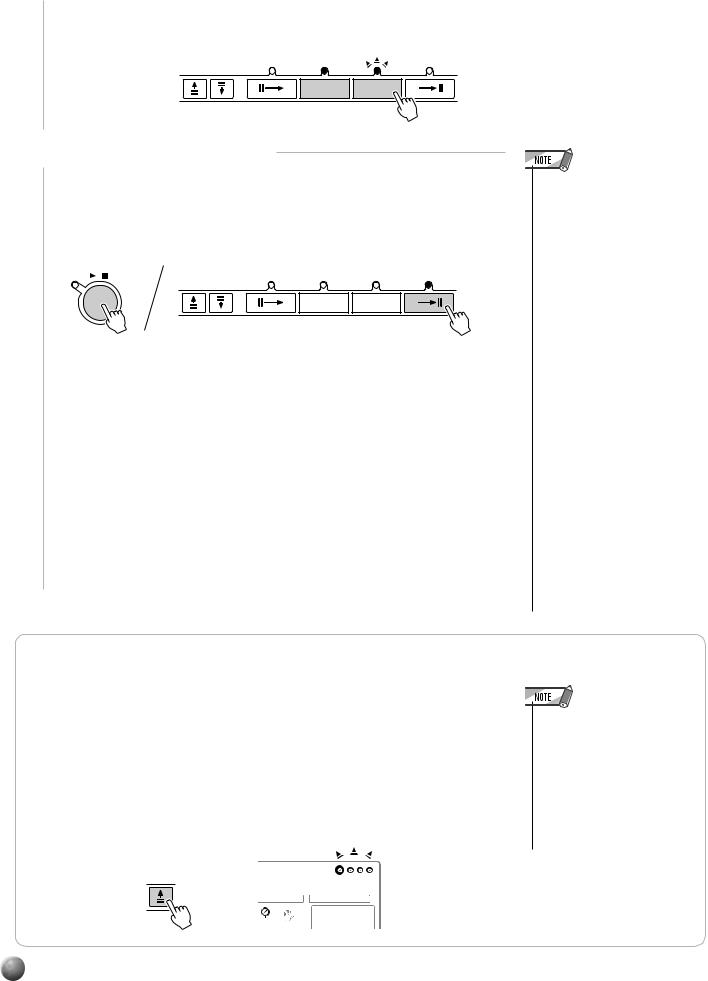
,,,,,,,,,,,,,,QQQQQQQQQQQQQQ¢¢¢¢¢¢¢¢¢¢¢¢¢¢
Auto Accompaniment
the last half beat of the measure, in which case the fill-in will begin from the first beat of the next measure.
SYNC SYNC |
INTRO |
MAIN/AUTO FILL |
ENDING |
STOP START
A |
B |
8 Stop the Accompaniment
The accompaniment can be stopped at any time by pressing the [START/ STOP] button. Press the [ENDING] button if you want to go to the ending section and then stop.
START/STOP |
|
INTRO |
MAIN/AUTO FILL |
ENDING |
/ |
SYNC SYNC |
|||
|
STOP START |
|
|
|
A B
•The ending will begin playing immediately when you press the [ENDING] button while the accompaniment is playing the first beat of the measure.
The ending will begin playing from the next measure when you press the button while the accompaniment is playing the second or larger numbered beat.
•If you press the [INTRO] button while the ending is playing, the intro section will begin playing after the ending is finished.
•Some INTRO and ENDING sections have their own chord progressions which play in the current accompaniment key.
•If the MAIN/AUTO FILL [A] or [B] button is pressed while the ENDING section is playing, an appropriate fill-in will be played, followed by a return to the MAIN A or B section.
•The accompaniment volume can be adjusted independently of the keyboard volume via the ACCOMPANIMENT/SONG VOLUME [▼] and [▲] buttons (page 28).
•Pressing the [ENDING] button during the Ending playback decelerate its tempo (ritardando).
The Synchro Stop Function
When the Synchro Stop function is engaged, accompaniment playback will stop completely when all keys in the auto-accompaniment section of the keyboard are released. Accompaniment playback will start again as soon as a chord is played. The BEAT indicators in the display will flash while the accompaneiment is stopped.
The Synchro Stop function is engaged by pressing the [SYNC STOP] button so that the SYNC STOP icon in the display appears. Press the [SYNC STOP] button again so that the icon disappears to turn the Synchro Stop function off.
SYNC
STOP
•The Synchro Stop function can not be turned on when the FULL KEYBOARD AUTO ACCOMPANIMENT fingering mode is selected. The Synchro Stop function will be automatically turned off if the FULL KEYBOARD fingering mode is selected while the Synchro Stop function is on.
26
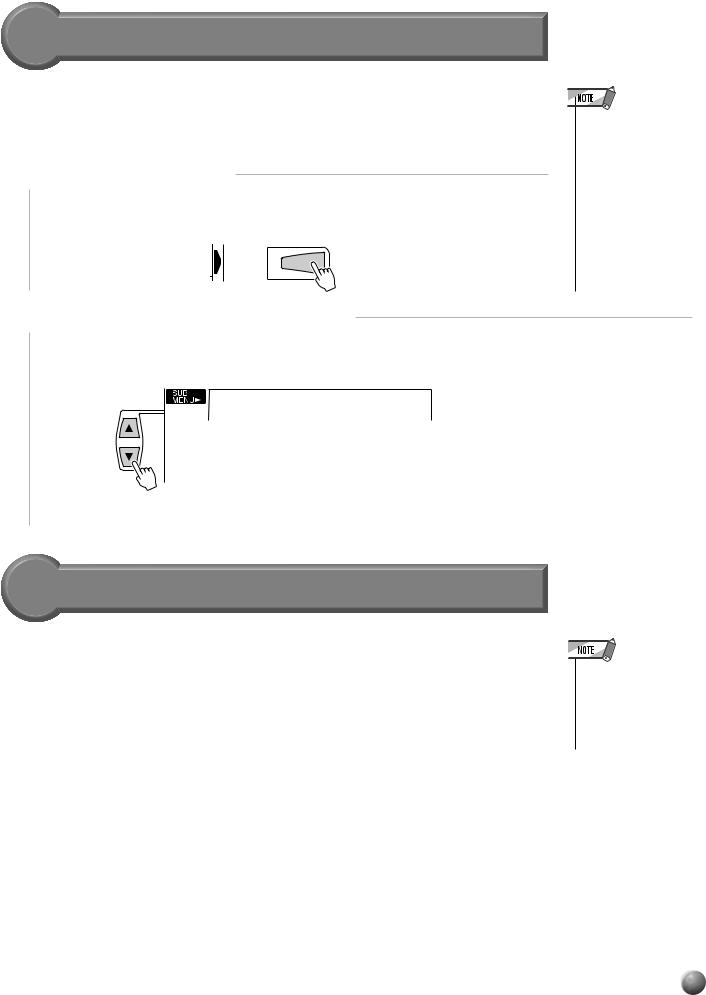
,,,,,,,,,,,,,,,QQQQQQQQQQQQQQQ¢¢¢¢¢¢¢¢¢¢¢¢¢¢¢
Auto Accompaniment
Using Virtual Arranger
Simply pressing chords causes the Auto Accompaniment automatically plays the slightly different chord variations and becomes livelier and more melodic when you turn on the Virtual Arranger function while the Auto Accompaniment is active.
1 Select the Style Menu
Press the [STYLE] button to select the STYLE menu (the triangular indicator will appear next to “STYLE” to the right of the display).
STYLE
•Simultaneously pressing the [SYNC STOP] and [SYNC START] buttons causes the Virtual Arranger to switch between off and on. The current on/off status will be shown at the top left of the display. (The on/off display will return to its original condition after a few seconds.)
2 Select the Virtual Arranger Function
Use the SUB MENU [▲] and [▼] buttons to select the “VirtArng” function. The current on/off status will be shown at the top left of the display.
on VirtArng
Then use the [–]and [+] buttons or the Dial to select “on” or “off.”
Accompaniment Track Muting
The PSR-530 has eight accompaniment tracks — RHYTHM 1, RHYTHM 2, BASS, CHORD 1, CHORD 2, PAD, PHRASE 1, and PHRASE 2 — that you can control to modify the “orchestration” and therefore the overall sound of the accompaniment. When a style is selected the icons corresponding to the tracks which contain data for any section of that style will light.
● What’s in the Tracks
RHYTHM 1 & 2 |
These are the main rhythm tracks. The RHYTHM tracks produce the |
|
drum and percussion sounds. |
|
|
BASS |
The BASS track always plays a bass line, but the voice will change to |
|
fit the selected style … acoustic bass, synth bass, tuba, etc. |
|
|
CHORD 1 & 2 |
These tracks provide the rhythmic chordal accompaniment required by |
|
each style. You’ll find guitar, piano, and other chordal instruments here. |
|
|
PAD |
This track plays long chords where necessary, using sustained instru- |
|
ments such as strings, organ, choir. |
|
|
PHRASE 1 & 2 |
This is where the musical embellishments reside. The PHRASE tracks |
|
are used for punchy brass stabs, arpeggiated chords, and other extras |
|
that make the accompaniment more interesting. |
|
|
•Individual track voices, volume, and other parameters can be changed by using the REVOICE function — page 80.
27
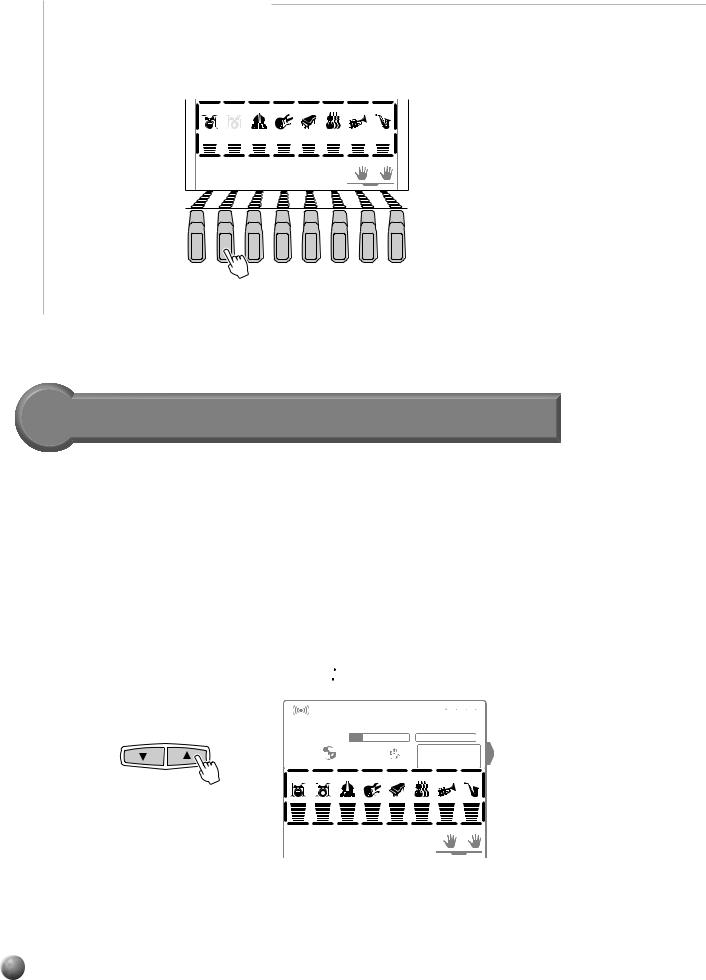
,,,,,,,,,,,,,,QQQQQQQQQQQQQQ¢¢¢¢¢¢¢¢¢¢¢¢¢¢
Auto Accompaniment
■ Muting Individual Tracks
Individual accompaniment tracks can be turned OFF (muted) or ON by using the TRACK buttons corresponding to the target tracks. The track icon will disappear when a track is muted.
RHYTHM |
RHYTHM |
BASS |
CHORD |
CHORD |
PAD |
PHRASE |
PHRASE |
1 |
2 |
|
1 |
2 |
|
1 |
2 |
MELODY |
MELODY |
MELODY |
MELODY |
ACCOM- |
VOICE |
VOICE |
VOICE |
1 |
2 |
3 |
4 |
PANIMENT |
L |
R2 |
R1 |
DUAL
TRACK
Accompaniment Volume Control
When the STYLE menu is selected (i.e. the accompaniment track and volume icons are framed) the volume of the accompaniment in relation to the keyboard can be adjusted for the best overall balance by using the ACCOMPANIMENT/SONG VOLUME [▼] and [▲] buttons. When either button is pressed the current accompaniment volume setting will appear on the top line of the display for a few seconds. The accompaniment volume range is from “0” (no sound) to “127” (maximum volume).
The default setting is “100”. Press the ACCOMPANIMENT/SONG VOLUME [▼] button to decrease the volume or the [▲] button to increase the volume. Pressing briefly to single step, or hold for continuous decrementing/incrementing.
|
100 AccVol |
|
||||||||
|
|
|
|
VOICE L |
76 VOICE R2 101 VOICE R1 |
1 |
||||
|
|
|
0 |
|
REPEAT |
|
|
|
1 |
|
|
REVERB TRANSPOSE |
|
|
|
|
MEASURE |
||||
|
|
|
116 |
|
|
|
|
|||
ACCOMPANIMENT/SONG VOLUME |
|
|
REGISTRATION |
MULTI PAD |
||||||
HARMONY |
TEMPO |
1 |
|
|
|
|
|
|||
|
CHORUS |
DSP |
|
|
SYNC |
FINGERING |
|
|
||
|
|
|
STOP |
|
|
|||||
|
RHYTHM |
RHYTHM |
BASS |
|
CHORD |
CHORD |
PAD |
PHRASE |
PHRASE |
|
|
1 |
|
2 |
|
|
1 |
2 |
|
1 |
2 |
|
MELODY |
MELODY |
MELODY |
MELODY |
ACCOM- |
VOICE |
VOICE |
VOICE |
||
|
1 |
|
2 |
|
3 |
4 |
PANIMENT |
L |
R2 |
R1 |
|
|
|
|
|
|
|
|
|
DUAL |
|
|
|
|
|
|
|
|
|
|
|
|
While the accompaniment volume setting appears on the top line of the display the [–]and [+] buttons, number buttons, or data dial can also be used to set the accompaniment volume.
28
 Loading...