


A
UNIVERSAL
REMOTE CONTROL
KH 2155
UNIVERSAL REMOTE CONTROL
Operating manual
KOMPERNASS GMBH
BURGSTRASSE 21 • D-44867 BOCHUM
www.kompernass.com
ID-NR.: KH2155-01/09-V4
KH 2155
q
w
2%
 e
e
 r
r
2$

 t
t
2#
 y
y 
 u 2@ i
o
a 2! s 2) d
 f 1(
f 1(

 g l
g l
 h k
h k

 j
j
2^
2&

Index |
Page |
|
|
|
|
|
|
|
|
Important safety instructions |
2 |
|
|
|
|
Device overview |
3 |
|
|
|
|
First use |
4 |
|
|
|
|
Unpacking the device / checking the package contents 4 |
|
|
|
|
|
Inserting the batteries |
4 |
|
|
|
|
Operating elements |
5 |
|
|
|
|
LCD display |
5 |
|
|
|
|
Buttons |
6 |
|
|
|
|
Configuration |
9 |
|
|
|
|
Setting the time |
9 |
|
|
|
|
Adjust contrast |
9 |
|
|
|
|
Background Illumination |
10 |
|
|
|
|
Child protection system |
10 |
|
|
|
|
SETUP - System settings |
10 |
|
|
|
|
Programming the remote control |
12 |
|
|
|
|
Programming by brand code search |
12 |
|
|
|
|
Programming by manual code input |
13 |
|
|
|
|
Programming by automatic code search |
14 |
|
|
|
|
Learn function |
15 |
|
|
|
|
Code learn function |
16 |
|
|
|
|
Clear programmed button |
17 |
|
|
|
|
Programming Macros |
18 |
|
|
|
|
Favourites channel |
20 |
|
|
|
|
Volume control |
22 |
|
|
|
|
Vol +/—, (Mute switching) |
22 |
|
|
|
|
Further volume control functions (except PC) |
22 |
|
|
|
|
Back to volume control |
22 |
|
|
|
|
Additional functions |
23 |
|
|
|
|
All OFF |
23 |
|
|
|
|
Automatic station redirecting |
24 |
|
|
|
|
Alternative button allocation in teletext mode |
24 |
|
|
|
|
Alternative button allocation in PIP mode |
25 |
|
|
|
|
Faults / Remedies |
25 |
|
|
|
|
Disposal |
26 |
|
|
|
|
CEConformity |
27 |
|
|
|
|
Importer |
27 |
|
|
|
|
Technical data |
27 |
|
|
|
|
Important Warranty Notices |
27 |
|
|
|
|
- 1 - |
|
Universal remote control KH2155
Read the operating instructions carefully before using the device for the first time and preserve this booklet for later reference. Hand over the instruction manual to whomsoever you might pass the device on to.
Important safety instructions
Proper use
Children may only operate the remote control under adult supervision.
The universal remote control can replace a maximum of eight remote controls. It can only be used for entertainment electronics with infrared receivers.
The functions of the universal remote correspond to those of the original remote controls. The universal remote control is intended for private use. It is not suitable for commercial use. Any other use is considered improper use. The manufacturer declines to accept responsibility for damage(s) arising from improper use.
There is a danger of injury in the event of
improper handling of batteries!
Batteries must be handled with special care. Take note of the following safety instructions:
•Take the batteries out of the battery compartment as soon as they are depleted.
•Do not throw batteries into a fire. Never subject batteries to high temperatures.
•If you will not be using the device for a long period of time, remove the batteries to prevent them from discharging.
•Explosion hazard! Non-rechargeable batteries must never be recharged.
•Do not open the batteries or short-circuit them.
•Battery acid leaking from a battery can cause inflammation of the skin. In the event of contact with the skin, rinse with large amounts of water. If the liquid comes into contact with your eyes, rinse thoroughly with water, do not rub and immediately consult a doctor.
•Always change all batteries at the same time and always use batteries of the same type.
•Keep batteries well away from children. Children can put batteries into their mouths and swallow them. If a battery is swallowed medical assistance must be sought immediately.
 Laser
Laser
The universal remote control has an infrared diode of laser class 1. A safety system prevents the emission of hazardous laser radiation during use. To prevent eye injuries, do not modify or damage the safety system of the device.
- 2 -

Damage to the device
•If the device is defective, do not attempt to repair it yourself. In case of damage, contact the manufacturer or the manufacturer's service hotline (see Warranty card).
•If liquid escapes from the device or if the device has been otherwise damaged, it must be inspected by the manufacturer or the manufacturer's service hotline. Contact the manufacturer or the manufacturer's service hotline (see Warranty card).
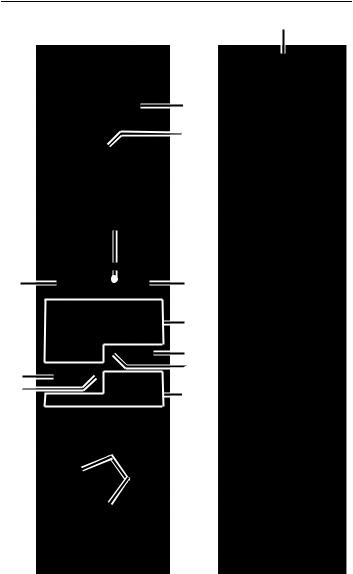
Device overview
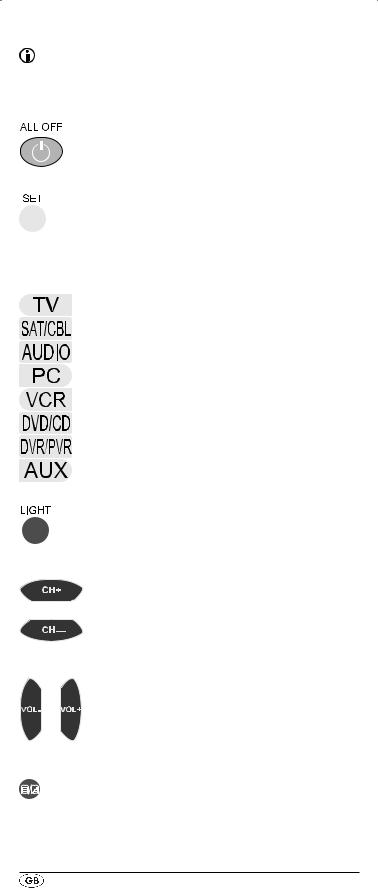
q LCD display.
w  /ALL OFF button. e SET button.
r Device buttons
t Illumination button. y CH +/— buttons. u VOL +/— buttons. i Teletext On/Off o Number buttons. a RECALL button.
s Button for one or two digit programme numbers. d Playback button and teletext button.
f Fast text buttons.
g Access the electronic programme guide. h Arrow buttons.
j EXIT button. k INFO button. l OK button.
1( MENU button. 2) SWAP button. 2! PIP button.
2@ MACRO button. 2#  Mute switching. 2$ FAV.CH button. 2% AV button.
2^ Infrared Sender/Receiver. 2& Battery compartment cover.
Note:
•The functions described here pertain to the theoretically ideal circumstance that the button structure of the respective original remote control is identical to this universal remote control. This only occurs, however, in rare cases. If, therefore, not all of the original remote control's functions can be reproduced it is not due to a dificiency in the Universal remote control.
•All the brand names used in these instructions or in the accompanying code list are trademarks of the corresponding companies.
- 3 -
First use
Unpacking the device / checking the package contents
Attention!
Keep the plastic packaging well away from small children.
There is a risk of suffocation.
•Unpack the device and accessories.
•Check the package contents,
-Universal remote control,
-Operating instructions,
-Manufacturer list with device code list
•Remove the protective foil from the LCD display q.
Note: Transport damage
If you notice any transport damage contact the manufacturer or the manufacturer's Service-Hotline (see warranty card).
Inserting the batteries
Attention!
The Universal remote control must only be operated with 1.5 Volt batteries (Type AAA, LR03).
Carry out the battery change as quickly as possible. Preset settings will remain saved for approx. 1 minute. If new batteries have not been installed within this time all of the settings will have to be carried out again. The time of day will, however, in any case be deleted.
1.Open battery compartment cover 2& in the direction of the arrows.
2.Insert the batteries as shown in the diagram and close
the battery compartment.
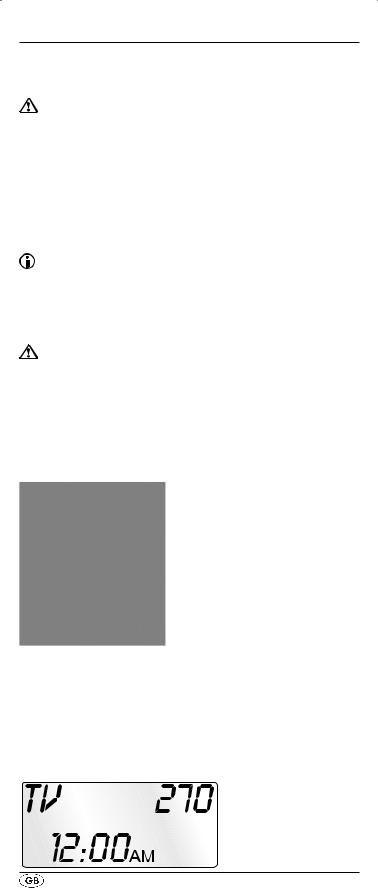
The LCD display q is activated as long as batteries are installed. The following diagram shows the LCD display q after the batteries have been installed or changed.
- 4 -
Note:
If no LCD display q is visible check the polarity of the batteries or install new ones.
Operating elements
LCD display
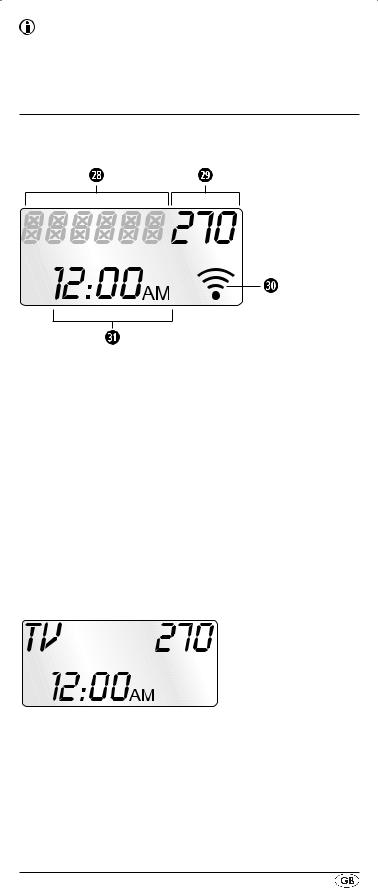
The LCD display q is divided into fields.
Text field 2*
Here is shown the currently selected device, for example DVD, TV or VCR
Code field 2(
Here is shown the device code of the currently selected device.
Infrared symbol 3)
Every time a button is pressed, with which an infrared signal is to be sent the Infrared symbol illuminates.
Time field 3!
Here you can read the time of day.
Standard display:
The standard display of the LCD display q consists of details of the current device, i.e. "TV", the device code and the time of day.
Illumination
If you press the Illumination button LIGHT t with every button press the LCD display q will stay illuminated for 8 seconds. Press the LIGHT button t again to deactivate the illumination function.
- 5 -
Buttons
Note:
All the functions described here can, of course, only be used if they are supported by the device being controlled.
 /ALL OFF button w
Switch device on/off; press twice within 2 seconds to switch all devices on/off.
SET button e
Hold down for 3 Seconds to access the SETUP menu.
Device buttons r
The device buttons are used to select which device should be operated.
Television
Satellite receiver/cable
Audio device
Computer
Video recorder
DVD or CD player
Digital/Personal video recorder
Additional device
Illumination button t
Press the LIGHT t button to illuminate the display.
CH+/— buttons y
Change the reception channel.
VOL+/— buttons u
Set volume (Volume).
TTX ON/OFF button i
Switch teletext on/off.
- 6 -
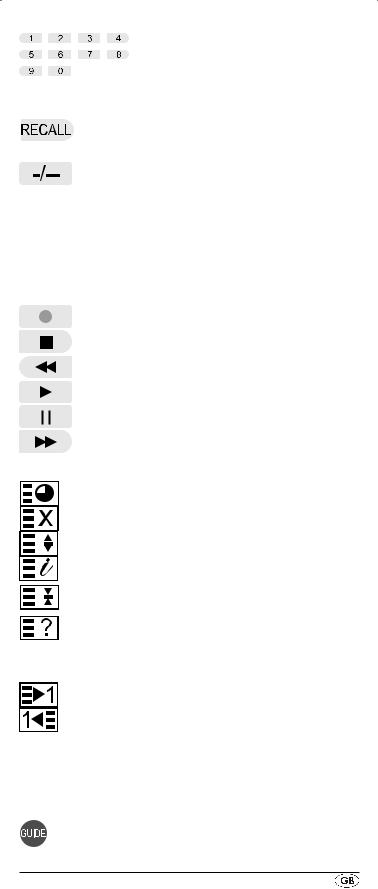
Number buttons o
Enter programme and device code numbers.
RECALL button a
Accesses the last selected programme slot
Button for one/two digit programme numbers s
For two digit programme numbers first press the s button then via the number buttons o enter the programme number. When pressed again the display becomes single digit once more.
Playback buttons and teletext function buttons
The playback buttons d control devices such as DVD/ CD players and video recorders:
Record.
Stop Playback/Record/Wind
Rewind
Start playback
Stop playback
Wind forward
In teletext operation the buttons have the following functions:
Access time
Cancel page access
Enlarge page presentation
Access Index page
Stop automatic page forwarding
for multi page teletexts. Mystery button
In addition the CH+/- buttons y control the following teletext functions:
Leaf one page forward Leaf one page backward
Coloured Fast text buttons f
The coloured fast text buttons open categories in the teletext selection.
GUIDE button g
The GUIDE button accesses the device's electronic programme guide.
- 7 -
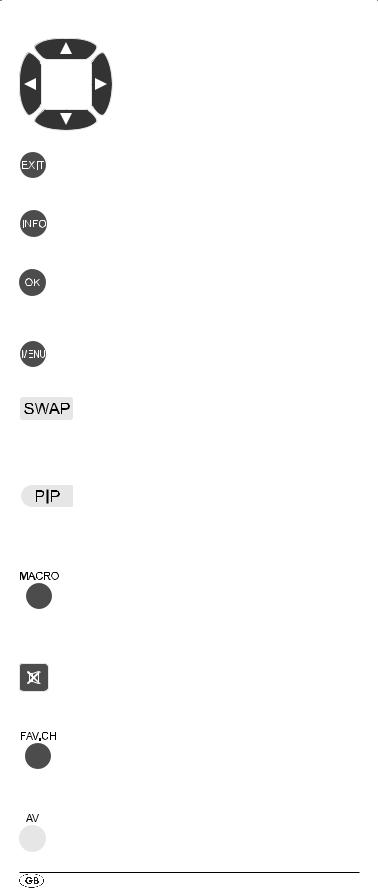
Arrow buttons h
Move up, right, left and down in menus.
For control of the "Picture in Picture" function.
EXIT button j
Move a level backward in the menu.
INFO button k
Superimpose programme information.
OK button l
You can confirm a menu selection with the OK button.
MENU button 1(
Access the menu of the controlled device.
SWAP button 2)
control the A-B repeat function in DVD/ CD modes.
To switch between the main and second image in PIP operation.
PIP button 2!
to access/end the TV's picture in picture mode.
With SAT/CABLE the PIP button serves as the video format selector.
MACRO button 2@
The MACRO button 2@ followed by a number button o 1-6, activates the previously saved chain of commands.
 Mute switching 2#
Switch sound on/off.
FAV.CH button 2$
Accesses your previously programmed favourite station.
AV button 2%
Switch to the AV input.
- 8 -
Configuration
Setting the time
The LCD display q shows you the time of day. You set this as follows:
1.Hold down the SET button e for a little longer than 3 seconds.
2.With the or button h select "CONFIG" and confirm with the OK button l.
3.In the LCD display q appears "TIME SETUP". Confirm with the OK button l. The LCD display q now shows
"TIME" and the first number of the hour display blinks.
4.With or h place the cursor on the position, in which you want to make an entry and press the number buttons o to set the hour and minutes. The switching between AM and PM you undertake with the or button h. Thereby "AM" stands for "ante meridium"
(= morning, 0:00 to 12:00 o'clock) and "PM" stands for "post meridium" (= afternoon, 12:00 to 0:00 o'clock).
5.With the OK button l you save the setting. In the LCD display q appears "SUCCESS" and the previous mode is accessed again. In the event of an error the LCD display q shows "ERROR".
6.To exit this menu press repeatedly the EXIT button j until the standard display appears in the LCD display q.
Adjust contrast
You can set the display's contrast as follows:
1.Hold down the SET button e for a little longer than 3 seconds.
2.With the or button h select "CONFIG" and confirm with the OK button l.
3.With the or button h select "CONTRAST" and confirm with the OK button l.
4.With the or h button you set the contrast ( reduces the contrast, increases the contrast). Display readout:
0 = highest contrast
15 = lowest contrast
5.With the OK button l you save the desired setting. In the LCD display q appears "SUCCESS" followed by "CONTRAST".
6.To exit this menu press repeatedly the EXIT button j until the standard display appears in the LCD display q.
- 9 -
 Loading...