


KH 2032
3
KOMPERNASS GMBH
BURGSTRASSE 21 · D-44867 BOCHUM
www.kompernass.com
ID-Nr.: KH2032-06/10-V4
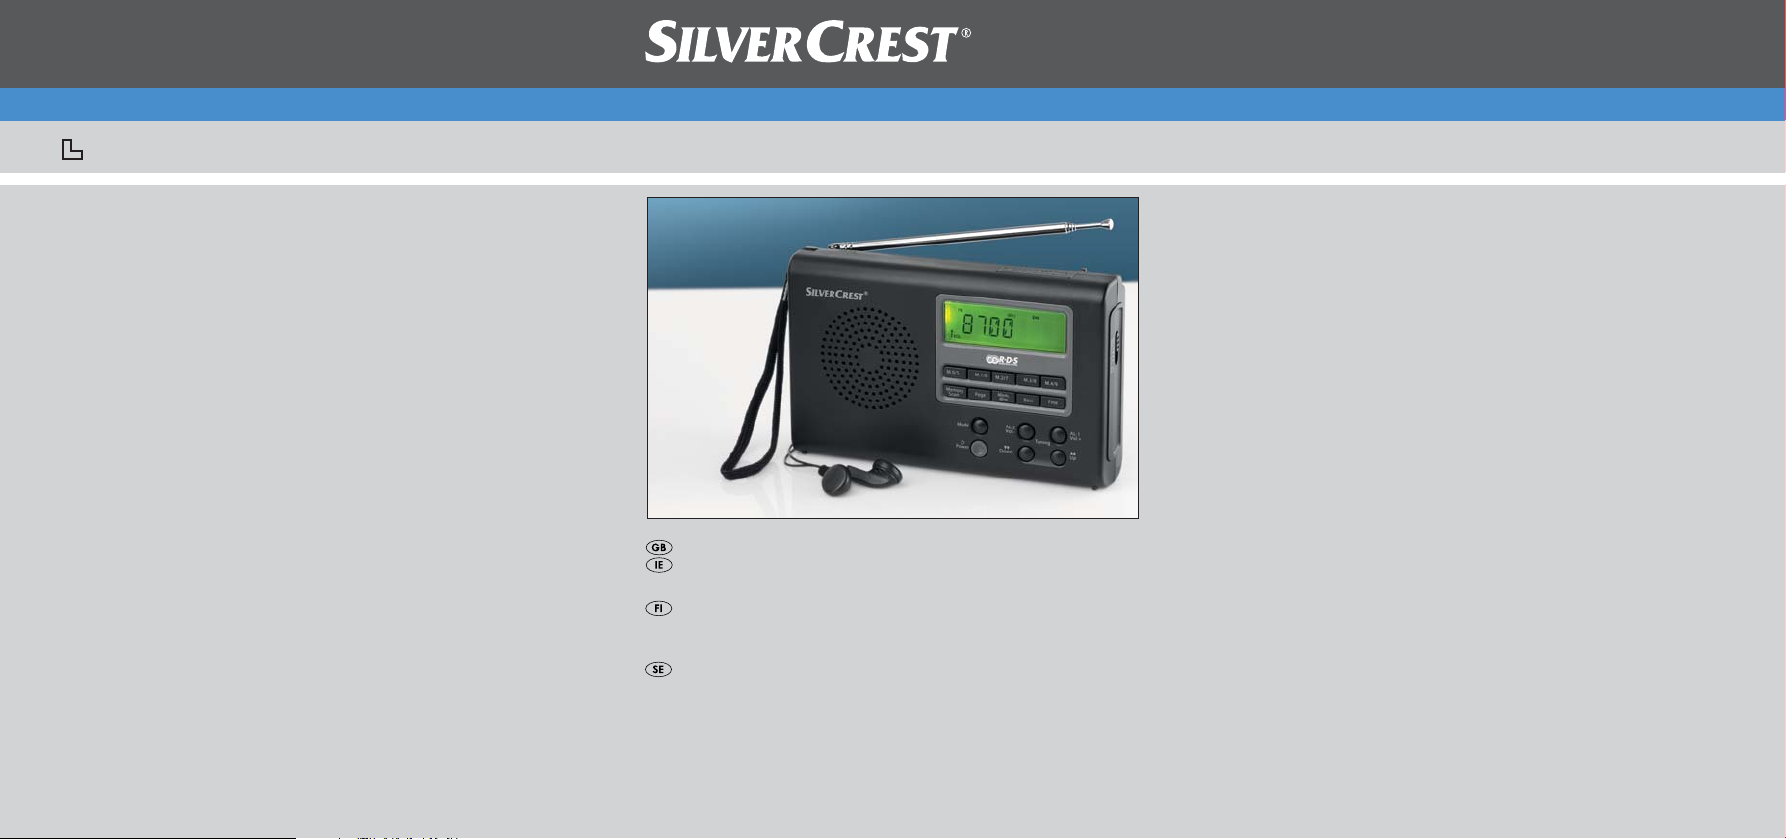
Multi-Band Radio
KH 2032
Multi-Band Radio
Operating instructions
Maailmanradio
Käyttöohje
Radiomottagare
Bruksanvisning

KH 2032
A
B
r
1
2
3
4
5
6
7
we
90q
8
t z
iu
o p

CONTENTS PAGE
Intended use 2
Technical Data 2
Symbols used 4
Safety information 5
Operating elements 9
Starting up 10
General functions 12
Time functions 12
Time, date, time zone and world time . . . . . . . . . . . . . . . . . . . . .13
Select display mode . . . . . . . . . . . . . . . . . . . . . . . . . . . . . . . . . . .19
Alarm function . . . . . . . . . . . . . . . . . . . . . . . . . . . . . . . . . . . . . . .19
Stop watch function . . . . . . . . . . . . . . . . . . . . . . . . . . . . . . . . . . .22
Countdown function . . . . . . . . . . . . . . . . . . . . . . . . . . . . . . . . . . .22
Radio operation 24
Setting the station . . . . . . . . . . . . . . . . . . . . . . . . . . . . . . . . . . . . .25
Fine tuning . . . . . . . . . . . . . . . . . . . . . . . . . . . . . . . . . . . . . . . . . .26
Aerial . . . . . . . . . . . . . . . . . . . . . . . . . . . . . . . . . . . . . . . . . . . . . .26
Memory functions . . . . . . . . . . . . . . . . . . . . . . . . . . . . . . . . . . . . .27
Cleaning 29
Disposal 29
Importer 30
Warranty & Service 31
- 1 -

MULTI-BAND RADIO KH2032
Before using the device for the first time, read these operating instructions
carefully and keep them for later reference. Hand the instructions over
when transferring the device to a third party.
This documentation is copyright protected. Every duplication resp. every
copying, also as extracts, as well as any reproduction of images, even in an
altered state, is only permitted with the written consent of the manufacturer.
Intended use
This appliance is intended for receiving generally approved radio transmissions in all countries (world receiver) and only for domestic use.
Utilisation other than as described here is not permitted and it could lead
to damages and injuries. No liability will be accepted for damages resulting
from misuse or improper handling, the application of force or unauthorised
modifications.
Technical Data
This appliance fulfills, in regard to conformity with, the fundamental requirements and other relevant provisions of the EMC Directive 2004/108/EC,
the Low Voltage Directive 2006/95/EC and the Ecodesign Directive
2009/125/EC (Commission Regulation 1275/2008 Annex II, No .1).
- 2 -

Power consumption: 5 watts
Power consumption Standby: 1.4 W
Operating temperature: +5 ~+40°C
Humidity: 5 ~90% (no condensation)
Dimensions (W x H x D): 17.5 x 11.2 x 3.8 cm
Appliance weight: 380 g approx.
Power transformer weight: 185 g approx.
Batteries
4x 1.5 V, Type AA/LR6/Mignon (not supplied)
Frequency range radio:
VHF (FM): 87 – 109 MHz
SW: 5.85 – 17.90 MHz
MW (AM) Europe 522 – 1656 kHz
MW (AM) USA 520 – 1710 kHz
LW 144 – 299 kHz
The technical features of the device enable the frequency ranges stated
above to be set. Various countries may have different national rules on the
radio frequency ranges assigned. Please note that you may not sell, transfer
to third parties or abuse information received outside the assigned radio
frequency ranges.
Tuning ranges (NORMAL/FINE):
FM (VHF) 100 kHz /50 kHz
SW 5 kHz /1 kHz
MW (AM) Europe 9 kHz /1 kHz
MW (AM) USA 10 kHz /1 kHz
LW 1 kHz
Sensitivity: SW can be set to 2 intervals
- 3 -
General
Memory positions : 1600 (400 for each frequency range)
Temperature display range: -5 - +55°C
Headphones
Model: E105
Impedance: 32 Ω
Wideband characteristic
Voltage (WBCV): approx. 220 mV
Headphone socket
max. Output voltage: approx. 50 mV
Power transformer
Manufacturer: FAI SHING INDUSTRIES LTD.
Model: JV35D0750400
Primary: 230 V ~50 Hz / max. 50 mA
Secondary: 7.5 V DC 400 mA
Symbols used
These symbols bring to your attention that here a warning notice
follows in regard to one of the following matters:
- Risk of injury,
- Risk of electric shocks,
- Risk of fire,
- Risk of explosion,
plus bringing your attention to important matters such as:
- Information regarding the handling of batteries,
- Information about voltage surges,
- Information about mains-power disconnection.
- 4 -
This symbol warns about submersing the appliance in water or
other liquids.
This symbol warns you about hearing damage.
Note:
With this symbol you are given tips about interaction with the appliance.
Safety information
• This device has not been designed for use by people (including children)
with restricted physical, sensory or intellectual abilities or lack of experience and/or knowledge, unless they are supervised by a responsible
person (for their own safety) or have received instructions on how to
use the device.
• Children should be supervised to ensure that they do not play with
the device.
• In order to avoid the device being switched on unintentionally, remove
the adapter from the mains socket after each use and before cleaning.
• Check the device and all parts for visible damage. The device’s safety
concept can only work if the device is in perfect condition.
• A mains adapter connected to the device must always be easily
accessible so that the device can be quickly disconnected from the
mains power in an emergency.
- 5 -
Risk of electric shock!
• Connect the mains-power adapter only to correctly installed and
earthed mains sockets. Ensure that the rating of the local power
supply tallies completely with the details given on the rating plate of
the appliance.
• Damaged adapters or mains cables should be exchanged immediately
by an authorised technician or the Customer Service in order to
avoid risks.
• Connection cables or devices that do not work perfectly or have been
damaged should be repaired or exchanged immediately by Customer
Services.
Never immerse the device in water! Simply wipe it with a slightly
damp cloth.
• Do not expose the wall wart to rain or use it in a damp or wet
environment.
• Ensure that the connection cable is never wet or damp when in use.
• You must not open or repair the device’s housing. This can be dangerous
and renders the warranty null and void.
• Protect the device from moisture and sprayed water. Therefore do not
place any objects filled with water (e.g. vases) on or near the device.
Risk of fire!
• Do not use the device near hot surfaces.
• Do not set the device up where it is exposed to direct sunlight.
This could cause it to overheat and damage it beyond repair.
• Never leave the device unattended during operation.
• Never cover the device’s ventilation slots when it is switched on.
• Do not place open flames, such as candles, on or near the device.
- 6 -

Risk of injury
• Keep children away from the connection cable and device.
Children frequently underestimate the danger of electrical devices.
• If the device has fallen down or is damaged it must no longer be used.
Have the device checked by a qualified specialist and, if necessary,
repaired.
• Batteries must not be handled by children.
Children can put batteries in their mouths and swallow them.
If a battery has been swallowed, obtain medical assistance immediately.
Thunder storms!
Devices connected to mains power can be damaged during a thunder
storm. If there is a thunder storm, always remove the mains plug from
the socket.
Information on voltage surges (EFT/electrical fast
transient) and electrostatic discharges:
If the product does not work properly due to electrical fast transient
processes (voltage surges) or electrostatic discharge, it must be
reset to restore normal operation. If necessary, remove the plug from
the power socket and insert it again. The batteries (if used) must be
removed and reinserted.
Information on separating the device from
mains power
The POWER button on this device does not completely separate it from
the mains network. In addition, the device uses power when in standby
mode. In order to completely separate the device from the mains supply
the plug must be removed from the mains socket.
- 7 -
Notes on handling batteries
The device uses batteries. Please note the following on handling batteries:
Risk of explosion!
Do not throw batteries into a fire. Do not recharge batteries.
• Never open, solder or weld batteries. There is a risk of explosion and injury!
• Check batteries regularly. Leaking batteries can damage the device.
• If the appliance is not going to be used for long periods, remove the
batteries.
• If batteries leak, put on protective gloves.
• Clean the battery compartment and contacts with a dry cloth.
Caution!
No liability/warranty applies to damage to the device caused by
moisture due to water penetrating the device or overheating!
- 8 -

Operating elements
A Front panel
Save buttons M.0/5 - M.4/9
q
Display
w
Button SNOOZE
e
Waveband selector switch (LW/SW/MW/FM)
r
BASS button
t
FINE button
y
VOL+(AL-1)/VOL-(AL-2) buttons
u
UP/DOWN buttons
i
MODE button
o
POWER button
a
MEM button
s
PAGE button
d
MEMORY SCAN button
f
Loudspeakers
g
B Back
Stand
h
Aerial
j
Carrying strap
k
switch SW SEN. (DX/LX)
l
Headphone output
;
EXT. DC 7.5 V: Mains adapter connection
2)
- 9 -

Starting up
Unpack the device
Remove all packaging materials.
Caution!
Do not let children play with the plastic film. There is a risk of suffocation.
Check the items supplied
Whilst unpacking, check that all of the following items are available to you:
• Shortwave Radio
• Power transformer
• Headphones
• Storage case
• These operating instructions
Mains and battery operation
When you disconnect the radio from the mains supply, any settings you
may have made (time, alarm, stations in memory) will be lost. If you wish
to keep these settings, insert batteries (see below) before disconnecting.
Inserting batteries
The device can also be operated with batteries (not supplied) as well as
from the mains. You will need four 1.5V mignon batteries, size AA/LR6.
• Open the battery compartment on the rear of the device by sliding
the cover downwards.
• Insert four batteries into the compartment, paying attention to
the polarity.
- 10 -
• Replace the cover on the battery compartment.
If the batteries become too weak, this is indicated by the symbol
blinking in the display. Subsequently, the appliance then switches itself off.
Mains connection
• Connect the plug of the mains adapter to the EXT. DC 7.5 V socket on the
side of the device.
• Plug the mains adapter into an easily accessible socket. To avoid
tripping hazards, please avoid using an extension cable.
Connecting headphones
On the left side of the radio, you will find the headphone socket.
Caution!
With this appliance, use only the supplied type E105 headphones.
• Insert the headphone jack plug into the headphone output.
The speaker will be deactivated automatically.
Caution:
Listening to music with headphones for long periods and at high
volume levels can lead to hearing damage!
- 11 -

General functions
Key lock
In order to prevent changing the settings unintentionally by touching the
buttons, you can activate the key lock.
• With the radio switched on, press and hold the button
3 seconds. On screen, the message flashes. All buttons, except
the buttons
• Press and hold down the
cancel the key lock. The message on the screen disappears.
SNOOZE and MEM, are now blocked.
MEM button again for about 3 seconds to
MEM for about
Screen lighting
• Press any button to illuminate the screen. The screen will remain lit for
about 15 seconds.
Stand
• Fold out the base on the rear of the device to make the device
more stable.
Time functions
When the power supply is effective (mains or battery operation), the device
launches with an automatic update.
"SYSTEM SETTING PLEASE WAIT" appears in the display.
When an RDS signal is received, the time and date are adjusted automatically. When it is finished, the current time and the temperature will then be
indicated in the display.
If the time is not adjusted automatically, make the settings manually,
as explained in the following sections.
- 12 -

The time functions can only be set when the radio is switched off. If an RDS
signal is not received at the first switch-on, the pre-adjusted time for the
multi-band radio begins with "0:00 00".
If the device is disconnected from its power supply the settings are lost.
Time, date, time zone and world time
You can set the time, date and time zone via the MODE button. In addition,
you can check and adjust the world time, the date alarm, medium wave
reception, the alarm time interruption and the hour mode as well as switch
the automatic update on or off.
When you press the button
programmed blinks for about 15 seconds. During this time, adjust the setting
with the
UP/DOWN buttons.
• Press
• Press
• Press
• Press
• Press
• Press
• Press
• Press
• Press
To apply a setting, just wait until the screen stops flashing (the screen reverts
to the time indication) or press
MODE x 1: Setting clock time
MODE x 2: Setting the date
MODE x 3: Set time zone (“Local City”)
MODE x 4: Show world time
MODE x 5: Date alarm
MODE x 6: Set reception range for medium wave.
MODE x 7: Set alarm pause.
MODE x 8: Set 12/24 hour mode.
MODE x 9: Switch automatic update on/off
MODE with the radio switched off, the function to be
MODE to move on to the next function.
- 13 -

Setting clock time
• Press MODE once. The most recently set time flashes on the screen.
• Press the
minute intervals. Hold down one of the buttons for a few seconds to
move the setting forward or backward quickly at 10 minute intervals.
UP or DOWN button to move the time forward or backward at
Note:
Set the time without summer time offset. If summer time is required, this can be
set when setting the time zone.
Setting the date
• Press MODE again or twice.
The date set flashes on the screen (“Fr 1- 01- 10” when first switched on).
• Press the
Keep either of these buttons pressed for a few seconds to change the
date in ten-day steps.
The weekday indication follows automatically. The indication uses the first
two letters of the English name of the day.
The built-in calendar runs from 2000 to 2099.
Day of the week indication:
Su = Sunday
Mo = Monday
Tu = Tuesday
We = Wednesday
Th = Thursday
Fr = Friday
Sa = Saturday
UP or DOWN button to move the date forward or backward.
- 14 -

Setting the time zone
• Press MODE again or three times. The selected time zone flashes on the
screen as the abbreviation for the corresponding city (UTC when first
switched on); the time disappears.
• Press the
The following table summarises the city abbreviations for the time zones and
time differences.
UP or DOWN button to move the time zone forward or backward.
- 15 -

Short code Difference from CET
HNL -10:00
ANC -9:00
YVR -8:00
LAX -8:00
DEN -7:00
CHI -6:00
MEX -6:00
NYC -5:00
YYZ -5:00
YUL -5:00
CCS -4:30
RIO -3:00
BUE -3:00
UTC* 0:00
LON 0:00
BER 1:00
PAR 1:00
ROM 1:00
CAI 2:00
IST 2:00
MOW 3:00
KWI 3:00
DXB 4:00
KHI 5:00
DAC 6:00
BKK 7:00
SIN 8:00
HKG 8:00
PEK 8:00
SHA 8:00
TYO 9:00
SYD 10:00
NOU 11:00
AKL 12:00
Summer time
no
yes
yes
yes
yes
yes
yes
yes
yes
yes
no
yes
no
no
yes
yes
yes
yes
yes
yes
yes
no
no
no
yes
no
no
no
no
no
no
yes
no
yes
Town
Honolulu/USA
Anchorage/USA
Vancouver/Canada
Los Angeles/USA
Denver/USA
Chicago/USA
Mexico City/Mexico
New York/USA
Toronto/Canada
Montreal/Canada
Caracas/Venezuela
Rio de Janeiro/Brazil
Buenos Aires/Argentina
Universal Time Coordinated
London/GB
Berlin/Germany
Paris/France
Rome/Italy
Cairo/Egypt
Istanbul/Turkey
Moscow/Russia
Kuwait City/Kuwait
Dubai/United Arab Emirates
Karachi/Pakistan
Dhaka/Bangladesh
Bangkok/Thailand
Singapore
Hong Kong
Beijing/China
Shanghai/China
Tokyo/Japan
Sydney/Australia
Noumea/New Caledonia
Auckland/New Zealand
- 16 -
*UTC
Universal Time Coordinated (UTC). UTC is the reference for the times of the
various time zones around the world.
Show world time
• Press MODE again or four times to show the world time. The city
abbreviation appears with the corresponding time.
• Press the
UP or DOWN button to move the time zone forward or backward.
Note:
To correctly present your set world time, you must set the summer time offset
depending on the world time (see table).
Summer Time Offset
Not every time zone around the world differentiates between summer time
and winter time. To correctly display your world time, you must set the summer time offset dependant on the time zone.
• When the display for the time zone is flashing, repeatedly press the
SNOOZE button until the corresponding time offset is set (see table).
Time offset Display Explanation
1 OFFSET 1
0 OFFSET 0
-1 OFFSET -1
In your time zone (Local City) it is winter time and
in the set world time it is summer time.
In your time zone (Local City) and in the set world
time it is summer resp. winter time.
In your time zone (Local City) it is summer time and
in the set world time it is winter time resp. they do
not have summer time.
- 17 -

Special date alarm
• Press the MODE button a fifth time to set the special date alarm.
The screen flashes SDA1 and the date in succession.
• Press the
(SDA1–SDA 10).
• Press the
sound.
• Press the
alarm sounds every year.
• When the current date tallies with the SDA alarm, on that day an
alarm sounds for 10 minutes on every hour from 8:00 - 23:00.
In addition, the SDA message will flash on the screen.
• Turn off the alarm by pressing any button.
Note:
In order to completely deactivate the date alarm set a date that is in the past!
PAGE button to select one of the ten settable date alarms
UP or DOWN button to set the date on which the alarm should
SNOOZE button to ignore the year number setting so that the
Setting 12/24 hour mode
• Press MODE eight times. The screen shows the”24 HR” message for
24-hour mode.
• Press the
• Press the
“12 HR” is displayed on the screen. In the afternoon in addition PM is
shown on the screen.
UP button to set the 24 hour mode.
DOWN button to set the 12 hour mode.
- 18 -

Switch Automatic Update (RDS) On/Off
With this function the device can automatically update the settings for date
and time from the RDS signal.
• Press the button
appears.
• Press the button
• Press the button
MODE nine times. In the display the indication UPDA ON
DOWN to switch the automatic update off.
UP to switch the automatic update back on.
Select display mode
You can select which information is shown on the screen when the radio is
switched off.
The selected mode is indicated by a corresponding symbol on the screen.
When the radio is switched off, select the display mode by repeatedly
pressing the
Symbol on the screen display mode
CLK only the time is displayed
CITY The time and world time are shown in succession
DATE The time and date are shown in succession
CIT DAT the time, date and world time are shown in succession
FINE button in accordance with the following table:
Alarm function
This multi-band radio provides you with two independently adjustable
alarm times, AL1 and AL2. You can programme for both ...
...if the device should sound an alarm on every workday, at the
weekend, the whole week or on a single specific weekday;
...if the alarm should sound with an alarm tone or with the radio.
- 19 -

Setting the alarm time
You can set two alarm times in your world receiver.
Alarm function Symbol on the screen
Radio
Acoustic signals
Switched off No symbol
• With the radio switched off, press the buttons
The screen shows the most recently set alarm time and the symbol for
the alarm type.
• Press the
at minute intervals. Hold down one of the buttons for a few seconds to
move the setting forward or backward quickly at 10 minute intervals.
• Press the
(see table above) is indicated on the screen.
• Press the
alarm to sound:
You can select between workdays (Mo, Tu, We, Th, Fr), weekends (Sa, Su),
the whole week (Su, Mo, Tu, We, Th, Fr, Sa) or a single weekday.
The selected setting is shown on the display.
UP or DOWN button to move the alarm time forward or backward
VOL.+/AL–1 (or VOL.–/AL–2) button until the desired alarm function
SNOOZE button to set the weekday on which you want the
- 20 -
VOL.+/AL–1 (or VOL.-/AL–2).

• Press the SNOOZE button until the desired alarm days are set. Hold down
the
SNOOZE button until the screen shows an individual week day.
• Press the
To go back to selecting week days, weekend or every day, briefly hold
down the
• Press the
The setting is also saved if you wait around 15 seconds until the
screen returns to displaying the time.
SNOOZE button to set the desired week day.
SNOOZE button again.
MODE button to save the setting and return to the time mode.
When the alarm sounds...
• and the “Radio” alarm function has been selected, the radio operates
for one hour at a predefined alarm volume. To switch off press the
VOL.+/AL–1 (or VOL.–/AL–2) button.
• and the “signal sounds” alarm function has been selected, the signal
sound is played for 10 minutes. To switch off press the
(or VOL.–/AL–2) button.
Note:
Please take note that the last tuned radio station together with the last used
sound volume setting is used for the alarm call.
VOL.+/AL–1
Interrupting the alarm
• Press the SNOOZE button to interrupt the alarm for 10 minutes.
- 21 -

Set snooze time
• With the radio switched off, press the button MODE seven times.
The screen displays the snooze time set (default is”SNO 10”).
• Use the
UP and DOWN buttons to set the snooze time to a time between
1 and 59 minutes.
Turning off the alarm function
• Press the VOL.+/AL–1 or VOL.–/AL–2 button until the relevant alarm symbols
disappear from the screen.
Stop watch function
The stop watch function is only available when the radio is switched off.
• Press and hold down the
shows 00.00.0 U.
• Press
• During time measurement, it can be stopped by pressing
• Pressing
• Hold down
• Leave the stop watch by pressing
SNOOZE to start the stop watch. The maximum time for the stop watch
is 99 minutes and 59 seconds. If the stopwatch exceeds the maximum
time, the indicator 99:59.0 appears and flashes in the display.
SNOOZE again restarts the stop watch.
SNOOZE to reset the stop watch.
PAGE button for around 2 seconds, the screen
SNOOZE.
PAGE.
Countdown function
The countdown function is only available when the radio is switched off.
Set and save countdown
• Press and hold down the MEMORY SCAN button for around 2 seconds,
the screen shows D 00.00.
- 22 -

• Press the UP or DOWN button to set the desired time.
5 countdown times are preset on the memory buttons and you can open
these directly using the corresponding memory button:
Button
M.0/5 10:00
Button
M.1/6 30:00
Button
M.2/7 45:00
Button
M.3/8 60:00
Button
M.4/9 90:00
• Press the
MEM button to save the set time, the memory space indicator
MEM flashes on the screen. Now use the M.0/5–M.4/9 buttons to select
a memory space; when you press the relevant memory key the time is
saved in this memory space and the time previously stored there
overwritten.
• When the
countdown mode.
MEMORY SCAN button is pressed again you leave the
Call up and activate the countdown function
• Press and hold down the MEMORY SCAN button for around 2 seconds,
the screen shows D 00. 00.
• Select the desired, saved countdown time with the aid of the
memory buttons.
• Press
When the set time has been counted down, an alarm sound plays for one
minute becoming gradually higher in tone and louder.
• Press the
SNOOZE to start the countdown. Pressing the SNOOZE button again
pauses the countdown.
MEMORY SCAN button to pause the countdown and leave
countdown mode.
M.0/5–M.4/9
- 23 -

Radio operation
Switching on/volume control
• Press the POWER button to switch the radio on. ON will appear briefly on
the screen, followed by the current frequency and band selection.
• Press the
Button
Button
The sound volume is shown as a bar graph in the left of the display.
Switch on bass amplifier
• When the radio is switched on, press the BASS button to switch on the
bass amplifier. The screen will flash BASS.
• In order to switch the bass amplifier off again, press
time. The BASS message disappears.
Switch display message
• In radio operation press the MODE button to switch between displaying
the time and frequency.
Turning off
• Switch the radio off by pressing the POWER button. OFF is shown briefly
on the screen and the time is displayed again.
VOL.+/AL–1 or VOL.–/AL–2 button to control the volume:
VOL.–/AL–2: quieter;
VOL.+/AL-1: louder.
BASS one more
- 24 -
Sleep function
You can activate the sleep function via the SNOOZE button. You can set a
time of up to 90 minutes in ten-minute steps, after which the radio will automatically turn itself off. To do so, first switch the radio off.
• Press the
90 (for 90 minutes) will appear.
• Press the
the sleep time in 10 minute steps.
• Either select a sleep time (the sleep symbol remains on the screen)
or press
The sleep time is now switched off.
SNOOZE button. The symbol for the sleep function and
SNOOZE button repeatedly until 90 is displayed to count down
SNOOZE again until 00 appears on the screen.
Setting the station
• Select the required frequency band (FM, MW, LW or SW), using the
frequency select button.
The corresponding abbreviation will appear on the screen.
• The
• If you keep
• The search stops as soon as a station with sufficient signal strength is
Setting the MW band
Since the radio transmitter systems differ from one country to another,
you should make the appropriate setting via the reception range setting:
• With the radio switched off, press the button
UP and DOWN buttons can now be used to set the desired frequency.
UP or DOWN pressed for about three seconds, the automatic
station search will start.
found.
MODE six times and then
select, using the buttons
as per the following table:
UP resp. DOWN, the appropriate reception range
- 25 -

Region Channel
spacing
Amerika 10 kHz 520-1710 kHz
Europa 9 kHz 522-1656 kHz
Band range
Fine tuning
If a station can not be found precisely the fine tuning can be use to improve
reception.
• During the channel search press the
FINE.
• Now, using the buttons
range with smaller frequency steps.
• By pressing the
This function is not available for the LW frequency range.
UP resp. DOWN, adjust the required reception
FINE again you leave the fine tuning function again.
FINE button, the screen shows
Aerial
The rotatable telescopic aerial on the radio can be used for the FM and
SW bands.
• Pull the aerial out fully and arrange it for optimum reception.
The
SW SEN. switch on the left side of the device can be used to improve the
reception quality for the SW band. Select LX for strong stations and DX to
improve reception for weak stations.
The telescopic aerial does not work in the MW and LW bands. In these
ranges, reception is made by means of the built-in ferrite aerial.
• Align the radio for best reception.
- 26 -

Memory functions
Save station
The world receiver can save 400 stations in each frequency range.
To store a station, proceed as follows:
• Set the frequency range with the frequency selection switch and then
the station that you want to save.
• Press the
MEM flashes.
• Within 10 seconds press the
and then select a memory page (from 00–39) using the
button.
• Within 10 seconds use the
space to store the station. For example, press the
for memory space 0 and again for memory space 5. The occupancy
is shown on the screen.
• Press
are shown on a permanent basis.
Note:
If the world receiver is connected to the mains adapter and no
batteries have been inserted, the station memories are lost when
the adapter plug is pulled from the socket.
MEM button. The screen shows the PAGE memory page and
PAGE button (the PAGE message flashes),
UP or DOWN
M.0/5–M.4/9 buttons to select a memory
M.0/5 button once
MEM again to save the station. The PAGE and MEM messages
- 27 -

Selecting a saved station
• In order to select a saved station directly, first use the frequency selection
switch to select the frequency range where the station is saved.
• Press the
memory page (from 00–39).
• Within 10 seconds press the
space to store the station.
The station is played immediately after entering the memory space.
PAGE button and then use the UP or DOWN buttons to select a
M.0/5–M.4/9 buttons to select a memory
Carry out automatic station search
Your world receiver can search the frequencies within a range and store
the stations it finds. Do the following to activate the automatic search
(automatic memory scan/AMS):
• Press the
• Hold down the
The world receiver now searches all frequencies in the currently selected
frequency range and saves the stations it finds from the currently set memory
page and memory space.
MEM button once. The MEM message flashes.
MEMORY SCAN button for about 1 second.
Displaying memory spaces
• Press the MEMORY SCAN button to call up the content of all station memories for the selected band.
All stored stations will be played in succession for about 15 seconds.
• Press the button
SNOOZE to finish the rendering of the memory positions.
Note:
Please take note that with this the snooze function will be activated.
Repeatedly press the button
SNOOZE until 00 appears in the display.
- 28 -
 Loading...