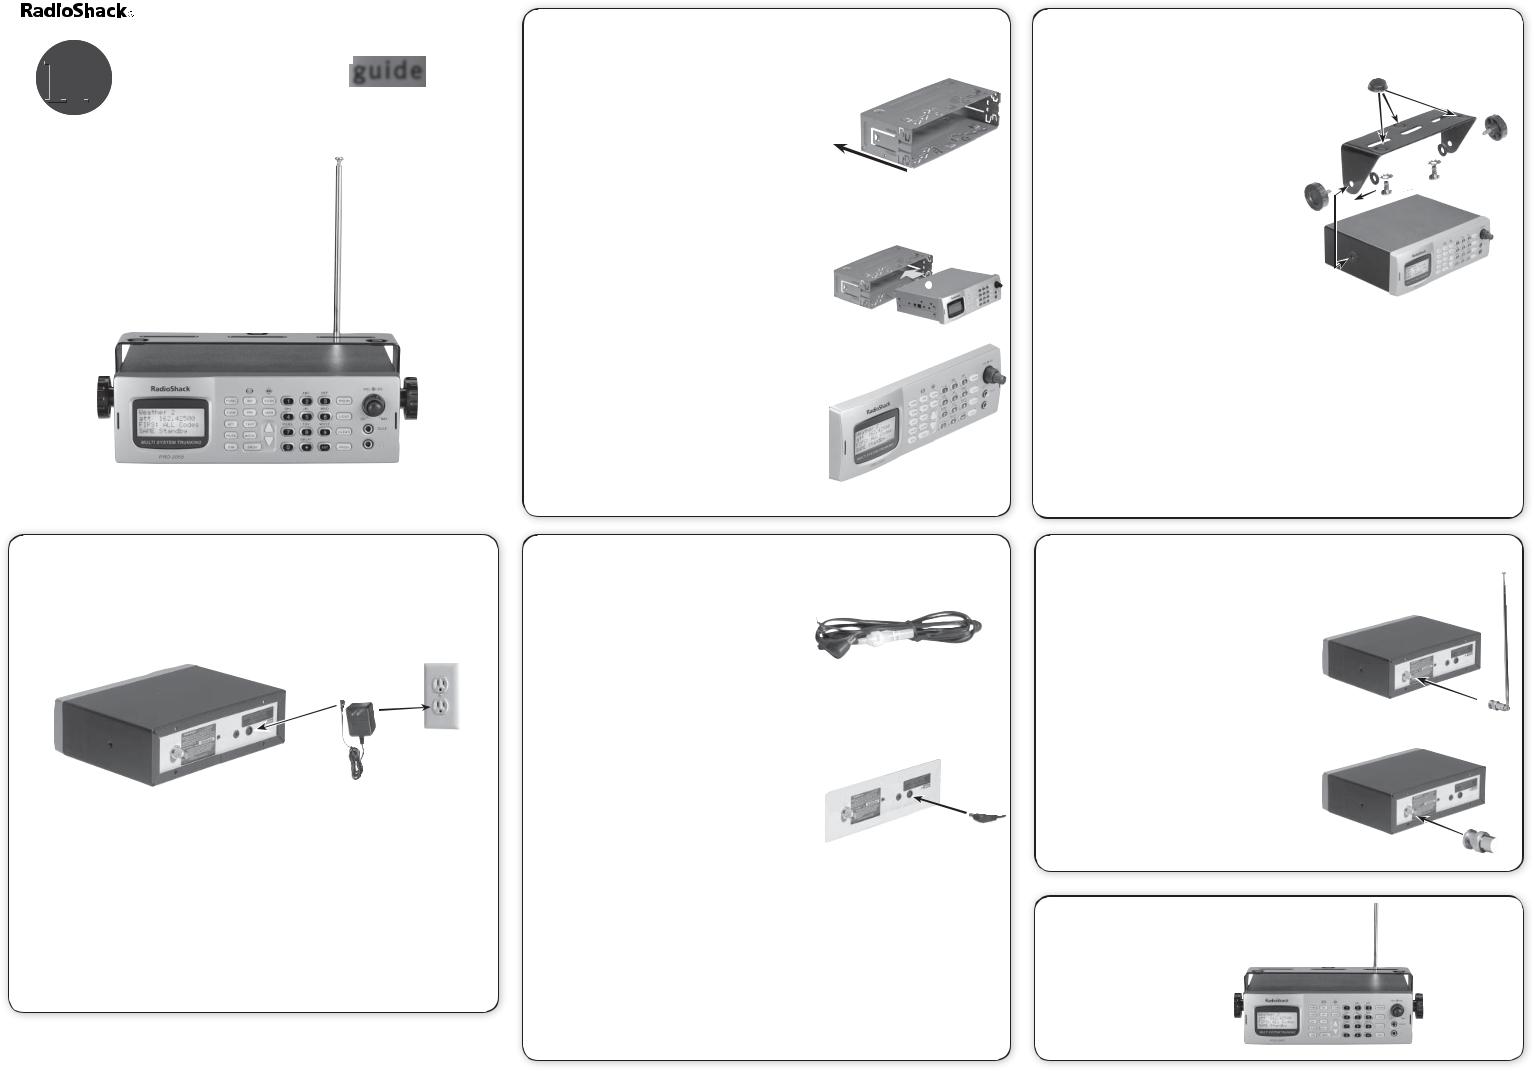
RadioShack PRO-2055 Quick Start Guide

QUICK
 guide
guide
START
PRO-2055 1,000 Channel Triple Trunking Mobile/Base Scanner
20-428
step 1: install your scanner
You can mount your trunking scanner in your vehicle, install it for mobility, or install it as a base station.
dashboard mounting
If you are unsure about how to install your scanner in your vehicle, consult your automobile
manufacturer, dealer, or a qualified installer. Before installing, confirm your scanner fits in the desired
mounting area and you have all the necessary materials. Your scanner requires a 2 x 71/8 x 5 5/16 inch(50 x 180 x 135 mm) mounting area.
1.Unscrew the four rear screws and remove the black case before installing your scanner.
2.Install the DIN sleeve into the opening in your dashboard, lip facing out.
3.Push out the top and bottom tabs to hold the sleeve firmly in place.
4.Slide the scanner into the sleeve until it locks in place.
When mounting in your dashboard, you will need to connect an external antenna and an external speaker.
mobile/base station mounting
You can use the mounting bracket to mount your scanner under the dashboard, on top of it, or to a flat surface, such as a shelf, desk or table.
1. |
Attach the three protective rubber |
|
|
|
feet to the mounting bracket |
|
|
|
|
||
|
when you use the scanner on |
|
|
|
a flat surface. Do not use them |
|
|
|
when you mount the bracket with |
|
|
|
screws. |
|
|
2. |
Use the supplied mounting bracket |
|
|
|
as a template to mark positions for |
|
|
|
|
||
|
the two mounting screws. |
|
|
3. |
At the marked positions, drill holes |
|
|
|
slightly smaller than the screws. |
|
|
4. |
Remove the paper backing from |
||
|
each washer and stick one inside
of each bracket’s ear, aligning the washer’s hole with the bracket’s hole.
5.Attach the mounting bracket to your vehicle’s surface using the supplied screws and lockwashers.
6.Slide the scanner into the bracket, aligning the scanner’s holes with the holes in the bracket, and then screw the mounting knobs into the scanner.
When drilling holes, be sure to avoid obstructions behind the mounting surface. Consult a qualified installer if in doubt.
step 2: power your scanner
You can power your scanner from a wall outlet, through your vehicle’s ignition, or from your vehicle’s cigarette lighter.
from a wall outlet
1.Connect the tip of the supplied AC adapter to the DC 13.8V jack at the rear of your scanner.
2.Plug the AC adapter into your wall outlet.
You must use a Class 2 power source that supplies 13.8V DC and delivers at least 600mA. Its center tip must be set to positive and its plug must fit the scanner’s DC 13.8V jack. Using an adapter that does not meet these specifications could damage the scanner or the adapter.
To prevent electric shock, do not use the AC adapter’s polarized plug with an extension cord, receptacle, or other outlet unless you can fully insert the blades to prevent blade exposure.
|
GE-05D-1000 |
04A05 |
Printed in Hong Kong |
 through your vehicle’s ignition
1.Disconnect the cable from the negative (-) terminal of your vehicle’s battery.
2.Ground the black wire of the supplied DC power cord to your vehicle’s chassis.
Be sure the grounding screw makes complete contact with the metal frame of your vehicle.
3.Connect the red wire of the supplied DC power cord to a voltage source that turns on and off with the ignition switch, such as a spare accessory terminal in your vehicle’s
fuse box.
4. |
Insert the power cord’s barrel plug into |
|
|
|
the scanner’s DC 13.8V jack. |
Rear |
|
5. |
Reconnect the cable to the negative (-) |
||
View |
|||
|
terminal of your vehicle’s battery. |
||
|
|
from your vehicle’s cigarrette lighter
To power your scanner from a 12V power source in your vehicle, such as a cigarette-lighter socket, you need a 12V, 600 mA DC cigarette-lighter adapter (not supplied), available at your local RadioShack store.
1.Insert the adapter’s barrel plug into the scanner’s DC 13.8V jack.
2.Plug the adapter’s other end into your vehicle’s cigarette lighter or power socket.
step 3: connect your scanner
connect the supplied antenna
Push the antenna onto your scanner’s antenna connector and rotate until it locks into place.
connect an external antenna
You will need to connect an external antenna when you mount your scanner in the dashboard of your vehicle. You may also want to connect an external antenna if you use your scanner as a base station.
step 4: use your scanner
 Loading...