


20-136 |
PRO-136 |
Desktop Radio Scanner |
Thank you for purchasing your 200 Channel Desktop Radio Scanner from RadioShack. Please read this user’s guide before installing, setting up and using your new scanner.
What’s Included
Scanner
AC adapter
Antenna
User’s guide
Preprogrammed frequency list
Quick start guide
www.radioshack.com

Contents |
|
Scanner Setup ................................................................................ |
4 |
Scanner Features ................................................................................................. |
4 |
Connecting the Antenna...................................................................................... |
6 |
Powering Your Scanner........................................................................................ |
6 |
Installing Batteries........................................................................................... |
6 |
Battery Notes................................................................................................. |
7 |
Recycle Rechargeable Batteries.................................................................... |
7 |
Scanner Placement.............................................................................................. |
7 |
Connecting Headphones ..................................................................................... |
8 |
Listening Safely................................................................................................ |
8 |
Connecting the External Alert Out ..................................................................... |
8 |
Understanding Your Scanner .............................................................................. |
8 |
Turning on the Scanner........................................................................................ |
9 |
Setting the Clock/Alarm...................................................................................... |
9 |
Alarm Function .............................................................................................. |
10 |
Programming Frequencies into Channels ..................................................... |
10 |
Searching ..................................................................................... |
12 |
Fine Tune............................................................................................................. |
12 |
Service Bank Search......................................................................................... |
12 |
Storing Frequencies Found During a Search................................................. |
13 |
Search Skip Memory......................................................................................... |
13 |
Search Speeds ................................................................................................... |
14 |
Scanning....................................................................................... |
15 |
Scanning Stored Channels............................................................................... |
15 |
Manually Selecting a Channel......................................................................... |
15 |
Weather Scan..................................................................................................... |
16 |
2
|
Contents |
Receiving NWR-SAME and Weather Alert Signals |
....................................... 16 |
Turning On the Digital Weather Alert Feature .......................................... |
16 |
Receiving Alerts in Standby Mode............................................................... |
17 |
Testing the Weather Alarm........................................................................... |
17 |
3URJUDPPLQJ $OHUWV IRU D 6SHFLÀF &RXQW\................................................. |
17 |
Programming FIPS ..................................................................................... |
17 |
Skywarn .............................................................................................................. |
18 |
About Skywarn .............................................................................................. |
19 |
Settings ........................................................................................ |
20 |
Setting Delay...................................................................................................... |
20 |
Turning Channel-Storage Banks On or Off..................................................... |
20 |
Locking Out Channels....................................................................................... |
20 |
Setting Priority ................................................................................................... |
21 |
Using the Display Backlight ............................................................................. |
21 |
Advanced Programming ................................................................. |
22 |
Cloning Your Scanner........................................................................................ |
22 |
Wired Programming.......................................................................................... |
23 |
Additional Information................................................................... |
24 |
FCC Notice .......................................................................................................... |
24 |
Scanning Legally................................................................................................ |
24 |
Care ..................................................................................................................... |
25 |
Service and Repair ............................................................................................ |
25 |
6SHFLÀFDWLRQV .................................................................................................... |
25 |
Troubleshooting ................................................................................................. |
27 |
Resetting your Scanner................................................................................ |
27 |
3

Scanner
 Setup
Setup 


 Scanner Setup
Scanner Setup
Scanner Features
Select a service band:
MAR (Marine), FD/PD (Fire/Police), AIR (Aircraft), HAM, or FM.
WX / 
Start a weather scan. Press and hold to activate Skywarn.
|
|
|
|
|
|
|
|
• / CLR / DELAY |
|
ENT (Enter) / PROGRAM |
|
|
|||
Enter a decimal point. |
|
Complete the entry of frequencies. |
|
Clear an entry. |
|
Put the scanner in programming |
|
Turn delay on or off. |
|
mode. |
|
SCAN / MAN
Scan the stored channel frequencies. Go to manual mode.
SRCH
Start a fine tune search.
S / T
Search up and down in a fine tune or service search.
0-9
Input a number.
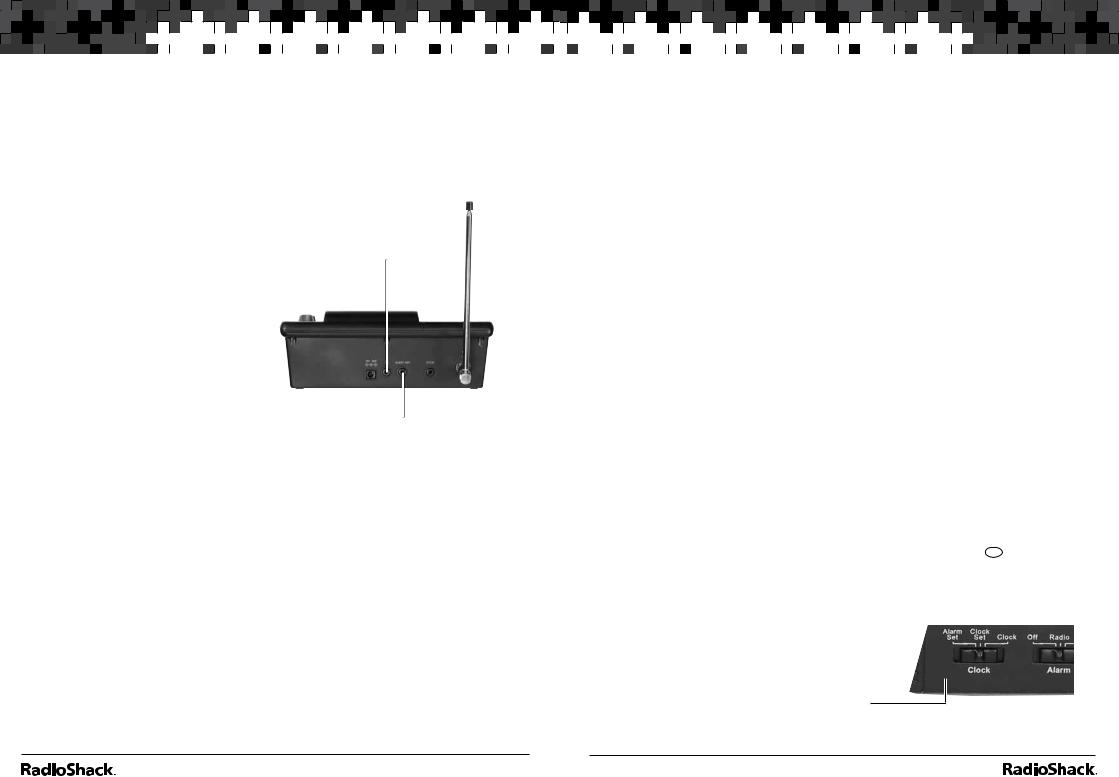
Clock Switch
Set to Alarm Set to set the alarm time. Set to Clock Set to set the current time. Set to Clock to display the current time.
PRI (Priority) / WX ALERT
Turns the priority function on or off. Press to turn weather alert on and off.
L/O
Lockout selected channels or skip specified frequencies during a search.
PSE (Pause)
Stop and resume search or scan.
Press to turn the backlight on for 15 seconds. Press and hold to turn the backlight on and off.
POWER
Press and hold to turn the scanner on or off.
Alarm Switch
Set to Off to disable alarm.
Set to Radio to enable the radio alarm. Set to Tone to enable the tone alarm.
4 |
5 |
Scanner
 Setup
Setup 


 Scanner Setup
Connecting the Antenna
Attach the supplied antenna to the
on its base with the tab on the scanner’s pressing into place.
When using an external antenna, always RG-58, or RG-8 coaxial cable. If the
is over 50 feet from the scanner, use RG-8 low-loss dielectric coaxial cable. If your antenna’s cable does not have a BNC connector, your local RadioShack store carries a variety of BNC adapters.
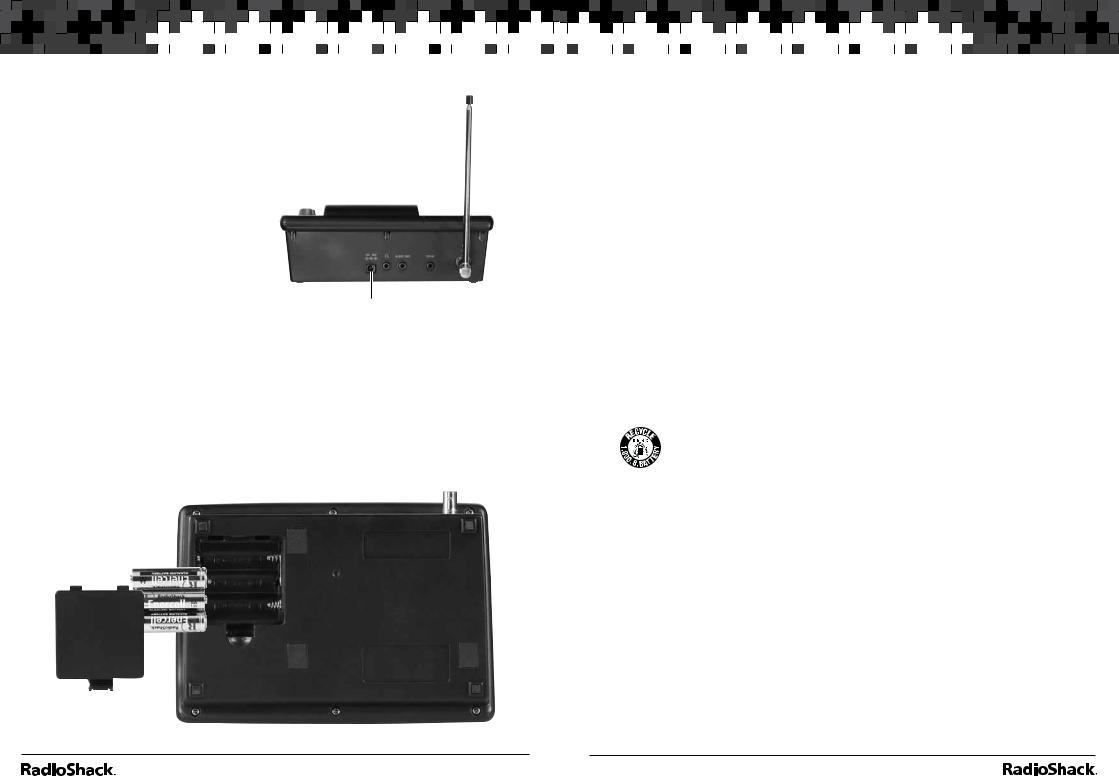
Powering Your Scanner |
DC 12V Jack |
Insert the supplied AC adapter’s barrel plug
into the power jack on the back of the scanner. Plug the adapter into a standard household outlet that supplies 120V AC, 60Hz. Do not plug the adapter into a switch-controlled outlet.
Installing Batteries
1.Remove the battery compartment cover.
2.Insert three AA batteries (not included) into the battery compartment, matching the polarity symbols (+ and –) marked inside.
3.Replace the cover.
Battery Notes
•Use fresh alkaline AA batteries.
•Rechargeable batteries can be used, but battery life is shorter than with alkaline batteries. The scanner will not recharge batteries in the compartment.
•Always remove old or weak batteries. Batteries can leak chemicals that destroy electronic circuits.
•Do not mix old and new batteries, different types of batteries (standard, alkaline, or rechargeable), or rechargeable batteries of different capacities.
•The batteries are intended to provide backup power for the clock and for scanning for a short time. When the backup batteries becomes too low,  appears. Promptly replace the batteries.
•When you either install batteries or connect the AC Adapter to a standard wall outlet, the scanner powers on and goes to STANDBY mode. The display shows the initial clock time of 12:00 AM. The scanner remains in STANDBY mode.
Recycle Rechargeable Batteries
Placing rechargeable batteries in the trash can be harmful to
the environment. Instead, recycle old rechargeable batteries at your local RadioShack store free of charge. RadioShack
participates in the RBRC© battery recycling program, and is committed to preserving the environment and conserving natural resources. Call 1-800-THE-SHACK (1-800-843-7422) for more information.
Scanner Placement
•Do not use the scanner in high-moisture environments such as the kitchen or bathroom.
•Avoid placing the scanner in direct sunlight or near heating elements or vents.
•If your scanner receives interference or electrical noise, move the scanner or its antenna away from the source. You might also try changing the height or angle of the antenna.
6 |
7 |
Scanner
 Setup
Setup 


 Scanner Setup
Connecting Headphones
For private listening, you can plug a mono earphone or headset into the Headphone Jack on the back of your scanner. This automatically disconnects the internal speaker. Note that the sound is not in stereo.
Listening Safely
To protect your hearing, follow these earphone or headphones guidelines:
•Do not listen at extremely high volume levels. Extended highvolume listening can lead to permanent hearing loss.
•Set the volume to the lowest setting before listening. Turn on the scanner, and adjust the volume to a comfortable level.
•After you set the volume, do not increase it. Over time, your ears adapt to the volume level, so a volume level that does not cause discomfort might still damage your hearing.
Headphone Jack
Alert Out Jack
Connecting the External Alert Out
To provide additional alerting options for the weather alert, connect a switch-closure activated device such as a strobe or siren controller (not supplied). The devise can be up to 200mA, AC/DC 20V and must have a 3.5mm mono plug cable. Plug the device into the Alert Out Jack on the back of your scnner.
Understanding Your Scanner
We use a few simple terms in this manual to explain the features of the scanner. Familiarize yourself with these terms and the scanner’s features, and you can put the scanner to work for you right away.
The scanner scans conventional frequencies. A frequency, expressed in MHz, is the tuning location of a station. To find active frequencies, use the search function or consult an online resource such as www.radioreference. com.
Besides searching within a selected frequency range, you can also search your scanner’s service banks. Service banks are preset groups of frequencies categorized by the type of services that use those frequencies. The scanner is preprogrammed with all the frequencies allocated to the Marine, Aircraft, Police (Fire/Emergency), Ham and FM services.
When you search and find a desired frequency, you can store it into a programmable memory location called a channel. Channels are grouped into channel-storage banks. Your scanner has 10 channel-storage banks (numbered 0-9). Each bank contains 20 channels (numbered 0-19), for a total of 200 channels. You can scan the channel storage banks to see if there is activity on the frequencies stored there.
Note: Search for frequencies to find your local frequencies, after you have programmed these frequencies into channels, you can scan the channels.
Use each channel-storage bank to group frequencies. For example, the police department might use four frequencies in your town while the fire department uses an additional four. You could program the police
frequencies in bank 0, and program the fire department frequencies in bank 1.
Turning on the Scanner
1.Turn SQUELCH fully counterclockwise.
2.Press and hold the POWER button to turn on your scanner. Turn up the VOLUME until you hear a hissing sound.
3.Turn SQUELCH clockwise until the hissing stops.
Note: Make sure the antenna is connected before you turn on the scanner.
To perform a quick check of scanner operation, press the WX/ key. If you are near a NOAA weather station, you should hear weather information.
Setting the Clock/Alarm
Your scanner’s clock displays whenever you turn off the radio functions. It can also be used as an alarm clock.
To set the clock time:
1.Slide the Clock Switch to Clock Set.
8 |
9 |
 Loading...