


 Loading...
[en] Instruction manual
C57M70N3GB
C57M70S3GB
Microwave

Ú Table of contents |
|
Important safety information .................................................... |
2 |
Causes of damage ............................................................................. |
4 |
Energy and environment tips ................................................... |
5 |
Saving energy...................................................................................... |
5 |
Environmentally-friendly disposal..................................................... |
5 |
Your new appliance ................................................................... |
5 |
Control panel ....................................................................................... |
5 |
Operating mode selector .................................................................. |
6 |
Accessories ......................................................................................... |
6 |
Cooking compartment ....................................................................... |
6 |
Switching the appliance on and off ......................................... |
7 |
Switching on ........................................................................................ |
7 |
Switching off......................................................................................... |
7 |
Before using the appliance for the first time........................... |
7 |
Setting the clock ................................................................................. |
7 |
Heating up the cooking compartment ............................................ |
7 |
Cleaning the accessories.................................................................. |
7 |
Operating the appliance............................................................ |
7 |
Setting the operating mode and temperature ............................... |
7 |
Rapid heat up ...................................................................................... |
8 |
The microwave ........................................................................... |
8 |
Notes regarding ovenware................................................................ |
9 |
Microwave power settings................................................................. |
9 |
Setting the microwave........................................................................ |
9 |
Microwave combi operation...................................................... |
9 |
Suitable microwave power settings................................................. |
9 |
Setting Microwave Combi operation ............................................... |
9 |
1, 2, 3 series of operations...................................................... |
10 |
Ovenware ......................................................................................... |
10 |
Setting a series of operations........................................................ |
10 |
Electronic clock ....................................................................... |
10 |
Clock display .................................................................................... |
10 |
Timer .................................................................................................. |
11 |
Cooking time .................................................................................... |
11 |
Setting the clock .............................................................................. |
11 |
Childproof lock......................................................................... |
11 |
Changing the basic settings................................................... |
12 |
Basic settings ................................................................................... |
12 |
Care and cleaning.................................................................... |
12 |
Cleaning agents ............................................................................... |
12 |
Malfunction table ..................................................................... |
13 |
Malfunction table.............................................................................. |
13 |
Replacing the cooking compartment bulb ................................. |
14 |
After-sales service................................................................... |
15 |
E number and FD number ............................................................. |
15 |
Technical data .................................................................................. |
15 |
Automatic programmes........................................................... |
15 |
Setting a programme ...................................................................... |
15 |
Defrosting and cooking with the automatic programmes........ |
16 |
Tested for you in our cooking studio..................................... |
17 |
Defrosting, heating up and cooking with the microwave ......... |
18 |
Microwave tips.................................................................................. |
20 |
Cakes and pastries ......................................................................... |
20 |
Baking tips ........................................................................................ |
21 |
Roasting and grilling ....................................................................... |
22 |
Tips for roasting and grilling .......................................................... |
23 |
Bakes, gratins................................................................................... |
23 |
Frozen convenience products ....................................................... |
24 |
Test dishes ............................................................................... |
24 |
Baking ................................................................................................ |
25 |
Grilling ................................................................................................ |
25 |
Acrylamide in foodstuffs......................................................... |
25 |
Additional information on products, accessories, replacement parts and services can be found at www.neff-
international.com and in the online shop www.neffeshop.com
:Important safety information
Read these instructions carefully. Only then will you be able to operate your appliance safely and correctly. Retain the instruction manual and installation instructions for future use or for subsequent owners.
This appliance is only intended to be fully fitted in a kitchen. Observe the special installation instructions.
Check the appliance for damage after unpacking it. Do not connect the appliance if it has been damaged in transport.
Only a licensed professional may connect appliances without plugs. Damage caused by incorrect connection is not covered under warranty.
This appliance is intended for domestic use only. The appliance must only be used for the preparation of food and drink. The appliance must be supervised during operation. Only use this appliance indoors.
This appliance may be used by children over the age of 8 years old and by persons with reduced physical, sensory or mental
2
capabilities or by persons with a lack of experience or knowledge if they are supervised or are instructed by a person responsible for their safety how to use the appliance safely and have understood the associated hazards.
Children must not play with, on, or around the appliance. Children must not clean the appliance or carry out general maintenance unless they are at least 8 years old and are being supervised.
Keep children below the age of 8 years old at a safe distance from the appliance and power cable.
Always slide accessories into the cooking compartment correctly. See "Description of accessories in the instruction manual.
Risk of fire!
■Combustible items stored in the cooking compartment may catch fire. Never store combustible items in the cooking compartment. Never open the appliance door if there is smoke inside. Switch off the appliance and unplug it from the mains or switch off the circuit breaker in the fuse box.
■Using the appliance for anything other than its intended purpose is dangerous and may cause damage.
The following is not permitted: drying out food or clothing, heating slippers, grain or cereal pillows, sponges, damp cleaning cloths or similar.
For example, heated slippers and grain or cereal pillows may catch fire, even several hours after they have been heated.The appliance must only be used for the preparation of food and drinks.
■Food may catch fire. Never heat food in heat-retaining packages.
Do not leave food heating unattended in containers made of plastic, paper or other combustible materials.
Do not select a microwave power or time setting that is higher than necessary. Follow the information provided in this instruction manual.
Never use the microwave to dry food. Never defrost or heat food with a low water content, e.g. bread, at too high a microwave power or for too long.
■Cooking oil may catch fire. Never use the microwave to heat cooking oil on its own.
Risk of explosion!
Liquids and other food may explode when in containers that have been tightly sealed. Never heat liquids or other food in containers that have been tightly sealed.
Risk of serious damage to health!
■The surface of the appliance may become damaged if it is not cleaned properly. Microwave energy may escape. Clean the appliance on a regular basis, and remove any food residue immediately. Always keep the cooking compartment, door seal, door and door stop clean; see also section Care and cleaning.
■Microwave energy may escape if the cooking compartment door or the door seal is damaged. Never use the appliance if the cooking compartment door or the door seal is damaged. Contact the aftersales service.
■Microwave energy will escape from appliances that do not have any casing. Never remove the casing. For any maintenance or repair work, contact the after-sales service.
Risk of electric shock!
■Incorrect repairs are dangerous. Repairs may only be carried out and damaged power cables replaced by one of our trained after-sales technicians. If the appliance is defective, unplug the appliance from the mains or switch off the circuit breaker in the fuse box. Contact the after-sales service.
■The cable insulation on electrical appliances may melt when touching hot parts of the appliance. Never bring electrical appliance cables into contact with hot parts of the appliance.
■Do not use any high-pressure cleaners or steam cleaners, which can result in an electric shock.
■When replacing the cooking compartment bulb, the bulb socket contacts are live. Before replacing the bulb, unplug the appliance from the mains or switch off the circuit breaker in the fuse box.
■A defective appliance may cause electric shock. Never switch on a defective appliance. Unplug the appliance from the mains or switch off the circuit breaker in
3
the fuse box. Contact the after-sales service.
■The appliance is a high-voltage appliance. Never remove the casing.
Risk of burns!
■The appliance becomes very hot. Never touch the interior surfaces of the cooking compartment or the heating elements. Always allow the appliance to cool down. Keep children at a safe distance.
■Accessories and ovenware become very hot. Always use oven gloves to remove accessories or ovenware from the cooking compartment.
■Alcoholic vapours may catch fire in the hot cooking compartment. Never prepare food containing large quantities of drinks with a high alcohol content. Only use small quantities of drinks with a high alcohol content. Open the appliance door with care.
■Foods with peel or skin may burst or explode during, or even after, heating. Never cook eggs in their shells or reheat hard-boiled eggs. Never cook shellfish or crustaceans. Always prick the yolk when baking or poaching eggs. The skin of foods that have a peel or skin, such as apples, tomatoes, potatoes and sausages, may burst. Before heating, prick the peel or skin.
■Heat is not distributed evenly through baby food. Never heat baby food in closed containers. Always remove the lid or teat. Stir or shake well after the food has been heated. Check the temperature of the food before it is given to the child.
■Heated food gives off heat. The ovenware may become hot. Always use oven gloves to remove ovenware or accessories from the cooking compartment.
■Airtight packaging may burst when food is heated. Always observe the instructions on the packaging. Always use oven gloves to remove dishes from the cooking compartment.
Risk of scalding!
■When you open the appliance door, hot steam may escape. Open the appliance
door with care. Keep children at a safe distance.
■Water in a hot cooking compartment may create hot steam. Never pour water into the hot cooking compartment.
■There is a possibility of delayed boiling when a liquid is heated. This means that the liquid reaches boiling temperature without the usual steam bubbles rising to the surface. Even if the container only vibrates a little, the hot liquid may suddenly boil over and spatter. When heating, always place a spoon in the container. This will prevent delayed boiling.
Risk of injury!
■Scratched glass in the appliance door may develop into a crack. Do not use a glass scraper, sharp or abrasive cleaning aids or detergents.
■Unsuitable ovenware may crack. Porcelain or ceramic ovenware can have small perforations in the handles or lids. These perforations conceal a cavity below. Any moisture that penetrates this cavity could cause the ovenware to crack. Only use microwave-safe ovenware.
Causes of damage
Caution!
■Creation of sparks: Metal e.g. a spoon in a glass must be kept at least 2 cm from the oven walls and the inside of the door. Sparks could irreparably damage the glass on the inside of the door.
■Water in the cooking compartment when the cooking compartment is hot: Never pour water into the cooking compartment when the cooking compartment is hot. Steam will be created. The temperature change can cause damage to the ceramic floor panel.
■Foil containers: Do not use foil containers in the appliance. They damage the appliance by producing sparks.
■Moist food: Do not store moist food in the closed cooking compartment for long periods. This will damage the enamel.
Do not use the appliance to store food. This can lead to corrosion.
■Cooling with the appliance door open: Only leave the cooking compartment to cool with the door closed. Do not trap anything in the appliance door. Even if the door is only slightly ajar, the fronts of adjacent units may be damaged over time.
■Heavily soiled seal: If the seal is very dirty, the appliance door will no longer close properly during operation. The fronts of adjacent units could be damaged. Always keep the seal clean.
■Using the appliance door for standing on or placing objects on: Do not stand or place anything on the open appliance door. Do not place ovenware or accessories on the appliance door.
■Transporting the appliance: Do not carry or hold the appliance by the door handle. The door handle cannot support the weight of the appliance and could break.
4
■Operating the microwave without food: Operating the appliance without food in the cooking compartment may lead to overloading. Never switch on the appliance unless there is food in the cooking compartment. An exception to this rule is a short crockery test (see the section "Microwave, suitable crockery").
■Never use the enamel baking tray when cooking with microwave operation. It will result in a technical fault.
■Microwave popcorn: Never set the microwave power too high. Use a power setting no higher than 600 watts. Always place the popcorn bag on a glass plate. The disc may jump if overloaded.
Energy and environment tips
Here you can find tips on how to save energy when baking and roasting and how to dispose of your appliance properly.
Saving energy
Only preheat the oven if this is specified in the recipe or in the operating instruction tables.
Use dark, black lacquered or enamelled baking tins. They absorb the heat particularly well.
Open the appliance door as little as possible during cooking, baking or roasting.
It is best to bake several cakes one after the other. The cooking compartment is still warm. This may reduce the baking time for the second cake.
For longer cooking times, you can switch the oven off
10 minutes before the end of the cooking time and use the residual heat to finish cooking.
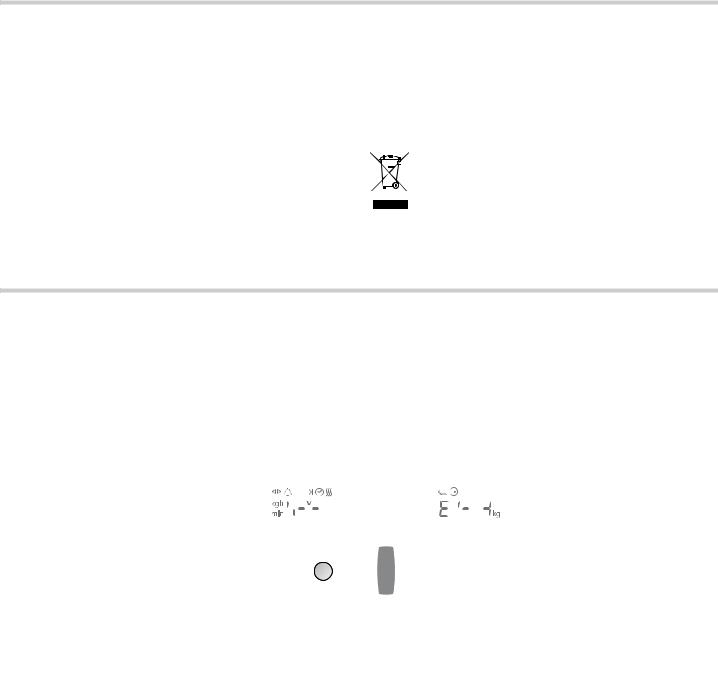
Environmentally-friendly disposal
Dispose of packaging in an environmentally-friendly manner.
This appliance is labelled in accordance with European Directive 2012/19/EU concerning used electrical and electronic appliances (waste electrical and electronic equipment - WEEE). The guideline determines the framework for the return and recycling of used appliances as applicable throughout the EU.
Your new appliance
In this section, you will find information on |
■ the shelf heights |
■ the control panel |
■ the accessories |
■ the operating modes |
|
Control panel
(OHFWURQLF FORFN 7HPSHUDWXUH GLVSOD\
|
|
|
|
|
|
|
|
|
|
|
|
|
|
|
|
|
|
|
|
|
|
|
|
|
|
|
|
|
|
|
|
|
|
|
|
|
|
|
|
|
|
|
|
|
|
|
|
|
|
|
|
|
|
|
|
|
|
|
|
|
|
|
|
|
|
|
|
|
|
|
|
|
|
|
|
|
|
|
|
|
|
|
|
|
|
|
|
|
|
|
|
|
|
|
|
0LFURZDYH |
6HULHV RI |
|
|
5RWDU\ |
|
|
7HPSHUDWXUH |
2SHUDWLQJ |
|||||||
|
SRZHU |
RSHUDWLRQV |
|
|
VHOHFWRU |
,QIR EXWWRQ |
|
VHOHFWRU |
FRQWUROV |
||||||
|
VHWWLQJV |
&ORFN IXQFWLRQ EXWWRQ |
|
|
2SHUDWLQJ PRGH VHOHFWRU |
|
|
|
|||||||
|
|
|
|
|
|
|
|||||||||
Operating controls |
Use |
|
|
90 |
Selects 90 watt microwave power |
|
|
180 |
Selects 180 watt microwave power |
|
|
360 |
Selects 360 watt microwave power |
|
|
600 |
Selects 600 watt microwave power |
|
|
1000 |
Selects 1000 watt microwave power |
|
|
°±² |
Selects a series of operations |
Operating controls |
Use |
|
|
à |
Clock function button |
|
Selects the required clock function or |
|
rapid heat up (see section: Electronic |
|
clock) |
|
|
Rotary selector |
Makes the settings in one of the clock |
|
functions or switches on rapid heat up |
|
(see section: Electronic clock) |
|
|
Operating mode |
Selects the desired operating mode |
selector |
(see section: Switching on the appli- |
|
ance) |
5
Operating controls |
Use |
|
|
± |
Info button |
|
Activates the childproof lock (see sec- |
|
tion: Childproof lock) |
|
Calls up the Basic settings menu (see |
|
section: Basic settings) |
|
|
Temperature selector |
Temperature selector |
|
Sets the temperature (see section: |
|
Operating the appliance) |
|
Changes the settings in the Basic set- |
|
tings menu (see section: Basic set- |
|
tings) |
|
|
n |
Selects automatic programmes |
|
|
ƒ |
Starts oven operation |
|
|
„ |
Stops oven operation or cancels a set- |
|
ting |
Microwave power settings and operating controls
When you press a button, the relevant item lights up on the display.
Retractable operating knob
The rotary, temperature and operating mode selectors can be pushed in and popped out. Press them towards the relevant operating knob to pop it in and out.
Operating mode selector
Use the operating mode selector to set the operating mode. Below is an overview of the operating modes on your appliance.
Operating modes |
Application |
|
|
|
|
3 |
Hot air |
For baking sponge cakes in tins, flans |
and cheesecakes and cakes, pizzas and small baked products on the baking tray.
4Hot air grilling For poultry and larger pieces of meat.
= |
Circulated air |
For cooking pieces of meat. |
|
grilling |
|
|
|
|
+ |
Full-surface |
For large amounts of flat, small items |
|
grill |
for grilling (e.g. steaks, sausages). |
|
|
|
( |
Centre-area |
For small amounts of flat, small items |
|
grill |
for grilling (e.g. steaks, bread). |
|
|
|
n |
Programmes |
4 defrosting programmes |
|
|
11 cooking programmes |
|
|
The operating mode and cooking time |
|
|
are determined depending on the |
|
|
weight. |
|
|
|
Notes
■When you press the operating mode selector, the appliance switches on. The ~ symbol lights up.
■The microwave only functions if you press the selector. The ~ symbol lights up.
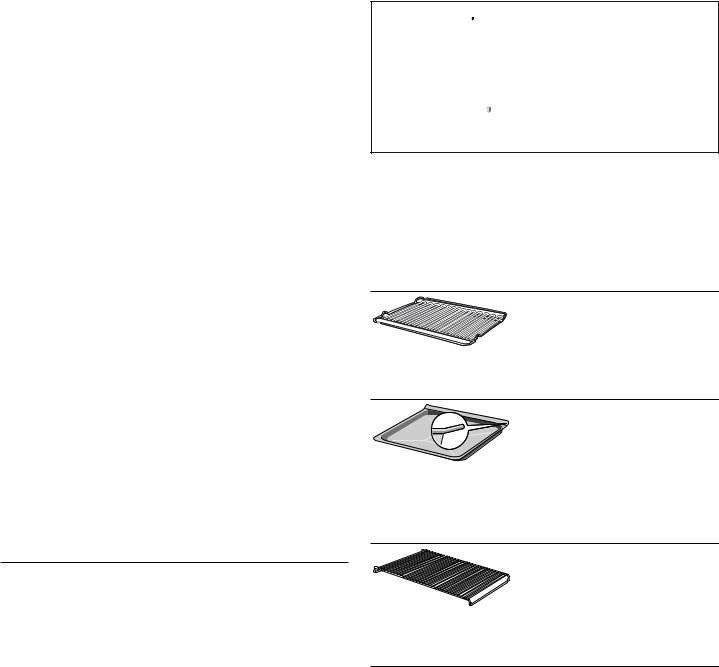
Accessories
The accessories can be inserted into the appliance at four different heights.
Note: Microwaveable ovenware can be placed on the oven floor (level 0).
Caution!
■Do not insert the enamel baking tray on the oven floor (level 0).
■Do not use any enamel baking trays or unsuitable microwave dishes while operating the microwave.
Wire rack
For ovenware, cake tins, grilled food and frozen meals.
Note: You can pull the wire rack two thirds of the way out without it tipping. This allows meals to be removed more easily.
Enamel baking tray
For cakes and biscuits.
Note: Slide the baking tray with the tapered edge as far as possible into the oven.
Caution!
Do not use the enamel baking tray when operating the microwave and microwave combi.
Wire rack
For grilled food. Always place the wire rack in the enamel baking tray. This ensures that dripping fat and meat juices are collected.
Caution!
The wire rack is not suitable for operation with the microwave.
Cooking compartment
Your appliance has a cooling fan.
Cooling fan
The cooling fan switches on and off as required. The hot air escapes above the door.
Caution!
do not cover the ventilation slots. Otherwise the oven will overheat.
Notes
■The cooling fan continues to run for a certain time after operation.
■The appliance remains cool during microwave operation. The cooling fan will still switch on. The fan may run on even when microwave operation has ended.
■Condensation may appear on the door window, interior walls and floor. This is normal and does not adversely affect microwave operation. Wipe away the condensation after cooking.
6
Switching the appliance on and off
Switch the microwave oven on and off using the operating mode selector.
Switching on
1.Press the operating mode selector.
The appliance switches on. The ~ symbol lights up.
2.Select a function:
■°±² button = series of operations
■Setting an operating mode and temperature
■n button = automatic programmes
Please refer to the individual sections for information on how to make the settings.
Switching off
■90, 180, 360, 600 or 1000 W button for a microwave power level
Turn the operating mode selector back, and push in. The appliance switches off and the time appears in the clock display.
Before using the appliance for the first time
In this section, you can read about
■How to set the clock after connecting up your appliance
■How to clean your appliance before using it for the first time
Note: In order to reduce the energy consumption of your appliance in standby, you can switch off the clock display. Refer to the section entitled Electronic clock.
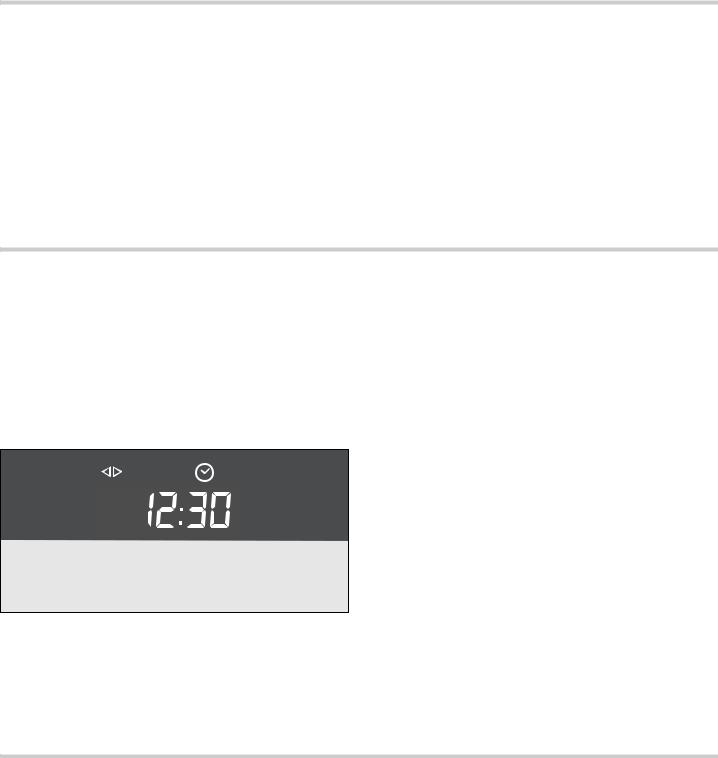
Setting the clock
‹:‹‹ and the KJ3 symbols light up in the clock display.
1.Turn the rotary selector to set the time of day.
2.Press the ON clock function button.
Your setting is applied.
Changing the clock
To subsequently change the clock time, press the ONclock function button repeatedly until the KJ and 3 symbols light up. Use the rotary selector to change the time of day.
Heating up the cooking compartment
To remove the new appliance smell, heat up the cooking compartment when empty and with the oven door closed.
Make sure that the cooking compartment contains no leftover packaging, e.g. polystyrene pellets.
Heat the cooking compartment for 60 minutes with the 4 Hot air grill at 200 °C.
Note: Keep the kitchen ventilated while the appliance is heating up.
1.Use the operating mode selector to set the 4 Hot air grill.
2.Using the temperature selector, set the temperature to 200 °C
3.Press the ƒ button.
4.Switch off the appliance after 60 minutes.
To do this, turn the operating mode selector back to ~ and push it in.
Once the cooking compartment has cooled, clean it with hot, soapy water.
Cleaning the accessories
Before you use the accessories for the first time, clean them thoroughly with hot soapy water and a soft dish cloth.
Operating the appliance
In this section, you can read about
■which operating modes are available for your oven.
■how to select an operating mode and temperature.
■how to set rapid heat up
The following operating modes are available for your microwave appliance. A default temperature always appears when you make a setting.
Operating mode |
Default temperaTemperature range |
||
|
|
ture in °C, grill |
in °C, grill settings |
|
|
settings |
|
|
|
|
|
3 |
Hot air |
160 |
40, 100-250 |
|
|
|
|
4 |
Hot air grilling |
160 |
100-250 |
Operating mode |
Default temperaTemperature range |
||
|
|
ture in °C, grill |
in °C, grill settings |
|
|
settings |
|
|
|
|
|
= |
Circulated air |
160 |
100-250 |
|
grilling |
|
|
|
|
|
|
+ Full-surface grill |
high (3) |
medium (2) |
|
|
|
|
low (1) |
|
|
|
|
( Centre-area grill |
- |
- |
|
|
|
|
|
Setting the operating mode and temperature
Example in diagram: Hot air 3, 190 °C.
7

1.Turn the operating mode selector until the required operating mode is set.
A default temperature appears on the temperature display.
2.Turn the temperature selector to change the default temperature.
3. Press the ƒ button.
The operation starts. The heating bars in the temperature indicator appear in the temperature display.
Switching off the oven
Turn operating mode selector back to ~ and push in.
Opening the appliance door during operation
Operation is suspended. The cooling fan may continue to run. After closing the door, press the ƒ button. Operation will then continue.
Pausing operation
Open the appliance door or briefly press the „ button. Microwave operation is interrupted. Press the ƒ button again once you have closed the door. Operation will then continue.
Changing the settings
The type of heating and temperature or grill setting can be changed at any time using their respective selectors.
Cancelling operation
Press the „ button, turn the operating mode selector back and push in.
Note: If you also set a cooking time, the operation which you have set will automatically switch off at the end of this time. See the section Electronic clock.
Rapid heat up
With rapid heating, your oven reaches the temperature set particularly quickly.
Use the rapid heating function when temperatures above 100 °C are set.
Suitable types of heating
■3 Hot air
■4 Hot air grilling
■= Circulated air grilling
Setting rapid heating
Condition: a suitable operating mode and temperature must have been set.
1.Set the operating mode and temperature.
2.Repeatedly press the clock function button until the KJuand f symbols light up and Πappears on the clock display.
3.Turn the rotary selector clockwise.
The clock display shows Ž and the f symbol lights up. Rapid heat up is activated.
4. Press theƒ button. The appliance heats up.
To ensure an even cooking result, do not place your food in the oven until rapid heat up is complete.
The rapid heat up process is complete
After reaching the set temperature, Rapid heat up switches off. The f symbol goes out. Put your food in the oven.
Cancelling rapid heat up
Press the clock function button repeatedly until Ž appears on the clock display. Turn the rotary selector anti-clockwise until Œ appears on the clock display. The f symbol on the clock display goes out.
Notes
■If you change an operating mode, rapid heat up is cancelled.
■Once a cooking time has been set, it will start counting down immediately after the oven is started, regardless of the rapid heat up function.
The microwave
Microwaves are converted to heat in foodstuffs. The microwave can be used solo, i.e. on its own, or in combination with a different type of heating.
In this section, you will find
■ information about ovenware
■ how to set the microwave
Note: In the Tested for you in our cooking studio section, you will find examples for defrosting, heating and cooking with the microwave oven.
8

Notes regarding ovenware
Suitable ovenware
Suitable dishes are heat-resistant ovenware made of glass, glass ceramic, porcelain, ceramic or heat-resistant plastic. These materials allow microwaves to pass through.
You can also use serving dishes. This saves you having to transfer food from one dish to another. You should only use ovenware with decorative gold or silver trim if the manufacturer guarantees that they are suitable for use in microwaves.
Unsuitable ovenware
Metal ovenware is unsuitable. Metal does not allow microwaves to pass through. Food in covered metal containers will remain cold.
Caution!
Creation of sparks: metal – e.g. a spoon in a glass – must be kept at least 2 cm from the oven walls and the inside of the door. Sparks could destroy the glass on the inside of the door.
Ovenware test
Do not switch on the microwave unless there is food inside. The following ovenware test is the only exception to this rule.
Perform the following test if you are unsure whether your ovenware is suitable for use in the microwave:
1.Heat the empty ovenware at maximum power for ½ to
1minute.
2.Check the temperature occasionally during that time. The ovenware should still be cold or warm to the touch.
The ovenware is unsuitable if it becomes hot or sparks are generated.
Microwave power settings
Use the button to set the desired microwave power.
90 W for defrosting delicate foods
180 W for defrosting and continued cooking
360 W for cooking meat and heating delicate foods
600 W for heating and cooking food
1000 W for heating liquids
Notes
■When you press a button, the selected power lights up.
■The microwave power can be set to 1000 watts for a maximum of 30 minutes. With all other power settings a maximum cooking time of 1 hour 30 minutes is possible.
Setting the microwave
Example: microwave power 600 W, cooking time 10 minutes.
1.Press the operating mode selector. The appliance is ready for operation.
2.Press the button for the microwave power setting you require.
The selected power setting lights up and a suggested cooking time is displayed.
3.Set the cooking time using the rotary selector.
4.Press the ƒ button.
The operation starts. The cooking time starts counting down.
The cooking time has elapsed
A signal sounds. Microwave operation has finished. You can stop the audible signal by pressing the à button. Switch off or reset the appliance.
Opening the appliance door during operation
Operation is suspended. The cooling fan may continue to run. After closing the door, press the ƒ button. Operation will then continue.
Changing the cooking time
Change the cooking time using the rotary selector.
Changing the microwave power setting
Press the button for the new microwave power setting. Use the rotary selector to set the cooking time and restart.
Cancelling operation
Press the illuminated button for the set microwave power setting. Make new settings or switch off the appliance.
Note: If you open the appliance door during cooking, the fan may continue running.
Microwave combi operation
This involves the simultaneous operation of another operating mode with the microwave. Using the microwave makes your meals ready more quickly, but they are still nicely browned.
In this section, you will read about
■which operating modes are suitable
■how to set the microwave combi mode
■Suitable types of heating
Suitable types of heating
■3 Hot air
■4 Hot air grilling
■= Circulated air grilling
Note: Rapid heat up cannot be switched on in microwave combination mode.
Suitable microwave power settings
All microwave power settings, except for 1000 watts, can be combined with an operating mode.
Setting Microwave Combi operation
Example:
Microwave 360 W, 17 minutes and circulated air grilling = 180 °C.
1.Set the operating mode using the operating mode selector and the temperature using the temperature selector.
2.Press the button for the microwave power setting you require. A suggested cooking time appears.
3.Set the cooking time using the rotary selector.
4.Press the ƒ button.
The operation starts. The cooking time starts counting down.
The cooking time has elapsed.
A signal sounds. Combination mode has finished. You can use the à button to cancel the signal before the time has elapsed and switch the appliance off or make new settings using the operating mode selector.
9
Loading...