


[en]Instruction manual
Built-in oven B15P52.3GB

Ú Table of contents |
|
Important safety information..................................................... |
4 |
Causes of damage ............................................................................. |
5 |
Your new oven ............................................................................ |
6 |
Control panel ....................................................................................... |
6 |
Operating modes ................................................................................ |
6 |
Cooking compartment ....................................................................... |
7 |
Your accessories........................................................................ |
7 |
Accessories ......................................................................................... |
7 |
Inserting accessories ......................................................................... |
7 |
Shelf positions ..................................................................................... |
7 |
Optional accessories ......................................................................... |
8 |
Before using the appliance for the first time ........................... |
8 |
Setting the clock ................................................................................. |
8 |
Cleaning the appliance...................................................................... |
8 |
Operating the appliance ............................................................ |
9 |
Switching on the appliance............................................................... |
9 |
Switching off the appliance............................................................... |
9 |
Changing the basic settings ............................................................. |
9 |
Automatic safety cut-out .................................................................... |
9 |
Electronic clock........................................................................ |
10 |
Clock display .................................................................................... |
10 |
Timer .................................................................................................. |
10 |
Cooking time .................................................................................... |
10 |
End of operation .............................................................................. |
11 |
Preset operation............................................................................... |
11 |
Setting the clock .............................................................................. |
11 |
Rapid heat up................................................................................... |
11 |
Checking, correcting or deleting settings ................................... |
11 |
Childproof lock ......................................................................... |
12 |
Lock.................................................................................................... |
12 |
Permanent lock ................................................................................ |
12 |
Baking ....................................................................................... |
12 |
Baking on one level......................................................................... |
12 |
Baking on two or more levels ....................................................... |
13 |
Baking table...................................................................................... |
13 |
Baking table for ready-made products........................................ |
14 |
Tips and tricks .................................................................................. |
15 |
Roasting and braising.............................................................. |
16 |
Roasting............................................................................................. |
16 |
Braising.............................................................................................. |
16 |
Tables for roasting and braising................................................... |
16 |
Tips and tricks .................................................................................. |
18 |
Grilling....................................................................................... |
18 |
Circo-roasting ................................................................................... |
18 |
Radiant grilling.................................................................................. |
18 |
Grilling table...................................................................................... |
19 |
CircoTherm® eco...................................................................... |
20 |
Low-temperature cooking ....................................................... |
21 |
Using Low-temperature cooking ................................................... |
21 |
Table for Low-temperature cooking ............................................. |
21 |
Tips and tricks .................................................................................. |
21 |
Defrost....................................................................................... |
22 |
Defrosting with CircoTherm®........................................................ |
22 |
Defrost................................................................................................ |
22 |
Yoghurt...................................................................................... |
22 |
Pyrolytic cleaning..................................................................... |
22 |
Important notes ................................................................................ |
22 |
Before cleaning ................................................................................ |
23 |
Setting the cleaning level ............................................................... |
23 |
After cleaning.................................................................................... |
23 |
Care and cleaning .................................................................... |
23 |
Cleaning agents ............................................................................... |
23 |
Cleaning the hook-in racks ............................................................ |
24 |
Detaching and attaching the oven door...................................... |
24 |
Removing the door cover............................................................... |
25 |
Removing and installing the door panels ................................... |
25 |
Faults and repairs .................................................................... |
26 |
Malfunction table.............................................................................. |
26 |
Replacing the bulb in the oven ceiling light ............................... |
27 |
Glass cover ....................................................................................... |
27 |
After-sales service ................................................................... |
28 |
E number and FD number ............................................................. |
28 |
Test dishes................................................................................ |
28 |
Additional information on products, accessories, replacement parts and services can be found at www.neff-
international.com and in the online shop www.neffeshop.com
3

:Important safety information
Read these instructions carefully. Only then will you be able to operate your appliance safely and correctly. Retain the instruction manual and installation instructions for future use or for subsequent owners.
This appliance is only intended to be fully fitted in a kitchen. Observe the special installation instructions.
Check the appliance for damage after unpacking it. Do not connect the appliance if it has been damaged in transport.
Only a licensed professional may connect appliances without plugs. Damage caused by incorrect connection is not covered under warranty.
This appliance is intended for domestic use only. The appliance must only be used for the preparation of food and drink. The appliance must be supervised during operation. Only use this appliance indoors.
This appliance may be used by children over the age of 8 years old and by persons with reduced physical, sensory or mental capabilities or by persons with a lack of experience or knowledge if they are supervised or are instructed by a person responsible for their safety how to use the appliance safely and have understood the associated hazards.
Children must not play with the appliance. Children must not clean the appliance or carry out general maintenance unless they are at least 8 years old and are being supervised.
Keep children below the age of 8 years old at a safe distance from the appliance and power cable.
Always slide accessories into the cooking compartment correctly. See "Description of accessories in the instruction manual.
Risk of fire!
■Combustible items stored in the cooking compartment may catch fire. Never store combustible items in the cooking compartment. Never open the appliance door if there is smoke inside. Switch off the appliance and unplug it from the mains or switch off the circuit breaker in the fuse box.
■A draught is created when the appliance door is opened. Greaseproof paper may come into contact with the heating element and catch fire. Do not place greaseproof paper loosely over accessories during preheating. Always weight down the greaseproof paper with a dish or a baking tin. Only cover the surface required with greaseproof paper. Greaseproof paper must not protrude over the accessories.
Risk of burns!
■The appliance becomes very hot. Never touch the interior surfaces of the cooking compartment or the heating elements. Always allow the appliance to cool down. Keep children at a safe distance.
■Accessories and ovenware become very hot. Always use oven gloves to remove accessories or ovenware from the cooking compartment.
■Alcoholic vapours may catch fire in the hot cooking compartment. Never prepare food containing large quantities of drinks with a high alcohol content. Only use small quantities of drinks with a high alcohol content. Open the appliance door with care.
Risk of scalding!
■The accessible parts become hot during operation. Never touch the hot parts. Keep children at a safe distance.
■When you open the appliance door, hot steam may escape. Open the appliance door with care. Keep children at a safe distance.
■Water in a hot cooking compartment may create hot steam. Never pour water into the hot cooking compartment.
Risk of injury!
Scratched glass in the appliance door may develop into a crack. Do not use a glass scraper, sharp or abrasive cleaning aids or detergents.
Risk of electric shock!
■Incorrect repairs are dangerous. Repairs may only be carried out by one of our trained after-sales engineers. If the appliance is faulty, unplug the mains plug
4
or switch off the fuse in the fuse box. Contact the after-sales service.
■The cable insulation on electrical appliances may melt when touching hot parts of the appliance. Never bring electrical appliance cables into contact with hot parts of the appliance.
■Penetrating moisture may cause an electric shock. Do not use any highpressure cleaners or steam cleaners.
■When replacing the cooking compartment bulb, the bulb socket contacts are live. Before replacing the bulb, unplug the appliance from the mains or switch off the circuit breaker in the fuse box.
■A defective appliance may cause electric shock. Never switch on a defective appliance. Unplug the appliance from the mains or switch off the circuit breaker in the fuse box. Contact the after-sales service.
Risk of fire!
■Loose food residues, grease and meat juices may catch fire during the Selfcleaning cycle. Remove coarse dirt from the cooking compartment and from the accessories before every Self-cleaning cycle.
■The appliance will become very hot on the outside during the Self-cleaning cycle. Never hang combustible objects, e.g. tea towels, on the door handle. Do not place anything against the front of the oven. Keep children at a safe distance.
Risk of burns!
■The cooking compartment will become very hot during the Self-cleaning cycle. Never open the appliance door or move the locking latch by hand. Allow the appliance to cool down. Keep children at a safe distance.
■; The appliance will become very hot on the outside during the Self-cleaning cycle. Never touch the appliance door. Allow the appliance to cool down. Keep children at a safe distance.
Risk of serious damage to health!
The appliance will become very hot during the Self-cleaning cycle. The non-stick coating on baking trays and tins is destroyed and noxious gases are released. Never let non-stick baking trays and tins go through the Self-cleaning cycle. Only enamelled accessories may be cleaned at the same time.
Causes of damage
Caution!
■Accessories, foil, greaseproof paper or ovenware on the cooking compartment floor: do not place accessories on the cooking compartment floor. Do not cover the cooking compartment floor with any sort of foil or greaseproof paper. Do not place ovenware on the cooking compartment floor if a temperature of over 50 ºC has been set. This will cause heat to accumulate. The baking and roasting times will no longer be correct and the enamel will be damaged.
■Water in a hot cooking compartment: do not pour water into the cooking compartment when it is hot. This will cause steam. The temperature change can cause damage to the enamel.
■Moist food: do not store moist food in the cooking compartment when it is closed for prolonged periods This will damage the enamel.
■Fruit juice: when baking particularly juicy fruit pies, do not pack the baking tray too generously. Fruit juice dripping from the baking tray leaves stains that cannot be removed. If possible, use the deeper universal pan.
■Cooling with the appliance door open: only allow the cooking compartment to cool when it is closed. Even if the appliance door is only open a little, front panels of adjacent units could be damaged over time.
■Very dirty door seal: If the door seal is very dirty, the appliance door will no longer close properly when the appliance is in use. The fronts of adjacent units could be damaged.Always keep the door seal clean.
■Appliance door as a seat, shelf or worktop: Do not sit on the appliance door, or place or hang anything on it. Do not place any cookware or accessories on the appliance door.
■Inserting accessories: depending on the appliance model, accessories can scratch the door panel when closing the appliance door. Always insert the accessories into the cooking compartment as far as they will go.
■Carrying the appliance: do not carry or hold the appliance by the door handle. The door handle cannot support the weight of the appliance and could break.
5

Your new oven
In this section, you will find information on |
■ |
the operating modes |
■ the control panel |
■ |
the cooking compartment |
Control panel
(OHFWURQLF FORFN 7HPSHUDWXUH GLVSOD\
|
|
|
|
|
|
|
|
|
|
|
|
|
|
|
|
|
|
|
|
|
|
|
|
|
|
|
|
|
|
|
|
|
|
|
|
|
|
|
|
|
|
|
|
|
|
|
|
|
|
|
|
|
|
|
|
|
|
|
|
|
|
|
|
|
|
|
|
|
|
|
|
|
|
|
|
|
|
|
|
|
|
|
|
|
|
|
|
5RWDU\ VHOHFWRU |
|
,QIR EXWWRQ |
|
|
|||||
|
|
&ORFN IXQFWLRQ EXWWRQ |
2SHUDWLQJ PRGH VHOHFWRU |
|
|
7HPSHUDWXUH VHOHFWRU |
|||||||
|
|
|
|
|
|
|
|
|
|
|
|
|
|
Control element |
Use |
|
|
|
|
|
|
|
|
||||
|
|
|
|
|
|
|
|
|
|
|
|
||
KJ |
Clock function button |
Selects the required clock function or Rapid heat up (see section: Electronic clock) |
|||||||||||
|
|
|
|
|
|
|
|
|
|
|
|
||
|
Rotary selector |
Makes settings within a clock function or activates Rapid heat up |
|||||||||||
|
|
|
|
(see section: Electronic clock) |
|
|
|
|
|
|
|||
|
|
|
|
|
|
|
|
|
|
|
|
||
|
Operating mode selector |
Selects the desired operating mode (see section: Switching on the appliance) |
|||||||||||
|
|
|
|
|
|
|
|
|
|
|
|
||
± |
Info button |
When the appliance is switched on: displays the current oven temperature during the |
|||||||||||
|
|
|
|
heating up phase (see section: Switching on the appliance) |
|||||||||
|
|
|
|
When the appliance is switched off: calls up the basic settings menu |
|||||||||
|
|
|
|
(see section: Changing the basic settings) |
|||||||||
|
|
|
|
|
|
|
|
|
|
|
|
||
|
Temperature selector |
When the appliance is switched on: sets the temperature (see section: Switching |
|||||||||||
|
|
|
|
on the appliance) |
|
|
|
|
|
|
|||
When the appliance is switched off: changes the settings in the basic settings menu (see section: Changing the basic settings)
Pop-out operating knob
The rotary, temperature and operating mode selectors can all be popped out. Push the required operating knob to pop it in or out.
Operating modes
Here you can obtain an overview of your appliance's operating modes.
Operating mode |
Application |
|
|
|
|
3 |
CircoTherm® |
For baking and roasting on one or more levels |
|
|
|
% |
Top/bottom heat |
For baking and roasting on one level. Ideal for cakes with moist toppings (e.g. cheese- |
|
|
cake) |
|
|
|
0 |
Circotherm intensive |
For frozen convenience products and for meals that require a lot of heat from underneath |
|
|
(see section: Baking) |
|
|
|
4 |
Circo-roasting |
For poultry and larger pieces of meat |
|
|
|
+ |
Full-surface grill |
For large amounts of flat, small items for grilling (e.g.steaks, sausages) |
|
|
|
( |
Centre-area grill |
For small amounts of flat, small items for grilling (e.g.steaks, bread) |
|
|
|
$ |
Bottom heat |
For food and baked items on which you want a crust to form, or which need more brown- |
|
|
ing on the underside. |
|
|
Only activate Bottom heat for a short while at the end of the baking time. |
|
|
|
/ |
Low-temperature cooking |
For tender pieces of meat that are to be cooked medium/medium rare or à point |
* Operating mode used to determine the energy efficiency class in accordance with EN50304.
6

Operating mode |
Application |
|
|
|
|
“ |
CircoTherm® eco* |
For energy-optimised baking and roasting on one level. The appliance does not need to |
|
|
be preheated. |
|
|
|
x |
Pyrolytic cleaning |
For automatic cleaning of the cooking compartment. The oven heats up until the dirt dis- |
|
|
integrates. |
|
|
|
\ |
Interior lighting |
Helps with the care and cleaning of the cooking compartment |
* Operating mode used to determine the energy efficiency class in accordance with EN50304.
Cooking compartment
The oven light is located in the cooking compartment. A cooling fan protects the oven from overheating.
Oven light
During operation, the oven light in the cooking compartment is on. The ^ setting on the function selector can be used to switch on the light without heating the oven.
Cooling fan
The cooling fan switches on and off as required. The hot air escapes above the door. Caution: do not cover the ventilation slots. Otherwise the oven will overheat.
So that the cooking compartment cools down more quickly after operation, the cooling fan continues to run for a certain period afterwards.
Your accessories
In this section, you will find information on
■Your accessories
■the correct way to insert the accessories into the cooking compartment
■the shelf positions
■the optional accessories
Accessories
The following accessories are included with your appliance:
Wire rack
for baking in baking tins, roasting in roasting dishes and grilling
Universal pan, enamelled
for baking moist cakes, roasting, grilling and collecting drops of liquid during cooking
Insert grid
for roasting and grilling
Note: The wire insert is always used together with the universal pan. In this combination, the wire insert is placed in the universal pan.
Note: The baking tray and universal pan may become distorted when the appliance is in operation. This is caused by the considerable temperature differences acting on the accessories. These differences may occur if only a part of the accessory is covered with food, or if frozen items such as pizza are placed on the accessory.
Inserting accessories
The accessories are equipped with a locking function. The locking function prevents the accessories from tilting when they are pulled out. The accessories must be inserted into the cooking compartment correctly for the tilt protection to work properly.
When inserting the wire rack, check
■that the lug (a) is pointing downwards
■that the lug (a) is in the rear part of the wire rack
D |
D |
|
When inserting the baking tray or the universal pan, check
■that the lug (a) is in the rear part of the of the accessory
■that the sloping edge of the accessory faces towards the appliance door when it is inserted
D |
D |
Shelf positions
The cooking compartment has four shelf heights. The shelf heights are counted from the bottom up.
7
Note: Do not use shelf height 2 when baking and roasting with 3 CircoTherm®. This will adversely affect air circulation and your baking and roasting results will not be as good.
Optional accessories
You can purchase optional accessories from the after-sales service or specialist retailers. You will find a comprehensive range of products for your appliance in our brochures and on our website.
The availability of special accessories and whether it is possible to order them online may vary depending on your country. Please see the sales brochures for more details.
Not all optional accessories are suitable for every appliance. When purchasing, please always quote the exact designation (E-no.) of your appliance.
Optional accessories |
Order no. |
|
|
Mega system steamer |
N8642X3 |
|
|
Universal pan, enamelled |
Z1232X3 |
|
|
Universal pan, non-stick |
Z1233X3 |
|
|
Universal pan with wire insert |
Z1242X3 |
Optional accessories |
Order no. |
|
|
Extra-deep pan, enamelled |
Z1272X0 |
|
|
Baking tray, aluminium |
Z1332X0 |
|
|
Baking tray, enamelled |
Z1342X0 |
|
|
Baking tray, non-stick |
Z1343X0 |
|
|
Pizza tray |
Z1352X0 |
|
|
Baking and roasting shelf |
Z1432X3 |
|
|
Roasting tray, enamelled, two-piece |
Z1512X0 |
|
|
CLOU® 1x telescopic shelf |
Z1701X2 |
|
|
CLOU® 2x telescopic shelf |
Z1765X2 |
|
|
CLOU® 3x telescopic shelf |
Z1742X2 |
|
|
CLOU® 3x telescopic shelf with full exten- |
Z1745X2 |
sion |
|
|
|
CLOU® 4x telescopic shelf with full exten- |
Z1755X2 |
sion |
|
|
|
VarioCLOU® telescopic shelf with full exten- |
Z1785X3 |
sion |
|
|
|
Bread-baking stone |
Z1913X0 |
|
|
Before using the appliance for the first time
In this section, you can read about
■How to set the clock after connecting up your appliance
■How to clean your appliance before using it for the first time
Setting the clock
Note: When you press the KJ clock function button, you have 3 seconds to set the clock using the rotary selector. Should this have been insufficient for you, you can amend the clock time later.
‹:‹‹ flashes in the clock display.
1.Briefly press the KJ clock function button to go to the setting mode.
The KJ and 3 symbols light up. ‚ƒ:‹‹ appears in the clock display.
2.Set the current time using the rotary selector. Your setting is accepted after 3 seconds.
Changing the clock
To subsequently change the time, press the KJclock function button repeatedly until the KJ and 3 symbols light up again. Change the time with the rotary selector.
Cleaning the appliance
Clean your appliance before using it for the first time.
1.Remove accessories and any remaining packaging from the cooking compartment.
2.Clean the accessories and cooking compartment with hot soapy water (see section: Cleaning and care).
3.Heat with % Top/bottom heat at 240°C for 60 minutes.
4.Afterwards, wipe the cooled cooking compartment with hot, soapy water.
5.Clean the outside of the appliance with a soft, damp cloth and soapy water.
8

Operating the appliance
In this section, you can read about
■how to switch your appliance on and off
■how to select an operating mode and temperature
■how you can change the basic settings
■when your appliance switches off automatically
Switching on the appliance
1.Turn the operating mode selector until the desired operating mode is selected.
A default temperature appears in the temperature display.
2.Turn the temperature selector to change the default temperature.
Notes
■The / Low-temperature cooking operating mode can only be switched on if neither • nor œ is displayed.
■If no default temperature is displayed, the temperature for your selected operating mode is a fixed setting. You cannot change this temperature.
Operating mode |
Default temper- |
Temperature |
|
|
|
ature in °C |
range in °C |
|
|
|
|
3 |
CircoTherm® |
160 |
40 - 200 |
|
|
|
|
% |
Top/bottom heat |
170 |
50 - 275 |
|
|
|
|
0 |
Circotherm intensive |
220 |
50 - 275 |
|
|
|
|
4 |
Circo-roasting |
170 |
50 - 250 |
|
|
|
|
+ |
Full-surface grill |
220 |
50 - 275 |
|
|
|
|
|
Full-surface grill |
Fixed setting |
‚Ÿ£ |
|
(intensive)* |
|
|
|
|
|
|
( |
Centre-area grill |
180 |
50 - 275 |
|
|
|
|
|
Centre-area grill |
Fixed setting |
‚Ÿ£ |
|
(intensive)* |
|
|
|
|
|
|
$ |
Bottom heat |
200 |
50 - 225 |
|
|
|
|
/ |
Low-temperature |
Fixed setting |
|
|
cooking |
|
|
|
|
|
|
“ |
CircoTherm® eco |
160 |
40 - 200 |
|
|
|
|
x |
Pyrolytic cleaning |
0 |
1, 2 and 3 |
|
|
|
|
^ |
Interior lighting |
Fixed setting |
|
* Turn the temperature selector beyond 275 °C. ‚Ÿ£ appears in the temperature display
Current temperature
Press the ± info button. The current temperature appears for 3 seconds.
Note: The current temperature can only be displayed with operating modes with a default temperature.
Heating indicator
The heating indicator displays the rising temperature in the cooking compartment.
■Temperature reached (figure A)
■Appliance reheating (figure B)
$ %
Switching off the appliance
Turn the operating mode selector to the Û position. The appliance is switched off.
The appliance has a cooling fan. After the appliance is switched off, the cooling fan may continue to run.
You can see in the temperature display whether there is high or low residual heat in the cooking compartment.
Temperature dis- |
Meaning |
play |
|
|
|
• |
Residual heat high (above 120 °C) |
|
|
œ |
Residual heat low (between |
|
60 °C and 120 °C) |
Changing the basic settings
Your appliance has various basic settings, which are preset at the factory. You can, however, change these basic settings as required.
The appliance must be switched off and controls must not be locked.
1.Press and hold the ± info button for 3 seconds to go to the basic settings menu.
In the temperature display, ™‚‹ appears.
2.Press the ± info button briefly and repeatedly until the setting symbol for the current basic setting of a submenu is displayed in the temperature display (e.g. ™„ƒ).
3.Using the temperature selector, set the required basic setting within a submenu (e.g. ™„„).
4.Press and hold the ± info button for 3 seconds. Your basic setting is saved.
You can change the following basic settings:
Basic settings menu |
|
|
Submenu |
Basic setting |
Setting |
|
|
symbol |
|
|
|
Childproof lock |
Appliance controls |
™‚‹ |
|
unlocked |
|
|
|
|
|
Appliance controls locked |
™‚‚ |
|
|
|
|
Appliance controls perma- |
™ƒ‚ |
|
nent lock |
|
|
|
|
Audible signal |
Audible signal off |
™„‹ |
|
|
|
|
Audible signal 30 seconds |
™„‚ |
|
|
|
|
Audible signal 2 minutes |
™„ƒ |
|
|
|
|
Audible signal 10 minutes |
™„„ |
|
|
|
Automatic safety cut-out
The automatic safety cut-out is activated if your appliance is switched on and you have not made any settings for a long time.
The length of time after which your appliance switches itself off depends on the settings that you make.
‹‹‹ flashes in the temperature display. Appliance operation is interrupted.
Turn the operating mode selector to the Û position to deactivate it.
9

Electronic clock
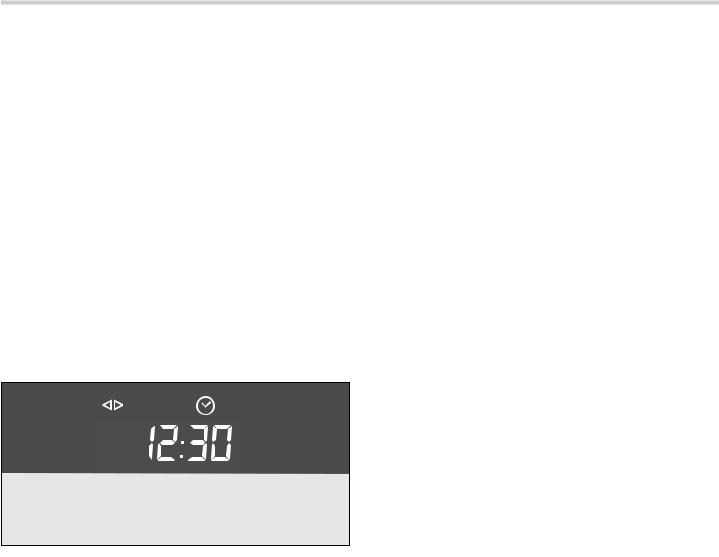
In this section, you can read about |
Clock display |
■how to set the timer
■how to switch your appliance off automatically (cooking time and end of operation)
■ how to switch your appliance on and off automatically (preset operation)
■
■
how to set the time
find out how to activate rapid heat up
|
|
&ORFN IXQFWLRQ EXWWRQ 5RWDU\ VHOHFWRU |
|
|
|
Clock function |
Use |
|
|
|
|
Q |
Timer |
You can use the minute minder as an egg timer or a kitchen timer. The appliance does |
|
|
not switch on or off automatically |
|
|
|
x |
Cooking time |
The appliances switches off automatically after a cooking time setting has elapsed |
|
|
(e.g. ‚:„‹ hours) |
|
|
|
y |
End of operation |
The appliance switches off automatically at a set time (e.g. ‚ƒ:„‹ ) |
|
|
|
|
Preset operation |
The appliance switches on and off automatically. Cooking time and end of operation |
|
|
have been combined. |
|
|
|
3 |
Clock |
Setting the clock |
|
|
|
f |
Rapid heat up |
Shortens the heat up time |
|
|
|
Notes
■Between the times ƒƒ:‹‹ and †:†Š the clock display is dimmed if you do not make any settings in that period or no clock function is activated.
■When you set a clock function, the time interval increases when you set higher values (e.g. cooking time up to‚:‹‹œ to the minute, using ‚:‹‹œ
to the nearest 5 minutes).
■For the Q minute minder, x cooking time, y end of operation and preselection mode clock functions, a signal sounds when the settings have elapsed and the Q or y symbol flashes. To cancel the audible signal before it ends, press the KJ clock function button.
■Briefly press the KJ clock function button to select a clock function. You then have 3 seconds to set the selected clock function. After this time, the setting mode is exited automatically.
Switching the clock display on and off
1.Press and hold the KJclock function button for 6 seconds.
The clock display switches off. If a clock function is active, the associated symbol remains lit.
2.Press the KJclock function button briefly. The clock display switches on.
Cooking time
Automatic switch-off after a cooking time setting has elapsed.
1.Set the operating mode and temperature. The appliance heats up.
2.Press the KJclock function button repeatedly until the KJand x symbols light up.
3.Set the cooking time with the rotary selector (e.g. ‚:„‹ hours).
The setting is applied automatically. The time is then displayed again and the set cooking time counts down.
Timer
1.Press the KJclock function button repeatedly until the KJ and Q symbols light up.
2.Set the duration using the rotary selector (e.g. †:‹‹minutes).
The setting is applied automatically. Then the clock is displayed again and the minute minder starts counting down.
10
 Loading...