


HP |
DesignJet 1050C/1055CM |
Large-Format Printers |
|
|
|
Service Manual

For HP Internal Use Only |
Warranty |
©Copyright Hewlett-Packard
Company 1999
This document contains proprietary information that is protected by copyright. All rights are reserved. No part of this document may be photocopied, reproduced, or translated to another language without the prior written consent of HewlettPackard Company.
First Edition, March 1999
The information contained in this document is subject to change without notice.
Hewlett-Packard makes no warranty of any kind with regard to this material, including, but not limited to, the implied warranties of merchantability and fitness for a particular purpose.
Hewlett-Packard shall not be liable for errors contained herein or for incidental or consequential damages in connection with the furnishing, performance, or use of this material.
WARNING
The procedures described in this manual are to be performed by HP-qualified service personnel only.
Electrical Shock Hazard
Serious shock hazard leading to death or injury may result if you do not take the following precautions:
-Ensure that the ac power outlet (mains) has a protective earth (ground) terminal.
-Disconnect the Printer from the power source prior to performing any maintenance.
-Prevent water or any other liquids from running onto electrical components or circuits, or through openings in the enclosure.
Electrostatic Discharge
Refer to the beginning of Chapter 8 of this manual, for precautions you should take to prevent damage to the Printer circuits from electrostatic discharge.
Safety Symbols
General definitions of safety symbols are given immediately after the table of contents.
WARNING
The Warning symbol calls attention to a procedure, practice, or the like, which, if not correctly performed or adhered to, could result in personal injury. Do not proceed beyond a Warning symbol until the indicated conditions are fully understood and met.
CAUTION
The Caution symbol calls attention to an operating procedure, practice, or the like, which, if not correctly performed or adhered to, could result in damage to or destruction of part or all of the product. Do not proceed beyond a Caution symbol until the indicated conditions are fully understood and met.
Technical Marketing,
Barcelona Division, Hewlett-Packard Espanola, S.A. Avda. Graells, 501
08190 Sant Cugat del Valles Spain
HP |
DesignJet 1050C/1055CM |
Large-Format Printers |
|
|
|
Service Manual

Using this Manual
Purpose
This Service Manual contains information necessary to test, calibrate and service:
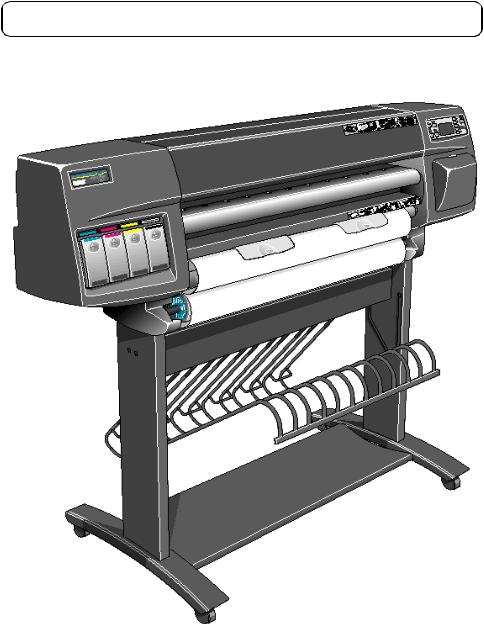
nHP DesignJet 1050C Printer (Model C6074A)
nHP DesignJet 1055CM Printer (Model C6075A)
For information about using these printers, refer to the corresponding User and Quick Reference Guides.
Readership
The procedures described in this Service Manual are to be performed by HP Certified service personnel only.
Part Numbers
Part Numbers for Printer options, accessories and service parts are located in Chapter 7.
Conventions
A small arrow Þ is used to indicate other parts of the Service Manual where you can find information related to the topic you are consulting.
2 |
HP DesignJets 1050C and 1055CM Printers Service Manual |
|

Table of Contents
Table of Contents
Troubleshooting 1-1
Introduction 1-2
Troubleshooting System Error Codes 1-2 Performing a Service Test on a Failed Assembly 1-3 Performing the Necessary Service Calibrations 1-3 Solving Image Quality Problems 1-3
Front-Panel LEDs Flash Briefly at Power ON & Nothing Else Happens 1-4 The Printer does not Power ON 1-5
ALL the Front-Panel LEDs are Lit but Nothing Else Happens 1-5 One of the Print Quality LEDs on the Front Panel is Lit (and nothing else) and the "SELF TEST..." Message Remains on the Front Panel 1-5 The Printer Continuously Rejects Printheads 1-6
Cover Sensors are not Working 1-6
The Line Sensor has Problems Detecting Media 1-6 Troubleshooting Media Jams/Printhead Crashes 1-7 Troubleshooting Shutdowns 1-7
Problems with the Vacuum Fan 1-9
Vacuum suction much lower at high altitudes 1-9
Bin marks on prints done on HP High Gloss media 1-9
Printhead Crashes/Smears on High Density Prints Using Coated Media 1-10 Color changes when stacking prints done on HP High Gloss Media 1-10 HP-GL/2 color differences in different HP DesignJet Printers 1-11 Scratches on prints done on NTP, Vellum and HP High Gloss media 1-11 Banding at variable extreme environmental conditions 1-12 Banding due to Ink Cartridge replacement while printing 1-12 Long term bleed and hue shift on HP High Gloss media 1-12 Lower image gloss directly after printing on HP High Gloss Photo Paper 1-13 34" Rice Paper not supported 1-13
Cut Sheet rice paper loading failure 1-13
Worm marks on HP Coated media with light area fills 1-13 Solving Media-Handling Problems 1-14
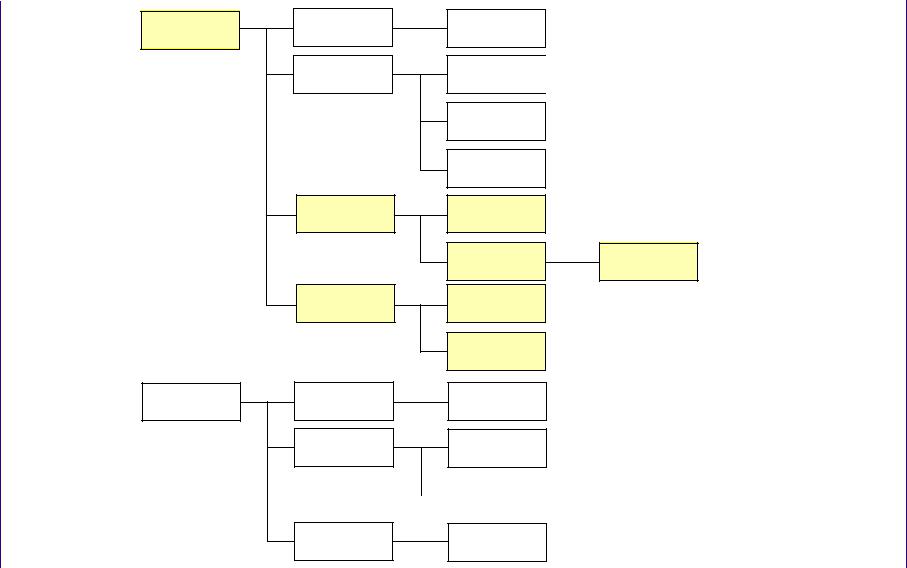
How to Navigate through the Front-Panel Menu 1-15 Service Configuration Print 1-19
HP DesignJets 1050C and 1055CM Printers Service Manual |
3 |
|

Table of Contents
System Error Codes 2-1
Introduction 2-2
Continuable and Non-Continuable Error Codes 2-2
System Error Codes During Initialization 2-18
HP No.80 Ink Supplies Troubleshooting 3-1
What are HP No.80 Supplies? 3-2
Ink Cartridges 3-2
Printheads and Printhead Cleaners 3-2
Identifying the Components 3-3
General Information About HP No.80 Supplies 3-4
Some General Precautions When Handling HP No.80 Supplies 3-5
Priming the Ink System 3-6
When Should You Replace the HP No.80 Supplies? 3-6
The Front Panel Display 3-7
Obtaining Ink Cartridge Information 3-8
Obtaining Printhead Information 3-9
Ink Cartridge Status Messages 3-11
Ink Cartridge Status While Printing 3-11
Ink Cartridge Status While Replacing 3-12
Printhead Status Messages While Printing 3-13
Printhead Status Messages While Replacing 3-15
Summary of Solving HP No.80 Supplies Problems 3-17
Carriage Interconnect Wiper 3-18
4 |
HP DesignJets 1050C and 1055CM Printers Service Manual |
|

Table of Contents
Service Tests and Utilities 4-1
Service Tests (Diagnostics) 4-3
Entering the Service Tests Menu 4-4
1.Electronic Systems 4-5
2.EIO Card 4-10
3.Hard Disk Drive 4-12
4.Ink Pressure System 4-14
5.Scan Axis 4-17
6.Paper Axis 4-20
7.Drop Detector 4-22 Service Utilities 4-25
Entering the Service Utilities Menu 4-26
1.Tubes Purge 4-28
2.Release Info 4-32
3.Set Asian PS Fonts 4-33
4.Printer Model Type 4-35
5.Overdrive Cleaning 4-37
6.EEROM Utilities 4-38
7.Printhead Check 4-41
8.Mon. Mode Baud Sel. 4-42
Service Calibrations 5-1
Service Calibrations 5-2
Entering the Service Calibrations Menu 5-4
1.Accuracy Calibration 5-6
2.Line Sensor 5-9
3.Service Station 5-11
4.Roller Mark Position 5-13
5.Pen to Paper Spacing 5-15
6.Color to Color calibration 5-16
7.Calibrations Backup 5-19
8.Pen Alignment 5-22
Carriage Height Calibration 5-24
HP DesignJets 1050C and 1055CM Printers Service Manual |
5 |
|

Table of Contents
Print Quality 6-1
Print Quality Troubleshooting Checklist 6-2
Print Modes 6-3
How to Use the Print Quality Test 6-4
What is the Print Quality Test? 6-4
Considerations for Printing the Print Quality Test. 6-4
Printing the Print Quality Test 6-4
Nozzle Print Test 6-6
How to fix the Nozzle Defects 6-7
Color Alignment Print Test 6-7
Solving the Color Alignment Problem 6-8
Overall Print Quality Test in BEST mode 6-9
What is Banding? 6-9
Solving the Banding Problem 6-10
Aligning the Printheads 6-12
Service Accuracy Calibration 6-12
Troubleshooting Print Quality Problems 6-13
Problems with Stepped Lines 6-13
Problems with printing lines 6-14
Problems with Color-to-Color Alignment 6-15
Problems with Horizontal Lines (Banding) 6-17
No Printing Defects Found in the Print Quality Test 6-21
Solving Color Accuracy problems 6-22
Color Consistency problems 6-22
Long Term Color Bleeding (Glossy Papers) 6-22
Color Accuracy Configuration 6-23
Media 6-24
There are Smears or Scratching on the Printed Media 6-24
6 |
HP DesignJets 1050C and 1055CM Printers Service Manual |
|

Table of Contents
Parts and Diagrams 7-1
Printer Support 7-2
Rear Covers 7-4
Electronics Module 7-6
Right Hand Cover 7-8
Left Hand Cover and Window 7-10
Right Hand Assemblies 7-12
ISS and APS Assembly 7-14
Clutch Assembly 7-16
Carriage Assembly 7-18
Scan-Axis Assemblies 7-20
Drive Roller and ARSS Miscellaneous Parts 7-22
Paper Path Assemblies 7-24
Pinch Assembly 7-26
Drive Roller Assemblies 7-28
Center Guide and Media Sensor 7-30
Tubes Guide Assemblies 7-32
Ordering Accessories 7-34
Removal and Installation 8-1
Introduction 8-2 Safety Precautions 8-2
Electrostatic Discharge (ESD) Precautions 8-3 Required Tools 8-3
Right Hand Cover 8-4 Front Panel Assembly 8-6
Right Hand Trim and Window Switch 8-7 Service Station Assembly 8-8
Drop Detector Assembly 8-10 Vacuum Fan 8-11
Paper-axis Motor Assembly 8-12 Left Hand Cover 8-13
Left Hand Trim Assembly 8-18
Ink Supply Station Assembly (ISS) 8-19 Air Pressurization System (APS) 8-20
Clutch Assembly and left hand miscellaneous parts 8-21 Tail Deflectors and Rear Platen 8-23
Left and Right Rear Covers 8-24
HP DesignJets 1050C and 1055CM Printers Service Manual |
7 |
|

Table of Contents
Electronics Module 8-25
Media Sensor 8-29
Window 8-30
Top Cover 8-31
Back Cover 8-32
Scan-axis Motor Assembly 8-33
Encoder Strip 8-34
Tensioner 8-37
Trailing Cable 8-39
Cutter Assembly 8-42
Carriage Assembly and Belt 8-44
Tubes System Assembly 8-53
Ink Leak Detector Assembly 8-60
Front Platen Assembly 8-62
Platen Assembly 8-63
Paper Entry Assembly 8-64
Roller Guide 8-66
Media Holder Strip 8-69
Drive Roller 8-70
Center Guide 8-71
Pinch-Wheel Assembly and Cam 8-73
Preventive Maintenance 9-1
Moisture on the Printer 9-2
Noisy Carriage Bushing 9-2
Belt Swelling 9-2
Cleaning the Printer 9-2
General Cleaning 9-2
Cleaning the Overdrive 9-3
Scheduled Maintenance 9-3
Level of Printer Usage 9-3
Scan-axis Maintenance 9-4
8 |
HP DesignJets 1050C and 1055CM Printers Service Manual |
|
Table of Contents
Functional Overview 10-1
Introduction 10-2
HP DesignJet 1050C Printer 10-2 HP DesignJet 1055CM printer 10-2 Electrical System 10-2
Power Supply Unit (PSU) 10-3 Soft Power-Off Switch 10-4 Front Panel 10-4
Ink Delivery System (IDS) 10-5 Ink Supply Station (ISS) 10-5 Tubes System 10-6
Air Pressurization System (APS) 10-7 Ink Level Sense (ILS) 10-7
Leak Detect System (LDS) 10-8 Service Station 10-9
Print Head Cleaner (PHC) 10-9 Printer Specifications 10-12 Printable Area 10-16
Interface Specifications 10-17 Regulatory Notices 10-18
To Obtain a Material Safety Data Sheet (MSDS) 10-18 Sound 10-18
Electro-Magnetic Compatibility (EMC) 10-18 VCCI Class A and Class B (Japan) 10-21 Declaration of Conformity 10-22 www.designjet-online.hp.com 10-23
Glossary
Index
HP DesignJets 1050C and 1055CM Printers Service Manual |
9 |
|

Table of Contents
10 |
HP DesignJets 1050C and 1055CM Printers Service Manual |
|

Troubleshooting 1
Introduction 1-2
Troubleshooting System Error Codes 1-2
Performing a Service Test on a Failed Assembly 1-3
Performing the Necessary Service Calibrations 1-3
Solving Image Quality Problems 1-3
Front-Panel LEDs Flash Briefly at Power ON & Nothing Else Happens 1-4
The Printer does not Power ON 1-5
ALL the Front-Panel LEDs are Lit but Nothing Else Happens 1-5
One of the Print Quality LEDs on the Front Panel is Lit (and nothing else) and the "SELF TEST..." Message Remains on the Front Panel 1-5
The Printer Continuously Rejects Printheads 1-6 Cover Sensors are not Working 1-6
The Line Sensor has Problems Detecting Media 1-6 Troubleshooting Media Jams/Printhead Crashes 1-7 Troubleshooting Shutdowns 1-7
Problems with the Vacuum Fan 1-9
Vacuum suction much lower at high altitudes 1-9
Bin marks on prints done on HP High Gloss media 1-9
Printhead Crashes/Smears on High Density Prints Using Coated Media 1-10 Color changes when stacking prints done on HP High Gloss Media 1-10 HP-GL/2 color differences in different HP DesignJet Printers 1-11 Scratches on prints done on NTP, Vellum and HP High Gloss media 1-11 Banding at variable extreme environmental conditions 1-12
Banding due to Ink Cartridge replacement while printing 1-12 Long term bleed and hue shift on HP High Gloss media 1-12
Lower image gloss directly after printing on HP High Gloss Photo Paper 1-13 Cut Sheet rice paper loading failure 1-13
34" Rice Paper not supported 1-13
Worm marks on HP Coated media with light area fills 1-13 Solving Media-Handling Problems 1-14
How to Navigate through the Front-Panel Menu 1-15 Service Configuration Print 1-19
HP DesignJets 1050C and 1055CM Printers Service Manual |
1-1 |

Troubleshooting
Guide to Troubleshooting the Printer
Introduction
This chapter will guide you through the relevant steps to take when troubleshooting the printer.
Troubleshooting System Error Codes
Chapter 2 - System Error Codes contains a list of system error codes and their respective descriptions and recommended corrective actions. Only try one recommended action at a time and check if the error code has disappeared.
If you have an error code which is not documented in this Service Manual or you have an error which you cannot resolve, then report the error to the HP Response Center or the nearest HP Support Office. When reporting the error, have the following information ready:
nModel and Serial Number of the printer.
nWhich firmware revision the printer is using (See Note below). Check firmware in Utilities / Statistics / Code rev.
nThe complete error number (See Note below).
nThe Service Configuration Print Þ Page 1-19
nThe Current configuration sheet.
nWhich software application the customer is using (name, version, etc.).
NOTE |
When reporting the System Error Code, make sure that you |
|
supply the full Error Code (including the last 8 numbers where |
|
applicable) and the firmware version. Without this information, |
|
HP Support Personnel cannot help you. |
|
|
1-2 |
HP DesignJets 1050C and 1055CM Printers Service Manual |

NOTE
NOTE
Troubleshooting
Performing a Service Test on a Failed Assembly
If possible, always perform a Service Test on the component/ assembly that you are about to replace, just to make sure that is the component/assembly that has failed.
If the test on that component/assembly passes, you should NOT replace it.
For information on the Service Tests and how to use them see Chapter 4 - Service Tests and Utilities.
Performing the Necessary Service Calibrations
Is the printer calibrated correctly after replacing a component? Refer to the table on Page 5-2 to determine when a calibration is required.
Remember that certain Calibrations are required even if an Assembly has been disassembled to gain access to another Assembly or Component.
For information on the Service Calibrations and how to use them see Chapter 5 - Service Calibrations.
Solving Image Quality Problems
Whenever an Image Quality problem appears, it is advisable to print the Image Quality Print to help diagnose the problem. The Image Quality Print will help you differentiate between possible printhead errors and other problems such as incorrect front-panel selection, driver or RIP configuration or mechanical problems. For information on solving Image Quality problems see Chapter 6 -
Print Quality.
HP DesignJets 1050C and 1055CM Printers Service Manual |
1-3 |

Troubleshooting
Front-Panel LEDs Flash Briefly at Power ON &
Nothing Else Happens
The Power Supply detects a Short and shuts down the Power.
1The Hard Disk Drive or the Network Card could be faulty. Troubleshoot the problem as follows:
a If the Printer has a Hard Disk Drive and/or a Network card installed, switch the Printer OFF from the back of the Printer, and remove them both.
b Switch the Printer ON again.
c If the Printer functions correctly now, switch the Printer OFF again and reinstall the Network Card correctly, making sure that the two installation screws are completely tightened.
NOTE |
If the Printer DOES NOT function correctly with the Hard Disk |
|
|
Drive and the Network Card removed, then you must replace the |
|
|
Electronics Module. |
|
|
d Switch the Printer ON again |
|
|
||
|
e |
If the Printer functions correctly with the Network Card installed, |
|
|
switch the Printer OFF again. |
|
If the Printer DOES NOT function correctly with the Network |
|
NOTE |
||
|
Card installed, then you must replace it. |
|
|
f |
Reinstall the Hard Disk Drive correctly, making sure that the two |
|
||
|
|
installation screws are completely tightened. |
|
g |
Switch the Printer ON again |
|
h Check if the Printer functions correctly with the Hard Disk Drive |
|
|
|
installed. |
|
If the Printer DOES NOT function correctly with the Hard Disk |
|
NOTE |
||
|
Drive installed, then you must replace it. |
|
|
|
|
2Make sure that none of the cables connected to the Electronics Module have been pinched between the cover and the sideplate.
1-4 |
HP DesignJets 1050C and 1055CM Printers Service Manual |

Troubleshooting
The Printer does not Power ON
1Check that the power cord is connected correctly to the Printer and to the Power Socket.
2Check that the Firmware DIMM is installed correctly in the correct slot (the first slot from the right) at the back of the Printer.
3Check that the Power Switch on the BACK of the Printer is in the ON position.
4Check that the Front-Panel Cable is correctly connected to the Electronics Module. Also make sure that the Front-Panel cable is not damaged.
ALL the Front-Panel LEDs are Lit but Nothing Else Happens
The Firmware DIMM is NOT correctly installed.
1Power OFF the Printer from the back and disconnect the power cord. Reseat the Firmware DIMM (the first slot from the right) making sure that it is installed correctly.
One of the Print Quality LEDs on the Front Panel is Lit (and nothing else) and the "SELF TEST..." Message Remains on the Front Panel
One of the DRAM DIMMs is NOT correctly installed or Faulty.
1Power OFF the Printer from the back and disconnect the power cord. Reseat both Firmware DIMMs (the first two slots from the left) making sure that they are installed correctly. If reseating the DRAM DIMMs does not solve the problem, replace them instead.
HP DesignJets 1050C and 1055CM Printers Service Manual |
1-5 |

Troubleshooting
The Printer Continuously Rejects Printheads
1Clean the flex contacts on the Printhead and in the Carriage Assembly using the Carriage Interconnect Wiper (Refer to Chapter 3) and try again.
2If ALL the Printheads are rejected (the status message on the Front
Panel does NOT show "OK" for all the Printheads) then perform the Electronic Systems Test Þ Page 4-5.
Cover Sensors are not Working
1Check if the faulty sensor is installed correctly.
2Check if the cable for the faulty sensor is connected correctly.
3Replace the faulty Sensor.
The Line Sensor has Problems Detecting Media
1Check the type of media that is being used since the Line sensor may have problems detecting transparent media or some types of Non-HP media. Try loading white HP media in to the Printer and check if the Line sensor detects it.
2Excessive ink deposits on the Platen surface can fool the sensor by reflecting the light. Clean the Platen.
3The Line Sensor is not calibrated correctly. Perform the Line Sensor calibration Þ Page 5-9.
4The Line Sensor is damaged or faulty. Replace the Carriage Assembly Þ Page 8-44.
1-6 |
HP DesignJets 1050C and 1055CM Printers Service Manual |

|
Troubleshooting |
|
|
|
Troubleshooting Media Jams/Printhead Crashes |
|
If using HP Coated Media when problem occurred, please also |
NOTE |
|
|
refer to Page 1-10, Printhead Crashes/Smears on High Density |
|
Prints Using Coated Media. |
|
|
The failure modes "media jam" and "head crash" are grouped together because in many cases a media jam causes the media to lift up into the carriage path and cause a head crash, thus causing many media jam failures to be reported as head crashes.
1Did the media jam occur when loading media?
n If the client has had media jams, it is common for pieces of media to get stuck in the media path. Clear the media path.
NOTE |
When clearing a media jam, sometimes media is stuck in the |
|
paper path. To clear this, you must lift the media load handles |
|
and insert thicker media into the paper path to push out the |
|
media that is still stuck there. |
|
|
2Is the customer using non-HP media?
n The use of non-HP media can easily be the cause of media jams and head crashes (especially head crashes because HP media is specially formulated to avoid cockle, one of the primary causes of head crashes). If the media is not HP approved, advise the customer to use HP media and check to see if the problem is now solved.
3The Carriage is at the incorrect height in relation to the Center Platen. Adjust the carriage to the correct height Þ Page 5-24 and try to load the media again.
4Check that the Vacuum Fan works correctly - Refer to Page 1-9, Problems with the Vacuum Fan.
Troubleshooting Shutdowns
If a shutdown occurs, you will get the message "Switch Power Off" followed by:
nCheck Printhead Cleaner Path.
nCheck Paper Path.
nCheck Printhead Path (followed by (1), (2) or (3)).
A shutdown in each path will require different steps to resolve the
HP DesignJets 1050C and 1055CM Printers Service Manual |
1-7 |

Troubleshooting
|
problem as explained as follows. |
|
In each case, make sure that you power OFF the printer before |
WARNING |
|
|
attempting any procedures to resolve the problem. |
|
|
Printhead Cleaner Path
1Open the right door of the printer and check for any visible obstacles restricting the movement of the Service Station. Manually move the Service Station, checking for smooth and free movement.
Paper Path
1Open the Window and check for any visible obstacles restricting the movement of the Drive Roller. If there is a wrinkled mass of media inside the paper path, lift the Pinch wheels (using the Media Load
Handles) and clear the obstruction. If you cannot reach the media, remove the Electronics Module (Þ Page 8-25) and the Roller Guide (Þ Page 8-66) from the Rear of the Printer to gain better access.
2If this shutdown happens at the end of a Roll of Media, it could be because the media is stuck firmly to the Roll. Lift the Pinch wheels (using the Media Load Handles) and pull the media clear.
3Replace media spindle if broken.
4Replace the Paper-Axis Motor Þ Page 8-12.
Printhead Path
When a shutdown occurs in the Printhead path, you will get the message "Switch Power Off / Check Printhead Path (*). The (*) will be a number, which will give an indication on where the failure occurred:
PWM Shutdown (1) and Energy Shutdown (3)
1Clean Slider Rods and Apply Oil along the complete axis of the Slider Rods. After applying the Oil, perform the Scan-Axis Test Þ Page 4-17 and check that the values are within the given limits.
2Replace the Scan-Axis Motor Þ Page 8-33.
Velocity Shutdown (2)
1Open the Window and check for any visible obstacles restricting the movement of the Carriage Assembly. Try and move the Carriage Assembly manually, checking for smooth and free movement.
2Check that the Encoder Strip is clean. If necessary, clean Encoder Strip using a damp cloth.
1-8 |
HP DesignJets 1050C and 1055CM Printers Service Manual |
Troubleshooting
Problems with the Vacuum Fan
If you have problems loading either Roll or Sheet Media, then there could be a problem with the Vacuum Fan. To verify if there really is a problem with the Vacuum Fan, try the following:
1With the Printer ON, open the Window of the Printer and place a sheet of HP High Gloss Photo Paper (must be D-Size), aligned with the blue lines on the Center Platen. If the Vacuum Fan holds the sheet in place, and then loads it correctly, then the Vacuum Fan functions correctly. If the Vacuum Fan does not hold the sheet in place (no suction), then try the following:
n Check that the holes in the Center Platen are NOT blocked. n Check that the Vacuum Fan is installed correctly.
n Replace the Vacuum Fan Þ Page 8-11.
2If the Vacuum Fan held the sheet in place, but couldn’t correctly
load it, then there could be a problem with the Overdrive. In this case, replace the Platen Assembly Þ Page 8-63.
Vacuum suction much lower at high altitudes
At altitudes above 3,000 meters, the vacuum force holding down the media will be lower, therefore the media will not be held in place properly causing:
nInk Smearing on the Media.
nPrinthead crashes against the Media.
nCut Sheet loading problems (high probability).
nRoll Media loading problems (low probability).
PRINTER LIMITATION - NO SOLUTION AVAILABLE.
Bin marks on prints done on HP High Gloss media
Prints done on HP High Gloss media are sensitive to scratches when they fall into the media bin. To solve the problem, try the following:
nAdvise the customer to install the Media Bin cover, that was included with the Printer, to avoid this problem.
nIf possible, advise the customer to hold the prints and prevent them from falling in to the bin.
HP DesignJets 1050C and 1055CM Printers Service Manual |
1-9 |

Troubleshooting
Printhead Crashes/Smears on High Density Prints
Using Coated Media
High density prints can cause cockle mainly on HP Coated Media. This causes two main problems:
1.Cockling in the borders - Because the printer places too much ink on the Coated Media, the borders of the print become raised, causing the Printhead to crash against the media. To solve the problem, try the following:
nCheck in the Front Panel if Ink Limiting is ON or OFF. If Ink Limiting is OFF, turn it ON.
nChange the paper margins to 15mm, either in the Front Panel or in the Driver. If the customer is printing PostScript images, send them a PPD file containing the extended margins of 15mm.
2.Cockling within the print - If the Printer places too much ink within the print, the media starts to ripple, causing the Printhead to smear against the media. To solve the problem, try the following:
nCheck in the Front Panel if Ink Limiting is ON or OFF. If Ink Limiting is OFF, turn it ON.
nNever use HP Coated Media for High Density prints. As a substitute use HP Heavy Coated Media.
Color changes when stacking prints done on HP High Gloss Media
Color differences can be seen between the covered and uncovered part of a print done on HP High Gloss Media. This is because the part of the print exposed to the air is always lighter than the covered one. The ink on the covered part of the print cannot evaporate therefore the ink continues to diffuse creating larger ink dots. To solve the problem, try the following:
nAllow the print to absolute drying completion before stacking. Depending on the ink percentage, this can take from 10 minutes up to 3 hours.
nCreating dryer environmental conditions helps reduce the problem. To find the environmental conditions, print the Service Configuration Print (Printer Setup Menu / Utilities / Test prints /
Service config)
1-10 |
HP DesignJets 1050C and 1055CM Printers Service Manual |

Troubleshooting
HP-GL/2 color differences in different HP DesignJet Printers
Color differences between one image printed on the HP DesignJet 1000 Series and the rest of the DesignJet platforms are due to the different chemistry of the 1000 series inks compared with the rest of the inks for other printers. This color variability among different HP DesignJet Series Printers has been always present. To solve the problem, try the following:
nPerform the color calibration from the driver at the time of printing. However, that calibration is not very accurate but it may help in the most severe cases.
nSome applications have color controls for the user to modify the image in order to obtain the desired colors.
nPrinting with PostScript reduces the problem significantly.
nAvoid very long exposures to extreme environmental conditions after printing with glossy media (more than 12 hours at 80% humidity may result in severe changes in color).
Scratches on prints done on NTP, Vellum and HP High Gloss media
Normally at the end of a roll, the curl on the media is high and the printed area can touch the media load handles or the media roll, transferring ink to the "still-not-printed" media or damaging the actual print. This problem mainly affects Natural Tracing Paper (NTP), Vellum and HP High Gloss Media. To solve the problem, try the following:
nIncrease the Dry Time using the Front Panel (Refer to the User’s Guide - Chapter 3 Working with Paper).
nInstall a new roll of media.
HP DesignJets 1050C and 1055CM Printers Service Manual |
1-11 |

Troubleshooting
Banding at variable extreme environmental conditions
Since the Accuracy Calibration has been done at normal environmental conditions, printing in extreme environmental conditions will cause banding because the advance of the Drive Roller does not correspond to the same conditions that the calibration was done in. To solve the problem, try the following:
nPerform the Accuracy Calibration in the new environmental conditions (Refer to the User’s Guide - Chapter 8 Reconfiguring your Printer).
Banding due to Ink Cartridge replacement while printing
A user has removed the Ink Cartridge while the printer was printing, which has caused the printer to stop. If the user does not replace the Ink Cartridge immediately, when the printer starts to print again, a band will appear in the position where the printing restarted. This is because the wet ink interacts with the dried ink on the media causing the band to appear. To solve the problem, try the following:
nDo NOT remove the Ink Cartridge while the Printer is Printing. Only replace/remove Ink Cartridges in between Prints.
nIf the Ink Cartridge was replaced due to the "Empty" status on the Front Panel, then advise the customer to replace the Ink Cartridge when the "Very Low" status is showing on the Front Panel.
Long term bleed and hue shift on HP High Gloss media
Under high humidity conditions (approx. >65%) the water trapped in the air can easily be absorbed by the highly hydrophilic media coating polymers. That allows the dye to migrate through the coating and causes bleeding. This problem is especially noticeable with the colors that require Magenta. To solve the problem, try the following:
nReduce the level of humidity (<65%) that the Printer is working in. To find the humidity level, print the Service Configuration Print (Printer Setup Menu / Utilities / Test prints / Service config).
1-12 |
HP DesignJets 1050C and 1055CM Printers Service Manual |

Troubleshooting
Lower image gloss directly after printing on HP High
Gloss Photo Paper
Lower gloss appearance of the print when the media is drying which gradually disappears to get the final gloss level (between 10 and 60 minutes depending on the ink density). Try the following:
n Wait at least 60 minutes to achieve the high gloss appearance.
34" Rice Paper not supported
Roll length is 34" (Non-standard) and the pinch wheels can’t control edge of media causing ink smears and Printhead crashes in middle of prints with or without area fills.
PRINTER LIMITATION - NO SOLUTION AVAILABLE.
Cut Sheet rice paper loading failure
Thin rice paper is sucked into the Center Platen grooves and Linear Blade Ridge. This implies that the friction between the Center Platen and the rice paper becomes higher than between the Overdrive wheels and the paper. This effect make it almost impossible to load the rice paper correctly because the Vacuum is too high.
PRINTER LIMITATION - NO SOLUTION AVAILABLE.
Worm marks on HP Coated media with light area fills
Light bands (S-shaped) in Paper axis direction where light area fills are printed, causing unacceptable Image Quality defect.
nPrint the Service Configuration Print (Þ Page 1-19) and check if the level of Humidity is very low (below 30%). Increasing humidity may help in reducing the severity of the problem.
NOTE |
The media is causing the problem and NOT the Printer. Do not |
|
attempt to try and replace Printer parts to solve this problem. |
|
|
HP DesignJets 1050C and 1055CM Printers Service Manual |
1-13 |

Troubleshooting
|
Solving Media-Handling Problems |
|
The Front Panel Keeps Indicating that Media Is Misaligned or |
|
Incorrectly Positioned |
Roll media |
n The roll may be loaded the wrong way. The paper should load |
|
over the roll toward you. |
|
n The paper may be loaded at an angle. The right-hand edge must |
|
be parallel to the white line on the paper entry roller. |
|
Ensure that the paper is wrapped tightly on the roll. This is a |
WARNING |
|
|
very important step to remember because if this is not done, the |
|
media may be loaded at an angle, causing the media to be |
|
rejected. |
|
n Perform the manual alignment procedure (Refer to the User’s |
|
|
|
Guide). |
|
n Check that the paper is correctly loaded onto the spindle. |
Sheet media |
n It must be loaded with the right-hand edge against the blue |
|
perforated line on the printer. |
|
n The media may be crumpled or warped or may have irregular |
|
edges. |
|
n If you are using hand-cut media, the edges may not form a right- |
|
angle or they may be rough. Do not use hand-cut media. Use only |
|
purchased sheet media. |
|
n If the media you are trying to load is very slippery, hold the |
|
media with both hands, and gently push the media into the printer |
|
until it buckles upwards in the middle, this will help the printer to |
|
load it. |
|
n If the overdrive is covered in dust, it will have problems picking |
|
up the sheet media during the load process. Clean the Overdrive |
|
using the Overdrive Cleaning Service Utility Þ Page 4-37. |
1-14 |
HP DesignJets 1050C and 1055CM Printers Service Manual |

Manual Service Printers 1055CM and 1050C DesignJets HP
15-1
Queuing & Nesting |
|
|
Queuing Management |
|
|
O. K. |
|
|
Copies |
|
|
|
|
|
|
|
|
|
|
|
|
|
|
|
|
|
|
|
|
|
|
|
|
|
|
Queue |
|
|
On, Off |
|
|
Statistics |
|
|
|
|
|
|
|
|
|
|
|
|
|
|
|
|
|
|
|
|
|
|
|
|
|
|
Nest |
|
|
Off |
|
|
Move to top, |
|
|
|
|
|
|
|
|
Delete page |
|
||
|
|
|
|
|
|
|
|
|
|
|
|
|
|
|
|
|
|
|
|
|
|
|
|
|
|
|
|
In order, Optimal |
|
|
99 ... 2, 1 min |
|
|
|
|
|
|
|
|
|
|
||
|
|
|
|
|
|
|
|
|
|
|
Page Format
Size
Rotate
Margins
Nest Spacing
Mirroring
@
PostScript Scale
Inked Area, Software etc
Oversize
ARCH
JIS
ANSI
ISO
TOYO,0 ... 270
SWOP, Native
Normal, Extended
On, Off
On, Off
@
100% ... 419% Fit to Page
99 ... 1, 0
Width, Length
Over A2, Over A1
Statistics
Best ARCH,
ARCH A ... E1
Best JIS B,
JIS B4 ... B1
Best ANSI,
ANSI A ... E
Best ISO A,
ISO A4 ... A0
Automatic
Manual |
30...5 |
Menu Panel-Front the through Navigate to How |
Troubleshooting |

16-1
Manual Service Printers 1055CM and 1050C DesignJets HP
HP-GL/2 Settings
@
Image Quality
Troubleshooting
|
Palette |
|
|
|
Software, Factory, |
|
|
|
|
|
|
|
|
|
|
|
|
Palette A, Palette B |
|
|
|
|
|
|
|
|
|
|
|
|
|
|
|
|
|
|
|
|
|
|
|
|
|
|
|
|
|
|
|
|
|
|
Define palette |
|
|
|
Palette A, |
|
Pen Number 0 ... 15 |
|
|
Width |
|
0.13 mm - 12.0 mm |
|
|
|
|
|
Palette B |
|
|
|
|
|
|
|
|
|
|
|
|
|
|
|
|
|
|
|
|
|
|
|
|
|
|
|
|
|
|
|
|
|
|
|
|
|
|
Factory |
|
Pen Number 0 ... 15 |
|
|
Color |
|
255 ... 1, 0 |
|
|
|
|
|
|
|
|
|||||
|
|
|
|
|
|
|
|
|
|
|
|
|
|
|
|
|
|
|
|
|
|
|
|
|
|
|
Merging |
|
|
|
Off, On |
|
|
|
|
|
|
|
|
|
|
|
|
|
|
|
|
|
|
|
|
|
|
|
|
|
|
|
|
|
|
|
|
|
|
|
@ |
|
@ |
|
|
|
Ink Emulation |
|
TOYO, EuroScale |
|
|
|
|
|
SWOP, Native |
|
|
|
|
|
|
|
|
|
|
|
|
|
|
|
@ |
|
@ |
|
|
|
Color Calib., |
|
Off, On |
|
|
|
Ink Limiting |
|
|
|
|
|
|
|
|
|
|
|
|
|
|
|
Manual Service Printers 1055CM and 1050C DesignJets HP
17-1
Device Setup
I/O Setup
Cutter
Lang
Drying time
Page Accuracy
Network ID
Network Card
I/O Timeout
On, Off
7586, HP-GL/2
HP-GL/2,
CALS/G4
@
PostScript,
Automatic
Automatic,
None
Manual
Optimized
Maximum
DNS Name,
Appletalk, IP Address
HW Address
Configuration
|
Terminator |
|
Normal, Special |
|
|
||
|
|
|
|
255 ... 2, 1 min
 JetDirect Menu
See the Setup Guide
|
Advanced |
|
Reset Card |
|
|
||
|
|
|
|
0.5 min ... 30 min
Troubleshooting

Troubleshooting
Create pattern, |
Measure pattern |
|
|
|
|
|
|
|
Restore Factory |
|
Recalibrate |
||
|
|
|
|
|
|
|
|
|
|
|
|
|
|
|
Up, Down |
RAM present, Hard disk, Code Rev |
@ PostScript Code Rev, PostScript Font Rev |
PrintheadOff,alignmentOn |
Accuracy |
HP-GL/2 Config, Service Config, Usage Report, Print Quality |
Short, Full |
|
|
|
|
|
|
|
|
|
|
|
|
|
|
|
|
|
|
|
|
|
|
|
|
|
|
|
|
|
|
|
|
|
|
|
|
|
|
|
|
|
|
|
|
|
|
|
|
|
|
printheads, |
menu, |
data |
|
OnOff, |
|
|
|
|
|
|
|
|
|
||
Displaycontrast |
|
Statistics |
|
Menu, |
|
|
|
Menu, |
Samples |
|
|
|
Testprints |
|
|
Menumode |
|||||
|
|
Recover |
Default |
|
|
Palette, |
|
|
|
|
|||||||||||
|
|
|
|
|
|
Palette, |
Samples Display |
|
Calibration |
|
|
|
|
|
|
|
|
|
|||
|
|
|
|
|
|
|
|
|
|
|
|
|
|
|
|
|
|
|
|
|
|
|
|
|
|
|
|
|
|
|
|
|
|
|
|
|
|
|
|
|
|
|
|
Utilities
|
enu, ples Malette, am S P |
|
|
@ onts Fcript ostSP |
|
|
|
|
|
|
|
|
|
|
|
|
|
Demosemos
1-18 |
HP DesignJets 1050C and 1055CM Printers Service Manual |
 Loading...